Pick your zone and the dates re-calibrate.
The Guide Crops Vol. 003

Broad Beans / Fava

in Zone 4, this week

Broad beans, better known as fava beans, are a cool-weather crop grown for their big, flat, buttery beans, eaten fresh and green shelled from the pod or dried. They are not the same as garden peas: the seeds are large and flat, and the plants are sturdy, upright stalks 2 to 4 feet tall that stand up on their own and do not need a trellis. Two things make favas special. They are extremely cold-hardy, handling frost down to about 10 to 15°F, so where winters are mild you plant them in fall to grow over winter, and where winters are cold they are one of the first things you plant in late winter or spring. And they dislike heat: they stop making pods once it stays above about 75 to 80°F, so they have to flower and fill before summer arrives. Favas also feed the soil with nitrogen and make a great cover crop. One important note: fava beans can cause a serious reaction, called favism, in people who have an inherited enzyme deficiency (G6PD), so they should always be cooked before you eat them. Broad beans, also called fava beans (Vicia faba), are a cool-season legume grown for their large, flat, buttery seeds, eaten as tender green favas shelled from the pod or dried as a pulse. They are a different plant from the garden pea, in a different genus (Vicia, not Pisum): the seeds are large and flat, and the plants are stiff, upright stalks 2 to 4 feet tall that stand on their own and need no trellis, unlike climbing peas. Two traits define how favas are grown. They are among the most cold-hardy of all vegetables, tolerating hard frost to roughly 10 to 15°F, so in mild-winter regions they are fall-sown and overwintered for an early crop, and in cold regions they are one of the first crops sown in late winter or spring. And they are heat-intolerant: they set pods best around 60 to 65°F and stop podding once daytime temperatures pass about 75 to 80°F, so the crop must flower and fill before summer heat. As a nitrogen-fixing legume, fava is also a favorite cover crop and green manure that leaves the soil richer. One honest caution: favas can trigger a serious reaction, called favism, in the minority of people with an inherited G6PD enzyme deficiency, so they should always be cooked before eating.
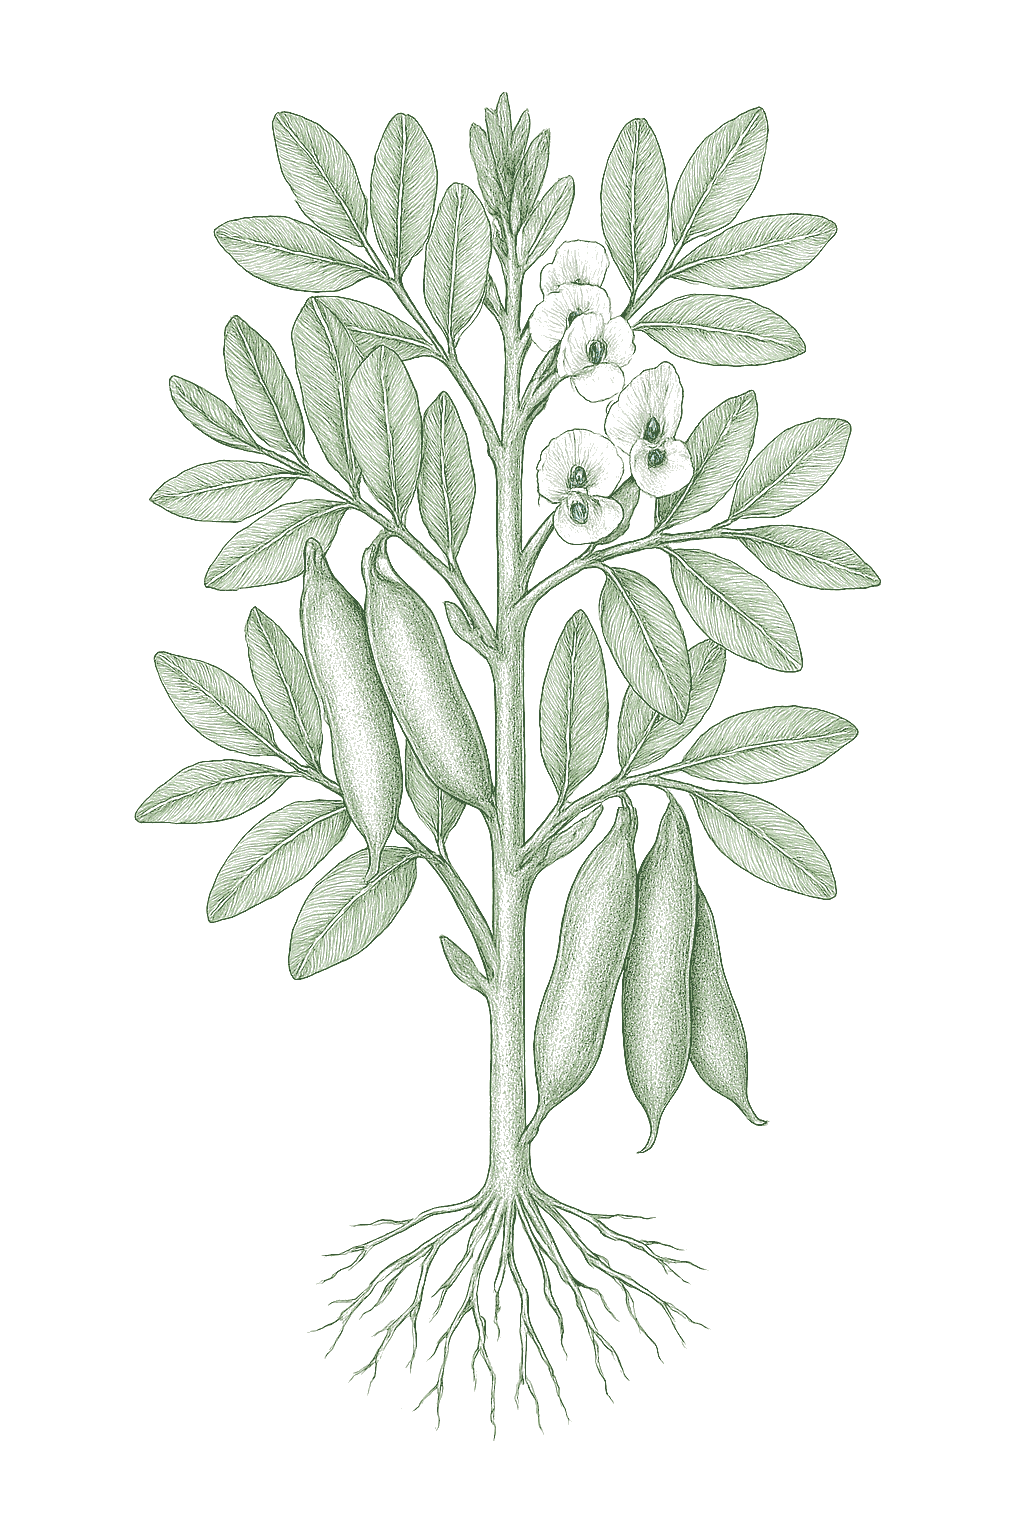
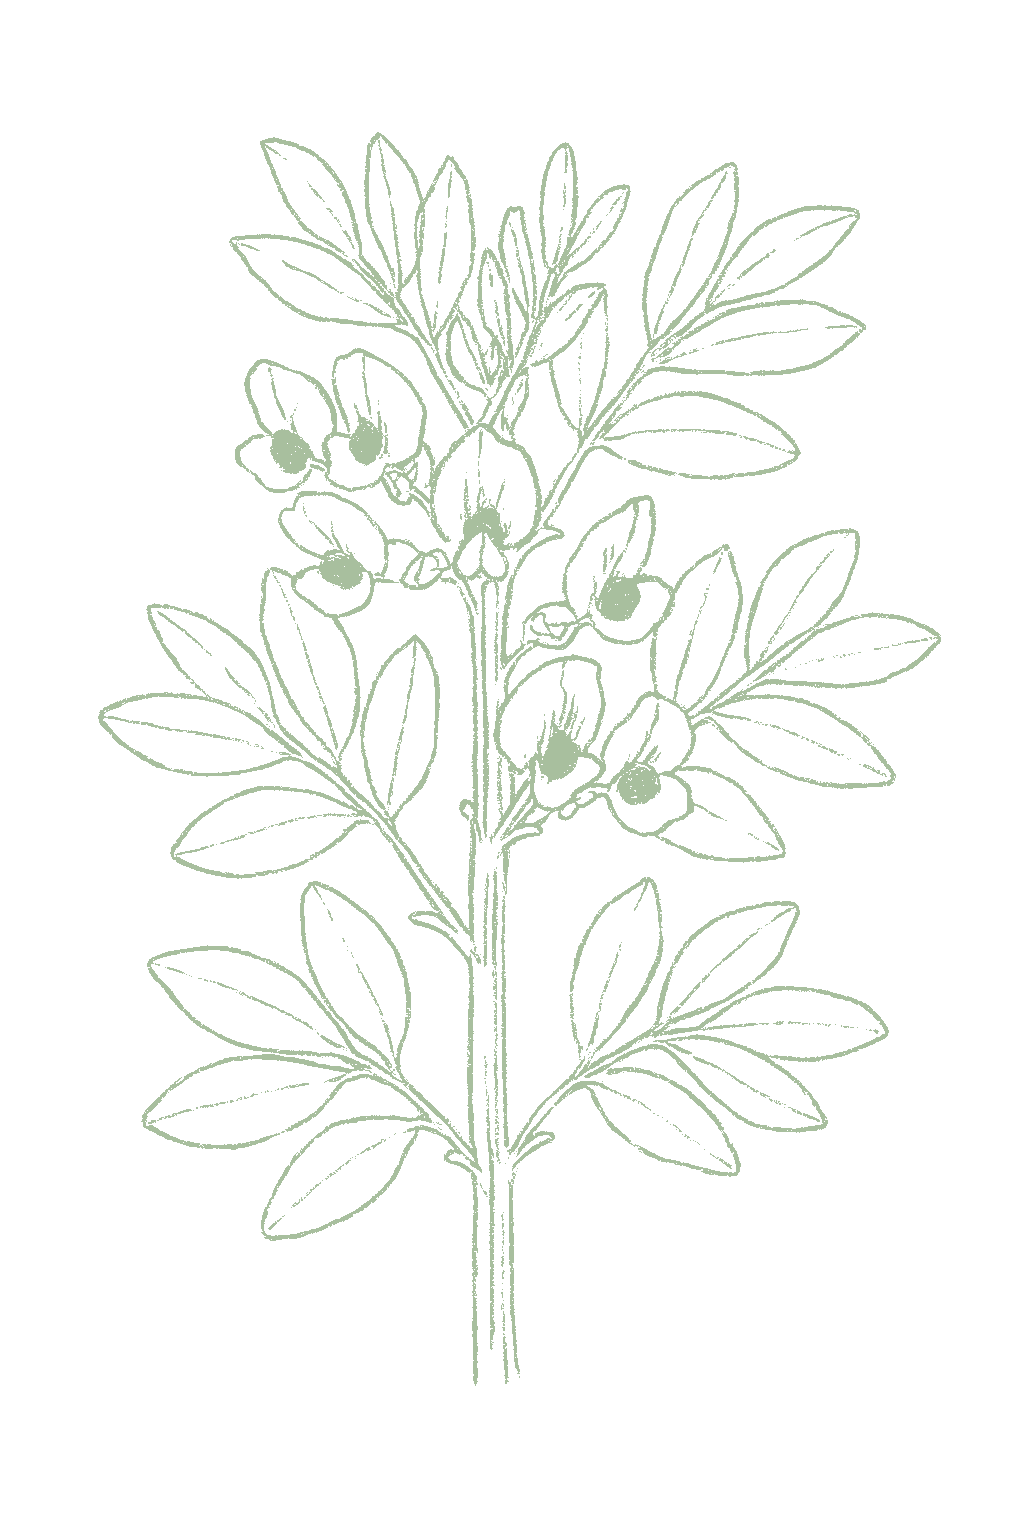
Broad Beans / Fava mature plant
Fig. 01 · Broad Beans / Fava, mature Zone 4
Mature in
80-100d
from transplant
Sunlight
Full sun
6-8 hrs daily
Water
Moderate
Spacing
4-8"
between plants
Soil pH
6-6.8
slightly acidic
Today · in your zone

What's happening right now

July 24 · Zone 4 · Stage 01 · Germination

Off-season for broad beans / fava in zone 4.

The season at a glance

Planting calendar

In Zone 4, broad beans / fava can be planted April through May. Harvest runs July through August.

Jan
Feb
Mar
Apr
May
Jun
Jul
Aug
Sep
Oct
Nov
Dec
plant
too cold
too cold
too cold
plant
plant
too late
too late
too late
too late
too cold
too cold
too cold
harvest
harvest
harvest
indoors
plant out
harvest
Above-ground cropBest planted on a none moon
The season, mapped

Seed to garden

Plant the big flat fava seeds right where they will grow, about 1 to 2 inches deep and 4 to 6 inches apart, then thin to about 8 to 10 inches apart. Where winters are mild, plant in fall so the crop grows over winter; where winters are cold, plant as early as you can work the soil in late winter or spring. The seeds are slow to sprout, sometimes taking up to three weeks, and there is no need to start them indoors.Direct-sow the large flat seed about 1 to 2 inches deep and 4 to 6 inches apart, thinning to stand 8 to 10 inches apart, in rows 18 to 30 inches apart. In mild-winter regions sow in fall (roughly October to November) to overwinter; in cold regions sow as early as the soil can be worked in late winter or early spring. Germination is slow in cool soil and can take up to three weeks; there is no benefit to starting favas indoors.
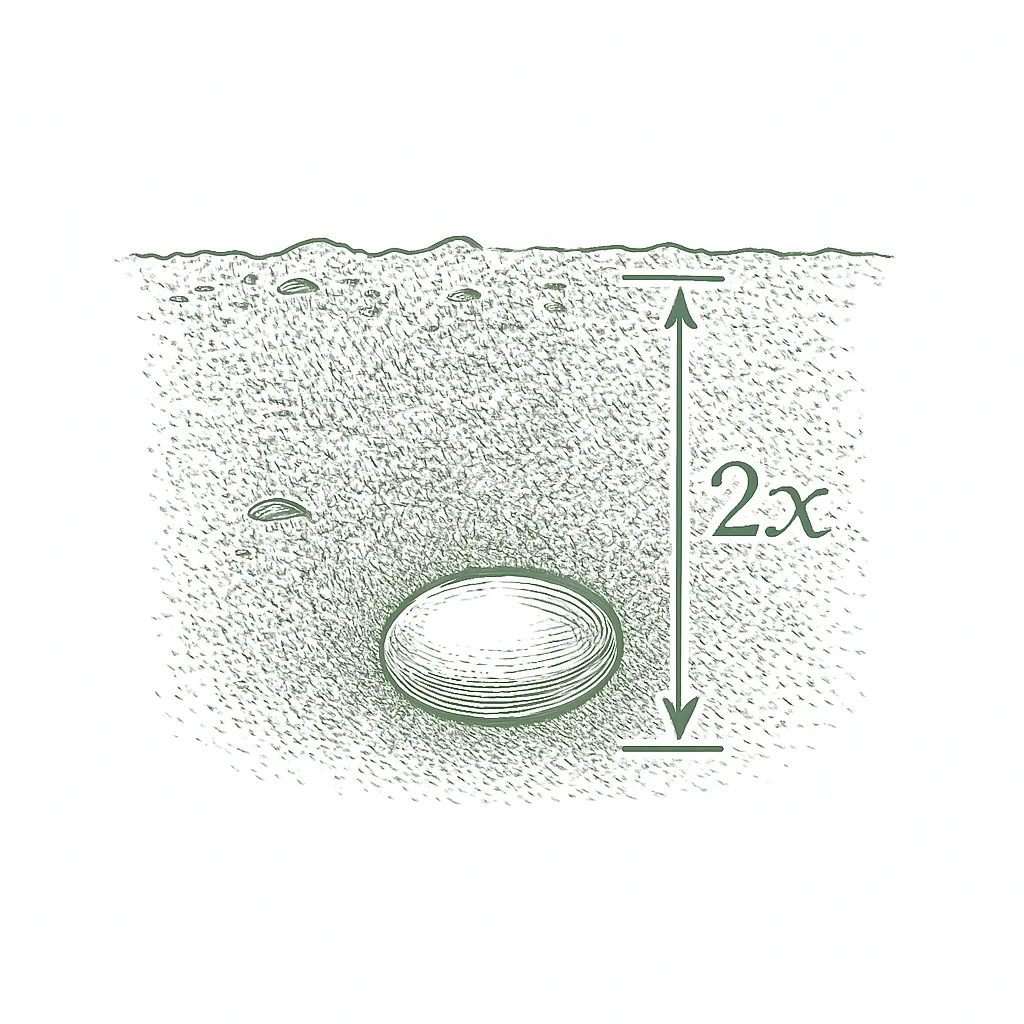
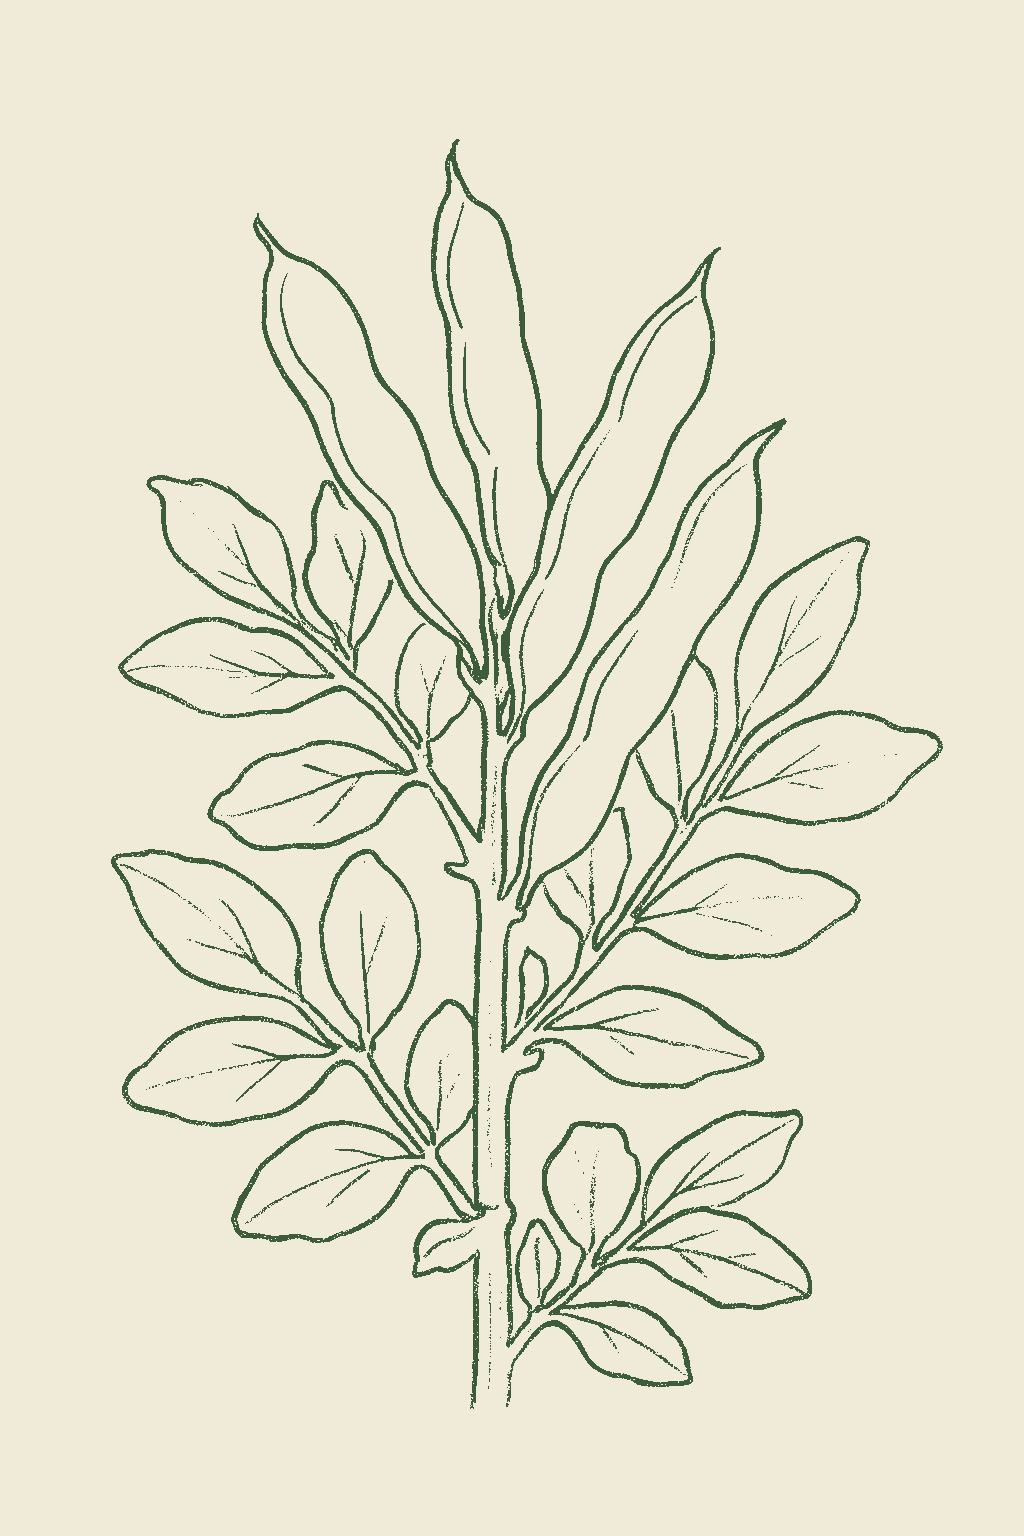
  1. 01
    Sow outside
    Apr - May
  2. 02
    First harvest
    From Jul 1
    80-100 days from sowing
Start method
Direct
Soil temp
40-75°F
From seed to fruit

The growing journey

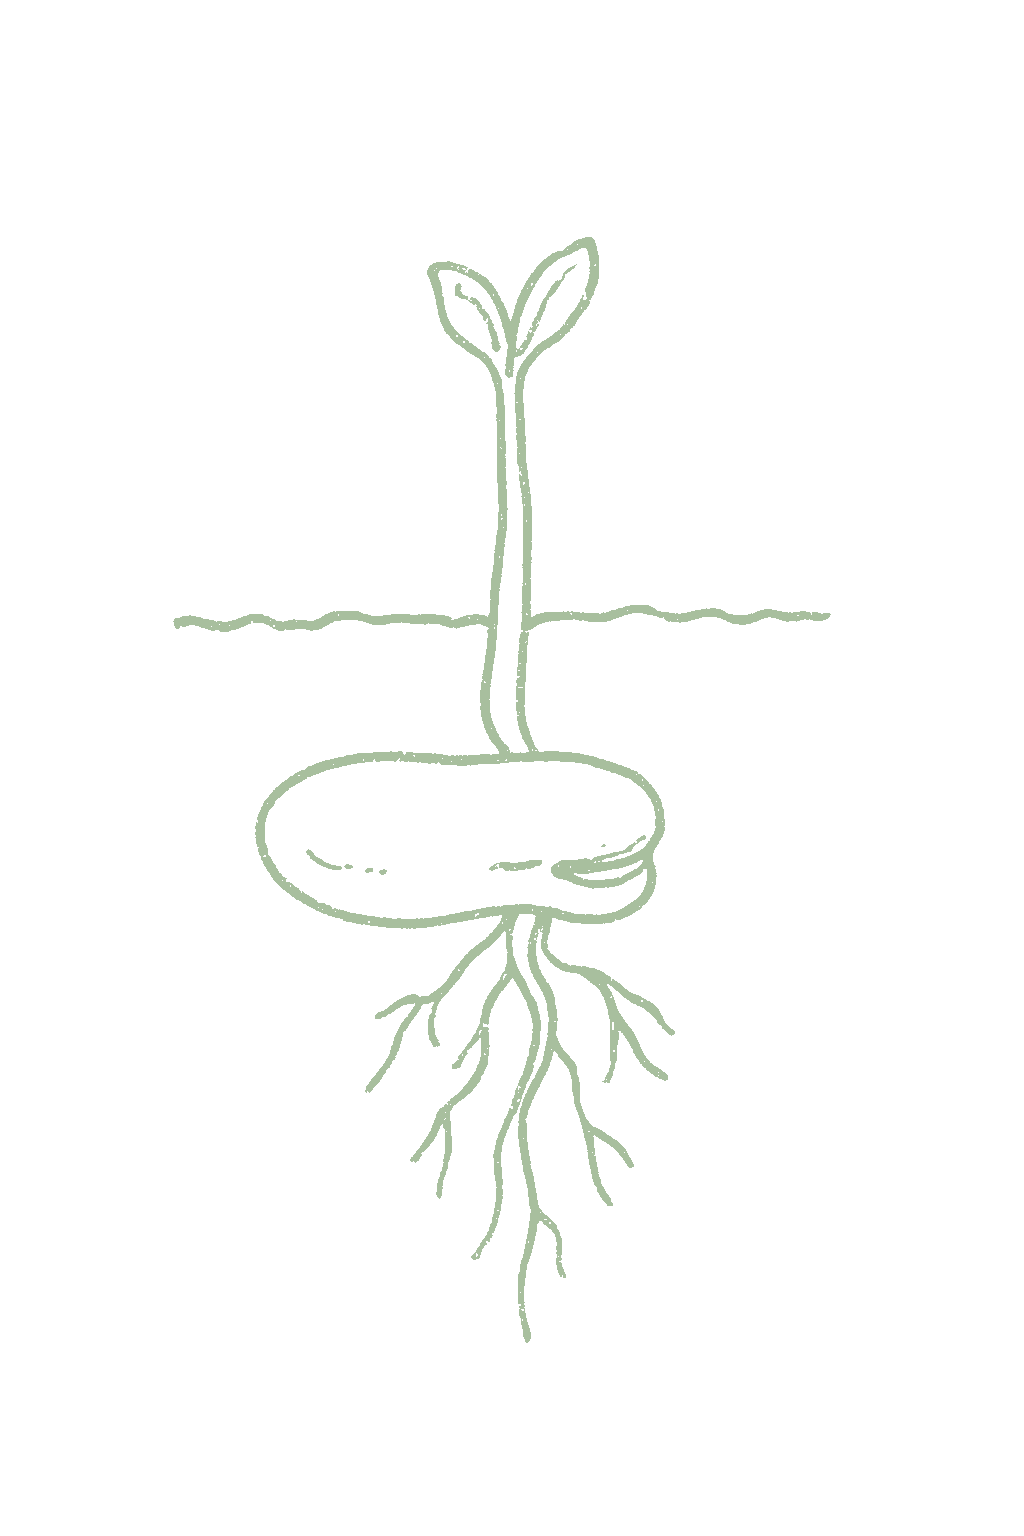
Stage 01 · Germination
01
Germination
Days 7-21 · current stage
Bare soil for one to three weeks, then the seedlings push up. Favas sprout in cool soil but the big seeds are slow, so be patient. Seed planted in cold, soggy ground rots instead of coming up, so wait for workable soil rather than muddy ground.Bare soil for one to three weeks, then the seedling pushes up. Favas germinate in cool soil, from about 40°F and best around 50 to 65°F, and the large seed is slow to emerge, sometimes taking up to three weeks. Seed sown into cold, saturated ground rots before it emerges, and the bean seed fly attacks slow-germinating seed, so drainage and workable soil matter more than an early calendar date.
Plant the big seeds about 1 to 2 inches deep and 4 to 6 inches apart in moist but well-drained ground. Plant in fall where winters are mild, or as early as you can work the soil where winters are cold. Do not keep the bed soggy after planting, since that rots the seed.Sow the large flat seed about 1 to 2 inches deep and 4 to 6 inches apart into a moist but well-drained bed; do not sow into waterlogged ground. Where winters are mild, sow in fall to overwinter; where cold, sow as early as the soil can be worked. A bean or pea inoculant helps nodulation where favas or vetch are new to the bed.
FROM PLANT · Plant favas in moist, well-drained soil, not soggy mud. The big seeds sprout in cool soil but are slow, sometimes taking up to three weeks, and they rot in cold, wet ground, which is the usual reason for gaps in the row. Good drainage matters more than an exact date.Sow favas into moist, well-drained ground, not cold mud. The large seed germinates from about 40°F and best around 50 to 65°F, but it is slow, up to three weeks, and rots in cold, saturated soil, the most common cause of a thin stand. Good drainage matters more than the calendar.
FROM PLANT · The big decision with favas is when to plant. Where winters are mild, plant in fall so the crop grows over winter; where winters are cold, plant as early as you can work the soil in late winter or spring. Either way, you want the plants to flower and make pods before the summer heat.The defining choice is when to sow. In mild-winter regions favas are fall-sown (about October to November) and overwintered for an early crop, since the plants are exceptionally cold-hardy; in cold regions they go in as early as the soil can be worked in late winter or spring. Either way, the aim is to flower and fill pods before summer heat.
02
Seedling
Days 14-40
Sturdy little plants a few inches tall with their first leaves on upright stems. Young favas are very cold-hardy and handle frost well, which is how a fall planting survives the winter, but this is when the pea and bean weevil notches the leaf edges and slugs can chew them in wet weather.Sturdy young plants a few inches tall with their first pairs of leaves on square, upright stems. Fava seedlings are exceptionally cold-hardy and shrug off frost, which is what lets a fall-sown crop overwinter, but they are the stage most vulnerable to the pea and bean weevil (scalloped leaf notches) and to slugs in wet weather.
Keep the soil evenly moist, pull weeds early, and weed shallowly so you do not damage the roots. Watch for half-circle notches on the leaf edges from the weevil; healthy plants grow past it. If the crop is overwintering, do not let it get too crowded.Keep the bed evenly moist and weed-free and cultivate shallowly, since fava roots run near the surface. Watch for weevil notching on the margins; a vigorous stand outgrows it. On an overwintered crop, avoid overcrowding, which invites chocolate spot later.
FROM PLANT · Fava seedlings are very cold-hardy, handling frost down to about 10 to 15°F, which is how a fall planting survives winter. You do not need to protect them from normal frost. Just keep them growing well, and watch the leaf edges for the half-circle notches of the pea and bean weevil.Fava seedlings are among the most cold-hardy of any vegetable, tolerating hard frost to roughly 10 to 15°F, which is exactly why a fall sowing can overwinter. Do not rush to protect them from ordinary frost; keep them growing steadily instead, and watch the leaf margins for the scalloped notches of the pea and bean weevil.
03
Plant growth
Days 30-75
Steady upward growth on stiff, upright stems to 2 to 4 feet. Unlike peas, favas stand up on their own sturdy stalks and do not climb or need a trellis, though a tall row may lean and can be corralled with stakes and string. The plants make much of their own nitrogen now, so you want healthy green growth, not big soft leafy stems, which draw aphids.Steady upward growth on stiff, square stems to 2 to 4 feet (dwarf types much shorter, some tall types to 5 or 6 feet). Unlike peas, favas stand on their own sturdy stalks and do not climb or need a trellis, though a tall stand may lean and benefit from a stake and string corral. The plants are fixing much of their own nitrogen now through root nodules, so aim for vigorous green growth, not overfed lushness that draws aphids.
Keep the watering steady and do not add fertilizer now. Favas need very little, and extra just gives you soft leafy plants and more aphids. Stake or corral a tall row so it does not fall over, keep the plants from crowding so air moves through, and check the tips for black aphids.Keep moisture steady and resist feeding; favas need little nitrogen and extra now pushes foliage and aphids over pods. Stake or string a tall row so it does not lodge. Keep the stand open for airflow to hold off chocolate spot, and watch the growing tips for the first black bean aphids.
FROM PLANT · Unlike peas, favas stand up on their own sturdy stalks and do not need a trellis. Tall types can lean over in wind or rain, so put a stake at each end of the row and run string down both sides to hold them up. Keep the plants from crowding so air moves through and disease stays down.Unlike peas, favas stand on their own stiff, upright stalks and do not climb or need a trellis. Tall types (2 to 4 feet, some to 5 or 6) can lean or lodge in wind or rain, so run a stake at each end of the row with string down both sides to corral them. Keep the stand open for airflow to hold off chocolate spot.
FROM PLANT · Do not add nitrogen fertilizer now. Favas make much of their own from the air, and extra fertilizer just gives you soft leafy plants that attract aphids and set fewer beans. A little compost mixed in before planting is all they need, and they feed the soil for the next crop.Hold off on nitrogen. As a legume, fava fixes much of its own through root nodules, and extra nitrogen now drives soft, leafy growth that draws black bean aphids and gives fewer pods. A little compost worked in before sowing is all favas need, and they leave the soil richer for the next crop.
04
Flowering
Days 50-90
Clusters of white flowers marked with black blotches open along the upper stems, often sweetly scented. This is an important time for water: if the plants dry out, or if it stays hotter than about 75 to 80°F, the flowers drop without making pods. Once the lowest flowers have set little pods, pinch off the soft growing tip, which is where the black aphids gather.Clusters of white flowers with striking black blotches (a few varieties are all-white or crimson) open along the upper stems, often fragrant. This is a moisture-critical stage: water stress now aborts blossoms, and sustained heat above about 75 to 80°F causes the plant to drop flowers instead of setting pods. Pinch out the soft growing tip once the lowest trusses have set to remove the black bean aphids that concentrate there.
Keep the water steady and generous while the plants flower, because dry soil now means fewer beans. Once the lowest flowers have turned into small pods, pinch off the soft growing tips to remove the aphids and push the plant into podding. Water the soil, not the leaves, and water deeply before a heat wave, but a crop flowering in real heat is running out of season.Keep moisture steady and ample through bloom, where water stress directly cuts the crop. Once the bottom flower clusters have set pods, pinch out the growing tips: this both removes the aphid-prone shoot and steers energy into pod fill. Avoid overhead watering on the dense canopy, and in a heat wave water deeply ahead of time, though a crop flowering into real heat is nearing its end.
FROM PLANT · Once the bottom flowers have turned into little pods, pinch off the soft growing tip of each fava plant. That tender tip is where the black aphids gather, so you remove most of them at once, and it also helps the plant put its energy into making beans.Once the lowest flower clusters have set pods, pinch out the soft growing tip of each plant. The tender tip is where black bean aphids, the signature fava pest, concentrate, so removing it takes most of the colony with it and channels energy into pod fill. It is the standard broad-bean tactic and worth doing before aphids build up.
FROM PLANT · The crop is in a race with the heat. Favas make pods best in cool weather and drop their flowers once it stays above about 75 to 80°F, so a planting that flowers as summer arrives makes few beans. That is why favas are planted early or over winter: to flower and fill pods while it is still cool.The crop is racing the heat. Favas set pods best around 60 to 65°F and drop their blossoms once sustained temperatures pass about 75 to 80°F, so a planting that flowers into early summer heat sets poorly. This is why favas are sown early or overwintered: the goal is to flower and fill pods in cool weather.
05
Pod development
Days 65-100
Pods form where the flowers were, standing up at first, then getting longer and drooping as the beans inside swell. For fresh green favas, wait until the pods are plump and glossy and the beans have filled out but are still tender. For dried beans, leave the pods on the plant to dry. Watch for chocolate-brown spots (chocolate spot) in wet weather.Pods form where the flowers were and at first point upward, then lengthen and begin to droop as the beans inside swell. For fresh green favas, the target is a plump, glossy, well-filled pod with beans the size you want but still tender; for dried beans, leave the pods to mature and dry on the plant. Watch for chocolate spot in wet weather and for rust as the season warms.
Keep the soil evenly moist while the pods fill. Start checking the pods as they plump up, and keep the plants open and dry to slow disease. If you have not pinched the tops yet and aphids are building up, do it now.Maintain even moisture right through pod fill, the payoff stage for steady watering. Begin checking the pods as they plump up, and keep the stand open and dry to slow chocolate spot and rust. If the plants have not been tipped yet and aphids are building, pinch the tops now.
FROM PLANT · Keep the plants open and dry while the pods fill. Chocolate spot (brown blotches in wet weather) is the worst fava disease and loves crowded, damp plantings, and rust comes on as it warms up. Space plants well, water the soil in the morning not the leaves, and pull off the worst leaves, since there is no home spray for these.Keep the stand open and dry as the pods fill. Chocolate spot (chocolate-brown blotches in wet weather) is the crop's most damaging disease and thrives on crowded, damp plantings, and rust follows as the weather warms. Wider spacing, good drainage, soil-level morning watering, and removing the worst leaves are the home controls, since no fungicides are available to gardeners.
06
Harvest
Days 80-110
For fresh green favas, pick the pods when they are plump and glossy and the beans inside have filled out but are still tender, starting from the bottom of the plant where the pods fill first. Small young pods can be eaten whole. For dried beans, wait until the pods go dark and papery on the plant. The fresh harvest lasts a few weeks, then the heat ends it.For fresh green favas, plump, glossy, well-filled pods picked while the beans are tender and bright, before the seed coats toughen; pick from the bottom of the plant up as the lower pods fill first. Very young, finger-sized pods can be eaten whole. For dried beans, wait until the pods turn dark and papery on the plant. The green harvest runs over a few weeks, then the crop ends as heat arrives.
Pick fresh favas regularly as the pods fill, snapping or cutting them off so you do not tear the plant. Shell out the beans and cook them before eating; the tender beans inside are often peeled after a quick dip in boiling water. When the crop finishes or the heat arrives, pull the plants and compost them, or dig them in to feed the soil.Pick fresh favas regularly as the pods fill, holding the stem and snapping or cutting the pod so you do not tear the plant. Shell the beans and cook them; the tender inner beans are often peeled after a quick blanch. Always cook favas before eating. Pull the spent plants once the crop finishes or the heat sets in; leave the roots to return their nitrogen, or turn the whole crop under as green manure.
FROM PLANT · Decide whether you want fresh or dried favas. For fresh green favas, pick when the pods are plump and glossy and the beans have filled out but are still tender, starting at the bottom of the plant. For dried beans, leave the pods on the plant until they are papery. Always cook favas before eating them.Decide fresh or dried and pick accordingly. For fresh green favas, harvest when the pods are plump and glossy and the beans are filled but still tender, working from the bottom of the plant up; the shelled beans are often peeled after a quick blanch. For dried beans, leave the pods to turn papery on the plant. In all cases, cook favas before eating.
Beginner
Know your soil

Your soil

Identify yours

Not sure what soil you have? Grab a small handful of damp soil from your garden bed and squeeze it. If it crumbles apart easily, it's sandy. If it holds together but breaks when you poke it, it's loam (what most vegetables want). If it stays in a hard, slippery ball, it's clay.

What this crop wants

Fava beans grow in most garden soil as long as it drains well. They like a fertile loam with some compost worked in, but they are not fussy and will handle heavier clay loam or lighter sandy soil. The one thing to avoid is cold, soggy ground, because the large seeds rot easily when they sit in wet soil before sprouting. If your bed stays wet after rain, add compost or plant on a raised bed.

If your soil doesn't match

You have sandy soil

Mix 2-3 inches of compost into the top 6 inches of your bed before planting. Compost holds moisture (which sandy soil drains too fast) and adds the nutrients sandy soil tends to lack. Repeat each season. Compost breaks down over time.

You have clay soil

Mix 2-3 inches of compost AND a few inches of coarse sand or perlite into the top 6 inches of your bed. The compost feeds the plants; the sand breaks up the clay so air and water can move through. Don't add sand without compost. It can compact like concrete.

Containers and raised beds

If amending your soil sounds like too much work, or if your soil is heavy clay, full of rocks, or contaminated, build over it. A raised bed at least 12 inches deep filled with a 50/50 mix of compost and sandy loam gives you ideal growing soil with no battles. A 5-gallon container with quality potting mix does the same for one plant at a time. Both bypass your native soil entirely.

Learn more about your soil
The specs

Care guide

The numbers that matter, at a glance.

Sunlight
Full sun · 6-8 hrs/day
Water
moderate
Spacing
4-8 inches
Soil
loam, silt loam
Days to maturity
80-100 days from transplant
Soil pH
6 to 6.8
Container OK?
Yes · 5+ gal pot
Germination temp
40-75°F
Soil chemistry

Soil pH for broad beans / fava

Preferred
6 to 6.8
Tolerated
6 to 7.5

Fava beans grow best in soil from about 6.0 to 6.8, which is slightly acidic to neutral, and they tolerate up to about 7.5. Most garden beds are already in a good range. If a soil test reads strongly acidic, mix in a little lime before planting.Aim for a soil pH of about 6.0 to 6.8, slightly acidic to neutral, with tolerance up to roughly 7.5. Fava beans are not demanding about pH, but like other legumes they nodulate and fix nitrogen best in this near-neutral range. A soil test is the reliable way to confirm pH and baseline fertility before sowing; lime an overly acidic plot the season before.

Verified · 2 sources View
Steady hand on the hose

Watering

When & how much
Frequency
Water moderately and evenly. Favas handle some dryness once they are growing well, but keep the water steady while they are flowering and filling pods, which is when it matters most.Moderate and even through the season. Favas are fairly drought tolerant once established, but the moisture-critical window is flowering through pod fill, when steady water sets and sizes the pods; before that, an established cool-season stand asks relatively little.
Amount
Water deeply enough to wet the soil several inches down, and water less often but more thoroughly rather than a daily splash. Give more while the plants are flowering and podding.Enough to wet the root zone several inches down; deep, less frequent watering builds a stronger root system than frequent light sprinkles. In cool weather favas need little; step it up through flowering and pod fill.
Method
Water the soil, not the leaves, and do it in the morning so the plants dry off during the day. Wet leaves, especially in a crowded planting, help spread disease.Water at the soil in the morning so the foliage dries quickly; wet, crowded foliage is what chocolate spot, rust, and downy mildew need. Avoid overhead watering on a dense stand in particular.
Signs of trouble
Too much water
If the soil is wet but the plants still wilt or the lower leaves yellow, you may be overwatering. Soggy soil rots fava roots.Yellowing lower leaves, wilting despite wet soil, and stunted plants point to waterlogged roots and the onset of the root rots favas are prone to in cold, wet ground.
Too little water
If plants dry out while flowering, they drop their flowers and the pods come out small and poorly filled. Keep the water steady at that stage.Drought stress during and after flowering aborts blossoms and produces small, poorly filled pods, and it hastens the decline as heat arrives.
Feeding rhythm

Feeding

Frequency
low
Type
balanced pre-plant, little to no nitrogen
When to start
work a little compost or balanced fertilizer into the bed before sowing

Fava beans make much of their own food from the air, so they barely need fertilizer. Mix a little compost or a balanced fertilizer into the bed before you plant and that is enough. Too much fertilizer gives you tall leafy plants but fewer pods, and it can attract aphids. You can coat the seed with a bean or pea inoculant powder to help the roots make nitrogen, but it is optional.Fava beans are light feeders. As a legume, fava fixes much of its own nitrogen through Rhizobium nodules on the roots, so heavy nitrogen drives leafy stalk growth at the expense of pods and can make plants more prone to aphids and disease. Without a soil test, work a little compost or balanced fertilizer into the bed before sowing and leave it at that. Adequate potassium supports the plant against chocolate spot. An inoculant of the correct Rhizobium can help nodulation where favas or vetch have not grown before, but it is optional.

N · P · K = 5-10-10

A balanced fertilizer like 5-10-10 mixed into the bed before planting is plenty; skip extra nitrogen.A balanced 5-10-10 worked in before sowing if no soil test is available; skip added nitrogen, which favas supply themselves.

Try 5-10-10 pre-plant
Who grows well together

Companion planting

Fava beans get along with most cool-season vegetables and, because they leave nitrogen in the soil, they make a good crop to grow before a leafy green or a brassica. Many growers plant summer savory nearby, which is the traditional herb partner for favas. As with peas, the pairing to be cautious about is planting favas right next to onions or garlic. As a nitrogen-fixing legume and a common cover crop, favas leave the bed richer for what follows and pair naturally with the other cool-season crops that share their spring and fall windows: brassicas, potatoes, lettuce, and spinach are traditional bed-mates that benefit from the nitrogen. Summer savory is the classic herb companion, long grown alongside broad beans and said by many growers to help deter the black bean aphid. The traditional caution, as with all legumes, is to keep favas away from the alliums (onion, garlic), which are widely held to interfere with the root bacteria the plant depends on to fix nitrogen.

Other
Potato
A classic cool-season neighbor; the favas add nitrogen the potatoes can use, and the two share the same early season.Potatoes and favas are a traditional pairing that share the cool early season, and the favas' nitrogen fixation lightly benefits the potato, a heavier feeder. It is a compatibility and soil-benefit pairing rather than a measured pest defense. Traditional
Summer savory
The traditional herb partner for broad beans; many growers plant it alongside and say it helps keep black bean aphids down.Summer savory is the classic companion herb for broad beans, grown alongside them for centuries as both a culinary match and, by tradition, a deterrent for the black bean aphid that plagues favas. Treat the aphid-deterrent claim as hedged garden tradition rather than a measured effect, but the pairing is harmless and useful in the kitchen. Traditional
Lettuce
Lettuce shares favas' cool-season timing and stays low, tucking in along the base of the taller bean plants.Lettuce slots in below the upright fava plants, sharing the same cool-season window and even moisture while occupying a lower layer of the bed. As the favas fill out they cast light shade that can delay lettuce bolting into spring. It is a compatibility pairing on shared-conditions grounds. Well-grounded
Keep apart from
Onion Onions and other alliums are traditionally kept away from beans and favas, which are said to grow poorly near them.Onions next to favas is the better-grounded of the traditional 'bad' pairings. Alliums release antibacterial sulfur compounds widely held to interfere with the Rhizobium bacteria on legume roots, the bacteria favas rely on to fix nitrogen, so keep them in separate parts of the bed. The useful corollary is that favas grown before an allium crop leave the soil better for it. Well-grounded
Garlic Like onions, garlic is a traditional bad neighbor for favas and other legumes.Garlic acts on favas the way onions do. As an allium it gives off antibacterial sulfur compounds held to disrupt the nitrogen-fixing bacteria on the roots, so treat garlic and favas as bed-mates to keep apart, and use the fava-then-allium rotation to your advantage instead. Well-grounded
Provenance tagged inline · see methodology for the labeling system Key
Harvest signals

When to pick

Fresh green favas are ready when the pods are plump and glossy and the beans inside have filled out but are still tender, starting with the lower pods on the plant. Small young pods can be eaten whole. For dried beans, leave the pods on the plant until they are dark and papery. Always cook favas before eating them.For fresh green favas, pick the pods when they are plump, glossy, and well filled but the beans are still tender, before the seed coats toughen, working from the bottom of the plant up as the lower pods fill first. Very young, finger-sized pods can be eaten whole. For dried beans, leave the pods to turn dark and papery on the plant. Always cook favas before eating.

Yield

What to expect

Each fava plant gives a modest handful of pods, so favas are grown in rows, not one at a time. A short row gives a steady picking of fresh green favas over a few weeks, or a batch of dried beans if you let them mature on the plant.Favas yield modestly per plant and are grown in rows or blocks rather than singly. A well-grown plant carries roughly a dozen to two dozen pods up its sturdy stalks; a short double row gives a steady picking of fresh green favas over a few weeks, or a batch of dried beans if left to mature.

The fresh harvest comes over a few weeks, from the bottom of the plant up, then ends as the heat arrives. Favas are a one-sowing crop, not something you replant every couple of weeks, so grow several plants and pick regularly to get the most from them.The fresh green harvest comes on over a few weeks from the bottom of the plant up, then the crop ends as summer heat stops pod set. Because favas are a single main sowing rather than a succession crop, most of the yield arrives in that window; growing several plants and picking regularly is how to make the most of it. Favas are a great, forgiving first-year crop. You plant the big seeds straight into cool soil, the plants stand up on their own without a trellis, and they are tough enough that a fall planting can grow over winter. The main things that affect your harvest are planting at the right time for your climate, pinching the tops to control aphids, and picking while the beans are tender.Favas are a rewarding and forgiving first-year crop: hardy seed sown straight into cool soil, plants that stand on their own without a trellis, and real cold tolerance that lets a fall sowing overwinter. The main levers on yield are sowing at the right time for your winters, pinching the tops to beat black bean aphid, and picking fresh favas while the beans are tender.

What changes yield
Sowing at the right time for your winters so the crop flowers and fills pods before summer heat (favas set pods poorly above about 75 to 80°F)Steady moisture through flowering and pod fill (drought here aborts blossoms and shrinks the beans)Pinching out the growing tips once the lower pods set, to remove black bean aphid and steer energy into podsOpen spacing and good airflow to hold off chocolate spot, the crop's most damaging disease
Verified · 2 sources View
Pick your variety

Recommended varieties

Fava beans, also called broad beans, come in tall big-seeded types like Windsor and shorter small-seeded types used for overwintering and cover cropping. The key is to match the variety to when you plant: for a fall planting that grows over winter, choose a hardy overwintering type like Aquadulce or Sweet Lorane; for a spring planting, the big Windsor types are excellent. Robin Hood is a short variety that suits pots.Fava beans (Vicia faba) come in a tall broad-bean form (Windsor and most named types, 2 to 4 feet, big flat seeds for shelling) and a shorter, small-seeded form grown for cover cropping and overwintering. The single most important variety choice is timing: for a fall-sown, overwintered crop pick a cold-hardy overwintering type such as Aquadulce, Sweet Lorane, or Ianto's Return; for a spring crop the large-seeded Windsor types shine. Vroma is a versatile all-rounder, and Robin Hood is the dwarf choice for containers.

Windsor (Broad Windsor)
The classic large-seeded broad bean: tall, sturdy plants bearing short pods of big, flat, buttery beans. A standard spring-sown variety for fresh green favas and shelling.
Aquadulce
The go-to overwintering fava (often sold as Aquadulce Claudia). Exceptionally cold hardy, to roughly 15°F, so it is the variety of choice for fall sowing and overwintering; long pods with smooth white beans.
Sweet Lorane
A small-seeded, very cold-hardy fava favored in the Pacific Northwest for fall sowing and as a cover crop and green manure; heavy nitrogen fixation and good flavor for eating too.
Ianto's Return
A hardy, small-to-medium-seeded overwintering fava selected for cold tolerance and reliable fall sowing; productive and good as both a food and cover crop.
Vroma
A productive, adaptable fava noted for high nitrogen fixation as a cover crop; a dependable choice for both eating and green manure that can be sown fall or spring.
Robin Hood
A dwarf fava around 12 to 18 inches, good for containers and small beds and for growing under cover; earlier and more compact than the tall standards.
Off the vine

Storing your harvest

Room temp
Do not leave fresh green favas out on the counter; cool them soon after picking. Dried favas, though, keep for months in a cool, dry, sealed jar.Not recommended for fresh green favas, which lose quality at room temperature and should be cooled soon after picking. Fully dried fava beans, by contrast, store for months in a cool, dry, airtight container.
Fridge
Cool fresh green favas right after picking and keep them in the fridge in the pod in a loosely closed bag, where they stay good for about a week. Shelled beans keep a few days. Always cook favas before eating them, because raw or undercooked favas make some people ill.Cool fresh green favas promptly after harvest and refrigerate them in the pod in a perforated bag; they hold good quality for about a week kept cold. Shelled beans keep a few days. Always cook favas before eating, since some people react badly to raw or undercooked beans.
Freezer
Green favas freeze well: shell them, give them a quick dip in boiling water (blanch), cool, and freeze. To dry favas, leave the pods on the plant until they are papery, then shell out the hard beans and store them in a sealed jar.Green favas freeze well. Shell them, blanch briefly to set color and texture, cool, and freeze. For dried favas, let the pods dry fully on the plant, then shell and store the hard beans airtight.
Verified · 2 sources View
When something goes wrong

Common problems

Flowers fell off without making beansFlowers dropped or few pods set
01 of 04
What happened The plants flowered but made few or no beans because it got too hot. Favas do not like heat: once it stays above about 75 to 80°F, they drop their flowers instead of making pods. This usually happens to a spring crop planted too late, or grown where summer comes on fast. It is a weather problem, not a disease.The plants flowered but set few or no pods because the weather turned too warm. Favas are heat-intolerant: once sustained temperatures pass about 75 to 80°F, they abort their blossoms instead of setting pods. It is the classic fate of a spring crop sown too late, or grown where summer arrives fast, and it is a weather problem, not a disease. Next season Plant at the right time so the favas flower while it is cool: plant in fall and overwinter a hardy variety where winters are mild, or plant as early as you can work the soil where winters are cold. Pick an early variety where summer comes fast, and keep the water steady while they flower.Sow at the right time for your climate so the crop flowers in cool weather: fall-sow and overwinter a cold-hardy variety in mild regions, or sow as early as the soil can be worked in cold regions. Choose an early variety where summers come on fast, and keep moisture steady through bloom.
Black aphids all over the topsBlack aphids swarming the tips
02 of 04
What happened Clusters of black aphids built up on the soft tops and flower stalks, curling the growth, knocking off flowers, and leaving a sticky, moldy coating. This is the classic fava pest, it comes on fast as it warms up, and it also spreads plant viruses.Dense colonies of black bean aphid built up on the soft growing tips and flower trusses, curling growth, dropping blossoms, and coating the plant in honeydew and sooty mold. It is the signature fava pest and it arrives fast as spring warms, and beyond direct damage it spreads legume viruses. Next season Pinch off the growing tips as soon as the bottom pods set, since that is where the aphids gather. Plant early so the crop is podding before the aphids peak, do not overfeed, try planting summer savory alongside, and leave the ladybugs and other helpers to do their work.Pinch out the growing tips as soon as the lowest pods set, removing the shoot the aphids concentrate on. Sow early so the crop is podding before the aphid flights peak, avoid excess nitrogen that softens growth, grow summer savory nearby by tradition, and conserve the ladybugs and wasps that control them.
Brown spots spreading over the leaves and stemsChocolate-brown spots spreading over the plants
03 of 04
What happened Reddish-brown spots the color of chocolate spread over the leaves, stems, and flowers, joining up and darkening in wet weather until leaves died and, in bad cases, whole plants collapsed. This is chocolate spot, the worst fava disease, which loves cool, damp, crowded plantings and hits overwintered stands hardest.Red-brown, chocolate-colored spots spread over the leaves, stems, and flowers, merging and darkening in wet weather until leaves died and, in severe cases, plants collapsed. This is chocolate spot (Botrytis fabae), the most damaging fava disease, favored by cool, damp, overcrowded conditions and worst on dense, overwintered stands in late winter and spring. Next season There is no home garden spray, so prevent it: space plants well so air moves through, avoid damp, shady, crowded spots, plant in well-drained soil, do not sow too thickly, do not save seed from a sick crop, clear away old plants, and move your favas on a three-to-four-year cycle.There is no home fungicide, so prevent it culturally: space plants wide for airflow, avoid damp, sheltered sites and dense stands, ensure good drainage and adequate potassium, sow at a sensible rate, do not save seed from an infected crop, clear debris, and rotate favas on a three-to-four-year cycle.
Seeds rotted or did not come upSeed rotted or came up patchy
04 of 04
What happened The big seeds went into cold, soggy soil and rotted instead of sprouting, or came up thin and patchy. Favas are slow to sprout, so the seed sits in the ground a long time; wet, poorly drained soil rots it and invites soil fungi and the bean seed fly. Planting too early into a wet bed is the usual reason for gaps.The large seed was sown into cold, saturated soil and rotted before emerging, or came up as a thin, patchy stand. Favas germinate slowly in cool soil and the seed is exposed for a long time; waterlogged ground starves it of oxygen, feeds the soilborne root rots, and invites the bean seed fly, so a too-early sowing into a wet, poorly drained bed is the usual cause of gaps. Next season Plant in well-drained soil or raised beds instead of cold, wet, low spots, and wait until the soil is workable, not muddy. Plant about 1 to 2 inches deep, do not keep the bed soggy, and let any fresh compost break down before planting to cut down the bean seed fly.Sow into well-drained ground or raised beds rather than cold, low, wet spots, and wait for the surface to be workable rather than muddy. Sow about 1 to 2 inches deep, do not keep the bed soggy, and let coarse fresh residue break down before sowing to reduce bean seed fly.
Verified · 6 sources View
The usual suspects

Pests & diseases

Pests
Black bean aphid
P · 01
Symptoms Thick clusters of tiny black insects packed onto the growing tips, flower stalks, and undersides of the top leaves, showing up as it warms up in spring. They curl and stunt the new growth, knock off flowers, and leave a sticky coating that turns black and moldy. This is the classic fava pest, and it also spreads plant viruses, so catch it early.Dense colonies of small, matte-black aphids packed onto the growing tips, flower trusses, and the undersides of the upper leaves, arriving as the weather warms. Heavy feeding curls and stunts the new growth, drops blossoms, and coats the plant in sticky honeydew that turns to black sooty mold. The black bean aphid is the signature pest of favas, and beyond direct damage it spreads bean and legume viruses. Cause The black bean aphid, a dark, soft-bodied aphid that multiplies very fast on favas as the weather warms. It swarms the tender growing tips before helpful insects like ladybugs can catch up, and favas are its favorite host.The black bean aphid (Aphis fabae), a dark green to black, soft-bodied aphid with a dark head and cornicles that builds up explosively on favas as spring warms. It reproduces very fast, so colonies form on the succulent growing tips before natural enemies catch up, which is why favas are its namesake host. Organic treatment Once the lowest pods have set, pinch off the soft growing tip of each plant, which is where the aphids gather, and you remove most of the colony at once. Blast the rest off with a strong spray of water or use insecticidal soap. Ladybugs and other helpers usually clean up the rest. Deal with them early, because they spread viruses.Once the lower pods have set, pinch out the soft growing tip of each plant: this removes the tender shoot the aphids concentrate on and the bulk of the colony with it, a standard broad-bean tactic. Knock remaining colonies off with a strong spray of water or treat with insecticidal soap on contact. Ladybugs, lacewings, and parasitic wasps usually finish the job; act early, since the real risk is virus spread. Prevention Plant early so the favas are strong and podding before the aphids peak, and try planting summer savory alongside as tradition suggests. Do not overfeed with fertilizer, since soft new growth is exactly what aphids like, and lay reflective mulch to confuse them. Pinch off the growing tips once the lower pods have set to take away their favorite spot.Sow early so the crop is well grown and podding before the spring aphid flights peak, and grow summer savory nearby by tradition. Avoid overfeeding with nitrogen, which produces the soft, lush growth aphids favor, and lay reflective mulch to disorient them. Conserve natural enemies by not spraying broadly, and pinch the tips promptly once pods have set.
Pea and bean weevil
P · 02
Symptoms Neat half-circle notches chewed out of the edges of the leaves on young plants, lining up into a scalloped look. The leaf notching alone does not hurt a strong plant much, but the grubs feed underground on the root nodules, which cuts the plant's own nitrogen supply and can slow a young crop.Neat, half-moon notches chewed from the leaf margins of young plants, which line up into a scalloped edge as the small weevils feed. The above-ground notching is mostly cosmetic on established plants, but the hidden damage matters: the larvae feed underground on the root nodules, which inhibits nitrogen fixation and can set back a young, cool-soil crop. Cause The pea and bean weevil (Sitona lineatus), a small brown striped weevil. The adults spend the winter nearby and move onto young favas and peas, and their grubs feed on the root nodules underground. Where winters are mild they are around as soon as the plants come up.The pea and bean weevil (Sitona lineatus), an elongate light-brown weevil with pale stripes down its back and a short snout. Adults overwinter and move onto favas and peas as they emerge; the larvae develop on the root nodules. In mild-winter regions the adults do not fully diapause, so they are present as soon as the crop comes up, and larval feeding is worst from spring into early summer. Organic treatment Healthy, fast-growing plants shrug off the leaf notching, so keep young favas growing well. A light row cover over the seedlings keeps the weevils off while the plants are small and most at risk. Encouraging beneficial ground insects helps keep them in check.Vigorous plants outgrow the leaf notching, so a strong, well-fed stand is the main defense; keep young plants growing steadily. A floating row cover over emerging seedlings keeps adults off during the vulnerable stage. Handpicking is impractical, but conserving ground beetles and other natural enemies helps hold numbers down. Prevention Plant so the seedlings come up and grow quickly past the tender stage, and move your favas and peas to a new spot each year. Clear away old plant debris where the weevils hide over winter, and cover young seedlings with a row cover if these weevils are a problem where you are.Sow into warm-enough soil so seedlings grow away quickly past the vulnerable stage, and rotate favas and peas away from last year's ground. Clear crop debris that shelters overwintering adults, and protect emerging seedlings with a row cover where the weevil is established.
Bean seed fly
P · 03
Symptoms The seed comes up thin and patchy, with gaps in the row, and if you dig into a gap you find a rotted seed with small pale maggots in it. Any seedlings that do come up may be weak. It is worst when the seed is sown into cold, wet soil that has a lot of fresh compost or crop residue in it.Poor, patchy emergence with gaps in the row, and seeds that rot in the ground before sprouting; digging up a gap turns up a hollowed, rotting seed with small, pale maggots inside. Seedlings that do emerge may be weak or damaged. The damage is worst in cold, wet soil rich in fresh organic matter, exactly the conditions favas are often sown into after a cover crop. Cause The bean seed fly (also called seedcorn maggot), a small gray fly whose maggots tunnel into the sprouting seed. The flies are attracted to rotting compost and manure, and they attack most when cold, wet soil makes the seed sit for a long time before it sprouts.The bean seed fly, or seedcorn maggot (Delia platura), a small gray fly whose maggots burrow into germinating bean seed and prevent it from emerging. The flies are drawn to decaying organic matter and lay eggs in cool, moist, recently worked soil; cold, wet conditions that slow germination leave the seed exposed to attack for longer and are the main risk factor. Organic treatment You cannot save a seed that has already been eaten out, so replant the gaps once the soil is warmer and drains better and the new seed can sprout quickly. Planting into workable, warmer soil rather than cold mud is the main way to avoid it.There is no rescue for a seed already hollowed out; replant the gaps once the soil is warmer and drier so the new seed germinates fast and outruns attack. Sowing shallowly into well-drained, workable soil, and waiting for the ground to warm before sowing where the fly is a known problem, is the practical control. Prevention Plant into workable, well-drained soil, not cold soggy ground, and let any fresh compost or manure rot down well before you sow rather than digging it in right before planting. Getting the seed to sprout quickly is the best protection, so favor warmer soil and shallow planting.Sow into a firm, well-drained seedbed once the soil is workable rather than cold and saturated, and let coarse fresh residue or manure break down well before sowing rather than turning it in just ahead of the crop. Shallow sowing that speeds emergence, and warmer soil, both shorten the window when the seed is vulnerable.
Diseases
Chocolate spot
D · 01
Symptoms Small round reddish-brown spots, the color of chocolate, scattered over the leaves, stems, and flowers. In dry weather they stay as small spots, but in a wet spell they spread and darken, killing leaves, dropping the flowers, and in bad cases collapsing the whole plant. It is the most serious fava disease and hits hardest on crowded, overwintered plants in late winter and spring.Small, round, red-brown (chocolate-colored) spots scattered over the leaves, stems, and flowers. In dry spells the spots stay small and discrete, but in prolonged wet weather they enlarge, merge, and darken, killing whole leaves, shedding blossoms, and in severe attacks collapsing the entire plant. It is the signature and most damaging disease of favas, and it is worst on dense, overwintered crops from late winter on. Cause A fungus (Botrytis fabae) that thrives in cool, damp, crowded conditions when the leaves stay wet for a long time. It spreads on the wind and can carry over on old plant debris and infected seed, so a wet spring on a thick, overwintered stand is when it does the most harm.The fungus Botrytis fabae (with Botrytis cinerea also involved), favored by cool, damp, overcrowded conditions and long leaf wetness. Spores are airborne and the fungus can carry over on infected debris and on the seed, so a wet spring on a dense autumn-sown stand is the classic setup for a damaging outbreak. Organic treatment There is no home garden spray for chocolate spot, so you manage it by keeping plants open and dry. At the first spots, thin crowded growth and pull weeds to move air through the planting, pick off the worst leaves, and stay out of the patch when the plants are wet. If an overwintered stand is badly hit, pick what you can and pull the plants.There are no fungicides available to home gardeners for chocolate spot, so management is cultural. At the first spots, improve airflow by thinning crowded growth and pulling weeds, remove the worst-affected leaves, and avoid working among wet plants. On a badly hit overwintered stand, harvesting what is usable and clearing the crop is often the practical choice. Prevention Space plants well and keep the planting open so air moves through it, and avoid damp, shady, crowded spots, which are exactly what the disease likes. Plant into well-drained soil, do not sow too thickly, do not save seed from an infected crop, and clear away old plant debris after harvest. Move your favas to a new spot on a three-to-four-year cycle.Give plants plenty of room and maximize airflow with wider spacing; avoid damp, sheltered sites and dense stands, the conditions the disease needs. Ensure good drainage, sow at a sensible rate rather than thickly, do not save seed from an infected crop, and remove crop debris and nearby common vetch that can harbor it. Rotate favas on a three-to-four-year cycle.
Broad bean rust
D · 02
Symptoms Small, dusty, dark-brown spots (pustules) scattered over the leaves and stems, often with a faint yellow ring around each, that leave a rusty smudge when rubbed. It usually turns up later, in the warmer weather of mid to late season. It is less serious than chocolate spot, but a heavy attack can strip the leaves and weaken plants as they finish up.Small, dusty, dark-brown pustules scattered over the leaves and stems, each often ringed by a faint yellow halo; rubbing them leaves a rusty smudge. It usually appears later in the season, in warmer weather from around midsummer, and while it is less destructive than chocolate spot, a severe attack can defoliate plants and sap their vigor as they finish. Cause A rust fungus (Uromyces viciae-fabae) that lives on favas and spreads on the wind in warm weather. Its spores survive on old plant debris and seed over winter, so it comes back where favas are grown in the same spot year after year.The rust fungus Uromyces viciae-fabae, which completes its life cycle on favas and spreads by airborne spores in warm conditions. It keeps the infected leaf tissue alive to feed on, and its end-of-season spores survive in crop debris and on the seed, so it returns where favas are grown repeatedly without a break. Organic treatment There is no home garden spray for broad bean rust, so keep the plants open and airy with wider spacing and avoid damp, sheltered spots. Pull off badly spotted leaves. Since rust shows up late, an early planting usually finishes its pods before it matters, and clearing away the old plants at the end helps.There are no fungicides available to home gardeners for broad bean rust, so cultural control is the mainstay. Improve airflow with wider spacing, avoid humid, sheltered sites, and remove badly affected leaves. Because rust arrives late, an early-sown crop often finishes its pods before rust does real harm; clear and destroy the debris at the end. Prevention Plant early so the crop finishes before the warm weather that brings on rust, give plants room for air to move, and avoid damp, crowded spots. Clear away and destroy the old plants at season's end, since the spores survive on debris and seed, and move your favas to a new spot each year.Sow early so the crop matures before the warm midsummer weather that drives rust, space plants for airflow, and avoid humid, crowded sites. Destroy infected plant material at the end of the season, since the spores overwinter in residue and on seed, and rotate favas so the disease does not build up in one bed.
Root rots and seed decay
D · 03
Symptoms The big seeds rot before they come up, or seedlings flop over at a pinched, water-soaked spot near the soil, leaving gaps in the row. On older plants the roots rot, the lower leaves yellow, and growth stalls. It is worst in cold, wet, poorly drained soil that makes the seed sit too long before sprouting.Large seed that rots before emerging and seedlings that damp off at a pinched, water-soaked stem base, leaving gaps in the row; on older plants a root-rot complex yellows and stunts the vines and rots the lower stem and roots. Damage is worst in cold, wet, poorly drained soil that slows germination and keeps seedlings vulnerable, and it overlaps with bean seed fly injury in the same conditions. Cause A group of soil fungi and water molds that attack the seed, roots, and seedlings. Cold, soggy soil and damaged roots let them in, and they build up where beans and favas are grown too often in the same place. You manage this by preventing it, not by spraying.A complex of soilborne fungi and water molds (Pythium, Rhizoctonia, Fusarium, and others) that attack seeds, roots, and seedlings. Cold, saturated soil and injured roots at sowing set the stage, and the organisms build up in ground cropped to legumes too often, so drainage and rotation are the levers rather than treatment. Organic treatment There is no saving seed or seedlings that have already rotted, so replant the gaps once the soil is warmer and drains better. Pulling affected plants and improving drainage help, but the main thing is preventing it, since these organisms live in the soil.There is no rescue for rotted seed or collapsed seedlings; replant the gaps into warmer, better-drained conditions once the soil has dried. Removing affected plants and improving drainage limits further loss, but because the organisms are already in the soil, prevention is the real control. Prevention Plant in well-drained soil or raised beds instead of cold, wet, low spots, and never sow into soggy ground. Avoid damaging the roots when planting, move your favas and beans around the garden on a three-to-four-year cycle, and clear away the old plants after harvest.Sow into well-drained ground or raised beds rather than cold, low, wet spots, and do not sow into waterlogged soil. Avoid root injury at planting, keep beds in a three-to-four-year rotation away from legumes to limit buildup, and clear crop debris after harvest.
Downy mildew
D · 04
Symptoms Pale, fuzzy patches on the top of the leaves, with a grayish, velvety mold on the underside in damp weather. The growing tips can twist and discolor, and a bad case means fewer pods. It shows up in cool, humid weather and is more of a spring problem.Pale, blurry patches on the upper surface of the leaves, with a grayish to mauve, velvety mold on the corresponding underside in damp weather. Growing points can become distorted and discolored, and heavy infection reduces pod set. It develops in cool, humid conditions and tends to be more of a problem on the spring crop. Cause A downy mildew fungus that likes cool, humid weather and wet leaves, and that can survive in the soil and on the seed for years. Crowded, damp plantings and growing favas in the same spot repeatedly make it worse.The downy mildew fungus, which favors cool, humid conditions and long leaf wetness and can persist in the soil and on seed for years. Crowded, damp plantings and repeated cropping in the same ground favor it. Organic treatment Manage it by keeping plants open and dry: thin crowded growth, pull off affected leaves and tips early, water at the soil rather than overhead, and stay out of the patch when it is wet. Clear away the old plants at the end of the season.Home management is cultural: improve airflow by thinning and wider spacing, remove affected leaves and growing tips early, avoid overhead watering, and stay out of the planting when wet. Clear infected debris at the end of the season. Prevention Give plants room so air moves through, avoid damp, shady spots, and water the soil rather than the leaves. Do not save seed from an infected crop, move your favas around the garden on a three-to-four-year cycle, and clear away debris, since the fungus can live on in the soil and seed.Space plants for airflow, avoid damp, sheltered sites, and water at the soil rather than overhead. Do not save seed from an infected crop, rotate favas on a three-to-four-year cycle, and remove crop debris, since the fungus can persist in soil and on seed.
Verified · 7 sources View
Seasoned
Where to plant next year

Crop rotation

Move your favas to a new spot on a three-to-four-year cycle, and do not plant them where any beans or peas grew recently. Because favas feed the soil with nitrogen, whatever heavy feeder you plant there next will benefit.Rotate favas on a three-to-four-year cycle away from all legumes, leaning to four years where chocolate spot has shown up. Their nitrogen-fixing habit and their common use as a cover crop make them an excellent predecessor for nitrogen-hungry crops.

Family
Fabaceae (legume, Vicia faba)
Years between
4 years
in the same bed
Avoid following
Do not plant favas where favas, peas, or beans grew recently. Diseases and pests build up in the soil and hit the next legume crop. Wait three to four years before favas return, and closer to four if you have had chocolate spot.Avoid following favas with favas, peas, or beans in the same bed. Favas are prone to soilborne diseases (chocolate spot, downy mildew, and root rots) and to the pea and bean weevil, all of which build up where legumes crop the same ground repeatedly. A three-to-four-year break is the standard guidance, and four years is advised where chocolate spot has appeared.
Plant after
Favas are one of the best crops to grow before a heavy feeder. As a nitrogen-fixing legume, and a widely used cover crop and green manure, favas leave the soil looser and richer, so follow them with a nitrogen-hungry crop such as a brassica, a leafy green, corn, or squash.
Verified · 3 sources View
In the app · pre-launch

When plant taps you on the shoulder

The plant app sends a timely reminder at every critical moment of your broad beans / fava season. The wording adjusts to whichever you pick: beginner or seasoned. Here are three you'll see in Zone 4.

p
plant
Last frost arrives
Time to plant fava beans
Plant favas now. Where winters are mild, plant in fall so the crop grows over winter; where winters are cold, plant as soon as you can work the soil, because young favas handle cold well. Plant the big seeds 1 to 2 inches deep and 4 to 6 inches apart in moist, well-drained soil.
p
plant
9 weeks after planting
Pinch off the tops to stop black aphids
Once the bottom flowers have turned into small pods, pinch off the soft growing tip of each fava plant. That is where the black aphids gather, so you remove most of them at once, and it also helps the plant put energy into making beans.
p
plant
12 weeks after planting
Start checking your fava pods
A spring-planted fava crop is usually ready about 80 to 100 days from planting; a fall-planted crop matures in spring. For fresh green favas, pick the pods when they are plump and glossy and the beans have filled out but are still tender, starting at the bottom of the plant. Always cook favas before eating.
Get personalized alerts.

plant sends the right notification at exactly the right moment, for your zone, your weather, your crops. Founding members lock the rate forever.

Back the Kickstarter →
Ask the gardener

Common questions

Got a question we missed?

We're building this guide with real growers. Got a question we missed? Ask here. We read every one and add the best answers right to this page.

Grown this before?

Share a tip

Learned something the hard way? Pass it on. Real growers' tips make this guide better for the next person, and we credit you by name when yours goes live.

Seasoned
Spot something wrong?

Report a problem

If you've grown this crop and you see a date, a temperature, a companion claim, or a recommendation that doesn't match your experience, tell us. Real growers' corrections make this guide better for the next person.

How we built this guide

Methodology & sources

Every date, temperature, spacing, and recommendation on this page is sourced from university cooperative extension publications, peer-reviewed agricultural research, NOAA climate data, and direct extension calendars. Where claims are softer (traditional gardening wisdom not formally documented), we say so.

Research-backed Documented in cooperative extension publications or peer-reviewed research
Well-grounded A known agronomic principle, but not formally tested for this specific pair
Traditional Time-tested gardening wisdom, limited formal research support
Last reviewed
July 2, 2026
Data version
crops_data_final · v1.0 · schema 2.9
Sources cited on this page
16 publications
Verified entries
Companion-planting claims tagged inline · zone dates verified against 5+ extensions
See all sources cited on this page
  • University of Minnesota Extension umn_ext
  • University of Maryland Extension umd_ext
  • Cornell Cooperative Extension cornell_ext
  • Iowa State University Extension iastate_ext
  • Michigan State University Extension msu_ext
  • NC State Extension ncsu_ext
  • Penn State Extension psu_ext
  • U. of Illinois Urbana-Champaign Extension uiuc_ext
  • UC Davis Postharvest Center ucd_postharvest
  • Texas A&M AgriLife Extension tamu_agrilife
  • Virginia Cooperative Extension 426-331 vce_426_331
  • Piedmont Master Gardeners piedmont_mg
  • UGA Vegetable Garden Calendar uga_calendar
  • Clemson Home & Garden Information Center clemson_hgic
  • UC IPM Statewide IPM Program uc_ipm
  • NOAA 1991-2020 Climate Normals noaa_normals

Growing notes, weekly.

Zone-aware seasonal nudges, what's worth planting now, and the occasional recipe from the harvest. No spam, ever.

Vol. 003 · Broad Beans / Fava · plant.lifestyle