Pick your zone and the dates re-calibrate.
The Guide Crops Vol. 003

Butternut Squash

in Zone 12, this week

Butternut is a warm-season squash grown for sweet, tan, hard-skinned fruit you harvest once in the fall, unlike summer squash that you pick young all season. It grows on long, sprawling vines that can spread 8 to 12 feet, so it needs a lot of room, though compact bush types like Butterbush fit smaller gardens. Each plant has both male and female flowers and needs lots of bee visits to set fruit. The good news is that butternut is one of the easier squash to grow: it shrugs off the squash vine borer that kills many other squash, and it handles heat and disease better. The main things to know: give it a long, warm season and plenty of space, water steadily while the fruit grows, watch for squash bugs, beetles, and mildew, and harvest when the squash are fully tan with hard, dull skin and a dry stem, before frost. Then cure them in a warm, dry place, and they store for months, longer than almost any other vegetable you can grow. Butternut squash is a warm-season winter squash (Cucurbita moschata) grown for its mature, hard-rind fruit, the long-season cousin of summer squash like zucchini. Unlike zucchini, it is harvested once, at full maturity in fall, then cured and stored: butternut is the best keeper of the common winter squashes, holding 4 to 6 months. Plants are vigorous, sprawling vines that run 8 to 12 feet for full-size types, so they need far more room than a bush squash, though compact varieties like Butterbush exist for small gardens. Butternut is monoecious, carrying separate male and female flowers on one plant, and fruit set is strongly pollinator-dependent. As a moschata, it is notably more tolerant of heat, disease, and especially the squash vine borer than its pepo relatives. The season's shape is set by three things: a long warm runway (85 to 110 frost-free days) to mature and sweeten the crop, moderate pest and disease pressure (squash bug, cucumber beetle and the bacterial wilt it spreads, plus powdery and downy mildew), and the single fall harvest, timed at a hard, fully tan rind, before frost and followed by curing for its long storage.
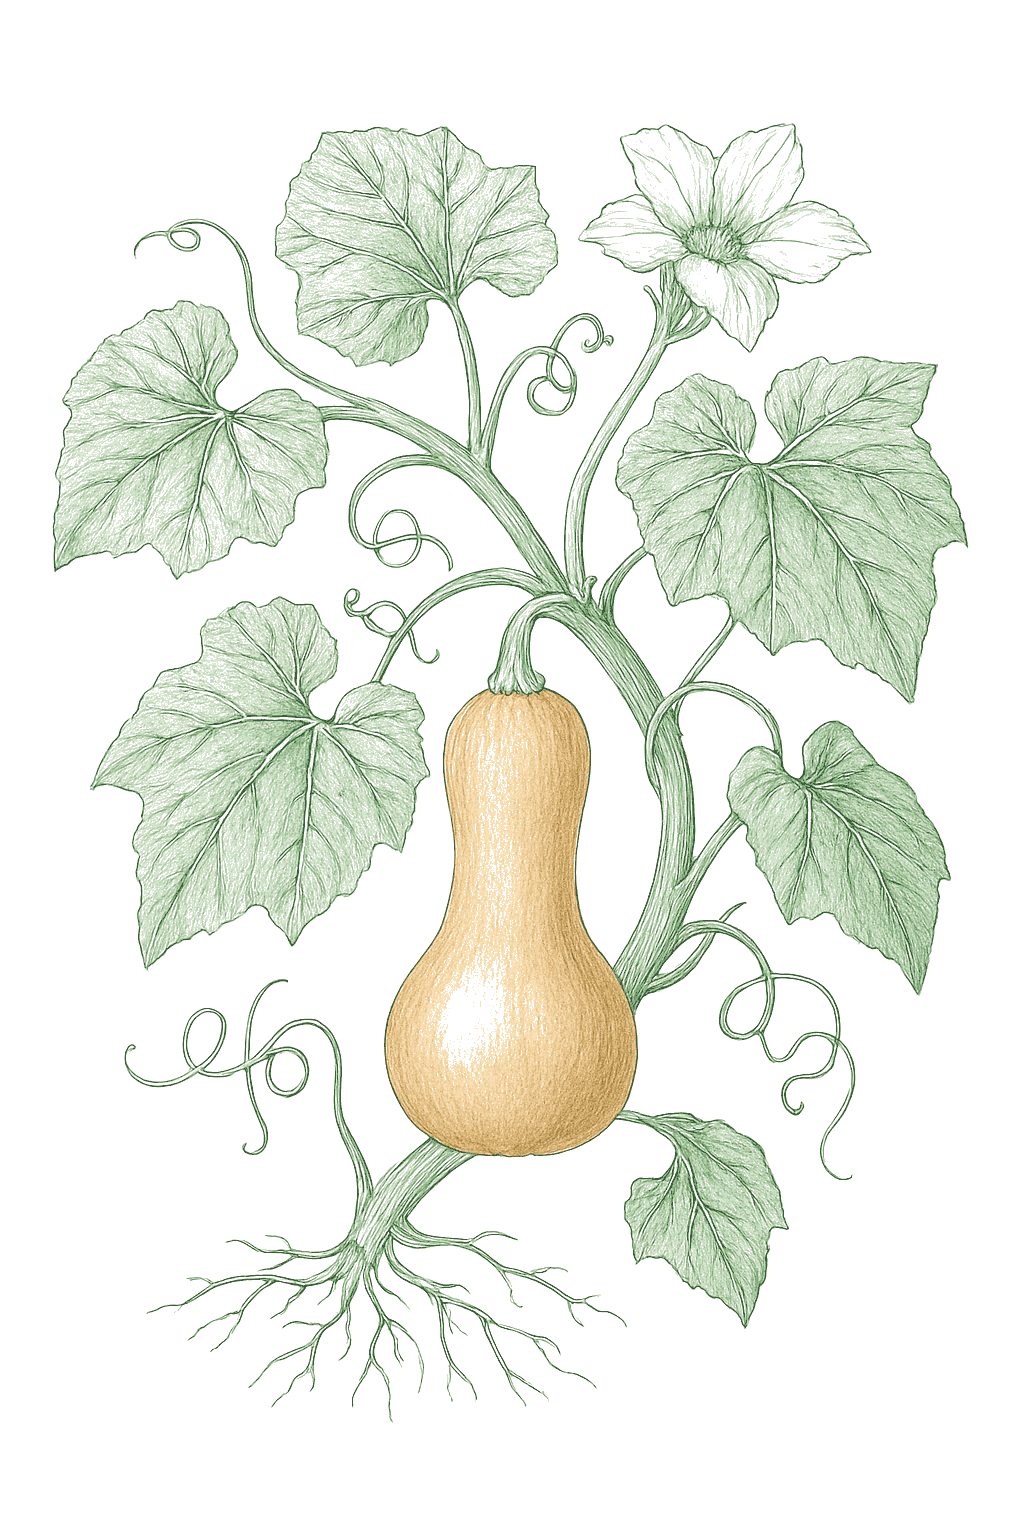
Butternut Squash mature plant
Fig. 01 · Butternut Squash, mature Zone 12
Mature in
85-110d
from transplant
Sunlight
Full sun
6-10 hrs daily
Water
Moderate
1.5 inches / week
Spacing
24-72"
between plants
Soil pH
6-6.8
slightly acidic
Today · in your zone

What's happening right now

July 24 · Zone 12 · Stage 01 · Germination

Off-season for butternut squash in zone 12.

The season at a glance

Planting calendar

In Zone 12, butternut squash can be planted January through August. Harvest runs April through December.

Jan
Feb
Mar
Apr
May
Jun
Jul
Aug
Sep
Oct
Nov
Dec
plant
plant
plant
plant
plant
plant
plant
plant
plant
too late
too late
too early
too early
harvest
harvest
harvest
harvest
harvest
harvest
harvest
harvest
harvest
harvest
indoors
plant out
harvest
The season, mapped

Seed to garden

The easiest way to grow butternut is to sow seeds right where they will grow, once the soil is warm (about 70°F). Plant a few seeds 1 inch deep in each hill and keep the strongest. Start seeds indoors only if your season is short, about three weeks before planting out, and move them outside while they are still small. In cold areas, use transplants and a fast-maturing variety like Early Butternut so the fruit ripens before frost.Because cucurbits resent root disturbance, direct sowing once the soil is reliably warm (at least 65°F, ideally 70°F, at 2 inches) is the simplest, most reliable method, and direct-sown plants quickly catch up. Sow several seeds about 1 inch deep per hill and thin to the strongest. Start seeds indoors only to gain two to three weeks in a short season, sowing in large cells and setting plants out before they outgrow the pot. In the coldest zones, transplants and early-maturing varieties such as Early Butternut are what make a fall crop possible.


Start method
Both
Soil temp
70-95°F
From seed to fruit

The growing journey

Stage 01 · Germination
01
Germination
Days 5-10 · current stage
In warm soil, seeds sprout in about a week to ten days, sending up two seed leaves first. In cold soil, seeds rot instead of sprouting.Seeds sprout in about 5 to 10 days in warm soil (70 to 95°F is ideal); soil below about 65°F rots seed rather than germinating it. Two seed leaves push up first.
Plant seeds 1 inch deep once the soil is warm, a few per hill. Keep the soil damp until they sprout, then keep the strongest one or two.Sow about 1 inch deep in warm soil, three to four seeds per hill. Keep evenly moist, not soggy. Thin to the one or two strongest seedlings once true leaves appear.
FROM PLANT · Wait for warm soil before sowing. Butternut seeds rot in cold ground but sprout fast once it warms up.Soil temperature, not the calendar, governs butternut germination. Wait until soil is at least 65°F, ideally 70°F, at 2 inches; seed sown in cold ground rots before it sprouts.
02
Seedling
Days 10-25
After the first two rounded leaves, true leaves appear and the plant grows quickly. Watch for beetles chewing the young leaves.Cotyledons followed by the first true leaves; growth is fast once warm. Watch for cucumber beetles, which target young plants and transmit bacterial wilt, and for squash bug eggs on leaf undersides.
Keep an eye out for beetles on young plants and use a light row cover if needed, but remove it once flowers form. Water regularly and keep weeds down.Protect from cucumber beetles and squash bugs with row cover if needed, removing it at flowering for pollination. Keep evenly watered and free of weeds.
FROM PLANT · Protect young plants from beetles. A light cover helps, but take it off once flowers appear so bees can reach them.Cucumber beetles swarm young cucurbits and can spread bacterial wilt. A floating row cover protects seedlings, but pull it off at flowering so bees can pollinate.
03
Vining
Days 25-50
The plant sends out long vines that spread fast across the ground, with big leaves. This is when you feed it and give it room to run.The plant sends out long runners and bulks up its leaves, often growing a foot or more of vine per day in warm weather. This is the window to side-dress. Butternut's solid moschata stems shrug off the squash vine borer that plagues thin-stemmed squash, so the usual stem-base worry is minimal here.
Feed the vines as they start to run and give them plenty of room to spread. Add mulch to keep the soil moist.Side-dress with nitrogen as the vines run, mulch to hold moisture, and give the runners room to spread, 8 to 12 feet for full-size types. Bury vine joints to encourage secondary rooting, which also helps a plant outpace pest damage.
FROM PLANT · Feed the vines as they spread, but do not overdo the nitrogen once fruit forms, or you get lots of leaves and few squash. Give them plenty of room.Feed the vines as they run, then ease off nitrogen once fruit sets, or you get vine at the expense of squash. Give full-size types 8 to 12 feet to sprawl.
FROM PLANT · A nice thing about butternut is that the squash vine borer, which kills many other squash, mostly leaves it alone.One reason to grow butternut: as a Cucurbita moschata, its solid stems make it far less prone to the squash vine borer than zucchini or acorn squash, so the usual stem-base vigil is largely unnecessary.
04
Flowering
Days 48-70
Big yellow-orange flowers open. The first ones are usually male and fall off, which is normal. Female flowers have a tiny squash at their base, and bees need to visit them many times to set fruit.Large yellow-orange flowers. Male flowers on thin stalks usually open first, often for a week or more before females appear, which is normal; female flowers carry a tiny squash behind the bloom. Each female needs many bee visits to set a full fruit.
Let the bees do their work and do not spray the flowers. If tiny squash turn yellow and rot, the flowers were not pollinated, so you can hand-pollinate in the morning. Keep watering steadily.Encourage pollinators and avoid spraying open blooms. If small fruit yellow and rot at the tip, pollination is poor, so hand-pollinate in the morning with a male flower or small brush. Keep moisture steady now.
FROM PLANT · The first flowers often fall off without making squash, that is normal. Trouble is when tiny squash turn yellow and rot, which means poor pollination.Early male flowers opening and dropping with no fruit is normal; females come later. Judge pollination by whether small fruit size up or yellow and rot at the blossom end.
FROM PLANT · Butternut needs lots of bee visits to set fruit. If fruit is not forming, hand-pollinate in the morning by touching a male flower to the center of a female flower.Butternut fruit set is pollinator-limited, each female needing many bee visits. If set is poor, hand-pollinate in the morning: pick a male flower, strip the petals, and dab pollen onto the center of each open female.
05
Fruit development
Days 65-95
The little squash grow bigger and slowly change color, going from green to tan as they ripen over several weeks.Set fruit swell and gradually turn from green to the mature tan over several weeks, while the rind hardens. The plant is sizing and ripening its crop for a single fall harvest rather than setting new fruit continuously. Butternut colors tan well before it is fully mature.
Keep watering steadily while the squash grow, then ease off as they ripen. Slip a board or some straw under each fruit so it is not sitting on damp ground, and watch the leaves for powdery mildew.Keep moisture even through sizing, then taper as fruit nears maturity. Remove the latest small fruit and pinch vine tips to channel energy into the keepers, set ripening fruit on a board or mulch to keep it off wet soil, and keep scouting for mildew.
FROM PLANT · Put a board or some straw under each squash so it is not on damp ground. To get bigger squash, remove the latest tiny fruit so the plant feeds the rest.Slip a board or straw under sizing fruit to keep it off wet soil and prevent rot. To push size, remove the latest small fruit and pinch vine tips so energy goes to the keepers before frost.
FROM PLANT · A butternut is ripe when it is fully tan, the skin is hard and dull, and the stem has dried out. It turns tan early, so wait a couple more weeks, and ease off watering near the end.Ripeness is full, deep tan color with no green, a hard rind a thumbnail cannot dent, and a dry, corky stem. Butternut colors tan early, so wait about two more weeks after it turns; taper watering near maturity to harden the rind for storage.
06
Harvest and cure
Days 85-110
The squash are fully tan, the skin is hard and dull, and the stem has dried and gone woody. They are ready to pick, all around the same time in fall.Full, deep tan color with no green, a hard rind a thumbnail cannot dent, a dried corky stem, and dull rather than glossy skin. Harvest the whole crop at maturity before a hard frost, then cure to harden the rind for its long storage.
Cut the squash off the vine with a knife, leaving a short piece of stem, and bring them in before a hard frost. Let them cure in a warm, humid place for about 10 days, then store them somewhere cool.Cut each squash with shears leaving a 1 to 2 inch handle, and get the crop in before a hard frost. Cure about 10 days in a warm, humid, airy spot (80 to 85°F), then store cool (50 to 60°F) for the months ahead.
FROM PLANT · Pick all your butternut when ripe, before a hard frost, leaving a short stem on. Cure them in a warm, humid place for about 10 days, then store somewhere cool, where they keep for months.Harvest the whole crop at maturity before a hard frost, cutting with shears and leaving a 1 to 2 inch handle. Cure about 10 days in a warm, humid, airy spot (80 to 85°F), then store cool near 50 to 60°F, where butternut keeps 4 to 6 months, the best of the winter squashes.
Beginner
Know your soil

Your soil

Identify yours

Not sure what soil you have? Grab a small handful of damp soil from your garden bed and squeeze it. If it crumbles apart easily, it's sandy. If it holds together but breaks when you poke it, it's loam (what most vegetables want). If it stays in a hard, slippery ball, it's clay.

What this crop wants

Plant butternut in rich, well-drained soil with plenty of compost mixed in. It is a large, long-season plant, so give it a generous, fertile bed. Many gardeners plant on low hills or mounds, which warm up faster and drain better. If your soil is heavy or stays wet, build up mounds or use raised beds so the roots and developing fruit do not sit in water.

If your soil doesn't match

You have sandy soil

Mix 2-3 inches of compost into the top 6 inches of your bed before planting. Compost holds moisture (which sandy soil drains too fast) and adds the nutrients sandy soil tends to lack. Repeat each season. Compost breaks down over time.

You have clay soil

Mix 2-3 inches of compost AND a few inches of coarse sand or perlite into the top 6 inches of your bed. The compost feeds the plants; the sand breaks up the clay so air and water can move through. Don't add sand without compost. It can compact like concrete.

Containers and raised beds

If amending your soil sounds like too much work, or if your soil is heavy clay, full of rocks, or contaminated, build over it. A raised bed at least 12 inches deep filled with a 50/50 mix of compost and sandy loam gives you ideal growing soil with no battles. A 5-gallon container with quality potting mix does the same for one plant at a time. Both bypass your native soil entirely.

Learn more about your soil
The specs

Care guide

The numbers that matter, at a glance.

Sunlight
Full sun · 6-10 hrs/day
Water
moderate
Spacing
24-72 inches
Soil
loam
Days to maturity
85-110 days from transplant
Soil pH
6 to 6.8
Container OK?
Yes · 10+ gal pot
Germination temp
70-95°F
Soil chemistry

Soil pH for butternut squash

Preferred
6 to 6.8
Tolerated
5.8 to 7.5

Butternut likes soil that is slightly acidic to neutral, about pH 6.0 to 6.8, and most garden soil is already close. An inexpensive soil test tells you where you stand and whether you need to adjust it before planting.Butternut does best in slightly acidic to neutral soil, around pH 6.0 to 6.8, with a sweet spot near 6.0 to 6.5. It still grows across a wider band, roughly 5.8 to 7.5, but uptake of some nutrients tightens as the soil turns alkaline. Test before planting and lime or add sulfur only on the test's advice rather than by guess.

Verified · 2 sources View
Steady hand on the hose

Watering

When & how much
Frequency
Give butternut about 1 to 1.5 inches of water a week, more when it is hot and dry. Water deeply rather than a little every day.Aim for at least 1 inch of water per week, leaning to 1.5 inches in heat or sandy soil, delivered deeply and less often rather than in light daily sprinkles. The long-season, big-leaved vine transpires heavily through summer.
Amount
About 1 to 1.5 inches of water a week is a good target, more while the plant is flowering and the squash are growing.Around 1 to 1.5 inches per week is the working range, leaning higher during flowering and fruit sizing and through hot, dry spells. Even, deep watering builds well-formed fruit; let it swing dry and you get poor set and small, uneven squash.
Method
Water the soil, not the leaves, using a soaker hose or watering wand at the base. Keeping the leaves dry helps prevent mildew. As the squash ripen and the skin hardens, ease off the water so they cure well.Water at the base of the plant with drip or a soaker hose, keeping the foliage as dry as possible, since wet leaves invite powdery and downy mildew. Taper watering as the fruit nears maturity and the rind hardens, which helps the squash cure and store, and keep ripening fruit off saturated soil.
Signs of trouble
Too much water
If lower leaves yellow, the plant wilts even though the soil is wet, or fruit and stems go soft and rotten, it is getting too much water or the soil drains poorly.Yellowing lower leaves, wilting even when the soil is wet, and soft, rotting stems or fruit at the base point to overwatering or poor drainage. Saturated soil invites crown and fruit rot, especially on heavy ground.
Too little water
Some midday wilting in hot weather is normal and passes by evening. Leaves that stay wilted mean the plant is too dry, and drought while fruit is forming gives small, poorly filled squash.Midday wilting that recovers overnight is normal in heat, but leaves that stay limp and dull signal real drought. Dry spells during fruit sizing show up as small, poorly filled squash and aborted young fruit.
Feeding rhythm

Feeding

Frequency
At planting, then side-dress once or twice
Type
balanced at planting, then nitrogen side-dress
When to start
Work into the bed before planting, then side-dress about 3 to 4 weeks after planting and again at flowering

Butternut grows for a long time and likes steady feeding. Mix a balanced fertilizer into the soil before planting, then feed with a little extra nitrogen about three to four weeks later as the vines start to run, and again when flowers appear. Once the squash begin to form, go easy on the nitrogen, because too much makes leafy vines instead of fruit.Butternut is a moderate feeder over a long season. Work a complete fertilizer such as 10-10-10 into the bed before planting, then side-dress with nitrogen about three to four weeks after planting as the vines begin to run, and again as flowering starts. Ease off heavy nitrogen once fruit has set, since late, lush vine growth comes at the expense of fruit and draws pests. Pair feeding with even moisture, because the nutrients only help a plant that is not also drought-stressed.

N · P · K = 10-10-10

Use a balanced fertilizer like 10-10-10 at planting, then a little nitrogen as the vines spread. Do not overdo the nitrogen once fruit forms.A complete fertilizer such as 10-10-10 worked in at planting, then a nitrogen side-dress while vines run, easing off once fruit sets. Avoid pushing high nitrogen late, which gives vine at the expense of fruit.

Try balanced 10-10-10 at planting, then a nitrogen source such as blood meal or 46-0-0
Who grows well together

Companion planting

The most useful butternut companions are flowers that bring in bees, since butternut needs lots of bee visits to set fruit, and the traditional Three Sisters partners, corn and beans. Nasturtiums can lure pests away. The one rule that really matters is to keep butternut away from other squash, cucumbers, and melons, which all share the same pests and diseases. Most butternut companion pairings are traditional rather than trial-tested, and the ones worth acting on serve two practical ends: pollination and pest pressure. Because cucurbit fruit set is pollinator-limited, with each female flower needing many bee visits, flowering insectary plants like borage near the patch are a genuine help. The Three Sisters partners, corn and beans, give the sprawling vines structure and a nitrogen boost while sharing none of butternut's pests, and a trap planting of nasturtium can divert squash bugs and beetles. The firmest rule is a rotation one: keep butternut away from other cucurbits, which share the squash pest and disease complex (though butternut, a Cucurbita moschata, shrugs off the squash vine borer that plagues its relatives).

Other
Corn
Corn and butternut are the traditional Three Sisters pairing. The corn stands tall while the squash vines spread along the ground, and the big leaves shade out weeds. It is a time-tested combination more than a proven boost.The classic Three Sisters partner: tall corn gives sprawling butternut vines structure and light shade in high heat, while the broad squash leaves shade the soil and suppress weeds beneath the corn. A long-standing intercropping tradition with a sound space-and-shade rationale, not a measured yield effect for this exact pair. Traditional
Beans
Beans are the third Three Sisters plant. They pull nitrogen from the air into the soil, which the hungry squash appreciates, and they do not share butternut's pests. A good, traditional neighbor.The third of the Three Sisters: pole or bush beans fix nitrogen that benefits the long-feeding butternut, and they share none of the cucurbit pests. A traditional, mechanistically plausible pairing rather than a trial-isolated one. Well-grounded
Nasturtium
Nasturtiums are often grown near squash to lure squash bugs and beetles away, and their flowers bring in bees, which butternut needs to set fruit. A helpful, low-risk neighbor.Often planted near cucurbits as a trap and deterrent for squash bugs and cucumber beetles, and its flowers also draw the bees butternut depends on for fruit set. Trap cropping is a documented principle, but the specific nasturtium-butternut effect is not formally isolated, so treat it as a plausible aid. Well-grounded
Borage
Borage flowers are loved by bees, and butternut needs lots of bee visits to set fruit, so a few borage plants nearby can help with pollination. Mainly grown to bring in bees.A strong bee magnet whose flowers recruit the pollinators that butternut fruit set depends on, since each female flower needs many bee visits to size a fruit. Pollinator-habitat value is well grounded; the specific borage-butternut pairing is traditional rather than trial-tested. Well-grounded
Keep apart from
Other cucurbits Keep butternut away from other squash, cucumbers, and melons. They share most of the same pests and diseases, so planting them together makes those problems worse.Cucumber, melon, summer squash, and other winter squash share much of butternut's pest and disease complex, including squash bug, cucumber beetle with the bacterial wilt it spreads, and powdery and downy mildew. Grouping them concentrates that pressure and lets soilborne problems build. A real epidemiology and rotation principle rather than a tested adjacency effect: spread cucurbits out and rotate them. Note butternut itself largely escapes the squash vine borer that hits its pepo relatives. Well-grounded
Potatoes Some gardeners keep potatoes and squash apart, since both are big, hungry plants and potatoes can bring their own diseases. This is more tradition than a proven rule.A traditional caution that potatoes and cucurbits compete heavily and that potatoes can harbor disease and attract pests near squash. There is no strong T1 mechanism for the specific pairing, so it persists mostly as garden lore. Traditional
Provenance tagged inline · see methodology for the labeling system Key
Harvest signals

When to pick

Unlike summer squash, you pick butternut once, when it is fully ripe. Look for a deep, even tan color with no green, a hard rind you cannot dent with a thumbnail, and a dry, woody stem. The skin also goes from shiny to dull when ready. Butternut turns tan before it is truly mature, so wait about two more weeks after it colors up. Cut the squash off the vine with a knife, leaving a short piece of stem attached. Bring them in before a hard frost. Then let them cure in a warm, dry place for about 10 days so the skin toughens for storage.Harvest butternut once at full maturity, not young: wait for a deep, solid tan or buff rind with no green streaks, a hard rind a thumbnail cannot dent, and a dried, corky stem. The skin turns from glossy to dull at ripeness. Butternut colors tan well before it is mature, so give it the extra time: UMass notes the rind turns tan around 45 days after fruit set but the squash should hang on the vine about two more weeks. Cut the fruit from the vine with shears or a knife, leaving a 1 to 2 inch handle of stem, and avoid carrying it by the stem. Get the crop in before a hard frost, which damages the rind and shortens storage. Then cure the squash about 10 days in a warm, dry spot to harden the skin before storing.

Verified · 2 sources View
Yield

What to expect

A full-size butternut plant usually gives you several squash, often 4 to 6, each 2 to 5 pounds. Bush types like Butterbush make fewer but take much less room. Plan on one or two plants going a long way, since each one sprawls widely.A healthy full-size butternut vine typically yields 4 to 6 fruit of 2 to 5 pounds each; compact and bush types set fewer, smaller fruit on far less space. Full-size vines need plenty of room per plant, and even moisture and feeding through sizing build the well-filled necks that make butternut worth growing.

Unlike summer squash, butternut does not keep producing all season. The plant sets its fruit over the summer and they all ripen together in fall, when you harvest once. Removing the latest tiny fruit helps the rest grow bigger before frost.Butternut does not produce continuously; the plant sets fruit through summer and then the crop matures together in fall for a single harvest. Once several fruit have set, removing the latest small fruit and pinching vine tips channels energy into sizing and ripening the keepers before frost. The big first-year surprise is how far butternut vines spread, often 8 to 12 feet for full-size types. Give them much more room than you think, and grow flowers nearby to bring in bees, since butternut needs lots of bee visits to set fruit.The usual first-year surprises are how much room the vines take (full-size types run 8 to 12 feet) and how pollinator-dependent fruit set is. Give plants far more space than seems necessary, and grow some flowers nearby to draw bees.

What changes yield
Pollination: fruit set is pollinator-limited, with each female flower needing many bee visits; poor pollination in cool or pollinator-scarce conditions drops young fruit.Season length and heat: butternut needs a long warm season (85 to 110 days) to mature before frost; a short season limits variety choice and yield.Space and vine vigor: full-size vines sprawl 8 to 12 feet and need room; crowding cuts yield and worsens disease.Pest and disease pressure: squash bug, beetle-vectored bacterial wilt, and powdery and downy mildew can end a planting early, though butternut largely escapes the squash vine borer.Even moisture and feeding: steady water and moderate feeding through fruit sizing build full, well-filled squash.
Verified · 2 sources View
Pick your variety

Recommended varieties

Pick a butternut variety by your season and space. For a full-size, reliable squash, grow Waltham Butternut. If your summers are short or cool, grow Early Butternut, which ripens faster. For small gardens or pots, grow the compact bush Butterbush or the small, super-sweet Honeynut. If powdery mildew is a problem where you live, look for a mildew-resistant type like Metro PMR.Choose by season length and use. Where the season is long, the full-size open-pollinated Waltham Butternut is the dependable standard and a fine keeper; where the season is short, the earlier-maturing Early Butternut or the compact bush Butterbush ripen a crop in time. For small spaces or containers, the bush Butterbush and the miniature Honeynut stay compact, and Honeynut is prized for concentrated sweetness. Where powdery mildew chronically shortens the season, a resistant hybrid such as Metro PMR keeps the foliage working longer.

Waltham Butternut
The classic open-pollinated full-size butternut and a 1970 All-America Selections winner. Uniform tan, blocky-necked fruit around 3 to 5 pounds with sweet, deep-orange flesh and a small seed cavity. The dependable, seed-saveable standard, and an excellent keeper.
Early Butternut
An All-America Selections hybrid bred for short seasons, maturing around 85 days on more compact vines. Smaller fruit (about 2 pounds) than Waltham but ripens weeks earlier, the go-to for cold zones 3 to 5.
Honeynut
A miniature single-serving butternut, about 1 pound, that ripens from green to a deep tan-orange. Exceptionally sweet, dense flesh; vines are productive and well suited to small gardens and large containers.
Butterbush
A compact bush butternut on short 3 to 4 foot vines, ideal for small beds and containers. Small fruit (about 1 to 2 pounds) on a space-saving plant that still keeps well.
Metro PMR (JWS 6823)
A powdery-mildew-resistant hybrid butternut with uniform, well-necked fruit. A good choice where mildew chronically shortens the season; the resistance keeps leaves working longer to size and sweeten the crop.
Off the vine

Storing your harvest

Room temp
A cured butternut keeps very well at room temperature, often for months in a cool spot out of the sun. Keep it off cold, damp floors so the bottom does not rot.A well-cured, sound butternut is an outstanding keeper at room temperature, the opposite of tender summer squash. After curing it holds for months in a cool room out of direct sun, though warm indoor heat shortens that. It keeps best sitting on a shelf with airflow rather than on a cold or damp floor.
Fridge
Do not put a whole butternut in the fridge, it is too cold and makes it break down faster. Once it is cut, wrap the pieces and keep them in the fridge for a few days, or freeze them.Whole butternut is not refrigerated; cold storage below about 50°F causes chilling injury and faster breakdown. Cut squash and cooked or pureed flesh, however, should be refrigerated and used within a few days, or frozen.
Freezer
Butternut freezes well once cooked. Roast or steam it, scoop out and mash the flesh, cool it, and freeze it in portions for soup and baking later. It keeps about a year.Butternut freezes well as cooked, mashed, or pureed flesh: roast or steam, scoop and puree, cool, and freeze in measured portions for soups and baking. Raw cubes can also be frozen for cooking. Frozen butternut keeps about a year.
Verified · 2 sources View
When something goes wrong

Common problems

Tiny squash turned yellow and rottedSmall fruit yellowed and rotted at the blossom end
01 of 04
What happened The flower was not pollinated well, so the little squash died instead of growing. This often happens in cool or rainy weather, or when there are few bees.Poor pollination. The female flower was not adequately pollinated, so the young fruit aborts, yellowing and rotting at the blossom end instead of sizing up. Common in cool, wet, or pollinator-scarce conditions, and butternut is strongly pollinator-dependent. Next season Grow some flowers nearby for the bees, and hand-pollinate early flowers if needed. It usually gets better as more flowers open.Plant flowers to draw bees, avoid spraying open blooms, and hand-pollinate in the morning if set is poor. It usually improves as more flowers open and bees get active.
Squash rotted on its undersideSquash sat on wet soil and rotted on the bottom
02 of 04
What happened The squash sat on wet ground and rotted on the bottom. Damp soil and poor drainage let a soil disease soften the fruit where it touched the ground.Fruit rot, typically from a wet underside in contact with damp soil, often a soilborne rot in poorly drained, rainy conditions. A soft, sometimes molded patch develops where the fruit sits, and can spread in storage. Next season Plant on raised hills so water drains away, and slip a board or straw under each squash so it is not on wet ground. Pick and cure them before storing.Plant on raised hills for drainage, avoid low wet spots, and set each sizing fruit on a board or thick mulch to lift it off the soil. Harvest promptly and cure before storing.
Leaves got white and powdery and the plant died backLeaves turned white and powdery, then the plant faded early
03 of 04
What happened Powdery mildew, a white coating on the leaves, spread until the leaves died and the plant stopped early, so the squash did not finish well.Powdery mildew defoliated the plant ahead of schedule. The white fungal coating spread across the leaves until they browned and died, cutting the season short and reducing fruit size, fill, and sweetness. Next season Pick resistant varieties, give plants more room and full sun, water the soil not the leaves, and treat the first white spots early.Choose resistant varieties such as Metro PMR, space plants generously, plant in full sun, water at the base, and treat at the first spots from midsummer rather than waiting.
Butternut tasted bland or wateryCut a green-shouldered butternut that tasted bland and watery
04 of 04
What happened The squash was picked too early. Butternut turns tan before it is really ripe, so picking at first color gives bland, watery flesh instead of sweet.Harvested before full maturity. Butternut turns tan well before the flesh has finished building sugars and dry matter, so a fruit picked at first color (or before a proper cure) eats watery and bland rather than sweet and dense. Green shoulders or streaks are the tell. Next season Wait until the squash is fully tan with no green and the stem is dry, then cure it for about 10 days. It actually tastes better after a few weeks of storage.Wait for a hard, dull, fully tan rind with no green and a dry stem, about two weeks past first color, then cure 10 days before eating or storing. Flavor improves further after a few weeks in storage.
The usual suspects

Pests & diseases

Pests
Squash bug
P · 01
Symptoms Leaves get yellow spots, then brown and wilt, and you find clusters of shield-shaped gray-brown bugs and their bronze eggs on the undersides of leaves near the base of the plant.Leaves develop yellow specks that brown and wilt, and heavily fed vines wilt rapidly and turn brittle, a damage pattern sometimes called anasa wilt. Flat bronze egg clusters appear on leaf undersides along the veins, and gray-brown adults and pale nymphs cluster near the crown and under debris. Cause Squash bugs pierce the leaves and stems and suck out the juices, which makes the vines wilt. They breed through the summer and hide in plant debris over winter.The squash bug, a true bug that feeds with piercing-sucking mouthparts on cucurbit foliage and stems, injecting saliva that wilts and browns the vines. Populations build through the season and are hardest to control once nymphs are large; the bugs overwinter as adults in garden debris. Organic treatment Pick the bugs off by hand and scrape off the egg clusters under the leaves. A board laid on the ground overnight draws them underneath, then lift it in the morning and destroy them. Treat the young bugs with insecticidal soap.Hand-pick adults, crush the egg masses on leaf undersides, and trap bugs by laying a board near the plants overnight, then lifting it in the morning and destroying the cluster underneath. Target young nymphs with insecticidal soap, since large nymphs and adults are tough to kill. Prevention Cover young plants until they flower, check under the leaves for eggs early in the season, and clean up old vines after harvest so the bugs have nowhere to overwinter.Use row cover on young plants until flowering, clean up vines and debris at season's end to cut overwintering sites, and rotate cucurbits. Scout leaf undersides for the bronze egg clusters from early in the season and act before nymphs mature.
Cucumber beetles
P · 02
Symptoms Small yellow beetles with stripes or spots chew on the leaves and flowers, especially of young plants. Worse, they can spread a disease called bacterial wilt that makes the vines collapse later.Small yellow beetles, striped or spotted, chew young leaves, stems, and flowers, and can scar developing fruit. The bigger threat is indirect: striped and spotted cucumber beetles transmit bacterial wilt, so beetle feeding on seedlings can be followed weeks later by sudden vine wilt. Cause Cucumber beetles feed on butternut plants and carry the germ that causes bacterial wilt, infecting the plant as they chew. Young seedlings are most at risk.Striped and spotted cucumber beetles feed on cucurbits and carry the bacterium that causes bacterial wilt in their gut, infecting plants as they feed. Seedlings are most vulnerable; once plants have several leaves they tolerate some feeding, and bacterial wilt is generally less severe in winter squash like butternut than in cucumber and melon. Organic treatment Cover young plants with row cover (remove it when flowers open), pick the beetles off, and use yellow sticky traps. Keeping the beetles down is the best way to avoid the wilt disease they spread.Protect seedlings with row cover removed at flowering, hand-pick beetles, and use yellow sticky traps to monitor and reduce numbers. Where bacterial wilt is a known problem, controlling the beetles is the most effective control of the disease, since there is no cure once a plant is infected. Prevention Cover seedlings until they flower, keep them growing strong, clear away weeds and old plants, and do not plant where squash-family crops grew last year.Exclude beetles from seedlings with row cover, keep young plants vigorous so they grow past the vulnerable stage, clear weeds and debris, and rotate away from where cucurbits grew. Aim control at the early-season colonizers that vector wilt.
Squash vine borer
P · 03
Symptoms On many squash, a healthy plant wilts all at once in summer with sawdust-like specks at a hole near the base of the stem, and a fat white grub inside. Butternut rarely gets this, since the borer mostly avoids it, but it is still worth a look.On susceptible squash, a vigorous vine wilts suddenly in mid to late summer with sawdust-like frass oozing from a hole low on the stem and a fat white caterpillar tunneling inside. Butternut is the happy exception: as a Cucurbita moschata, it is far less susceptible than summer squash, zucchini, acorn, or Hubbard, so this collapse is uncommon, though heavy local pressure can still produce occasional damage. Cause A moth lays eggs at the base of the stem in early summer, and the grubs tunnel inside and kill the vine. The moth prefers thin-stemmed squash like zucchini and mostly leaves tough-stemmed butternut alone.The larva of the squash vine borer moth, which lays eggs at the stem base in early summer; the hatching larvae bore into the stem and cut off the plant's water. The moth strongly prefers thin-stemmed Cucurbita pepo squash and largely avoids the solid, tougher stems of moschata types like butternut, which is why butternut planted near a borer-ravaged zucchini often sails through untouched. Organic treatment Butternut seldom needs treatment. If you do find a borer, slit the stem with a knife, dig out the grub, and cover the spot with damp soil so it can re-root. Pull and destroy badly damaged vines.Rarely needed on butternut. If a borer does enter, slit the stem lengthwise, remove the larva, and bury that node under moist soil to re-root. Bury vines at the joints as they run so a damaged plant can survive on secondary roots, and remove infested vines to reduce next year's brood. Prevention Growing butternut is half the battle, since the borer mostly avoids it. If borers are bad where you live, cover young plants with a light row cover until they flower, then take it off so bees can reach the flowers.Choosing butternut is itself the main prevention, since moschata squash are a recognized borer-tolerant choice. Where pressure is severe, row cover from planting until flowering excludes the egg-laying moths, and scouting the stem base for frass from early summer catches the rare entry early.
Aphids
P · 04
Symptoms Tiny soft insects gather on the undersides of leaves and on new growth, making leaves curl and turn yellow, often with a sticky film. They can also spread viruses.Colonies of small soft-bodied insects, often melon aphids, cluster on leaf undersides and growing tips, causing leaves to curl, pucker, and yellow, with sticky honeydew and sooty mold following. Beyond direct feeding, aphids transmit mosaic viruses that mottle and distort the foliage. Cause Aphids are small insects that suck the plant's juices and multiply fast, especially on soft, over-fed growth. The sticky honeydew they leave behind grows black mold.Melon and other aphids suck sap and reproduce rapidly in warm weather, building up quickly on stressed or over-fertilized plants. The honeydew they excrete fosters sooty mold, and several aphid species spread cucurbit mosaic viruses. Organic treatment Blast them off with a strong spray of water and treat the undersides of the leaves with insecticidal soap, repeating every few days. Ladybugs and other helpful insects eat aphids, so welcome them.Knock colonies off with a strong jet of water and spray insecticidal soap or horticultural oil with thorough coverage of leaf undersides, repeating every few days. Conserve ladybugs, lacewings, and parasitic wasps, which usually bring aphids under control. Prevention Do not over-fertilize with nitrogen, check the undersides of leaves regularly, and let helpful insects do their work instead of spraying everything.Avoid excess nitrogen, which drives the soft growth aphids favor, scout leaf undersides and growing tips, and support natural enemies rather than spraying broadly. Reflective mulch deters aphids from young plants.
Diseases
Powdery mildew
D · 01
Symptoms A white, powdery coating spreads over the leaves until they turn yellow and brown and die. The plant fades early, and the squash may not size up or sweeten well.White, powdery patches appear first on the upper and lower leaf surfaces and stems, spreading until leaves yellow, brown, and die back ahead of schedule. Early defoliation cuts the season short, reduces fruit size and the sugars that make butternut sweet, and exposes fruit to sunscald. Cause A fungus that spreads on warm, humid days, especially where plants are crowded and air does not move well. It does not need wet leaves to take hold.Powdery mildew fungi that thrive in warm conditions with high humidity but do not need leaf wetness, spreading by wind-blown spores. Crowded plantings, poor airflow, and shade worsen it, and it is one of the most common late-season winter-squash diseases. Organic treatment Treat early, at the first white spots, with a labeled fungicide like sulfur or horticultural oil, and remove badly affected leaves. Water the soil, not the leaves. Once it covers the plant it is hard to stop.Treat at the first spots, before it spreads, with a labeled fungicide such as sulfur or a horticultural oil or biofungicide, covering both leaf surfaces, and remove the worst leaves. Avoid overhead watering. Once it is widespread, control is mostly damage limitation. Prevention Pick resistant varieties, give plants plenty of room so air moves between them, plant in full sun, and water at the base. Start checking in midsummer and act at the first white spots.Choose resistant varieties (several butternut hybrids carry powdery-mildew resistance), space plants generously for airflow, plant in full sun, and avoid excess nitrogen and overhead watering. Scout from midsummer and treat at the first sign, since prevention and early action beat rescue.
Downy mildew
D · 02
Symptoms Yellow patches show on top of the leaves with fuzzy gray growth underneath, mostly in damp, humid weather. The spots brown and spread until the leaves die.Angular yellow blotches, bounded by the leaf veins, appear on the upper leaf surface, with a grayish or purplish fuzzy growth on the underside in humid weather. Spots brown and coalesce, and severe infection rapidly defoliates the vines. Cause A mold-like disease that spreads in wet, humid weather and needs wet leaves to infect. It can move through a planting quickly.A fungus-like water mold that spreads on wind-borne spores and needs leaf wetness and humidity to infect, so it flares in wet, humid spells and dewy conditions. It moves fast once established and is favored by crowding and prolonged leaf wetness. Organic treatment Open up the planting so leaves dry faster, remove the worst leaves, and use a labeled fungicide when wet weather sets in. Do not water over the leaves.Improve airflow, let foliage dry, remove badly affected leaves, and apply a labeled fungicide, covering leaf undersides, when conditions favor the disease. Avoid overhead irrigation, which keeps leaves wet and feeds the infection. Prevention Give plants room so air moves between them, water at the base, and watch closely in humid weather. Choose resistant varieties if downy mildew is common where you live.Space for airflow, water at the soil line rather than overhead, choose resistant varieties where available, and avoid working among wet vines. Scout closely in humid weather, when the disease can appear and spread quickly.
Bacterial wilt
D · 03
Symptoms Vines wilt and die even though the soil is wet. If you cut a wilted stem and pull the two ends apart slowly, infected sap stretches into sticky white strings.Individual leaves, then whole vines, wilt and collapse even though the soil is moist, often spreading until the plant dies. A field test helps confirm it: cut a wilted stem and slowly draw the cut ends apart, and infected sap pulls into thin, sticky white strands. Cause A germ spread by cucumber beetles as they feed. It blocks the plant's water pipes, so the vine wilts even when watered. Butternut is somewhat less prone than cucumbers or melons.A bacterium spread by striped and spotted cucumber beetles, which carry it in their gut and infect plants as they feed. It clogs the water-conducting tissue, so the plant wilts despite adequate water. Winter squash like butternut are generally less susceptible than cucumber and melon, but losses still occur. Organic treatment There is no cure once a plant has it, so pull and destroy infected plants. The real fix is keeping cucumber beetles down, since they spread it.There is no cure once a plant is infected; remove and destroy wilting plants to limit spread. Control is really beetle control, so management aims at keeping cucumber beetle numbers down, especially early in the season. Prevention Keep cucumber beetles under control, since they spread the disease. Cover young plants until they flower, and pull any plant that wilts and tests positive.Manage cucumber beetles from seedling stage with row cover removed at flowering, keep young plants vigorous, and remove infected plants promptly. Controlling the beetle vector is the most effective control of the disease.
Verified · 4 sources View
Seasoned
Where to plant next year

Crop rotation

Try not to grow butternut or its relatives in the same spot more than once every 3 years or so. Moving them around the garden each year helps avoid a buildup of pests and disease. Clean up old vines at the end of the season too.Rotate cucurbits on a 3 year cycle, returning butternut to a given bed no sooner than the third or fourth year, to break the buildup of squash bug, beetle-vectored wilt, and soilborne disease. Clear and remove spent vines at season's end rather than tilling them in, which removes overwintering pest and disease sites and makes rotation more effective.

Family
Cucurbitaceae
Years between
3 years
in the same bed
Avoid following
Do not plant butternut where you grew cucumbers, melons, or other squash in the last few years. They get the same pests and diseases, which build up in the soil.Avoid planting butternut where another cucurbit grew in the last few years, including cucumber, melon, summer squash, and other winter squash. They share squash bug, cucumber beetle, bacterial wilt, the mildews, and soilborne rots, all of which build up in the soil and on debris.
Plant after
Legumes such as beans and peas, sweet corn, leafy greens, or alliums like onions and garlic make good preceding crops, since they do not share the cucurbit pest and disease complex, and a legume leaves nitrogen behind for the long-feeding butternut.
Verified · 2 sources View
In the app · pre-launch

When plant taps you on the shoulder

The plant app sends a timely reminder at every critical moment of your butternut squash season. The wording adjusts to whichever you pick: beginner or seasoned. Here are three you'll see in Zone 12.

p
plant
NaN days after vining
Time to feed your butternut
Your butternut vines are spreading fast now. Give them a feeding of nitrogen a few inches away from the stems, and water it in.
p
plant
NaN days after flowering
Check that squash are forming
Your butternut is flowering. If the tiny squash turn yellow and fall off, the flowers were not pollinated, so try hand-pollinating in the morning.
p
plant
NaN days after harvest
Time to harvest and cure your butternut
Your butternut should be fully tan with hard skin. Pick them before a hard frost, leaving some stem on, then let them cure in a warm, humid place for about 10 days.
Get personalized alerts.

plant sends the right notification at exactly the right moment, for your zone, your weather, your crops. Founding members lock the rate forever.

Back the Kickstarter →
Ask the gardener

Common questions

Got a question we missed?

We're building this guide with real growers. Got a question we missed? Ask here. We read every one and add the best answers right to this page.

Grown this before?

Share a tip

Learned something the hard way? Pass it on. Real growers' tips make this guide better for the next person, and we credit you by name when yours goes live.

Seasoned
Spot something wrong?

Report a problem

If you've grown this crop and you see a date, a temperature, a companion claim, or a recommendation that doesn't match your experience, tell us. Real growers' corrections make this guide better for the next person.

How we built this guide

Methodology & sources

Every date, temperature, spacing, and recommendation on this page is sourced from university cooperative extension publications, peer-reviewed agricultural research, NOAA climate data, and direct extension calendars. Where claims are softer (traditional gardening wisdom not formally documented), we say so.

Research-backed Documented in cooperative extension publications or peer-reviewed research
Well-grounded A known agronomic principle, but not formally tested for this specific pair
Traditional Time-tested gardening wisdom, limited formal research support
Last reviewed
June 29, 2026
Data version
crops_data_final · v1.0 · schema 2.9
Sources cited on this page
16 publications
Verified entries
Companion-planting claims tagged inline · zone dates verified against 5+ extensions
See all sources cited on this page
  • University of Minnesota Extension umn_ext
  • University of Maryland Extension umd_ext
  • Cornell Cooperative Extension cornell_ext
  • Iowa State University Extension iastate_ext
  • Michigan State University Extension msu_ext
  • NC State Extension ncsu_ext
  • Penn State Extension psu_ext
  • U. of Illinois Urbana-Champaign Extension uiuc_ext
  • UC Davis Postharvest Center ucd_postharvest
  • Texas A&M AgriLife Extension tamu_agrilife
  • Virginia Cooperative Extension 426-331 vce_426_331
  • Piedmont Master Gardeners piedmont_mg
  • UGA Vegetable Garden Calendar uga_calendar
  • Clemson Home & Garden Information Center clemson_hgic
  • UC IPM Statewide IPM Program uc_ipm
  • NOAA 1991-2020 Climate Normals noaa_normals

Growing notes, weekly.

Zone-aware seasonal nudges, what's worth planting now, and the occasional recipe from the harvest. No spam, ever.

Vol. 003 · Butternut Squash · plant.lifestyle