Pick your zone and the dates re-calibrate.
The Guide Crops Vol. 003

Cauliflower

in Zone 8, this week

Cauliflower grows one dense, round head (the curd) in the center of the plant. There are white kinds plus fun orange, purple, and spiraled green Romanesco types, taking about 2 to 3 months to mature. It likes steady cool weather, so it is grown in spring and fall, not summer heat. Cauliflower is the trickiest of the cabbage family: it needs to grow without any stress, or it makes a tiny head early (buttoning) or a loose, discolored one. Many white types need blanching, where you tie the outer leaves over the head to keep it white. There are no side shoots like broccoli, so it is one head per plant, and it does not store like cabbage, so use it fresh or freeze it. Cauliflower is a cool-season brassica grown for the single dense white curd, the immature flower head, that forms at the center of the plant. It comes in white types plus orange, purple, and lime-green spiraled Romanesco forms, maturing from about 50 to 100 days, and is grown as a spring crop and a fall crop, timed to mature in cool weather. It is the fussiest of the common cole crops and less cold-hardy than cabbage or broccoli: the curd forms well only in steady cool weather around 60°F to 65°F, and almost any stress (heat, cold, drought, or a checked transplant) causes buttoning (a tiny premature curd) or ricing and discoloration of the head. Many white varieties need blanching, tying the outer leaves over the curd to keep it white, while self-blanching and colored types skip that step. Unlike broccoli it forms no side shoots, so it is a single harvest per plant, and unlike cabbage it does not store, so it is used fresh or frozen.
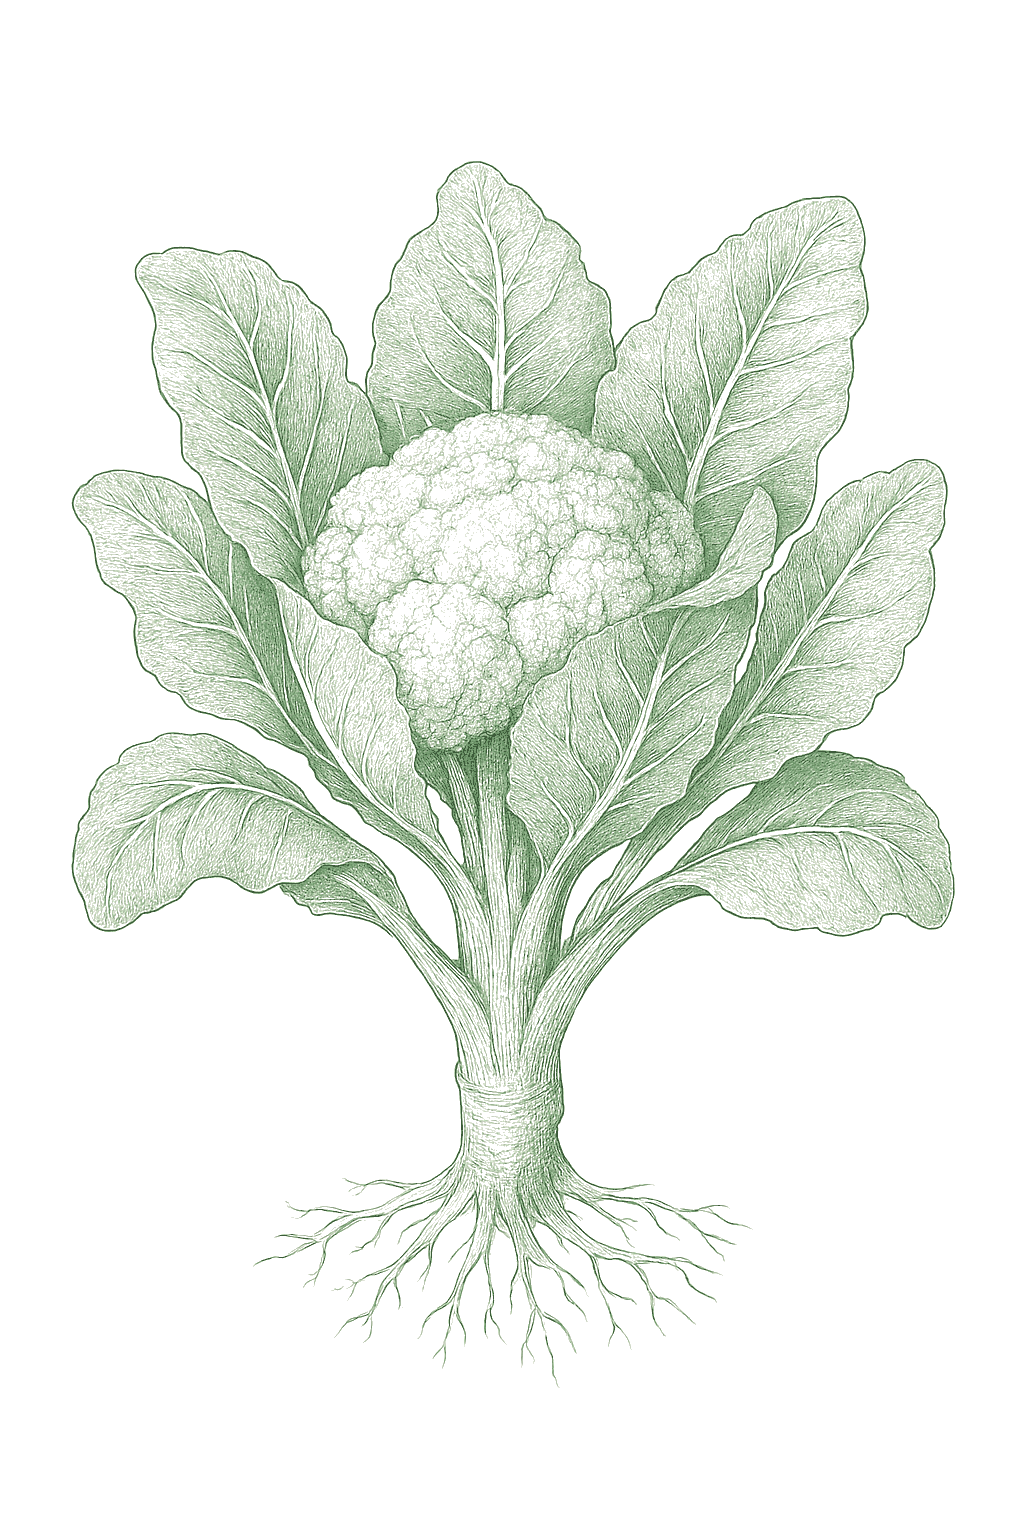
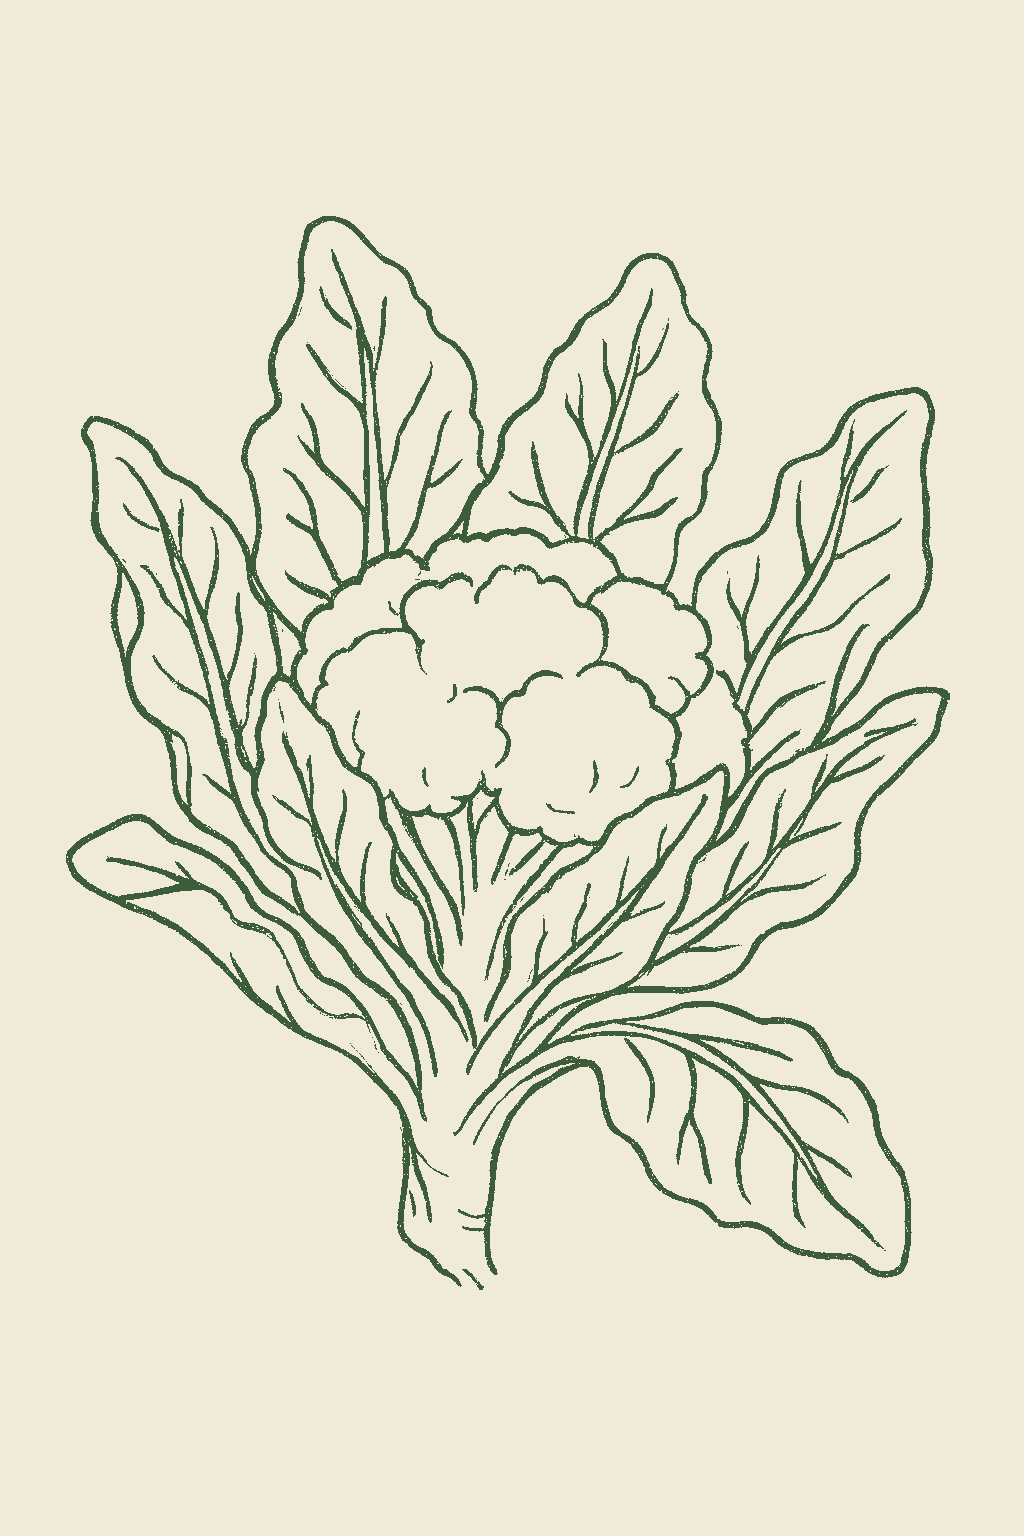
Cauliflower mature plant
Fig. 01 · Cauliflower, mature Zone 8
Mature in
50-100d
from transplant
Sunlight
Full sun
6-8 hrs daily
Water
Regular
1.5 inches / week
Spacing
18-24"
between plants
Soil pH
6-7
slightly acidic
Today · in your zone

What's happening right now

July 24 · Zone 8 · Stage 01 · Germination

Off-season for cauliflower in zone 8.

Your climate region in Zone 8
The season at a glance

Planting calendar

In Zone 8, cauliflower can be planted February through May, then again September, skipping the summer heat. Harvest runs January through December.

Jan
Feb
Mar
Apr
May
Jun
Jul
Aug
Sep
Oct
Nov
Dec
plant
too early
plant
plant
plant
plant
too hot
too hot
too hot
plant
too late
too late
too early
harvest
harvest
harvest
indoors
plant out
harvest
Above-ground cropBest planted on a none moon
Seasoned
Stagger your sowings

Succession planting

Plant cauliflower in spring and again in late summer for fall, in small batches a couple of weeks apart, instead of all at one time. The fall crop, with the head forming in cool weather, is usually the easier and more reliable one. Skip the hottest part of summer, since cauliflower will not form a good head in the heat.Cauliflower crops in the cool shoulders of the year, so plant in small batches within the spring window and again in late summer for fall, rather than all at once. Because it is so tightly tied to cool weather and so prone to buttoning in heat, the spring window is short and unforgiving: most gardens fit only a sowing or two before midsummer heat shuts it down. The fall planting, with the curd maturing into cooling weather, is usually the more reliable crop. Mixing early and late varieties in one planting also spreads the harvest.

Every 3 weeks · sow a short new rowUp to 12 sowings a seasonToo hot to sow midsummer
Jan
Feb
Mar
Apr
May
Jun
Jul
Aug
Sep
Oct
Nov
Dec
sow
harvest
keep sowing
too hot
continuous harvest
The season, mapped

Seed to garden

Cauliflower is best grown from transplants, since timing and a smooth, unstressed start are so important. For spring, start seeds indoors about a month before planting out and set the plants out around 2 weeks before your last frost; do not rush them into hard cold, since young cauliflower is touchier than cabbage. For fall, start them in early-to-mid summer. The key is to never let the seedlings get old, root-bound, or chilled, because that stress makes them head early. Let homegrown seedlings get used to the outdoors over a week before planting.Cauliflower is almost always transplanted, since precise timing and an unstressed start matter so much. For spring, start seeds indoors about 4 to 6 weeks before set-out and transplant sturdy young plants out around 2 weeks before the last frost; cauliflower transplants are less cold-hardy than cabbage or broccoli, so do not rush them into hard cold. For fall, start indoors or direct sow in early-to-mid summer and set out so the curd matures in cool fall weather. The single biggest transplant mistake is setting out an old, root-bound, or cold-checked plant: that stress triggers buttoning, where the plant forms a tiny premature curd. Set out stocky plants with 4 to 6 true leaves, harden them off over 7 to 10 days, and keep them growing without a stall.
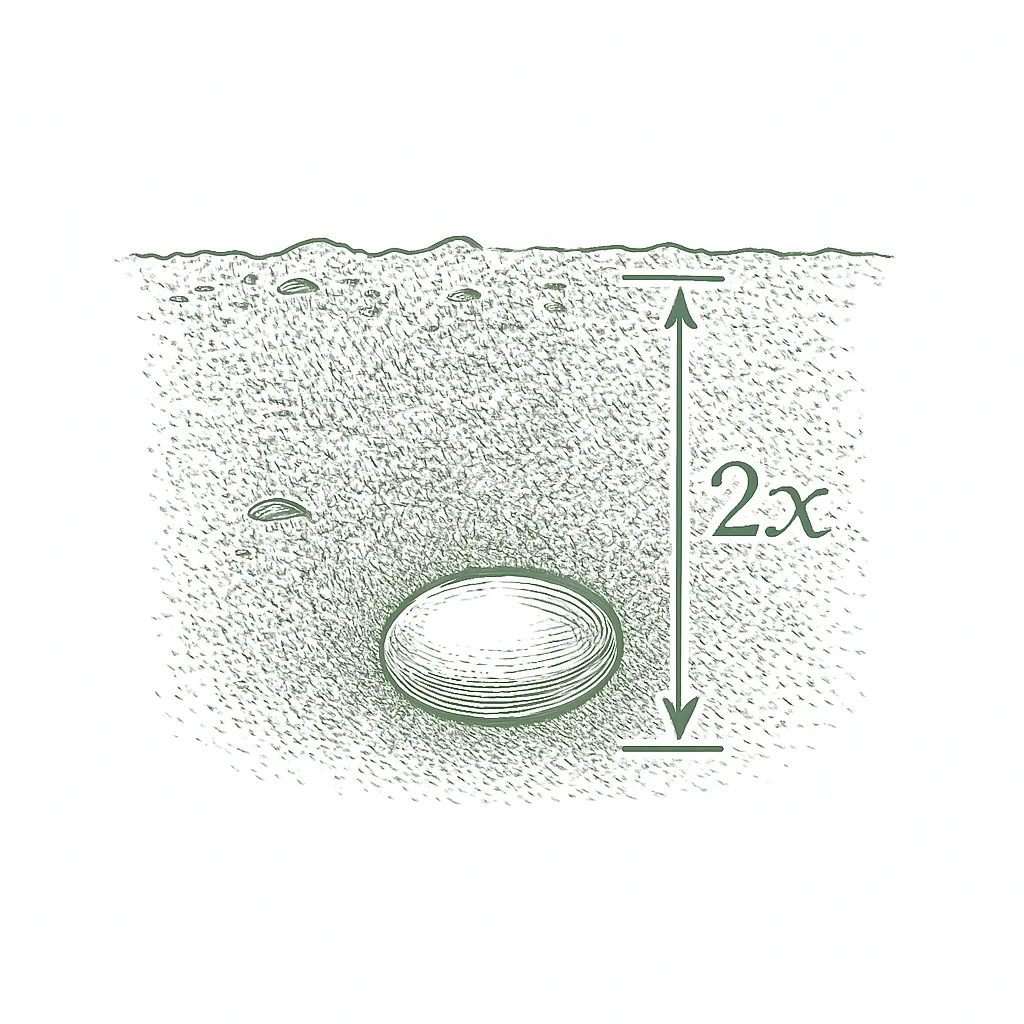
  1. 01
    Sow outside
    Feb - Mar, Sep
  2. 02
    First harvest
    From Jan 1
    50-100 days from sowing
Start method
Both
Soil temp
45-85°F
From seed to fruit

The growing journey

Stage 01 · Germination
01
Germination
Days 5-14 · current stage
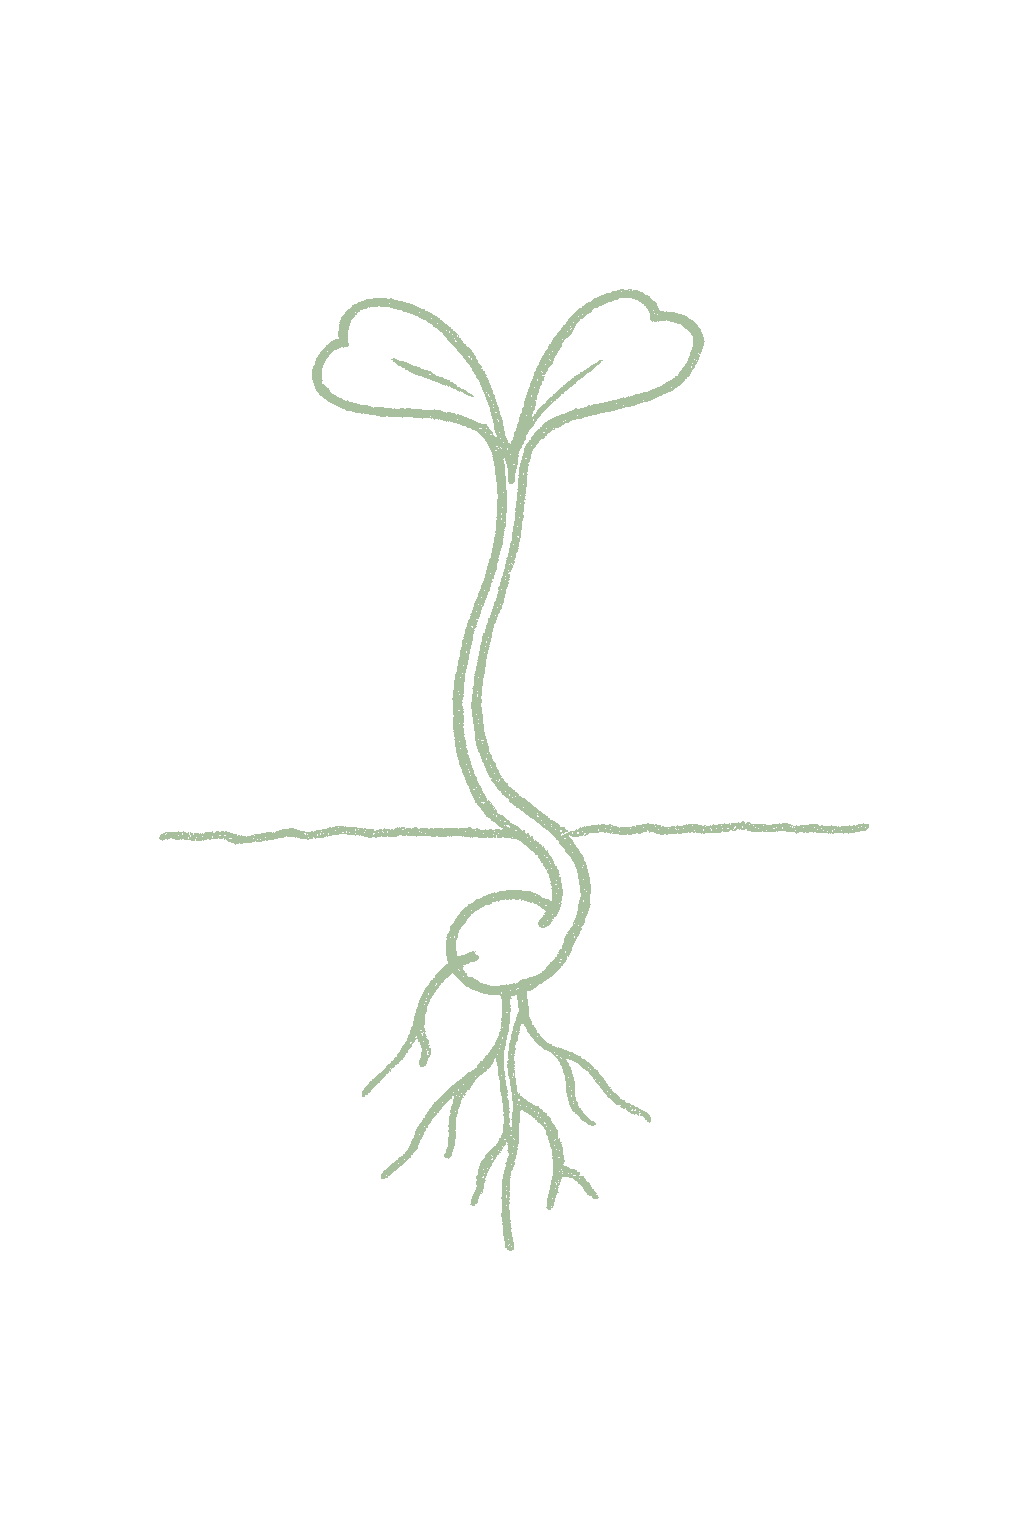
In about 5 to 10 days, your seeds sprout and push up their first two little leaves (the seed leaves).Seeds sprout in about 5 to 10 days, pushing up two seed leaves (cotyledons). Cauliflower is started indoors for transplanting in nearly all regions.
Keep the starting mix damp. Once the first real leaves appear, give the seedlings strong light so they do not get leggy.Keep the starting mix evenly moist and give bright light from emergence to avoid stretch; pot up before plants crowd, since a root-bound cauliflower seedling is prone to buttoning.
FROM PLANT · Start seeds indoors about a month before you plan to plant them out.Start seeds indoors about 4 to 6 weeks before set-out; cauliflower is transplanted in nearly all regions for timing and an unstressed start.
FROM PLANT · Plant the seeds about a quarter to half an inch deep, keep them damp, and give them strong light so they do not get leggy.Sow about 0.25 to 0.5 inch deep into a moist starting mix, give bright light from emergence, and pot up before roots crowd, since a root-bound start invites buttoning.
02
Seedling
Days 14-35
The seedlings grow their real leaves and a stronger stem. They are ready to plant out at about 4 to 6 weeks old, with several true leaves.Young plants build true leaves and a sturdy stem; transplants are ready at about 4 to 6 true leaves, roughly 4 to 6 weeks from sowing. Set out stocky young plants, never oversized or root-bound ones.
Harden the seedlings off over about a week before planting out, and plant them before they get old or root-bound. Watch for flea beetle holes and use a row cover.Harden off over 7 to 10 days, then transplant at 18-to-24-inch spacing without a growth check; protect from flea beetles with row cover and from cabbage root maggot with stem collars. An old, root-bound, or cold-shocked transplant is the classic cause of buttoning.
FROM PLANT · Space plants about 18 to 24 inches apart and plant them while they are still young and stocky, never old or root-bound. Harden them off over about a week first.Transplant stocky young plants (4 to 6 true leaves) at 18 to 24 inches apart without a growth check; harden off over 7 to 10 days first and do not set out old or root-bound plants.
FROM PLANT · Cover young plants with a row cover to stop flea beetles, and put a collar around the stem to keep root maggots out.Protect transplants from flea beetles with row cover and from cabbage root maggot with stem collars, especially in cool, wet spring soil; a checked seedling is prone to buttoning.
03
Established
Days 35-70
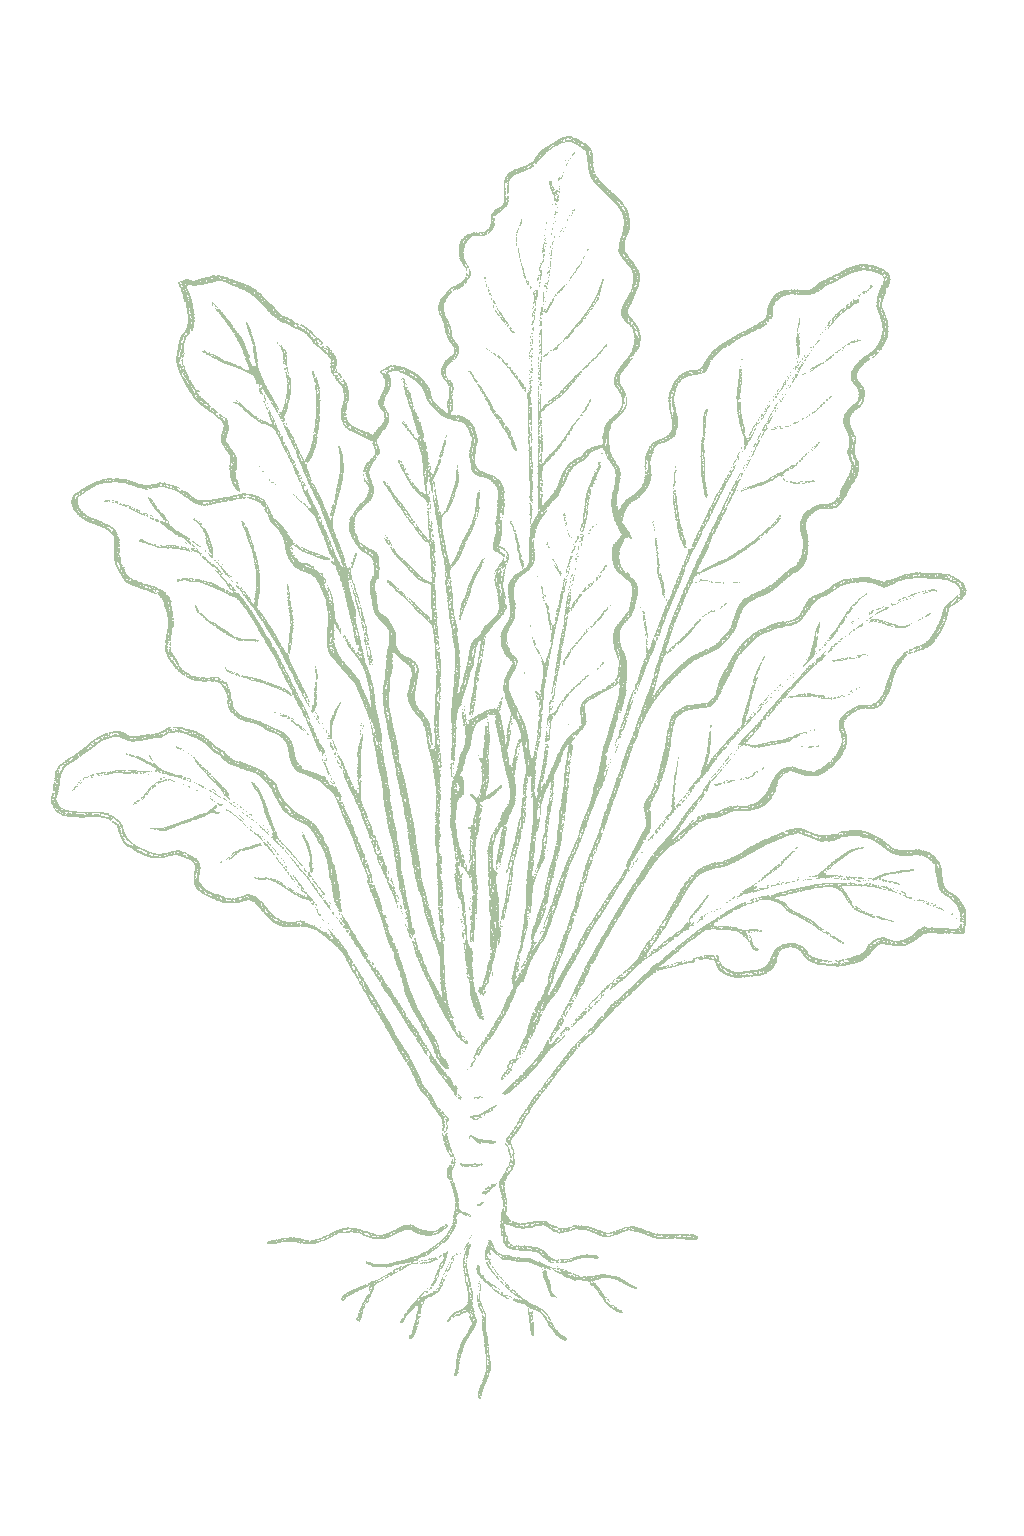
The plant grows a big rosette of spreading leaves before it forms a curd. This leafy frame is what feeds the head, so you want lots of strong growth now.The plant builds a broad rosette of frame leaves over several weeks before initiating a curd. Vigorous, uninterrupted growth now sets the eventual curd size; any stall risks buttoning.
Feed with nitrogen and keep it evenly watered so it never stalls. A cauliflower that gets stressed now will head early and badly, so steady growth is everything.Side-dress with nitrogen, hold moisture dead even, and scout for cabbageworms, loopers, cabbage aphids, and (in the South) harlequin bugs. The whole job at this stage is to prevent any check to growth from drought, low fertility, heat, or cold.
FROM PLANT · Feed with nitrogen and water steadily so the plant never stalls. Any stress now can make it head early.Side-dress nitrogen and hold moisture dead even at about 1 to 1.5 inches per week; the entire job now is to prevent any stall in growth, which causes buttoning.
FROM PLANT · Check the leaves for green caterpillars and the new growth for aphids, and deal with them early before the head forms.Scout for cabbageworms and loopers on the leaves and cabbage aphids on the growing tips; getting ahead of them now keeps them out of the curd later.
04
Curd forming
Days 60-120
A small white head (the curd) appears in the center of the plant and grows bigger and rounder. For white types, this is when you blanch it by tying the outer leaves over the head.A small curd initiates in the center and enlarges over 1 to 3 weeks. White types need blanching: when the curd reaches roughly silver-dollar to tennis-ball size, tie the outer leaves up over it with twine or rubber bands to shade it white (self-blanching types wrap on their own). Colored and Romanesco types are left unblanched in full sun.
When the curd is about the size of an egg or a tennis ball, gather the outer leaves up over it and tie them loosely with twine or a rubber band to keep it white. Skip this for orange, purple, or green types, which need sun. Keep watering steady.Blanch white curds at silver-dollar to tennis-ball size and keep moisture even; tie loosely so water drains rather than pools (a wet, tied head invites bacterial rot). Tighten caterpillar and aphid control, since contamination of the curd is the costly damage, and watch the weather, since heat now causes ricing and discoloration.
FROM PLANT · When the white head is about the size of an egg or tennis ball, tie the big outer leaves up over it to keep it white. Skip this for orange, purple, or green types, which need sun.Blanch white curds at silver-dollar to tennis-ball size by tying the outer leaves up over them with twine or rubber bands; tie loosely so water drains. Leave colored and Romanesco types unblanched in full sun.
FROM PLANT · Keep watering steady while the head forms. Heat can make it loose and discolored, so shade it in hot spells, and tie the leaves loosely so water does not pool in the head.Keep moisture even and watch the weather as the curd fills; heat causes ricing and discoloration, and a wet, tightly tied head invites bacterial rot, so tie loosely.
05
Harvest
Days 85-135
The head is full size (about 6 to 8 inches across), firm, and still tight and smooth. That is the moment to cut it, before the head loosens or discolors.Curds are ready when full-sized (about 6 to 8 inches across), firm, compact, and still smooth, typically 1 to 2 weeks after blanching. A curd left too long rices (separates into a loose, grainy texture), discolors, and begins to open toward flower, so the harvest window is short.
Cut the whole head off with a few leaves attached while it is still compact, usually about a week or two after you tied the leaves. Don't wait, since a cauliflower head goes from perfect to loose and grainy quickly.Cut the head at the base with a few wrapper leaves while it is still tight, before the curd rices or yellows; this window is only a few days to a week, shorter in warm weather. Cauliflower does not hold in the garden the way cabbage does, so harvest promptly and refrigerate.
FROM PLANT · Cut the head while it is full-sized and still tight and smooth. Don't wait, since it quickly turns loose and grainy.Cut curds while full-sized (about 6 to 8 inches), firm, compact, and still smooth, usually 1 to 2 weeks after blanching; left too long they rice and discolor, so the window is short.
FROM PLANT · Cut the head with a few leaves around it to protect it, and put it in the fridge soon. Cauliflower does not keep well, so use it within about a week.Harvest with a few wrapper leaves to protect the curd and refrigerate promptly; cauliflower does not hold in the garden the way cabbage does.
Beginner
Know your soil

Your soil

Identify yours

Not sure what soil you have? Grab a small handful of damp soil from your garden bed and squeeze it. If it crumbles apart easily, it's sandy. If it holds together but breaks when you poke it, it's loam (what most vegetables want). If it stays in a hard, slippery ball, it's clay.

What this crop wants

Cauliflower grows best in rich, well-drained soil with lots of compost worked in, and it needs steady, even moisture the whole way. More than most vegetables, cauliflower hates being stressed: if it dries out or runs short on food even briefly, it can quit growing and form a tiny, useless head early (called buttoning). Soil that holds moisture but still drains well is ideal.

If your soil doesn't match

You have sandy soil

Mix 2-3 inches of compost into the top 6 inches of your bed before planting. Compost holds moisture (which sandy soil drains too fast) and adds the nutrients sandy soil tends to lack. Repeat each season. Compost breaks down over time.

You have clay soil

Mix 2-3 inches of compost AND a few inches of coarse sand or perlite into the top 6 inches of your bed. The compost feeds the plants; the sand breaks up the clay so air and water can move through. Don't add sand without compost. It can compact like concrete.

Containers and raised beds

If amending your soil sounds like too much work, or if your soil is heavy clay, full of rocks, or contaminated, build over it. A raised bed at least 12 inches deep filled with a 50/50 mix of compost and sandy loam gives you ideal growing soil with no battles. A 5-gallon container with quality potting mix does the same for one plant at a time. Both bypass your native soil entirely.

Learn more about your soil
The specs

Care guide

The numbers that matter, at a glance.

Sunlight
Full sun · 6-8 hrs/day
Water
Regular
Spacing
18-24 inches
Soil
loam, sandy loam
Days to maturity
50-100 days from transplant
Soil pH
6 to 7
Container OK?
Yes · 5+ gal pot
Germination temp
45-85°F
Soil chemistry

Soil pH for cauliflower

Preferred
6 to 7
Tolerated
5.5 to 7.5

Cauliflower grows best in soil that is slightly acidic to neutral, about 6.0 to 7.0. A simple soil test tells you where you stand. If you have had clubroot, a soil disease, keeping the soil closer to neutral (up toward 7.0) helps hold it back.Aim for a soil pH of about 6.0 to 7.0 (UMN and Iowa State both give 6 to 7; Clemson lists 5.8 to 6.5). Cauliflower tolerates a wider 5.5 to 7.5 band. Clubroot, the major brassica soil disease, is far more likely in acidic soil below about 6.5, so where it is a concern lime acidic ground well ahead of planting and hold the pH toward neutral.

Verified · 3 sources View
Steady hand on the hose

Watering

When & how much
Frequency
Water regularly so the soil stays evenly moist, roughly 1 to 1.5 inches a week. Never let it dry out and wilt, since stress makes it head early and badly.Give about 1 to 1.5 inches weekly, kept as even as possible; cauliflower must never go through a dry check, which triggers buttoning.
Amount
Aim for roughly 1 to 1.5 inches of water a week.About 1 to 1.5 inches per week (UMN: roughly 1 inch a week; USU: 1 to 2 inches, deep and infrequent), more in warm, dry spells while the plant is sizing up.
Method
Water at the base of the plant rather than over the leaves.Water at the soil line with drip or a soaker hose where possible to keep foliage dry and discourage leaf disease.
Signs of trouble
Too much water
Lower leaves yellow and the plant looks soggy and limp.Yellowing lower leaves and limp growth; cauliflower dislikes waterlogged soil, which invites root maggots, clubroot, and crown rot in cold, wet ground.
Too little water
Wilting leaves and stalled growth, and worst of all, a tiny head forms way too early (buttoning) because the dry spell stressed the plant.Wilting and stalled growth, then the classic failure: a stressed plant buttons, forming a tiny, premature curd instead of a full head. Drought stress is the single most common cause of a ruined cauliflower crop.
Feeding rhythm

Feeding

Frequency
once or twice during the season
Type
Nitrogen-rich fertilizer
When to start
starter at transplanting, then side-dress about 3 to 4 weeks later as the plant builds its frame

Cauliflower needs rich soil and regular feeding to grow a good head. The big rule is to never let it get hungry or stressed: a plant that runs short on food or water stops growing and makes a tiny, useless head early. Mix a balanced fertilizer into the soil before planting, then feed with a nitrogen fertilizer about 3 to 4 weeks after planting out. Keep it growing steadily the whole way.Cauliflower is a heavy feeder, and steady fertility matters even more than with other cole crops because a hungry plant buttons, forming a tiny premature curd instead of a full one. Work a balanced fertilizer such as 5-10-10 or 10-10-10 into the bed before planting (Clemson: 5-10-10 at 3 pounds per 100 square feet), then side-dress with nitrogen about 3 to 4 weeks after transplanting, using roughly 33-0-0 or calcium nitrate. Keep the plant growing vigorously and without interruption right up to curd formation; the most common cause of failed curds is any stall in growth from low fertility or uneven water. On acid or sandy soils, a boron and molybdenum deficiency can cause hollow stem and whiptail, so a soil rich in organic matter at a near-neutral pH is the best insurance.

N · P · K = 10-10-10

Use a balanced fertilizer like 10-10-10 at planting, then a nitrogen feed a few weeks after planting out to keep it growing strong.High N to drive steady, uninterrupted growth to a full curd: a 5-10-10 or 10-10-10 starter worked in before planting, then a nitrogen side-dress such as 33-0-0 or calcium nitrate (15.5-0-0) about 3 to 4 weeks after transplanting.

Try Blood meal, 33-0-0, calcium nitrate (15.5-0-0), or a balanced 10-10-10 vegetable fertilizer
Who grows well together

Companion planting

Cauliflower does well next to aromatic herbs, onions, and quick crops you can tuck in while the plants are small. The most important rule is to keep it away from other cabbage-family plants, which share the same pests and diseases. Most cauliflower companion pairings are traditional rather than trial-tested. The ones worth acting on are practical: aromatic herbs and alliums as scent-based deterrents for cabbage-family pests, small flowering plants such as sweet alyssum and dill to draw the parasitic wasps and hoverflies that attack cabbage aphids and caterpillars (a habitat tactic Clemson recommends for cole crops), and quick crops like lettuce that use the open ground while the cauliflower fills in. The well-grounded caution is to separate cauliflower from other brassicas, which share clubroot and the whole cabbage-family pest complex, a rotation and disease principle more than a tested adjacency effect.

Other
Sweet alyssum
Sweet alyssum makes lots of tiny flowers that bring in helpful insects which eat aphids and caterpillars, two major cauliflower pests.Sweet alyssum is one of the better-supported cole-crop companions. Its low mats of tiny flowers are a classic insectary plant, drawing the hoverflies, lacewings, and parasitic wasps that prey on cabbage aphids and the cabbage-family caterpillars, and Clemson specifically advises small flowers like alyssum near cole crops for biological control. Let it self-sow along the bed edge. Research-backed
Dill
Dill's flowers attract helpful insects that hunt the aphids and caterpillars that bother cauliflower.Dill works for cauliflower mainly through beneficial insects. Its umbel flowers draw the parasitoid wasps and hoverflies that attack cabbage aphids and cabbageworms, and Clemson lists dill among the flowers to plant near cole crops for natural control. Let some flower, and keep it off to the side so it does not shade the plants. Research-backed
Onions
Onions are a traditional neighbor for cole crops; their strong smell is said to help confuse and deter cabbage pests.Alliums are a traditional brassica companion, their pungent scent thought to mask the crop from the cabbage pests that hunt partly by smell. Shallow-rooted and undemanding, onions tuck around young cauliflower without competing for much. Treat it as a low-risk, scent-based aid rather than a proven control. Traditional
Leafy green
Lettuce
A quick, shallow cool-season crop that uses the open ground and light between young cauliflower plants and is harvested long before they fill in. Space-driven and traditional, not a documented growth effect; the two share no serious pest. Traditional
interplant along edges
Trap crop
Nasturtiums
Often planted as a trap crop for cabbage aphids near brassicas. Trap cropping is a documented principle but is not a tested cauliflower-nasturtium pairing, so treat it as a plausible aid rather than a proven control. Well-grounded
interplant nearby
Keep apart from
Other brassicas Keep cauliflower away from other cabbage-family plants like broccoli, cabbage, brussels sprouts, and kale. They share the same pests and diseases, so grouping them makes problems worse.Planting cauliflower shoulder to shoulder with its brassica relatives, broccoli, cabbage, brussels sprouts, kale, collards, concentrates the family's shared pests (cabbage aphids, cabbageworms, loopers, harlequin bugs, root maggots) and shared diseases in one spot, and repeated same-family planting lets soil-borne clubroot build up. Spread brassicas out and rotate where they grow each year. Well-grounded
Strawberries A traditional caution that brassicas and strawberries inhibit each other. There is no documented mechanism or T1 support; it persists as folklore. Traditional
Provenance tagged inline · see methodology for the labeling system Key
Harvest signals

When to pick

Your cauliflower is ready when the head is full-sized (about 6 to 8 inches), firm, and still tight, smooth, and white, usually a week or two after you tied the leaves over it. Cut the whole head off with a few leaves attached. Don't wait, because the head quickly goes loose and grainy and yellows. Use it within about a week, since it does not keep like cabbage.Cut the curd when it is full-sized (about 6 to 8 inches across), firm, compact, and still smooth and white, usually 1 to 2 weeks after blanching and roughly 50 to 100 days from transplanting depending on the variety. Slice the whole head off at the base with a few wrapper leaves to protect it. Harvest promptly: a curd left too long rices (separates into a loose, grainy surface), discolors, and starts to open toward flower, and that window is only a few days, shorter in warm weather. Refrigerate soon, since cauliflower does not hold in the garden the way cabbage does.

Verified · 3 sources View
Yield

What to expect

Each plant gives you one head, usually about 1 to 3 pounds. There are no side shoots afterward like broccoli has, so it is one head per plant.One curd per plant, typically about 1 to 3 pounds and 6 to 8 inches across depending on variety, spacing, and how steadily the plant grew. Unlike broccoli, cauliflower does not produce useful side shoots after the main curd is cut, so it is strictly a single harvest.

Each cauliflower makes one head over a few weeks and is cut once, while it is still tight. The best heads form in the cool weather of fall and spring.Each curd matures over a short window in cool spring or fall weather and must be cut promptly before it rices; the crop is a one-time cut per plant. In hot regions the spring crop must beat the summer heat and the fall crop is usually the more reliable one. Cauliflower is the fussiest of the cabbage family, and almost all of its problems come from getting stressed. If it dries out, runs low on food, or hits heat or cold while young, it makes a tiny useless head early (buttoning). The two tricks are to keep it growing smoothly with even water and feeding, and to time it so the head forms in cool weather. Tie the leaves over white heads to keep them white, and cut the head as soon as it is full and still tight.Cauliflower is the most demanding of the common cole crops, and almost every failure traces to one cause: a check to growth. Buttoning (a tiny premature curd) comes from any stress, drought, low fertility, heat, cold, or a root-bound transplant, on a young plant; ricing and discoloration come from heat or harvesting late. The two keys are steady, unbroken growth (even water, steady feeding, no transplant shock) and tight timing so the curd matures in cool weather. Blanch white types by tying the leaves, and harvest the instant the curd is full and still smooth.

What changes yield
No growth checks: drought, low fertility, heat, cold, or a root-bound transplant all cause buttoning (tiny premature curds), the signature cauliflower failure.Timing and temperature: curds form best in steady cool weather (about 60°F to 65°F); heat above roughly 75°F to 80°F causes ricing and discoloration, so time maturity for cool spring or fall.Blanching: white types need the outer leaves tied over the curd to stay white; colored and Romanesco types are grown unblanched in sun.Even moisture and steady feeding: cauliflower is a heavy feeder that must never go hungry or dry, more so than other cole crops.Harvest timing: the curd holds only a short window before it rices and discolors, so cut promptly.
Verified · 2 sources View
Pick your variety

Recommended varieties

Pick the type that fits your patience. For a first try, choose an easy self-blanching or self-wrapping kind like Snow Crown, Amazing, or Self Blanche, which need little or no leaf-tying. The colored kinds are fun and skip blanching completely: orange (Cheddar) and purple (Graffiti) just need full sun, and green Romanesco makes a beautiful spiraled head but takes a long, cool fall to do well.Match the variety to the season and your tolerance for fuss. For a first try, the early self-wrapping or self-blanching hybrids (Snow Crown, Amazing, Self Blanche) are the most forgiving and need the least leaf-tying. Open-pollinated whites (Early Snowball, Snowball Y Improved) are seed-saveable but want blanching. The colored types are the fun ones and skip blanching entirely: orange (Cheddar) and purple (Graffiti, Purple of Sicily) are grown in full sun for their color, and lime-green Romanesco (Veronica) brings a spiraled curd but wants a long, steady cool fall. Days-to-maturity figures are approximate and run from transplanting.

Snow Crown
An early, dependable white hybrid (about 50 to 60 days) and the standard beginner pick; vigorous, fairly forgiving, and quick enough for spring before the heat. Some leaf wrap, but blanching (tying the leaves) gives the whitest curd.
Amazing
A mid-season white hybrid (about 65 to 70 days) noted for self-wrapping leaves and tolerance of a wider weather range, which makes it one of the more reliable types for the fall crop and for less-than-perfect conditions.
Early Snowball / Snowball Y Improved
Open-pollinated white heirloom types (about 60 to 70 days) with compact white curds; seed-saveable garden standards, though less self-wrapping than the hybrids, so plan to blanch them.
Self Blanche
A self-blanching white variety (about 65 to 70 days) whose inner leaves curl up over the curd on their own, so it needs little or no tying; a good fall choice and an easy one for new growers. Days approximate.
Cheddar (orange)
An orange-curded hybrid (about 58 to 70 days) high in beta-carotene; do NOT tie the leaves, since the color needs sun. Holds its color when cooked. Days approximate.
Graffiti / Purple of Sicily (purple)
Purple-curded types (about 70 to 85 days) colored by anthocyanins; grown unblanched in full sun for the deepest color. Purple of Sicily is a large open-pollinated Italian heirloom. Days approximate.
Veronica / Romanesco (green)
Lime-green Romanesco types (about 75 to 85 days) with a striking spiraled, pointed curd; grown unblanched and best as a long-season fall crop, since they want a steady cool finish. Days approximate.
Off the vine

Storing your harvest

Room temp
Cauliflower does not keep well at room temperature, only a day or two. It is best eaten soon after cutting or frozen.Cauliflower is a poor keeper at room temperature, holding only a day or two before the curd softens and discolors. Unlike cabbage, it is not a storage vegetable: plan to use it fresh or freeze it.
Fridge
Store the head unwashed in the fridge crisper, where it keeps about a week (up to 2 to 3 weeks if very cold). Use it soon, since the curd yellows and starts to smell as it sits.Refrigerate the head unwashed, with a few wrapper leaves on, stem side down. It holds about a week in the crisper, and no more than 2 to 3 weeks even at an ideal 32°F and high humidity (Clemson; USU). The curd yellows and develops off odors as it ages, so use it promptly.
Freezer
You can freeze cauliflower if you boil the florets briefly first (about 3 minutes), cool them in ice water, drain, and freeze; use them cooked. This freezer step is a different thing from the leaf-tying also called blanching out in the garden.Cauliflower freezes well after blanching: cut into florets, blanch about 3 minutes, cool quickly in ice water, drain, and freeze. Blanching (the boiling step) halts the enzymes that cause off-flavors; frozen cauliflower is best used cooked. Note this freezer blanch is unrelated to the in-garden leaf-tying also called blanching.
Verified · 2 sources View
When something goes wrong

Common problems

01 of 04
What happened Your cauliflower formed a tiny, button-sized head while the plant was still small. This is called buttoning, and it is the most common cauliflower problem. It happens when a young plant gets stressed, most often by drying out, going hungry, sitting too long as a root-bound transplant, or hitting a cold spell or heat. Once it buttons, that plant will not recover. Next time, set out young, stocky transplants without a check, keep them watered and fed without fail, and time the crop for cool weather.The plant buttoned, forming a tiny premature curd on an undersized plant. Buttoning is triggered by any check to growth that pushes the plant to head before it has built a leafy frame: drought, low fertility, an old or root-bound transplant, a cold spell (Iowa State: prolonged temperatures below 50°F), or heat. Next time transplant young, stocky plants without a stall, hold moisture and fertility dead even, protect from cold and heat, and avoid setting out root-bound starts. Next season Set out young, unstressed plants, keep them watered and fed without fail, and time the crop for cool weather.Transplant young, stocky, unchecked plants; keep moisture and fertility even; protect from cold and heat; never set out root-bound starts.
02 of 04
What happened Your cauliflower head turned loose and grainy (called ricing) or yellowed and browned instead of staying tight and white. This usually means it ran into warm weather or was left on the plant too long, and for white types it can also mean the head was not blanched (the leaves were not tied over it to shade it). Next time, time the crop for cool weather, blanch white types by tying the leaves, and cut the head the moment it is full and still smooth.The curd riced (the buds separated into a loose, grainy surface) or discolored. This comes from heat (sustained temperatures above about 75°F to 80°F), from leaving the curd past its short prime, or, for the yellow-brown sun discoloration of white types, from failing to blanch. Next time time maturity for cool weather, blanch white curds at silver-dollar size by tying the outer leaves, and harvest promptly while the curd is firm, compact, and smooth. Next season Time the crop for cool weather, tie the leaves over white heads, and cut as soon as the head is full and tight.Time maturity for cool weather, blanch white curds, and harvest promptly at firm, compact, smooth stage.
03 of 04
What happened When you cut the head you found green caterpillars and droppings, or clusters of gray-green aphids, tucked down in the curd. These pests love cabbage-family plants and hide right in the head, which is the part you eat, and they are very hard to wash out of a tight white curd. Next time, cover plants with a row cover, scout the leaves and growing tips weekly, and treat caterpillars with Bt before the curd forms.Cabbageworms, loopers, or diamondback larvae crawled into the curd, or cabbage aphids colonized it, contaminating the head and proving nearly impossible to clean from the tight florets. The window to act is before and during early curding. Next time exclude egg-laying adults with row cover from transplanting, scout leaves and tips weekly, apply Bt or spinosad for caterpillars, and dislodge aphid colonies early; taper nitrogen as the curd sets, since soft growth favors aphids. Next season Use a row cover, scout weekly, and treat caterpillars with Bt before the head forms.Exclude adults with row cover, scout weekly, treat caterpillars early with Bt, and knock aphids back before the curd closes.
04 of 04
What happened Your plants stayed small and yellowish, wilted in the afternoon, and when you dug one up the roots were swollen into lumps. That is clubroot, a soil disease that infects cabbage-family roots and lasts for years in the soil. It builds up when brassicas are grown in the same spot repeatedly and in acidic soil. Next time, rotate so cabbage-family crops do not return to that bed for several years, keep the soil pH near neutral, and improve drainage.Plants were stunted and chlorotic, wilted by day, and showed galled, clubbed roots, the signature of clubroot (Plasmodiophora brassicae). The soilborne organism persists for years and builds under repeated brassica cropping and acidic, poorly drained soil. A clubroot-checked plant also tends to button. Next time rotate cole crops out for at least 3 years (up to 7 where clubroot is known), lime toward a neutral pH, and improve drainage. Next season Rotate brassicas out of that bed for several years, keep soil pH near neutral, and improve drainage.Use a long brassica rotation, raise pH toward neutral, and improve drainage.
The usual suspects

Pests & diseases

Pests
Cabbageworms, loopers, and diamondback moths
P · 01
Symptoms You'll see ragged holes chewed in the leaves, green caterpillars on the plant, and dark droppings, and worst of all, caterpillars and their mess tucked down into the curd, where they are very hard to wash out.Ragged holes chewed in the leaves with green caterpillars and dark frass; as the curd forms, larvae crawl into it and foul it, the costly damage that is very hard to clean from a tight white curd. Imported cabbageworms are velvety green; cabbage loopers move in a looping arch; diamondback larvae are small and wriggle when disturbed (Clemson rates the diamondback the most numerous cole-crop caterpillar in home gardens). Cause These are caterpillars that hatch from eggs laid by white butterflies and small moths. They love cabbage-family plants, chew the leaves, and crawl into the head you want to eat.The larvae of the imported cabbageworm, cabbage looper, and diamondback moth feed on brassica foliage and contaminate the curd; the adults are white or brownish butterflies and moths that lay eggs on the leaves. Cauliflower is a primary host for all three. Organic treatment Spray Bt, which is safe and targets only caterpillars, or spinosad, and pick caterpillars and eggs off by hand from under the leaves. Spray again after rain, since it washes off.Spray Bt (Bacillus thuringiensis kurstaki) or spinosad, which target caterpillars and spare beneficials, and hand-pick larvae and eggs from leaf undersides. Repeat after rain, since Bt breaks down. Tighten control as the curd forms, when contamination of the head is the expensive kind. Prevention Cover plants with a light fabric row cover after planting to keep the butterflies and moths from laying eggs, clear away old cabbage-family plants, and watch for the first white butterflies as your signal to act.Use floating row cover or fine mesh from transplanting to exclude the egg-laying adults, clean up brassica debris that shelters pupae, and scout for the first white butterflies as a spray cue.
Cabbage aphids
P · 02
Symptoms You'll see clusters of small gray-green insects with a dusty, waxy coating on the new growth and tucked into the curd, where they are very hard to wash out. Leaves may curl and there can be a sticky film.The gray-green, waxy-coated cabbage aphid forms dense colonies on growing tips and leaf undersides and then lodges in the curd, where it contaminates the marketable product with insects and honeydew and is nearly impossible to clean from the tight florets. Curling and distortion of young leaves is common. Cause Cabbage aphids are tiny insects that suck the plant's juices and breed fast. They love cabbage-family plants and hide down in the curd, which is the part you eat.Brevicoryne brassicae, a brassica-specialist aphid, sucks sap and reproduces rapidly; contamination of the harvested curd with aphids and sticky honeydew is usually the real problem rather than plant stunting. Pressure is heaviest on the long-season fall crop. Organic treatment Knock colonies off with a strong spray of water and hit the undersides of leaves with insecticidal soap or neem oil, repeating every few days. Welcome ladybugs and lacewings, which eat aphids.Dislodge colonies with a strong jet of water and spray insecticidal soap, neem, or horticultural oil with thorough coverage of leaf undersides; repeat every few days. Conserve natural enemies (the parasitoid Diaeretiella rapae, hoverflies, ladybugs) that suppress this aphid. Prevention Check the growing tips and the developing curd often and act early. Go easy on nitrogen once the curd forms, since soft growth draws them, and clear away old cabbage-family plants after harvest.Scout growing tips and the curd weekly and catch infestations before aphids colonize the head. Avoid excess nitrogen once the curd sets, use row cover on young plants, and destroy crop debris that carries them over.
Cabbage root maggot
P · 03
Symptoms New transplants wilt and grow badly or fall over. If you pull one up, you'll find small white maggots eating the roots. It is worst in cool, wet soil.Transplants wilt, grow poorly, and may collapse; pulling a plant reveals small white maggots tunneling in the roots and lower stem. Damage is worst in cool, wet soil at spring establishment, and a root-checked plant is also far likelier to button. Cause A small fly lays eggs at the base of the plant, and the maggots that hatch burrow down and eat the roots. The fly is most active in cool, damp weather, so spring transplants are most at risk.The larvae of the cabbage root fly (Delia radicum) tunnel into brassica roots; the adult lays eggs at the stem base, and the maggots feed below, sometimes killing young plants and opening the door to rots. Organic treatment Once the maggots are in the roots you can't save that plant, so pull and throw away the badly damaged ones. Put your effort into protecting the rest from new eggs.There is no effective rescue once maggots are in the roots; remove and destroy badly affected plants and protect the rest from further egg-laying. Prevention Put a small collar or disk around the base of each transplant to stop the fly from laying eggs there, or use a row cover. Avoid planting into cold, soggy soil, and rotate away from where cabbage-family plants grew.Place a collar or disk around the stem base at transplanting to block egg-laying, or use row cover; avoid planting into cold, wet soil and rotate away from where brassicas grew.
Harlequin bug
P · 04
Symptoms Shield-shaped black-and-orange (or black-and-red) bugs on the leaves, which develop white or yellow spots, then brown and look tattered. It is mostly a warm-region problem and loves cabbage-family plants.Shield-shaped bugs up to about 3/8 inch, brightly black-and-yellow or black-and-red, feeding with piercing-sucking mouthparts that leave white stipples; affected leaves brown and look tattered, and heavy feeding wilts and deforms plants. A warm-region brassica specialist. Cause The harlequin bug is a colorful stink-bug relative that pierces the leaves and sucks the juices, leaving pale blotches. It strongly prefers cabbage-family plants, especially in the South.The harlequin bug (Murgantia histrionica) is a true bug that specializes on cole crops, most damaging in the southern United States, where it completes several generations a year and overwinters as an adult in debris and weeds. Organic treatment Search out and crush the bugs, their barrel-shaped eggs laid in rows, and the young ones by hand. Use a row cover to keep them off, pull badly infested plants, and clear away weeds and old plants where they hide over winter.Hand-pick and crush adults, nymphs, and the barrel-shaped egg rows; exclude with floating row cover; remove heavily infested plants. Insecticidal soap, pyrethrum, or neem help where pressure is severe. Prevention Clean up garden debris and cabbage-family weeds where the adults overwinter, use row cover, and consider a trap crop of mustard to lure them away from the main crop, then destroy it.Eliminate overwintering sites by removing crop debris and crucifer weeds, use row cover, and deploy an early trap crop of mustard to divert overwintering adults, then destroy it before the main crop is set out.
Flea beetles
P · 05
Symptoms Lots of tiny round holes in the leaves of young plants, made by small dark beetles that jump away like fleas when you get close. Bad damage can stunt seedlings.Tiny round shot-hole pits chewed in the leaves of young plants; the small dark beetles jump like fleas when disturbed. Heavy feeding stunts or kills seedlings and slows establishment, and a checked cauliflower seedling is prone to buttoning. Cause Flea beetles are small jumping beetles that chew on young cabbage-family leaves. They hurt seedlings most, because a tiny plant can't grow fast enough to recover, and a stunted cauliflower seedling often heads early and badly.Flea beetles chew the foliage of young brassicas and are most damaging at the seedling stage; a vigorous transplant generally outgrows them, but a stalled seedling can be set back badly. Organic treatment Cover young plants with a row cover, and if there are a lot of beetles, use a spray such as spinosad. The main goal is to get the seedlings big enough to handle the damage.Protect seedlings with row cover and spray spinosad if pressure is high; the goal is getting plants past the vulnerable seedling stage without a growth check. Prevention Cover seedlings with row cover from the start, keep them strong with steady water and food so they grow past the damage, and pull nearby weeds in the cabbage family.Use row cover from transplanting, keep seedlings vigorous with even water and feeding so they grow through the damage, and clean up weedy brassica relatives nearby.
Diseases
Clubroot
D · 01
Symptoms Plants wilt in the afternoon, stay small and yellowish, and don't bounce back. If you dig one up, the roots are swollen into lumpy, club-shaped knobs.Plants wilt in the heat of the day, grow stunted and yellowed, and recover poorly; roots are swollen into distorted clubs and galls instead of normal fine roots. A clubroot-checked plant rarely makes a usable curd. Cause A germ that lives in the soil infects the roots of cabbage-family plants and makes them swell, which stops the plant from taking up water and food. It stays in the soil for years.A soilborne organism (Plasmodiophora brassicae) infects brassica roots and forms the galls, which block water and nutrient uptake. It persists in soil for many years, spreads in contaminated soil and water, and infects most readily in acidic soils below pH 6.5. Organic treatment There's no cure once a plant has it, so pull and destroy infected plants. Keeping the soil from being too acidic (closer to neutral) helps hold it back, and growing cabbage-family plants only rarely in that spot starves the germ out.There is no cure once plants are infected; remove and destroy them. Raising soil pH toward neutral with lime suppresses the disease, and long rotations starve it out over time. Prevention Don't grow cauliflower or other cabbage-family plants in the same spot more than once every few years, longer if you've had clubroot. Keep the soil from being too acidic, improve drainage, and clean soil off your tools.Rotate brassicas out of affected ground on a long cycle (UMN advises up to 7 years where clubroot is known), keep soil pH up, improve drainage, and avoid moving infested soil on tools and boots.
Black rot
D · 02
Symptoms Yellow patches shaped like the letter V appear at the leaf edges, pointing inward, with black veins inside them. It can spread through the plant and rot the curd.Yellow, V-shaped lesions spread inward from the leaf margins, with the veins inside the V turning black; the disease moves through the vascular system and can blacken and rot the curd. Often the most serious cole-crop disease in warm, wet weather. Cause A bacteria that often comes in on infected seeds or transplants. It gets into the leaves and travels through the plant's veins, spreading fastest in warm, wet weather.A seedborne bacterium (Xanthomonas campestris pv. campestris) that enters through leaf pores and wounds and moves through the veins; it spreads in warm, wet conditions and on infected seed or transplants. Organic treatment There's no real cure, so remove and destroy infected plants to keep it from spreading. Don't handle or brush against the plants while they're wet, because that spreads the bacteria.There is no effective cure; remove and destroy infected plants. Avoid working among plants when foliage is wet, since that moves the bacteria. Prevention Begin with clean, certified seed and healthy transplants, don't plant where cabbage-family crops grew recently, space plants for good airflow, and avoid overhead watering.Start with clean, certified seed and healthy transplants (a hot-water seed treatment helps), rotate 2 to 3 years away from brassicas, give plants room for airflow, and avoid overhead watering and handling wet foliage.
Alternaria leaf spot
D · 03
Symptoms Small dark spots with rings like a target appear on the leaves and can spread onto the curd as brown, fuzzy patches that ruin it. It is worse in warm, wet weather.Small dark leaf spots with concentric target-like rings and a yellow halo; in wet weather the spots enlarge, and on cauliflower the fungus can spread onto the curd as a brown, sometimes fuzzy discoloration that ruins its market quality. Clemson lists Alternaria brown spot among the main cauliflower diseases. Cause A fungus that spreads by spores in wet weather and on infected seed. It spots the leaves and, on cauliflower, can blemish the white curd, which makes it unsellable.Alternaria species (A. brassicae / A. brassicicola), fungi that spread by airborne and splashed spores and on infected seed; long leaf wetness and warm, humid weather favor them, and they survive in crop debris and on seed. Organic treatment Remove badly spotted leaves, improve airflow so leaves dry, and use a copper spray if it is spreading onto the curd. Keep water off the leaves.Remove affected leaves, improve airflow and let foliage dry, and apply a copper-based fungicide if the disease threatens the curd; control is largely preventive. Prevention Start with clean seed, space plants for airflow, water at the soil rather than overhead, rotate away from cabbage-family crops, and clear away old plants where the fungus survives.Use clean, certified, hot-water-treated seed, space for airflow, water at the soil line, rotate away from brassicas, and bury or remove crop debris that carries the fungus over.
Downy mildew
D · 04
Symptoms Pale yellow blotches on top of the leaves, with fuzzy grayish growth on the underside, mostly in cool, damp weather. Bad cases discolor the leaves and can spot the curd.Pale yellow patches form on the upper leaf surface with a fuzzy gray-white growth underneath, mainly in cool, damp weather; severe infection discolors the leaves and can spot and darken the curd. Cauliflower's cool, humid season overlaps the weather it likes. Cause A mold-like disease that loves cool, wet, humid weather and spreads through the air and water. Wet leaves and crowded plants make it worse.A fungus-like organism (Hyaloperonospora parasitica) that thrives in cool, wet, humid conditions and spreads by spores in water and air; long leaf wetness and crowded plantings favor it. Organic treatment Open up the airflow so leaves can dry, remove the worst leaves, and use a copper spray if it's spreading. It's hard to stop once the weather stays damp.Improve airflow and let foliage dry, remove badly affected leaves, and apply a copper-based fungicide if pressure is high; the disease is hard to stop once humidity stays high. Prevention Space plants so air moves between them, water at the soil instead of from above, and pick resistant varieties if downy mildew is common where you live.Space plants for good air movement, water at the soil line rather than overhead, and choose resistant varieties where downy mildew is common.
Bacterial soft rot (head rot)
D · 05
Symptoms The curd develops soft, watery, brown or black mushy patches that quickly turn slimy and smell bad. It usually shows up in warm, wet weather on a curd that stayed wet.Soft, water-soaked brown to black lesions on the curd that rapidly become slimy and foul-smelling, the bacterial head rot Clemson lists for cauliflower; it spreads fastest in warm, wet weather and where water sits in a tied (blanched) head. Cause Bacteria get into the curd through small wounds or where water sits in the head, then rot it from the inside, especially in warm, humid weather.Soft-rot bacteria (Pectobacterium / Pseudomonas species) enter through wounds and natural openings and macerate the curd tissue; free moisture in the head and warm, humid conditions drive it, and a tightly tied blanch that traps water raises the risk. Organic treatment There's no cure for a rotting curd, so remove affected heads. The fix is prevention: keep the curd dry and harvest promptly.There is no cure for a rotting curd; remove and discard affected heads. Management is cultural and preventive. Prevention Keep water off the curd, give plants room so heads dry quickly after rain, blanch (tie the leaves) loosely so water doesn't pool, harvest promptly, and avoid bruising the heads.Keep the curd dry: space for airflow, blanch loosely so water drains rather than pools, avoid overhead watering and handling wet heads, harvest promptly once the curd is full, and do not bruise the heads.
Verified · 5 sources View
Seasoned
Where to plant next year

Crop rotation

Don't plant cauliflower or other cabbage-family crops in the same spot year after year. Waiting at least 3 years between them, and longer if you have had clubroot, helps avoid soil diseases.Rotate so cauliflower and its brassica relatives do not return to the same ground for at least 3 years, and longer where clubroot is present (UMN advises up to a 7-year break where clubroot is known). Repeated same-family cropping builds soil-borne clubroot, and holding soil pH near neutral also helps suppress it.

Family
Brassica family (Brassicaceae), the cole crops
Years between
3 years
in the same bed
Avoid following
Other cabbage-family crops like broccoli, cabbage, brussels sprouts, kale, and turnips.Other brassicas (broccoli, cabbage, brussels sprouts, kale, collards, kohlrabi, turnip, radish, mustard), which share clubroot and the cabbage-family pests.
Plant after
Legumes such as beans and peas, or unrelated crops like tomatoes, squash, cucumbers, or onions.
Verified · 2 sources View
In the app · pre-launch

When plant taps you on the shoulder

The plant app sends a timely reminder at every critical moment of your cauliflower season. The wording adjusts to whichever you pick: beginner or seasoned. Here are three you'll see in Zone 8.

p
plant
NaN days after last frost
Time to tie the leaves over the head
A small white head has started. For white cauliflower, gather the big outer leaves up over it and tie them loosely so the head stays white. Skip this for orange, purple, or green types. Keep watering steady.
p
plant
NaN days after last frost
Your cauliflower looks ready, cut it now
Your cauliflower head should be full-sized and still tight and smooth. Cut it off with a few leaves attached now, since the head goes from perfect to loose and grainy quickly. Don't wait.
p
plant
NaN days after last frost
Don't let your cauliflower get stressed
Cauliflower makes a tiny, useless head early if it ever gets stressed. Keep the water steady, feed it so it never gets hungry, and shield young plants from sudden cold or heat. The trick is to keep it growing smoothly the whole time.
Get personalized alerts.

plant sends the right notification at exactly the right moment, for your zone, your weather, your crops. Founding members lock the rate forever.

Back the Kickstarter →
Ask the gardener

Common questions

Got a question we missed?

We're building this guide with real growers. Got a question we missed? Ask here. We read every one and add the best answers right to this page.

Grown this before?

Share a tip

Learned something the hard way? Pass it on. Real growers' tips make this guide better for the next person, and we credit you by name when yours goes live.

Seasoned
Spot something wrong?

Report a problem

If you've grown this crop and you see a date, a temperature, a companion claim, or a recommendation that doesn't match your experience, tell us. Real growers' corrections make this guide better for the next person.

How we built this guide

Methodology & sources

Every date, temperature, spacing, and recommendation on this page is sourced from university cooperative extension publications, peer-reviewed agricultural research, NOAA climate data, and direct extension calendars. Where claims are softer (traditional gardening wisdom not formally documented), we say so.

Research-backed Documented in cooperative extension publications or peer-reviewed research
Well-grounded A known agronomic principle, but not formally tested for this specific pair
Traditional Time-tested gardening wisdom, limited formal research support
Last reviewed
June 29, 2026
Data version
crops_data_final · v1.0 · schema 2.9
Sources cited on this page
16 publications
Verified entries
Companion-planting claims tagged inline · zone dates verified against 5+ extensions
See all sources cited on this page
  • University of Minnesota Extension umn_ext
  • University of Maryland Extension umd_ext
  • Cornell Cooperative Extension cornell_ext
  • Iowa State University Extension iastate_ext
  • Michigan State University Extension msu_ext
  • NC State Extension ncsu_ext
  • Penn State Extension psu_ext
  • U. of Illinois Urbana-Champaign Extension uiuc_ext
  • UC Davis Postharvest Center ucd_postharvest
  • Texas A&M AgriLife Extension tamu_agrilife
  • Virginia Cooperative Extension 426-331 vce_426_331
  • Piedmont Master Gardeners piedmont_mg
  • UGA Vegetable Garden Calendar uga_calendar
  • Clemson Home & Garden Information Center clemson_hgic
  • UC IPM Statewide IPM Program uc_ipm
  • NOAA 1991-2020 Climate Normals noaa_normals

Growing notes, weekly.

Zone-aware seasonal nudges, what's worth planting now, and the occasional recipe from the harvest. No spam, ever.

Vol. 003 · Cauliflower · plant.lifestyle