Pick your zone and the dates re-calibrate.
The Guide Crops Vol. 003

Collards (Collard Greens)

in Zone 5, this week

Collards are a leafy cousin of kale and cabbage, grown for their big, smooth green leaves. They are the famous green of Southern cooking, and they are tough: they handle cold better than almost any other vegetable and get sweeter after frost, but they also keep growing in summer heat that stops other greens. The plant grows tall with a bunch of large leaves at the top. You pick the lower leaves a few at a time for months, or cut the whole young plant. In warm areas collards grow almost all year; in cooler areas they do best in spring and fall. Collards (Brassica oleracea, Acephala group) are a loose-leaf, non-heading cabbage relative grown for their large, smooth blue-green leaves, the same species as kale and the classic green of Southern gardens. Their signature is unusual tolerance of BOTH cold and heat: collards are the most cold-hardy of the cole crops, sweetening after frost and holding through hard freezes, yet they are also the most heat-tolerant, producing right through Southern summers where lettuce and most brassicas have long since bolted. A collard plant builds a stout upright stem topped with a rosette of broad leaves, and you crop the lower leaves over a long run or cut the whole young plant. In much of the South they grow nearly year-round; everywhere else they shine in the long cool shoulders of spring and fall.
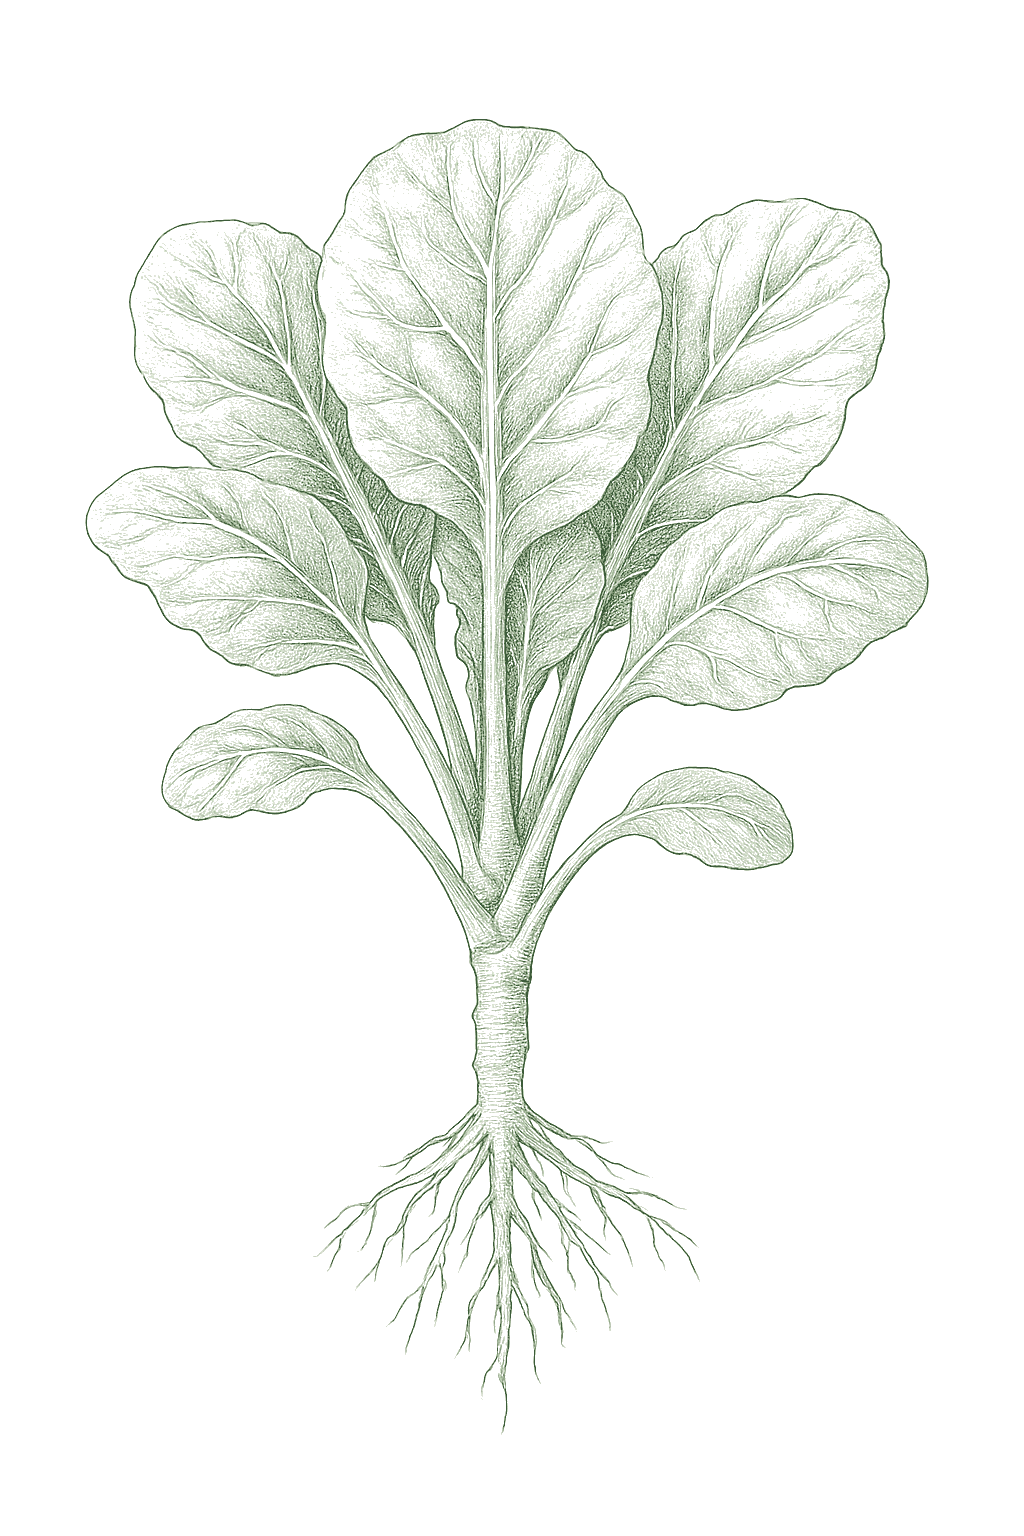
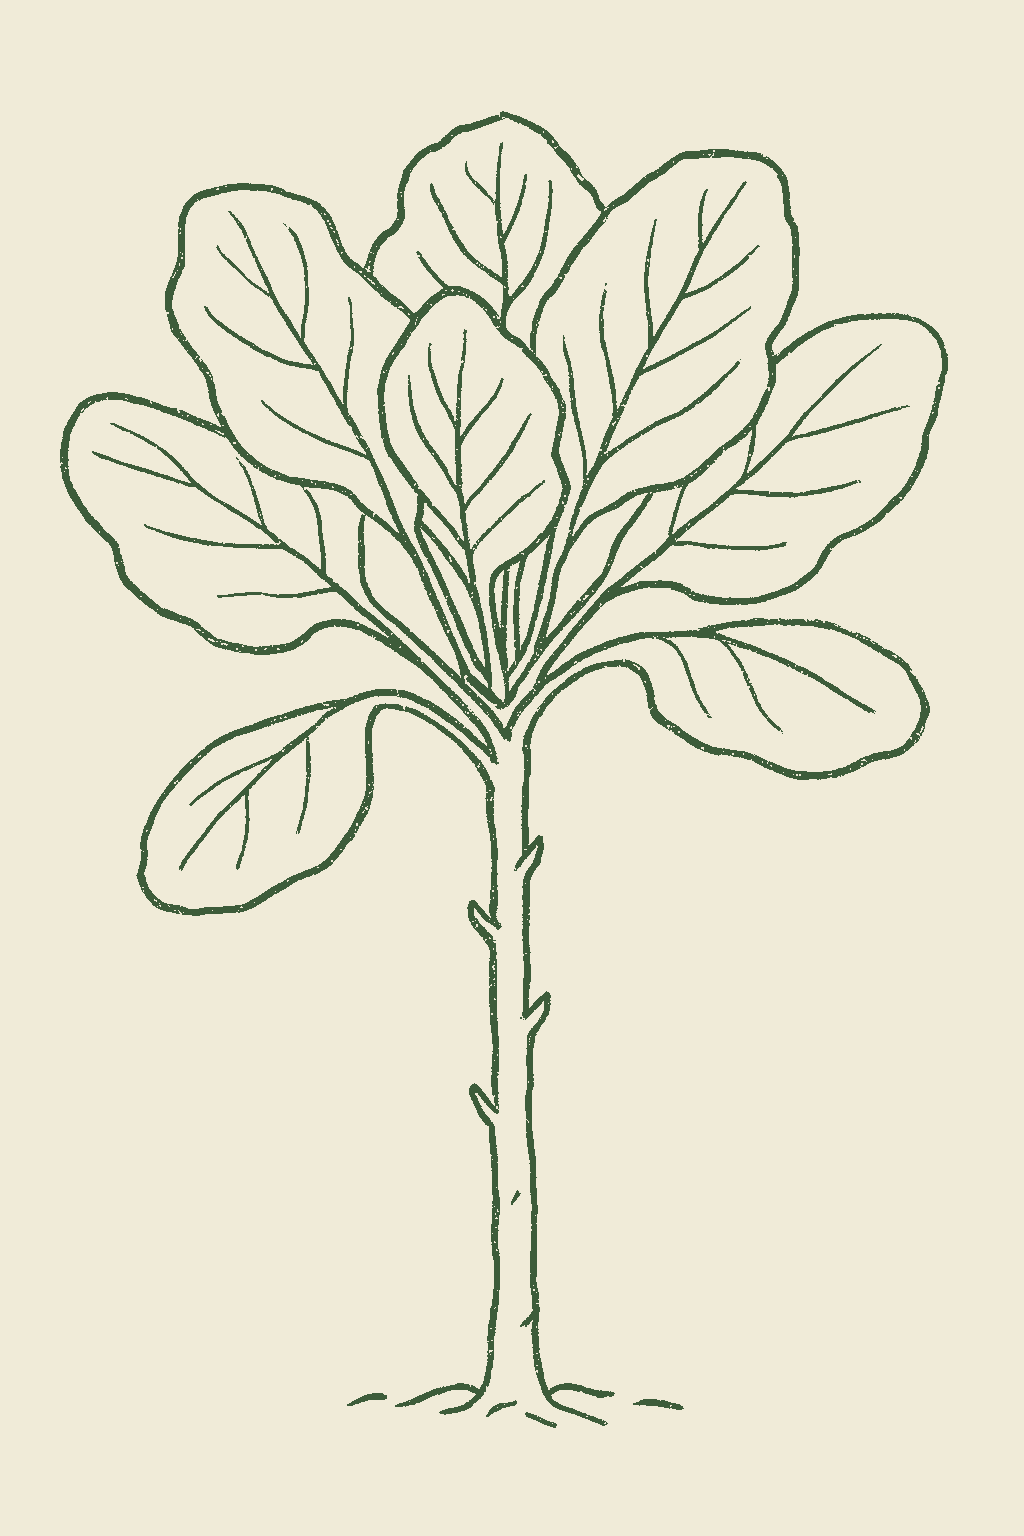
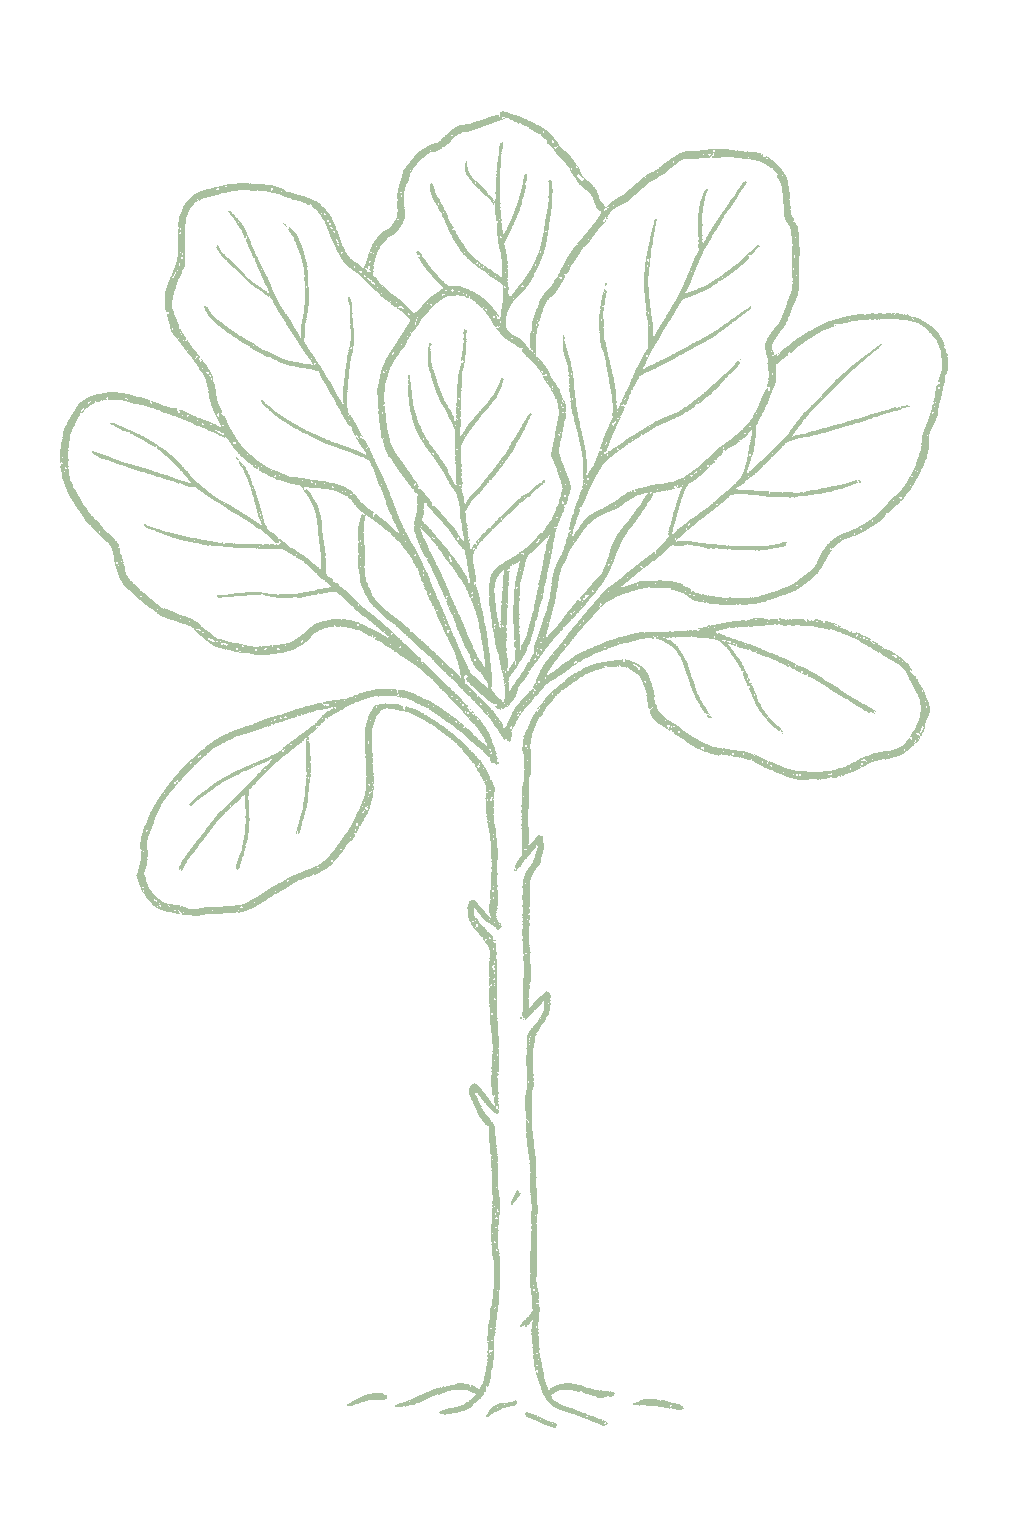
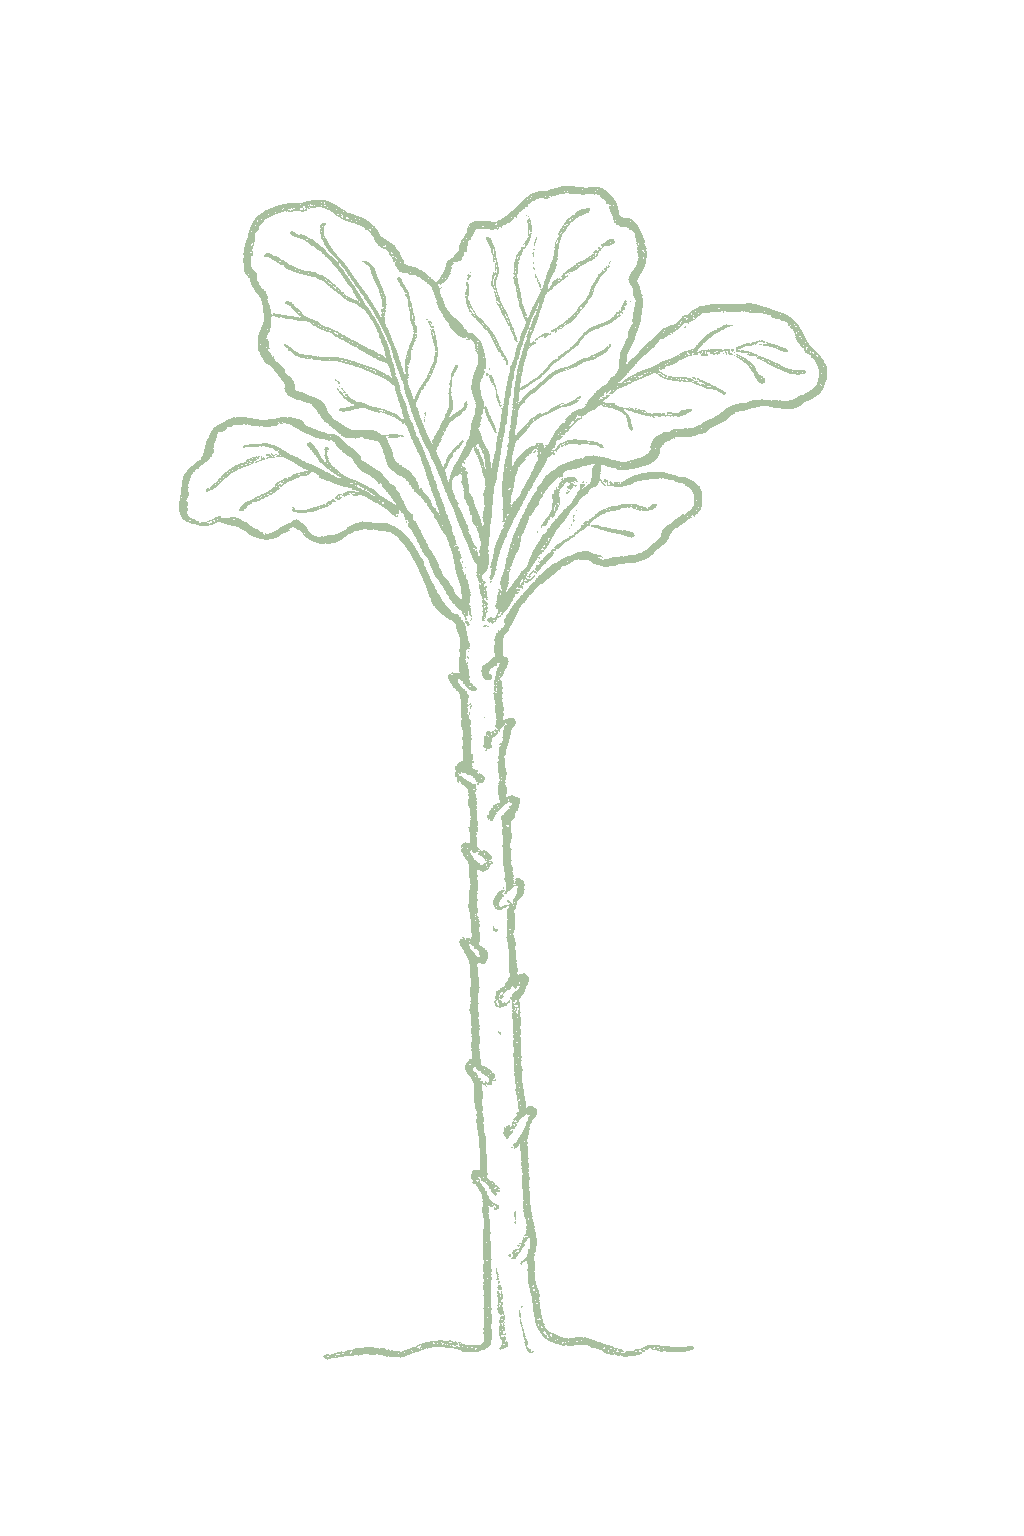
Collards (Collard Greens) mature plant
Fig. 01 · Collards (Collard Greens), mature Zone 5
Mature in
55-75d
from transplant
Sunlight
Full sun
6-8 hrs daily
Water
Regular
1.5 inches / week
Spacing
18-24"
between plants
Soil pH
6-6.8
slightly acidic
Today · in your zone

What's happening right now

July 24 · Zone 5 · Stage 01 · Germination

Off-season for collards (collard greens) in zone 5.

The season at a glance

Planting calendar

In Zone 5, collards (collard greens) can be planted April through August. Start indoors Mar. Harvest runs June through November.

Jan
Feb
Mar
Apr
May
Jun
Jul
Aug
Sep
Oct
Nov
Dec
plant
too cold
too cold
indoors
plant
plant
plant
plant
plant
too late
too late
too late
too cold
harvest
harvest
harvest
harvest
harvest
harvest
harvest
indoors
plant out
harvest
Above-ground cropBest planted on a none moon
Seasoned
Stagger your sowings

Succession planting

Plant collards in small batches a couple of weeks apart, in spring and again in late summer for fall, rather than all at once. Each plant keeps giving leaves for a long time, so you do not need many. In hot-desert and tropical areas, skip the peak summer and plant for fall and winter.Collards crop over a long window, so rather than one big planting, sow small batches every 2 to 3 weeks through the cool stretches of spring and again from late summer for a fall and winter crop. Because each plant is cropped over many weeks, you need fewer sowings than for a fast crop, but staggering keeps tender young leaves coming. In the South you can plant across most of the year; only in genuinely extreme heat (deserts, peak Florida and Hawaii summers) do you skip the peak and plant for fall and winter instead.

Every 3 weeks · sow a short new rowUp to 12 sowings a seasonToo hot to sow midsummer
Jan
Feb
Mar
Apr
May
Jun
Jul
Aug
Sep
Oct
Nov
Dec
sow
harvest
keep sowing
too hot
continuous harvest
The season, mapped

Seed to garden

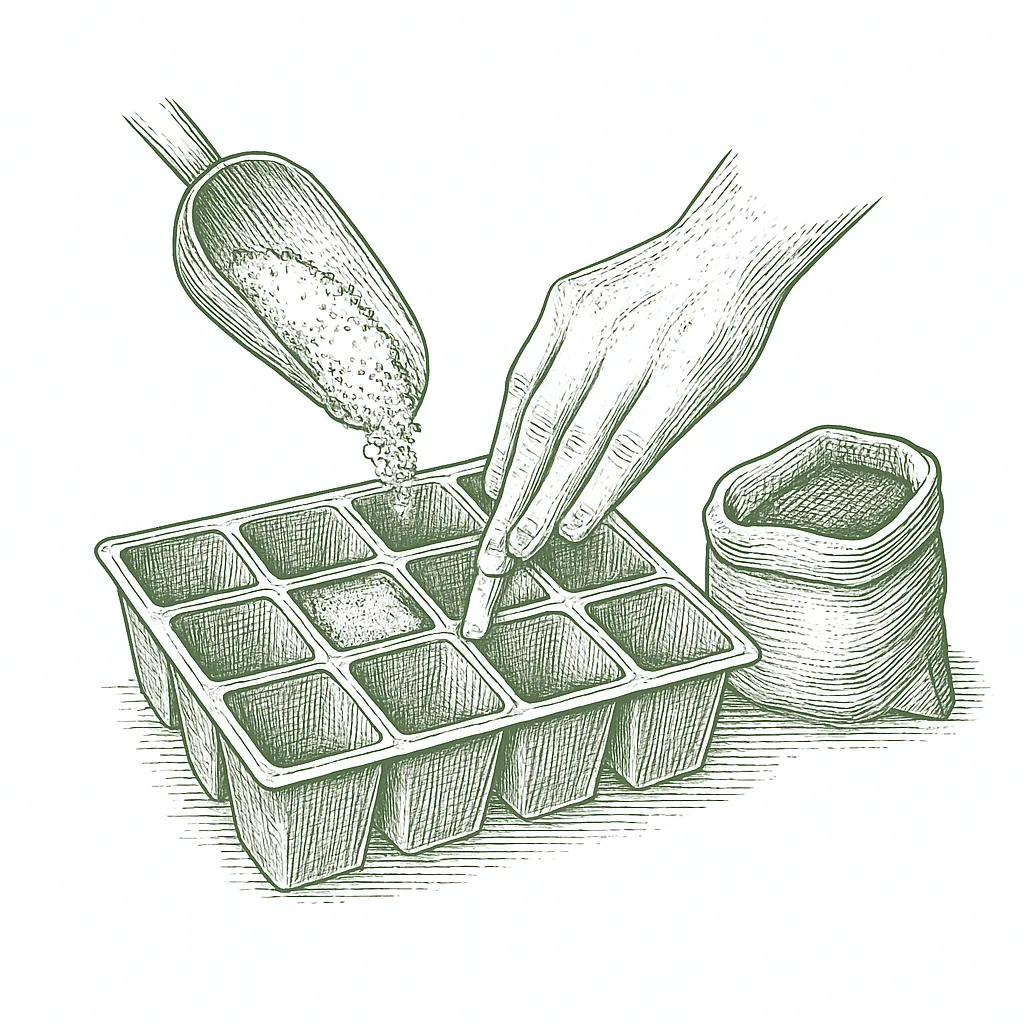
You can sow collard seeds right in the garden or start them indoors. For spring, start seeds about a month before planting out, and set plants in the garden a few weeks before your last frost, or just sow seeds once the soil can be worked. For a fall crop, sow in mid to late summer so it is ready before winter. Space full-size plants 18 to 24 inches apart. If you grow your own transplants, let them get used to the outdoors over a week before planting.Collards can be direct sown or transplanted, and in the South direct sowing is the norm. For a spring crop, start seeds indoors about 4 to 5 weeks before set-out and transplant around 3 to 4 weeks before the last frost, or direct sow as soon as the soil is workable; collards tolerate frost. For a fall and winter crop, sow in mid to late summer so plants size up before cold, then harvest through fall and, in mild zones, winter. Harden transplants off over 7 to 10 days. Thin or set plants 18 to 24 inches apart for full-size plants.
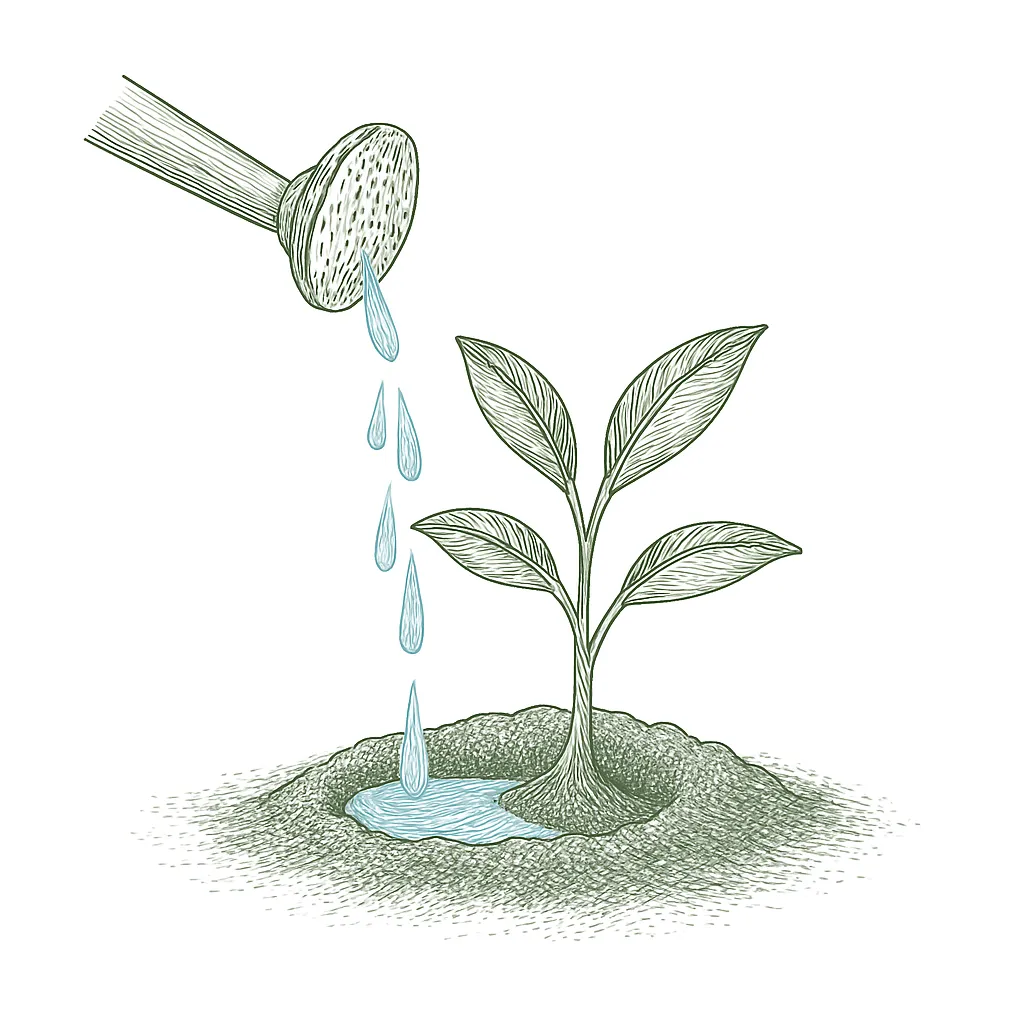
  1. 01
    Sow indoors →
    Mar
    Start about 4 weeks before your last frost
  2. 02
    Transplant out →
    Apr - May
    After hardening off
  3. 03
    First harvest
    From Jun 1
    55-75 days from transplant
Start method
Both
Soil temp
45-85°F
Hardening off
7-10 days
From seed to fruit

The growing journey

Stage 01 · Germination
01
Germination
Days 5-14 · current stage
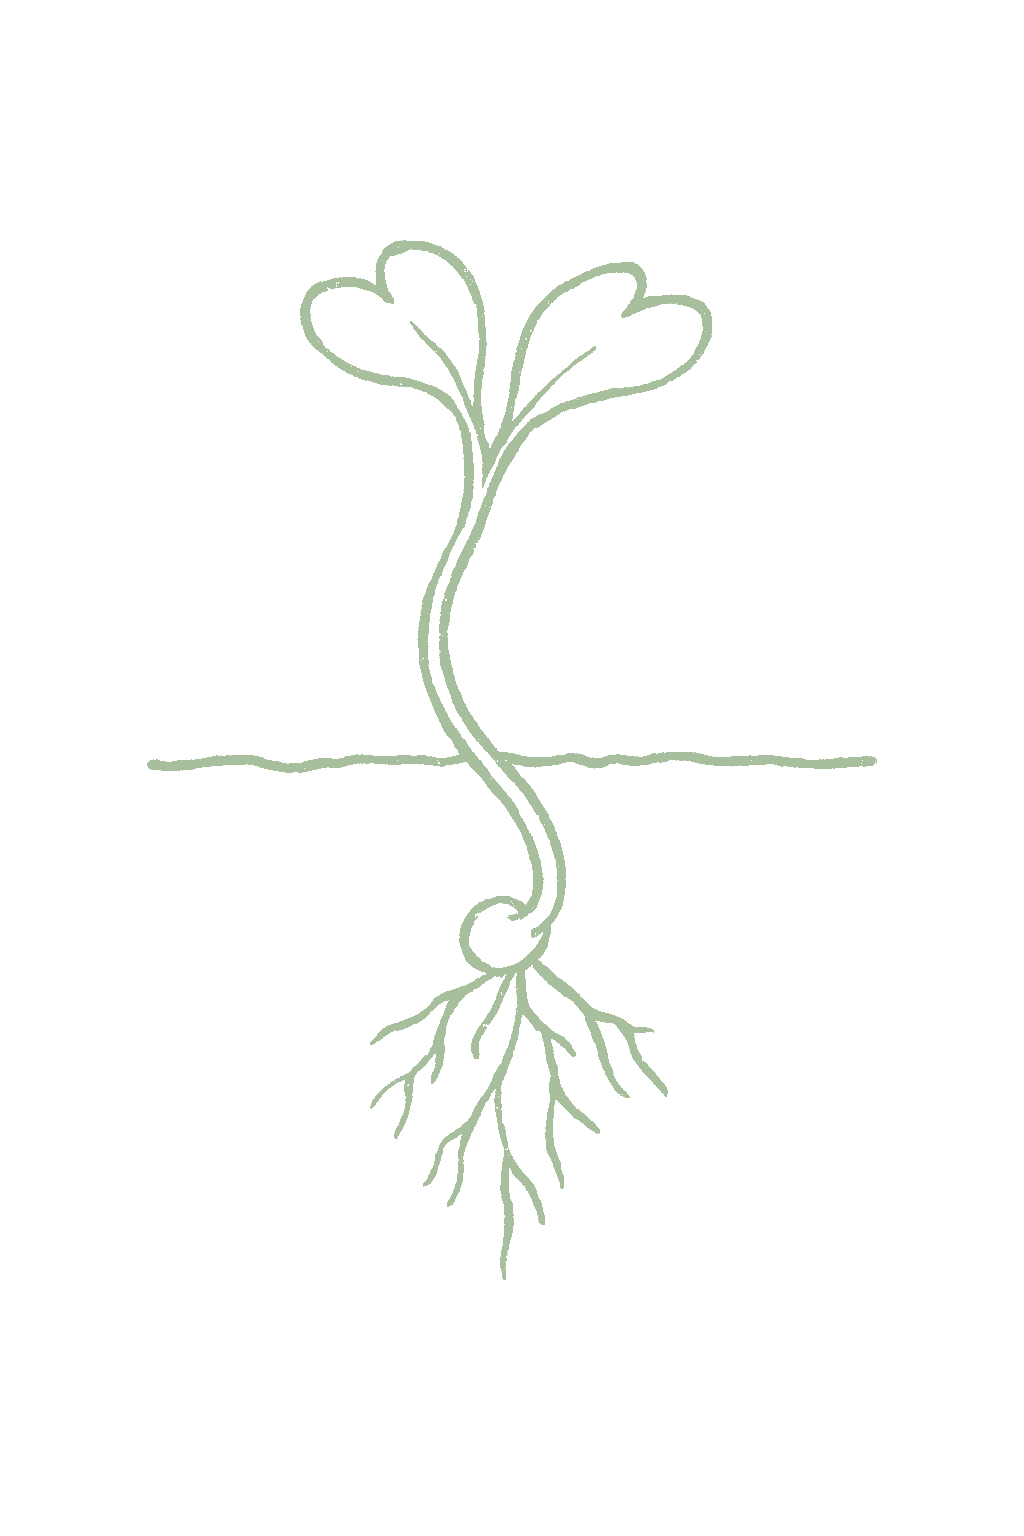
In about 5 to 10 days, your seeds sprout and push up their first two little leaves (the seed leaves).Seeds sprout in about 5 to 10 days at soil temperatures of roughly 45 to 85°F, pushing up two seed leaves (cotyledons).
Keep the soil damp. Once the first real collard leaves appear after the seed leaves, thin crowded seedlings.Keep the seedbed or starting mix evenly moist; thin or pot up once the first true leaves appear.
FROM PLANT · Plant the seeds about a quarter to half an inch deep in damp soil, and keep it evenly moist while they sprout in 5 to 10 days.Sow about 0.25 to 0.5 inch deep into a moist seedbed or starting mix; collards germinate reliably across 45 to 85°F in about 5 to 10 days.
FROM PLANT · Start seeds indoors about a month before planting out, sow them in the garden once the soil can be worked, or sow in late summer for a fall crop.For a spring crop start indoors about 4 to 5 weeks before set-out, or direct sow as soon as the soil is workable; for a fall crop sow in mid to late summer.
02
Seedling
Days 12-32
The seedlings grow their real, smooth leaves and a stronger stem. They are ready to move outside at about 4 to 5 weeks old.Young plants develop true leaves and a sturdy stem; collard transplants are ready at about 4 to 5 weeks. Flea beetles are the main seedling threat.
If you grew transplants, harden them off over about a week before planting out. Watch for flea beetle shot-holes on the young leaves.Harden off over 7 to 10 days before setting out; thin or set plants 18 to 24 inches apart and protect seedlings from flea beetles with row cover.
FROM PLANT · Space plants about 18 to 24 inches apart for big plants, or closer together if you plan to cut them while young.Thin or transplant to about 18 to 24 inches apart for full-size plants, or closer (10 to 15 inches) if you will cut them young; harden transplants off over 7 to 10 days.
FROM PLANT · Cover young plants with a light row cover to stop flea beetles from peppering the leaves with holes.Protect seedlings from flea beetles with row cover; a vigorous, well-watered seedling outgrows light feeding damage.
03
Established
Days 30-55
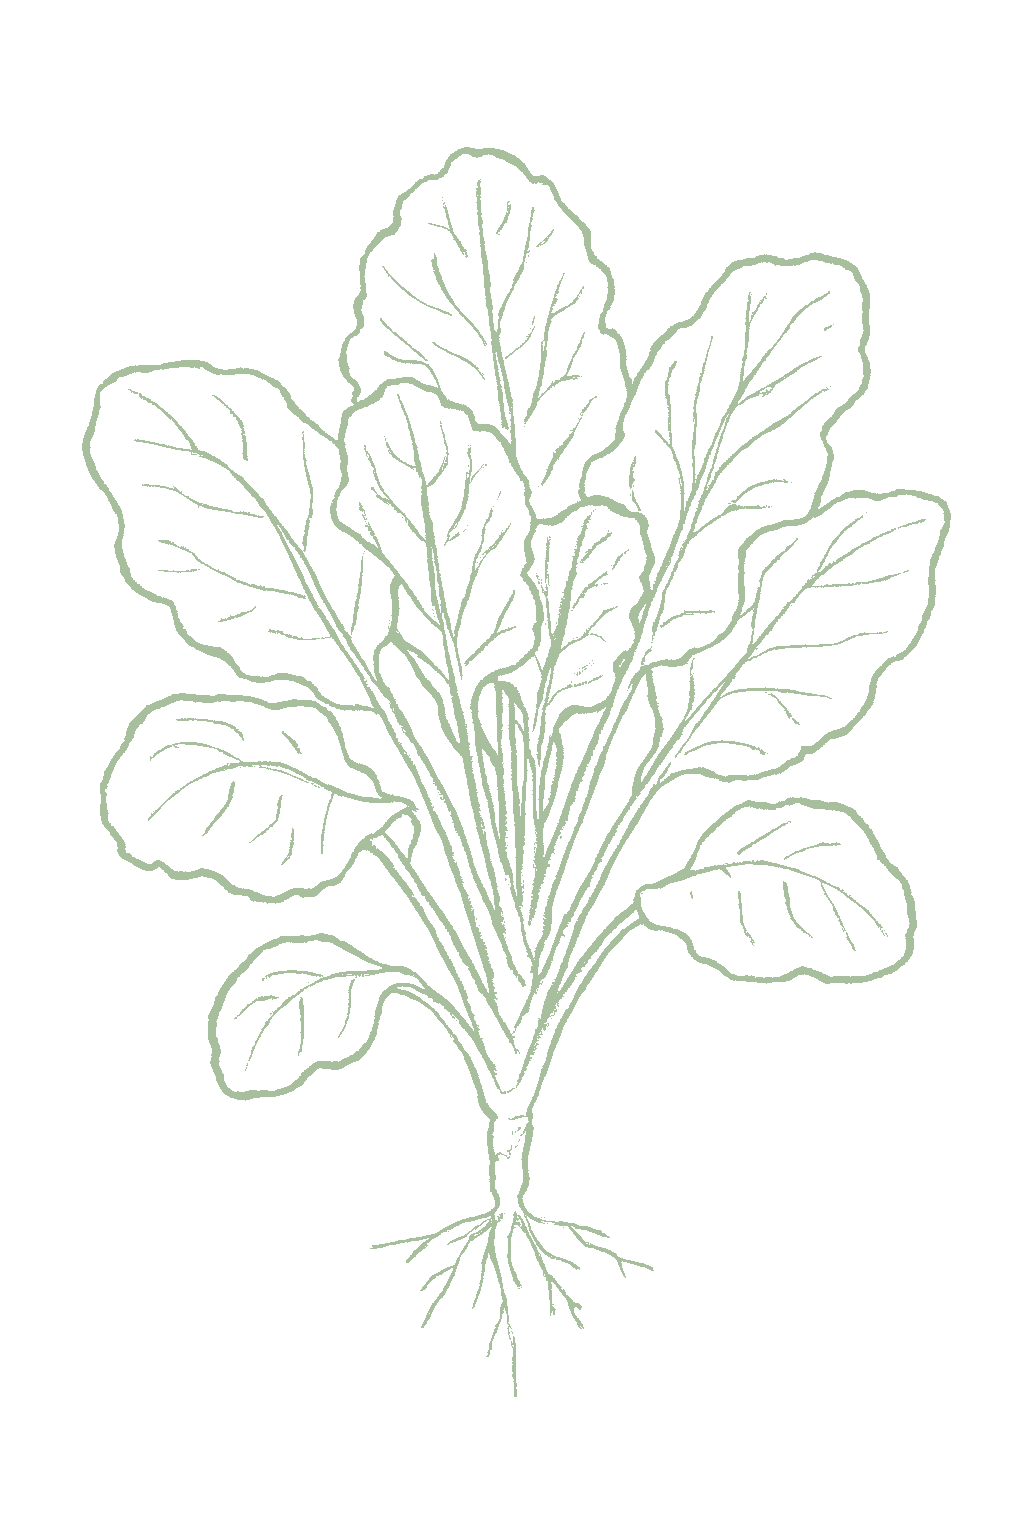
The plant grows into a tall stem with a bunch of big leaves on top. This is when it builds the frame that you will harvest from for months.The plant builds an upright stem topped with a rosette of large leaves over several weeks, laying down the productive frame.
Feed with nitrogen and keep it evenly watered so the leaves stay tender. Check for aphids in the growing tip and caterpillars and harlequin bugs on the leaves.Side-dress with nitrogen, keep moisture even for tender leaves, and scout for aphids, cabbageworms, and harlequin bugs while the frame fills out.
FROM PLANT · Feed with nitrogen and water steadily, about 1 to 1.5 inches a week, so the leaves stay tender and mild.Side-dress nitrogen as the plant builds and keep moisture even at roughly 1 to 1.5 inches per week; drought stress is the top cause of tough, stringy leaves, especially in heat.
FROM PLANT · Check the growing tip for aphids and the leaves for caterpillars and shield-shaped harlequin bugs, and deal with them early.Scout the growing tip and crown for cabbage aphids, the leaves for cabbageworms, and, in the South, for harlequin bugs; catching them early keeps the harvested leaves clean.
04
Harvest
Days 55-75
Once the lower leaves are about 8 to 10 inches, start picking. Take the lowest, outside leaves and leave the center to keep growing, so the plant gives leaves for months. Or cut the whole young plant.Lower leaves reach usable size (8 to 10 inches) at about 55 to 75 days; harvest cut-and-come-again, taking the lowest leaves and leaving the growing bud, or cut whole young plants at 6 to 10 inches.
Pick the outer leaves regularly, never stripping more than about a third at once. Feed lightly after a big harvest. The leaves taste sweeter after frost.Crop the outer leaves regularly to keep new growth coming, side-dress lightly after heavy picking, and expect the best flavor after a frost.
FROM PLANT · Pick the lowest leaves when they are about hand-sized or bigger, and leave the center growing, so the same plant keeps making leaves. Or cut the whole young plant and let it grow back.Crop the lower leaves once they reach 8 to 10 inches, taking no more than about a third of the plant so the growing bud keeps producing for months; or cut whole young plants and let them regrow.
FROM PLANT · Collards taste sweeter after frost, and you can keep picking even after the leaves have frozen in cool weather.Leaves are sweetest after a frost or two; in cool weather you can keep harvesting straight from the garden even after the foliage has frozen.
05
Overwintering
Days 90-240
As cold sets in, collards keep going. They are the most cold-hardy cabbage-family plant: in mild areas you harvest right through winter; in cold areas the plant may rest under cover and regrow, then send up a flower stalk (bolt) in spring.Collards are the hardiest of the cole crops: mature plants shrug off hard frost and freezes into the low-to-mid 20s°F and below, sweetening as starch converts to sugar. In mild zones they crop through winter; in cold zones they overwinter under cover and resume, then bolt as spring warms and days lengthen.
In mild zones, keep picking through winter. In cold zones, protect plants with a row cover or low tunnel. When spring warmth makes the plant bolt, harvest what is left, since the leaves turn bitter once it flowers.Harvest through winter in mild zones; use row cover or low tunnels in cold zones. Once the plant bolts in spring, harvest remaining leaves promptly, as flavor turns bitter, and pull it to make room.
FROM PLANT · In mild areas keep picking all winter. In cold areas, cover the plants to keep harvesting longer; collards handle cold better than any other cabbage-family plant.In mild zones keep cropping through winter; in cold zones a low tunnel or row cover extends the harvest, and collards take more cold than any other cole crop.
FROM PLANT · In spring, collards that lived through winter will send up a flower stalk and turn bitter, so pick the last good leaves before that happens.Watch for spring bolting as warmth and long days return: harvest remaining leaves before the flower stalk elongates, since the leaves turn bitter once the plant flowers.
Beginner
Know your soil

Your soil

Identify yours

Not sure what soil you have? Grab a small handful of damp soil from your garden bed and squeeze it. If it crumbles apart easily, it's sandy. If it holds together but breaks when you poke it, it's loam (what most vegetables want). If it stays in a hard, slippery ball, it's clay.

What this crop wants

Collards like rich, loose soil that holds moisture but still drains well. Mix in plenty of compost before planting, since these big leafy plants are hungry feeders. They grow in most garden soils, but do best when the soil is fertile and never bone dry or waterlogged.

If your soil doesn't match

You have sandy soil

Mix 2-3 inches of compost into the top 6 inches of your bed before planting. Compost holds moisture (which sandy soil drains too fast) and adds the nutrients sandy soil tends to lack. Repeat each season. Compost breaks down over time.

You have clay soil

Mix 2-3 inches of compost AND a few inches of coarse sand or perlite into the top 6 inches of your bed. The compost feeds the plants; the sand breaks up the clay so air and water can move through. Don't add sand without compost. It can compact like concrete.

Containers and raised beds

If amending your soil sounds like too much work, or if your soil is heavy clay, full of rocks, or contaminated, build over it. A raised bed at least 12 inches deep filled with a 50/50 mix of compost and sandy loam gives you ideal growing soil with no battles. A 5-gallon container with quality potting mix does the same for one plant at a time. Both bypass your native soil entirely.

Learn more about your soil
The specs

Care guide

The numbers that matter, at a glance.

Sunlight
Full sun · 6-8 hrs/day
Water
Regular
Spacing
18-24 inches
Soil
loam, sandy loam
Days to maturity
55-75 days from transplant
Soil pH
6 to 6.8
Container OK?
Yes · 5+ gal pot
Germination temp
45-85°F
Soil chemistry

Soil pH for collards (collard greens)

Preferred
6 to 6.8
Tolerated
5.5 to 7.5

Collards grow best in soil that is slightly acidic to neutral, around 6.0 to 6.8. A simple soil test tells you where you stand. If you have had clubroot, keeping the soil closer to neutral helps hold it back.Aim for a soil pH of about 6.0 to 6.8; collards still grow across a wider 5.5 to 7.5 band. Holding the soil toward neutral, roughly 6.8 to 7.2, also helps suppress clubroot, a key brassica soil disease, so a grower with clubroot history should lean to the high end.

Verified · 2 sources View
Steady hand on the hose

Watering

When & how much
Frequency
Water regularly so the soil stays evenly moist, roughly 1 to 1.5 inches a week.Give about 1 to 1.5 inches weekly, kept even through the season, and more in hot, dry spells.
Amount
Aim for roughly 1 to 1.5 inches of water a week, more when it is hot.About 1 to 1.5 inches per week, leaning to the high end during summer heat in the South.
Method
Water at the base of the plant rather than over the leaves.Water at the soil line with drip or a soaker hose where possible.
Signs of trouble
Too much water
Lower leaves yellow and the plant looks soggy and limp.Yellowing lower leaves and limp, soft growth; collards dislike waterlogged soil and can rot at the crown.
Too little water
Wilting leaves that turn tough and bitter, especially in hot weather.Wilting, slowed growth, and tough, stringy, bitter leaves; drought stress is the main cause of poor leaf quality, especially in summer heat.
Feeding rhythm

Feeding

Frequency
every 3 to 4 weeks
Type
Nitrogen-rich fertilizer
When to start
balanced feed at planting, then side-dress with nitrogen 3 to 4 weeks later and after heavy cutting

Collards grow a lot of leaves, so they need regular feeding to stay deep green and tender. Mix some fertilizer into the soil when you plant, feed again about 3 to 4 weeks later, and give a light feed after a big harvest so it grows fresh leaves. Do not overdo it, since too much fertilizer makes soft growth that bugs love.Collards are leafy and N-hungry, and steady nitrogen drives the deep green color and tender growth that make the crop. Work a balanced fertilizer into the bed at planting, then side-dress with nitrogen about 3 to 4 weeks later, and feed again after a heavy cutting to push new leaves. Extension guides commonly cite a nitrogen side-dressing such as calcium nitrate or 27-3-3 along the row; on long-held plants a feed every 3 to 4 weeks keeps them productive. Avoid overdoing nitrogen, which softens growth and draws aphids.

N · P · K = 10-10-10

Use a balanced vegetable fertilizer at planting, then a nitrogen-rich feed like blood meal as the plant grows.A balanced feed such as 10-10-10 at planting, then nitrogen side-dressings (calcium nitrate, blood meal, or 27-3-3) 3 to 4 weeks later and after heavy cutting to keep tender leaves coming.

Try 10-10-10 at planting, then calcium nitrate, blood meal, or 27-3-3 to side-dress
Who grows well together

Companion planting

Collards do well next to aromatic herbs, onions, and quick cool-season crops like lettuce and beets. The main thing is to keep them away from other cabbage-family plants, which share their pests and diseases, so planting them together makes problems worse. Most collard companion pairings are traditional rather than research-tested. The ones worth acting on are practical: aromatic herbs and alliums as scent-based deterrents against the cabbage-family pests that hammer collards in the South, and quick cool-season crops like lettuce and beets as interplants that use space while the collards are small. The well-grounded caution is to separate collards from other brassicas, which share clubroot and the whole cole-crop pest complex, a rotation and disease principle more than a tested adjacency effect.

Other
Onions
Onions are a traditional neighbor for collards; their strong smell is said to help confuse and deter cabbage pests.Onions are one of the better-supported brassica companions. Their pungent allium scent helps mask the collards from cabbage-family pests, loopers, cabbageworms, and root maggots, that hunt partly by smell, and extension trial work including onion in a mix with cole crops showed reduced caterpillar damage. Alliums are shallow-rooted and undemanding, so they tuck around collards without competing for much. Research-backed
Dill
Dill is a classic friend for cabbage-family plants. Its strong smell is said to put off pests, and its flowers bring in helpful insects.Dill works for collards mainly through beneficial insects. Its umbel flowers attract parasitoid wasps and predators like hoverflies and ladybugs that prey on the aphids and cabbage caterpillars collards draw, and extension work pairing aromatic umbels with brassicas has shown reduced caterpillar damage. Let some dill flower for the benefit, and site it nearby rather than crowding the collards. Research-backed
Lettuce
Lettuce grows fast and low, so you can tuck it between young collard plants to use the space while the collards fill in.Lettuce and collards interplant well on structure and timing rather than chemistry. Lettuce is shallow-rooted and quick, collards taller and slower, so the lettuce uses the open ground and light between young collard plants and is harvested before the collards spread. Expect an efficient use of the bed in the cool shoulder season, not pest protection. Traditional
Vegetable
Beets
A cool-season root that shares collards' window and works the lower soil while collards feed higher up. A traditional, space-efficient pairing rather than a tested effect. Traditional
interplant nearby
Trap crop
Nasturtiums
Often planted as a trap crop for cabbage aphids near brassicas. Trap cropping is a documented principle but works best for moderately mobile pests and is not a tested collard-nasturtium pairing, so treat it as a plausible aid rather than a proven control. Well-grounded
interplant nearby
Herb
Aromatic herbs (thyme, mint, sage)
Strongly scented herbs are a long-standing brassica companion, thought to mask the crop from cabbage moths and aphids that locate hosts by smell. Folk practice with partial mechanistic support rather than a measured collard-specific benefit. Traditional
interplant nearby
Keep apart from
Other brassicas Keep collards away from other cabbage-family plants like broccoli, cabbage, kale, and cauliflower. They share the same pests and diseases, so planting them together makes problems worse.Planting collards cheek-by-jowl with their brassica relatives, broccoli, cabbage, cauliflower, kale, Brussels sprouts, concentrates the whole family's shared pests (cabbage worms, loopers, flea beetles, harlequin bugs, root maggots) and shared diseases in one spot, and repeated same-family planting lets soil-borne clubroot build up. Spread brassicas out and rotate where they grow each year. Well-grounded
Strawberries A traditional caution that brassicas and strawberries inhibit each other. There is no documented mechanism or T1 support; it persists as folklore. Traditional
Provenance tagged inline · see methodology for the labeling system Key
Harvest signals

When to pick

Begin picking when the lower leaves are about the size of your hand or bigger, around 8 to 10 inches. Take the lowest, outside leaves and leave the middle growing, so the plant keeps making more for months. You can also cut the whole young plant off near the ground and let it grow back. The leaves taste best picked while still tender, and they get sweeter after a frost.Start cropping outer leaves once they reach about 8 to 10 inches, taking the lowest, oldest leaves first and leaving the central bud and upper rosette to keep producing. Leaves are most tender picked young to medium-sized; old leaves turn tough and stringy. Alternatively cut the whole young plant near the soil line at 6 to 10 inches and let it regrow, or harvest the tender inner rosette. Flavor is mildest and sweetest in cool weather and after a frost.

Verified · 2 sources View
Yield

What to expect

Each collard plant gives you a steady supply of big leaves over months, not one big harvest. How much you get depends on the variety and how long your season is, but a few plants keep producing for a long time.A single collard plant yields a steady run of large outer leaves over a long season rather than one harvest, roughly 1 to 2 pounds or more per plant depending on variety, season length, and how often you crop it. Extension yields run about 8 to 15 pounds per 10 feet of row.

Collards produce the most once the plant is full-sized, and they keep going strongest in cool fall weather and, in mild areas, through winter. Unlike most greens they also keep going through summer in the South, and they stop once they flower in spring.Production climbs as the plant sizes up and then holds for weeks to months as you crop the lower leaves, peaking in the cool weeks of fall and, in mild zones, through winter. Collards keep producing through summer in much of the South, slowing only in genuinely extreme heat, and the crop ends when the plant bolts in spring. Here is the trick: pick the lower leaves often, but always leave the small center bud to keep growing. Regular picking keeps a plant making leaves for months. Do not take the middle of the plant, and do not let old leaves toughen on the stem.The key to total yield is cropping the lower leaves regularly while leaving the central growing bud: frequent, moderate picking keeps a plant productive for months, whereas stripping a plant bare or letting old leaves toughen on the stem checks it. New growers often pick too timidly or take the bud, which stalls the plant.

What changes yield
Harvest method: regular cut-and-come-again cropping of lower leaves (leaving the bud) sustains months of production; taking the bud or stripping the plant ends it.Temperature: cool weather through fall and mild winters gives the highest-quality, sweetest leaves; collards also produce through Southern summers but the leaves are milder in cool weather.Variety: Georgia and the Vates types crop longest; fast hybrids like Top Bunch reach a first cutting sooner.Nitrogen and even moisture: steady nitrogen and consistent water keep new leaves tender; stress makes them tough, stringy, and aphid-prone.
Verified · 2 sources View
Pick your variety

Recommended varieties

Georgia is an easy, tough heirloom that takes heat and poor soil, great for beginners. Vates and Champion are compact and very cold-hardy, perfect for a fall or winter crop. Top Bunch and Blue Max are fast hybrids if you want tender leaves sooner. Morris Heading makes a softer, cabbage-like collard.Match the variety to the slot. Georgia (Georgia Southern) is the heat- and stress-tolerant Southern heirloom for summer-into-fall production; Vates and Champion are compact, bolt-resistant, very cold-hardy types that shine in fall and overwintering. Top Bunch and Blue Max are fast, uniform hybrids for quick, repeated cutting. Morris Heading is the traditional heading collard for a milder, more tender leaf. Where clubroot or other brassica diseases are a concern, look for resistant cultivars.

Georgia (Georgia Southern)
Large, crumpled blue-green leaves on a tall plant; a classic Southern heirloom prized for tolerance of both heat and poor soil, and dependable yields. Slower to bolt and forgiving for beginners.
Vates
Compact, non-heading plant with large dark green leaves that hold color in cold; bolt-resistant and very cold-hardy, a dependable garden standard.
Champion
An improved Vates type, compact and slow to bolt, with good cold tolerance; a reliable choice for fall and overwintering.
Morris Heading (Carolina Improved Heading)
A Southern heading type that forms a loose head of tender leaves; a traditional favorite where a milder, cabbage-like collard is wanted.
Top Bunch
A fast, vigorous hybrid with tender, slightly savoyed leaves and good bolt resistance; quick to a first cutting and good for repeated harvest.
Blue Max
A productive hybrid with smooth blue-green leaves and uniform, vigorous growth; widely grown for high yields of tender leaves.
Off the vine

Storing your harvest

Room temp
Do not leave collards out on the counter. They wilt fast in the warmth, so get them into the fridge soon after picking.Collards wilt and toughen at room temperature and lose quality within a day or two, so do not leave them out. Refrigerate as soon as possible after cutting; if they must sit briefly, stand the stems in water like cut flowers.
Fridge
Store collards unwashed in a loose bag in the fridge's crisper drawer, where they stay good for about a week, sometimes up to 2 weeks if very cold. Wait to wash them until you are ready to cook.Refrigerate unwashed in a loose or perforated bag in the crisper; collards hold their quality for roughly 1 week, and up to about 10 to 14 days held near 32°F at high humidity, a bit longer than tender greens because the leaves are sturdier. Washing before storage traps moisture and speeds spoilage.
Freezer
Collards freeze well if you blanch them first. Strip the leaves off the tough stems, boil them for about 3 minutes, cool them right away in ice water, drain, and freeze.Collards freeze well once blanched: strip the leaves from the tough stems, blanch about 3 minutes in boiling water, cool quickly in ice water, drain, and freeze. Blanching halts the enzymes that otherwise cause off-flavors and loss of color in storage.
Verified · 2 sources View
When something goes wrong

Common problems

01 of 04
What happened Your collards shot up a tall stalk with buds or yellow flowers and the leaves turned bitter. Collards are biennials that bolt (run to flower) mostly in their second spring after a cold winter, and sometimes from heat and long days on a stressed plant. Once they bolt the leaves go bitter and tough. People often blame the plant, but it is just its life cycle. Next time, treat an overwintered plant as a spring bonus you harvest before it flowers, and pick bolt-resistant types like Vates or Champion.The plant elongated a flowering stalk and the leaves turned bitter and tough. Bolting is driven mainly by vernalization (a cold winter) flowering the biennial in its second spring, and secondarily by heat and long days on stressed plants; once it bolts, leaf quality is lost. Next time crop overwintered plants out before the stalk elongates, choose bolt-resistant cultivars (Vates, Champion, Top Bunch), and avoid drought stress. Next season Harvest overwintered plants before they bolt in spring, grow bolt-resistant varieties, and keep plants unstressed with steady water.Crop overwintered collards before they bolt, favor bolt-resistant varieties, and hold even moisture to avoid stress-triggered bolting.
02 of 04
What happened Your collard leaves are tough, leathery, and bitter instead of tender. This usually comes from the plant drying out, from leaving leaves on too long so they age, or from very hot weather. It is tempting to think the variety is bad, but conditions are almost always the cause. Next time, keep the soil evenly moist, pick leaves while they are young to medium-sized, and remember that frost actually sweetens them.Leaves are tough and stringy rather than tender. Drought stress, over-mature leaves, and extreme heat are the usual causes; collards tolerate heat but their leaf quality still suffers when they dry out, and flavor is best in cool weather and sweetened by frost. Next time hold even moisture, crop leaves at a young-to-medium size, shade them in genuinely extreme heat, and lean on the cool shoulders and fall window for the sweetest leaves. Next season Keep moisture steady, pick leaves young, give afternoon shade in extreme heat, and enjoy the post-frost sweetening.Hold even moisture, crop leaves young, shade in extreme heat, and use the cool fall and winter window for the sweetest leaves.
03 of 04
What happened Your summer collards got covered in shield-shaped harlequin bugs, green caterpillars, or clusters of aphids, and the leaves are stippled and chewed. Collards keep growing in summer heat, but so do their pests, and pressure is worst in the warm South. People often stop scouting once the plants are big. Next time, scout weekly, use row cover, hand-pick harlequin bugs and their barrel-shaped eggs, spray Bt for caterpillars, and clean up old plants and weeds where pests overwinter.Summer collards drew heavy harlequin bug, caterpillar, and cabbage-aphid pressure, with stippled, chewed, and contaminated leaves. The crop's summer persistence is also its pest liability in the South, where harlequin bugs run several generations a year. Next time scout weekly, exclude with row cover, hand-pick harlequin adults and egg rows, use Bt or spinosad for caterpillars, knock down aphid colonies early, and remove crucifer weeds and debris that harbor overwintering adults. Next season Scout weekly in warm weather, use row cover, hand-pick harlequin bugs, spray Bt for caterpillars, and clear old plants and weeds.Scout weekly, exclude with row cover, hand-pick harlequin bugs and egg rows, treat caterpillars with Bt, and sanitize overwintering sites.
04 of 04
What happened Your collards stayed small and yellowish, wilted in the afternoon, and when you dug them up the roots were swollen into lumps. That is clubroot, a soil disease that infects cabbage-family roots and lasts for years in the soil. It usually builds up when brassicas are grown in the same spot repeatedly, which is easy to do with a near-year-round crop. Next time, rotate so cabbage-family crops do not return to that bed for at least 3 years, keep the soil pH near neutral, and improve drainage.Plants were stunted and chlorotic, wilted by day, and showed galled, clubbed roots, the signature of clubroot (Plasmodiophora brassicae). The soilborne organism persists for years and builds under repeated brassica cropping and acidic, poorly drained soil, a real risk where collards are grown nearly year-round. Next time rotate cabbage-family crops out for at least 3 years (longer where known), lime toward a neutral-to-slightly-alkaline pH, and improve drainage; there is no in-season cure. Next season Rotate brassicas out of that bed for at least 3 years, keep soil pH near neutral, and improve drainage.Use a 3-year-plus brassica rotation, raise pH toward neutral, and improve drainage; remove and destroy infected plants.
The usual suspects

Pests & diseases

Pests
Cabbageworms and cabbage loopers
P · 01
Symptoms You'll see ragged holes eaten in the big leaves, green caterpillars on the plant, and little dark droppings. Some caterpillars loop up in the middle as they crawl.Ragged holes chewed through the leaves, with green caterpillars and dark frass on the foliage. Imported cabbageworms are velvety green; cabbage loopers move in a looping arch; diamondback larvae are small and wriggle when disturbed. Because collards are sold and eaten as whole leaves, even modest feeding scars the crop. Cause These are caterpillars that hatch from eggs laid by white butterflies and small moths. They love cabbage-family plants like collards and chew the leaves, which are the part you eat.The larvae of the imported cabbageworm, cabbage looper, and diamondback moth feed on brassica foliage; the adults are white or brownish butterflies and moths that lay eggs on the leaves. Caterpillar pressure runs especially long on collards in the warm South, where the crop is in the ground most of the year. Organic treatment Spray a product called Bt, which is safe and targets only caterpillars, or pick the caterpillars and eggs off by hand from under the leaves. Spray again after rain, since it washes off.Spray Bt (Bacillus thuringiensis) or spinosad, which target caterpillars, and hand-pick larvae and eggs from leaf undersides. Repeat after rain, since Bt breaks down. Prevention Cover plants with a light fabric row cover right after planting to keep the butterflies and moths from laying eggs. Clear away old cabbage-family plants, and watch for the first white butterflies as your signal to act.Use floating row cover from transplanting to exclude the egg-laying adults, clean up brassica debris that shelters pupae, and scout for the first white butterflies as a spray cue.
Harlequin bug
P · 02
Symptoms Shield-shaped black-and-orange (or black-and-red) bugs on the leaves, which develop white or yellow spots, then brown and look tattered. It is mostly a warm-region problem and loves collards.Shield-shaped bugs up to about 3/8 inch, brightly black-and-yellow or black-and-red, feeding with piercing-sucking mouthparts that leave white stipples; affected leaves brown and look tattered, and heavy feeding wilts and deforms plants. A warm-region pest that prefers collards, mustard, and kale over other cole crops, and a leading reason summer collards in the Deep South get buggy. Cause The harlequin bug is a colorful stink-bug relative that pierces the leaves and sucks the juices, leaving pale blotches. It strongly prefers cabbage-family plants like collards, mustard, and kale, especially in the South.The harlequin bug (Murgantia histrionica) is a brassica-specialist stink bug, most damaging in the southern United States, where it completes two to four generations a year and overwinters as an adult in debris and weeds. Organic treatment Search out and crush the bugs, their eggs (little barrel-shaped eggs in rows), and young ones by hand. Use a row cover to keep them off, pull out badly infested plants, and clear away weeds and old plants where they hide over winter.Hand-pick and crush adults, nymphs, and the barrel-shaped egg rows; exclude with floating row cover; remove heavily infested plants. Pyrethrins are permitted in organic production if pressure is severe. Prevention Clean up garden debris and cabbage-family weeds where the adults overwinter, use row cover, and consider a trap crop of mustard or an early collard planting to lure them away from the main crop, then destroy it.Eliminate overwintering sites by removing crop debris and crucifer weeds, use row cover, and deploy an early trap crop of mustard, collards, or rapeseed to divert overwintering adults, then destroy it before the main crop is set out.
Aphids
P · 03
Symptoms You'll see clusters of tiny soft insects on the new growth and tucked into the leaf folds, often a waxy gray-green kind. Leaves curl and pucker, and there may be a sticky coating.Clusters of small soft-bodied insects on growing tips and leaf undersides; the waxy gray-green cabbage aphid is especially troublesome because it lodges in the crown and leaf folds and is hard to wash out at harvest. Cause Aphids are tiny insects that suck juice from the plant. They breed fast and hide deep in the leaf folds and growing tip, where they are hard to wash out.Several aphid species, notably the cabbage aphid, suck sap from collards; they multiply quickly and their feeding distorts growth and contaminates the harvested leaves. Populations explode in warm weather, so summer collards need close scouting. Organic treatment Blast them off with a strong spray of water, or use insecticidal soap or neem oil, making sure to hit under the leaves and into the folds where they hide. Repeat every few days.Knock colonies off with a strong jet of water, or spray insecticidal soap or neem, covering leaf undersides and the crown; repeat every few days. Catch infestations early before they lodge in the growing point. Prevention Welcome helpful bugs like ladybugs and lacewings that eat aphids, don't overdo the nitrogen fertilizer (lush growth attracts them), and check the new growth often.Encourage natural enemies like ladybugs and lacewings, avoid overfeeding nitrogen (which spurs the soft growth aphids favor), and inspect growing tips early so colonies do not lodge in the crown.
Flea beetles
P · 04
Symptoms Lots of tiny round holes in the leaves of young plants, made by small dark beetles that jump away like fleas when you get close. Bad damage can stunt seedlings.Tiny round shot-hole pits chewed in the leaves of young plants; the small dark beetles jump like fleas when disturbed. Heavy feeding stunts or kills seedlings and scars the leaves of a leaf crop. Cause Flea beetles are small jumping beetles that chew on young cabbage-family leaves. They hurt seedlings most, because a tiny plant can't grow fast enough to recover.Flea beetles chew the foliage of young brassicas and are most damaging at the seedling stage; on collards they also leave cosmetic shot-holes in the harvested leaves. Organic treatment Cover young plants with a row cover, and if there are a lot of beetles, use a spray such as spinosad or a kaolin clay coating. The main goal is to get the seedlings big enough to handle it.Protect seedlings with row cover, and spray spinosad or apply kaolin clay if pressure is high; the goal is getting plants past the vulnerable seedling stage. Prevention Cover seedlings with row cover from the start, keep them strong with steady water and food so they grow past the damage, and pull nearby weeds in the cabbage family.Use row cover from sowing or transplanting, keep seedlings vigorous with even water and feeding so they grow through the damage, and clean up weedy brassica relatives nearby.
Cabbage root maggot
P · 05
Symptoms New transplants wilt and grow badly or fall over. If you pull one up, you'll find small white maggots eating the roots. It's worst in cool, wet spring soil.Transplants wilt, grow poorly, and may collapse; pulling a plant reveals small white maggots tunneling in the roots and lower stem. Damage is worst in cool, wet spring soil, so it bites the early spring planting more than the fall one. Cause A small fly lays eggs at the base of the plant, and the maggots that hatch burrow down and eat the roots. The fly is most active in cool spring weather.The larvae of the cabbage root fly tunnel into brassica roots; the adult lays eggs at the stem base, and the maggots feed on the roots below, sometimes killing young plants. Organic treatment Once the maggots are in the roots you can't save that plant, so pull and throw away the badly damaged ones. Put your effort into protecting the rest from new eggs.There is no effective rescue once maggots are in the roots; remove and destroy badly affected plants and protect the rest from further egg-laying. Prevention Put a small collar or disk around the base of each transplant to stop the fly from laying eggs there, or use a row cover. Don't plant into cold, soggy soil, and avoid spots where you grew cabbage-family plants last year.Place a collar or disk around the stem base at transplanting to block egg-laying, or use row cover; avoid planting into cold, wet soil and rotate away from where brassicas grew.
Diseases
Clubroot
D · 01
Symptoms Plants wilt in the afternoon, stay small and yellowish, and don't bounce back. If you dig one up, the roots are swollen into lumpy, club-shaped knobs.Plants wilt in the heat of the day, grow stunted and yellowed, and recover poorly; roots are swollen into distorted clubs and galls instead of normal fine roots. Cause A germ that lives in the soil infects the roots of cabbage-family plants and makes them swell, which stops the plant from taking up water and food. It stays in the soil for years.A soilborne organism (Plasmodiophora brassicae) infects brassica roots and causes the galls, which block water and nutrient uptake. It persists in soil for many years and spreads in contaminated soil and water. Organic treatment There's no cure once a plant has it, so pull and destroy infected plants. Adding lime to make the soil less acidic (closer to neutral) helps hold it back, and growing cabbage-family plants only rarely in that spot starves the germ out.There is no cure once plants are infected; remove and destroy them. Raising soil pH toward 7.0 or above with lime can suppress the disease, and long rotations starve it out over time. Prevention Don't grow collards or their cabbage-family relatives in the same spot more than once every 3 years, or longer if you've had clubroot. Keep the soil from being too acidic, improve drainage, and clean soil off your tools.Rotate brassicas on a cycle of at least 3 years, and longer where clubroot is known; keep soil pH up, improve drainage, and avoid moving infested soil on tools and boots.
Black rot
D · 02
Symptoms Yellow patches shaped like the letter V appear at the leaf edges, pointing inward, with black veins inside them. It can spread through the plant and rot the leaves you want to eat.Yellow, V-shaped lesions spread inward from the leaf margins, with the veins inside the V turning black; the disease moves through the vascular system and can blacken and rot the harvested leaves. Warm, wet Southern weather drives it hard. Cause A bacteria that often comes in on infected seeds or transplants. It gets into the leaves and travels through the plant's veins, spreading fastest in warm, wet weather.A seedborne bacterium (Xanthomonas campestris) that enters through leaf pores and wounds and moves through the plant's veins; it spreads in warm, wet conditions and on infected seed or transplants. Organic treatment There's no real cure, so remove and destroy infected plants to keep it from spreading. Don't handle or brush against the plants while they're wet, because that spreads the bacteria.There is no effective cure; remove and destroy infected plants. Avoid working among plants when foliage is wet, since that moves the bacteria. Prevention Begin with clean, certified seed and healthy transplants, don't plant where cabbage-family crops grew recently, space plants for good airflow, and avoid overhead watering.Start with clean, certified seed and healthy transplants, rotate away from brassicas, give plants room for airflow, and avoid overhead watering and handling wet foliage.
Alternaria leaf spot
D · 03
Symptoms Small dark spots on the leaves that grow into round patches with concentric rings, like a tiny target. Bad cases make the leaves yellow and unusable.Small dark lesions enlarge into circular spots with characteristic concentric rings (a target-spot look) and a yellow halo; because the leaves are the crop, even moderate spotting reduces the harvest. Favored by warm, wet conditions. Cause A fungus that spreads in warm, wet weather and infects the leaves, leaving target-like spots. It's worse on stressed plants and in crowded, damp plantings.Fungi in the genus Alternaria (with Cercospora causing a similar leaf spot) infect brassica foliage, spreading by spores in wind and splashing water; infected seed, crop debris, and long leaf wetness drive it. Organic treatment Remove and destroy badly spotted leaves, improve airflow so leaves dry quickly, and use a copper spray if it spreads. Avoid wetting the leaves when you water.Remove and destroy spotted leaves and debris, improve airflow, avoid overhead watering, and apply a copper-based fungicide if pressure is high. Prevention Start with clean seed, rotate away from brassicas, space plants for airflow, water at the soil line, and keep plants healthy so they resist infection.Use clean, disease-free seed, rotate away from brassicas, space for airflow, water at the soil line, and clear crop debris that harbors spores.
Downy mildew
D · 04
Symptoms Pale yellow blotches on top of the leaves, with fuzzy grayish growth on the underside, mostly in cool, damp weather. Bad cases discolor the leaves.Pale yellow patches form on the upper leaf surface with a fuzzy gray-white growth underneath, mainly in cool, damp weather; severe infection discolors and downgrades the leaves. Cause A mold-like disease that loves cool, wet, humid weather and spreads through the air and water. Wet leaves and crowded plants make it worse.A fungus-like organism that thrives in cool, wet, humid conditions and spreads by spores in water and air; long leaf wetness and crowded plantings favor it. Collards' cool-season window overlaps the weather it likes. Organic treatment Open up the airflow so leaves can dry, remove the worst leaves, and use a copper spray if it's spreading. It's hard to stop once the weather stays damp.Improve airflow and let foliage dry, remove badly affected leaves, and apply a copper-based fungicide if pressure is high; the disease is hard to stop once humidity stays high. Prevention Space plants so air moves between them, water at the soil instead of from above, and pick resistant varieties if downy mildew is common where you live.Space plants for good air movement, water at the soil line rather than overhead, and choose resistant varieties where downy mildew is common.
Verified · 4 sources View
Seasoned
Where to plant next year

Crop rotation

Do not plant collards or other cabbage-family crops in the same spot year after year. Waiting at least 3 years between them, and longer if you have had clubroot, helps avoid soil diseases.Rotate so collards and their brassica relatives do not return to the same ground for at least 3 years, and longer where clubroot is present, since the clubroot organism persists in soil for years. Keeping soil pH near neutral also helps suppress clubroot. In the South, where collards are grown nearly year-round, planning that rotation across beds takes extra thought.

Family
Brassica family (Brassicaceae), the cole crops
Years between
3 years
in the same bed
Avoid following
Other cabbage-family crops like broccoli, cabbage, cauliflower, kale, and turnips.Other brassicas (broccoli, cabbage, cauliflower, kale, Brussels sprouts, kohlrabi, turnip, radish, mustard), which share clubroot and cabbage-family pests.
Plant after
Legumes such as beans and peas, or unrelated crops like tomatoes, squash, or onions.
Verified · 2 sources View
In the app · pre-launch

When plant taps you on the shoulder

The plant app sends a timely reminder at every critical moment of your collards (collard greens) season. The wording adjusts to whichever you pick: beginner or seasoned. Here are three you'll see in Zone 5.

p
plant
NaN days after last frost
Time to start picking collard leaves
Your collards' outside leaves should be big enough to pick. Take the lowest, outer ones and leave the middle growing, so it keeps making more.
p
plant
NaN days after last frost
Time to feed your collards
Collards like regular feeding. Give them some nitrogen now, and again after big harvests, to keep tender leaves coming.
p
plant
NaN days after last frost
Frost ahead, your collards will sweeten
Frost is coming, but that is good news for collards: the cold makes the leaves sweeter. You do not need to cover them for a normal frost. Keep picking.
Get personalized alerts.

plant sends the right notification at exactly the right moment, for your zone, your weather, your crops. Founding members lock the rate forever.

Back the Kickstarter →
Ask the gardener

Common questions

Got a question we missed?

We're building this guide with real growers. Got a question we missed? Ask here. We read every one and add the best answers right to this page.

Grown this before?

Share a tip

Learned something the hard way? Pass it on. Real growers' tips make this guide better for the next person, and we credit you by name when yours goes live.

Seasoned
Spot something wrong?

Report a problem

If you've grown this crop and you see a date, a temperature, a companion claim, or a recommendation that doesn't match your experience, tell us. Real growers' corrections make this guide better for the next person.

How we built this guide

Methodology & sources

Every date, temperature, spacing, and recommendation on this page is sourced from university cooperative extension publications, peer-reviewed agricultural research, NOAA climate data, and direct extension calendars. Where claims are softer (traditional gardening wisdom not formally documented), we say so.

Research-backed Documented in cooperative extension publications or peer-reviewed research
Well-grounded A known agronomic principle, but not formally tested for this specific pair
Traditional Time-tested gardening wisdom, limited formal research support
Last reviewed
June 29, 2026
Data version
crops_data_final · v1.0 · schema 2.9
Sources cited on this page
16 publications
Verified entries
Companion-planting claims tagged inline · zone dates verified against 5+ extensions
See all sources cited on this page
  • University of Minnesota Extension umn_ext
  • University of Maryland Extension umd_ext
  • Cornell Cooperative Extension cornell_ext
  • Iowa State University Extension iastate_ext
  • Michigan State University Extension msu_ext
  • NC State Extension ncsu_ext
  • Penn State Extension psu_ext
  • U. of Illinois Urbana-Champaign Extension uiuc_ext
  • UC Davis Postharvest Center ucd_postharvest
  • Texas A&M AgriLife Extension tamu_agrilife
  • Virginia Cooperative Extension 426-331 vce_426_331
  • Piedmont Master Gardeners piedmont_mg
  • UGA Vegetable Garden Calendar uga_calendar
  • Clemson Home & Garden Information Center clemson_hgic
  • UC IPM Statewide IPM Program uc_ipm
  • NOAA 1991-2020 Climate Normals noaa_normals

Growing notes, weekly.

Zone-aware seasonal nudges, what's worth planting now, and the occasional recipe from the harvest. No spam, ever.

Vol. 003 · Collards (Collard Greens) · plant.lifestyle