Pick your zone and the dates re-calibrate.
The Guide Crops Vol. 003

Edamame

in Zone 9, this week

Edamame is a soybean you eat as plump green pods, boiled or steamed in the pod and popped straight into your mouth. It grows like a bush bean: you plant the seeds in the garden after the last frost once the soil is warm, and the sturdy plants need no trellis. But edamame takes longer than green beans, about 75 to 100 days, and the big difference is that the whole plant ripens at once. Instead of picking for weeks, you harvest the whole plant in one go when the pods are plump and green, and the best window is only a few days. Soybeans flower by day length, so pick a variety suited to your area, and use a soybean inoculant on the seed, not the regular bean kind. Always cook edamame before eating it. Edamame (Glycine max) is a warm-season vegetable soybean grown for its plump, immature green pods, boiled or steamed in the pod and popped out to eat. Like snap beans it is a frost-tender bush legume direct-sown after the last frost into warm soil, but it takes longer to mature (about 75 to 100 days) and, unlike beans, the whole plant ripens together: the crop comes ready in one concentrated harvest at the plump green R6 stage, over a narrow window of only a few days before the beans turn starchy. Soybean is a short-day plant, so the variety's maturity group must match your latitude. As a legume it fixes much of its own nitrogen, but only with the soybean-specific inoculant Bradyrhizobium japonicum, not the general bean and pea kind. Edamame must be cooked before eating; raw soybeans are not eaten.
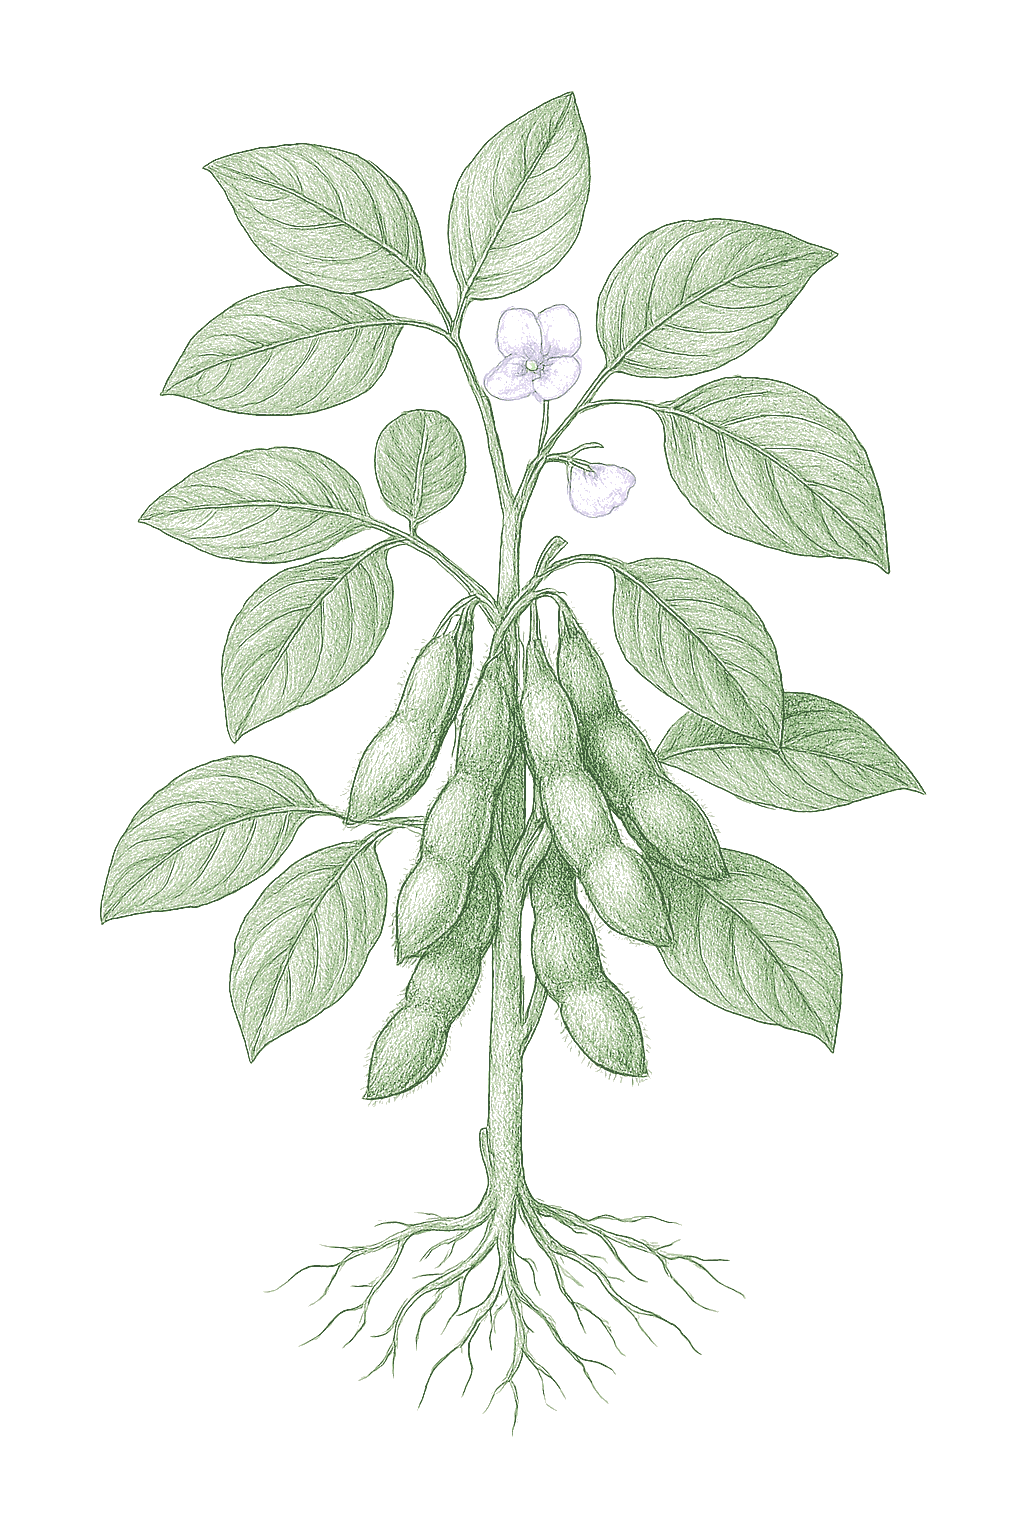
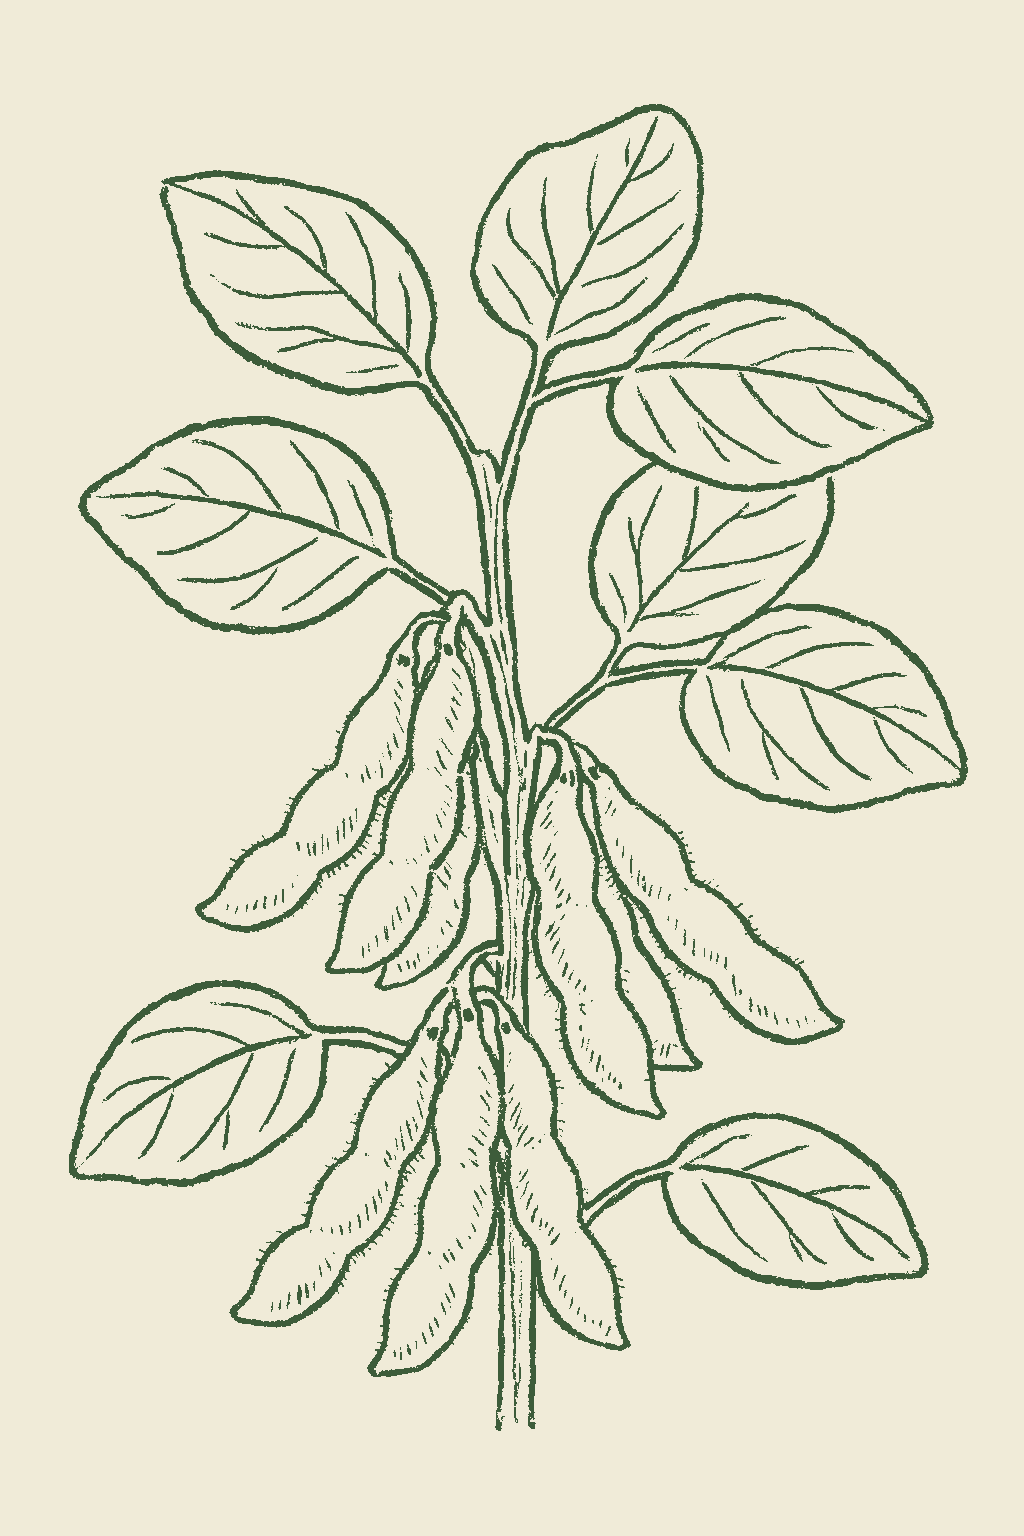
Edamame mature plant
Fig. 01 · Edamame, mature Zone 9
Mature in
75-100d
from transplant
Sunlight
Full sun
6-8 hrs daily
Water
Moderate
6 inches / week
Spacing
2 to 4 in
between plants
Soil pH
6-6.8
slightly acidic
Today · in your zone

What's happening right now

October 21 · Zone 9 · Stage 01 · Germination

Off-season for edamame in zone 9.

Seasoned
Microclimate · Zone 9a vs 9b

Your zone, at a finer grain

Zone 9 averages a last frost around March 1. Within Zone 9, the colder half (9a, winters down to 20°F) runs about a week later. The warmer half (9b, winters down to 25°F) runs about a week earlier. The plant app picks your subzone from your ZIP.

SubzoneLast springFirst fallGrowing daysWinter minFruits reliably
9aMar 8Nov 24~26120-25°FYes · two seasons
9bFeb 28Nov 30~27525-30°FYes · two seasons

Averages from 8 weather stations per subzone, drawn from NOAA 1991-2020 Climate Normals. Your actual frost date can vary by up to two weeks based on elevation, proximity to water, and local topography.

Source: NOAA 1991-2020 Climate Normals Methodology
Your climate region in Zone 9
The season at a glance

Planting calendar

In Zone 9, edamame can be planted March through June. Harvest runs July through October.

Jan
Feb
Mar
Apr
May
Jun
Jul
Aug
Sep
Oct
Nov
Dec
plant
too cold
too cold
plant
plant
plant
plant
too late
too late
too late
too late
too cold
too cold
harvest
harvest
harvest
harvest
harvest
indoors
plant out
harvest
Seasoned
Stagger your sowings

Succession planting

A row of edamame ripens all at once and gives one big harvest, then it is done. To keep edamame coming, plant several small batches a week or two apart through the warm season instead of all at once. Stop about three months before your first fall frost so the last batch has time to finish. In very hot areas, skip the hottest weeks and plant for spring and fall.Edamame ripens all at once, so a single sowing gives one concentrated harvest rather than a long pick. To spread the supply, sow several small batches a week or two apart through the warm season, each maturing in turn, and stop about 90 days before your first fall frost so the last sowing finishes. In the hottest regions, skip the peak of summer and sow for spring and fall sets instead.

Every 2 weeks · sow a short new rowUp to 12 sowings a seasonToo hot to sow midsummer
Jan
Feb
Mar
Apr
May
Jun
Jul
Aug
Sep
Oct
Nov
Dec
sow
harvest
keep sowing
too hot
continuous harvest
The season, mapped

Seed to garden

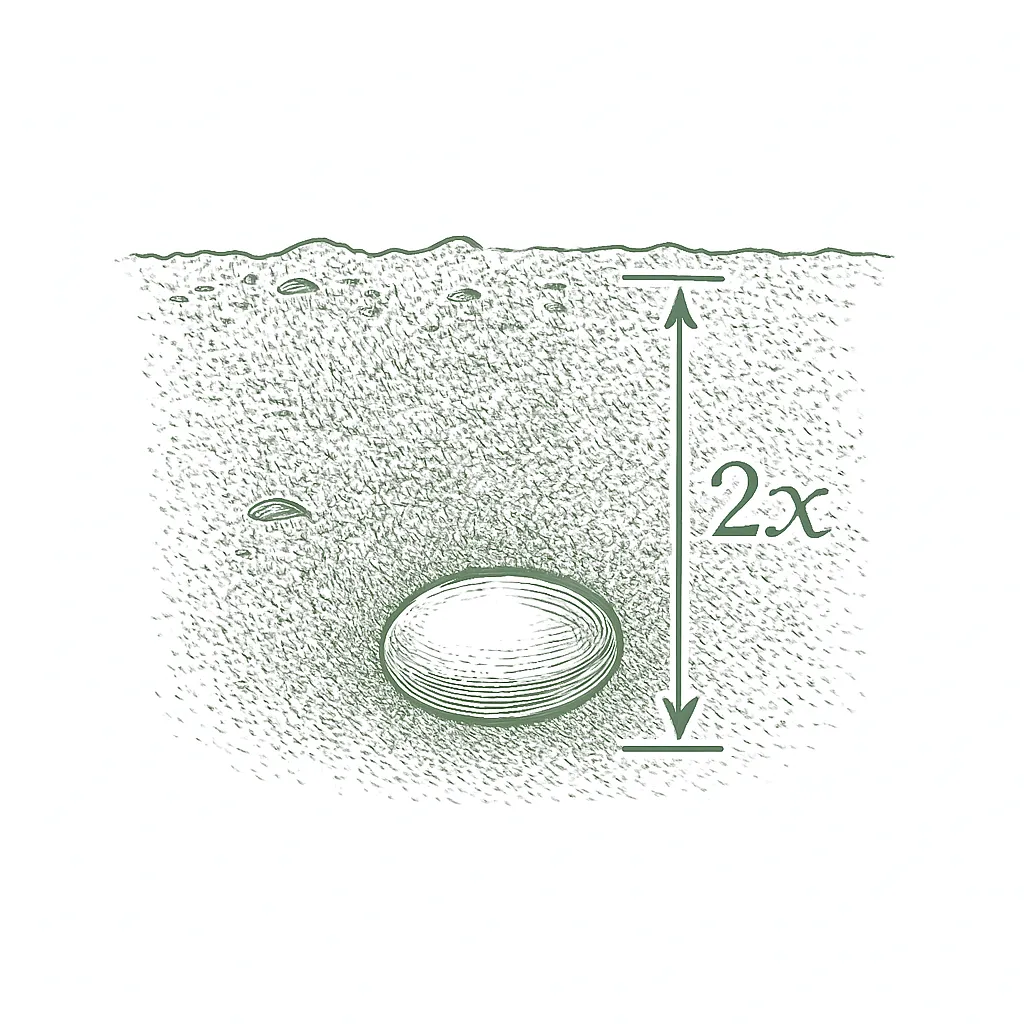
Plant edamame seeds right where they will grow, after the last frost once the soil has warmed to at least 60 to 65°F. Edamame does not like its roots disturbed, so skip starting it indoors. Plant about 1 to 1.5 inches deep, and coat the seed with a soybean inoculant if you have it.Direct-sow after the last spring frost, once the soil has warmed to at least 60 to 65°F. Edamame resents root disturbance and germinates quickly in warm soil, so transplanting offers no advantage. Sow about 1 to 1.5 inches deep, and inoculate the seed with a soybean-type (Bradyrhizobium japonicum) inoculant, especially where soybeans have not grown before.
  1. 01
    Sow outside
    Mar 15 - Jun 30
  2. 02
    First harvest
    From Jul 1
    75-100 days from sowing
Start method
Direct
Soil temp
60-85°F
From seed to fruit

The growing journey

Stage 01 · Germination
01
Germination
Days 0-14 · current stage
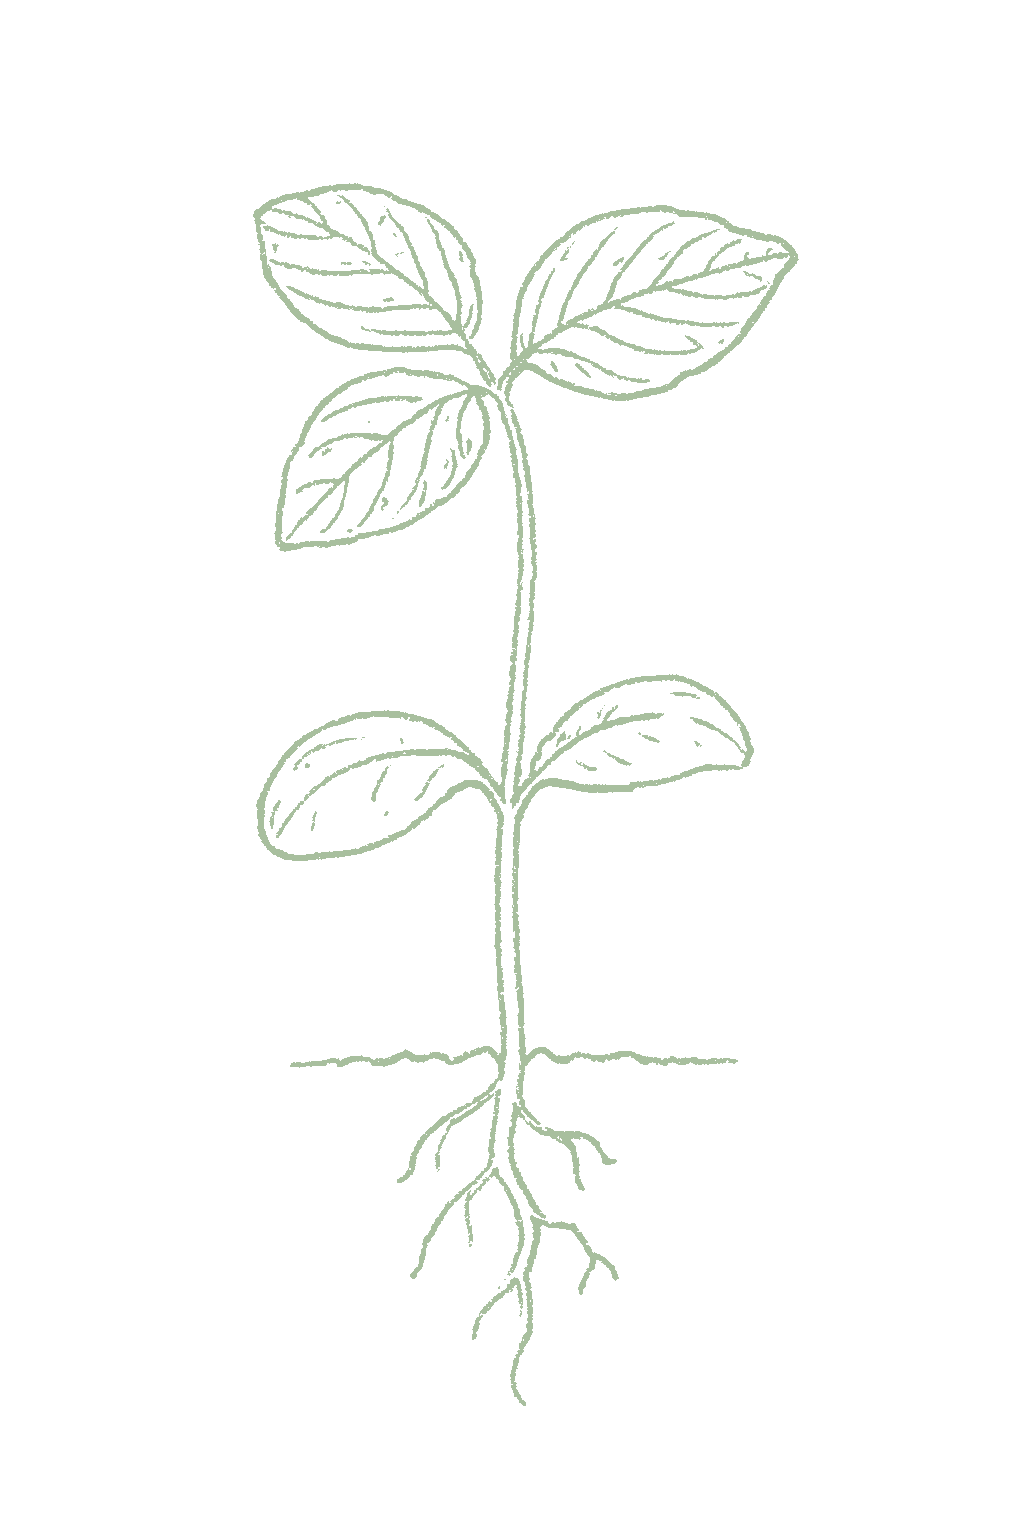
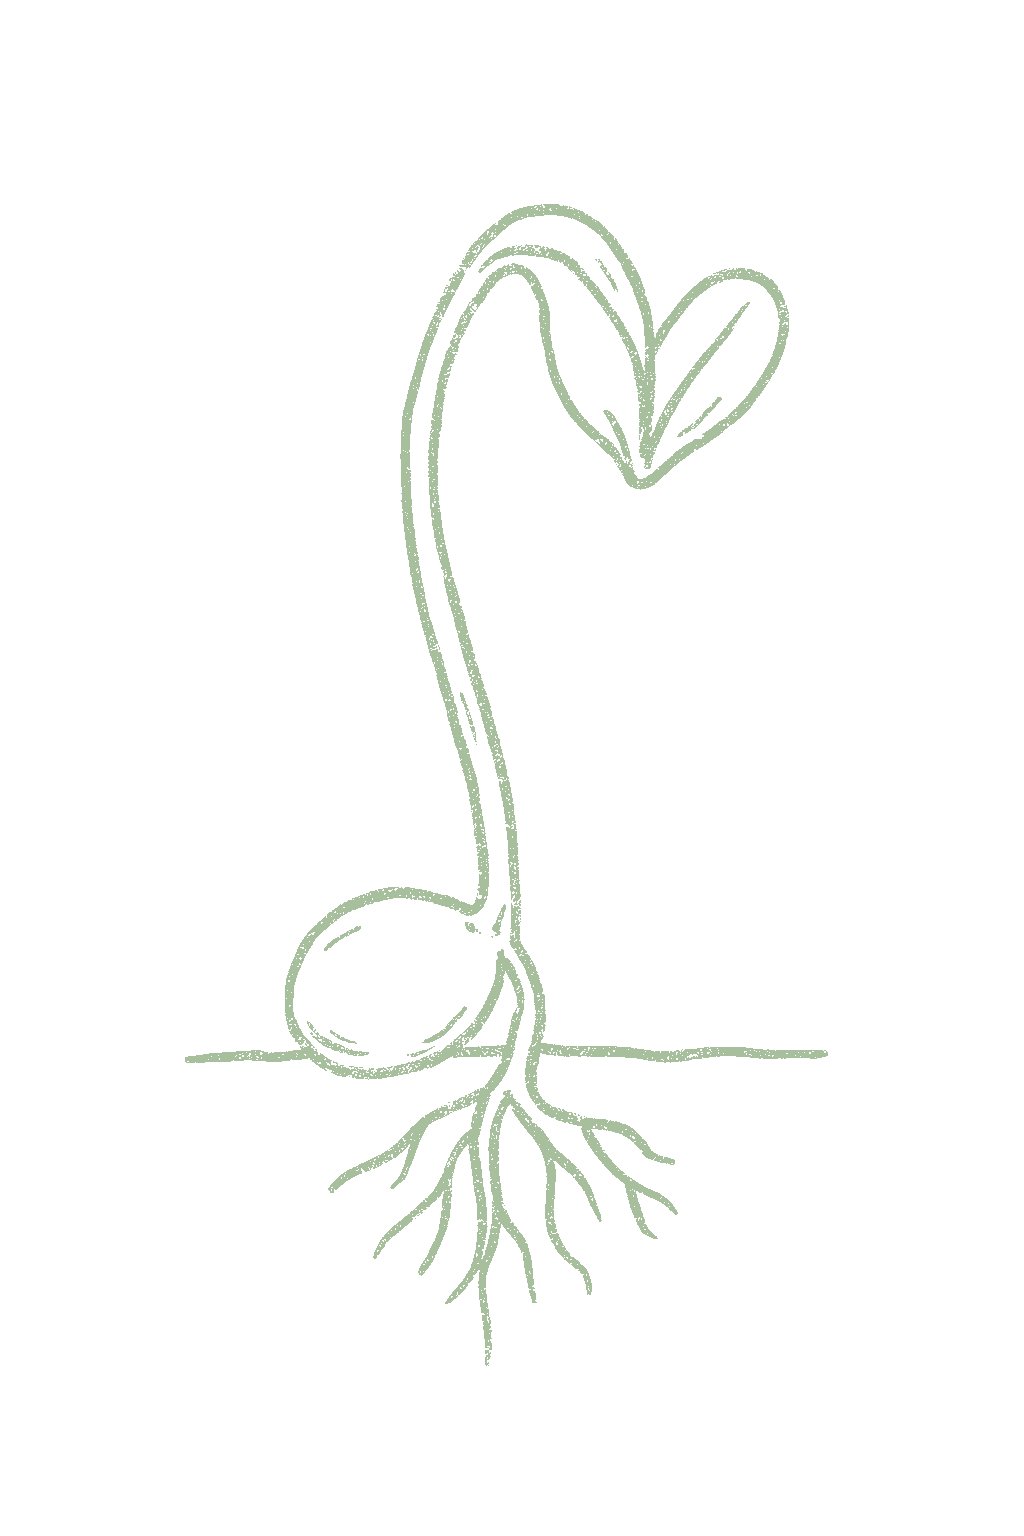
Bare soil for about a week, then a stem pushes up through the surface, pulling two thick first leaves up with it. Edamame seed is large and needs warm soil; it comes up well only once the soil has warmed to about 60 to 65°F and rots in cold, wet ground.Bare soil for about a week, then the seedling shoulders up through the surface, dragging its two thick seed leaves (cotyledons) up with it. Edamame seed is large and needs warm soil: it germinates well only once the soil has warmed to about 60 to 65°F, and it rots in cold, wet ground. A slow, cold start invites seed rot and seedcorn maggot.
Wait to plant until the soil has warmed to at least 60 to 65°F, after the last frost. There is no reward for planting edamame early, only rotted seed. Plant about 1 to 1.5 inches deep in moist, well-drained soil, coat the seed with a soybean inoculant if you have it, and do not keep the bed soggy.Sow only once the soil has warmed to at least 60 to 65°F, after the last frost; there is no advantage to planting early. Sow about 1 to 1.5 inches deep into a moist, well-drained bed, inoculate the seed with a soybean-type inoculant where soybeans are new to the ground, and avoid soaking the bed, which suffocates the seed and feeds root rot.
FROM PLANT · Edamame seeds are big and rot in cold, wet soil. Wait until the soil has warmed to at least 60 to 65°F after the last frost, because planting early just leads to rotted seed and missing plants. Seed planted in warm soil catches up fast, so there is nothing to gain by rushing.Edamame seed is large and rots in cold, wet ground. Wait until the soil is at least 60 to 65°F after the last frost before sowing, since early planting only invites poor stands, seed rot, and seedcorn maggot. There is no head start to be had: seed sown into warm soil quickly overtakes seed sown into cold soil.
FROM PLANT · Edamame makes its own nitrogen, but it needs the soybean kind of inoculant (called Bradyrhizobium japonicum), not the regular bean and pea inoculant, which is a different bacteria. If soybeans have never grown in your bed, coat the seed with a soybean inoculant to help. The regular bean inoculant will not do the job.Edamame fixes its own nitrogen, but only with the SOYBEAN bacterium Bradyrhizobium japonicum, which is a different species from the all-purpose bean and pea inoculant. Where soybeans have not grown before, coating the seed with a soybean-specific inoculant improves nodulation; the generic legume inoculant will not work for soybeans.
02
Seedling
Days 10-25
The two seed leaves open, then the real leaves appear, first a single pair, then the three-leaflet leaves soybeans are known for. Once they are up and the weather is warm, they grow fast. This young stage is when cutworms, beetles, and rabbits can do the most damage.The cotyledons open and the first true leaves appear: a pair of single leaflets, then the soybean's characteristic three-part (trifoliate) leaves. Growth is quick once the plant is up and the weather is warm. Young seedlings are the stage most vulnerable to cutworms, bean leaf beetle, and rabbits.
Keep the soil evenly moist and pull weeds early, since small plants do not compete well with them. Weed and hoe shallowly, since the roots are close to the surface. You do not need to thin if you planted at the right spacing, but watch for rabbits and cutworms that can chew off seedlings.Keep the bed evenly moist and weed-free; young edamame competes poorly with weeds. Cultivate shallowly, since the roots run near the surface. There is no thinning if sown at final spacing of 2 to 4 inches; protect the stand from rabbits and cutworms, which can clip seedlings overnight.
FROM PLANT · Pull weeds early, but weed shallowly. Young edamame does not compete well with weeds, yet the roots are near the surface, so digging deep hurts the plant more than the weeds. Pull by hand and hoe lightly near the row, and watch for rabbits and cutworms on the young plants.Weed early and cultivate shallowly. Young edamame competes poorly with weeds, but the roots run close to the surface, so deep hoeing does more harm than the weeds. Hand-pull and scuffle-hoe lightly near the row through the first few weeks, and watch for rabbits and cutworms on the tender seedlings.
03
Leafy growth
Days 20-55
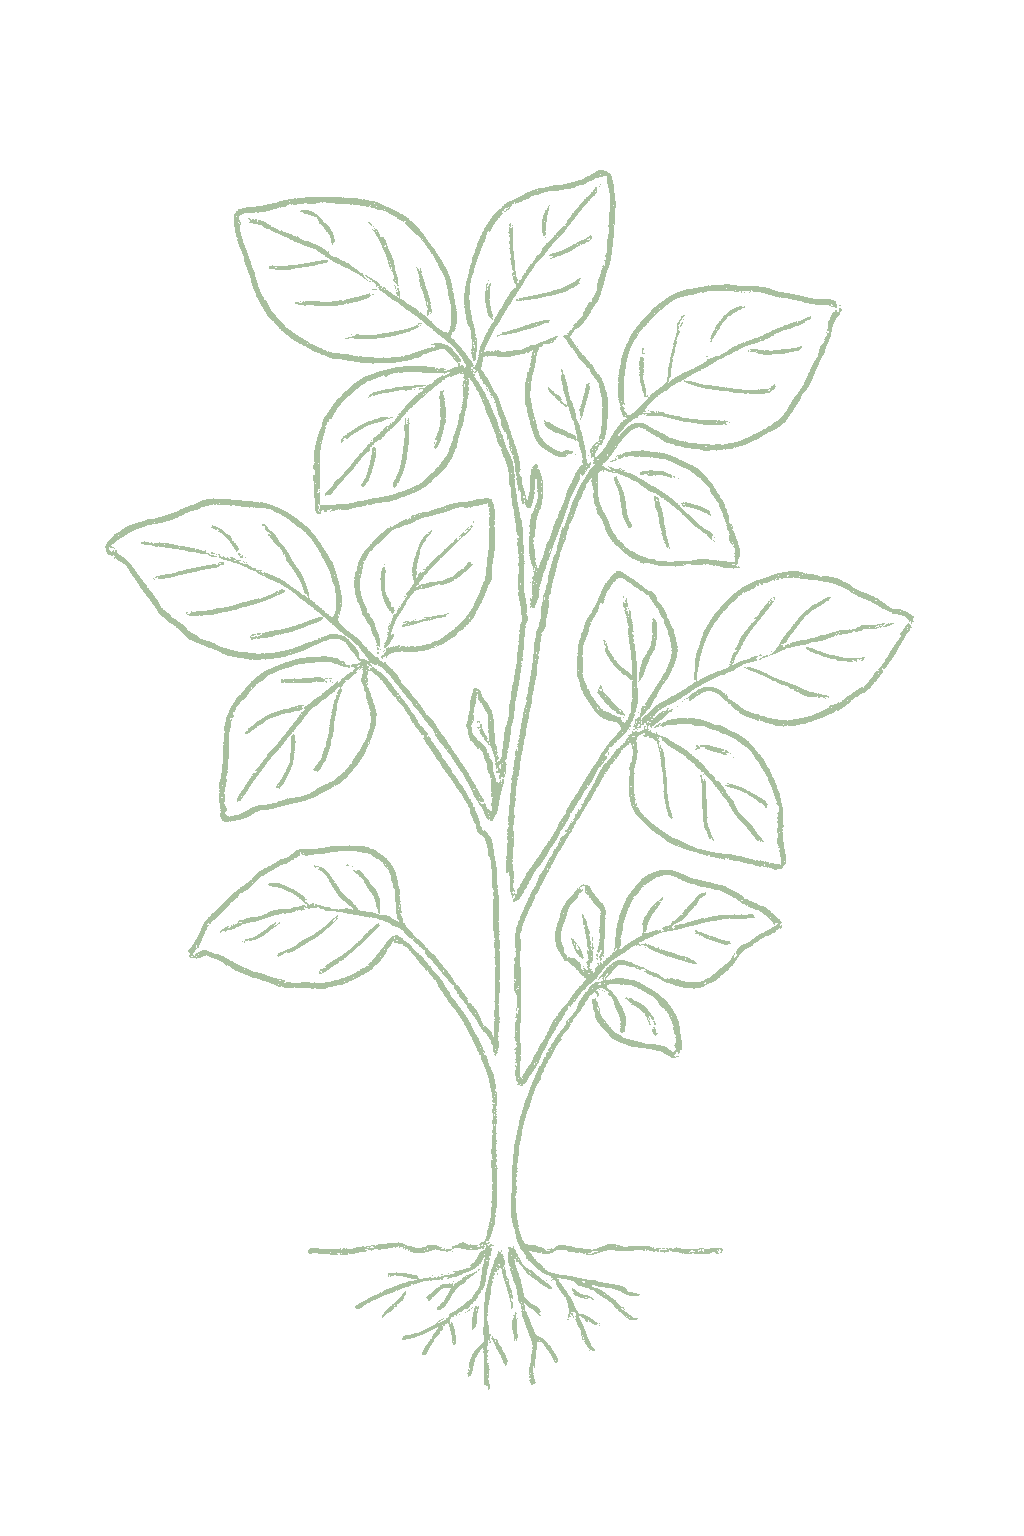
The plant grows bushy and fills out to its full size, usually about three feet tall and standing on its own without support. Edamame makes much of its own food (nitrogen) at this stage, so you want healthy green growth, not huge dark leafy plants, which usually mean too much fertilizer and fewer pods.Steady, bushy growth as the plant fills out to its full height of about three feet, sturdy and upright with no need for support, building the canopy that will carry the pods. The plant is fixing much of its own nitrogen now through root nodules, so vigorous green growth, not dark, overfed lushness, is the goal.
Keep the watering steady and do not add fertilizer now. Edamame needs very little, and extra just gives you big leafy plants with fewer pods. Keep the plants from getting crowded so air moves through them.Hold steady, even moisture and resist the urge to feed. Edamame needs little nitrogen, and adding more now pushes leafy growth at the expense of pods. Keep the rows open for airflow to hold off the foliar diseases that come on in humid weather.
FROM PLANT · Do not add nitrogen fertilizer now. Edamame makes much of its own from the air, and extra fertilizer just gives you big leafy plants with fewer pods. A little balanced fertilizer or compost mixed in before planting, plus a soybean inoculant on the seed, is all it needs.Hold off on nitrogen. As a legume, edamame fixes much of its own through root nodules, and extra nitrogen now drives leafy growth at the expense of pods. A little balanced fertilizer or compost worked in before sowing, plus a soybean inoculant on the seed, is all the crop needs.
04
Flowering
Days 40-70
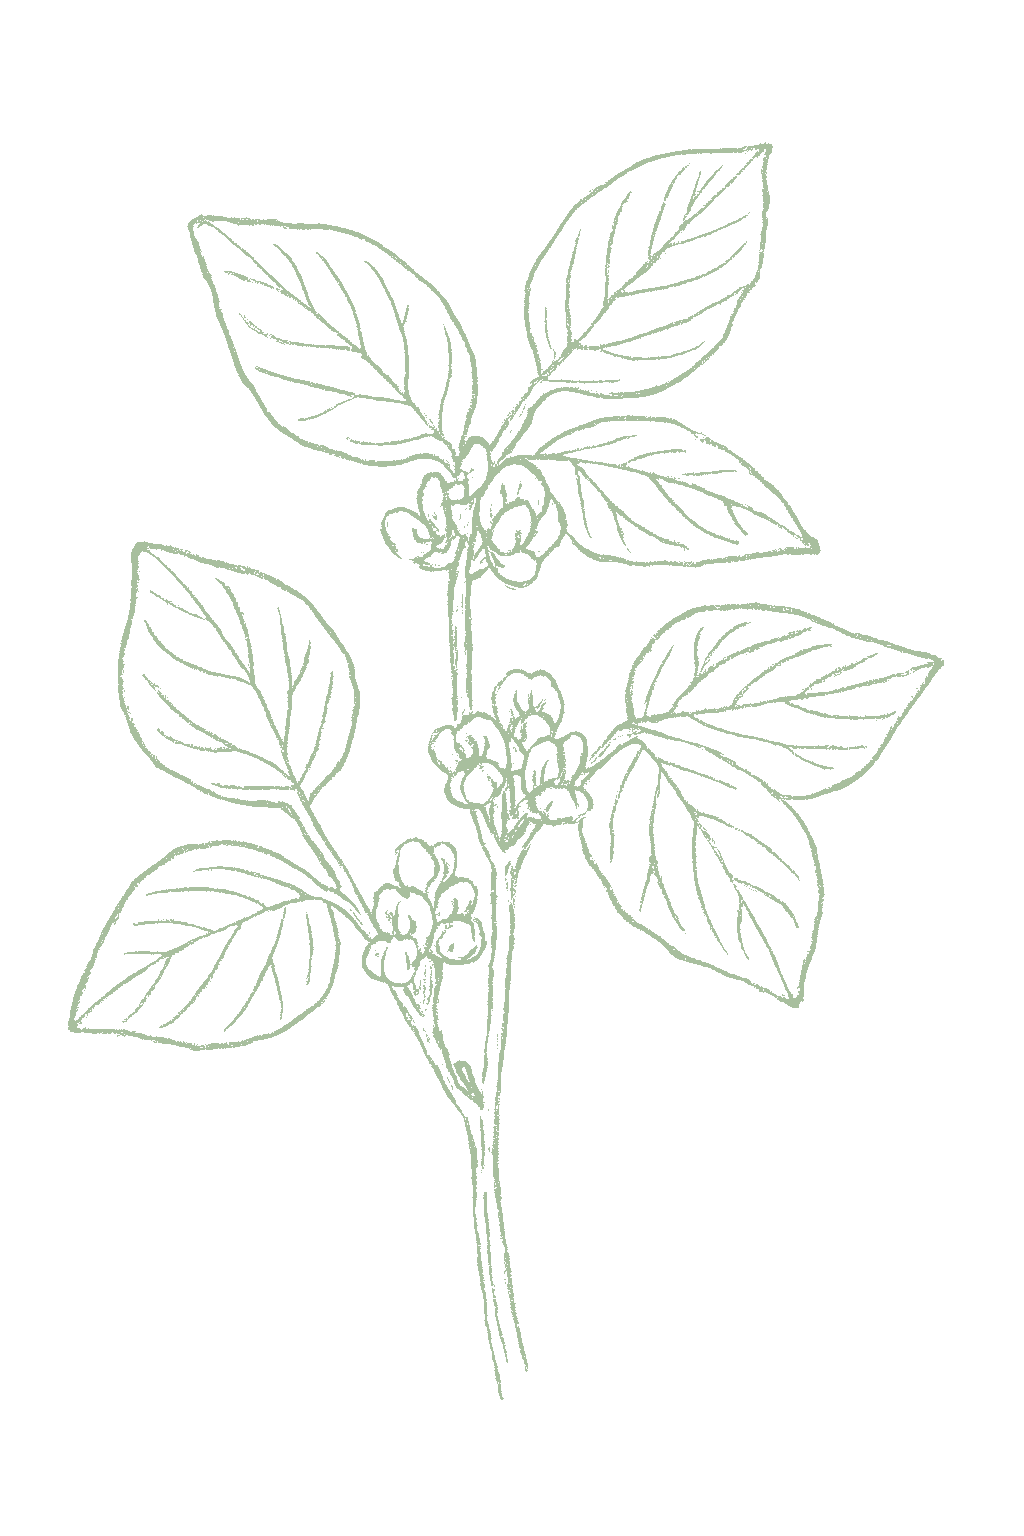
Small white or purple flowers open along the stems. Soybeans flower partly in response to the shortening days of late summer, which is why the right variety for your area matters. This is an important time for water: if the plants dry out, or in extreme heat above about 95 to 100°F, the flowers can drop without setting pods.Small white or purple flowers open in the leaf axils along the stems. Soybean is a short-day plant, so flowering is triggered by shortening days as much as by age, which is why matching the variety's maturity to your latitude matters. This is a moisture-critical stage: drought now aborts blossoms, and sustained extreme heat above roughly 95 to 100°F can drop flowers and small pods.
Keep the water steady and generous while the plants flower, because dry soil now means fewer pods. Water the soil, not the leaves. In a serious heat wave water deeply beforehand; edamame handles normal summer heat well, but extreme heat can still drop some flowers.Keep moisture steady and ample through bloom; water stress here directly cuts the crop. Avoid overhead watering on the dense canopy. In an extreme heat wave, water deeply ahead of time; edamame tolerates ordinary summer heat far better than snap beans, but sustained extremes still abort some flowers.
FROM PLANT · Keep the water steady and generous while the plants flower and set pods. Flowering and pod-filling are the times edamame most needs water, and letting it dry out now means fewer pods. Water the soil in the morning, not the leaves, to keep disease down.Keep moisture steady and ample through bloom and pod set. Flowering and pod fill are the moisture-critical stages, and water stress now aborts blossoms and thins the set. Water at the soil in the morning, not overhead, to keep the dense canopy dry and limit foliar disease.
05
Pod fill
Days 55-90
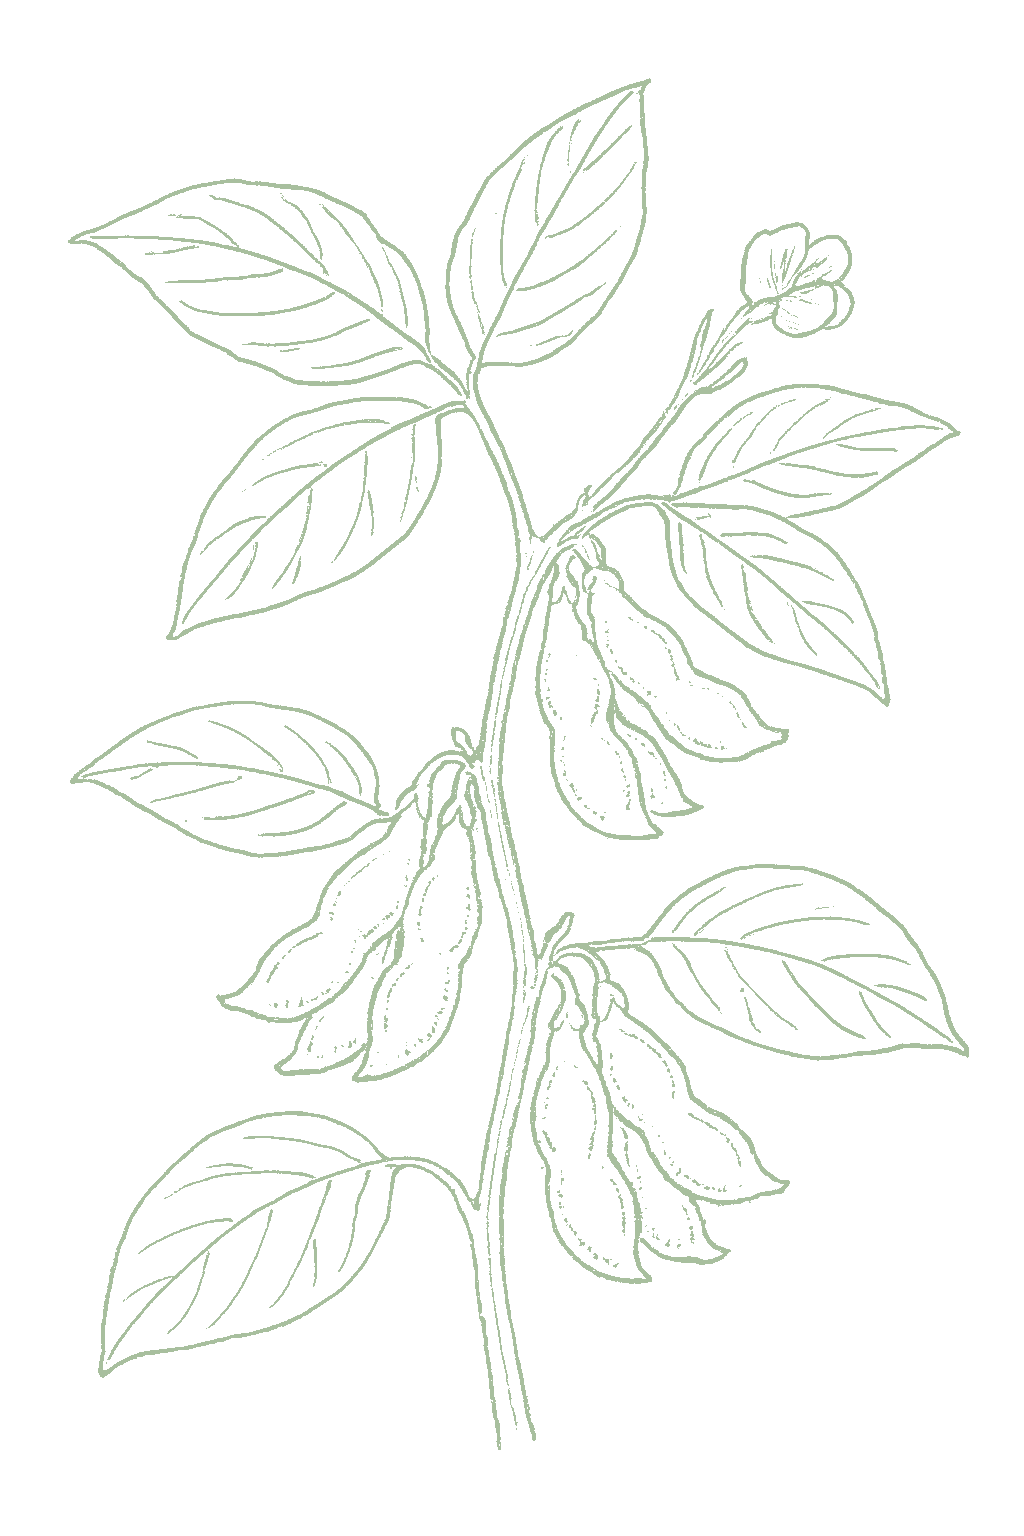
Flat young pods form where the flowers were and then plump up fast as the beans inside swell. You pick edamame when the pods are bright green and plump and the beans nearly touch inside but are still tender, before they get hard or start to yellow. Steady water matters most now.Flat young pods form where the flowers were, then plump rapidly as the seeds swell to fill them. Edamame is picked at the R6 stage, when the bright green pods are plump and the beans inside nearly touch but are still tender and sweet, not yet hard or yellowing. This and flowering are the moisture-critical stages; drought here gives thin, poorly filled pods.
Keep the soil evenly moist while the pods fill, since this is what the steady watering was for. Watch the pods as they plump up, because the whole plant ripens together and the crop will be ready all at once over just a few days.Maintain even moisture right through pod fill, the payoff stage for steady watering. Watch the pods closely as they plump: because the whole plant matures together, the crop comes ready over just a few days, so this is when you decide the timing of a single concentrated harvest.
FROM PLANT · Start checking the pods every day as they fill out. Unlike green beans, edamame ripens all at once, so the best picking window is short, only about four to ten days, when the pods are plump and green and the beans nearly touch inside but are still tender. Left longer, the beans get starchy and dull.Start watching the pods daily as they plump. Because the whole plant matures together, edamame does not give a long, forgiving pick like green beans: the prime window is only about four to ten days, when the pods are plump and green and the beans nearly touch but are still tender. Picked past that, the beans turn starchy and the color dulls.
06
Harvest
Days 75-100
Plump, bright green pods with the beans nearly filling them and almost touching inside, still tender and sweet. The whole plant ripens at the same time, so the pods are ready together, and the best window is short, about four to ten days, before they get tough and starchy and start to yellow.Plump, bright green pods with the beans filling about 80 to 90 percent of the pod and nearly touching inside, still tender and sweet. The whole plant ripens together, so most pods reach this stage within a few days of one another, and the prime window is short, roughly four to ten days before the pods toughen, the beans turn starchy, and the color dulls toward yellow.
Harvest the whole plant at once when most of the pods are plump and green: pull up the plant and strip off the pods, or pick all the ready pods in one go. Pick in the cool morning. The window is short, so check every day as the pods fill and do not wait too long. Cook or freeze them the same day for the best flavor.Harvest the whole plant at once when most pods are plump and green: pull or cut the plant and strip the pods, or pick all the ready pods in one or two passes. Pick in the cool morning. Because the window is short and the quality drops fast once the beans pass their peak, check daily as the pods plump and do not wait. Cook or freeze the same day for the best flavor.
FROM PLANT · Harvest the whole plant at once. Since edamame ripens all together, the easiest way is to pull up the plant when most pods are plump and green and strip off the pods, instead of picking many times. Cook or freeze them the same day, and remember edamame must be cooked, never eaten raw.Harvest the whole plant in one go. Because edamame ripens together, the easiest method is to pull or cut the plant when most pods are plump and green and strip the pods off, rather than picking over many times. Cook or freeze the same day, and remember the beans must be cooked, since soybeans are not eaten raw.
Beginner
Know your soil

Your soil

Identify yours

Not sure what soil you have? Grab a small handful of damp soil from your garden bed and squeeze it. If it crumbles apart easily, it's sandy. If it holds together but breaks when you poke it, it's loam (what most vegetables want). If it stays in a hard, slippery ball, it's clay.

What this crop wants

Edamame likes loose, fertile soil that drains well, with some compost worked in. It grows best in full sun and warm soil. Like other beans, edamame seed rots in cold, soggy ground, so good drainage matters and you wait for the soil to warm before planting. If water sits on your bed a long time after rain, mix in compost or plant on a raised bed first.

If your soil doesn't match

You have sandy soil

Mix 2-3 inches of compost into the top 6 inches of your bed before planting. Compost holds moisture (which sandy soil drains too fast) and adds the nutrients sandy soil tends to lack. Repeat each season. Compost breaks down over time.

You have clay soil

Mix 2-3 inches of compost AND a few inches of coarse sand or perlite into the top 6 inches of your bed. The compost feeds the plants; the sand breaks up the clay so air and water can move through. Don't add sand without compost. It can compact like concrete.

Containers and raised beds

If amending your soil sounds like too much work, or if your soil is heavy clay, full of rocks, or contaminated, build over it. A raised bed at least 12 inches deep filled with a 50/50 mix of compost and sandy loam gives you ideal growing soil with no battles. A 5-gallon container with quality potting mix does the same for one plant at a time. Both bypass your native soil entirely.

Learn more about your soil
The specs

Care guide

The numbers that matter, at a glance.

Sunlight
Full sun · 6-8 hrs/day
Water
moderate
Spacing
2 to 4 inches
Soil
loam, sandy loam
Days to maturity
75-100 days from transplant
Soil pH
6 to 6.8
Container OK?
Yes · 5+ gal pot
Germination temp
60-85°F
In a pot

Yes, 5 gallons and up

Edamame grows in a pot at least 5 gallons and 8 inches deep, but one plant gives only a handful of pods, so plant several seeds across a wide container and expect a small harvest. A big bed gives a far better return than pots.Edamame will grow in a container of at least 5 gallons and 8 inches deep, but it is a low-yielding-per-plant crop (about a pound of pods per foot of row) that matures all at once, so a pot returns only a small one-time pick. Plant several seeds across a wide container for a worthwhile handful; growers who want a real harvest are better served by an in-ground block.

Pot size
5 gallons and up
Mature size
3 feet tall
Drainage
Drainage holes are a must. Skip the gravel layer. Empty any saucer after watering so the pot never sits in standing water, which rots edamame roots.
Watering
Pots dry out faster than garden beds, so check the soil daily in warm weather and water when the top inch is dry.Containers dry faster than beds; monitor daily in heat and water when the top inch dries.
Depth and shape
At least 8 inches deep. A wide container suits edamame better than a deep, narrow one. The plants are bushy and shallow-rooted and crop best grown several together, so surface area matters more than depth. A broad pot lets you space several plants for a worthwhile one-time pick.
Self-watering pot
Yes. A self-watering container suits edamame well, smoothing out the steady moisture it wants through pod fill while avoiding the soggy roots it dislikes.
Mix
A well-draining potting mix; avoid native garden soil, which compacts and drains poorly in containers. Blend in compost for baseline fertility and tilth; edamame needs little added nitrogen but does want a soybean inoculant on the seed.
Feeding
Feeding needs stay low in containers; compost in the mix plus a seed inoculant usually suffices.
One to try

EnvyAn early, short-season green edamame on compact two-foot plants; a dependable choice for northern gardens and short summers where a later variety would not finish before frost.

2 more compact types

Midori GiantA popular large-podded green edamame with big, sweet beans and good yields; widely grown and a reliable mid-season standard.

BeSweet 2032A sweet, productive green edamame valued for flavor and a concentrated set that makes the single harvest easy to time.

Pot safety

Ask what your balcony or roof can carry

A balcony or roof can only hold so much weight. Before you set heavy pots there, ask a building architect what it can safely carry.Illinois Extension's guidance is to consult a building architect about weight limits before placing heavy pots on a balcony or rooftop garden. It gives no weight figure.

Never grow food in a container with anything toxic in it

Many kinds of containers can be used. Whatever you choose, keep anything toxic out of it, especially if you are growing food.Colorado State accepts nearly any container material but warns against using a container that holds toxic materials, especially for edible plants. Illinois adds that a vegetable container should be free of chemicals toxic to plants or people, and urges caution with treated lumber when growing food. If you cannot account for what a repurposed container once held, that alone is a reason to keep food out of it.

Secure hanging containers well

Fasten hanging baskets and window or rail boxes securely. Think about what is below them too, since they can drip on people or things underneath.Illinois Extension asks growers to secure hanging containers well and to think through the safety issues of hanging them. Placement matters too, since a hanging container can drip onto people or belongings below.

Soil chemistry

Soil pH for edamame

Preferred
6 to 6.8
Tolerated
5.8 to 7

Edamame grows best in soil from about 6.0 to 6.8, which is slightly acidic to neutral. It does poorly in strongly acidic soil, so if a soil test reads low, mix in some lime before planting. Most garden beds are already in a good range.Aim for a soil pH of about 6.0 to 6.8, the band where soybean nodulates and yields best. Rutgers gives an ideal of 6.0 to 6.5 for edamame; below about 6.0 nitrogen fixation falls off, and above roughly 7.0 the crop is more prone to iron and manganese problems. A soil test is the reliable way to confirm pH and fertility before the season starts, and lime an acid plot the season before sowing.

Verified · 2 sources View
Steady hand on the hose

Watering

When & how much
Frequency
Water regularly, about an inch a week, so the soil stays evenly moist but not soggy. Pay closest attention while the plants are flowering and the pods are filling out.Regular and even through the season, about an inch of water a week from rain or irrigation, keeping the soil moist but never waterlogged. The need peaks during flowering and pod fill, when moisture stress directly cuts the set.
Amount
Water deeply enough to wet the soil about 6 inches down. Deep, less frequent watering beats a daily light sprinkle.Enough to wet the root zone roughly 6 inches down; watering deeply and less often builds deeper roots than frequent light sprinkles.
Method
Water the soil, not the leaves, and do it in the morning so the plants dry off during the day. Wet leaves, especially overnight, help spread disease.Water at the soil level in the morning so the foliage dries before evening; this limits the foliar diseases edamame is prone to in humid weather.
Signs of trouble
Too much water
If the soil is wet but the plants still wilt or the lower leaves turn yellow, you may be overwatering. Soggy soil rots the roots.Yellowing lower leaves, wilting despite wet soil, and stunted growth point to waterlogged roots and the root rots edamame is prone to in cold, wet ground.
Too little water
If plants dry out while flowering, they drop their flowers and the pods fill poorly. Keep the water steady at that stage.Drought stress during and after flowering aborts blossoms and produces small, poorly filled pods, the single biggest avoidable hit to an edamame crop.
Feeding rhythm

Feeding

Frequency
low
Type
balanced pre-plant, soybean inoculant, little to no nitrogen
When to start
work a little balanced fertilizer or compost into the bed before sowing; inoculate the seed

Edamame makes much of its own food from the air, so it barely needs fertilizer. Mix a little compost or balanced fertilizer into the bed before you plant and that is enough. The useful step is to coat the seed with an inoculant, but it must be the soybean kind (Bradyrhizobium japonicum), not the regular bean and pea inoculant, since soybeans use a different bacteria. Too much fertilizer gives you big leafy plants but fewer pods.Edamame is a light feeder. As a legume it fixes much of its own nitrogen through root nodules, so heavy nitrogen drives leafy growth at the expense of pods. Without a soil test, work a little balanced fertilizer or compost into the bed before sowing; that is usually all edamame needs. The one feeding step that matters is the inoculant: edamame needs the SOYBEAN-specific bacterium Bradyrhizobium japonicum, not the all-purpose bean and pea inoculant, to nodulate and fix nitrogen, and it helps most where soybeans have not grown before. Avoid high-nitrogen feeds, which delay flowering and cut pod set.
N · P · K = 5-10-10

A balanced vegetable fertilizer like 5-10-10 mixed into the bed before planting is plenty.A balanced 5-10-10 worked in before sowing if no soil test is available; skip extra nitrogen, which edamame supplies itself, and inoculate the seed with a soybean-type inoculant.

Try 5-10-10 pre-plant
Who grows well together

Companion planting

Edamame gets along with most warm-season vegetables and, like other beans, leaves nitrogen in the soil for the next crop. It is a classic Three Sisters partner with corn and squash, and a good neighbor to cucumbers and potatoes. The pairing to avoid is planting edamame right next to onions or garlic. As a nitrogen-fixing legume, edamame leaves the soil richer for what follows and sits comfortably among the warm-season crops grown in the same window. It is a traditional Three Sisters partner with corn and squash and a compatible neighbor for cucumbers and potatoes. The long-standing caution is to keep edamame away from the alliums (onion, garlic), which are widely held to suppress legumes by interfering with the root bacteria they depend on to fix nitrogen.

Other
Corn
The traditional Three Sisters partner; the planting has been grown together for generations and the edamame's nitrogen helps the hungry corn.Corn is the classic Three Sisters partner for a bushy soybean like edamame. Edamame does not climb the corn the way pole beans do, so the benefit is mostly foliage diversity and the legume nitrogen helping the heavy-feeding corn over the season. Give the corn room so it does not shade the lower edamame, which needs full sun to fill its pods. Traditional
Squash
The third Sister; its broad leaves shade the soil and keep weeds down around the edamame.Squash rounds out the Three Sisters trio. Its sprawling leaves shade the soil, hold moisture, and suppress weeds around the edamame, while the varied foliage heights make it harder for pests to lock onto one crop. This is a soil-and-space benefit; give the squash room so it does not swamp the lower edamame. Traditional
Cucumber
An easy warm-season neighbor that shares edamame's sun, warmth, and water needs.Cucumber and edamame coexist comfortably: similar warm-season timing, sun, and water needs, with complementary growth habits, and the edamame's nitrogen fixation lightly benefits the cucumber as a moderate feeder. It is a compatibility pairing rather than a strongly protective one, so expect easy cohabitation more than active pest control. Well-grounded
Keep apart from
Onion Onions and other alliums are traditionally kept away from beans and soybeans, which are said to grow poorly near them.Onions next to edamame is the better-grounded of the 'bad' pairings. Alliums release antibacterial sulfur compounds widely held to interfere with the nitrogen-fixing bacteria on legume roots, the bacteria edamame relies on, so growth tends to stall near onions. Keep them in separate parts of the bed. The useful corollary is that a legume grown before an allium crop leaves the soil better for it. Well-grounded
Garlic Like onions, garlic is a traditional bad neighbor for beans and soybeans.Garlic acts on edamame the way onions do. As an allium it gives off antibacterial sulfur compounds held to disrupt the nitrogen-fixing bacteria on legume roots, slowing the plants. Treat garlic and edamame as bed-mates to keep apart, and use the legume-then-allium rotation to your advantage instead. Well-grounded
Provenance tagged inline · see methodology for the labeling system Key
Harvest signals

When to pick

Edamame is ready when the pods are plump and bright green and the beans nearly touch inside but are still tender, before they get hard or turn yellow. The whole plant ripens at the same time, so harvest it all at once: pull up the plant and strip off the pods. The best window is only about four to ten days, so check every day as the pods fill and cook or freeze them the same day.Harvest edamame at the R6 stage, when the pods are plump and bright green with the beans filling about 80 to 90 percent of the pod and nearly touching inside, still tender and sweet rather than hard or yellowing. Because the whole plant ripens together, harvest it all in one or two passes, pulling or cutting the plant and stripping the pods. The prime window is short, only about four to ten days, so check daily as the pods plump and cook or freeze the same day.

Yield

What to expect

Each edamame plant gives only a handful of pods, all at once, which is why it is grown in rows or blocks rather than one at a time. A rough guide is about a pound of pods per foot of row, and a dozen plants is plenty for a family of four.Edamame yields modestly per plant, which is why it is grown in blocks or rows rather than singly. Missouri Extension puts a home crop at roughly a pound of pods per foot of row, and notes a dozen plants will supply more than enough pods for a family of four. A single plant gives only a handful, all at once.

Unlike green beans, edamame ripens all at once, so a planting gives one big harvest over just a few days rather than picking for weeks. To spread it out, plant several small batches a week or two apart so they ripen in turn, and freeze what you cannot eat fresh.Unlike green beans, edamame ripens all at once: the whole plant, and most of a planting, comes ready over just a few days, so there is no long picking season. The way to stretch the supply is to make several small succession sowings a week or two apart, each maturing in turn, and to freeze the surplus from each one-time harvest. Edamame is a great first-year crop. The seed is big and comes up strongly in warm soil, the plants stand on their own without a trellis, and they ask little beyond steady water. The main things that affect your harvest are choosing the right variety for your area, planting in warm soil, keeping the water steady while it flowers and fills pods, and picking in the short window when the pods are plump.Edamame is a rewarding and forgiving first-year crop: large seed that comes up strongly in warm soil, sturdy self-supporting plants that need no trellis, and few demands beyond steady water. The main levers on yield are matching the variety's maturity to your latitude, sowing into warm soil, keeping moisture steady through flowering and pod fill, and catching the short harvest window.

What changes yield
Variety maturity matched to latitude (soybean is short-day; a mismatched variety flowers too early or too late and yields poorly)Warm soil at sowing (edamame germinates poorly below about 60 to 65°F and the seed rots in cold, wet ground)Steady moisture through flowering and pod fill (the moisture-critical stages; drought here aborts blossoms and thins pods)Catching the short harvest window (the whole plant ripens together, and pods pass from prime to starchy in a few days)
Verified · 1 source View
Pick your variety

Recommended varieties

These are edamame, the kind of soybean you eat as green pods, not the dry grain soybean. The key is to pick a variety that matures in your area: soybeans flower based on day length, so a variety from the wrong region may not make pods before frost. Choose an early type like Envy or Tohya in cool or short-summer areas, and a mid-season type in warmer regions. A local garden center or extension office can point you to a good match.These are vegetable soybean (edamame) cultivars, eaten as immature green pods, not the small dry grain soybean. The single most important choice is matching the variety's maturity to your latitude: soybean is a short-day plant, so a variety bred for the South will flower late and may not fill pods before frost in the North, while a northern early type rushed in the South may flower and mature too soon and yield little. Pick an early, short-season type (Envy, Tohya) in cold and short-summer regions and a mid-season type farther south, and lean on adapted regional recommendations.

Envy
An early, short-season green edamame on compact two-foot plants; a dependable choice for northern gardens and short summers where a later variety would not finish before frost.
Midori Giant
A popular large-podded green edamame with big, sweet beans and good yields; widely grown and a reliable mid-season standard.
BeSweet 2032
A sweet, productive green edamame valued for flavor and a concentrated set that makes the single harvest easy to time.
Tohya
An early, tender Japanese-type edamame with good flavor and a uniform set; suits cooler and shorter seasons.
Chiba Green
A vigorous green-seeded edamame with large pods and a clean, nutty flavor; a well-regarded mid-season pick.
Off the vine

Storing your harvest

Room temp
Do not leave edamame out on the counter. It loses its sweetness quickly, so cool it soon after picking. Always cook edamame before eating it; do not eat the beans raw.Not recommended. Edamame loses sweetness fast at room temperature as the sugars convert to starch, so cool it promptly after picking rather than holding it on the counter. Soybeans must be cooked before eating and are not eaten raw.
Fridge
Cool the pods right after picking, then keep them in the fridge in a loosely closed bag. They stay good for only a few days and get less sweet the longer they sit, so use them soon.Cool edamame immediately after harvest to shed field heat, then refrigerate in a perforated bag. It holds good quality for only a few days, near 32 to 40°F at high humidity; the sugars convert to starch over time, so use it sooner rather than later. Many growers cook or blanch it the day it is picked.
Freezer
Edamame freezes very well, which is the usual way to keep a big harvest. Blanch the pods in boiling water for three to four minutes, cool them, and freeze within a few hours of picking. Shell the beans out after cooking.Edamame freezes very well for longer storage and is the usual way to keep a one-time harvest. Blanch the pods in boiling water for three to four minutes, cool them, and freeze within a few hours of picking for the best quality; shell after cooking.
Verified · 2 sources View
When something goes wrong

Common problems

Pods came out tough and starchyPods tough, starchy, or yellowing
01 of 04
What happened The pods were picked too late, so the beans turned starchy and tough and the pods went from bright green to yellowish. This is the classic edamame mistake: the whole plant ripens at once over just a few days, and waiting even a week too long makes the beans mealy instead of sweet. It is a timing problem, not a disease.The pods were picked past their brief prime window, so the beans turned starchy and tough and the pods dulled from bright green toward yellow. This is the signature edamame mistake: unlike green beans, the whole plant ripens together over just a few days, and a crop left even a week too long passes from sweet and tender to mealy. It is a timing problem, not a disease. Next season Start checking every day once the pods fill out, and harvest the whole plant as soon as most pods are plump and green, before they yellow. Plant a few small batches a week or two apart so they do not all ripen together, and freeze what you cannot eat the day you pick.Start checking daily once the pods plump, and harvest the whole plant as soon as most pods are full and green with the beans nearly touching, before any yellowing. Stagger several small sowings a week or two apart so the crop does not all peak at once, and freeze the surplus the day you pick.
Seeds rotted or did not come upSeeds rotted or came up poorly
02 of 04
What happened The seed went into soil that was too cold and wet, so it sat there instead of sprouting and rotted, or came up thin and patchy. Edamame seed is big and sprouts well only once the soil warms to about 60 to 65°F, and a slow, cold start lets soil fungi and a seed-eating maggot get to it.The seed was sown into soil that was too cold and wet, so it sat without germinating and rotted, or came up as a thin, patchy stand. Edamame seed is large and germinates well only once the soil reaches about 60 to 65°F, and a slow, cold start invites soilborne root rots and seedcorn maggot. Next season Wait until the soil has warmed to at least 60 to 65°F after the last frost before planting, since there is no reward for planting edamame early. Plant in well-drained soil or raised beds instead of low, wet spots, plant about 1 to 1.5 inches deep, and do not keep the bed soggy.Wait until the soil has warmed to at least 60 to 65°F after the last frost before sowing; there is no benefit to planting early. Sow into well-drained ground or raised beds rather than low, wet spots, plant about 1 to 1.5 inches deep, and do not keep the bed soggy after sowing.
Big leafy plants but hardly any podsBig leafy plants but few pods
03 of 04
What happened The plants grew big, dark, and leafy but made few pods, usually from too much nitrogen, or because the variety was wrong for your area. Edamame makes its own nitrogen, so extra fertilizer just pushes leaves and delays pods, and a variety bred for a different region flowers at the wrong time and makes few pods.The plants grew large, dark, and leafy but set few pods, usually from too much nitrogen, or because the variety was a poor match for your latitude. As a legume, edamame fixes its own nitrogen, and extra fertilizer over-stimulates leaves and delays pod set; a soybean variety bred for a different latitude also flowers at the wrong time and yields poorly. Next season Skip the extra fertilizer: mix in just a little balanced fertilizer or compost before planting, coat the seed with a soybean inoculant, and let the plant make its own nitrogen. Pick a variety that is recommended for your area.Skip the nitrogen feeding: work in only a little balanced fertilizer or compost before planting, inoculate the seed with a soybean inoculant, and let the plant's own nitrogen fixation carry the crop. Choose a variety whose maturity is recommended for your latitude.
Flowers fell off or pods did not fillFlowers dropped or pods stayed flat
04 of 04
What happened The plants flowered but made few pods, or the pods stayed flat and empty, usually because the soil dried out or it got extremely hot while the plants were flowering. Edamame handles normal summer heat, but very hot spells above about 95 to 100°F, or dry soil at flowering, make it drop its flowers and small pods.The plants flowered but set few pods, or the pods stayed flat and empty, usually from drought stress or a spell of extreme heat during bloom and pod set. Edamame tolerates ordinary summer heat well, but sustained temperatures above roughly 95 to 100°F, or dry soil at flowering, cause the plant to abort blossoms and small pods. Next season Keep the water steady from the first flowers through pod-filling, and water deeply before a heat wave. In very hot areas, time the planting so the flowering misses the hottest part of summer, aiming for a late-spring or a fall crop instead.Keep moisture steady and ample from first flower through pod fill, and water deeply ahead of a heat wave. In the hottest regions, time the crop so flowering misses the peak of summer, sowing for a late-spring or a fall set rather than flowering in midsummer extremes.
Verified · 3 sources View
The usual suspects

Pests & diseases

Pests
Bean leaf beetle
P · 01
Symptoms Round holes chewed in the leaves, and worse, chewing on the pods themselves and even pods clipped off at the stem late in the season. The adult is a small reddish or yellowish beetle with a little black triangle behind its head and rows of black spots on its back.Round to irregular holes chewed through the leaves, and on the pods the more damaging sign: chewing on the pod wall and, late in the season, clipping at the base of the pod that drops it entirely. The adult is a small reddish to yellowish beetle with a black triangle behind the head and usually a row of black spots along each wing cover. Cause The bean leaf beetle, the main leaf-eating beetle of soybeans. The adults move into young plants in spring, and a summer generation feeds on the pods, which is the worst damage. It can also spread a virus from plant to plant.The bean leaf beetle (Cerotoma trifurcata), the most important leaf-feeding beetle of soybeans. Overwintered adults move into seedlings in spring, and a later summer generation feeds on the pods, which is the costly stage. It also transmits bean pod mottle virus. Organic treatment Edamame can lose a fair amount of leaf early without losing beans, so light leaf damage needs nothing. Pick beetles off in a small patch, and focus on protecting the pods later in the season, when the beetles do the real harm. A light row cover keeps them off, and an organic spray such as spinosad helps if they get bad.Edamame tolerates a lot of early leaf feeding without losing yield, so light damage on the foliage needs nothing. Handpick adults in a small patch, and protect the pods later in the season, when pod feeding and clipping matter; a floating row cover keeps beetles off, and an organic option such as spinosad or pyrethrin is labeled where pressure is heavy. Prevention Because the pod damage is the worst part, planting early so the pods finish before the summer beetles build up helps. Clear away the old plants after harvest and move your edamame each year, and cover young seedlings with a row cover if this beetle is a problem where you are.Since pod feeding is the costly damage, an early sowing that fills pods before the summer beetle generation peaks helps. Clear crop debris after harvest and rotate edamame away from last year's bed to remove overwintering shelter; a row cover protects emerging seedlings where the beetle is a known problem.
The control ladder

The ladder troubleshoots from the gentlest solution to the strongest. Start with the gentlest option and only move on when and if it doesn't work.

  1. Sow as early as your season allows, so the pods are filling before the summer wave of beetles builds. Pod feeding and the clipped pods that come with it are what cost you beans, so getting the crop through that stage ahead of the beetles is worth more than anything applied afterward. Beetle timing shifts from place to place, so treat the summer peak as a regional pattern to confirm.The costly injury is pod feeding by the summer generation, so a sowing early enough to carry pods through fill ahead of that peak removes the exposure instead of treating it. Emergence timing varies regionally, so confirm the local pattern rather than importing a date.

  2. Move edamame to a fresh bed rather than replanting where it grew last year. Adults get through the winter around the ground the crop occupied, so a change of bed takes that shelter away before a seedling is ever up.Siting the crop away from the previous season's bed strips out the shelter overwintered adults use, and it is the preventive that costs nothing once the garden plan allows for it.

  3. Once the last pods are off, take the spent plants and the litter under them out of the bed. What is left lying there over winter is cover for the beetles.Clearing crop debris after harvest closes the overwintering refuge; a stand left standing through winter preserves it, which is why this pairs with siting the crop elsewhere.

  4. A lightweight fabric cover laid over the seedlings keeps the spring beetles from reaching them as they emerge, and it is worth using where this beetle turns up most years. Later in the season the same cover keeps beetles off the pods, which is the damage that actually costs you beans.Cover excludes overwintered adults from emerging seedlings and, later, keeps the summer generation off the pods, which is where the loss sits. Worth deploying where the beetle is locally established rather than as a routine measure.

  5. In a small patch you can pick the beetles off as you find them. A fair amount of chewed leaf early on does not cost you beans, so put the effort into the pods later in the season instead of into ragged foliage.Hand-collection is practical at garden scale. Early foliar feeding sits inside what this crop tolerates, so the return on collecting rises once the beetles move onto the pods.

  6. Where the beetles get heavy on the pods, spinosad, a stronger organic spray, is a labeled option. Keep it for that situation rather than for chewed leaves, and read its cautions about bees before you mix any.Spinosad is a labeled organic material for heavy pressure here, and the trigger is pod feeding rather than defoliation. Its bee timing caution governs when the application can go on.

The bottom rungs are products with label rules: timing, pollinators, and days to wait before harvest. Before you spray →

Stink bugs
P · 02
Symptoms Pods that look fine on the outside but hold flat, shrunken, or stained beans inside, because the bugs poke through the pod and feed on the seeds. Stink bugs are shield-shaped insects about half an inch long, green or brown.Pods that look intact from outside but hold flat, shriveled, or discolored beans, because the bugs pierce the pod wall and feed on the developing seeds. Green and brown stink bugs are shield-shaped insects about half an inch long; their feeding scars the seed and can stop it filling. Cause Several kinds of stink bugs, including the green, brown, and brown marmorated stink bugs. They matter because they feed straight on the beans inside the pods while the pods are filling, which is the part you eat.The stink bug complex (green stink bug, brown stink bug, and the invasive brown marmorated stink bug). They are among the most damaging soybean pests because they feed directly on the seed during pod fill, exactly the part of edamame you eat. Organic treatment Pick the shield-shaped bugs and their barrel-shaped egg clusters off by hand, checking while the pods fill. Keep weeds down around the bed, since the bugs come in from weedy edges, and use an organic spray only if they are really feeding on the pods.Handpick the shield-shaped adults and the barrel-shaped egg clusters in a home patch, checking through pod fill. Keep weeds down around the bed, since stink bugs move in from weedy edges, and treat with an organic option such as spinosad or pyrethrin only where feeding on the pods is heavy. Prevention Check the pods from the time they set through filling, which is when stink bugs do harm. Clear weedy edges that shelter them before the season, move your edamame each year, and clean up old plants after harvest. An early variety can finish before the bugs peak in late summer.Watch the pods closely from pod set through fill, the window stink bugs damage. Mow or clear weedy borders that harbor them ahead of the season, rotate the bed, and clean up debris after harvest. An early-maturing crop can finish before peak late-summer pressure.
The control ladder

The ladder troubleshoots from the gentlest solution to the strongest. Start with the gentlest option and only move on when and if it doesn't work.

  1. Mow or pull the weeds along the edges of the bed before the season starts, and do not let them come back. Stink bugs gather in that untended growth and cross into the crop from it.The population builds in the untended border, so clearing it ahead of sowing and holding the edge cut down reduces how many arrive by pod set. It is a running habit rather than one pass.

  2. Give edamame a different bed each season rather than returning it to the same ground.Rotating the bed belongs with the cleanup measures rather than standing on its own here, since these bugs arrive from surrounding cover rather than out of the soil the crop grew in.

  3. Clear the spent plants out of the bed after the last picking, so less cover is left standing near where you will grow next year.Removing crop residue after harvest is the closing step of the preventive routine, taken alongside the border work rather than in place of it.

  4. A quick-maturing variety can be finished before the bugs reach their late-summer peak, which sidesteps the heaviest pressure instead of fighting it.An early-maturing crop completes pod fill ahead of peak late-summer numbers, moving the vulnerable stage out from under the pressure curve. Local timing varies, so confirm the late-summer peak regionally.

  5. Walk the bed from the time the pods set and take the shield-shaped adults off by hand, along with the barrel-shaped clusters of eggs. Pod fill is the stretch that matters, because the feeding happens inside pods that still look fine from outside.Scout from pod set through fill and hand-collect adults, taking out the barrel-shaped egg masses with them. Detection has to lead the symptom, since the injury registers as flat or discolored seed inside a pod that looks intact.

  6. If the bugs are genuinely working the pods, pyrethrin, a short-lived organic spray made from a plant extract, is an option. It is for heavy pod feeding rather than routine use, and its cautions about bees and beneficial insects are strict, so read them first.Reserve pyrethrin for heavy feeding on the pods. It is a short-persistence botanical knockdown rather than a scheduled material, and it carries the strictest bee band along with a moderate rating for harm to natural enemies.

The bottom rungs are products with label rules: timing, pollinators, and days to wait before harvest. Before you spray →

Soybean aphid
P · 03
Symptoms Clusters of tiny, soft, pale-yellow insects on the growing tips and undersides of the upper leaves, sometimes with ants around them. Heavy feeding curls and yellows the leaves and leaves a sticky residue, and the aphids can spread viruses.Colonies of small, soft, pale-yellow aphids on the growing tips, undersides of upper leaves, and stems, often tended by ants. Heavy feeding puckers and yellows the leaves, stunts the plant, and leaves a sticky honeydew that blackens with sooty mold; the aphids also transmit several plant viruses. Cause The soybean aphid, an invasive aphid that feeds only on soybeans and can multiply fast in midsummer. Mild weather lets it build up quickly, and ladybugs and other helpers usually bring it down.The soybean aphid (Aphis glycines), an invasive aphid specific to soybeans that can build explosively in midsummer. Cool to warm, calm weather favors rapid buildup; ladybugs and other natural enemies usually catch up. Organic treatment Spray the colonies off with a strong jet of water or use insecticidal soap, starting while there are only a few. Ladybugs and other helpful insects usually finish the job, so avoid sprays that kill them too. Deal with aphids early since they can spread viruses.Knock colonies off with a strong spray of water or treat with insecticidal soap, beginning while numbers are low. Ladybugs, lacewings, and parasitic wasps usually control soybean aphid in a garden, so avoid broad sprays that kill those helpers. Act early, since the aphids also move viruses. Prevention Do not overfeed with fertilizer, since the soft new growth is what aphids like, and keep weeds down nearby. Reflective mulch confuses them and cuts the viruses they spread, and helpful insects do most of the work in a home garden.Avoid overfeeding with nitrogen, which produces the soft growth aphids favor, and keep nearby weeds and buckthorn (the aphid's overwintering host) in check. Reflective mulch disorients them and reduces virus spread, and natural enemies do most of the work in a home garden.
The control ladder

The ladder troubleshoots from the gentlest solution to the strongest. Start with the gentlest option and only move on when and if it doesn't work.

  1. Hold back on feeding. A heavy dose of nitrogen produces the soft new growth these aphids multiply on fastest, so a lighter hand gives them less to work with.Restrained nitrogen limits the flush of succulent tissue colony growth runs on, so the lever sits in the fertility plan rather than in anything you reach for once the colonies are visible.

  2. Keep the weeds down around the bed, and keep an eye on any buckthorn growing nearby, since that shrub is where this aphid spends the winter. Dealing with the winter host lowers what turns up in the crop.This aphid overwinters on buckthorn, so managing that host along with the surrounding weeds acts on the source rather than on the colonies. The scale is the neighborhood rather than the bed, which is what puts it this early.

  3. A reflective mulch, a silvery sheet spread on the soil, confuses aphids looking for somewhere to land. It also cuts down the viruses they carry, which is a second reason to have it down early.Reflective mulch laid while the crop is small disorients incoming winged aphids and reduces virus transmission, which carries extra weight here because this species moves several viruses.

  4. Hose the colonies off. Direct the stream at the growing tips and the undersides of the upper leaves where they sit, and start while only a few clusters are there rather than after they have covered the tips.A forceful directed rinse is the first physical knock-back. Run it early: this aphid moves viruses as well as feeding, so the value of acting is loaded toward the front of the infestation.

  5. In a garden, ladybugs, lacewings, and parasitic wasps generally do most of the work on this one. Leaving them undisturbed, and passing on the broad sprays that would kill them off too, is usually the whole decision.Resident predators and parasitoids usually carry this species at garden scale, which is the argument against a broad-spectrum material: the spray removes the control that was already working.

  6. If the colonies keep building, insecticidal soap kills the aphids it touches directly. Aim it at the growing tips and the undersides of the upper leaves, and use it while the clusters are still small.Soap acts on contact and leaves nothing behind, so wetting the tips and upper-leaf undersides where colonies sit is what decides the result. Spot application while numbers are low also spares the natural enemies that would otherwise finish it.

The bottom rungs are products with label rules: timing, pollinators, and days to wait before harvest. Before you spray →

Japanese beetle
P · 04
Symptoms Leaves chewed down to a lacy skeleton of veins, the classic Japanese beetle damage, as the shiny green-and-copper beetles feed in groups on top of the plants in midsummer. They can strip a lot of leaf, but edamame handles a fair amount of leaf loss.Leaves skeletonized to a lacy network of veins, the classic Japanese beetle signature, as the metallic green-and-copper adults feed in groups on the upper canopy in midsummer. Heavy feeding can strip the foliage, though edamame tolerates a good deal of leaf loss before yield suffers. Cause The Japanese beetle, a shiny green beetle with copper wings whose grubs live in lawns and whose adults feed on many plants, including soybeans, in midsummer.The Japanese beetle (Popillia japonica), a metallic green beetle with coppery wing covers whose grubs develop in lawns and whose adults feed on many garden plants, soybeans included, through midsummer. Organic treatment Pick the beetles off in the early morning when they are slow, dropping them into soapy water; this works well in a garden. Skip the beetle traps, which often attract more beetles than they catch. Since edamame handles a lot of leaf loss, light damage needs no spray.Handpick the beetles in the early morning when they are sluggish, knocking them into soapy water; this is effective in a home patch and avoids the traps, which draw in more beetles than they catch. Because edamame tolerates real defoliation, light to moderate feeding on the leaves needs no spray. Prevention Watch through midsummer, when the adults feed, and cover plants with a row cover during a heavy beetle flight if needed. Keeping the lawn a bit drier in midsummer means fewer grubs, and light leaf damage is better tolerated than sprayed.Watch through midsummer, the adult-feeding window, and protect plants with a floating row cover during a heavy flight if needed. Healthy lawns kept on the dry side in midsummer support fewer grubs; tolerate light leaf feeding rather than spraying.
The control ladder

The ladder troubleshoots from the gentlest solution to the strongest. Start with the gentlest option and only move on when and if it doesn't work.

  1. Pick the beetles off early in the morning, while they are still cool and slow, and drop them into soapy water. That is the step that does the work in a garden. Do not bother with the traps sold for them, since the number they pull toward your yard is larger than the number they hold. Edamame also carries a fair amount of chewed leaf without losing beans, so light damage can be left alone.Cool-morning collection into soapy water, taken while the adults are torpid, is the workable home control. The traps sold against them amount to a net import of beetles rather than a removal. Defoliation tolerance is high on this crop, so light to moderate skeletonizing is something to note and leave rather than to act on.

  2. During a heavy flight in midsummer, a light fabric cover over the plants keeps the beetles from landing at all. Put it on ahead of the flight rather than once the leaves have already gone lacy.Cover through the midsummer adult flight is straight exclusion, and its value depends on going on before the flight rather than after feeding starts. Given how much leaf loss this crop absorbs, it is a heavy-pressure option rather than a standing one.

No spray for this one. Prevention is the control.

Two-spotted spider mite
P · 05
Symptoms Fine whitish or yellow speckling on the leaves, turning to a dried, bronzed look, with fine webbing on the undersides. The mites are tiny specks, easiest to see by tapping a leaf over white paper. They explode in hot, dry weather.Fine whitish or yellow stippling on the leaves that progresses to a bronzed, dried-out look, with fine silken webbing on the undersides; the mites are minute specks, easiest to confirm by tapping a leaf over white paper. They build explosively in hot, dry weather. Cause Two-spotted spider mites, tiny relatives of spiders that pierce the leaf and suck out the contents. Hot, dry, dusty weather and dried-out plants let them build up fast, so they flare in dry midsummer.Two-spotted spider mites (Tetranychus urticae), tiny relatives of spiders that pierce leaf cells and suck the contents. Hot, dry, dusty conditions and drought-stressed plants favor rapid buildup, so they flare in dry midsummer spells. Organic treatment Spray the undersides of the leaves with a strong jet of water to knock off the mites and webbing, and use insecticidal soap before they get thick. Keeping the plants well watered and unstressed slows them down, and helpful bugs pitch in.Hose the undersides of leaves with a strong spray of water to dislodge mites and webbing, and treat with insecticidal soap or horticultural oil before numbers climb. Keeping plants well watered and unstressed slows buildup, and natural predators help. Prevention Keep the soil evenly moist, because dried-out plants are much more likely to get mites, and keep dust down. Check the undersides of the leaves during hot, dry weather so you catch them early.Maintain even soil moisture, since drought-stressed plants are far more mite-prone, and keep dust down around the bed. Watch the undersides of leaves through hot, dry spells so you catch the buildup early.
The control ladder

The ladder troubleshoots from the gentlest solution to the strongest. Start with the gentlest option and only move on when and if it doesn't work.

  1. Hold the soil at an even moisture instead of letting the bed dry out hard between waterings. Stress from drying is what lets mite numbers climb quickly, so steady irrigation is the cheapest thing you control here.Water stress is the accelerant, so an even irrigation schedule is the lever with the most reach. It matters most through the dry midsummer stretches, which is when this mite flares.

  2. Hose under the leaves with enough force to wash the mites and their webbing away. The mites themselves are barely visible specks, so tap a leaf over a sheet of white paper to check what you actually have.A forceful directed rinse of leaf undersides removes both mites and webbing. Confirm the population by tapping foliage over white paper rather than reading the stippling alone, and repeat through the dry spell driving it.

  3. Natural predators feed on these mites and take some of the pressure off, which is a reason to treat the hot spots rather than the whole planting.Natural enemies already in the bed take part of the load, which is the reason to keep any treatment targeted rather than broad.

  4. If numbers keep climbing, insecticidal soap is the next step. It works only on what it wets, so the spray has to get under the leaves, and it is worth doing while the speckling is still fine rather than after the leaves have gone bronze.Soap acts only where it lands and leaves no residue, so getting the material under the leaf is what decides the result. Timing it while stippling is still fine, ahead of the bronzed stage, matters as much as the coverage does.

  5. Horticultural oil, a light oil sprayed onto the foliage, is the other material named for mites here, used the same way and aimed at the undersides. Read its cautions first: oil does not suit plants that are already hot and dry-stressed, which is exactly the weather mites flare in, so keeping the plants watered is what makes this option usable.Oil is the second named material, applied for thorough coverage of leaf undersides. Its constraint bites in this exact situation, since it is not for water-stressed plants or hot conditions and that is the weather that produced the outbreak; steady moisture is therefore what keeps it available as an option.

The bottom rungs are products with label rules: timing, pollinators, and days to wait before harvest. Before you spray →

Diseases
White mold (Sclerotinia stem rot)
D · 01
Symptoms Stems with a white, cottony mold at the joints, sometimes with hard black lumps in them; the stem above bleaches, wilts, and dies. It shows up in cool, wet weather where the plants are crowded and the air does not move.Water-soaked lesions on the stems at the nodes that turn into a white, cottony fungal growth, often with hard black resting bodies (sclerotia) inside or on the stems; affected stems bleach, wilt, and die above the lesion. It develops in cool, wet weather in dense, lush canopies with poor airflow. Cause A fungus, the same white mold that hits beans. Hard black survival bodies live for years in the soil and sprout in cool, damp weather to infect the plants, especially where crowded, overfed growth keeps the leaves humid.The fungus Sclerotinia sclerotiorum, the same white mold that hits beans. Its hard black sclerotia survive years in the soil and germinate in cool, moist conditions to infect flowering plants, especially where dense, overfed growth keeps the canopy humid. Organic treatment There is no home spray that cures it; you manage it by how you grow. Pull and throw away (do not compost) infected plants, since the black lumps survive, and space the plants out so the leaves dry faster.There is no home-garden cure once plants are infected; management is cultural. Remove and destroy infected plants (do not compost them, since the sclerotia survive), and open up spacing and airflow to dry the canopy. Prevention Give plants room so air moves through them, and go easy on fertilizer, since heavy growth feeds the mold. Move edamame away from beans on a long rotation, water at the base instead of overhead, and avoid spots where white mold has been bad.Space plants and rows for good airflow rather than crowding, and go easy on nitrogen, since excess feeding drives the dense growth the mold needs. Rotate away from beans and other susceptible crops on a long cycle, avoid overhead watering, and do not plant where white mold has been severe.
The control ladder

The ladder troubleshoots from the gentlest solution to the strongest. Start with the gentlest option and only move on when and if it doesn't work.

  1. Give each plant room at sowing and keep the rows open, so the leaves dry after rain or dew instead of staying damp. Crowded, still growth is the setting this one needs.Layout is the primary lever: spacing that lets the stand dry shortens the humid, motionless period the fungus infects in. It is decided at sowing, so it is not something you can add once the stand has closed over.

  2. Hold back on the fertilizer. Feeding hard produces a bulk of lush growth, and the humidity trapped inside it is what the mold works in.Overfeeding produces the bulk that keeps the interior of the stand humid, so restrained nitrogen and open spacing act on the same condition from two directions.

  3. Keep edamame on a long rotation away from beans and the other crops this mold hits, and steer clear of ground where it has already been bad. The hard black survival bodies sit in the soil for years, so a single season off is not much of a break.Rotate on a long cycle away from beans and other susceptible crops, and decline ground with a severe history outright. Sclerotia persist in soil across years, which is what sets the length of the break rather than the fact of taking one.

  4. Put the water on the ground rather than over the tops of the plants. Overhead watering leaves the foliage wet in the same cool, damp conditions that let this mold start.Irrigating at ground level keeps the foliage out of the wetting cycle, which is worth more in the cool, wet spells the fungus germinates in than at any other point in the season.

  5. Pull the affected plants and put them in the trash rather than the compost heap, since the hard black lumps in those stems live on and composting hands them back to the garden. Nothing on the home shelf cures this once a plant has it, so removal is the action available to you.Lift infected plants and destroy the tissue rather than composting it: the sclerotia survive the heap and would return to the bed with it. With no home-garden curative, this removal together with how the stand is grown is all there is to work with.

No spray for this one. Prevention is the control.

Bacterial blight
D · 02
Symptoms Small angular spots on the leaves that turn brown to black with a yellowish ring, often falling out to leave the leaves looking torn. It likes cool, wet weather and spreads in blowing rain. It is the most common leaf disease of soybeans.Small, angular, water-soaked spots on the leaves that turn brown to black with a yellow-green halo, the spots often dropping out to leave a ragged, tattered look; it favors cool, wet weather and spreads in wind-driven rain. The most common foliar disease of soybeans. Cause A bacterium that survives the winter on old plant debris and seed. Splashing rain and touching wet plants carry it from leaf to leaf, and cool, wet weather is when it strikes.The bacterium Pseudomonas savastanoi pv. glycinea. It overwinters on infected residue and seed, and splashing rain and handling wet plants move it from leaf to leaf; cool, wet conditions favor infection. Organic treatment There is no cure once plants are infected, but it rarely costs much in a garden. Water at the base, not overhead, and stay out of the patch when the leaves are wet, since that spreads the bacteria.There is no cure once plants are infected; the disease rarely causes real yield loss in a garden. Avoid overhead watering and do not handle plants when the foliage is wet, which moves the bacteria from plant to plant. Prevention Plant clean seed and do not save seed from infected plants, since the disease travels on seed. Move your edamame each year, clear away old plants after harvest, give the plants room, and keep out of the patch when the leaves are wet.Plant clean seed and do not save seed from an infected crop, since the disease is seedborne. Rotate away from soybeans and beans, clear residue after harvest, give plants room for airflow, and keep out of the bed when the foliage is wet.
The control ladder

The ladder troubleshoots from the gentlest solution to the strongest. Start with the gentlest option and only move on when and if it doesn't work.

  1. Buy fresh seed rather than saving your own off a crop that carried these spots. Because the bacterium rides inside the seed, the purchase is where you shut the door on it.Seed carries this one, so the purchase decision does work that nothing applied later can undo. Seed held back from an affected stand puts the bacterium into the next planting at sowing.

  2. Move edamame away from where soybeans or beans grew last year. The bacterium gets through the winter in the material those crops leave behind.Rotating away from soybeans and beans denies the pathogen the infected residue it overwinters on, and it works with clearing that residue rather than substituting for it.

  3. Sow at a spacing that lets each plant dry out soon after a rain. This one spreads while the foliage is wet in cool weather, so a stand that sheds water fast spends less of the season open to it.Open layout limits the leaf wetness that carries this from leaf to leaf in the cool, wet conditions the bacterium favors, and it is a decision made before the crop is up.

  4. Deliver the water at ground level and keep the sprinkler off the crop. Splashing droplets are one of the ways this moves, so overhead irrigation works for the disease rather than against it.Splash is a transport mechanism here, so ground-level irrigation removes one of the ways the bacterium reaches new leaves. Wind-driven rain is the other, and no watering choice touches that.

  5. Do your weeding and picking after the foliage has dried, not while it is still damp from rain or dew. The bacteria transfer onto hands and clothing as you push through, and go onto the next plant you touch.Moving through a wet stand transfers the bacterium leaf to leaf, so timing your passes for dry foliage is a control in its own right. What it buys is a lower rate of spread; it does not clear tissue that is already infected.

  6. Clear the old plants out after harvest, since the bacterium overwinters on that debris. Pulling the worst-spotted leaves during the season helps too, though this disease seldom costs a garden much yield.Residue removal at season's end takes out the overwintering substrate, and roguing the most affected leaves in season trims what is available to spread. Weigh the effort against the fact that yield loss at garden scale is usually slight.

No spray for this one. Prevention is the control.

Downy mildew
D · 03
Symptoms Pale green to yellow blotches on top of the leaves with a grayish, fuzzy growth underneath in humid weather; the spots grow and turn brown. It is common but usually mild, and infected seed can have a white coating.Pale green to yellow spots on the upper leaf surface with a matching grayish, downy fungal growth on the underside in humid weather; spots enlarge and brown. It is common but usually minor, and seed from infected plants can carry a white crust. Cause A fungus-like organism that likes warm, humid weather and wet leaves. It survives on old plant debris and seed and spreads in damp, humid spells.The fungus-like organism Peronospora manshurica, favored by warm, humid weather and frequent leaf wetness. It survives on residue and seed and spreads on wind and splashing in humid spells. Organic treatment Downy mildew rarely needs treatment in a garden; the plants usually grow through it. Give the plants room and avoid wetting the leaves to slow it, and pull badly spotted leaves if you like.Downy mildew seldom needs treatment in a home garden; edamame outgrows light infection. Improve airflow and avoid wetting the foliage to slow it, and remove badly spotted leaves where practical. Prevention Give plants room so the leaves dry, water at the base, and move your edamame each year. Clear away old plants after harvest and use clean seed, since it carries over on debris and seed.Space plants for airflow, water at the soil rather than overhead, and rotate away from soybeans. Clean up residue after harvest and use clean seed, since the organism carries over on debris and seed.
The control ladder

The ladder troubleshoots from the gentlest solution to the strongest. Start with the gentlest option and only move on when and if it doesn't work.

  1. Leave room between the plants so a wet leaf has a chance to dry. Warm, humid weather with foliage that stays damp is what this one runs on, and an open planting shortens that wet period.Spacing shortens how long leaves stay wet in the warm, humid weather that favors it. Layout has the most reach of any step on a disease that stays minor here in most seasons.

  2. Keep the water on the soil rather than the leaves, since wet foliage is what this one needs to get going.Ground-level irrigation removes an avoidable wetting period. It is a small lever on a small problem, which is exactly why it is worth taking, since it costs nothing to do.

  3. Move edamame off last year's ground. The organism carries over on the old plant material left in the bed.Rotation addresses carryover on residue rather than a soil population, so it works alongside clearing the bed rather than on its own.

  4. Sow clean seed. Seed off infected plants can carry a white crust, and the organism travels with it into the next planting.Seed is one of the two carryover routes named here, and seed from infected plants can show a white crust; sourcing clean seed closes that route at purchase.

  5. Clear the finished plants at the end of the season, and take off badly spotted leaves during it where that is easy to do. Edamame usually grows through a light infection, so this rarely needs to be more than tidying.Strip residue at season's end and remove heavily spotted leaves where practical. The crop generally outgrows light infection, so this sits as tidying rather than rescue, and no spray is called for at garden scale.

No spray for this one. Prevention is the control.

Soybean cyst nematode
D · 04
Symptoms Patches of stunted, yellow, slow plants, usually in spots rather than all over, with very few of the normal root nodules. The clue is tiny lemon-shaped white or yellow specks (cysts) on the roots in summer.Patches of stunted, yellowed, slow-growing plants, often in spots rather than uniformly, with few nodules and tiny lemon-shaped white to yellow females (cysts) just visible on the roots in summer. Above-ground symptoms are easy to miss, but the cysts on the roots are the giveaway. Cause The soybean cyst nematode, a microscopic worm that is the most damaging soybean pest in much of the country. Its egg-filled cysts survive in the soil for years and build up where soybeans grow in the same spot again and again.The soybean cyst nematode (Heterodera glycines), a microscopic roundworm that is the most damaging soybean pest in much of the country. Its cysts hold eggs that survive in the soil for years, and they build up where soybeans are grown repeatedly. Organic treatment There is no home treatment once it is established; you manage it by prevention. If plants are stunted in patches, check the roots for the tiny cysts in summer, and avoid carrying soil from that bed to clean ground on tools or shoes.There is no rescue treatment in a home garden; management is preventive. Where plants are stunted in patches, check the roots for cysts in summer and avoid moving soil from that bed to clean ground on tools or shoes. Prevention Rotate edamame with crops other than soybeans and dry beans on a long cycle, which is the main control, and never grow soybeans in the same spot every year. Where it is a known problem, plant resistant varieties and keep weeds down.Rotate edamame with non-host crops (anything but soybeans and dry beans) on a long cycle, the main control, and do not grow soybeans in the same bed year after year. Where the nematode is established, grow resistant soybean varieties and keep the soil clean of weed hosts.
The control ladder

The ladder troubleshoots from the gentlest solution to the strongest. Start with the gentlest option and only move on when and if it doesn't work.

  1. Rotate edamame with crops other than soybeans and dry beans, on a long cycle, and keep soybeans out of the same bed season after season. This is the main control, because the egg-filled cysts sit in the soil for years and build up wherever soybeans keep coming back.A long rotation into non-host crops, meaning anything other than soybeans and dry beans, is the principal control. Cyst-borne eggs persist in soil across years and accumulate under repeated soybean cropping, so the length of the break is what does the work rather than the fact of rotating.

  2. Where you already know this nematode is in the ground, plant a resistant soybean variety. The way to tell is to lift a stunted plant in summer and look for the tiny lemon-shaped specks on the roots, since the yellowing above ground is easy to miss or mistake for something else.On ground with a confirmed population, resistant soybean varieties are the step taken at seed-buying time. Confirmation comes from the roots rather than the canopy: cysts are visible on roots in summer, while patchy stunting above ground reads as any number of other things.

No spray for this one. Prevention is the control.

Verified · 3 sources View
Seasoned
Where to plant next year

Crop rotation

Move your edamame to a new spot each year, on about a three-year rotation, and longer if you have had nematode or mold trouble. Because edamame feeds the soil with nitrogen, whatever you plant there next will benefit.Rotate edamame on at least a three-year cycle, longer where soybean cyst nematode or white mold have appeared. Its nitrogen-fixing habit makes it a good predecessor for nitrogen-hungry crops.

Family
Fabaceae (legume)
Years between
3 years
in the same bed
Avoid following
Do not plant edamame where soybeans or beans grew last year. Diseases and especially the soybean cyst nematode build up in the soil and hit the next crop. If you have had nematode or white mold trouble, wait several years before soybeans return.Avoid following edamame with soybeans, dry beans, or other legumes in the same bed; rotate to break the soilborne disease cycle and, above all, to keep soybean cyst nematode and white mold from building up. Where the nematode is present, extend the rotation and grow only non-host crops there for several years.
Plant after
Edamame is an excellent crop to grow before a heavy feeder. As a legume it fixes nitrogen and leaves the soil in better shape for a following crop such as a leafy green, a brassica, or corn.
Verified · 2 sources View
In the app · pre-launch

When plant taps you on the shoulder

The plant app sends a timely reminder at every critical moment of your edamame season. The wording adjusts to whichever you pick: beginner or seasoned. Here are three you'll see in Zone 9.

p
plant
2 weeks after last frost
Time to plant edamame Time to sow edamame
Plant edamame after the last spring frost, once the soil has warmed to at least 60 to 65°F. Plant about 1 to 1.5 inches deep in moist, well-drained soil, and coat the seed with a soybean inoculant if you have it. There is no benefit to planting earlier. Direct-sow edamame after the last spring frost, once the soil has warmed to at least 60 to 65°F. Sow about 1 to 1.5 inches deep into a moist, well-drained bed, and inoculate the seed with a soybean-type (Bradyrhizobium japonicum) inoculant where soybeans are new to the ground.
p
plant
2 weeks after last planting
Plant your next row of edamame Sow your next short row of edamame
Because the whole edamame plant ripens at once, the way to get a steady supply is to plant a new short row every week or two instead of all at once. Plant again now, about two weeks after the last row, and stop in time for the last batch to finish before your first fall frost. Because each edamame plant matures all at once, the way to spread the harvest is to sow a fresh short row every week or two rather than picking over a long window. Sow again now, about two weeks after the last, and stop early enough that the final sowing matures before your first fall frost.
p
plant
11 weeks after planting
Start checking your edamame every day Start checking your edamame daily
Most edamame is ready about 75 to 100 days from planting. Start checking every day as the pods fill, and pick when they are bright green and plump with the beans nearly touching inside. The whole plant ripens at once and the best window is only about four to ten days, so do not wait too long. Most edamame is ready about 75 to 100 days from sowing. Begin checking daily as the pods plump: harvest when they are bright green and plump with the beans nearly touching inside. The whole plant ripens together and the prime window is only about four to ten days, so do not wait.
Get personalized alerts.

plant sends the right notification at exactly the right moment, for your zone, your weather, your crops. Founding members lock the rate forever.

Back the Kickstarter →
Ask the gardener

Common questions

Got a question we missed?

We're building this guide with real growers. Got a question we missed? Ask here. We read every one and add the best answers right to this page.

Grown this before?

Share a tip

Learned something the hard way? Pass it on. Real growers' tips make this guide better for the next person, and we credit you by name when yours goes live.

Seasoned
Spot something wrong?

Report a problem

If you've grown this crop and you see a date, a temperature, a companion claim, or a recommendation that doesn't match your experience, tell us. Real growers' corrections make this guide better for the next person.

How we built this guide

Methodology & sources

Every date, temperature, spacing, and recommendation on this page is sourced from university cooperative extension publications, peer-reviewed agricultural research, NOAA climate data, and direct extension calendars. Where claims are softer (traditional gardening wisdom not formally documented), we say so.

Research-backed Documented in cooperative extension publications or peer-reviewed research
Well-grounded A known agronomic principle, but not formally tested for this specific pair
Traditional Time-tested gardening wisdom, limited formal research support
Last reviewed
June 29, 2026
Data version
crops_data_final · v1.0 · schema 2.9
Sources cited on this page
16 publications
Verified entries
Companion-planting claims tagged inline · zone dates verified against 5+ extensions
See all sources cited on this page
  • University of Minnesota Extension umn_ext
  • University of Maryland Extension umd_ext
  • Cornell Cooperative Extension cornell_ext
  • Iowa State University Extension iastate_ext
  • Michigan State University Extension msu_ext
  • NC State Extension ncsu_ext
  • Penn State Extension psu_ext
  • U. of Illinois Urbana-Champaign Extension uiuc_ext
  • UC Davis Postharvest Center ucd_postharvest
  • Texas A&M AgriLife Extension tamu_agrilife
  • Virginia Cooperative Extension 426-331 vce_426_331
  • Piedmont Master Gardeners piedmont_mg
  • UGA Vegetable Garden Calendar uga_calendar
  • Clemson Home & Garden Information Center clemson_hgic
  • UC IPM Statewide IPM Program uc_ipm
  • NOAA 1991-2020 Climate Normals noaa_normals

Growing notes, weekly.

Zone-aware seasonal nudges, what's worth planting now, and the occasional recipe from the harvest. No spam, ever.

Vol. 003 · Edamame · plant.lifestyle