Pick your zone and the dates re-calibrate.
The Guide Crops Vol. 003

Eggplant / Aubergine

in Zone 9, this week

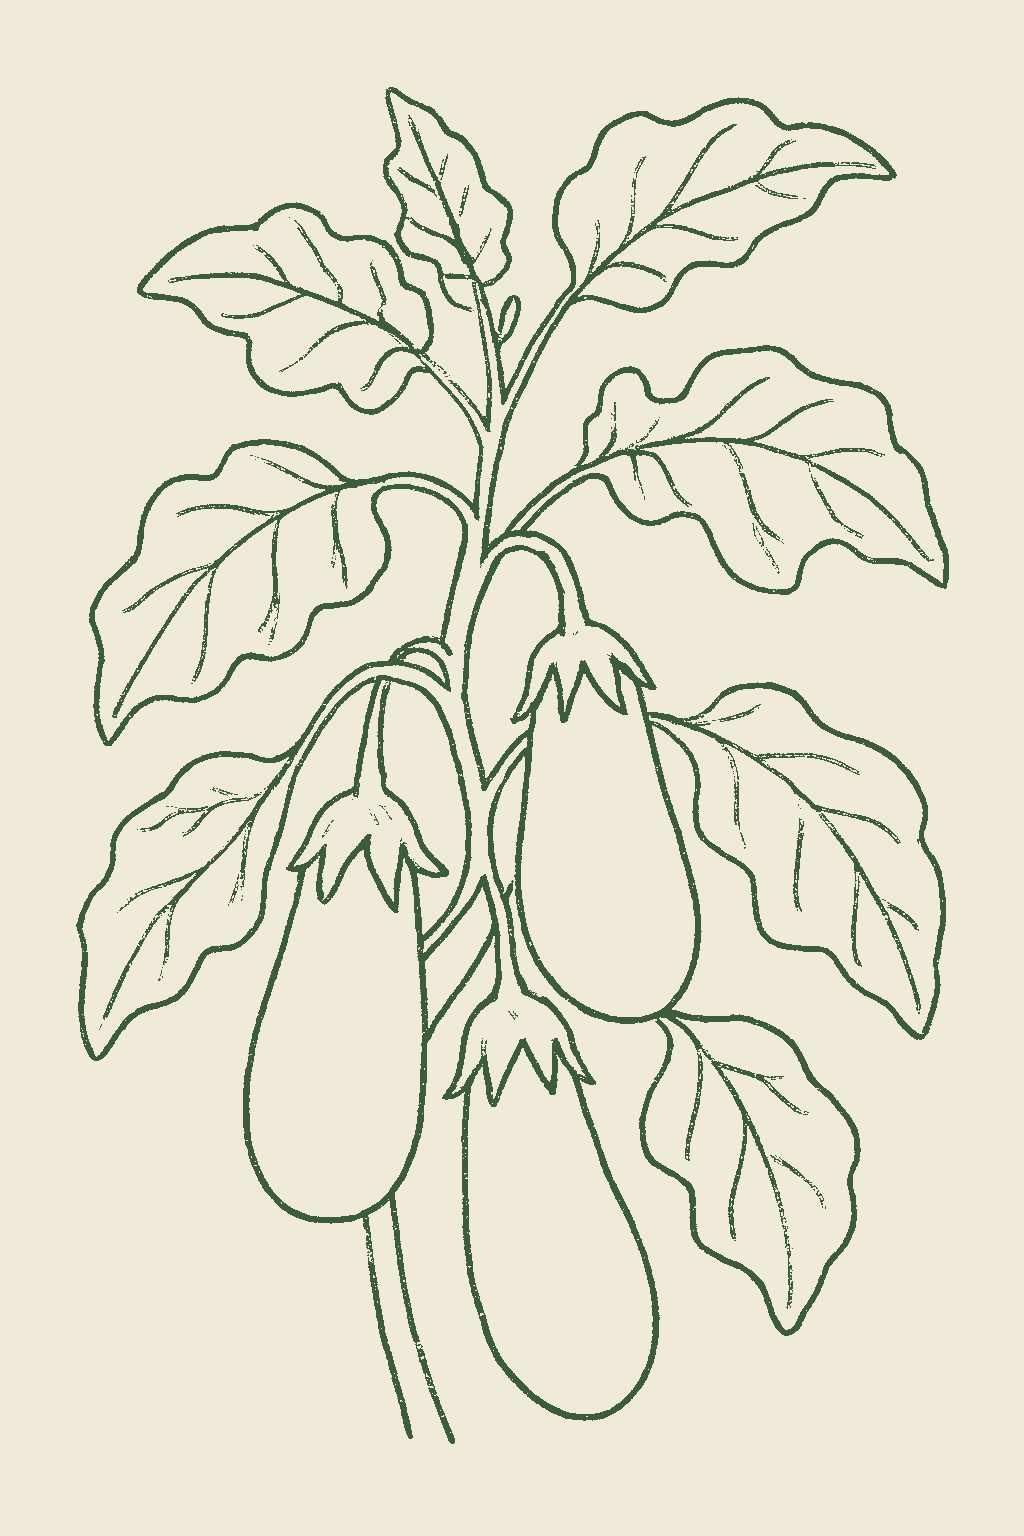
Eggplant is a warm-season vegetable in the same family as tomatoes and peppers, grown for its shiny, smooth fruit. The big thing to know is that eggplant loves heat: it keeps producing through hot summer weather that makes tomatoes struggle, but it really dislikes the cold and will sulk for weeks if planted out too early. It is also slower than a tomato and needs a long, warm season, so you grow it from transplants set into warm soil a week or two after you would plant tomatoes, and you usually stake the plant once it is carrying fruit. You pick eggplant while it is young and glossy, not at its biggest, because once the skin goes dull the inside turns seedy and bitter. There are many kinds: big purple globes like Black Beauty, slim Asian types like Ichiban, beautiful Italian heirlooms like Rosa Bianca, white ones like Casper, and small container types like Patio Baby and Fairy Tale. The main things to get right are warmth (never rush it into cold soil), protecting young plants from flea beetles, watering steadily, and rotating it away from where tomatoes, peppers, or potatoes grew. Eggplant is a warm-season fruiting vegetable (Solanum melongena) in the nightshade family, a close relative of tomato and pepper grown for its glossy, immature fruit. Where it differs from tomato is instructive: eggplant is markedly more heat-loving, thriving and setting fruit through summer heat that makes tomato sulk and drop blossoms, while it is the more cold-sensitive of the two, stalling badly if set out before the soil and nights are reliably warm. It is also slower, wanting a long, warm season (roughly 100 to 120 days from seed, about 65 to 85 from transplant), so it is grown from transplants set into warm soil a week or two after tomatoes. Plants are bushy and often need staking once loaded with fruit. The crop is harvested young and glossy and picked continuously; a dull skin signals an over-mature, seedy, bitter fruit. Types span the large purple-black globes (Black Beauty), slender Asian fruit (Ichiban), Italian heirlooms (Rosa Bianca), white-skinned (Casper), and compact container varieties (Patio Baby, Fairy Tale). The season's shape is set by three things: a long warm runway with no cold checks, the signature early pest pressure of flea beetles on seedlings (plus the Colorado potato beetle later), and the soilborne wilts (verticillium, bacterial wilt) and fruit rots (phomopsis) that rotation and warm, well-drained soil hold off.
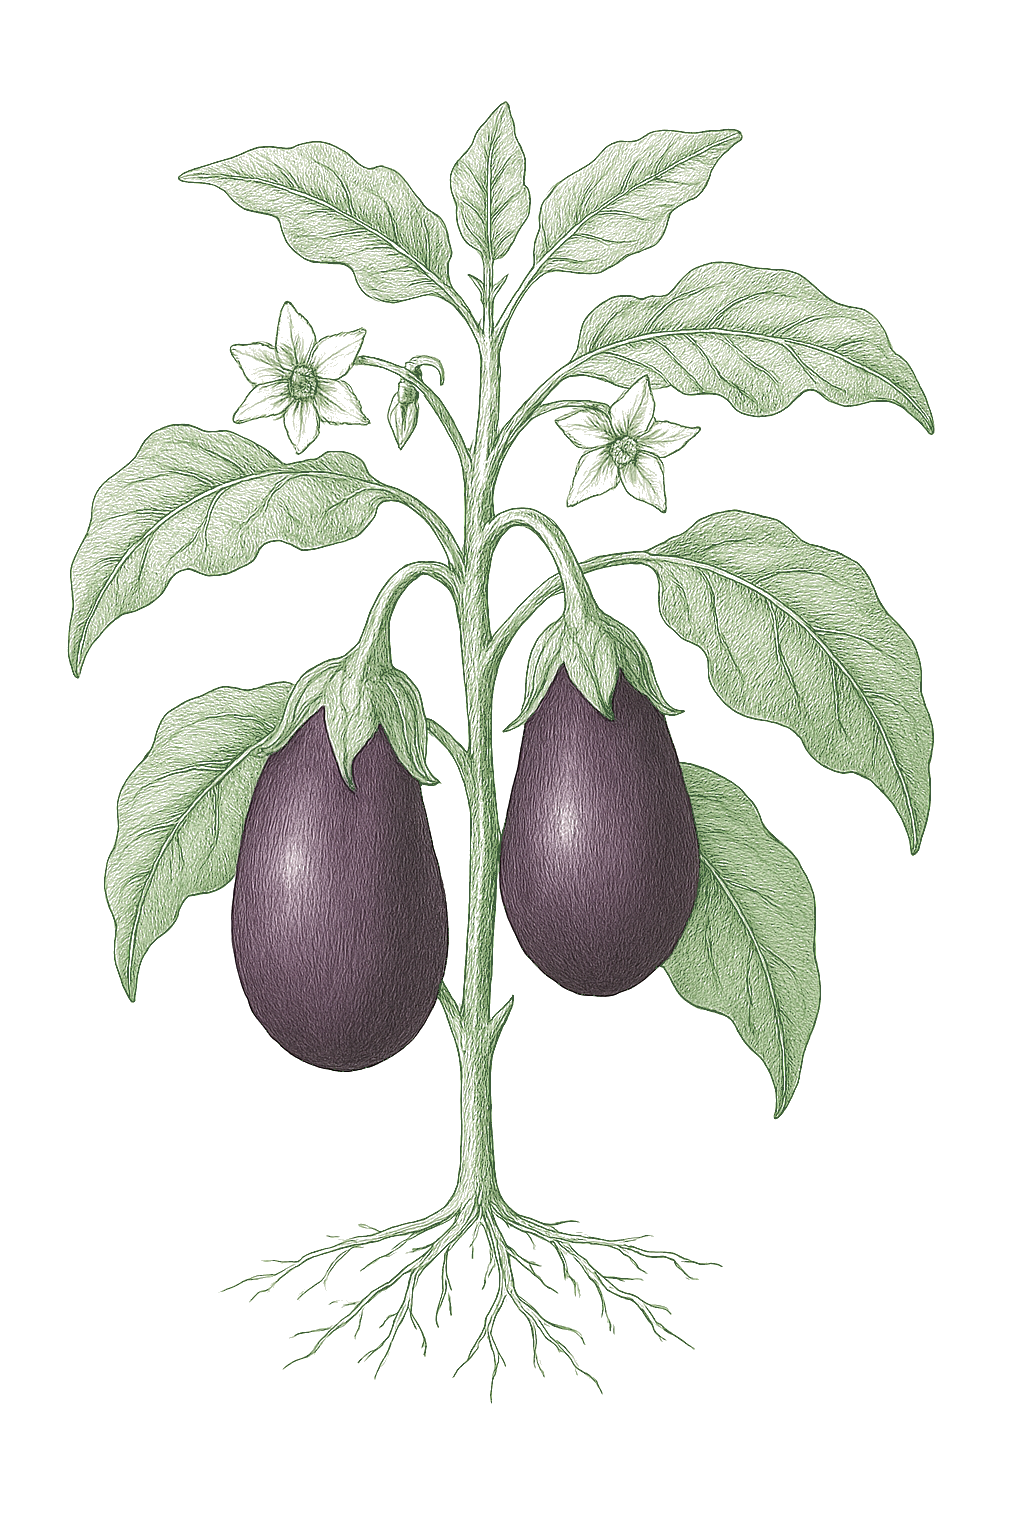
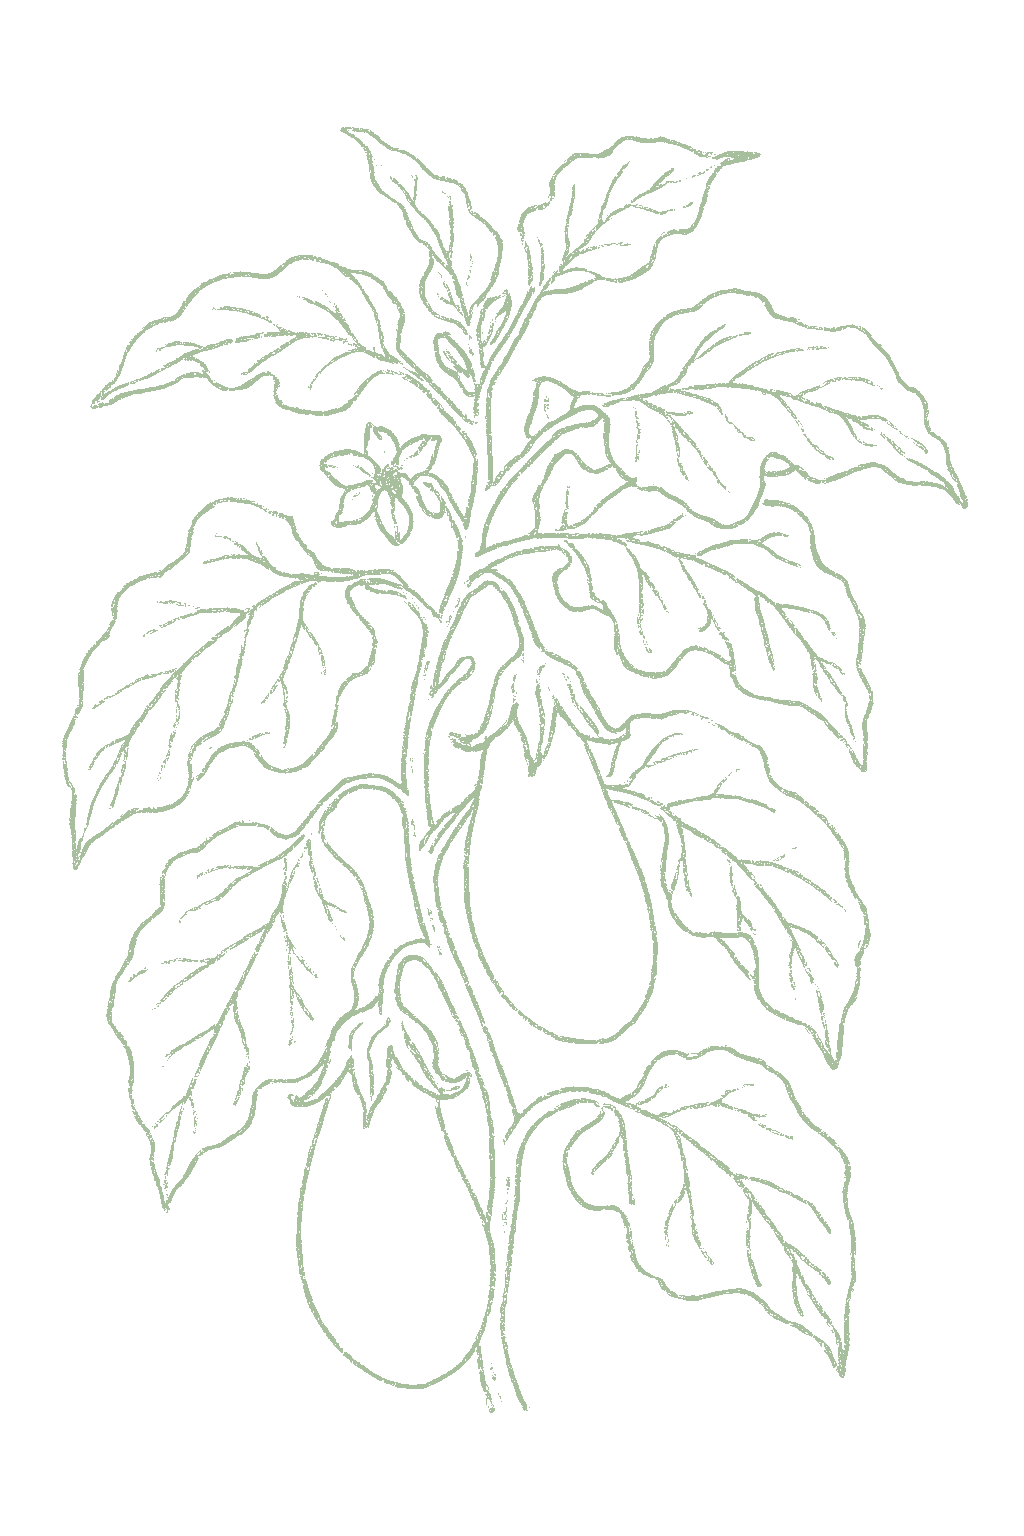
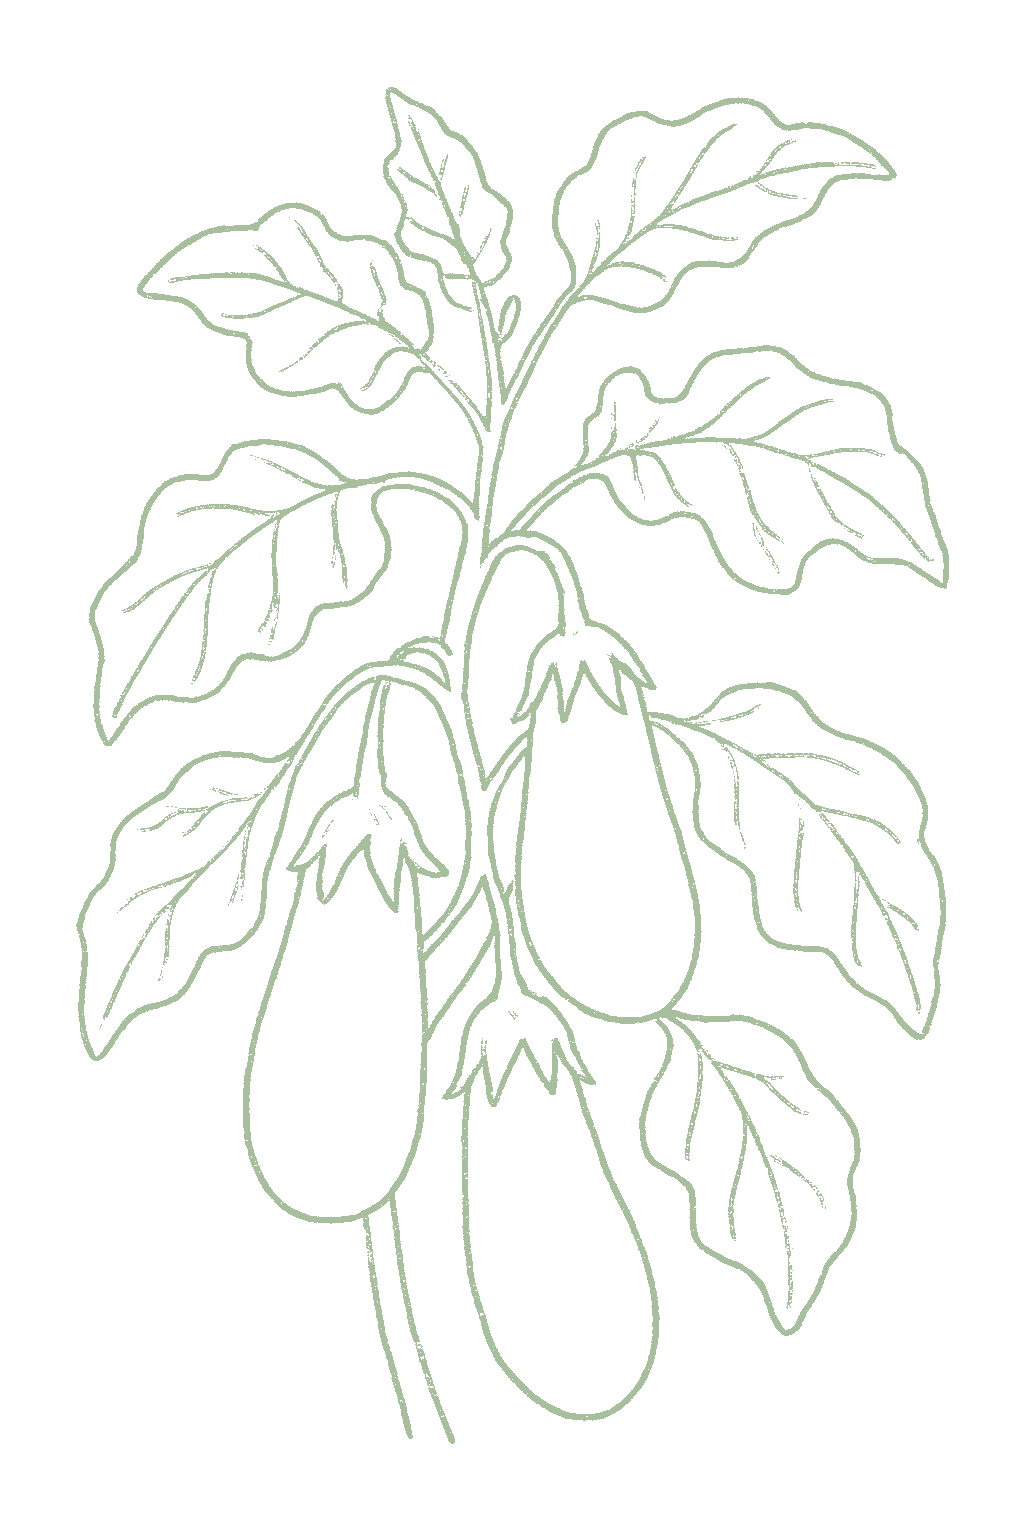
Eggplant / Aubergine mature plant
Fig. 01 · Eggplant / Aubergine, mature Zone 9
Mature in
65-85d
from transplant
Sunlight
Full sun
6-8 hrs daily
Water
Regular
1 inch / week
Spacing
18 to 24 in
between plants
Soil pH
5.5-6.8
slightly acidic
Today · in your zone

What's happening right now

October 21 · Zone 9 · Stage 01 · Germination

Off-season for eggplant / aubergine in zone 9.

Seasoned
Microclimate · Zone 9a vs 9b

Your zone, at a finer grain

Zone 9 averages a last frost around March 1. Within Zone 9, the colder half (9a, winters down to 20°F) runs about a week later. The warmer half (9b, winters down to 25°F) runs about a week earlier. The plant app picks your subzone from your ZIP.

SubzoneLast springFirst fallGrowing daysWinter minFruits reliably
9aMar 8Nov 24~26120-25°FYes · two seasons
9bFeb 28Nov 30~27525-30°FYes · two seasons

Averages from 8 weather stations per subzone, drawn from NOAA 1991-2020 Climate Normals. Your actual frost date can vary by up to two weeks based on elevation, proximity to water, and local topography.

Source: NOAA 1991-2020 Climate Normals Methodology
Your climate region in Zone 9
The season at a glance

Planting calendar

In Zone 9, eggplant / aubergine can be planted April through May. Harvest runs June through October.

Jan
Feb
Mar
Apr
May
Jun
Jul
Aug
Sep
Oct
Nov
Dec
plant
too cold
too cold
too cold
plant
plant
too late
too late
too late
too late
too late
too cold
too cold
harvest
harvest
harvest
harvest
harvest
harvest
indoors
plant out
harvest
Above-ground cropBest planted on a above ground moon
The season, mapped

Seed to garden

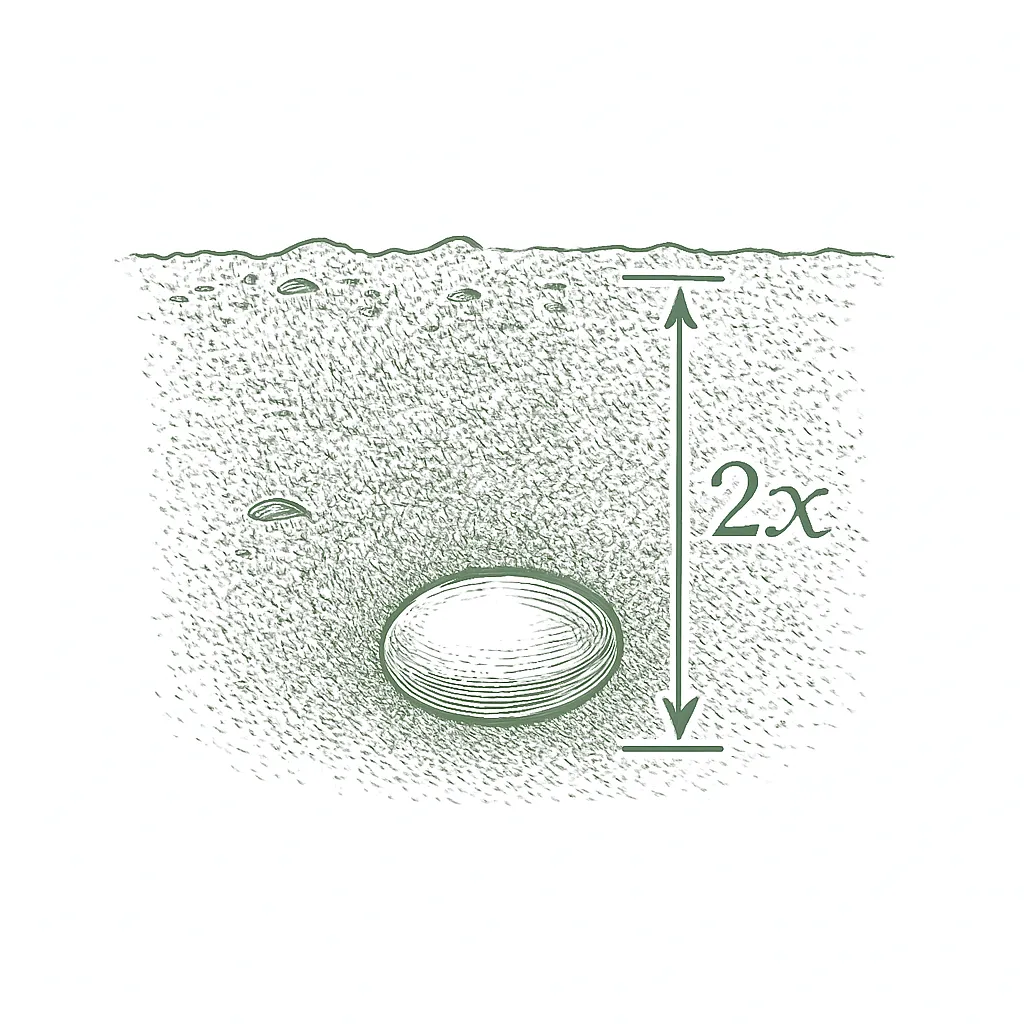
Start eggplant seeds indoors about 8 weeks before you plan to plant out, keeping them warm (75 to 85°F) to sprout well. Eggplant needs more warmth and a longer head start than tomatoes, and it goes outside later, only once nights stay above 50°F and the soil is warm. Use stocky transplants up to a foot tall, and put a stake or cage in at planting time.Start eggplant seeds indoors about 8 weeks before transplanting (UMD uses 8 to 10 week old transplants), with bottom heat of 75 to 85°F for fast, even germination. Eggplant needs a longer, warmer start than tomato and is set out later, once nights hold above 50°F and the soil has warmed to at least 60 to 65°F. Choose sturdy transplants up to a foot tall with stems about pencil thick, and set plant supports at planting. Direct sowing is practical only in the longest, warmest regions; everywhere else this is a transplant crop.
  1. 01
    Sow outside
    Apr 1 - May 1
  2. 02
    First harvest
    From Jun 20
    65-85 days from sowing
Start method
Indoors
Soil temp
75-90°F
From seed to fruit

The growing journey

Stage 01 · Germination
01
Germination
Days 7-14 · current stage
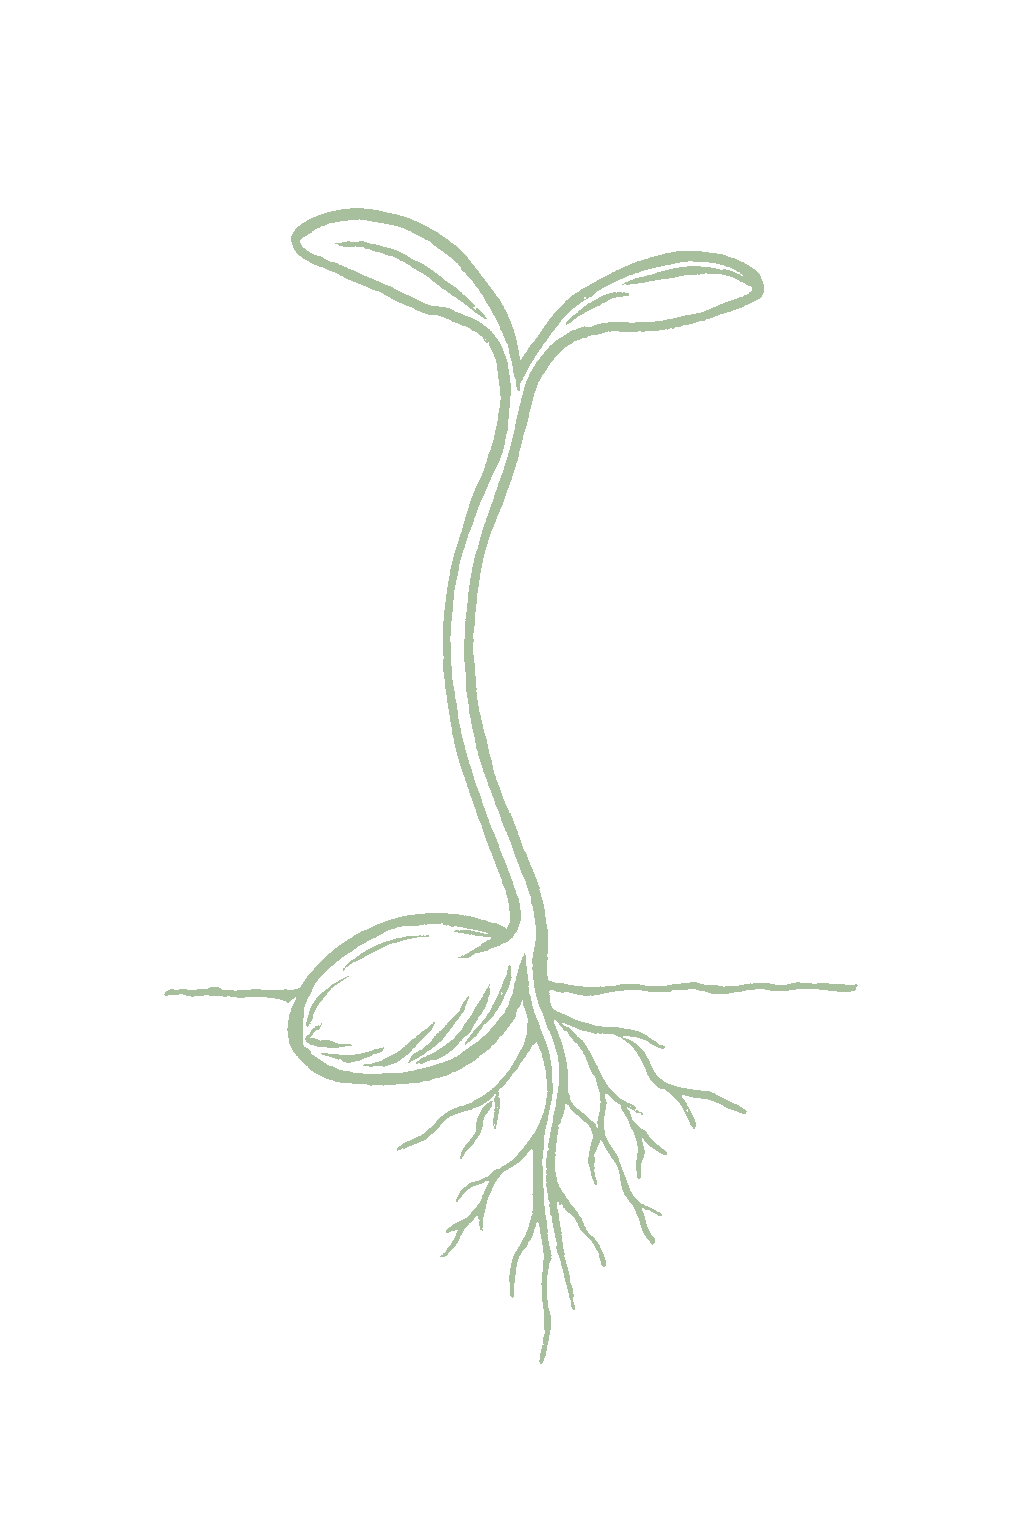
In warm conditions, seeds sprout in roughly one to two weeks, sending up two seed leaves first. Cool soil makes them slow or fail.Seeds sprout in about 7 to 14 days in warm conditions; bottom heat of 75 to 85°F is ideal, and cool soil delays or prevents germination. Two seed leaves emerge first.
Plant seeds about a quarter inch deep in a warm spot, ideally on a heat mat, and keep the soil damp until they sprout. Eggplant likes it warmer than tomatoes to come up.Sow about a quarter inch deep in warm flats with bottom heat (75 to 85°F), keeping the mix evenly moist, not soggy. Eggplant germinates slower and warmer than tomato, so give it heat and patience.
FROM PLANT · Eggplant seeds like it warmer than tomatoes and take a bit longer to sprout. A heat mat at 75 to 85°F helps a lot. Start them about 8 weeks before you will plant out.Eggplant germinates slower and warmer than tomato. Give it bottom heat of 75 to 85°F and patience; cool flats sit and sulk. Start about 8 weeks before your warm transplant date.
02
Seedling
Days 14-56
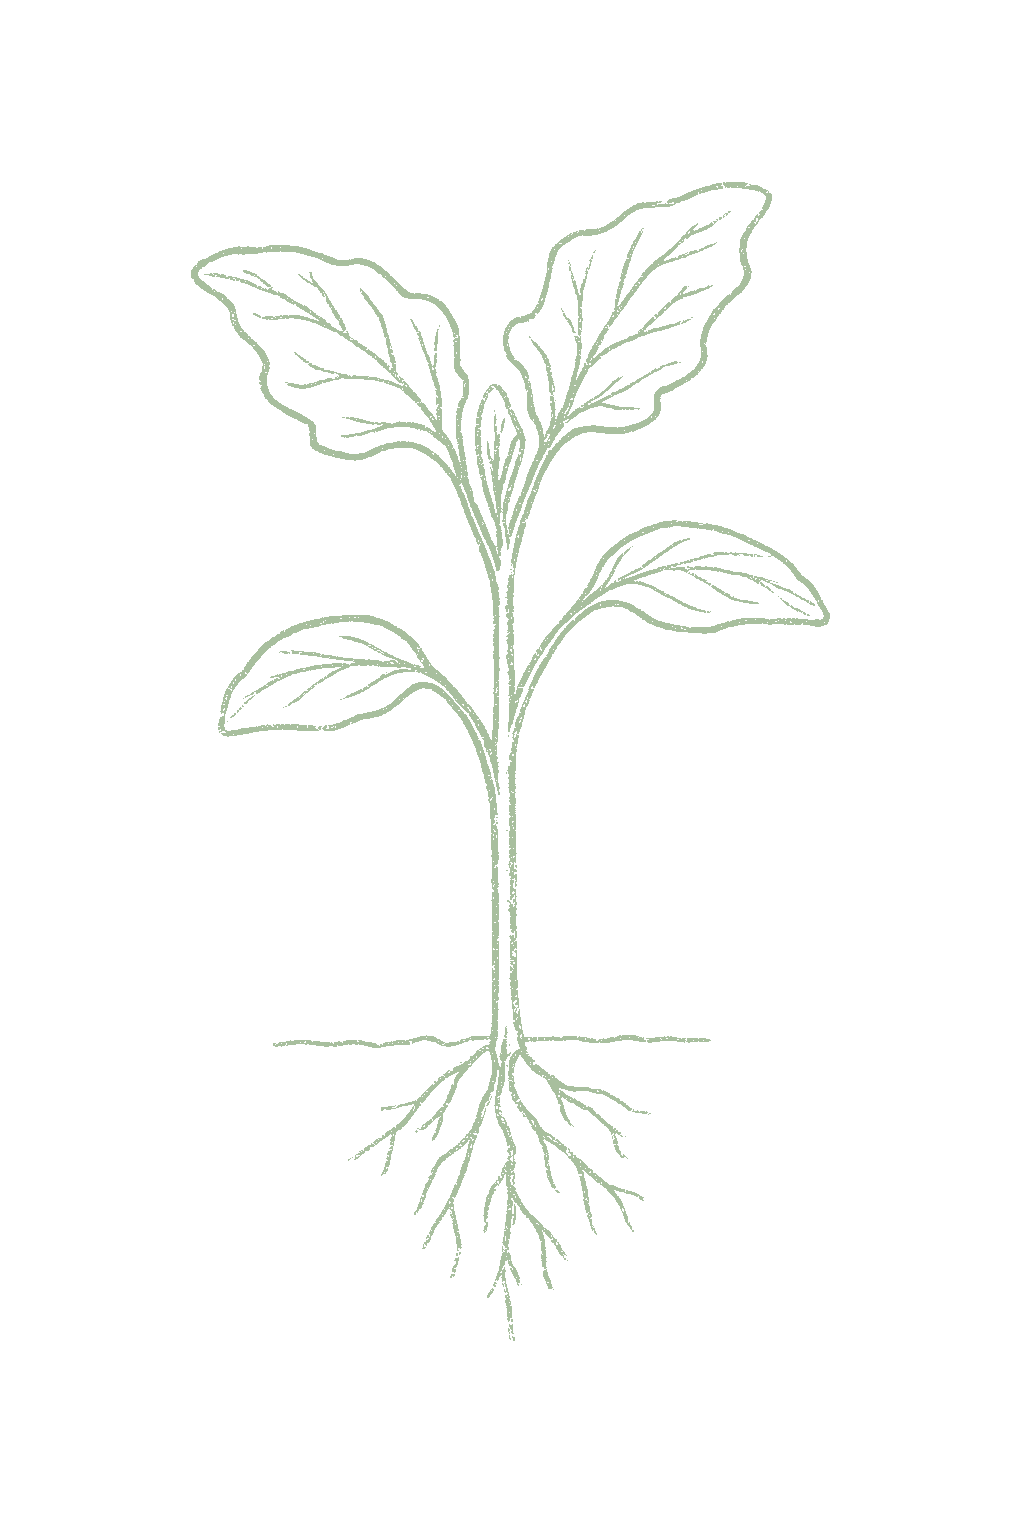
After the first two rounded leaves, true leaves appear and the plant grows slowly but steadily in warmth. Watch for tiny holes in the leaves from flea beetles, which hit young plants hardest.After the seed leaves, true leaves appear and growth is steady but unhurried in warmth. This is the most vulnerable stage to flea beetles, which can shred small plants, so watch the leaves closely.
Keep the seedlings warm and in bright light so they grow stocky, and protect them from flea beetles. Do not be in a hurry to plant them out; wait for warm weather.Keep seedlings warm and in strong light to avoid legginess, pot up as needed, and protect from flea beetles. Grow stocky, pencil-thick transplants and do not rush them outside before warmth arrives.
FROM PLANT · Keep seedlings in bright light so they grow stocky, and protect them from flea beetles, which chew tiny holes and can destroy young eggplant. A light cover keeps them off.Grow stocky transplants in strong light, and guard seedlings from flea beetles, the signature early eggplant pest, which can shred small plants. Row cover or a screened cold frame protects them until they are large.
03
Transplanting
Days 49-63
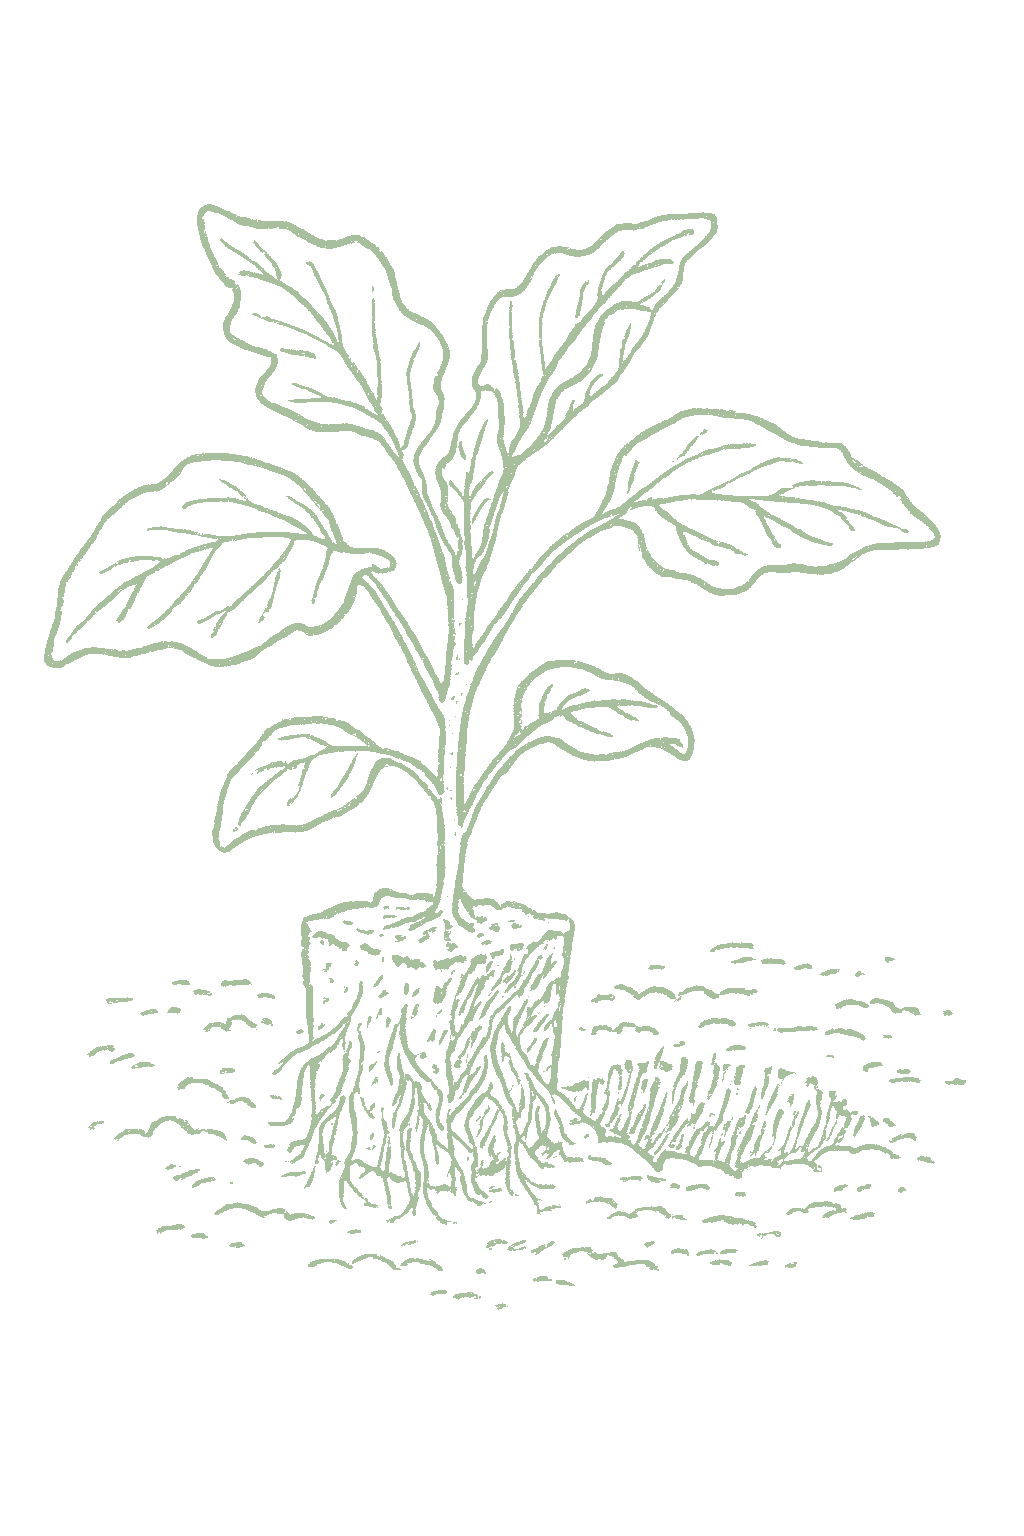
Strong young plants up to a foot tall, ready to go outside only when nights stay above 50°F and the soil is warm. Planting too early into cold soil stalls them.Sturdy transplants up to a foot tall with pencil-thick stems, ready to set out only once nights hold above 50°F and the soil has warmed to at least 60 to 65°F. Planting into cold ground is the classic eggplant setback.
Harden the plants off over about a week, then plant them 18 to 24 inches apart into warm soil, and put a stake or cage in right away. A sheet of black plastic mulch warms the soil and helps.Harden off over 7 to 10 days, then transplant into warm soil, 18 to 24 inches apart in rows 30 to 36 inches apart, and set a stake or cage at planting. Black plastic or fabric mulch warms the soil and gives a heat-loving crop a head start.
FROM PLANT · Do not rush eggplant outside. Planting into cold soil stalls it badly. Wait until nights stay above 50°F and the soil is warm, a couple of weeks after tomato time. Black plastic mulch warms the soil and helps.Patience beats the calendar: eggplant set out into cold soil sulks for weeks and never fully recovers. Wait until nights hold above 50°F and the soil is 60 to 65°F, a week or two past the tomato date, and warm the soil with black mulch.
04
Flowering
Days 72-98
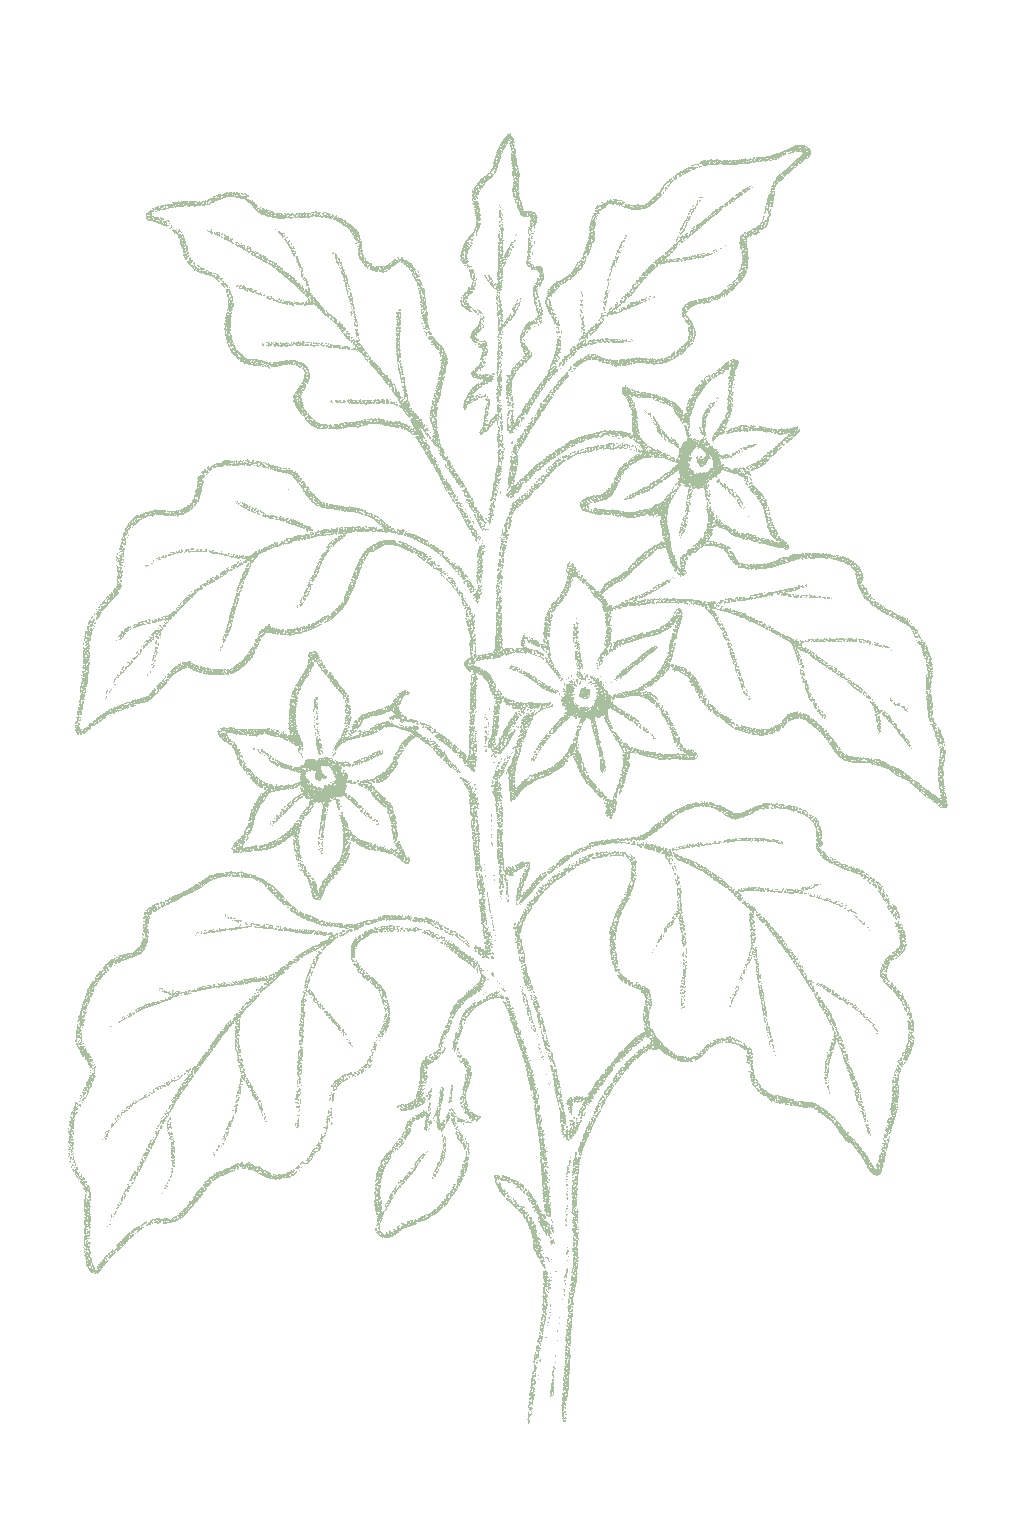
Pretty star-shaped purple or white flowers appear. Eggplant flowers pollinate themselves, so you do not need more than one plant. A tiny eggplant forms behind each flower that sets. Some flowers drop in very hot or cold spells, which is normal.Star-shaped purple (or white) flowers open singly or in small clusters. Eggplant flowers are self-fertile and largely self-pollinating, so a single plant sets fruit; a small fruit swells behind a successfully pollinated bloom. Blossom drop in cold snaps or extreme heat is normal and temporary.
Keep the plant evenly watered as it flowers, and feed it with nitrogen once the first fruit sets. If flowers drop during a hot or cold spell, do not worry, it picks back up when the weather settles.Keep moisture steady through flowering and side-dress with nitrogen as the first fruits set. If blossoms drop in a heat wave or cold snap, wait it out; set resumes as conditions moderate. A gentle tap or shake can aid pollination on still days.
FROM PLANT · Eggplant flowers pollinate themselves, so a single plant will fruit. If flowers fall off during very hot or cold spells, that is normal and it picks back up. Just keep the plant evenly watered.Eggplant flowers are self-fertile and self-pollinating, so one plant sets fruit. Blossom drop during a heat wave or a cold snap is normal and temporary; keep moisture steady and let set resume as conditions moderate.
05
Fruiting
Days 92-122
The little eggplants grow and turn shiny. The plant keeps making fruit through the warm months, often fastest in the heat of summer. The fruit is best while it is firm and glossy, before it gets really big.Set fruit swell and color up with a high gloss. Eggplant carries fruit continuously through the warm months, often accelerating in midsummer heat. Watch the skin: peak quality is firm and glossy, well before the fruit reaches full size.
Keep watering evenly and feeding, hold up heavy stems with stakes or a cage, and start picking the fruit while it is young and shiny. Keep an eye out for spider mites in hot, dry weather.Keep moisture even and feeding steady through fruiting, support fruit-laden stems, and begin harvesting while fruit is immature and glossy. Picking regularly keeps the plant setting; scout for mites and lace bugs in the heat.
FROM PLANT · Unlike tomatoes, eggplant keeps going strong in summer heat. Feed it with nitrogen once fruit sets, keep the water steady so the fruit is not bitter, and stake the plant so heavy fruit does not snap it.This is eggplant's advantage over tomato: it keeps setting fruit through midsummer heat that stalls tomato. Feed with nitrogen at fruit set, keep water even to avoid bitter, misshapen fruit, and support fruit-laden stems.
06
Harvest
Days 121-141
Firm, shiny fruit, picked while it is young rather than at its biggest. Dull skin and a dent that stays when you press it mean it is past its best, seedy and bitter.Firm fruit with a high, mirror-like gloss, picked from about 2 inches across up to two-thirds of mature size for globe types, or finger-to-hot-dog size for Asian types. A dull skin and a dent that stays when pressed mean the fruit is over-mature, seedy, and bitter.
Cut the eggplant off with scissors or a knife, leaving a bit of stem on (watch for prickles on the cap), and pick every few days. Keep harvesting until frost, and bring in the last fruit before the first frost kills the plant.Cut fruit with shears or a knife, leaving a short stem and the green calyx, and harvest at least once or twice a week. Wear care around the often-spiny calyx. Keep picking through the season until frost; bring the harvest in before the first frost ends the plant.
FROM PLANT · Pick eggplant while it is young and shiny, not when it is biggest. Shiny and firm is perfect; dull skin means it is past its best and bitter. Cut it off with a little stem on, and keep picking every few days.Pick eggplant immature and glossy, not at full size: firm fruit with a mirror gloss is at its peak, while a dull skin and a dent that stays means seedy, bitter flesh. Cut with shears leaving a short stem, and harvest at least once or twice a week to keep production going.
Beginner
Know your soil

Your soil

Identify yours

Not sure what soil you have? Grab a small handful of damp soil from your garden bed and squeeze it. If it crumbles apart easily, it's sandy. If it holds together but breaks when you poke it, it's loam (what most vegetables want). If it stays in a hard, slippery ball, it's clay.

What this crop wants

Eggplant likes rich, well-drained soil that warms up well in the sun, since it is a heat-loving plant that hates cold, soggy ground. Mix in 2 to 3 inches of compost before planting. If your soil is heavy clay or slow to warm, a sheet of black plastic or fabric mulch laid down before planting warms the soil and gives eggplant the head start it wants. Aim for soil that stays evenly moist but never waterlogged.

If your soil doesn't match

You have sandy soil

Mix 2-3 inches of compost into the top 6 inches of your bed before planting. Compost holds moisture (which sandy soil drains too fast) and adds the nutrients sandy soil tends to lack. Repeat each season. Compost breaks down over time.

You have clay soil

Mix 2-3 inches of compost AND a few inches of coarse sand or perlite into the top 6 inches of your bed. The compost feeds the plants; the sand breaks up the clay so air and water can move through. Don't add sand without compost. It can compact like concrete.

Containers and raised beds

If amending your soil sounds like too much work, or if your soil is heavy clay, full of rocks, or contaminated, build over it. A raised bed at least 12 inches deep filled with a 50/50 mix of compost and sandy loam gives you ideal growing soil with no battles. A 5-gallon container with quality potting mix does the same for one plant at a time. Both bypass your native soil entirely.

Learn more about your soil
The specs

Care guide

The numbers that matter, at a glance.

Sunlight
Full sun · 6-8 hrs/day
Water
Regular
Spacing
18 to 24 inches
Soil
loam, sandy loam
Days to maturity
65-85 days from transplant
Soil pH
5.5 to 6.8
Container OK?
Yes · 5+ gal pot
Germination temp
75-90°F
In a pot

Yes, 5 gallons and up

Eggplant is a great container plant, and pots even help by warming the roots, which this heat-lover enjoys. Use at least a 5-gallon pot, 12 inches deep, one plant per pot, in full sun. Compact varieties like Patio Baby and Fairy Tale are bred for containers, and slim Asian types like Ichiban also do well. Keep it well watered (pots dry fast), feed regularly, and stake or cage the plant so a fruit-laden stem does not topple.Eggplant is an excellent container crop, and the warmer root zone of a dark pot in sun suits this heat-loving plant. Use a pot of at least 5 gallons (7 is better) and 12 inches deep, one plant per pot, in full sun. Compact, container-bred varieties such as Patio Baby and Fairy Tale, and slender Asian types such as Ichiban, perform best; full-size globe types need the larger pot and a stake. Water consistently, since a small soil volume dries fast and moisture swings drop blossoms, feed regularly because containers leach nutrients, and cage or stake plants to carry the fruit.

Pot size
5 gallons and up; 7 gallons is comfortable
Mature size
2 to 4 feet tall
Drainage
Drainage holes are a must. Skip the gravel layer. Do not let the pot sit in a saucer of standing water. Empty it soon after watering. A saucer is fine for keeping the pot warm, which eggplant enjoys, but the roots should never sit in pooled water.Drainage holes are a must. Skip the gravel layer. If you use a saucer, empty it within an hour of watering. Eggplant will not tolerate sitting in standing water, which starves the roots of oxygen and invites root rot. A saucer is useful for holding warmth, which eggplant likes, but the roots must not stay submerged.
Watering
Pots dry out much faster than garden beds, so in summer heat a potted eggplant may need water every day. Check daily, and water until it runs from the bottom. Keep it even, since drying out and then flooding drops the flowers.Containers dry far faster than beds, and a potted eggplant can need water once or even twice a day in summer heat. Check daily by feeling the top inch of mix, and water until it runs from the drainage holes; even moisture prevents the blossom drop and misshapen fruit that water swings cause.
Depth and shape
At least 12 inches deep. A container eggplant wants a deep, sturdy pot, at least 12 inches deep and 5 gallons or more, with a wide enough base that a fruit-laden plant does not tip. Depth for the roots matters more than width. Choose compact or Asian varieties for the smallest pots and give full-size globe types a larger container and a stake.
Self-watering pot
Yes. A self-watering container suits eggplant well, smoothing the moisture swings that drop blossoms on this thirsty summer crop. Keep the reservoir topped up in heat, water from below to keep the foliage dry, and occasionally water from the top to flush the salts that concentrate with constant sub-irrigation.
Mix
Use a rich, free-draining peat- or coir-based container potting mix, not garden soil, which compacts and drains poorly in a pot. Blend in about 20 to 25 percent compost plus a slow-release balanced fertilizer at planting. Because frequent watering leaches nutrients, plan to feed a container eggplant more regularly than one in the ground, shifting to nitrogen once fruit sets.
Feeding
Feed container eggplant more often than in-ground plants, since steady watering leaches nutrients. After the slow-release charge at planting, add a balanced liquid feed every 1 to 2 weeks, shifting toward nitrogen once fruit sets.
Plants per pot
Illinois Extension: 1 plant in a 2 gallon pot. UMD Extension: 1 plant in an 8 to 10 gallon pot.
One to try

IchibanA productive Asian hybrid with long, slender, glossy purple fruit and tender, mild, low-seed flesh. Early and heavy-bearing on a tall plant; excellent for containers and small gardens and quick to a first pick.

4 more compact types

Fairy TaleAn All-America Selections dwarf hybrid bred for containers, with small, slender, purple-and-white striped fruit on a compact plant. Very early, sweet, and tender, and productive in a pot or small bed.

Patio BabyAn All-America Selections miniature hybrid for containers, bearing many small, deep-purple, egg-sized fruit on a compact, spineless plant. Extremely early and well suited to pots, balconies, and short seasons.

Hansel

Gretel

Pot safety

Ask what your balcony or roof can carry

A balcony or roof can only hold so much weight. Before you set heavy pots there, ask a building architect what it can safely carry.Illinois Extension's guidance is to consult a building architect about weight limits before placing heavy pots on a balcony or rooftop garden. It gives no weight figure.

Never grow food in a container with anything toxic in it

Many kinds of containers can be used. Whatever you choose, keep anything toxic out of it, especially if you are growing food.Colorado State accepts nearly any container material but warns against using a container that holds toxic materials, especially for edible plants. Illinois adds that a vegetable container should be free of chemicals toxic to plants or people, and urges caution with treated lumber when growing food. If you cannot account for what a repurposed container once held, that alone is a reason to keep food out of it.

Secure hanging containers well

Fasten hanging baskets and window or rail boxes securely. Think about what is below them too, since they can drip on people or things underneath.Illinois Extension asks growers to secure hanging containers well and to think through the safety issues of hanging them. Placement matters too, since a hanging container can drip onto people or belongings below.

Soil chemistry

Soil pH for eggplant / aubergine

Preferred
5.5 to 6.8
Tolerated
5.5 to 7.5

Eggplant likes slightly acidic soil, about pH 5.5 to 6.8, and a lot of garden soil is already close. The pH scale runs from acidic to alkaline, and this range is where eggplant takes up nutrients best. If your soil runs alkaline (common in the dry interior West), you may need to add sulfur before planting. An inexpensive soil test from your local extension office tells you where you stand.Eggplant grows best at a soil pH of about 5.5 to 6.8, with a sweet spot near 6.0 to 6.5 where the nutrients it needs stay most available. It tolerates a somewhat wider band, up to roughly 7.5, but uptake of iron, manganese, and other micronutrients tightens as the soil turns alkaline, showing up as yellowing between the veins of younger leaves. Alkaline soils common across the interior West often need sulfur worked in before planting; most Eastern and Midwestern soils sit naturally near the target. A simple soil test from your local extension office settles it before you plant.

Verified · 2 sources View
Steady hand on the hose

Watering

When & how much
Frequency
Give eggplant about 1 inch of water a week, more when it is hot and dry. Water deeply rather than a little every day. Plants in pots dry out much faster and may need checking daily in summer.Aim for about 1 inch of water per week from rain plus irrigation, more in heat or on sandy soil, delivered deeply and less often rather than in light daily sprinkles. As a heat-loving plant grown through the hottest part of the year, eggplant transpires heavily in summer, and container plants dry out far faster still.
Amount
About 1 inch of water a week, soaking the soil down 6 to 8 inches so the roots grow deep. Keep it even: letting the soil go bone-dry and then flooding it stresses the plant and makes flowers drop.Around 1 inch per week is the working range, leaning higher during flowering and fruit set, wetting the soil to a depth of at least 6 to 8 inches so the roots follow the moisture down. Even, deep watering is what sizes well-shaped fruit; letting the soil swing from dry to soaked stresses the plant and drops blossoms.
Method
Water the soil, not the leaves, with a soaker hose or by holding the hose at the base. Keeping the leaves dry helps prevent disease. If you must use a sprinkler, do it in the morning so the leaves dry off by evening. Mulch helps keep the soil evenly moist and warm.Water at the base with a soaker hose or drip line, keeping the foliage as dry as possible, since wet leaves favor the leaf spots and fruit rots eggplant is prone to. If overhead watering is unavoidable, do it in the morning so leaves dry before evening. A layer of mulch buffers soil moisture and warmth and blocks soil-borne spores from splashing onto the lower leaves.
Signs of trouble
Too much water
If the lower leaves yellow, the plant wilts even though the soil is wet, or stems and fruit go soft and rotten, it is getting too much water or the soil drains poorly.Yellowing lower leaves, wilting even when the soil is wet, and soft, rotting stems or fruit point to overwatering or poor drainage. Saturated soil starves the roots of oxygen and invites the Phytophthora and bacterial wilts eggplant is susceptible to, especially on heavy ground.
Too little water
Some midday wilting in hot weather is normal and passes by evening. Leaves that stay wilted mean the plant is too dry, and drought while it is flowering causes dropped blossoms and small, bitter fruit.Midday wilting that recovers overnight is common in heat and not alarming, but leaves that stay limp and dull signal real drought. Drought stress during flowering and fruit set shows up as dropped blossoms and small, misshapen, sometimes bitter fruit.
Feeding rhythm

Feeding

Frequency
At planting, then side-dress at fruit set
Type
Balanced at planting, then nitrogen at fruit set
When to start
Work into the bed before transplanting, then side-dress when the first fruits set

Eggplant grows for a long time and likes steady feeding, but the timing matters. Mix a balanced fertilizer such as 10-10-10 into the soil before you plant. Then wait: once the first little eggplants have set, feed with a nitrogen fertilizer, and again a few weeks later. Going heavy on fertilizer too early gives you a big leafy plant with few flowers, so save the feeding for after the fruit starts forming.Eggplant is a moderately heavy feeder over a long season. Work a complete fertilizer such as 1 to 2 pounds of 10-10-10 per 100 square feet into the bed before transplanting, then side-dress with nitrogen once the first fruits have set and again three to four weeks later through the harvest. Hold the nitrogen back before fruit set, since too much early on drives leafy growth and few flowers; the time to push it is after the plant starts carrying fruit. Pair feeding with steady moisture, because fertilizer only helps a plant that is not also drought-stressed.

N · P · K = 10-10-10

Use a balanced fertilizer like 10-10-10 at planting, then switch to a nitrogen feed once the fruit sets. Do not overdo the nitrogen early or you get all leaves and no eggplants.A complete fertilizer such as 10-10-10 worked in at planting, then a nitrogen side-dress (for example calcium nitrate, 15.5-0-0) once fruit sets. Avoid heavy nitrogen before fruit set, which gives leaf at the expense of flowers.

Try 10-10-10 at planting, then calcium nitrate (15.5-0-0) as a side-dress
Who grows well together

Companion planting

The most useful eggplant companions help with its two biggest pests, flea beetles and Colorado potato beetles. Aromatic herbs and a ring of nasturtiums or marigolds can draw or shoo those pests away, and bush beans add a little nitrogen. The one rule that really matters is to keep eggplant away from tomatoes, peppers, and potatoes, which are all close relatives and share the same pests and soil diseases. Most eggplant companion pairings are traditional rather than trial-tested, and the ones worth acting on target its two signature problems: flea beetles and the Colorado potato beetle. Aromatic herbs and a border of nasturtium or marigold are the classic deflectors, drawing or repelling flea beetles and aphids off the crop, while bush beans both fix a little nitrogen and serve as a noted trap for the potato beetle. The single firmest rule is a rotation one: keep eggplant away from its Solanaceae relatives, tomatoes, peppers, and potatoes, which share its full pest and disease complex, including verticillium wilt and the flea beetle.

Other
Bush beans
Bush beans add a little nitrogen to the soil and can lure Colorado potato beetles away from your eggplant. A good, traditional neighbor.Legumes fix a little nitrogen the long-feeding eggplant appreciates, and bush beans are a noted trap host for the Colorado potato beetle, helping pull it off the crop. A traditional, mechanistically plausible pairing rather than a trial-isolated one. Well-grounded
Nasturtium
Nasturtiums are often grown near eggplant to lure flea beetles and aphids away from the crop. A helpful, low-risk neighbor.Often planted around solanaceous crops as a trap and deterrent for flea beetles and aphids, drawing them off the eggplant. Trap cropping is a documented principle, but the specific nasturtium-eggplant effect is not formally isolated, so treat it as a plausible aid. Well-grounded
Marigold
Marigolds are a classic companion flower for eggplant, traditionally grown to help keep pests down. Mostly tradition, but a cheerful, low-risk choice.A long-standing companion tradition near eggplant; French marigold grown as a cover crop has documented nematode-suppressive effects, though the interplanted marigold-eggplant pest benefit is traditional rather than trial-isolated. Traditional
Aromatic herbs
Strong-smelling herbs like thyme, oregano, and dill are traditionally planted near eggplant to help confuse pests like flea beetles. A pleasant, low-risk companion.Pungent herbs such as thyme, oregano, and dill are traditionally interplanted to confuse or repel flea beetles and other pests and to draw beneficial insects. The effect is plausible and habitat-based rather than trial-isolated for eggplant. Traditional
Keep apart from
Tomatoes, peppers, and potatoes Keep eggplant away from tomatoes, peppers, and potatoes. They are all close relatives that share the same pests and soil diseases, so planting them together makes those problems worse.All are Solanaceae and share eggplant's full pest and disease complex, including flea beetle, Colorado potato beetle, verticillium and bacterial wilt, and the blights. Grouping them concentrates that pressure and lets soilborne problems build. A real epidemiology and rotation principle rather than a tested adjacency effect: spread the nightshades out and rotate them on at least a 3 to 4 year cycle. Well-grounded
Fennel Many gardeners keep fennel away from eggplant and most other vegetables, since it is said to stunt their growth. This is more tradition than a proven rule.A widely repeated caution that fennel inhibits the growth of many garden vegetables and is best kept to its own corner. There is no strong T1 mechanism for an eggplant-fennel antagonism, so it persists mostly as garden lore. Traditional
Provenance tagged inline · see methodology for the labeling system Key
Harvest signals

When to pick

Pick eggplant while it is young and shiny, not when it is biggest. A ready eggplant has firm flesh and a bright, glossy skin, and when you press the side with your thumb the dent springs back. If the skin looks dull instead of shiny, you waited too long: the inside will be seedy, spongy, and bitter. Harvest large oval types when they are firm and glossy and slimmer Asian types at finger or hot-dog size. Cut the fruit off with scissors or a knife, leaving a little stem on, instead of pulling, because the stems are tough and sometimes prickly. Keep picking every few days, since taking the fruit young keeps the plant making more.Harvest eggplant YOUNG and GLOSSY, while the fruit is immature, not at full size. The single best cue is the skin: a ripe eggplant is firm and has a high, mirror-like gloss, and press the side gently with a thumbnail and the dent springs back. Once the skin turns dull or bronzed, the flesh has gone seedy, spongy, and bitter and the dent stays, the sign you waited too long. Pick large oval types from about 2 inches across up to two-thirds of their mature size, and slender Asian types at finger-to-hot-dog size. Cut the fruit with shears or a knife leaving a short piece of the stem and the green calyx attached, rather than pulling, since the stems are tough and often spiny. Harvest regularly, at least once or twice a week, because picking fruit while immature keeps the plant setting more; fruit left to over-ripen shuts down further production.

Verified · 3 sources View
Yield

What to expect

A healthy eggplant usually gives you several fruit over the season, around 4 to 8 for the big globe types and many more for slim Asian and baby types. Keeping it warm, evenly watered, and regularly picked makes the difference.A healthy full-size eggplant typically yields about 4 to 8 fruit over the season for large globe types, and many more for the slender Asian and small-fruited types, which set heavily and continuously. Steady warmth, even moisture, and regular picking are what carry a plant to the upper end; a single cold check or a flea-beetle-ravaged seedling pulls it down.

Once it gets going, eggplant keeps producing through the warm months, picking up in the heat of summer and slowing as fall cools down. Keep picking the fruit while it is young and shiny, since leaving big fruit on the plant makes it stop setting new ones.Eggplant bears continuously through the warm months once it starts, with production accelerating in midsummer heat (its strength relative to tomato) and slowing as nights cool in fall. Picking fruit while it is still immature and glossy keeps the plant flowering and setting; leaving fruit to over-ripen on the plant shuts down further set. The two things that trip up first-year eggplant growers are planting too early into cold soil and letting flea beetles destroy the young plants. Wait until it is truly warm, cover the seedlings, and then just keep the plant watered, sunny, and picked.First-season growers most often lose eggplant to two things: setting plants out too early into cold soil, which stalls them for weeks, and flea beetles shredding unprotected seedlings. Wait for real warmth, protect young plants with row cover, and the rest is steady water, sun, and regular picking.

What changes yield
Warmth: eggplant needs a long, warm season and warm soil; cold checks stall it and cut yield, while it thrives in summer heat that stalls tomato.Flea-beetle protection of seedlings: unprotected young plants can be devastated, slashing the season's yield.Even moisture: steady water through flowering and fruit set prevents dropped blossoms and small, bitter fruit.Regular harvest: picking fruit young and glossy keeps the plant setting more.Sun and feeding: full sun and a nitrogen side-dress after fruit set drive continuous production.
Verified · 2 sources View
Pick your variety

Recommended varieties

Pick an eggplant variety to match your space and season. For the classic big purple eggplant, grow Black Beauty, but give it a long, warm summer. Slim Asian types like Ichiban are easier, earlier, and very productive. Italian heirlooms like Rosa Bianca are beautiful and mild but slower. White types like Casper are eye-catching. If you have a short or cool season, or you are growing in a pot, choose a fast dwarf variety like Fairy Tale or Patio Baby.Choose by type, season, and space. The large globe types (Black Beauty and the many hybrids) give the familiar meaty slicing fruit but need a long, warm season; slender Asian types (Ichiban and kin) are earlier, more productive, tender, and less seedy; Italian heirlooms such as Rosa Bianca offer creamy, mild flesh prized for cooking but are slower. White types (Casper) are mild and striking but want sunscald protection. For containers, short seasons, or cool summers, the early dwarf hybrids Fairy Tale and Patio Baby ripen a crop fast on a compact plant, the safest choice where the warm season is short.

Black Beauty
The classic large, glossy, deep-purple-black globe eggplant and a dependable open-pollinated standard. Big, meaty, teardrop fruit on a sturdy plant; the benchmark American type for slicing and grilling, though slower than the hybrids.
Ichiban
A productive Asian hybrid with long, slender, glossy purple fruit and tender, mild, low-seed flesh. Early and heavy-bearing on a tall plant; excellent for containers and small gardens and quick to a first pick.
Rosa Bianca
An Italian heirloom with rounded, lavender-and-white streaked fruit and creamy, mild, non-bitter flesh prized for cooking. Beautiful and delicious, somewhat slower and less productive than hybrids, and best where the season is warm and long.
Fairy Tale
An All-America Selections dwarf hybrid bred for containers, with small, slender, purple-and-white striped fruit on a compact plant. Very early, sweet, and tender, and productive in a pot or small bed.
Casper
A white-skinned variety with elongated, ivory fruit and mild, tender flesh that some find less bitter. The white types are eye-catching and good for cooking; protect the pale fruit from sunscald in intense sun.
Patio Baby
An All-America Selections miniature hybrid for containers, bearing many small, deep-purple, egg-sized fruit on a compact, spineless plant. Extremely early and well suited to pots, balconies, and short seasons.
Off the vine

Storing your harvest

Room temp
Eggplant does not keep well, so use it within a day or two for the best texture and flavor. At warm room temperature it goes soft and wrinkled fast, so keep it somewhere cool and out of the sun if you are not cooking it right away.Eggplant is a poor keeper and is best used within a day or two of picking, when its texture and mild flavor are at their best. Held at warm room temperature it softens and shrivels quickly, so a cool spot out of direct sun is better for a short hold. Unlike a winter squash, it does not cure or store, so harvest close to when you will cook it.
Fridge
Eggplant does not like the cold. Keep it in the warmest part of the fridge, ideally around 45 to 50°F, loosely bagged so it does not dry out, and use it within a week. Stored too cold for too long it develops pitting and brown spots.Eggplant is chilling-sensitive: store it at a medium-cool 45 to 54°F with high humidity for up to about a week, not in the coldest part of the fridge. Below about 50°F for long it develops chilling injury, surface pitting, bronzing, and browning of the seeds and flesh, so a cool pantry or the warmest part of the refrigerator, loosely bagged to hold humidity, beats deep cold. Use within a week.
Freezer
Do not freeze raw eggplant, as it turns mushy. Instead cook it first, by roasting or grilling, then cool it and freeze it in portions to use in cooked dishes later. It keeps a few months that way.Eggplant does not freeze well raw; the texture turns mushy. To freeze, slice and blanch it or, better, cook it first, for example roast or grill and puree it, then cool and freeze in portions for later dishes. Cooked or breaded-and-cooked eggplant freezes acceptably for a few months.
Verified · 2 sources View
When something goes wrong

Common problems

Young leaves full of tiny holesSeedlings shredded with tiny round holes
01 of 04
What happened Flea beetles. These tiny beetles chew lots of little holes in the leaves and can devastate young eggplant, though big plants shrug it off.Flea beetles, the signature early eggplant pest. The small beetles riddle the leaves with shot-hole punctures, and on a young transplant with little leaf area the damage can stunt or kill the plant. Mature plants tolerate the same feeding easily. Next season Cover young plants with row cover until they are big and strong, plant larger transplants into warm soil, and grow a few nasturtiums nearby to lure the beetles away.Protect transplants with floating row cover from planting until they are large, set out bigger, well-hardened plants into warm soil so they grow away fast, and use a nasturtium trap planting at the edge.
Eggplant stopped growing after plantingPlant set out early then stalled and sat for weeks
02 of 04
What happened The plant was set out too early into cold conditions. Eggplant hates the cold, and a chilly start makes it sit and sulk for weeks instead of growing.A cold check from transplanting too early. Eggplant is highly cold-sensitive, and exposure to soil and nights below about 50°F stalls growth, drops blossoms, and leaves the plant sulking for weeks even after warmth returns; yield never fully recovers. Next season Wait to plant until nights stay above 50°F and the soil is warm, a couple of weeks after tomatoes. Warming the soil first with black plastic mulch helps a lot.Wait until nights hold above 50°F and the soil is 60 to 65°F, a week or two past the tomato date, harden off fully, and warm the soil with black plastic or fabric mulch before planting.
Eggplant was bitter and full of seedsCut a dull eggplant that was seedy, spongy, and bitter
03 of 04
What happened The eggplant was left on the plant too long. Picked past its prime, when the skin is dull instead of shiny, the inside turns seedy, spongy, and bitter.Harvested over-mature. Eggplant is picked immature; once the skin loses its gloss and turns dull, the flesh has gone seedy and spongy and the bitter compounds have built up. A thumbnail dent that stays rather than springing back is the tell. Next season Pick eggplant while it is shiny and firm, before it gets big, and harvest every few days. Keep it evenly watered, since dry spells make it more bitter.Pick while the skin is firm and glossy and the dent springs back, well before full size, and harvest at least once or twice a week. Keep moisture even, since drought stress adds bitterness.
Leaves wilted and yellowed and the plant stuntedLeaves yellowed and wilted one side, plant stunted
04 of 04
What happened Probably verticillium wilt, a common soil disease of eggplant. It blocks the plant's water flow, so leaves yellow and wilt and the plant stunts. There is no cure once a plant has it.Most likely verticillium wilt, the most common serious eggplant disease. The soilborne fungus clogs the vascular system, so leaves yellow (often one-sided), wilt, and drop while the plant stunts and fails to size fruit; a cut stem shows brown streaking. There is no cure. Next season Plant in a spot where eggplant, tomatoes, peppers, and potatoes have not grown for several years, and look for resistant or grafted plants. Keeping plants healthy helps them cope.Rotate to a bed with no recent nightshade history, choose tolerant varieties or grafted plants on resistant rootstock, keep plants vigorous with steady water and feeding, and consider soil solarization where the disease is established.
The usual suspects

Pests & diseases

Pests
Flea beetles
P · 01
Symptoms The leaves are peppered with lots of tiny round holes, as if hit by birdshot. It hits young plants hardest and can devastate seedlings. Touch the plant and you will see tiny dark beetles jump away.Tiny shot-hole punctures riddle the leaves, a scatter of small round holes that is the classic flea-beetle signature on eggplant. Damage is by far most severe on seedlings and young transplants, whose small leaf area a heavy infestation can shred or kill outright; established plants tolerate considerable feeding. Brush a plant and the small dark beetles spring away like fleas. Cause Small dark beetles that jump like fleas and chew tiny holes in the leaves. They are most active in spring and love eggplant, so they target young plants early in the season.Several Epitrix flea beetle species that feed on eggplant foliage, overwintering as adults in debris and emerging to attack the earliest, most vulnerable plants in spring. Eggplant is a strongly preferred host, and the beetles concentrate on it, which is why flea beetles are the defining early-season eggplant pest. Organic treatment Cover young plants with a light row cover until they are big and strong, then take it off when they flower. Setting out larger transplants helps them outgrow the damage. For heavy attacks on seedlings, an organic spray such as spinosad or a kaolin clay coating helps.Protect transplants with floating row cover until they are large and vigorous, removing it at flowering. Set out stout, well-hardened transplants rather than tiny seedlings so plants can outgrow the damage, and treat heavy early infestations with spinosad or kaolin clay. Mature plants rarely need treatment. Prevention Cover plants early with row cover, set out larger transplants into warm soil so they grow quickly, and clear away weeds and old plant debris where the beetles hide over winter. A border of nasturtiums can lure them away.Use row cover from transplanting, delay setting plants out until the soil and air are warm so they grow away fast, and clean up crop debris and weeds that harbor overwintering adults. A nasturtium or other trap planting at the bed edge can draw beetles off the crop.
The control ladder

The ladder troubleshoots from the gentlest solution to the strongest. Start with the gentlest option and only move on when and if it doesn't work.

  1. Clear away weeds and old crop debris at the end of the season. The beetles spend the winter as adults tucked into that litter, then come out in spring aimed at your youngest plants.Adults overwinter in crop debris and weedy cover, so removing both lowers the spring emergence that lands on the earliest transplants; eggplant is a strongly preferred host, which is why the pressure concentrates here.

  2. Plant a border of nasturtiums at the edge of the bed. The beetles find them attractive and can be lured off the eggplant. Treat the patch as a sacrifice rather than part of the crop, and see this method's cautions for when it must be dealt with.A nasturtium or other preferred trap planting at the bed margin can draw beetles off the crop by preference rather than by treating them. Its value hinges on the removal step in this method's cautions; a loaded patch left standing holds beetles beside the crop instead of away from it.

  3. Cover the plants with floating row cover, a light fabric that lets light and water through while keeping the beetles out, from planting day until the flowers open. Then take it off so pollination can happen.Row cover from transplanting excludes the overwintered adults through the window when leaf area is smallest and a heavy infestation can shred or kill seedlings outright; remove it at flowering.

  4. For a heavy attack on young plants, coat the leaves with kaolin clay, a fine white mineral powder mixed with water and sprayed on. The chalky film helps put the beetles off feeding.A kaolin particle film is one of the two treatments the guidance reserves for heavy early infestations; established plants tolerate considerable feeding, so this is a seedling-stage tool.

  5. Spinosad, an organic spray made by a soil microbe, is for a heavy infestation that is tearing up seedlings. Mature plants rarely need any treatment at all.Reserve spinosad for heavy early pressure on seedlings and young transplants; mature plants rarely need treatment, so the spray window is the establishment period, not the season.

The bottom rungs are products with label rules: timing, pollinators, and days to wait before harvest. Before you spray →

Colorado potato beetle
P · 02
Symptoms Striped yellow-and-black beetles and plump red larvae with black spots eat the leaves, sometimes stripping a plant bare. Eggplant is one of their favorite foods. Check the undersides of leaves for clusters of orange-yellow eggs.Rounded yellow-and-black-striped adults and humpbacked, brick-red larvae with rows of black spots chew the leaves, and eggplant is a favorite host. Both stages feed voraciously and populations build fast, so an unmanaged infestation can defoliate plants and cut yield sharply. Look for clusters of orange-yellow eggs on leaf undersides. Cause A striped beetle whose larvae and adults both feed on eggplant and potato leaves. They overwinter in the soil, show up as plants get going, and multiply quickly through the summer.Leptinotarsa decemlineata, a Solanaceae specialist that prefers potato and eggplant. Adults overwinter in the soil and nearby debris and move in as plants establish; left alone they go through multiple generations a season and quickly resist many insecticides, making non-chemical control important. Organic treatment Pick the beetles, larvae, and egg clusters off by hand and drop them in soapy water, checking every day or two. Squash the orange egg clusters under the leaves. For heavy infestations, an organic spray such as spinosad or Bt (the tenebrionis strain) works on the young larvae.In a home garden, hand-pick adults, larvae, and egg clusters daily into soapy water, which keeps small plantings clean. Crush egg masses on leaf undersides, and where pressure is high apply spinosad or Bacillus thuringiensis var. tenebrionis to young larvae. Rotating away from last year's nightshade bed cuts the overwintered population. Prevention Do not plant eggplant where potatoes, tomatoes, or eggplant grew last year, since the beetles come up from the soil there. Cover young plants with row cover, and a thick straw mulch makes it harder for the beetles to reach them.Rotate eggplant well away from where potatoes, tomatoes, or eggplant grew last year, since the overwintered adults emerge near old hosts. Row cover on young plants excludes the colonizers, and a thick straw mulch hinders the adults that walk in from the soil.
The control ladder

The ladder troubleshoots from the gentlest solution to the strongest. Start with the gentlest option and only move on when and if it doesn't work.

  1. Plant eggplant away from wherever potatoes, tomatoes, or eggplant grew last year. The beetles spend winter in the soil near their old food plants and come up right where they left off.Overwintered adults emerge near last season's nightshade hosts, so rotating well away from the previous solanaceous bed cuts the population that moves straight onto establishing plants.

  2. Cover young plants with floating row cover, a light fabric that keeps the beetles off the leaves while letting light and water through.Cover on young plants excludes the colonizing adults during establishment; it pairs with rotation, since emergence is heaviest near old host ground.

  3. Pick off the striped adults, the plump red larvae, and the orange-yellow egg clusters under the leaves and drop them into soapy water, checking every day or two. Squash any egg masses you find. This keeps a small planting clean.Daily handpicking of adults, larvae, and egg masses keeps small plantings clean, and crushing egg clusters on leaf undersides stops each generation before it feeds. Populations build fast and the species quickly resists many insecticides, which is what makes this the workhorse rung.

  4. Where the plants are still crawling despite picking, spinosad, an organic spray made by a soil microbe, works on the young larvae. Aim it at the small ones rather than the full-grown beetles.Apply spinosad to young larvae where pressure runs high; the species' record of developing resistance to many insecticides is the argument for leaning on the non-chemical rungs first.

The bottom rungs are products with label rules: timing, pollinators, and days to wait before harvest. Before you spray →

Aphids
P · 03
Symptoms Tiny soft green or black insects gather on new growth and the undersides of leaves, making them curl and yellow, often with a sticky film and black mold. They can also spread plant viruses.Colonies of small soft-bodied insects, often green peach aphid, cluster on growing tips and leaf undersides, causing leaves to curl, pucker, and yellow, with sticky honeydew and sooty mold following. Beyond direct feeding, aphids transmit mosaic and other viruses that mottle and distort the foliage. Cause Small sap-sucking insects that multiply quickly in warm weather, especially on soft growth from too much fertilizer. The sticky honeydew they leave grows black mold.Several aphid species, predominantly green peach aphid, that suck sap and reproduce rapidly in warm weather, building up fast on soft, over-fertilized growth. The honeydew they excrete fosters sooty mold that shades the leaves. Organic treatment Blast them off with a strong spray of water and treat the undersides of the leaves with insecticidal soap, repeating every few days. Ladybugs and other helpful insects eat aphids, so welcome them.Knock colonies off with a strong jet of water and spray insecticidal soap or horticultural oil with thorough coverage of leaf undersides, repeating every few days. Conserve ladybugs, lacewings, and parasitic wasps, which usually bring aphids under control. Prevention Do not over-fertilize with nitrogen, check the undersides of leaves regularly, and let helpful insects do their work instead of spraying everything.Avoid excess nitrogen, which drives the soft growth aphids favor, scout leaf undersides and growing tips, and support natural enemies rather than spraying broadly. Reflective mulch deters aphids from young plants.
The control ladder

The ladder troubleshoots from the gentlest solution to the strongest. Start with the gentlest option and only move on when and if it doesn't work.

  1. Go easy on nitrogen fertilizer. The soft, lush growth that heavy feeding pushes out is exactly what aphids multiply on fastest.Excess nitrogen drives the succulent growth aphids favor, so moderating feeding slows colony buildup on growing tips and leaf undersides in warm weather.

  2. Lay reflective mulch, a silvery sheet, around young plants. The bounced light puts arriving aphids off landing while the plants are small.Reflective mulch deters aphids from young plants, which carries extra weight here because the aphids involved transmit the mosaic viruses that mottle and distort foliage.

  3. Knock the colonies off with a strong jet of water from the hose, aiming at the new growth and the undersides of the leaves. Repeat every few days.A strong jet against the leaf undersides breaks colonies up faster than they can reorganize; repeat the pass every few days through warm spells, when reproduction runs quickest.

  4. Aphids have plenty of enemies, from ladybugs and lacewings to tiny parasitic wasps, and those helpers usually bring an outbreak down on their own. Give them the chance by not spraying everything in sight.Conserved ladybugs, lacewings, and parasitic wasps usually bring aphids under control without intervention; broad sprays strip that pressure out, so support the natural enemies rather than spraying broadly.

  5. If the colonies keep growing, spray insecticidal soap, wetting the undersides of the leaves where the aphids sit. It works only where it touches them, so repeat every few days.Soap is contact-only, so thorough coverage of leaf undersides governs the outcome; repeat every few days to catch the colonies rebuilding between passes.

  6. Horticultural oil, a light spray oil, is the other choice at this step. It also works only on contact, so coat the undersides of the leaves well and repeat as with soap.Oil is the alternative contact material and carries the same underside-coverage demand and repeat interval as soap, rather than any residual activity.

The bottom rungs are products with label rules: timing, pollinators, and days to wait before harvest. Before you spray →

Spider mites
P · 04
Symptoms The leaves look dusty or speckled with tiny yellow dots, and in bad cases you see fine webbing underneath. The leaves can bronze and dry out. Mites love hot, dry weather.Fine yellow stippling speckles the leaves, which may bronze, dry, and drop, and in bad infestations fine webbing appears on leaf undersides. Two-spotted spider mites thrive in hot, dry weather, exactly the conditions eggplant is grown in, so mite pressure often peaks in midsummer. Cause Tiny mites, almost too small to see, that feed on the undersides of leaves and thrive in hot, dry, dusty conditions. They build up fast in summer.Tetranychus urticae and related mites that feed on the lower leaf surfaces with piercing mouthparts. Populations explode in heat and drought and on dusty, water-stressed plants, and can build quickly on eggplant in summer. Organic treatment Spray the undersides of the leaves with a strong jet of water every day for a week, then follow up with insecticidal soap or horticultural oil if needed. Keeping plants well watered helps, since stressed plants are hit hardest.Spray the leaf undersides with a strong jet of water repeatedly to disrupt colonies, then apply insecticidal soap or horticultural oil to the undersides, repeating every few days. Keeping plants well watered and raising humidity discourages mites; predatory mites help under heavy pressure. Prevention Keep plants well watered in hot weather, hose dust off the leaves now and then, and avoid spraying broad insecticides that kill the helpful bugs that eat mites.Keep plants well watered in hot weather, since drought-stressed plants are most vulnerable, avoid dusty conditions, and avoid broad-spectrum insecticides that kill the predators holding mites in check.
The control ladder

The ladder troubleshoots from the gentlest solution to the strongest. Start with the gentlest option and only move on when and if it doesn't work.

  1. Keep the plants steadily watered through hot weather. Mites hit drought-stressed plants hardest, so a plant kept from drying out badly is a tougher target.Water stress is the amplifier: populations explode on hot, dry, dusty, drought-stressed plants, so steady moisture through midsummer heat removes the predisposing condition rather than treating the symptom.

  2. Spray the undersides of the leaves with a strong jet of water every day for a week. It breaks up the colonies, and hosing dust off the leaves now and then helps too, since mites thrive in dusty conditions.Repeated forceful water on the leaf undersides disrupts colonies, and the added moisture works against a pest that builds fastest in dry conditions; it is the first pass before reaching for any material.

  3. Helpful insects and mites in the garden eat spider mites. Avoid spraying broad insect killers, which wipe out the helpers that keep mites in check.Broad-spectrum insecticides remove the predators holding mites in check, so conserving natural enemies is itself a control decision, made mostly by what you choose not to spray.

  4. Under a heavy infestation you can buy predatory mites, tiny mites that hunt the pest ones, and release them onto the affected plants.Purchased predatory mites help under heavy pressure once conservation is already in place; release onto an infestation you have actually located rather than ahead of one.

  5. If mites persist after the water treatment, spray insecticidal soap on the undersides of the leaves, repeating every few days.Follow the water passes with soap applied to the lower leaf surfaces where the mites feed, repeating every few days; it acts on contact only.

  6. Horticultural oil, a light spray oil, is the other option here. Coat the undersides of the leaves well and repeat if needed.Oil is the alternate contact material against the same underside-feeding colonies; coverage and repetition, not residue, do the work.

The bottom rungs are products with label rules: timing, pollinators, and days to wait before harvest. Before you spray →

Eggplant lace bug
P · 05
Symptoms The tops of the leaves look pale and stippled, and underneath you find dark sticky specks and small insects with lacy-looking wings. Bad infestations brown and curl the leaves.Leaves develop a pale, yellow-stippled or bleached look on top, while the undersides carry dark, varnish-like specks of excrement and the small, lacy-winged adults and spiny nymphs. Heavy feeding browns and curls the foliage and can stunt the plant, and lace bugs are fairly eggplant-specific. Cause A small flat insect with lacy wings that feeds in groups on the undersides of eggplant leaves, sucking out the juices. It is most active in warm weather.The eggplant lace bug (Gargaphia solani), a true bug that feeds in colonies on leaf undersides with piercing-sucking mouthparts. It overwinters in debris and is most damaging in warm weather, with several generations a season. Organic treatment Check the undersides of the leaves and spray any colonies directly with insecticidal soap or horticultural oil, making sure to coat underneath. Pick off and destroy the most badly affected leaves.Scout leaf undersides early and treat colonies directly with insecticidal soap or horticultural oil, which reach the soft nymphs, covering the undersides thoroughly and repeating as needed. Remove and destroy the worst-infested leaves. Prevention Clear away old plants at the end of the season, move eggplant to a new spot each year, and check the undersides of the lower leaves early so you catch the bugs before they spread.Clean up crop debris at season's end to remove overwintering sites, rotate eggplant, and scout the undersides of lower leaves from early in the season so colonies are caught while small.
The control ladder

The ladder troubleshoots from the gentlest solution to the strongest. Start with the gentlest option and only move on when and if it doesn't work.

  1. Move eggplant to a new spot each year so the bugs that wintered near last year's bed do not start the season on top of your plants.Rotating the planting separates the crop from lace bugs overwintering in debris around last season's bed, and since the pest is fairly eggplant-specific, the move counts for more than it would against a generalist.

  2. Clear out the old plants at the end of the season, since the bugs spend winter in that debris. During the season, pick off and destroy the leaves carrying the worst colonies.End-of-season debris removal takes out the overwintering sites; in season, removing the worst-infested leaves culls whole underside colonies of adults and nymphs at once.

  3. Check the undersides of the lower leaves from early in the season, and spray any colonies you find directly with insecticidal soap, making sure to coat underneath where the bugs feed.Soap reaches the soft nymphs when applied directly to the underside colonies; scouting lower leaves early catches colonies while they are small, and thorough underside coverage plus repetition decide the result.

  4. Horticultural oil, a light spray oil, works the same way at this step. Coat the undersides of the leaves and repeat if the bugs return.Oil is the alternative contact material against the nymph colonies, with the same demand for thorough underside coverage and repeat passes as needed.

The bottom rungs are products with label rules: timing, pollinators, and days to wait before harvest. Before you spray →

Hornworms
P · 06
Symptoms Whole leaves vanish overnight, leaving just the veins, with dark droppings on the leaves below. The cause is a large green caterpillar that hides against the stems, easier to spot by its droppings than by sight.Large sections of leaf, and sometimes whole shoots, are stripped down to the veins overnight, with dark pellet droppings on the leaves below. The culprits are big green tomato or tobacco hornworms, up to four inches long, that blend into the stems and are easiest to find by their frass. Cause Big green caterpillars, the young of large moths, that feed on eggplant and tomato leaves mostly in mid to late summer. Even a few can strip a lot of foliage.Tomato and tobacco hornworms, the larvae of large sphinx moths, which feed on solanaceous foliage including eggplant from midsummer on. A few caterpillars can do conspicuous damage given their size. Organic treatment Pick the caterpillars off by hand and drop them in soapy water. If you find one covered in small white capsules, leave it, those are parasitic wasps that will do the work for you. An organic Bt spray works on the smaller caterpillars.Hand-pick the caterpillars, which is effective in a home garden, and apply Bacillus thuringiensis to younger larvae where numbers are high. Leave any hornworm studded with white parasitic-wasp cocoons in place, since the wasps will kill it and breed more. Prevention Turn the soil at the end of the season to destroy the pupae, watch for droppings and missing leaves from midsummer, and welcome the helpful wasps that attack hornworms.Till the soil in fall to destroy overwintering pupae, scout for frass and stripped leaves from midsummer, and encourage the parasitic wasps and other natural enemies that keep hornworms in check.
The control ladder

The ladder troubleshoots from the gentlest solution to the strongest. Start with the gentlest option and only move on when and if it doesn't work.

  1. Turn the soil over in fall once the plants come out. The caterpillars pass the winter underground as pupae, the resting stage between caterpillar and moth, and tilling destroys them.Fall tillage destroys overwintering pupae in the bed, trimming the local carryover before the next summer's moths emerge.

  2. Pick the big caterpillars off by hand and drop them into soapy water. They blend into the stems, so look for the dark droppings, called frass, on the leaves below and search just above that spot.Handpicking is effective at home-garden scale; frass on lower leaves locates larvae far more reliably than scanning the stems they match.

  3. If you find a hornworm covered in small white capsules, leave it right where it is. Those are the cocoons of parasitic wasps that will kill it and go on to attack other hornworms.Leave any larva studded with parasitic-wasp cocoons in place, since the emerging wasps kill it and breed more; encouraging these natural enemies is part of what keeps hornworm numbers in check.

  4. When there are more caterpillars than you can pick, Bt, short for Bacillus thuringiensis, is an organic spray that works on the smaller, younger ones.Apply Bt where numbers run high, aimed at younger larvae; it is the material for small caterpillars, with handpicking covering the full-grown ones.

The bottom rungs are products with label rules: timing, pollinators, and days to wait before harvest. Before you spray →

Diseases
Verticillium wilt
D · 01
Symptoms Leaves turn yellow and wilt, often on one side of the plant first, then brown and drop while the plant stunts. Cut a wilting stem and you may see brown streaks inside. It is the most common serious eggplant disease.Lower and outer leaves yellow, often in a wedge or one-sided pattern, then wilt, brown, and drop, working upward as the plant stunts and fails to size its fruit. A cut through a wilting stem shows tan-to-brown streaking in the water-conducting tissue. It is the most common and damaging eggplant disease in much of the country. Cause A soil fungus that infects the roots and blocks the plant's water pipes, so it wilts even when watered. It lives in the soil for years and attacks many crops, especially the nightshade family.Verticillium dahliae, a soilborne fungus that infects the roots and clogs the vascular system, so the plant wilts despite moist soil. It persists in soil for years as resting structures, has a wide host range across the Solanaceae and many other crops, and is favored by cool-to-moderate soil temperatures. Organic treatment There is no cure once a plant has it, so pull and destroy infected plants. The real answer is prevention: rotate your crops and choose resistant or grafted plants next time.There is no cure once a plant is infected; remove and destroy affected plants. Management is preventive and centered on rotation and resistant or grafted plants, since the fungus cannot be eradicated from infested soil by home-garden means. Prevention Plant eggplant in soil with no recent history of the disease, rotate away from tomatoes, peppers, and potatoes, and look for resistant or grafted plants. Keeping plants healthy with steady water and feeding helps them cope.Do not plant eggplant where verticillium-susceptible crops (tomato, pepper, potato, eggplant, and many others) have grown, rotate on a long cycle, choose tolerant varieties or grafted plants on resistant rootstock, and keep plants vigorous with steady water and balanced feeding. Solarizing infested beds can lower inoculum.
The control ladder

The ladder troubleshoots from the gentlest solution to the strongest. Start with the gentlest option and only move on when and if it doesn't work.

  1. When you buy seed or plants, look for varieties described as tolerant of verticillium. There is no cure once a plant is infected, so the choice you make before planting carries most of the weight.Tolerant cultivars are a core preventive move against a pathogen that cannot be cured in the plant or cleared from infested soil by home-garden means; note the sources say tolerant, not immune.

  2. Another option is a grafted plant, the variety you want joined onto roots bred to resist the disease. It lets you keep growing eggplant on ground where the fungus is already present.Grafting onto resistant rootstock keeps the fruiting variety while swapping out the root system the soilborne fungus infects, the practical route on ground already carrying inoculum.

  3. Plant eggplant in ground that has not recently grown tomatoes, peppers, potatoes, or eggplant, and keep the break long. The fungus lives on in the soil for years.The fungus persists for years as resting structures with a wide host range across the Solanaceae and many other crops, so only a long rotation away from susceptible hosts meaningfully lowers exposure.

  4. Pull out and destroy any plant that wilts with it. It will not recover, and removing it is the one useful thing left to do that season.Infected plants do not recover, so remove and destroy them; in-season management ends there, which is why the weight of this ladder sits on the preventive rungs.

  5. Where a bed is known to carry the fungus, solarizing, covering moist soil with clear plastic through the hottest weeks so the sun heats it, can lower the amount of disease in the soil.Solarizing an infested bed can lower inoculum ahead of replanting; it lowers the population rather than clearing it, so it backs up rotation and resistant or grafted plantings rather than replacing them.

No spray for this one. Prevention is the control.

Phomopsis blight
D · 02
Symptoms Pale sunken spots on the fruit spread quickly into soft, rotting patches, and the disease can also spot the leaves and rot the stem near the base. It is worst in warm, wet weather and later in the season.Pale, sunken spots appear on the fruit that rapidly enlarge to soft, spongy, rotting areas, sometimes shrinking the fruit into a dry mummy; the disease also causes grayish leaf spots and a collar rot that can break young stems an inch or two above the soil line. It is most damaging in warm, wet weather and toward fall. Cause A fungus carried on seed and in old plant debris that spreads in warm, wet weather. It can come in on infected seed, so starting clean matters.Phomopsis vexans, a fungus that is both soil- and seedborne and overwinters on crop debris. Warm, humid conditions and splashing water spread it, and infected seed or volunteer debris often starts an outbreak, so clean seed and rotation are central to control. Organic treatment Pick off and throw away infected fruit and plants right away. Keep the leaves and fruit dry by watering at the soil, and use a labeled fungicide if it is spreading. Rotted fruit cannot be saved.Remove and destroy infected fruit and plants promptly to limit spread, and where the disease is active apply a labeled fungicide, keeping foliage and fruit as dry as possible. There is no rescue for badly rotted fruit. Prevention Use clean seed and healthy transplants, do not plant eggplant in the same spot for about four years, water at the soil instead of over the leaves, and clean up old plants at the end of the season.Start with clean, treated, or resistant seed and disease-free transplants, rotate eggplant out of the bed for about four years, water at the soil rather than overhead, mulch to limit splash, space for airflow, and remove crop debris at season's end.
The control ladder

The ladder troubleshoots from the gentlest solution to the strongest. Start with the gentlest option and only move on when and if it doesn't work.

  1. Start with clean seed and healthy, disease-free transplants. This fungus can ride in on the seed itself, so an outbreak is sometimes planted right along with the crop.The pathogen is seedborne as well as soilborne, and infected seed often starts an outbreak, so clean or treated seed and disease-free transplants are the first control point, set at purchase.

  2. Seed sold as resistant to this disease is one of the clean-start options worth looking for when you buy.Resistant seed sits alongside clean and treated seed in the guidance; it is a decision made at purchase, before anything else on this ladder applies.

  3. Keep eggplant out of the same bed for about four years. The fungus survives on old plant debris in the ground.A rotation of about four years lets debris-borne inoculum decline; volunteer debris can start an outbreak, so the gap only counts if the bed is genuinely clear of it.

  4. Water the soil at the base of the plants instead of over the leaves, and keep the leaves and fruit as dry as you can. The disease spreads in splashing water and warm, wet weather.Soil-directed watering removes the splash that spreads the fungus and shortens the warm, humid wetness periods that drive it, which matter most toward fall when the disease peaks.

  5. Spread mulch under the plants so rain cannot splash soil, which can carry the fungus, up onto the leaves and fruit.A mulch layer intercepts splash off infested soil and residue, cutting the inoculum that reaches foliage and fruit by that route.

  6. Space the plants so air moves between them and wet leaves dry quickly. Warm, wet conditions are what this disease runs on.Spacing for airflow shortens leaf and fruit wetness, working directly against the warm, humid conditions that favor infection.

  7. Pick off and throw away any fruit with pale sunken spots as soon as you see it, pull plants that are badly hit, and clear all the old plants out at the end of the season. Rotted fruit cannot be saved.Prompt removal of infected fruit and plants limits spread, and stripping crop debris at season's end removes the overwintering substrate; there is no rescue for badly rotted fruit, so removal is the in-season play.

No spray for this one. Prevention is the control.

Bacterial wilt
D · 03
Symptoms The plant wilts and collapses suddenly even though the soil is wet, without much yellowing first. If you cut the stem near the base, the inside looks brown, and a cut stem held in a glass of water gives off milky strands. It is mainly a problem in the hot, wet South.Individual leaves, then whole plants, wilt and collapse suddenly even though the soil is moist, with little of the yellowing that precedes verticillium. Cut low on the stem and the pith is discolored reddish-brown; suspended in clear water, a cut stem streams milky bacterial ooze. It is most serious in hot, wet soils of the South. Cause A soil bacterium that gets into the roots and blocks the plant's water flow, so it wilts fast. It lives in warm, wet soil and spreads in water and on tools.Ralstonia solanacearum, a soilborne bacterium that invades the roots and plugs the vascular tissue. It survives in soil and infected debris, spreads in water and on tools, and is favored by high soil temperature and moisture, so it is most damaging in warm, wet regions. Organic treatment There is no cure, so pull and destroy any plant that wilts from it, and clean your tools. The real fix is prevention next season.There is no cure; remove and destroy wilted plants promptly to limit spread, and disinfect tools. Because it persists in soil, management is preventive, through rotation, resistant or grafted plants, and improved drainage. Prevention Do not plant eggplant where tomatoes, potatoes, or eggplant grew in the last three years, improve drainage in wet spots, and look for resistant or grafted plants if this disease is common where you live.Avoid planting eggplant where tomato, potato, or eggplant grew in the previous three years, choose resistant varieties or graft onto resistant rootstock in problem areas, improve drainage, and avoid moving infested soil or working among wet plants.
The control ladder

The ladder troubleshoots from the gentlest solution to the strongest. Start with the gentlest option and only move on when and if it doesn't work.

  1. If this disease is common where you live, look for varieties described as resistant. There is no cure once a plant has it, so what you plant matters more than anything you can do afterward.In problem areas, resistant varieties lead the program against a soilborne bacterium that cannot be cured in the plant; everything after infection is containment.

  2. A grafted plant, your chosen variety joined onto resistant roots, is the other way to keep growing eggplant in ground that carries the disease.Grafting onto resistant rootstock keeps the fruiting variety while replacing the roots the bacterium invades, the practical route where the soil is already infested.

  3. Do not plant eggplant where tomatoes, potatoes, or eggplant grew in the last three years. The bacterium lives on in the soil and in old infected plant matter.Keep eggplant off ground that carried tomato, potato, or eggplant within the previous three years; the bacterium persists in soil and infected debris and is favored where soils run hot and wet.

  4. Improve the drainage in wet spots before planting. The bacterium does best in hot, wet soil, so ground that drains freely works against it.High soil moisture and temperature favor the pathogen, so drainage work on heavy or low-lying ground removes part of what makes a bed conducive.

  5. Stay out of the bed while the plants are wet, and avoid tracking soil from a spot where plants have wilted into a clean one. The bacterium travels in water and on tools.The bacterium spreads in water and on tools, so work the planting when it is dry, and avoid moving infested soil between beds; timing your chores is itself part of the control.

  6. Pull and destroy any plant that wilts and collapses with it, then clean your tools before touching anything else. Removing sick plants quickly is what limits the spread.Prompt removal and destruction of wilted plants, with tools disinfected afterward, limits spread from a plant that cannot be saved; in-season management is containment, not rescue.

No spray for this one. Prevention is the control.

Phytophthora blight
D · 04
Symptoms Dark, wet-looking patches appear on the stems, leaves, or fruit, and the plant can wilt and die quickly. The fruit can rot, sometimes with white fuzzy growth. It strikes in warm, wet, poorly drained ground.Dark, water-soaked lesions and streaking develop on stems, leaves, or fruit, and a plant can collapse and die rapidly once the stem is girdled. Fruit rots with a firm, sometimes white-cottony decay. It flares in warm, wet, poorly drained conditions and after heavy rain or flooding. Cause A mold-like disease that lives in wet soil and spreads in splashing water, attacking plants in warm, soggy conditions. It moves fast once it starts.Phytophthora species (such as P. capsici and P. nicotianae), water molds that thrive in saturated soil and spread in splashing and running water. They survive in soil and debris and move fast in warm, wet weather, especially on heavy or poorly drained ground. Organic treatment Pull and destroy affected plants and fruit, and fix the drainage. There is no good home cure once it takes hold, so prevention is what matters.Remove and destroy affected plants and fruit promptly, and improve drainage immediately. There is no effective home-garden cure once plants collapse, so control is preventive and drainage-based. Prevention Too much water in the soil makes this disease worse, so keep the soil moist but not soggy. Water with a drip line if you can, or water at the base of the plants and keep the leaves dry. Don't plant eggplant where tomatoes, potatoes, peppers or eggplant grew in the last three years. This disease also attacks tomatoes, beans and most squash and melons, so rotating crops helps less against it. Corn and wheat don't get it, so they are good crops to plant in that spot instead.Keeping soil moisture from getting excessive is a key strategy for managing Phytophthora. Water often enough to keep the soil moist but not saturated. Use drip irrigation rather than overhead watering, or water at the base of the plants and keep the leaves as dry as possible. Don't plant eggplant where tomatoes, potatoes, peppers or eggplant grew in the last three years, since the pathogen survives in soil. The pathogen's broad host range, which includes tomato, beans and most cucurbits, makes rotation much less effective. Rotate to cereals such as corn or wheat, which are not hosts.
The control ladder

The ladder troubleshoots from the gentlest solution to the strongest. Start with the gentlest option and only move on when and if it doesn't work.

  1. Plant on raised beds or mounds so water drains away fast, and avoid the low spots that stay soggy after rain. This disease lives in wet soil, so drainage is the main defense.Raised, well-drained beds and avoiding low ground deny these water molds the saturated soil they need; once plants collapse there is no effective home-garden cure, so drainage is where control actually lives.

  2. Water the soil rather than showering the plants from above. The disease spreads in splashing and running water.Soil-directed irrigation removes the splash and surface flow that carry the pathogen through a warm, wet bed.

  3. Mulch under the plants so rain cannot splash infested soil up onto the stems, leaves, and fruit.Mulch intercepts splash off infested soil, one of the routes by which the pathogen reaches stems, foliage, and fruit above the soil line.

  4. Rotate eggplant away from beds that grew peppers, tomatoes, or squash-family crops. The disease survives in the soil and in old plant debris.Rotation off solanaceous and cucurbit hosts matters because the pathogen survives in soil and debris and flares again whenever warm, saturated conditions return.

  5. Pull out affected plants and rotting fruit as soon as you see them and get them out of the garden. Once a plant collapses it cannot be saved.Prompt removal and destruction of affected plants and fruit limits what running and splashing water can spread through the rest of the bed; beyond removal, control is preventive and drainage-based.

No spray for this one. Prevention is the control.

Verified · 6 sources View
Seasoned
Where to plant next year

Crop rotation

Move eggplant to a different part of the garden each year, and do not return it, or its relatives tomato, pepper, and potato, to the same spot for about four years. Soil diseases like verticillium wilt and the pests that bother eggplant build up where nightshades grow, and rotation is the main tool to keep them in check. Clean up old plants at the end of the season too.Rotate eggplant on a long cycle, returning it to a given bed no sooner than the fourth year, to break the buildup of verticillium and bacterial wilt, phomopsis (which is also seedborne), and the flea and Colorado potato beetles. The wider Solanaceae, tomato, pepper, and potato, share that complex, so rotate as a group and avoid following any of them. Clear and remove spent plants at season's end rather than tilling them in, which removes overwintering pest and disease sites.

Family
Nightshade family (Solanaceae)
Years between
4 years
in the same bed
Avoid following
Do not plant eggplant where you grew tomatoes, peppers, potatoes, or eggplant recently. They are all in the same family and share the same soil diseases and pests, which build up and carry over.Tomatoes, peppers, potatoes, and eggplant, which share verticillium and bacterial wilt, phomopsis, the flea beetle, and the Colorado potato beetle. These soilborne diseases and overwintering pests build up wherever a nightshade has grown.
Plant after
Legumes (beans, peas), brassicas, sweet corn, alliums (onions, garlic), and leafy greens make good preceding crops, since they do not share the nightshade pest and disease complex, and a legume leaves nitrogen behind for the long-feeding eggplant.
Verified · 2 sources View
In the app · pre-launch

When plant taps you on the shoulder

The plant app sends a timely reminder at every critical moment of your eggplant / aubergine season. The wording adjusts to whichever you pick: beginner or seasoned. Here are three you'll see in Zone 9.

p
plant
Wait for warm weather to plant eggplant Plant eggplant only when it is truly warm
Eggplant hates the cold. Wait to plant it out until nights stay above 50°F and the soil is warm, a couple of weeks after you would plant tomatoes. Put a stake in when you plant. Eggplant is heat-loving and sets back badly in cold soil. Transplant only once nights hold above 50°F and the soil has warmed to 60 to 65°F, a week or two after the tomato date, and set a stake at planting.
p
plant
Time to feed your eggplant Side-dress your eggplant at fruit set
Your eggplant is starting to set fruit. Feed it with a nitrogen fertilizer a few inches out from the stem, and water it in. Your eggplant is setting its first fruit, the moment to side-dress with nitrogen. Place it a few inches out from the plants and water it in, then repeat every 3 to 4 weeks through harvest.
p
plant
Pick your eggplant while it is shiny Harvest eggplant young and glossy
Your eggplant is ready to pick while it is firm and shiny, not at its biggest. Cut it off with a little stem on, and keep picking every few days so the plant makes more. Your eggplant is ready to pick while firm and glossy, before full size. Cut with shears leaving a short stem, and harvest at least once or twice a week to keep the plant setting more fruit.
Get personalized alerts.

plant sends the right notification at exactly the right moment, for your zone, your weather, your crops. Founding members lock the rate forever.

Back the Kickstarter →
Ask the gardener

Common questions

Got a question we missed?

We're building this guide with real growers. Got a question we missed? Ask here. We read every one and add the best answers right to this page.

Grown this before?

Share a tip

Learned something the hard way? Pass it on. Real growers' tips make this guide better for the next person, and we credit you by name when yours goes live.

Seasoned
Spot something wrong?

Report a problem

If you've grown this crop and you see a date, a temperature, a companion claim, or a recommendation that doesn't match your experience, tell us. Real growers' corrections make this guide better for the next person.

How we built this guide

Methodology & sources

Every date, temperature, spacing, and recommendation on this page is sourced from university cooperative extension publications, peer-reviewed agricultural research, NOAA climate data, and direct extension calendars. Where claims are softer (traditional gardening wisdom not formally documented), we say so.

Research-backed Documented in cooperative extension publications or peer-reviewed research
Well-grounded A known agronomic principle, but not formally tested for this specific pair
Traditional Time-tested gardening wisdom, limited formal research support
Last reviewed
June 29, 2026
Data version
crops_data_final · v1.0 · schema 2.9
Sources cited on this page
16 publications
Verified entries
Companion-planting claims tagged inline · zone dates verified against 5+ extensions
See all sources cited on this page
  • University of Minnesota Extension umn_ext
  • University of Maryland Extension umd_ext
  • Cornell Cooperative Extension cornell_ext
  • Iowa State University Extension iastate_ext
  • Michigan State University Extension msu_ext
  • NC State Extension ncsu_ext
  • Penn State Extension psu_ext
  • U. of Illinois Urbana-Champaign Extension uiuc_ext
  • UC Davis Postharvest Center ucd_postharvest
  • Texas A&M AgriLife Extension tamu_agrilife
  • Virginia Cooperative Extension 426-331 vce_426_331
  • Piedmont Master Gardeners piedmont_mg
  • UGA Vegetable Garden Calendar uga_calendar
  • Clemson Home & Garden Information Center clemson_hgic
  • UC IPM Statewide IPM Program uc_ipm
  • NOAA 1991-2020 Climate Normals noaa_normals

Growing notes, weekly.

Zone-aware seasonal nudges, what's worth planting now, and the occasional recipe from the harvest. No spam, ever.

Vol. 003 · Eggplant / Aubergine · plant.lifestyle