Today · in your zone
What's happening right now
Off-season for pickling cucumber in zone 9.
The pickling cucumber is an easy, fast warm-season vegetable grown for small, bumpy fruit that you pick young to make pickles. The plants grow as vines or compact bushes and produce a lot of small fruit in a short time. Like all cucumbers, you pick them often, every day or two, while they are still small; if you leave one on too long it gets fat, seedy, and yellow, and the plant stops making new ones. Some types give you a big batch of pickles all at once, and others spread the harvest out. Pickling cucumbers like warm soil, full sun, and steady watering. Letting them get too hot or too dry is what makes them taste bitter. The pickling cucumber is a fast warm-season cucurbit, a type of Cucumis sativus grown for small, blocky fruit with thin, bumpy, warted skin, harvested young for brining and canning rather than fresh slicing. Plants are vigorous and tendrilled, often a little more compact than long slicing vines, and they crop heavily over a short window once the heat arrives. Like all cucumbers it is a continuous-harvest crop: pick every day or two and the plant keeps setting, but let a fruit oversize and it turns fat, yellow, and seedy and the plant slows down. Growers choose among gynoecious hybrids that set a concentrated crop ideal for a single pickling batch, open-pollinated heirlooms that spread the harvest, and parthenocarpic types that fruit without pollination. Pickling cucumbers want warm soil, full sun, and steady, even moisture; uneven water and heat stress are what turn the fruit bitter, and bitterness bites harder when the skin is most of a 2 to 4 inch pickle.
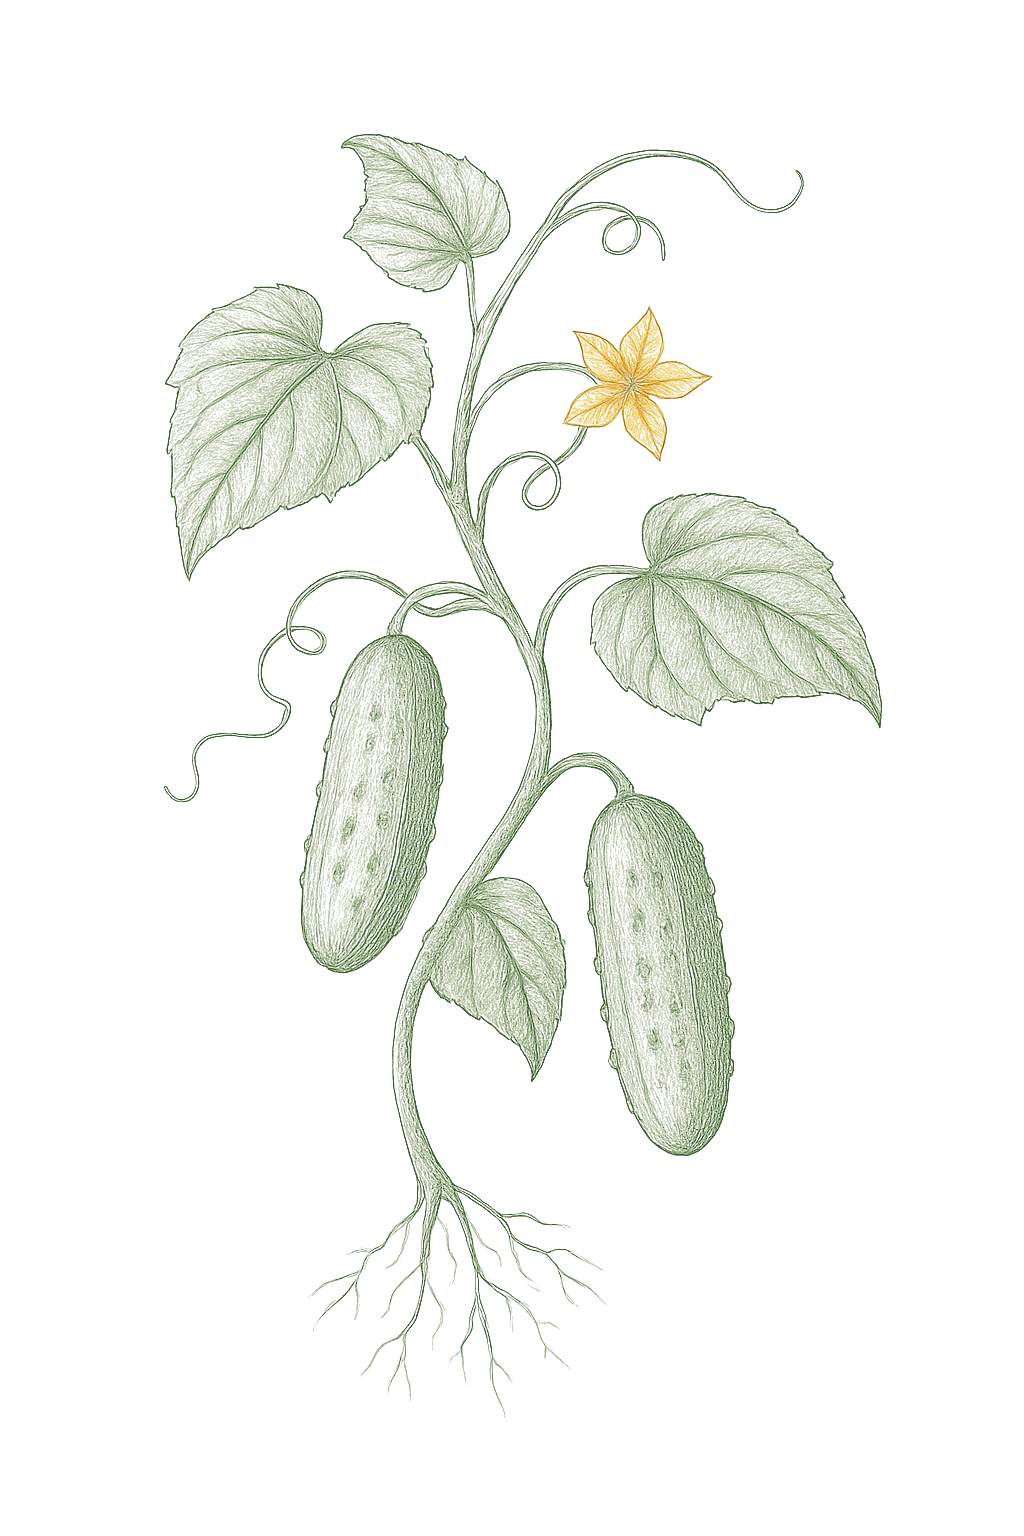
Off-season for pickling cucumber in zone 9.
Zone 9 averages a last frost around March 1. Within Zone 9, the colder half (9a, winters down to 20°F) runs about a week later. The warmer half (9b, winters down to 25°F) runs about a week earlier. The plant app picks your subzone from your ZIP.
| Subzone | Last spring | First fall | Growing days | Winter min | Fruits reliably |
|---|---|---|---|---|---|
| 9a | Mar 8 | Nov 24 | ~261 | 20-25°F | Yes · two seasons |
| 9b | Feb 28 | Nov 30 | ~275 | 25-30°F | Yes · two seasons |
Averages from 8 weather stations per subzone, drawn from NOAA 1991-2020 Climate Normals. Your actual frost date can vary by up to two weeks based on elevation, proximity to water, and local topography.
In Zone 9, pickling cucumber can be planted March through July. Start indoors Feb 15 - Mar 15. Harvest runs May through November.
Pickling cucumbers produce heavily for a few weeks, then slow down. For a few pickles at a time, plant a little every 2 to 3 weeks. For a big pickling batch, plant a block all at once. A second planting in summer is a smart backup, since pests and mildew often wear out the first plants by late summer.Pickling cucumbers crop hard for a few weeks and then tire, so how you sow depends on your goal. For a steady trickle of fresh small fruit, succession sow every 2 to 3 weeks, taking advantage of the quick 48 to 58 day maturity. For putting up a batch, sow a block of a gynoecious variety all at once so a concentrated crop comes ready together on one pickling day. Either way, the real late-season payoff is a replacement planting: cucumber beetle, bacterial wilt, and powdery and downy mildew often take down the first planting by midsummer, so a fresh sowing in early to midsummer, counted back from your first fall frost, frequently outproduces the spring crop on cleaner plants.
In Zone 9, pickling cucumber can be planted February through June, then again August through September, skipping the summer heat. Harvest runs April through November.
Pickling cucumbers produce heavily for a few weeks, then slow down. For a few pickles at a time, plant a little every 2 to 3 weeks. For a big pickling batch, plant a block all at once. A second planting in summer is a smart backup, since pests and mildew often wear out the first plants by late summer.Pickling cucumbers crop hard for a few weeks and then tire, so how you sow depends on your goal. For a steady trickle of fresh small fruit, succession sow every 2 to 3 weeks, taking advantage of the quick 48 to 58 day maturity. For putting up a batch, sow a block of a gynoecious variety all at once so a concentrated crop comes ready together on one pickling day. Either way, the real late-season payoff is a replacement planting: cucumber beetle, bacterial wilt, and powdery and downy mildew often take down the first planting by midsummer, so a fresh sowing in early to midsummer, counted back from your first fall frost, frequently outproduces the spring crop on cleaner plants.
In Zone 9, pickling cucumber can be planted February through June, then again September, skipping the summer heat. Harvest runs April through December.
Pickling cucumbers produce heavily for a few weeks, then slow down. For a few pickles at a time, plant a little every 2 to 3 weeks. For a big pickling batch, plant a block all at once. A second planting in summer is a smart backup, since pests and mildew often wear out the first plants by late summer.Pickling cucumbers crop hard for a few weeks and then tire, so how you sow depends on your goal. For a steady trickle of fresh small fruit, succession sow every 2 to 3 weeks, taking advantage of the quick 48 to 58 day maturity. For putting up a batch, sow a block of a gynoecious variety all at once so a concentrated crop comes ready together on one pickling day. Either way, the real late-season payoff is a replacement planting: cucumber beetle, bacterial wilt, and powdery and downy mildew often take down the first planting by midsummer, so a fresh sowing in early to midsummer, counted back from your first fall frost, frequently outproduces the spring crop on cleaner plants.
In Zone 9, pickling cucumber can be planted May through July. Start indoors Mar 1 - Apr 1. Harvest runs June through November.
Pickling cucumbers produce heavily for a few weeks, then slow down. For a few pickles at a time, plant a little every 2 to 3 weeks. For a big pickling batch, plant a block all at once. A second planting in summer is a smart backup, since pests and mildew often wear out the first plants by late summer.Pickling cucumbers crop hard for a few weeks and then tire, so how you sow depends on your goal. For a steady trickle of fresh small fruit, succession sow every 2 to 3 weeks, taking advantage of the quick 48 to 58 day maturity. For putting up a batch, sow a block of a gynoecious variety all at once so a concentrated crop comes ready together on one pickling day. Either way, the real late-season payoff is a replacement planting: cucumber beetle, bacterial wilt, and powdery and downy mildew often take down the first planting by midsummer, so a fresh sowing in early to midsummer, counted back from your first fall frost, frequently outproduces the spring crop on cleaner plants.
In Zone 9, pickling cucumber can be planted April through July. Start indoors Mar 1 - Apr 1. Harvest runs June through November.
Pickling cucumbers produce heavily for a few weeks, then slow down. For a few pickles at a time, plant a little every 2 to 3 weeks. For a big pickling batch, plant a block all at once. A second planting in summer is a smart backup, since pests and mildew often wear out the first plants by late summer.Pickling cucumbers crop hard for a few weeks and then tire, so how you sow depends on your goal. For a steady trickle of fresh small fruit, succession sow every 2 to 3 weeks, taking advantage of the quick 48 to 58 day maturity. For putting up a batch, sow a block of a gynoecious variety all at once so a concentrated crop comes ready together on one pickling day. Either way, the real late-season payoff is a replacement planting: cucumber beetle, bacterial wilt, and powdery and downy mildew often take down the first planting by midsummer, so a fresh sowing in early to midsummer, counted back from your first fall frost, frequently outproduces the spring crop on cleaner plants.
In Zone 9, pickling cucumber can be planted May. Start indoors Apr 3 - May 3. Harvest runs June through November.
Pickling cucumbers produce heavily for a few weeks, then slow down. For a few pickles at a time, plant a little every 2 to 3 weeks. For a big pickling batch, plant a block all at once. A second planting in summer is a smart backup, since pests and mildew often wear out the first plants by late summer.Pickling cucumbers crop hard for a few weeks and then tire, so how you sow depends on your goal. For a steady trickle of fresh small fruit, succession sow every 2 to 3 weeks, taking advantage of the quick 48 to 58 day maturity. For putting up a batch, sow a block of a gynoecious variety all at once so a concentrated crop comes ready together on one pickling day. Either way, the real late-season payoff is a replacement planting: cucumber beetle, bacterial wilt, and powdery and downy mildew often take down the first planting by midsummer, so a fresh sowing in early to midsummer, counted back from your first fall frost, frequently outproduces the spring crop on cleaner plants.
In Zone 9, pickling cucumber can be planted March through April, then again August, skipping the summer heat. Harvest runs May through June.
Pickling cucumbers produce heavily for a few weeks, then slow down. For a few pickles at a time, plant a little every 2 to 3 weeks. For a big pickling batch, plant a block all at once. A second planting in summer is a smart backup, since pests and mildew often wear out the first plants by late summer.Pickling cucumbers crop hard for a few weeks and then tire, so how you sow depends on your goal. For a steady trickle of fresh small fruit, succession sow every 2 to 3 weeks, taking advantage of the quick 48 to 58 day maturity. For putting up a batch, sow a block of a gynoecious variety all at once so a concentrated crop comes ready together on one pickling day. Either way, the real late-season payoff is a replacement planting: cucumber beetle, bacterial wilt, and powdery and downy mildew often take down the first planting by midsummer, so a fresh sowing in early to midsummer, counted back from your first fall frost, frequently outproduces the spring crop on cleaner plants.
In Zone 9, pickling cucumber can be planted February through June, then again August through September, skipping the summer heat. Start indoors Jan 24 - Mar 25. Harvest runs April through November.
Pickling cucumbers produce heavily for a few weeks, then slow down. For a few pickles at a time, plant a little every 2 to 3 weeks. For a big pickling batch, plant a block all at once. A second planting in summer is a smart backup, since pests and mildew often wear out the first plants by late summer.Pickling cucumbers crop hard for a few weeks and then tire, so how you sow depends on your goal. For a steady trickle of fresh small fruit, succession sow every 2 to 3 weeks, taking advantage of the quick 48 to 58 day maturity. For putting up a batch, sow a block of a gynoecious variety all at once so a concentrated crop comes ready together on one pickling day. Either way, the real late-season payoff is a replacement planting: cucumber beetle, bacterial wilt, and powdery and downy mildew often take down the first planting by midsummer, so a fresh sowing in early to midsummer, counted back from your first fall frost, frequently outproduces the spring crop on cleaner plants.
In Zone 9, pickling cucumber can be planted March through June, then again August through September, skipping the summer heat. Start indoors Feb 15 - Mar 8. Harvest runs May through November.
Pickling cucumbers produce heavily for a few weeks, then slow down. For a few pickles at a time, plant a little every 2 to 3 weeks. For a big pickling batch, plant a block all at once. A second planting in summer is a smart backup, since pests and mildew often wear out the first plants by late summer.Pickling cucumbers crop hard for a few weeks and then tire, so how you sow depends on your goal. For a steady trickle of fresh small fruit, succession sow every 2 to 3 weeks, taking advantage of the quick 48 to 58 day maturity. For putting up a batch, sow a block of a gynoecious variety all at once so a concentrated crop comes ready together on one pickling day. Either way, the real late-season payoff is a replacement planting: cucumber beetle, bacterial wilt, and powdery and downy mildew often take down the first planting by midsummer, so a fresh sowing in early to midsummer, counted back from your first fall frost, frequently outproduces the spring crop on cleaner plants.
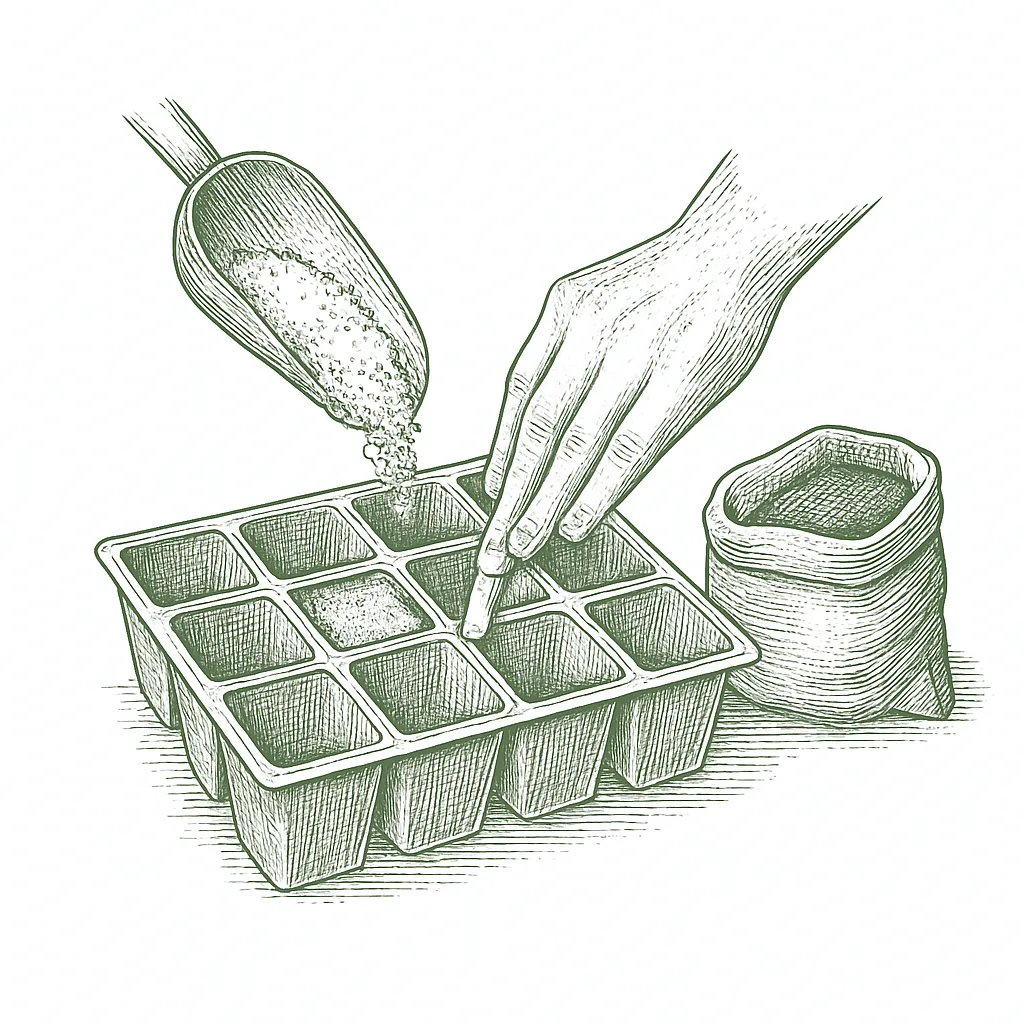
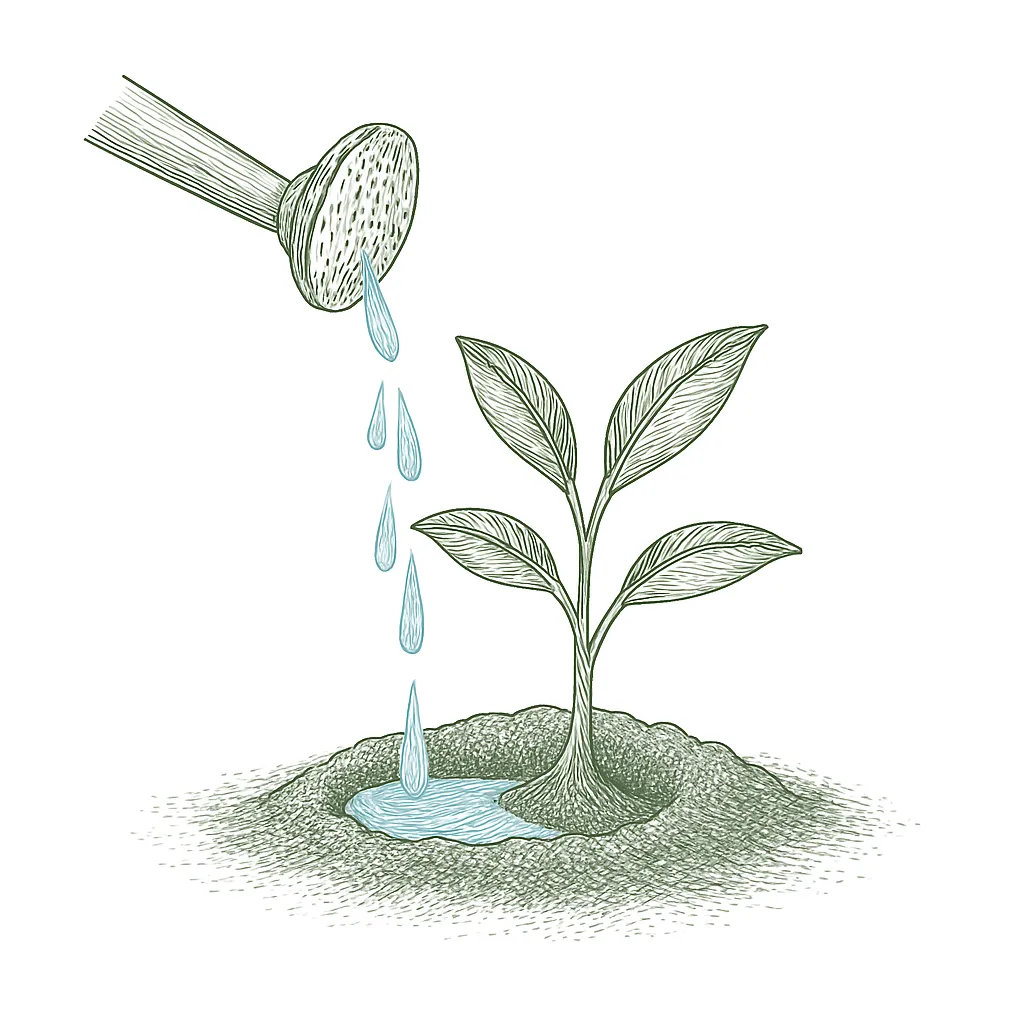
The easiest way to grow pickling cucumbers is to sow seeds right where they will grow, once the soil is warm (about 70°F). Plant a few seeds 1 inch deep in each spot and keep the strongest. Start seeds indoors only if your season is short, about three weeks before planting out, ideally in peat pots you can plant whole, and move them outside while they are still small.Because cucurbits resent root disturbance, direct sowing once the soil is reliably warm (at least 70°F; seed will not germinate below about 50°F) is the simplest, most reliable method, and pickling types are quick from seed, so direct-sown plants lose little time. Sow several seeds about 1 inch deep per hill or station and thin to the strongest. Start seeds indoors only to gain two to three weeks in a short season, sowing in peat pots about three weeks before planting out and setting them out before they outgrow the pot. Gynoecious hybrid seed often includes a few pollenizer seeds in the packet, so sow the whole packet together rather than sorting it.





Not sure what soil you have? Grab a small handful of damp soil from your garden bed and squeeze it. If it crumbles apart easily, it's sandy. If it holds together but breaks when you poke it, it's loam (what most vegetables want). If it stays in a hard, slippery ball, it's clay.
Plant pickling cucumbers in rich, well-drained soil with plenty of compost mixed in. They grow fast and have shallow roots, so they like soil that stays evenly moist but never soggy. Even watering matters a lot here, because you pick these cucumbers small and the skin is most of the fruit, and dry, stressed plants make bitter skins. Many gardeners plant them on low hills, which warm up quicker and drain better. If your soil is heavy or stays wet, build up mounds or use raised beds so the roots do not sit in water.
Mix 2-3 inches of compost into the top 6 inches of your bed before planting. Compost holds moisture (which sandy soil drains too fast) and adds the nutrients sandy soil tends to lack. Repeat each season. Compost breaks down over time.
Mix 2-3 inches of compost AND a few inches of coarse sand or perlite into the top 6 inches of your bed. The compost feeds the plants; the sand breaks up the clay so air and water can move through. Don't add sand without compost. It can compact like concrete.
If amending your soil sounds like too much work, or if your soil is heavy clay, full of rocks, or contaminated, build over it. A raised bed at least 12 inches deep filled with a 50/50 mix of compost and sandy loam gives you ideal growing soil with no battles. A 5-gallon container with quality potting mix does the same for one plant at a time. Both bypass your native soil entirely.
The numbers that matter, at a glance.
Pickling cucumbers grow well in a container if you pick a compact or bush variety like Bush Pickle and give it a big enough pot, at least 5 gallons and 12 inches deep, with a small trellis or cage for the vines. Put it in full sun, keep it well watered (pots dry out fast, and dry cucumbers turn bitter), and feed it regularly. Water the soil, not the leaves, to help avoid mildew. Check daily and pick the small fruit often.Pickling cucumbers container well when you choose a compact bush type such as Bush Pickle or Pick a Bushel, or a small-fruited gherkin like Parisian Gherkin, and parthenocarpic types that fruit without pollinators suit a balcony. They still want a real pot: at least 5 gallons and 12 inches deep, larger is better, with a trellis or cage so the vines climb and the fruit hangs straight. Give it full sun, water at the base daily in heat (a dry pot makes bitter fruit), and feed regularly, since a small soil volume dries and depletes fast over the short, fast season. Pick the small fruit every day or two. The container figures here follow general container-vegetable guidance; pickling-cucumber-specific container numbers are modeled.
Bush PickleCompact bush habit on short vines, the best pickling pick for small beds, raised beds, and containers while still yielding full pickling fruit.
Pick a Bushel
Parisian Gherkin
Patio Pickle
Ask what your balcony or roof can carry
A balcony or roof can only hold so much weight. Before you set heavy pots there, ask a building architect what it can safely carry.Illinois Extension's guidance is to consult a building architect about weight limits before placing heavy pots on a balcony or rooftop garden. It gives no weight figure.
Never grow food in a container with anything toxic in it
Many kinds of containers can be used. Whatever you choose, keep anything toxic out of it, especially if you are growing food.Colorado State accepts nearly any container material but warns against using a container that holds toxic materials, especially for edible plants. Illinois adds that a vegetable container should be free of chemicals toxic to plants or people, and urges caution with treated lumber when growing food. If you cannot account for what a repurposed container once held, that alone is a reason to keep food out of it.
Secure hanging containers well
Fasten hanging baskets and window or rail boxes securely. Think about what is below them too, since they can drip on people or things underneath.Illinois Extension asks growers to secure hanging containers well and to think through the safety issues of hanging them. Placement matters too, since a hanging container can drip onto people or belongings below.
Pickling cucumbers like soil that is slightly acidic to neutral, about pH 6.0 to 6.5, and most garden soil is already close. An inexpensive soil test tells you where you stand and whether you need to adjust it before planting.Pickling cucumbers do best in slightly acidic to neutral soil, around pH 6.0 to 6.5. They still grow across a wider band, roughly 5.8 to 7.0, but nutrient uptake tightens as the soil turns alkaline, and lime up to about pH 6.0 if a test reads below 5.8. Test before planting and amend only on the test's advice rather than by guess.
Pickling cucumbers grow fast and need a moderate amount of feeding, not a lot. Mix a balanced fertilizer or compost into the soil before planting, then feed with a little nitrogen about a week after the flowers start, and again a few weeks later if the plants look pale. Do not overdo the nitrogen, since too much makes leafy vines instead of pickles. Keep the plants evenly watered too, because feeding only helps a well-watered plant.Pickling cucumbers are moderate feeders over a short, fast season. Work a balanced fertilizer or several inches of compost into the bed before planting, then side-dress with a little nitrogen about a week after flowering starts and again roughly three weeks later if the plants look pale. The main pitfall is too much nitrogen, which drives lush vines and leaf at the expense of fruit and draws aphids and disease, and lush plants also hide the small fruit so you miss pickables. Pair feeding with steady, even moisture, since the nutrients only help a plant that is not drought-stressed, and drought stress is what turns pickles bitter.
Use a balanced fertilizer with equal numbers, like 10-10-10, at planting, then a little nitrogen once flowers appear. Avoid high-nitrogen lawn fertilizer.A balanced ratio such as 10-10-10 worked in at planting suits pickling cucumbers, followed by a light nitrogen side-dress once they flower. Avoid high-nitrogen lawn-type fertilizers, which push foliage at the expense of fruit.
The most useful pickling cucumber companions are flowers that bring in bees, since most pickling types need bee visits to set fruit, plants like radish and nasturtium that lure pest beetles away, and beans that feed the soil. Dill is a nice neighbor too, since it draws helpful insects and is the classic herb for the pickle jar. The one rule that really matters is to keep pickling cucumbers away from other squash, melons, and pumpkins, which all share the same pests and diseases. Pickling cucumber companions earn their place by drawing pests away, bringing in bees, or feeding the soil, rather than by crowding the bed. The signature pest is the cucumber beetle, which also vectors bacterial wilt, so radish and nasturtium are traditionally interplanted to lure or deter beetles, and a row of sunflowers or corn can serve as a living trellis and windbreak. Monoecious pickling types are insect-pollinated, so pollinator flowers like borage and dill keep bees working the blooms and improve fruit set; dill is also the classic brining partner, so many growers tuck it in beside the pickles on purpose. Beans fix nitrogen for the moderately hungry vines. Most of these pairings are traditional or mechanistic rather than trial-proven, and are labeled accordingly. The firmest rule is a rotation one: keep pickling cucumbers away from other cucurbits, which share the whole pest and disease complex.
Pick pickling cucumbers while they are young, firm, and warty, before the skin dulls or yellows. Tiny gherkins are picked around 1.5 inches and regular pickles around 2 to 4 inches, but the size is up to you and your recipe. Cut or clip the stem instead of pulling, so you do not damage the vine. Check every day or two, because they grow fast and an over-ripe one turns yellow, fat, and seedy, and leaving big fruit on the plant makes it stop producing. For the crispest pickles, use them the day you pick.Harvest pickling cucumbers young and often, while the skin is glossy, firm, and warty and the seeds are still soft. Pick gherkins and cornichons at about 1.5 inches, whole-pack dills at 2 to 4 inches, and spears or slices up to about 5 to 6 inches; the exact size is your preference and your recipe, but smaller is crisper. Cut or clip the stem rather than pulling, to avoid tearing the brittle vine. At peak, check every 1 to 2 days, because the fruit quickly turns fat, yellow, and seedy, and a single oversized fruit signals the plant to stop setting new ones. Remove any oversized or yellowed fruit you missed to keep the plant producing, and process the harvest within a day for the crispest pickles.
One pickling cucumber plant makes a lot of small fruit over the season, since you pick them young. For putting up pickles, grow a block of plants together so you get a batch at once. Two or three plants are plenty if you just want a few.A healthy pickling plant yields heavily over its short season, easily dozens of small fruit per vine because you pick them so young. Gynoecious hybrids concentrate that yield into a tight window, while open-pollinated and parthenocarpic types spread it out. A pickling project wants a block of plants sown together so a batch comes ready at once; a couple of plants is plenty for occasional fresh snacking.
At its peak, a pickling cucumber plant makes fruit fast. Pick every day or two, since picking often actually keeps more coming. Some types give you a big batch all at once, perfect for a pickling day.At peak in warm weather a plant sets fruit quickly, and the small fruit sizes up so fast that picking every 1 to 2 days is essential. Frequent harvest at this stage actually keeps the plant producing; leaving a mature, seedy fruit on the vine signals it to slow down or stop. Gynoecious types can drop most of their crop in a concentrated flush ideal for a single canning day. Pickling cucumbers are one of the easier crops for beginners. The things that catch people out are bitter fruit from letting the plants get dry, the plant stopping when big fruit is left on it, and plants suddenly wilting from a beetle-spread disease. Water steadily, pick small and often, and watch for beetles early.The pickling cucumber is forgiving and productive even for a first-time grower; the usual first-year surprises are bitterness from letting the plants dry out, over-mature fruit shutting the plant down when you skip a few days of picking, and a sudden mid-season collapse from beetle-spread bacterial wilt. Steady water, picking small every day or two, and early beetle control head these off.
Choose a pickling cucumber for how you want to pick it. Gynoecious types like Calypso give you a big crop all at once, which is great for making a batch of pickles, while other types spread the harvest out for a few pickles at a time. County Fair resists the beetle-spread wilt disease, Sumter handles heat and mildew, and Bush Pickle is compact for pots and small beds. Old favorites like National Pickling and Boston Pickling are productive and let you save seed. Whatever you grow, pick the fruit small and often.Pick a pickling cucumber by how you want to harvest. Gynoecious hybrids like Calypso and Fancipak set a heavy, concentrated crop that ripens close together, which is ideal for putting up a batch at once, while parthenocarpic and open-pollinated types spread the harvest over a longer window for steady small pickings. County Fair earns its place where cucumber beetles and bacterial wilt are bad, Sumter where mildew pressure is high, and Bush Pickle where space is short or you are growing in a pot. Classic open-pollinated heirlooms such as National Pickling and Boston Pickling are productive and seed-saveable, though home-saved seed can carry seedborne angular leaf spot, so refresh from clean seed periodically. Pick everything young for the size you want: small and warty is the point.
The ladder troubleshoots from the gentlest solution to the strongest. Start with the gentlest option and only move on when and if it doesn't work.
Where bacterial wilt has shown up in your beds before, choose a wilt-tolerant pickling variety such as County Fair when you buy seed. It is a head start rather than a fix on its own, so keep the steps below going as well.Wilt-tolerant cultivars such as County Fair are the plant-once lever here, settled at seed order. They do not displace vector suppression, since the beetles also feed directly on young leaves, stems, flowers, and fruit.
Do not sow where squash-family crops grew last year. Moving the patch means this year's seedlings are not sitting on the ground the beetles were feeding on last season.Rotating out of ground that carried cucurbits separates the seedling stage from last season's feeding sites, which matters most against the early-season colonizers that vector the wilt.
Keep weeds and old plant debris cleared from around the bed. It works with rotation to lower the beetle pressure young cucumbers face.Weed and debris removal around the planting sits in the prevention set with rotation, aimed at reducing pressure on seedlings rather than at rescuing a vine that is already being fed on.
Cover the seedlings with row cover, a light fabric laid over the bed that keeps beetles off. Take it off once the flowers open so bees can reach the blooms.Row cover over the seedling stage excludes the vector through the window when cucumber is most at risk. Lift it at first bloom for pollinator access, and let scouting take over from there.
Pick the beetles off by hand in the cool of the morning, when they move slowly and are easy to catch. Keep at it while the plants are small.Hand removal in the cool morning, while the beetles are sluggish, pays off most on seedlings, the stage where even light feeding pressure can seed the wilt.
Yellow sticky traps set among the plants catch beetles and show you how many are around, which tells you whether the other steps are keeping up.Sticky traps do double duty as a monitoring readout and a modest population sink. Read them for the early-season numbers, which is the pressure that matters for wilt transmission.
No spray for this one. Prevention is the control.
The ladder troubleshoots from the gentlest solution to the strongest. Start with the gentlest option and only move on when and if it doesn't work.
Move cucumbers and other squash-family crops to a different spot each year, so the bugs do not start the season on the crop they emerge into.Rotating cucurbits denies the overwintered adults a host in the same ground they come out of, lowering the founding population that builds through summer.
Clean up the old vines and plant debris after harvest. The adults spend the winter hiding in that litter, so clearing it takes away their cover.Adults overwinter in garden debris, so an end-of-season clean-out of vines and litter cuts the sheltering sites that seed the following year's build-up.
Lay row cover, a light fabric barrier, over young plants and leave it on until flowering, then take it off so bees can work the blooms.Cover from planting to first bloom keeps adults off the crown through establishment. Removal at flowering is a pollination requirement, so plan for scouting to pick up where the cover leaves off.
Pick the adults off and scrape the bronze egg clusters off the undersides of the leaves. A board laid flat on the ground overnight draws the bugs under it, so you can turn it over at first light and finish off what has gathered there. Start checking leaf undersides early in the season, because the young bugs are much easier to deal with than grown ones.Hand removal of adults plus crushing the egg masses along the veins is the core physical control, and a board trap concentrates bugs overnight for a morning collection. Scout undersides from early season, since large nymphs and adults are hard to kill once they get there.
If hand-picking is not keeping up, spray insecticidal soap on the young bugs, the small pale ones. It acts where it lands, so wet them directly, and it does much less against the large ones and the adults.Soap is a contact material aimed at early-instar nymphs. Coverage of the crown and leaf undersides is what makes it work, and knockdown falls off sharply once nymphs are large or adults dominate.
The bottom rungs are products with label rules: timing, pollinators, and days to wait before harvest. Before you spray →
The ladder troubleshoots from the gentlest solution to the strongest. Start with the gentlest option and only move on when and if it doesn't work.
If cucumber mosaic virus is a problem where you garden, look for a pickling variety bred to resist it. It does not stop aphids from feeding, but it lowers what their feeding can pass on.CMV-resistant pickling cultivars reduce the virus risk that makes melon aphid more than a sap-feeding nuisance. It is a variety-level answer to what the aphids carry, not to the colonies themselves.
Go easy on nitrogen fertilizer. Over-fed plants push soft new growth, and that is what aphids build up on fastest.Restrained nitrogen avoids the succulent flush colonies compound on. Over-fertilized and stressed plants are where numbers run away quickest in warm weather.
Lay reflective or aluminum-foil mulch while the plants are young. It deters aphids from settling on small plants.Reflective or aluminum-foil mulch deters aphids from young plants, so it earns its place at planting rather than as a mid-season response once the vines have run.
Knock the colonies off with a strong jet of water, aimed under the leaves where they gather. Repeat as new clusters show up.A forceful water jet dislodges established colonies from leaf undersides and growing tips without setting back natural enemies, which makes it the right move before any spray.
Ladybugs, lacewings, and tiny parasitic wasps feed on aphids and usually bring them under control on their own. Leave them be, and avoid blanket spraying that takes them out along with the aphids.Conserving resident ladybugs, lacewings, and parasitic wasps is what usually resolves aphid pressure here. Broad sprays remove that control and are a reliable way to let colonies rebound.
If the colonies keep rebuilding, spray insecticidal soap and coat the undersides of the leaves thoroughly, since it acts where it lands. Expect to repeat every few days.Soap is a contact material, so undersides coverage and a repeat every few days are what carry it. It is the lighter of the two sprays here and the kinder one to the natural enemies you are conserving.
Horticultural oil is the other option for a heavier infestation, used the same way: thorough coverage of the leaf undersides, repeated every few days.Oil suits denser colonies and, like soap, lives or dies on undersides coverage and a repeat interval of a few days. Sooty mold on the honeydew clears as the colonies go, rather than needing its own treatment.
The bottom rungs are products with label rules: timing, pollinators, and days to wait before harvest. Before you spray →
The ladder troubleshoots from the gentlest solution to the strongest. Start with the gentlest option and only move on when and if it doesn't work.
Keep the plants steadily watered. Mites flare on dry, dusty, drought-stressed plants, and that same stress is what turns the small pickling fruit bitter.Steady soil moisture is the primary cultural lever, since hot dry conditions and water stress are what let two-spotted mite populations multiply. The same stress drives bitterness in the small fruit, so one habit covers both problems.
Turn a strong jet of water up under the foliage. It knocks mites loose and rinses off the dust film they thrive in. Repeat through hot spells, when the numbers climb fastest.Hosing undersides both dislodges mites and suppresses the dust film that favors them. Worth repeating through hot, dry spells, the conditions in which populations expand explosively.
Predatory mites, ladybugs, and minute pirate bugs are the main things that keep spider mites down. Protect them by staying off broad-spectrum insecticides, the ones that kill a wide range of bugs at once.Predatory mites, ladybugs, and minute pirate bugs are the resident controls. Broad-spectrum insecticides remove them and are a common trigger for mite flare-ups, so conservation outranks any spray decision here.
If the mites persist, spray insecticidal soap with good coverage of the leaf undersides, then spray a second time about five days later.Two passes about five days apart, with thorough undersides coverage, catch the mites that were eggs at the first application. Soap acts on contact, so whatever it misses carries on.
Horticultural oil is the alternative, used the same way: cover the undersides well and treat twice, about five days apart.Oil runs on the same two-pass, five-day interval as soap. Mites are not insects, so many general insecticides do not touch them, which is why the ladder ends at these contact materials rather than climbing further.
The bottom rungs are products with label rules: timing, pollinators, and days to wait before harvest. Before you spray →
The ladder troubleshoots from the gentlest solution to the strongest. Start with the gentlest option and only move on when and if it doesn't work.
Choose a variety listed as resistant. It is the easiest step you can take, because everything else here is about preventing a disease that is hard to stop once it has spread across the plant.Cultivar resistance is the durable lever against one of the most common late-season cucumber diseases. Once the coating is widespread, management is damage limitation, so the choice made at seed order carries a lot of the load.
Set the plants far enough apart that air moves freely between them, and site them in full sun. Crowded, shaded plantings get it worse.Generous spacing and a full-sun site cut the crowding, poor airflow, and shade that favor the fungus. Unlike the wet-leaf diseases, this one infects without leaf wetness, so canopy humidity is what the layout is managing.
Water the soil rather than the leaves. Overhead watering is worth avoiding here even though this mildew does not need wet leaves to take hold.Base watering is listed for this disease despite its independence from leaf wetness. The value is in not raising humidity around the canopy, which is the condition the fungus does respond to.
Pull off the worst-affected leaves as you spot them. Start looking from midsummer and act at the first white patches rather than waiting to see how far it goes.Removing the most heavily colonized leaves lowers the local spore load. Pair it with scouting from midsummer, since early action is what separates a manageable case from the early defoliation that shortens the season and exposes small fruit to sunscald.
If it keeps coming back, sulfur is a labeled organic spray. Apply it at the very first white spots, covering both the tops and the undersides of the leaves. Once the coating is all over the plant, spraying will not turn it around.Sulfur is a protectant, so its value sits at first symptom with coverage of both leaf surfaces, ahead of spread. Where the coating is already general, a spray is damage limitation rather than a recovery.
The bottom rungs are products with label rules: timing, pollinators, and days to wait before harvest. Before you spray →
The ladder troubleshoots from the gentlest solution to the strongest. Start with the gentlest option and only move on when and if it doesn't work.
If downy mildew is common where you live, choose a resistant variety where one is offered. Cucumbers catch this disease easily, so the head start counts.Resistant cultivars where available are the front lever. Cucumber is among the most susceptible cucurbits, and the disease moves fast enough once established that prevention carries most of the weight.
Space plants so air moves between them and the leaves dry quickly after rain or dew. Crowding keeps foliage wet, which is what this disease needs in order to infect.Spacing shortens the leaf-wetness periods this water mold requires for infection. Crowding and prolonged wetness are the two conditions that favor it, and layout addresses both at once.
Water at the soil line instead of over the top of the plants, since wet leaves feed the infection. Stay out of the patch while the vines are still wet, too.Base irrigation removes the share of leaf wetness you control, and keeping out of wet vines is listed alongside it in the same prevention set.
Take the worst-affected leaves off and get them out of the patch. Look the planting over carefully through humid weather, which is when it tends to show up and take off.Removing badly affected foliage trims inoculum and opens the canopy a little. Scouting intensity should track humid spells, since wind-borne spores can establish and run through a planting in a short window.
When wet, humid weather sets in, a labeled copper fungicide can help hold the line. Cover the leaf undersides, where the fuzzy gray growth appears. It works ahead of the disease rather than curing what is already there.Copper goes on when conditions favor the disease, with undersides coverage where sporulation occurs. Treat it as protection through the wet window rather than a rescue once defoliation is under way.
If downy mildew keeps moving after the copper, chlorothalonil is the other fungicide this crop's guidance names for it. Cover the undersides of the leaves, since that is the surface it has to protect, and start when the weather turns to what the disease likes rather than once the leaves are already covered. Read this one's warnings before you decide: it is the heaviest thing in this guide, and stopping at the copper is a real choice.The second material named for this disease alongside copper, and applied on the same terms: undersides covered, begun as conditions turn favorable rather than after lesions are established. Protectant only, so it defends clean tissue and does nothing for what is already infected. Weigh the method's own cautions, which are the heaviest carried by anything in this catalog, against stopping one rung lower.
The bottom rungs are products with label rules: timing, pollinators, and days to wait before harvest. Before you spray →
The ladder troubleshoots from the gentlest solution to the strongest. Start with the gentlest option and only move on when and if it doesn't work.
Where this wilt has hit before, start with a wilt-tolerant variety such as County Fair. Once a vine has it, nothing on the shelf will cure it, so anything that shortens the odds up front is worth doing.Wilt-tolerant cultivars such as County Fair are the plant-once step for a disease with no curative option. Cucumber and muskmelon sit far above squash and pumpkin in susceptibility, so variety choice carries more weight here than it does across the rest of the cucurbits.
Pull out and destroy any vine that wilts and passes the sap test: cut a wilted stem and slowly draw the two cut ends apart to see whether the sap stretches into sticky white strands. Getting infected plants out of the patch limits the spread.Prompt removal and destruction of wilting plants is the in-season limit on spread. Confirm with the stem-sap strand test first, which is what the field diagnosis rests on, since the plant wilts despite moist soil and can read as a watering problem.
Cover young plants with row cover from the seedling stage and keep it on until they flower, then take it off so bees can get to the blooms. Keeping cucumber beetles off the seedlings is what keeps this disease out, since the beetles are what carry it. Keep the young plants growing strongly while they are covered. There is no spray that cures an infected vine, so the ladder ends with excluding the beetles rather than treating the disease.Row cover through the seedling window excludes the beetle vector at the stage that sets up the wilt, with removal at flowering required for pollination, and vigorous early growth alongside it. Beetle management carries the rest of the season, since control of this disease is really control of its vector.
No spray for this one. Prevention is the control.
The ladder troubleshoots from the gentlest solution to the strongest. Start with the gentlest option and only move on when and if it doesn't work.
Start with certified disease-free seed. This bacterium rides on seed, so seed saved from home-grown open-pollinated pickling heirlooms can carry it into next year's patch.The pathogen is seedborne, so clean seed is the entry-point control. Saved seed off open-pollinated pickling heirlooms is the route that walks it forward from one season to the next.
Lean on resistant varieties as well, since there is no spray that cures this one once it is in the planting.Resistant cultivars pair with clean seed as the two pre-season steps. With no curative material available, the choices made before sowing carry disproportionate weight.
Move cucumbers to a new spot on a three to four year cycle. The bacteria survive the winter in old crop debris, so coming back too soon puts new plants right on top of it.A three to four year cucurbit rotation outlasts survival in residue. A shorter cycle leaves infested debris in the root zone of the next susceptible planting.
Water the soil rather than the leaves, because splashing water is how the spots spread. Stay out of the patch while the plants are wet, since handling wet vines moves it too.Splashing water and handling wet foliage are the two spread routes named here, so base irrigation and a rule against working among wet vines address the same mechanism from opposite ends.
Take off the badly affected leaves, and clear the old vines out of the bed after harvest so there is less debris for the bacteria to sit in over the winter.In-season removal of the worst leaves plus a post-harvest debris clean-out narrows the overwintering reservoir. It works with rotation rather than substituting for it.
A labeled copper spray applied at the first sign can slow the spread, though it will not clear the spots that are already there. It is worth the trouble because the fruit spots matter more for a whole-pack pickle than they would on a fruit you were going to slice.Copper is used as a bactericide at first symptom to slow spread, not to recover infected tissue. The payoff calculation leans on the sunken fruit lesions, which downgrade a whole-pack pickle further than they would a sliced fruit.
The bottom rungs are products with label rules: timing, pollinators, and days to wait before harvest. Before you spray →
The ladder troubleshoots from the gentlest solution to the strongest. Start with the gentlest option and only move on when and if it doesn't work.
Start with disease-free seed, and do not save seed off plants that showed the disease. The fungus travels on infected seed as well as in old debris.The fungus survives on infected seed and on cucurbit residue, so clean seed closes one of the two carryover routes. Discard seed from symptomatic plants rather than replanting it.
Choose a resistant variety where you can, alongside the clean seed.Resistant cultivars sit with seed sourcing as the pre-season pair, both settled before the first sowing goes in.
Rotate out of cucumbers and other squash-family crops for three years, since the fungus lives on in old vines and residue.A three-year cucurbit rotation covers survival on residue. It is the counterpart to the seed route, and shortening it undercuts the debris cleanup below.
Water at the soil line rather than over the top of the plants. Infection here takes several rainy days in a row, and the spores travel in splashing water, so anything that keeps the foliage drier works against it.Infection takes several days of wet weather and dispersal is by splash, so base irrigation removes the share of leaf wetness and splashing you control.
Take off infected leaves and fruit as you find them, and destroy the old vines and debris after harvest rather than leaving them in the bed.In-season removal of lesioned leaves and fruit plus destruction of post-harvest residue strips the overwintering substrate. With seed, rotation, and debris covered, the cultural set is where the practical control of this one sits.
This is the only spray this crop's guidance names for anthracnose, and it is meant preventively: it goes on ahead of a wet spell rather than after spots show. Notice the gap below it. There is no gentler spray listed for this disease on this crop, so the step under this one is the cleanup, and declining to go further is a reasonable place to stop rather than a rung skipped. Read this method's warnings before you take it, because it is a long way up from the step below.The only material this crop's guidance names for anthracnose, specified preventively in wet spells, which is when the infection periods fall. The escalation runs straight from sanitation to a conventional here because the source offers nothing between the two, so the jump is a property of the evidence rather than a gap in the ladder. Declining it leaves the cultural program as the whole of the control, which is what the source describes for a home crop.
The bottom rungs are products with label rules: timing, pollinators, and days to wait before harvest. Before you spray →
Try not to grow pickling cucumbers or their relatives in the same spot more than once every 3 years or so. Moving them around the garden each year helps avoid a buildup of pests and disease. Clean up old vines at the end of the season too.Rotate cucurbits on a 3 year cycle, and a 3 to 4 year break where angular leaf spot or anthracnose has been a problem, since both persist on residue and on seed. The point is to break the buildup of cucumber beetle, beetle-vectored wilt, and soilborne and seedborne disease. Clear and remove spent vines at season's end rather than tilling them in, which removes overwintering pest and disease sites and makes rotation more effective.
The plant app sends a timely reminder at every critical moment of your pickling cucumber season. The wording adjusts to whichever you pick: beginner or seasoned. Here are three you'll see in Zone 9.
plant sends the right notification at exactly the right moment, for your zone, your weather, your crops. Founding members lock the rate forever.
We're building this guide with real growers. Got a question we missed? Ask here. We read every one and add the best answers right to this page.
Learned something the hard way? Pass it on. Real growers' tips make this guide better for the next person, and we credit you by name when yours goes live.
If you've grown this crop and you see a date, a temperature, a companion claim, or a recommendation that doesn't match your experience, tell us. Real growers' corrections make this guide better for the next person.
Every date, temperature, spacing, and recommendation on this page is sourced from university cooperative extension publications, peer-reviewed agricultural research, NOAA climate data, and direct extension calendars. Where claims are softer (traditional gardening wisdom not formally documented), we say so.
Spot a data point that doesn't match your experience? Submit a correction; accepted corrections earn full author credit on the page.
Zone-aware seasonal nudges, what's worth planting now, and the occasional recipe from the harvest. No spam, ever.