Pick your zone and the dates re-calibrate.
The Guide Crops Vol. 003

Potato

in Zone 10, this week

Potatoes are a cool-weather crop grown for the starchy tubers that form underground. You do not grow them from seed: you plant seed potatoes, which are small whole potatoes or cut chunks, each with an eye or two, set right in the soil. The leafy tops are tender and killed by hard frost, so in cold places potatoes are a spring crop, and in warm places they are grown through fall and winter. The key trick is hilling: as the plants grow, you mound soil up over the row. This gives the potatoes room to form and, most importantly, keeps them covered so they do not turn green, because green potatoes are bitter and mildly poisonous. Potatoes grow best in loose, well-drained, slightly acidic soil, and they like cool soil to make tubers, so heat slows them down. They are ready when the tops turn yellow and die back, about 3 to 4 months after planting, and you can dig a few small new potatoes a bit earlier. Keep potatoes away from their cousins (tomatoes, peppers, eggplant), which share the same diseases, especially late blight, the famous one behind the Irish potato famine. Potato (Solanum tuberosum) is a cool-season member of the nightshade family (Solanaceae) grown for its starchy underground tubers. It is planted not from seed but from seed potatoes: small whole tubers or cut pieces, each carrying one or more eyes, set directly in the ground. The foliage is frost tender, so the tops are killed by hard frost even though the crop is grown in the cool season; in cold climates it is a single spring crop, and in mild and hot climates a fall-through-winter crop. The signature practice is hilling: soil is mounded over the row as the plants grow, which expands the zone where tubers form and, critically, keeps them covered and out of the light, since exposed tubers turn green and develop bitter, mildly toxic solanine. Tubers set and bulk best in cool soil, roughly 60 to 70°F, and tuber formation falls off in sustained heat. The crop is ready when the tops yellow and die back, about 90 to 120 days from planting, with thin-skinned new potatoes dug a few weeks earlier. Potatoes prefer loose, well-drained, acidic soil (pH about 5.0 to 6.0, lower than most vegetables) which suppresses common scab, and they are rotated away from their nightshade relatives (tomato, pepper, eggplant) to limit shared disease, above all late blight, the water mold behind the historic Irish potato famine.
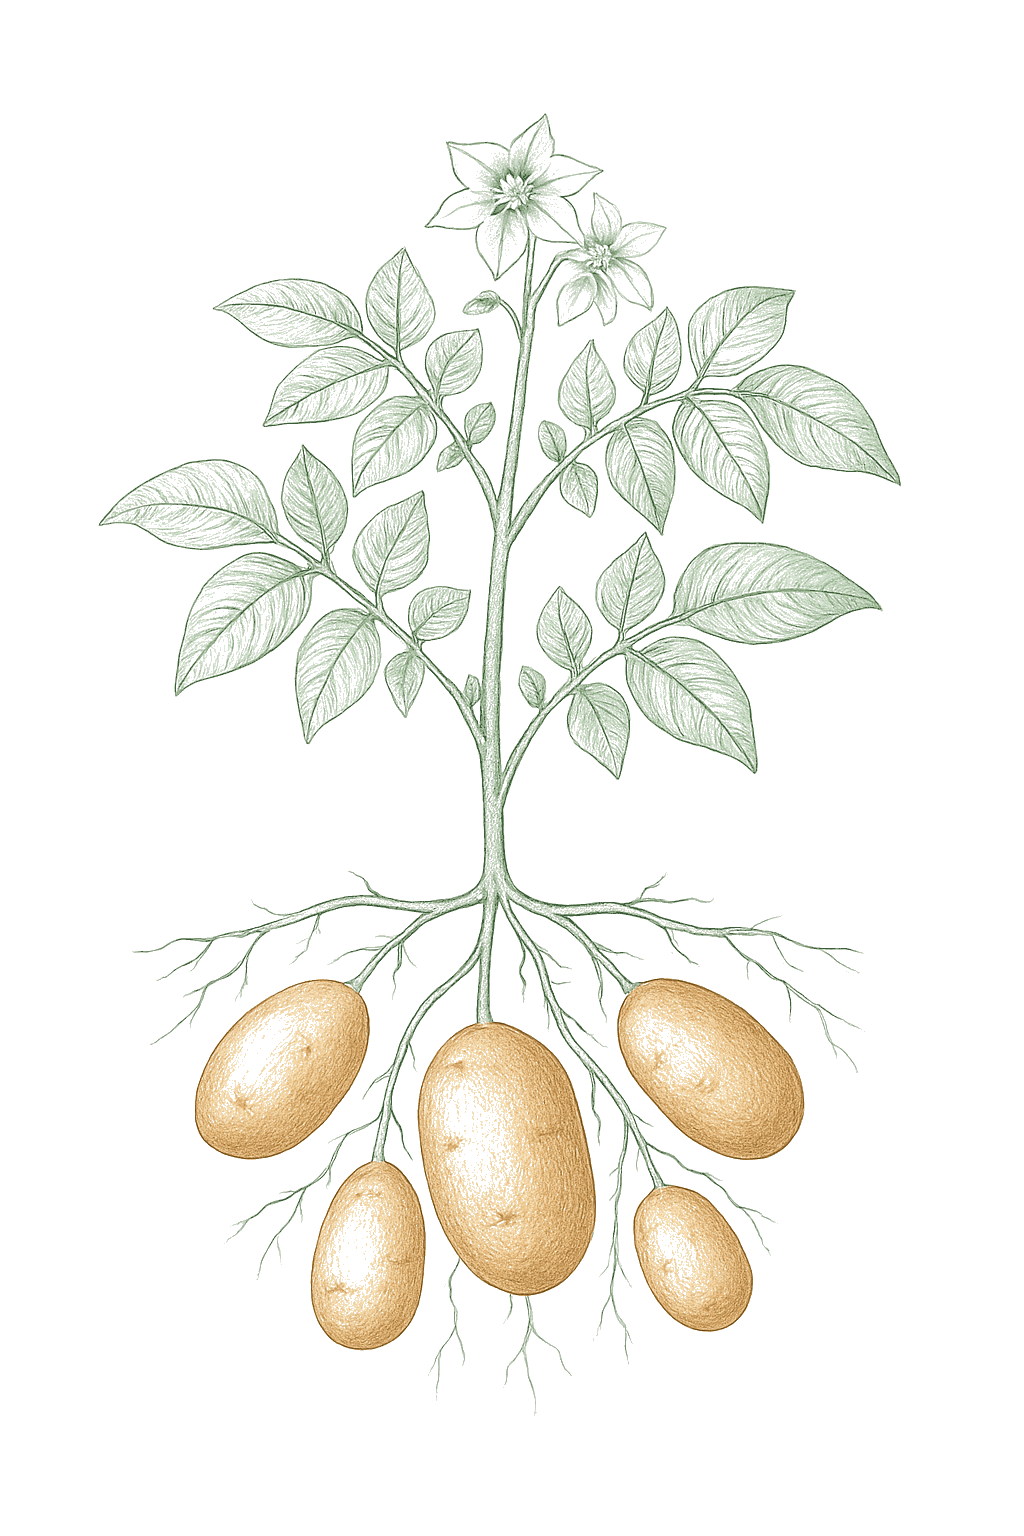
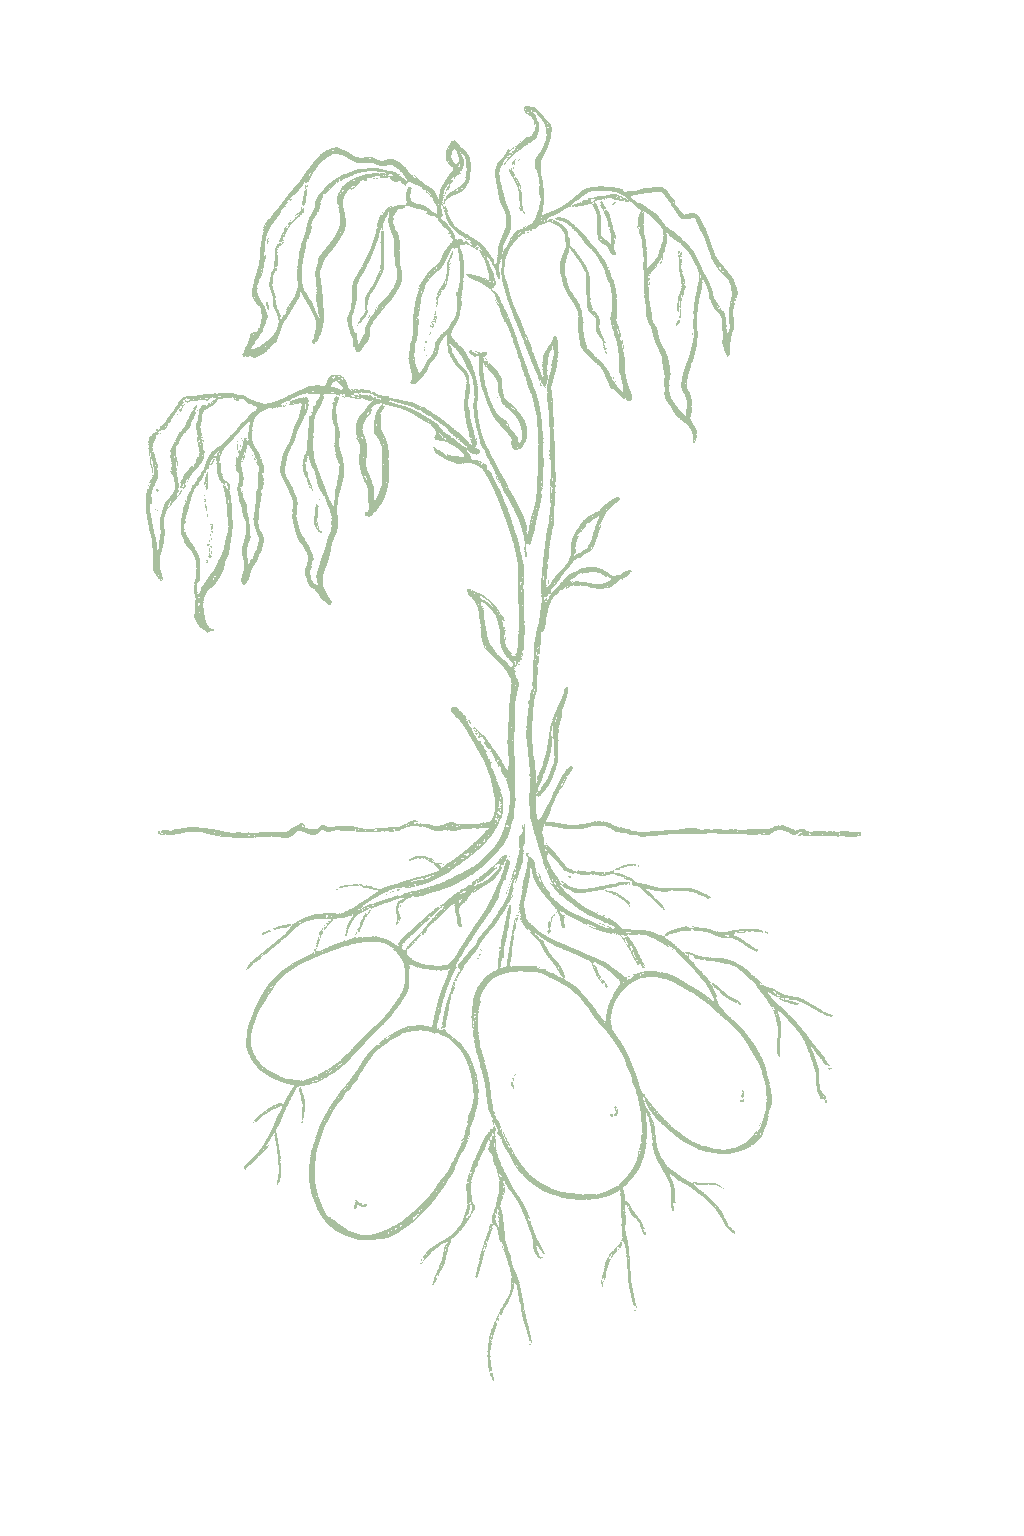
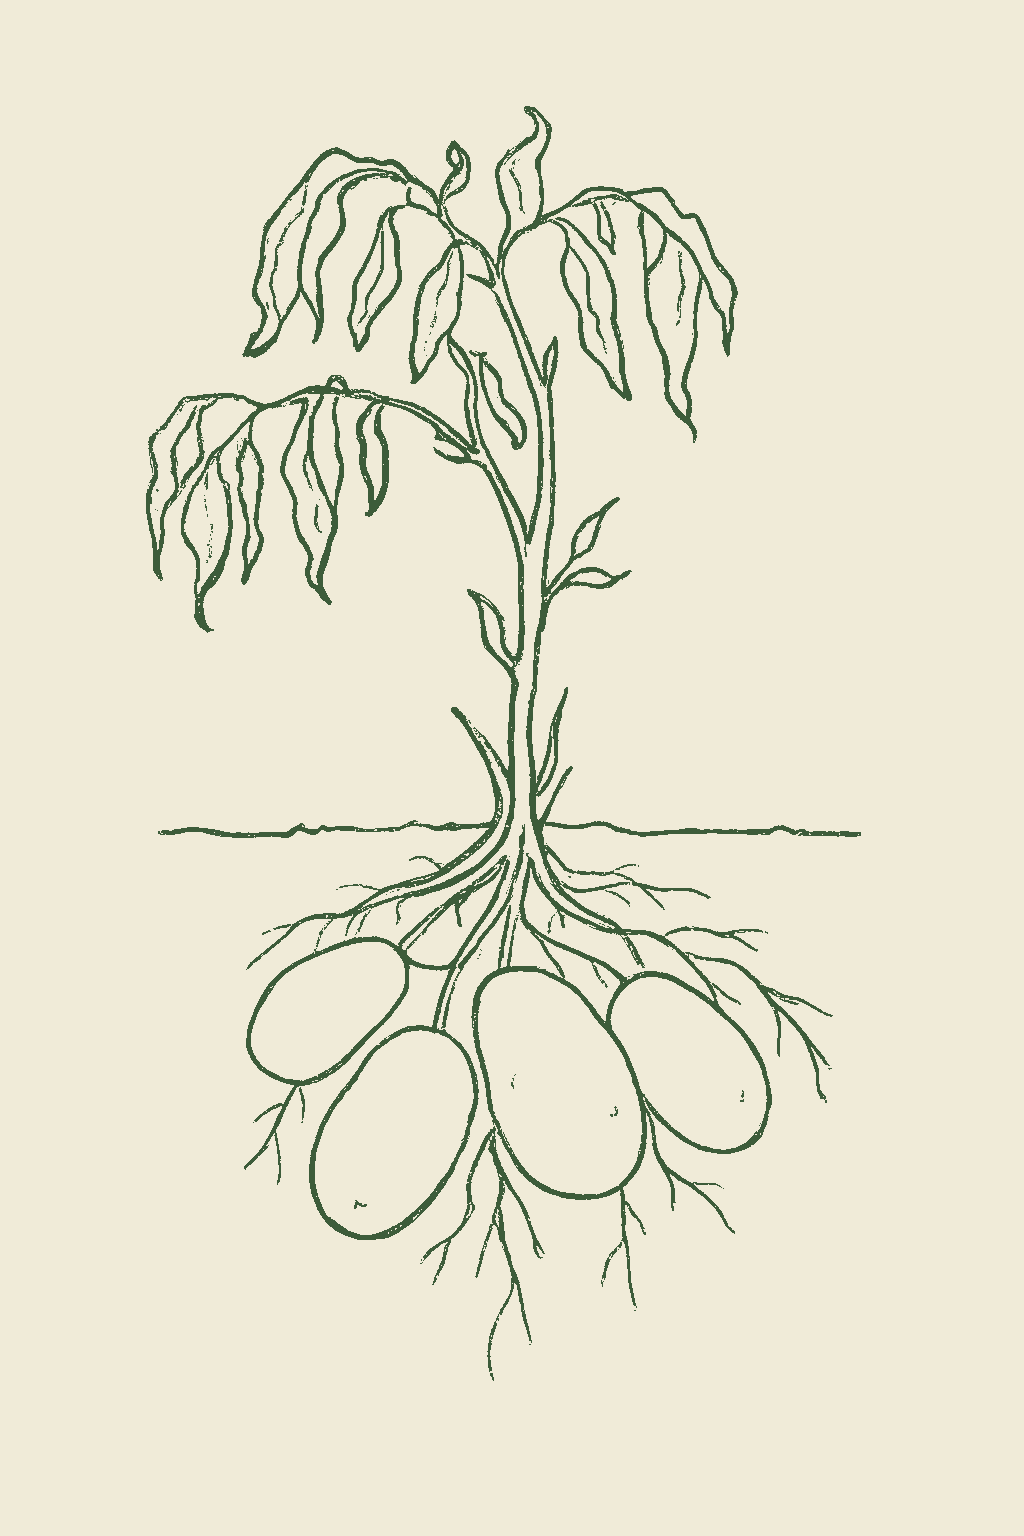
Potato mature plant
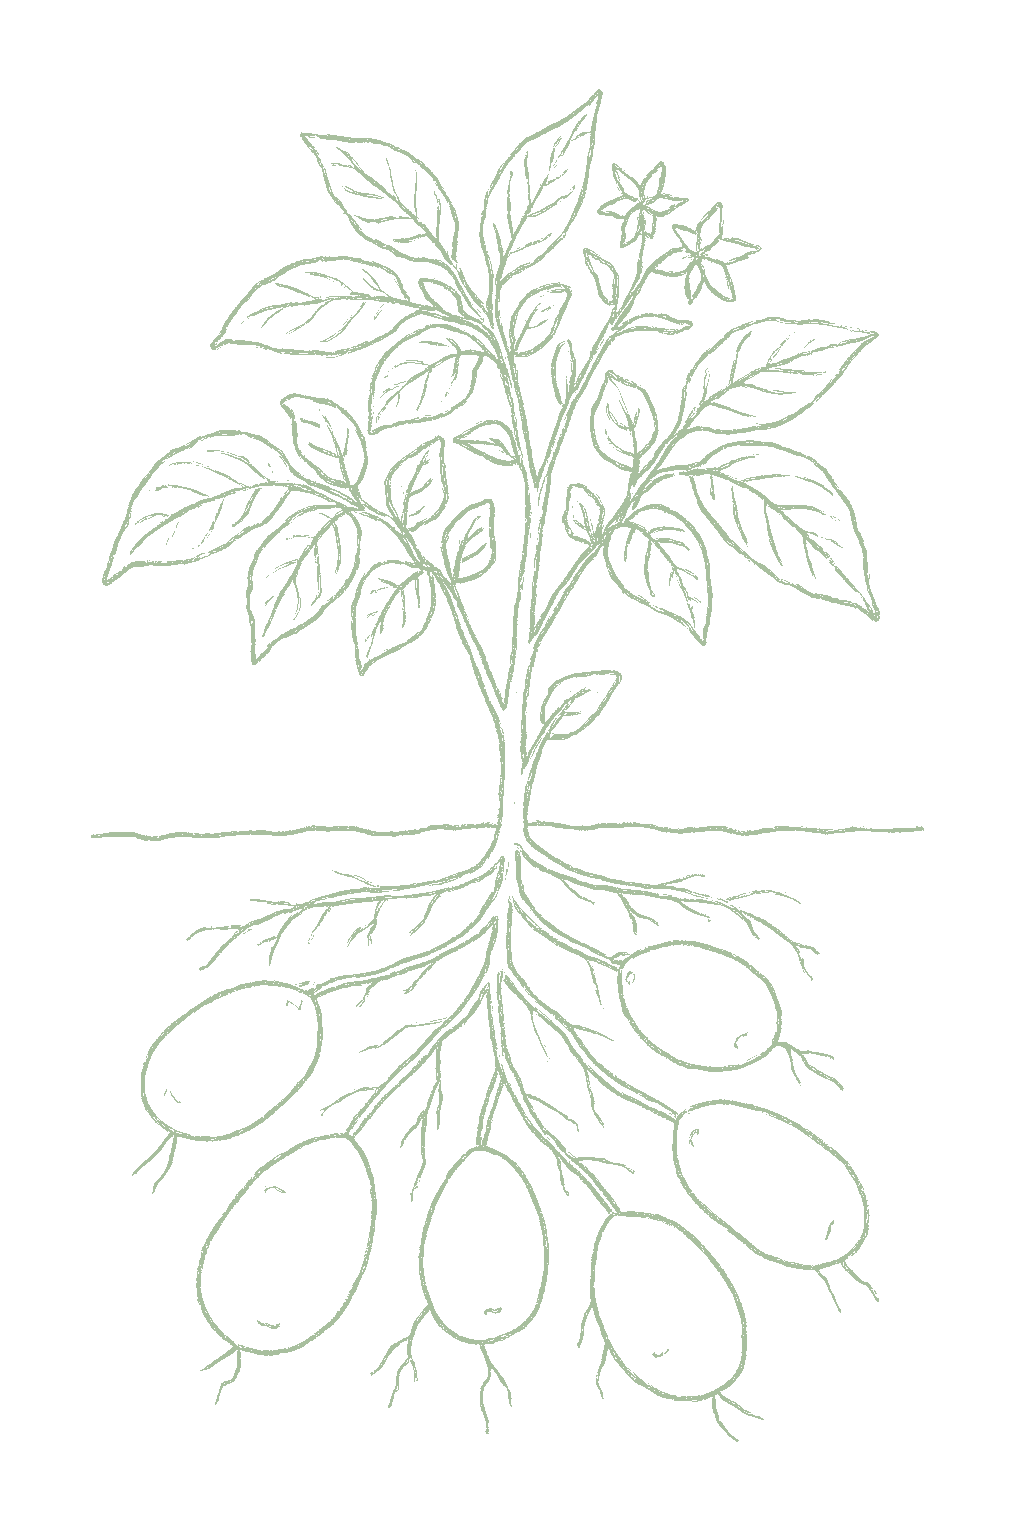
Fig. 01 · Potato, mature Zone 10
Mature in
70-120d
from transplant
Sunlight
Full sun
6-8 hrs daily
Water
Regular
1 inch / week
Spacing
10-12"
between plants
Soil pH
5-6
slightly acidic
Today · in your zone

What's happening right now

July 24 · Zone 10 · Stage 01 · Sprouting and emergence

Off-season for potato in zone 10.

Your climate region in Zone 10
The season at a glance

Planting calendar

In Zone 10, potato can be planted October through February, skipping the summer heat. Harvest runs January through April.

Jan
Feb
Mar
Apr
May
Jun
Jul
Aug
Sep
Oct
Nov
Dec
plant
plant
plant
too late
too late
too late
too hot
too hot
too hot
too hot
plant
plant
plant
harvest
harvest
harvest
harvest
harvest
indoors
plant out
harvest
Above-ground cropBest planted on a waning moon
The season, mapped

Seed to garden

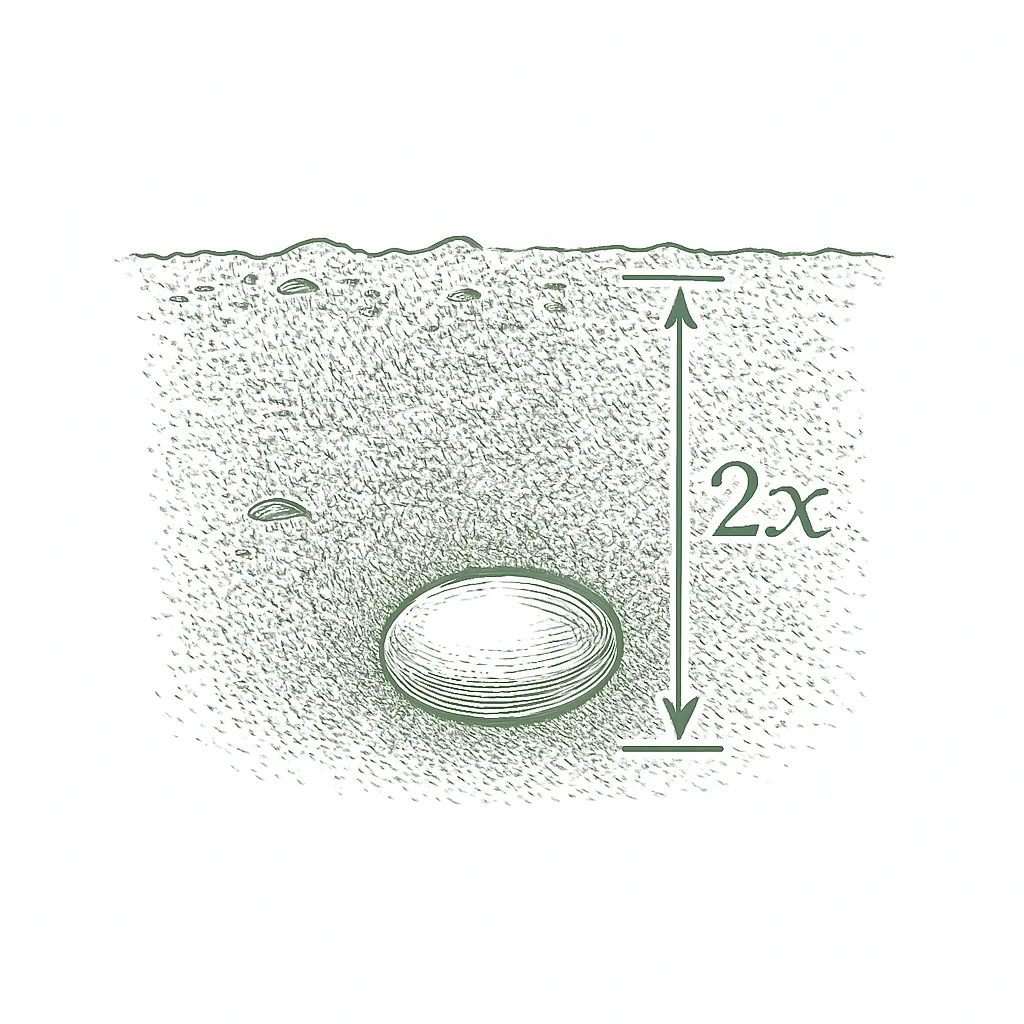
Grow potatoes from seed potatoes, which are small whole potatoes or cut pieces, bought as certified disease-free stock (not from the grocery store, and not from packets of seed). Cut bigger ones into chunky pieces about the size of an egg, each with one or two eyes (the little dimples that sprout), and let the cut sides dry and heal for a few days before planting. Plant the pieces cut-side down about 3 to 5 inches deep, 10 to 12 inches apart, in rows about 3 feet apart, once the soil has warmed to about 50°F. There is nothing to start indoors and nothing to harden off.Plant potatoes from certified seed potatoes, not grocery-store tubers (which may carry disease or be sprout-inhibited) and not true seed. Cut larger seed potatoes into blocky pieces of about 1.5 to 2 ounces, each with at least one or two eyes, and let the cut surfaces heal (suberize) for a few days in a warm, humid spot before planting; small egg-sized tubers can be planted whole. Plant pieces cut-side down about 3 to 5 inches deep in rows 30 to 36 inches apart, spacing the pieces 10 to 12 inches apart, once the soil reaches about 50°F. There is no indoor-start or hardening-off step.
  1. 01
    Sow outside
    Oct - Feb
  2. 02
    First harvest
    From Jan 1
    70-120 days from sowing
Start method
Direct
Soil temp
50-70°F
From seed to fruit

The growing journey

Stage 01 · Sprouting and emergence
01
Sprouting and emergence
Days 0-21 · current stage
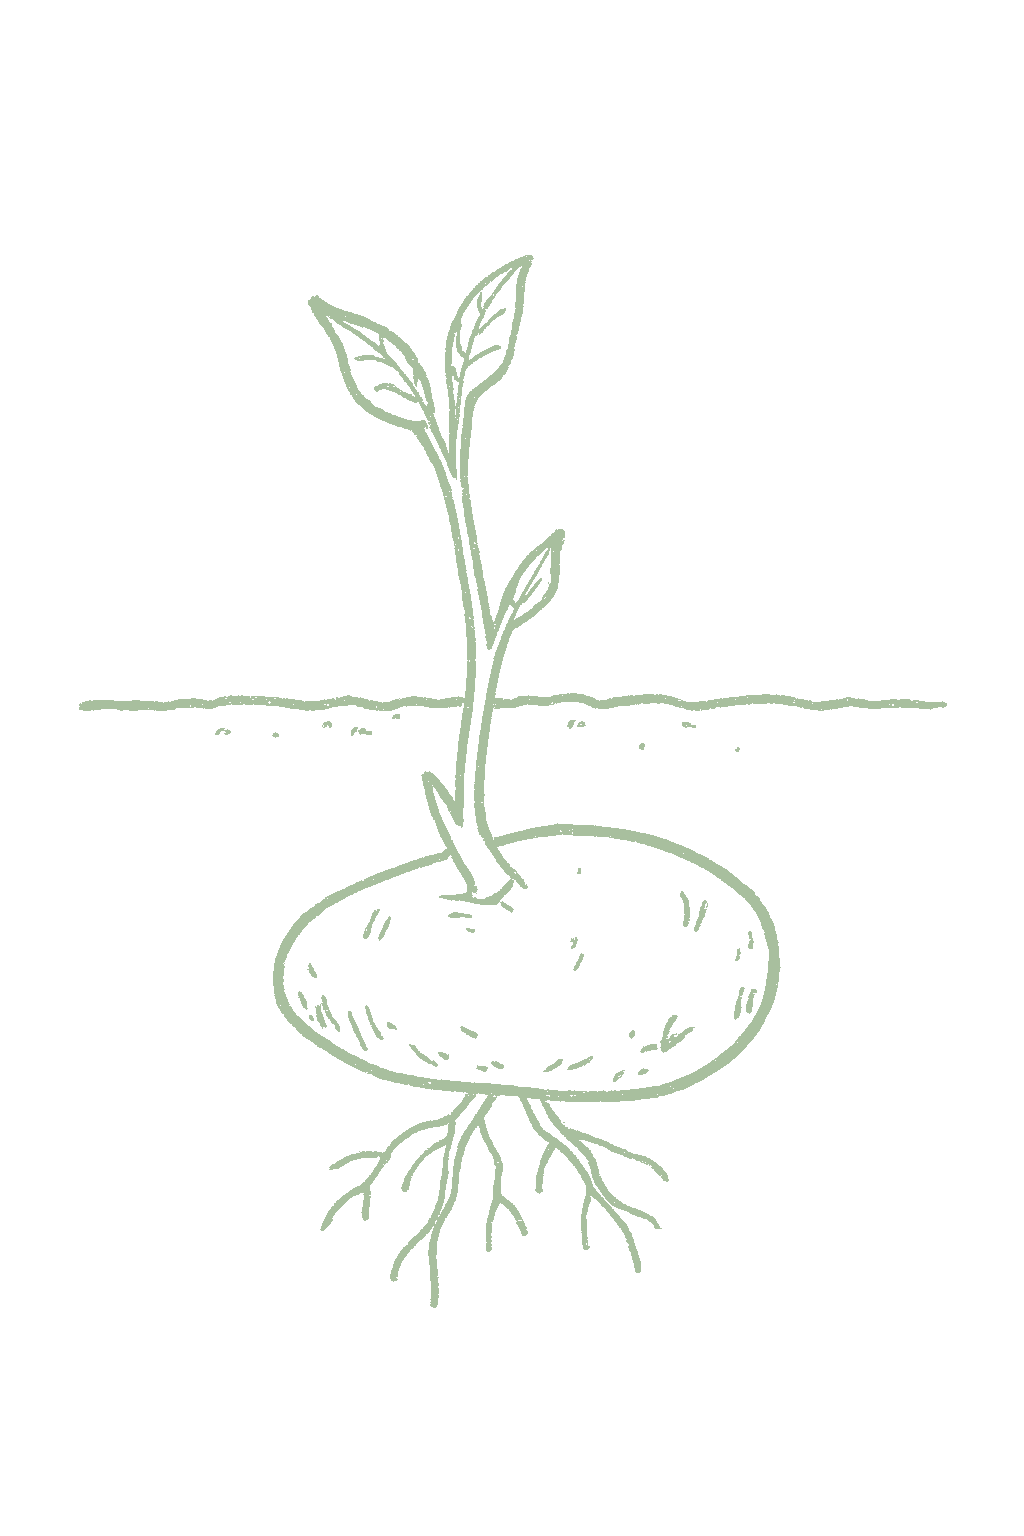
Nothing for a couple of weeks, then green shoots poking up from the buried seed pieces. They come up slower in cold soil. If frost nips the first leaves, do not worry, the plants grow back from the seed piece below.Bare soil for two to four weeks, then sprouts pushing up from the buried seed pieces. Emergence is slower in cold soil and faster as it warms. A late frost can blacken the first leaves, but the plants regrow from the protected seed piece.
Keep the soil damp but not soaking while the shoots come up. If a hard frost is coming after they sprout, mound a little soil over them or cover them for the night.Keep the soil evenly moist but not soggy while sprouts emerge. If a hard frost threatens after emergence, mound a little soil or mulch over the young shoots or cover them overnight.
FROM PLANT · Use certified seed potatoes from a garden store, not ones from the grocery, which can carry disease or be treated not to sprout. Cut big ones into egg-sized chunks with an eye or two, and let the cut sides dry for a few days before planting.Plant certified seed potatoes, not grocery-store tubers: certified stock is disease-free, while store potatoes may carry late blight or scab or be treated to resist sprouting. Cut large pieces to about 1.5 to 2 ounces with one or two eyes and let them suberize a few days before planting.
FROM PLANT · Plant when the soil has warmed to about 50°F, about 2 to 4 weeks before your last frost. The seed underground can take the cold, but planting into cold, soggy mud rots the pieces, so wait for the soil to warm a bit.Plant once the soil reaches about 50°F, roughly 2 to 4 weeks before the last frost; the seed underground tolerates cold, but cold, wet soil rots seed pieces, so do not rush into mud.
02
Vegetative growth
Days 21-45
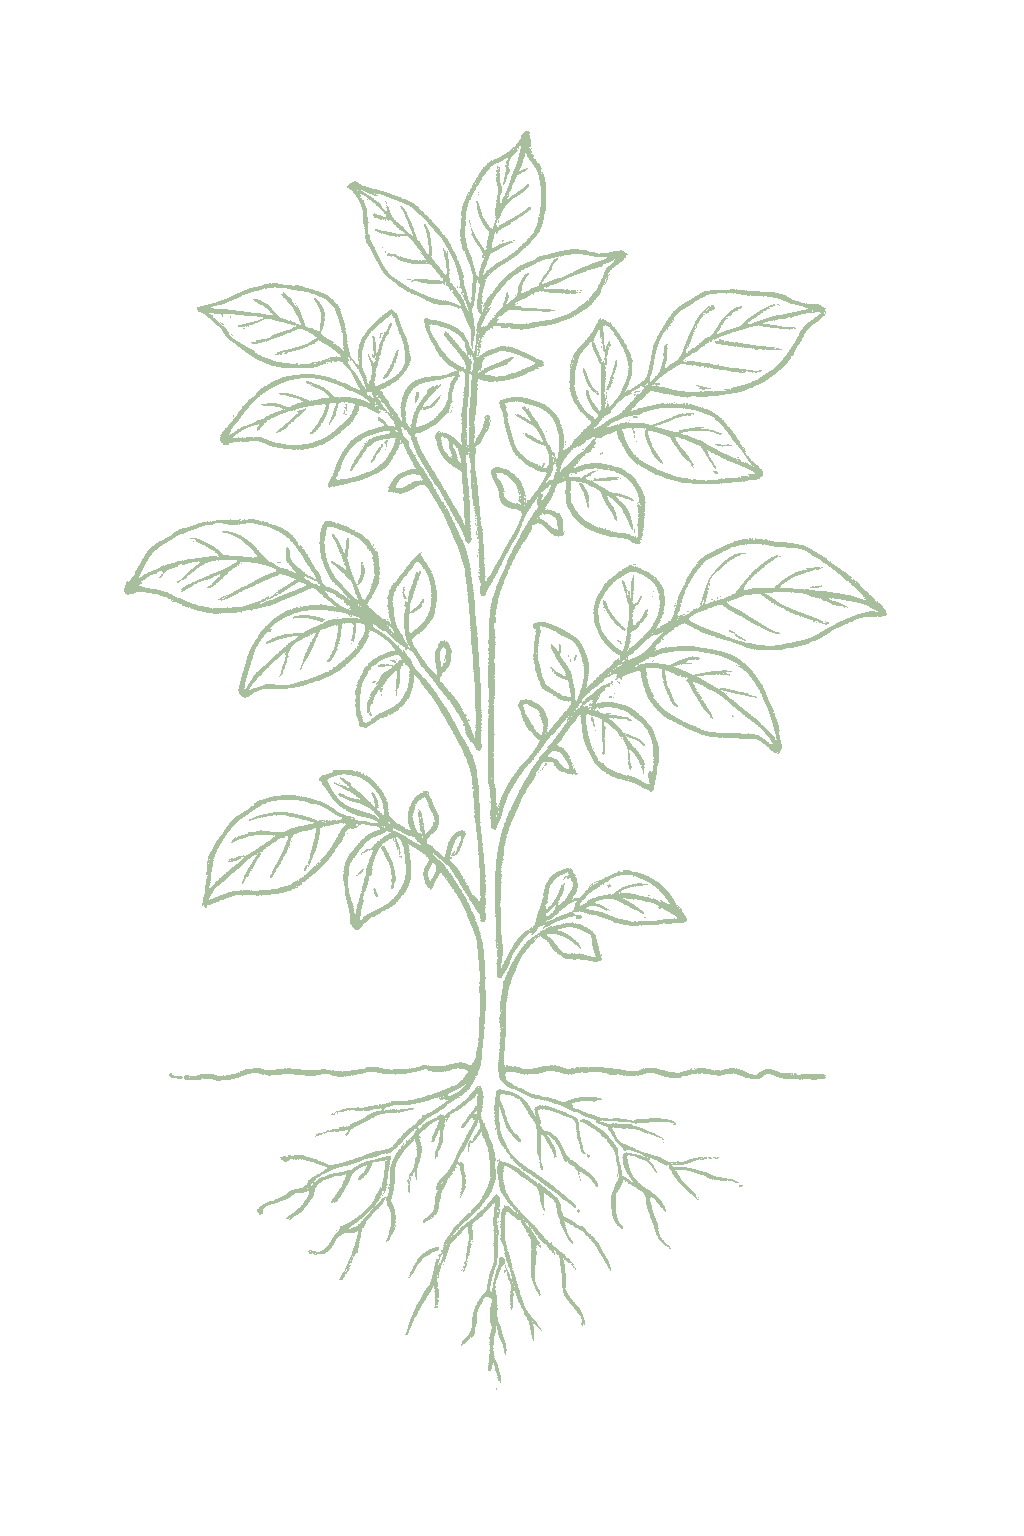
Bushy, leafy plants growing fast. This is the time for the first hilling, mounding soil up around the stems once they are about 6 to 12 inches tall.Leafy stems growing quickly. This is when the plant builds the canopy that will feed the tubers, and when the first hilling is usually done as the stems reach 6 to 12 inches.
Start hilling: mound soil up around the stems once they are 6 to 12 inches tall, leaving the leafy tops sticking out. Keep weeds down and water evenly, and feed lightly if the plants look weak.Begin hilling: draw soil up around the stems when they reach 6 to 12 inches, leaving the top few inches exposed. Keep the bed weed-free and evenly watered, and side-dress lightly if growth is weak.
FROM PLANT · Begin mounding (hilling) soil up around the plants when they are 6 to 12 inches tall, leaving the leafy tops out. This gives the potatoes room to form and keeps them covered.Start hilling when stems reach 6 to 12 inches: draw loose soil up around them, leaving the top few inches of leaves exposed. Hilling builds the zone where tubers form and keeps them covered.
FROM PLANT · Feed lightly as the plants fill in. Do not pile on high-nitrogen fertilizer or fresh manure, which grow leaves instead of potatoes and bring on scab.Feed modestly: a light side-dressing as the tops fill in is plenty. Skip heavy nitrogen and fresh manure, which grow vines instead of tubers and encourage scab.
03
Tuber initiation
Days 45-70
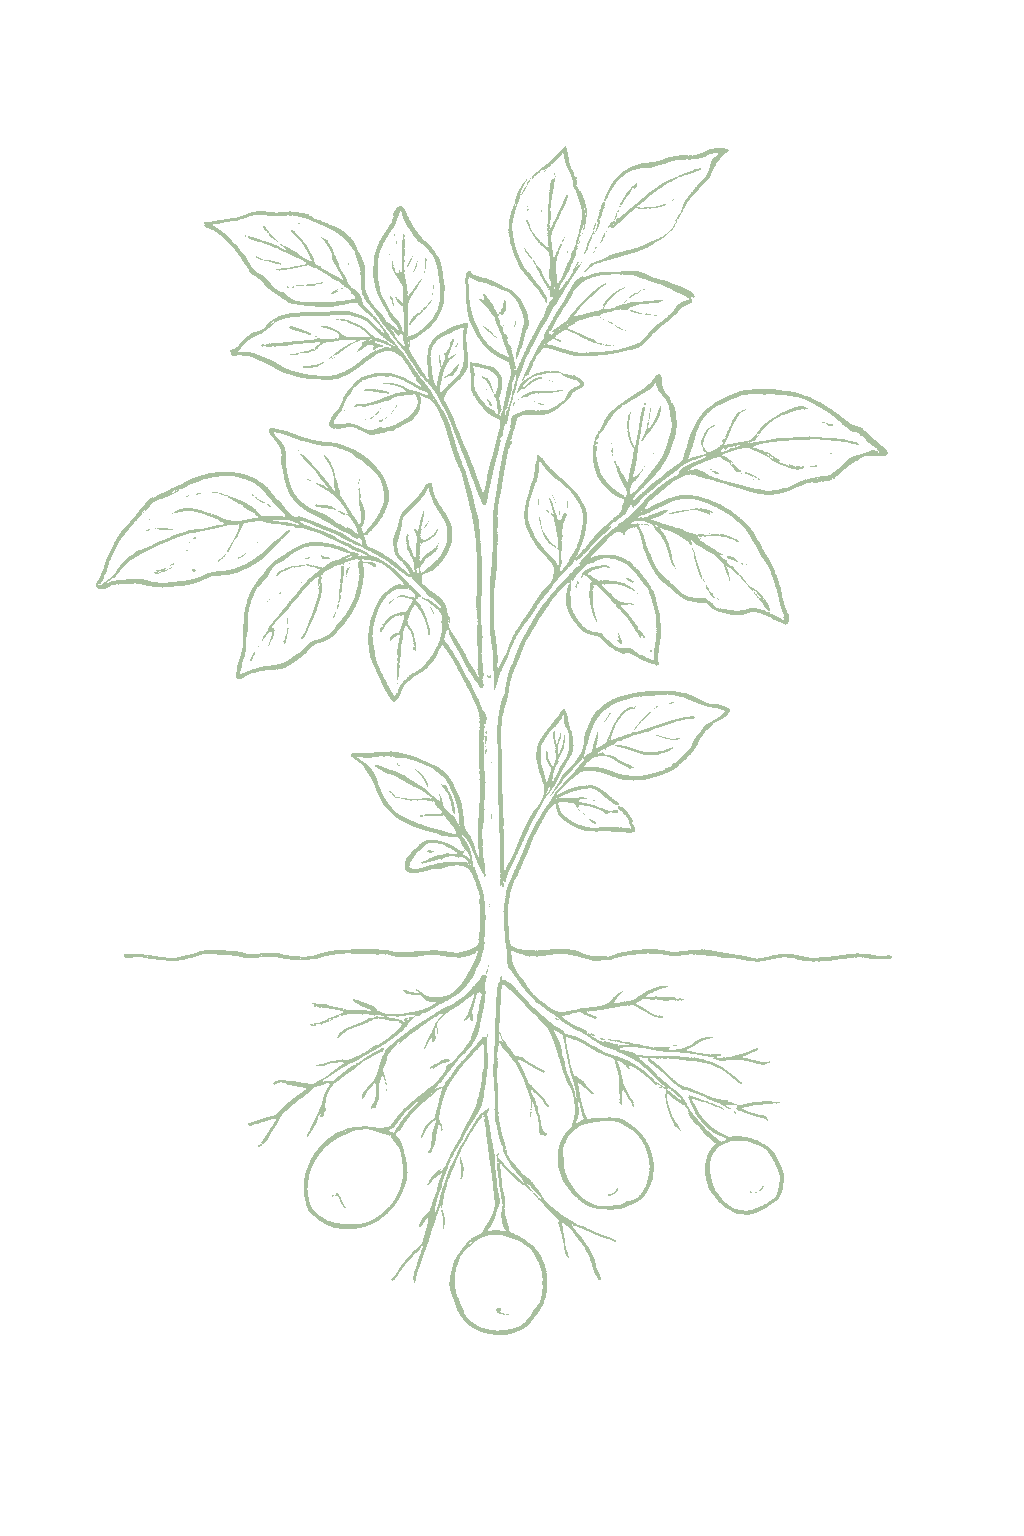
Big, full plants, often with flowers, which is about when the little potatoes start forming underground. Hill again to keep them covered so they do not turn green.Plants reaching full size and often flowering, which roughly coincides with the start of tuber formation underground. Hill again to keep the developing tubers covered and out of the light.
Mound up soil again to keep the potatoes covered, and keep the watering steady now that they are forming, because this is when the number and shape of your potatoes is decided. Watch for potato beetles and squash their egg clusters.Hill a second time to keep tubers covered, and hold steady, even moisture now that tubers are forming, since this window sets tuber number and shape. Watch for Colorado potato beetle and remove egg clusters.
FROM PLANT · Mound up soil again around flowering, when the potatoes start forming, so none are uncovered. Potatoes left in the light turn green and form a bitter, mildly poisonous substance, so keeping them covered matters for safety too.Hill again around flowering as tubers begin forming, keeping every tuber covered with soil. Exposed tubers turn green and develop bitter, toxic solanine, so covering them is both a quality and a safety step.
FROM PLANT · Watch for the Colorado potato beetle: pick the striped beetles and orange grubs off into soapy water and crush their orange egg clusters under the leaves. They resist many sprays, so hand-picking is your best bet.Scout for Colorado potato beetle now: handpick adults and larvae into soapy water and crush the orange egg clusters on leaf undersides. The beetle resists many sprays, so steady handpicking is the home grower's best tool.
04
Tuber bulking
Days 70-100
The potatoes are growing bigger underground while the plants stay green and leafy. You can sneak a few small new potatoes now, about 7 to 8 weeks after planting, by digging gently at the edge.Tubers sizing up underground while the tops stay green and full. You can dig a few thin-skinned new potatoes now, about 7 to 8 weeks after planting, without disturbing the rest.
Keep the water steady while the potatoes are sizing up, which is the most important time. Keep them covered with soil. For a few new potatoes, dig gently at the side of a plant and cover it back up.Keep moisture even and steady while tubers bulk, which is the critical period for size and quality. Keep shoulders covered. For new potatoes, dig carefully at the edge of a hill and re-cover.
FROM PLANT · Keep the watering steady while the potatoes size up, about 1 inch a week. Letting the soil go dry and then soaking it now makes the potatoes lumpy and cracked, so being even matters more than giving a lot at once.Keep moisture steady and even while tubers bulk, about 1 inch per week. Swings from dry to soaked now cause knobby growth, growth cracks, and hollow heart, so consistency matters more than volume.
FROM PLANT · For baby new potatoes, dig gently at the side of a plant about 7 to 8 weeks after planting, then cover it back up so the rest keep growing. Eat new potatoes fresh, because their thin skins do not store.For new potatoes, dig carefully at the edge of a hill about 7 to 8 weeks after planting and re-cover the plant; the rest keep bulking. Use new potatoes fresh, since their thin skins do not store.
05
Maturity and harvest
Days 100-120
The tops turn yellow and die down, which means the potatoes are full grown and the skins are toughening up. For potatoes you want to store, wait about two weeks after the tops die before digging.Tops yellowing and dying back, the signal that the main crop is mature and the skins are setting. For storage potatoes, wait about two weeks after the vines die before digging so the skins toughen.
Stop watering as the tops die back. Dig on a dry day, pushing a fork in well away from the plant so you do not stab the potatoes. Let them dry off, then cure them in the dark before storing.Ease off watering as the vines die back. Dig on a dry day, lifting carefully with a fork well outside the hill to avoid spearing tubers. Let them dry briefly, then cure in the dark before storage.
FROM PLANT · Dig the main crop when the tops turn yellow and die down. For storing, wait about two weeks after the tops die so the skins toughen, then dig on a dry day with a fork, pushing it in well away from the plant.Harvest the main crop when the tops yellow and die back. For storage, wait about two weeks after the vines die so the skins set, then dig on a dry day, lifting with a fork well outside the hill.
FROM PLANT · Cure the dug potatoes in the dark somewhere around 50 to 60°F and humid for about two weeks so the skins toughen, then store them cool, dark, and humid. Always keep potatoes out of the light so they do not turn green.Cure dug potatoes in the dark at about 50 to 60°F and high humidity for roughly two weeks before storage to toughen skins and heal wounds, then store cool, dark, and humid. Keep them out of the light always to prevent greening.
Beginner
Know your soil

Your soil

Identify yours

Not sure what soil you have? Grab a small handful of damp soil from your garden bed and squeeze it. If it crumbles apart easily, it's sandy. If it holds together but breaks when you poke it, it's loam (what most vegetables want). If it stays in a hard, slippery ball, it's clay.

What this crop wants

Potatoes want loose, well-drained soil that the growing tubers can swell into easily. Light, sandy or loamy soil with plenty of compost works best. Heavy, soggy clay is the main thing to avoid: it holds water and rots the seed pieces and tubers, and it makes the potatoes come out knobby. If your soil is heavy clay, a raised bed or a deep container of loose mix is the easy fix. Keep the soil on the acidic side (pH about 5.0 to 6.0), which also helps prevent scab, the rough corky patches on the skin. Do not add fresh manure, because it makes scab worse.

If your soil doesn't match

You have sandy soil

Mix 2-3 inches of compost into the top 6 inches of your bed before planting. Compost holds moisture (which sandy soil drains too fast) and adds the nutrients sandy soil tends to lack. Repeat each season. Compost breaks down over time.

You have clay soil

Mix 2-3 inches of compost AND a few inches of coarse sand or perlite into the top 6 inches of your bed. The compost feeds the plants; the sand breaks up the clay so air and water can move through. Don't add sand without compost. It can compact like concrete.

Containers and raised beds

If amending your soil sounds like too much work, or if your soil is heavy clay, full of rocks, or contaminated, build over it. A raised bed at least 12 inches deep filled with a 50/50 mix of compost and sandy loam gives you ideal growing soil with no battles. A 5-gallon container with quality potting mix does the same for one plant at a time. Both bypass your native soil entirely.

Learn more about your soil
The specs

Care guide

The numbers that matter, at a glance.

Sunlight
Full sun · 6-8 hrs/day
Water
Regular
Spacing
10-12 inches
Soil
sandy loam, loam
Days to maturity
70-120 days from transplant
Soil pH
5 to 6
Container OK?
Yes · 10+ gal pot
Germination temp
50-70°F
Soil chemistry

Soil pH for potato

Preferred
5 to 6
Tolerated
4.8 to 6.5

Soil pH measures how acidic or alkaline your soil is, on a scale from 1 to 14 where 7 is neutral. Potatoes like it on the acidic side, about 5.0 to 6.0, which is lower (more acidic) than most vegetables. There is a good reason: keeping the soil acidic helps prevent scab, the rough corky patches that form on the potato skin. Scab gets worse when the soil is less acidic and dry, so if scab is a problem, aim toward the low end (around 5.0 to 5.3) and keep the soil evenly moist while the tubers are forming. A cheap soil test from your local extension office tells you your number.Potatoes grow best in acidic soil, roughly pH 5.0 to 6.0, lower than most garden vegetables. The acidity is deliberate disease management: common scab (Streptomyces scabies) is suppressed in acidic soil and worsens as pH rises above about 5.5, especially in dry soil. Where scab is a recurring problem, hold the pH between about 5.0 and 5.3 and keep the soil evenly moist for the 4 to 9 weeks after planting when tubers are forming. Potatoes tolerate a wider band (down to about 4.8 and up to 6.5), and they will grow at neutral pH, but scab pressure climbs with pH, so do not lime a potato bed. A soil test removes the guesswork before planting.

Verified · 3 sources View
Steady hand on the hose

Watering

When & how much
Frequency
Keep the soil evenly damp, especially once the plants flower and the potatoes start forming underneath. Give about 1 inch of water a week, counting rain, in fewer but deeper waterings. Steady water makes smooth potatoes; letting the soil go dry and then soaking it makes them knobby and cracked and brings on more scab.Potatoes want steady, even moisture, especially from the time tubers begin forming (around flowering) through bulking. Aim for about 1 inch of water per week including rain, delivered in deeper, less frequent soakings. Even moisture is what produces smooth, well-shaped tubers; a dry-then-wet swing causes knobby growth, growth cracks, and hollow heart, and it worsens scab.
Amount
About 1 inch of water a week, counting rain, and a bit more in hot or sandy conditions. Do not let the bed dry out while the potatoes are sizing up. Ease off on water once the tops start to yellow and die back, so the skins toughen before you dig.About 1 inch per week including rainfall, increased in heat or sandy soil. The critical window is from tuber initiation through bulking; do not let the bed dry out then. Taper off as the vines yellow and die so the crop can cure and the skins set before harvest.
Method
Water at the soil with a soaker hose or drip line instead of overhead, because wet leaves bring on blight. A layer of mulch helps keep the moisture steady and the soil cooler around the potatoes.Water at the base with a soaker hose or drip line to keep foliage dry, since wet leaves favor late and early blight. Mulch helps hold even moisture and keeps the soil cooler over the developing tubers.
Signs of trouble
Too much water
If the soil stays soaking wet, the seed pieces and potatoes rot. Watch for yellowing, wilting from the bottom, a sour-smelling soggy bed, and soft potatoes; if you see these, water less and fix the drainage.Constantly saturated soil rots seed pieces and tubers and drives soft rot and blackleg; yellowing, wilting from the base, a sour waterlogged bed, and soft tubers are signs to back off and improve drainage.
Too little water
Droopy leaves in the afternoon, dull color, and slow growth mean the plants are thirsty. The bigger problem is letting the soil go dry and then flooding it while the potatoes are sizing, which makes them knobby and cracked.Wilting in the heat of the day, dull foliage, and slow growth signal too little water; the sharper risk is an irregular dry-then-soaked cycle during tuber sizing, which causes knobs, growth cracks, and hollow heart.
Feeding rhythm

Feeding

Frequency
Moderate
Type
Balanced, moderate nitrogen
When to start
Work a balanced fertilizer into the row at planting; side-dress once about 4 weeks after planting as the plants establish.

Potatoes need a moderate amount of food. Mix a balanced fertilizer like 10-10-10 into the row when you plant, then feed lightly again about a month later as the plants grow. Do not pile on high-nitrogen fertilizer or fresh manure: too much nitrogen grows big leafy tops but fewer potatoes, and manure makes scab worse. Compost mixed into the bed is the safe way to enrich the soil.Potatoes are moderate feeders. Work a balanced fertilizer such as 10-10-10 into the row at planting (UGA suggests about 1.5 pounds per 100 square feet), then side-dress lightly about 4 weeks later as the tops fill in and again as the vines spread. Favor balanced feeding over heavy nitrogen: excess nitrogen grows lush vines and delays tuber formation, and fresh manure encourages scab, so use only well-finished compost. Adequate potassium supports tuber quality.

N · P · K = 10-10-10

The three numbers on a fertilizer bag are nitrogen, phosphorus, and potassium (N-P-K). Potatoes do best with a balanced fertilizer like 10-10-10, not a high-nitrogen one. Too much of the first number grows leaves instead of potatoes, and fresh manure brings on scab, so use compost and a balanced feed.Potatoes are moderate feeders that want balanced nutrition with good potassium and only modest nitrogen. A balanced blend such as 10-10-10 worked into the row at planting covers most home soils. Too much nitrogen drives vines instead of tubers, and fresh manure encourages scab, so lean on compost and a balanced fertilizer rather than a high-nitrogen feed.

Try 10-10-10
Who grows well together

Companion planting

Potatoes are easygoing with most neighbors. Beans and peas are a classic match because they add nitrogen to the soil, and bush beans are said to help keep the Colorado potato beetle down. The plants to keep well away are potato's nightshade relatives, tomato, pepper, and eggplant, because they share the same diseases, especially late blight, and the same soil pests. Do not trust every companion chart online; many of their claims have never been tested. Potatoes mix easily into the garden. The best-grounded pairings are with legumes (beans, peas), which fix nitrogen and are traditionally credited with deterring the Colorado potato beetle. The clearest avoids are potato's own family, the nightshades: tomato, pepper, and eggplant share late blight and other soilborne diseases and pests, so keep them apart and rotate among them on a multi-year cycle. Most other companion-chart claims for potato are folklore; treat them with healthy skepticism, since university reviews find little evidence behind most of them.

Other
Bush beans
Beans are legumes that pull nitrogen from the air and leave some in the soil, and many gardeners plant bush beans near potatoes to help fend off the Colorado potato beetle. It is a popular, sensible pairing, though the pest-deterrent part is traditional rather than proven.Beans and potatoes are a classic reciprocal pairing. As legumes, beans fix nitrogen and undemanding bush beans share a bed without competing hard, and tradition holds that beans deter Colorado potato beetle while potatoes deter Mexican bean beetle. The nitrogen contribution is real; treat the mutual pest-repellence as traditional rather than proven. Traditional
Cabbage-family greens
Leafy brassicas like cabbage, kale, and lettuce-style greens grow in the same cool season as potatoes and use the bed without fighting for the same below-ground space, a handy way to fit more into a spring garden.Cool-season leafy crops (cabbage-family greens, lettuce) overlap potato's spring window and root shallowly, so they share the bed efficiently while the potato builds tubers below. This is a space-and-timing interplant, not a measured pest benefit, but it is a reliable way to use a spring bed. Traditional
Horseradish
An old tradition is to plant horseradish at the corner of the potato patch, where some gardeners believe it helps keep the potatoes healthier. It spreads aggressively, so keep it contained or in its own spot.Planting horseradish at the edge of the potato patch is traditional lore said to improve potato health. There is no controlled evidence for it, and horseradish spreads aggressively, so contain it. Recorded for growers who keep the tradition, not as a proven tactic. Traditional
Keep apart from
Tomatoes Tomatoes are potato's close cousin (both nightshades) and catch the same diseases, especially late blight, which can wipe out both. Keep them well apart, and do not plant potatoes where tomatoes, peppers, or eggplant grew last year.Tomatoes and potatoes are both Solanaceae and share their worst diseases, including late blight (Phytophthora infestans) and early blight, plus soilborne pests. Grown together they form a disease bridge that can destroy both crops, so keep them apart and rotate so potatoes never follow tomato, pepper, or eggplant. Research-backed
Peppers and eggplant Peppers and eggplant are also nightshades, like potatoes, so they share the same soil diseases and pests. Grow them in a different part of the garden and rotate where each goes each year.Peppers and eggplant are nightshade relatives that share potato's soilborne diseases (Verticillium, early blight) and pests (flea beetles). Clustering the family or following one with another sustains that pressure, which is why extension guidance rotates potatoes well away from all Solanaceae. Research-backed
Provenance tagged inline · see methodology for the labeling system Key
Harvest signals

When to pick

You can tell potatoes are ready by the plants, not a set date. Small new potatoes can be dug gently at the side of a plant from about 7 to 8 weeks after planting, and are best eaten fresh. The main crop is ready when the tops turn yellow and die down, about 3 to 4 months after planting. If you want to store them, leave them in the ground about two weeks after the tops die so the skins toughen, then dig on a dry day with a fork, pushing it in well away from the plant so you do not stab the potatoes. Let them dry off out of the sun, brush off the dirt (do not wash them), and keep them in the dark. Always keep potatoes covered and out of the light, because light turns them green and bitter, and green potatoes are mildly poisonous.Potatoes are ready to harvest based on the foliage, not a fixed date. New potatoes, thin-skinned and best used fresh, can be dug carefully at the edge of a hill from about 7 to 8 weeks after planting. The main crop is mature when the tops yellow and die back, roughly 90 to 120 days from planting. For storage potatoes, leave them in the ground about two weeks after the vines die so the skins set and toughen, then dig on a dry day, pushing a fork in well outside the hill so you do not spear tubers. Lift, let them dry briefly out of direct sun, brush off soil (do not wash), and cure in the dark at about 50 to 60°F for two weeks before storing. Keep tubers covered and shaded at every stage, since light greens them and produces bitter, mildly toxic solanine.

Verified · 3 sources View
Yield

What to expect

About 5 to 10 potatoes, roughly 1 to 2 pounds, from each plant when things go well, though it varies a lot. By the row, expect something like 20 to 30 pounds from a 10-foot row.Roughly 5 to 10 tubers, about 1 to 2 pounds, per plant in good conditions, varying widely with variety, season length, and care. Yield is best thought of by row: Iowa State puts a home crop at about 20 to 30 pounds per 10 feet of row.

A potato planting is ready all at once, about 3 to 4 months after planting, and you dig it when the tops die back (with a few early new potatoes from about 7 to 8 weeks). It does not keep producing after that, so store the cured crop for a longer supply.A potato planting matures over a single window, about 90 to 120 days, and is dug once when the vines die back, with optional earlier new-potato digs from about 7 to 8 weeks. It is not a repeat-harvest crop; for a longer supply, stagger plantings where the season allows, or store the cured main crop. Potatoes are grown fresh each year from seed pieces, so your first crop can do as well as any later one. What matters is good seed, loose well-drained soil, steady water, and finishing in cool weather.Potatoes are grown fresh from seed pieces each season, so there is no first-year-versus-later difference as with perennials; results depend on certified seed, loose well-drained soil, even moisture, and finishing in cool weather.

What changes yield
Certified disease-free seed: virus or blight carried on saved seed caps yield from the start.Even moisture during bulking: drought-then-flood cycles cut yield and cause knobs, cracks, and hollow heart.Temperature at tuber formation: sustained heat above the cool 60 to 70°F optimum reduces tuber set.Nitrogen balance: excess nitrogen grows vines at the expense of tubers.Hilling and depth: thorough hilling expands the tuber zone and prevents greening losses.
Verified · 2 sources View
Pick your variety

Recommended varieties

Pick a variety for your area and how soon you want potatoes. Early kinds like Yukon Gold and Irish Cobbler are ready fastest and are good where summers turn hot. Later kinds like Kennebec and Russet Burbank give bigger harvests and store longer. In the South, grow thin-skinned reds and golds (Red Pontiac, Yukon Gold) rather than thick brown russets. If scab or blight is a problem in your garden, choose a resistant variety. Always buy certified disease-free seed potatoes, not grocery-store ones.Choose by maturity and your climate. Early varieties (Irish Cobbler, Yukon Gold) finish fastest and suit short seasons and hot-summer regions where the crop must beat the heat; mid and late varieties (Kennebec, Russet Burbank) yield more and store better where the season is long. In the South, thin-skinned reds and whites (Red Pontiac, Yukon Gold) outperform thick russets, which size up poorly there. Where scab or late blight recurs, lean on resistant or tolerant varieties (Russet Burbank or Superior for scab; Kennebec or Sebago for late blight). Always start from certified disease-free seed potatoes.

Yukon Gold: yellow-fleshed, all-purpose early-to-mid main crop, widely adapted and a reliable first choice
Red Pontiac: red-skinned, vigorous, tolerant of heavier soils, a strong pick in the South
Kennebec: high-yielding mid-to-late white, with useful late blight tolerance
Russet Burbank: classic late russet for baking and frying, with some scab tolerance
Irish Cobbler: heirloom early white, quick to a first dig of new potatoes
Off the vine

Storing your harvest

Room temp
Only for a short while. Left out warm and in the light, potatoes sprout, go soft, and turn green. Keep a few days' worth in a dark cupboard and store the rest somewhere cool.Short term only. At room temperature potatoes sprout, soften, and shrivel within a couple of weeks, and light exposure greens them. Keep only what you will use soon on the counter, in the dark, and store the rest cool.
Fridge
The fridge is not the best place for raw potatoes. When they get colder than about 40°F, their starch turns to sugar and they taste sweet and brown too fast when cooked. A cool spot like a cellar or unheated garage around 40 to 50°F is better. If you do refrigerate them, let them sit out a day or two before frying.Not ideal for raw potatoes. Below about 40°F the starch converts to sugar, making them overly sweet and prone to darkening when cooked. A cool cellar or garage near 40 to 50°F is better than the refrigerator for raw storage; if you must refrigerate, let them warm at room temperature for a day or two before frying.
Freezer
Do not freeze raw potatoes, which go mushy and dark. Freeze them only after cooking, like mashed or par-cooked, and they keep for several months.Raw potatoes do not freeze well and turn watery and dark. Freeze only after cooking (blanched, mashed, or as prepared dishes), where they keep for several months.
Verified · 3 sources View
When something goes wrong

Common problems

Green potatoes
01 of 05
What happened Some potatoes turned green because they got light, either by poking out of the soil or by sitting out in the light after you dug them. The green part contains solanine, which is bitter and mildly poisonous, so cut the green parts off and throw them away (or toss the whole potato if it is very green).Tubers developed green patches because they were exposed to light, either pushing out of the soil while growing or sitting in the light after harvest. The green tissue contains solanine, a bitter, mildly toxic alkaloid, so green portions should be cut away and discarded, or the tuber discarded if heavily greened. Next season Mound soil up well so no potatoes are uncovered, and store them in the dark. Cover any that push up to the surface, and do not leave dug potatoes sitting in the light.Hill thoroughly and keep every tuber covered through the season, and store the crop in the dark. Re-cover any shoulders that heave up, and never leave dug potatoes in the sun.
Hollow middle in the potatoHollow center in the tuber
02 of 05
What happened Big potatoes had a hollow space in the middle. This is not a disease; it comes from uneven, fast growth, usually from on-again off-again watering or plants spaced too far apart so the potatoes grow too quickly.Large tubers showed a star-shaped or irregular hollow cavity in the center, a physiological disorder, not a disease. It comes from uneven, rapid growth, often a checked-then-surging pattern from irregular water or very wide spacing that lets individual tubers grow too fast. Next season Water steadily while the potatoes size up instead of letting them dry out and then soaking them, and do not space the plants too far apart, which makes a few oversized potatoes that hollow out.Keep moisture even through bulking and avoid feast-or-famine watering, and do not space plants too widely, which encourages oversized, fast-growing tubers prone to hollowing.
Rough, scabby skin
03 of 05
What happened The potatoes had rough, corky brown patches on the skin. That is scab, caused by a soil germ that gets worse when the soil is not acidic enough, when it is dry while the potatoes form, and when fresh manure is used. The potatoes are fine to eat once peeled.Tubers came up with rough, corky brown scabs or pits on the skin. This is common scab, a soil bacterium favored by less-acidic soil (pH above about 5.5), dry conditions during tuber formation, and fresh manure. The potatoes are still edible after peeling. Next season Keep the soil acidic (do not add lime), keep it evenly moist while the potatoes are forming, skip fresh manure, and grow a scab-resistant variety if it keeps happening.Keep the soil acidic (around pH 5.0 to 5.3 where scab recurs) and never lime a potato bed, keep the soil evenly moist for the weeks after planting, avoid fresh manure, and grow scab-resistant varieties.
Lumpy, oddly shaped potatoesKnobby, misshapen tubers
04 of 05
What happened The potatoes came out lumpy or cracked because their growth started and stopped, usually from the soil going dry and then wet again, or from heavy clay that the potatoes could not grow through smoothly.Tubers grew knobby, with secondary lumps or growth cracks, from a stop-and-start growth pattern: a dry spell or heat check followed by a surge of moisture and growth, or heavy clay soil that resists smooth expansion. Next season Keep the watering steady while the potatoes grow, mulch to even out the soil, and loosen heavy soil with compost or use a raised bed so the potatoes can grow smoothly.Hold even moisture through bulking, mulch to buffer soil temperature and moisture, and loosen heavy soil with organic matter or use raised beds so tubers can expand evenly.
Big plants but few potatoesLots of vines but few potatoes
05 of 05
What happened The plants were big and leafy but made few potatoes. This usually comes from too much nitrogen (which grows leaves not potatoes), heat while the potatoes were trying to form, or planting too late so they were sizing up in the summer heat.The plants grew lush, leafy tops but set few tubers. The usual causes are too much nitrogen (which favors foliage over tubers), sustained heat during tuber formation (tubers set poorly above the cool optimum), or planting too late so bulking ran into summer heat. Next season Use less nitrogen and a balanced fertilizer, and time the crop so the potatoes form in cool weather, not summer heat: plant earlier in spring, or grow them in the cool season where summers are hot.Cut back nitrogen and use balanced feeding, and time the crop so tubers form and bulk in cool weather rather than summer heat: plant earlier in spring, or grow in the cool season in hot regions.
Verified · 4 sources View
The usual suspects

Pests & diseases

Pests
Colorado potato beetle
P · 01
Symptoms Leaves chewed ragged, sometimes stripped to the stems. The beetles are oval, about 3/8 inch, with yellow and black stripes; the larvae are fat, pinkish-orange grubs with black heads; and the eggs are clusters of bright orange ovals on the undersides of leaves. The big grubs do most of the eating, and damage hurts most once the potatoes are forming underneath.Ragged, chewed foliage that can be stripped to the stems in a bad outbreak. Look for oval, 3/8-inch adults with yellow and black lengthwise stripes, plump pink-to-salmon larvae with black heads and two rows of dark spots, and bright yellowish-orange egg clusters on the undersides of leaves. The last-stage larvae do most of the damage. Potatoes tolerate up to about 30 percent defoliation before flowering but only about 10 percent once tubers are sizing. Cause The Colorado potato beetle, a striped beetle that spends winter in the soil near old potato patches and comes out in spring to feed and lay eggs. Each female lays hundreds of eggs and there can be two rounds in a summer, so numbers build fast. It also goes after eggplant and other nightshades.Larvae and adults of the Colorado potato beetle (Leptinotarsa decemlineata), which overwinter 5 to 10 inches deep in soil in and around last year's potatoes and emerge in spring to feed and lay eggs. Each female lays up to 350 eggs, and there is often a second generation by midsummer in central and southern areas. It also attacks eggplant and other nightshades. Organic treatment Pick the beetles, grubs, and orange egg clusters off by hand and drop them in soapy water; check the plants every couple of days. There is no easy spray fix, because the beetles have grown resistant to many of them, so hand-removal is the most reliable home control.Handpicking is effective in a home garden: knock adults and larvae into a pail of soapy water and crush the orange egg clusters on the leaf undersides; check every few days. There is no quick spray cure, and the beetle has developed resistance to many insecticides, so persistence with handpicking and removal does most of the work. Prevention Move potatoes to a new spot each year, away from where they (or eggplant) grew last year, because the beetles wake up right there in spring. A row cover over the bed early keeps them off, straw mulch slows them down, and crushing the first egg clusters stops a generation before it starts.Rotate potatoes well away from last year's bed, since the overwintered adults emerge where potatoes grew before. Floating row cover laid over the bed at emergence keeps the beetles off until you need to remove it for the developing plants, and a thick straw mulch can slow the adults walking in. Crush early egg clusters before they hatch to break the first generation.
Flea beetles
P · 02
Symptoms Lots of tiny holes in the leaves, as if peppered with shot, made by little dark beetles that hop away when you come near. Young plants are hurt most; big healthy plants shrug it off. The grubs can also nibble the tubers.Tiny dark beetles that jump when disturbed and chew many small round shot-holes in the leaves. Heavy early feeding on young plants stunts growth; the larvae feed on roots and can leave small tracks or pits on tubers. Established, vigorous plants usually outgrow light feeding. Cause Small beetles called flea beetles that spend winter nearby and jump onto young potato plants in spring. They do the most harm to little plants and in warm, dry spells.Several species of small flea beetles, including the tuber flea beetle, that overwinter nearby and move onto young potato foliage in spring. They are worst on small, slow plants and in warm, dry weather. Organic treatment Keep young plants growing strong with steady water and they usually outgrow the damage. A row cover protects seedlings early on, and clearing weeds and old plant debris takes away their winter hiding spots.Healthy, well-watered plants usually outgrow flea beetle damage. Floating row cover protects young plants during the vulnerable early weeks; remove it once the plants are established. Clearing weeds and old crop debris reduces the shelter they overwinter in. Prevention Move the potatoes to a new spot, pull weeds, and cover the young plants until they are big and strong. Plants that are well fed and watered handle flea beetles much better than struggling ones.Rotate away from last year's nightshade beds, keep the area weed-free, and protect young plants with row cover until they are large enough to tolerate feeding. Vigorous, evenly watered plants are far more tolerant than stressed ones.
Aphids and the viruses they spread
P · 03
Symptoms Tiny soft insects, usually green or pink, crowded on the new growth and the undersides of leaves, sometimes leaving a sticky film. Their feeding is minor, but they can pass on plant viruses that make the leaves mottle, curl, or roll and cut your harvest. A plant that catches a virus will not get better.Small soft-bodied insects, often green or pink, clustered on growing tips and leaf undersides, sometimes with sticky honeydew and sooty mold. The bigger problem is not their feeding but the viruses they transmit (such as potato virus Y and leafroll), which cause mottled, curled, or rolled leaves and reduce yield; virus-infected plants do not recover. Cause Aphids are small sap-sucking insects, and as they move from plant to plant they carry potato viruses. The viruses, more than the bugs, are the real concern, which is why it is best to plant certified disease-free seed potatoes instead of saving your own.Several aphid species colonize potato foliage, and as they move plant to plant they spread potato viruses. Virus pressure, not the feeding itself, is the main reason to manage them, and it is the reason gardeners are advised to start from certified disease-free seed potatoes rather than saved tubers. Organic treatment Plant certified disease-free seed potatoes so the patch starts clean. A little aphid activity is fine, because ladybugs and other helpers usually keep them in check; for heavy clusters, spray them off with water or use insecticidal soap. Pull and throw away any plant that clearly has a virus.Start with certified seed potatoes to keep virus out of the patch. Tolerate light aphid numbers, since beneficial insects (ladybugs, lacewings, parasitic wasps) often control them; a strong spray of water or insecticidal soap knocks down heavy colonies. Remove and destroy any plant showing clear virus symptoms. Prevention Buy certified seed potatoes, avoid harsh sprays that kill the helpful bugs, keep weeds down, and pull out any virus-looking plant right away so it does not spread.Use certified seed potatoes, encourage beneficial insects by avoiding broad-spectrum sprays, control nearby weeds that host aphids and virus, and rogue out virus-symptomatic plants promptly so they do not seed an outbreak.
Wireworms
P · 04
Symptoms Hard, shiny, tan-colored worms in the soil that drill narrow holes into the potatoes. You usually do not notice anything above ground; you find the little tunnels when you dig the crop. Tunneled potatoes do not store well.Slender, shiny, yellow-brown, hard-bodied larvae in the soil that bore narrow holes straight into the tubers, leaving clean round tunnels that downgrade quality and invite rot in storage. There are no useful aboveground symptoms; the damage is found at harvest. Cause The larvae of click beetles. They live in the soil for years and are most common in beds that were lawn or grass not long ago. You tend to find them only when you dig.The larvae of click beetles, which live in the soil for several years and are most common in ground recently in sod or grass. They feed on many roots and tubers and are hard to detect until harvest. Organic treatment You cannot fix potatoes that are already tunneled, so cut out the bad parts and eat those first instead of storing them. Dig the crop on time rather than leaving it in the ground, where the worms keep boring.There is no rescue for tunneled tubers; trim damaged areas and use them first rather than storing them. Harvest promptly once the crop matures rather than leaving tubers in infested soil, where damage accumulates. Prevention Do not plant potatoes in a bed that was grass or lawn in the last year or two, where wireworms are worst. Rotate your crops, work the soil, and dig on time. If wireworms keep ruining a bed, use a raised bed with clean soil.Avoid planting potatoes in ground that was recently lawn or pasture, since wireworm numbers are highest there. Rotate, keep the soil well worked, and harvest on time. Where wireworm history is bad, grow elsewhere or in clean raised-bed soil.
Diseases
Late blight
D · 01
Symptoms Dark, wet-looking spots on the leaves and stems that spread fast, with a fuzzy white mold underneath in cool, damp weather. The plants can collapse in just a few days, and the rot moves down into the potatoes, leaving firm reddish-brown corky patches inside. This is the famous, most dangerous potato disease, the one behind the Irish famine.Dark, water-soaked spots that appear on leaves and stems and enlarge rapidly, often with a downy white mold on the leaf undersides in cool, wet weather. The foliage can collapse within days, and the disease moves into the tubers, which develop a firm, reddish-brown, dry, corky rot beneath the skin. This is the disease behind the Irish potato famine and the most serious threat to a potato crop. Cause A fungus-like organism (Phytophthora infestans) that thrives in cool, wet, humid weather and blows in on the wind. It attacks tomatoes too, so an infected tomato nearby is a danger, and it survives in leftover infected potatoes.The water mold Phytophthora infestans, favored by cool, wet, humid weather and spread on wind and splashing water. It infects both potato and tomato, so a nearby infected tomato is a real risk, and it survives between seasons in infected tubers and cull piles. Organic treatment You cannot cure a badly infected plant, so pull and destroy infected plants fast (do not compost them) to slow it down. In a wet year a copper fungicide started early can help, but mostly it is about prevention. Throw away every infected potato so it does not bring the disease back next year.There is no home cure once a plant is badly infected. Remove and destroy infected plants quickly to slow spread, and do not compost them. In wet seasons a copper-based fungicide applied early and repeated can suppress it, but the real defenses are cultural. Destroy all infected tubers so they cannot carry it over. Prevention Plant certified disease-free seed potatoes and a resistant variety like Kennebec, water at the soil in the morning so the leaves stay dry, give plants room for air to move, and keep them away from tomatoes. Clean up any leftover or volunteer potatoes, and cut and remove infected vines before you dig so the disease does not reach the potatoes.Start with certified disease-free seed, choose resistant varieties (such as Kennebec or Sebago), keep foliage dry by watering at the base in the morning, space for airflow, and never plant near tomatoes. Remove volunteer potatoes and cull piles that harbor the pathogen, and destroy any infected vines before harvest so spores do not reach the tubers.
Early blight
D · 02
Symptoms Dark spots with rings inside them, like a little target or bull's-eye, on the older lower leaves, often with a yellow edge. The spots spread and the lower leaves die off; in a bad case the plant loses its leaves and the potatoes get brown corky patches. Tired, stressed plants get it worst.Small dark brown to black lesions on the older, lower leaves, each with concentric rings that give a target or bull's-eye look, often ringed by a yellow halo. Spots multiply and merge and the lower canopy dies back; severe infection causes defoliation and brown, corky, dry spots on the tubers. Stressed and aging plants are hit hardest. Cause A fungus (Alternaria solani) that lives on old plant debris and in the soil and spreads in warm, damp weather. It comes on gradually, especially on stressed plants, rather than wiping a plant out overnight like late blight.The fungus Alternaria solani, which survives on crop debris and in the soil and spreads in warm, humid weather with wet foliage. It is more of a slow, stress-related decline than the explosive collapse of late blight. Organic treatment Pick off the worst spotted lower leaves, keep the plants healthy with even water and feeding, and water at the soil so the leaves dry fast. A copper fungicide can help if you start early in a wet spell, but keeping plants strong and the leaves dry does most of the work.Remove badly spotted lower leaves, keep plants vigorous with steady water and feeding (stress worsens it), and water at the base in the morning. A copper or other labeled fungicide can slow spread in a wet season if started early, but cultural care carries most of the load. Prevention Do not grow potatoes (or tomatoes and peppers) in the same spot for a few years, use clean seed and a resistant variety, clear away old plant debris, give plants room, water at the base, and keep them well fed so they stay strong.Rotate potatoes and other nightshades out of the bed for several years, start with clean seed and resistant varieties, clear crop debris, space and hill for airflow, avoid overhead watering, and keep plants well nourished so they resist the slow decline.
Common scab
D · 03
Symptoms Rough, brown, corky patches or pits on the potato skin, sometimes spreading into larger areas. The leaves look fine, so you only see it when you dig the potatoes. It does not rot them, it just roughens the skin, and they are fine to eat once peeled, but they do not store or sell as well.Rough, brown, corky scabs or pits on the tuber skin that can merge into larger patches; sometimes raised, sometimes sunken. The leaves and stems are not affected, so it is found only at harvest. It is a skin-quality problem rather than a rot, and the potatoes are fine to eat after peeling, but it downgrades appearance and storage. Cause A soil germ (Streptomyces scabies) that gets worse when the soil is not acidic enough (above about pH 5.5), when it is dry while the potatoes are forming, and when fresh manure is used. It lives in the soil for years, so just rotating crops does not get rid of it.The soil bacterium Streptomyces scabies, which is favored by less-acidic soil (pH above about 5.5), dry conditions while tubers are forming, and fresh manure. It persists for years in the soil and on many hosts, so rotation alone does not eliminate it. Organic treatment You cannot fix scabbed potatoes, but they are fine to eat after peeling. There is no spray for it; you prevent it by managing the soil instead.There is no rescue once tubers are scabbed; the potatoes are still edible after peeling. Management is preventive: it is controlled by soil conditions, not a spray. Prevention Keep the soil acidic (about pH 5.0 to 5.3 if scab is a problem) and never add lime to a potato bed. Keep the soil evenly moist while the potatoes are forming, skip fresh manure, plant a scab-resistant variety if it keeps happening, and rotate the bed every few years.Keep soil acidic, around pH 5.0 to 5.3 where scab is a problem, and never lime a potato bed. Keep the soil evenly moist for the 4 to 9 weeks after planting when tubers form, avoid fresh manure, and grow scab-resistant varieties (such as Russet Burbank or Superior) where the disease recurs. Rotate on a 3 to 4 year cycle.
Blackleg and bacterial soft rot
D · 04
Symptoms Blackleg makes the bottom of the stem turn black and slimy while the top of the plant yellows, wilts, and stays small, usually from a bad seed piece. Soft rot turns the potatoes themselves into a soft, wet, smelly mush, in the ground or in storage. Both get into the potato through cuts and bruises and spread in wet conditions.Blackleg shows as an inky-black, slimy rot at the base of the stem with yellowed, wilting, stunted tops, often from infected seed; bacterial soft rot turns tubers into a soft, wet, foul-smelling mush, in the ground or in storage, and can rot a tuber completely within days. The bacteria enter through wounds and spread in wet conditions. Cause Bacteria that thrive in wet, poorly drained, warm soil and spread through cuts. They often come in on a bad seed piece, and they are worst when the soil is waterlogged or when bruised potatoes are stored damp.Bacteria in the Pectobacterium and related groups, which are favored by wet soil, poor drainage, and warm conditions, and which spread on cutting knives and through wounds. They often arrive on infected or poorly cured seed pieces and are worst in waterlogged ground and in bruised, wet-stored tubers. Organic treatment There is no cure once a plant or potato is infected, so pull out affected plants and never store soft or damaged potatoes. The fix is prevention: be gentle with the tubers and keep them dry.There is no cure for an infected plant or tuber; remove and discard affected plants and do not store blemished or soft potatoes. Management is preventive: handle tubers gently and keep them dry. Prevention Use certified, well-cured seed pieces and plant them in warm, well-drained soil, not cold mud. Let cut seed pieces heal before planting, do not overwater, dig in dry weather, and handle the potatoes gently. Never store bruised or wet potatoes.Plant certified, well-cured seed pieces (or whole small seed potatoes) in warm, well-drained soil, let cut seed suberize before planting, avoid overwatering and waterlogged beds, harvest in dry conditions, cure the crop, and avoid bruising. Do not store damaged or wet tubers.
Verified · 3 sources View
Seasoned
Where to plant next year

Crop rotation

Move your potatoes to a different spot each year and do not put them (or tomatoes, peppers, and eggplant) back in the same bed for about 3 to 4 years. This keeps diseases and pests from building up. Planting potatoes after beans or peas is great, since those add nitrogen.Rotate potatoes on a 3 to 4 year cycle, keeping them and all other nightshades out of a bed for several seasons. This breaks the buildup of late blight, early blight, scab, Verticillium, and nightshade pests. Following a legume (which adds nitrogen) or a non-host crop is ideal; following a heavily manured crop is not, because residual conditions favor scab.

Family
Solanaceae
Years between
3 years
in the same bed
Avoid following
Do not grow potatoes where you grew potatoes, tomatoes, peppers, or eggplant in the last few years. They are all in the same family and share the same soil diseases and pests, which pile up over time. Also avoid beds that just got fresh manure, because that brings on scab. Wait about 3 to 4 years before potatoes or their cousins go back in a bed.Do not plant potatoes where another nightshade (Solanaceae) grew recently: potato, tomato, pepper, or eggplant. They share soilborne diseases (late blight, early blight, Verticillium wilt) and pests that build up where the family is grown repeatedly. Avoid beds freshly amended with manure, which encourages scab. The standard guideline is a 3 to 4 year gap before potatoes or their relatives return to a bed.
Plant after
Legumes such as beans and peasSweet cornBrassicas such as cabbage and broccoliLeafy greens
Verified · 2 sources View
In the app · pre-launch

When plant taps you on the shoulder

The plant app sends a timely reminder at every critical moment of your potato season. The wording adjusts to whichever you pick: beginner or seasoned. Here are three you'll see in Zone 10.

p
plant
3 weeks before last frost
Time to plant potatoes
Plant your seed potatoes about 2 to 4 weeks before your last frost, when the soil has warmed to about 50°F. Set the pieces cut-side down, a few inches deep and about a foot apart.
p
plant
3 weeks after planting date
Potatoes take a while to come up
Potato shoots can take 2 to 4 weeks to appear, longer when it is cold. Keep the soil damp, and cover the shoots if a hard frost is coming.
p
plant
5 weeks after planting date
Time to mound up your potatoes
When the plants are 6 to 12 inches tall, mound soil up around them, leaving the tops out. Do it again at flowering so the potatoes stay covered and do not turn green.
Get personalized alerts.

plant sends the right notification at exactly the right moment, for your zone, your weather, your crops. Founding members lock the rate forever.

Back the Kickstarter →
Ask the gardener

Common questions

Got a question we missed?

We're building this guide with real growers. Got a question we missed? Ask here. We read every one and add the best answers right to this page.

Grown this before?

Share a tip

Learned something the hard way? Pass it on. Real growers' tips make this guide better for the next person, and we credit you by name when yours goes live.

Seasoned
Spot something wrong?

Report a problem

If you've grown this crop and you see a date, a temperature, a companion claim, or a recommendation that doesn't match your experience, tell us. Real growers' corrections make this guide better for the next person.

How we built this guide

Methodology & sources

Every date, temperature, spacing, and recommendation on this page is sourced from university cooperative extension publications, peer-reviewed agricultural research, NOAA climate data, and direct extension calendars. Where claims are softer (traditional gardening wisdom not formally documented), we say so.

Research-backed Documented in cooperative extension publications or peer-reviewed research
Well-grounded A known agronomic principle, but not formally tested for this specific pair
Traditional Time-tested gardening wisdom, limited formal research support
Last reviewed
June 30, 2026
Data version
crops_data_final · v1.0 · schema 2.9
Sources cited on this page
16 publications
Verified entries
Companion-planting claims tagged inline · zone dates verified against 5+ extensions
See all sources cited on this page
  • University of Minnesota Extension umn_ext
  • University of Maryland Extension umd_ext
  • Cornell Cooperative Extension cornell_ext
  • Iowa State University Extension iastate_ext
  • Michigan State University Extension msu_ext
  • NC State Extension ncsu_ext
  • Penn State Extension psu_ext
  • U. of Illinois Urbana-Champaign Extension uiuc_ext
  • UC Davis Postharvest Center ucd_postharvest
  • Texas A&M AgriLife Extension tamu_agrilife
  • Virginia Cooperative Extension 426-331 vce_426_331
  • Piedmont Master Gardeners piedmont_mg
  • UGA Vegetable Garden Calendar uga_calendar
  • Clemson Home & Garden Information Center clemson_hgic
  • UC IPM Statewide IPM Program uc_ipm
  • NOAA 1991-2020 Climate Normals noaa_normals

Growing notes, weekly.

Zone-aware seasonal nudges, what's worth planting now, and the occasional recipe from the harvest. No spam, ever.

Vol. 003 · Potato · plant.lifestyle