Pick your zone and the dates re-calibrate.
The Guide Crops Vol. 003

Radish

in Zone 8, this week

Radishes are a fast cool-weather root vegetable in the cabbage family. The part you eat is the crisp, peppery root. They are one of the quickest crops you can grow: the small round kinds are ready in about 22 to 30 days, while the big Asian or winter kinds (daikon) take longer. Plant the seeds right where they will grow, and they sprout fast, often in just 3 to 7 days. Radishes like loose, well-drained soil and cool weather, around 50 to 65 °F. The trick is to grow them fast and steadily: radishes that grow quickly stay mild and crunchy, while heat, crowding, or uneven watering make them tough, hollow, cracked, and very hot-tasting. When the weather warms up and days get longer in late spring, radishes bolt, meaning they send up a flower stalk and turn strong and woody, so they are grown in the cool parts of the year. They handle cool weather and a light frost, but unlike carrots they do not get sweeter after frost. When you plant depends on your climate: spring and fall where summers are warm, and fall through early spring where summers are hot. Radish (Raphanus sativus) is a fast cool-season root crop in the cabbage family (Brassicaceae), grown for its crisp, peppery root. It is one of the quickest vegetables in the garden: small round and oval garden types size up in roughly 22 to 30 days from sowing, while the large Asian and winter types (daikon) take longer, around 50 to 60 days. Radishes are direct-sown, germinate fast (often in 3 to 7 days, far quicker than carrots), and grow best in loose, well-drained, slightly acidic soil at cool temperatures, roughly 50 to 65 °F. Quality is set by speed: radishes that grow quickly and without stress stay mild, crisp, and tender, while heat, crowding, or uneven moisture turn them woody, pithy, cracked, and sharply hot. As days lengthen and temperatures rise in late spring, radishes bolt, sending up a flower stalk and turning strong-flavored, so the crop is grown in the cool windows on either side of summer. They tolerate cool weather and light frost but are not a frost-sweetened storage crop the way carrots are. The planting season inverts by climate: spring and fall where summers are warm, and fall through early spring where summers are hot.
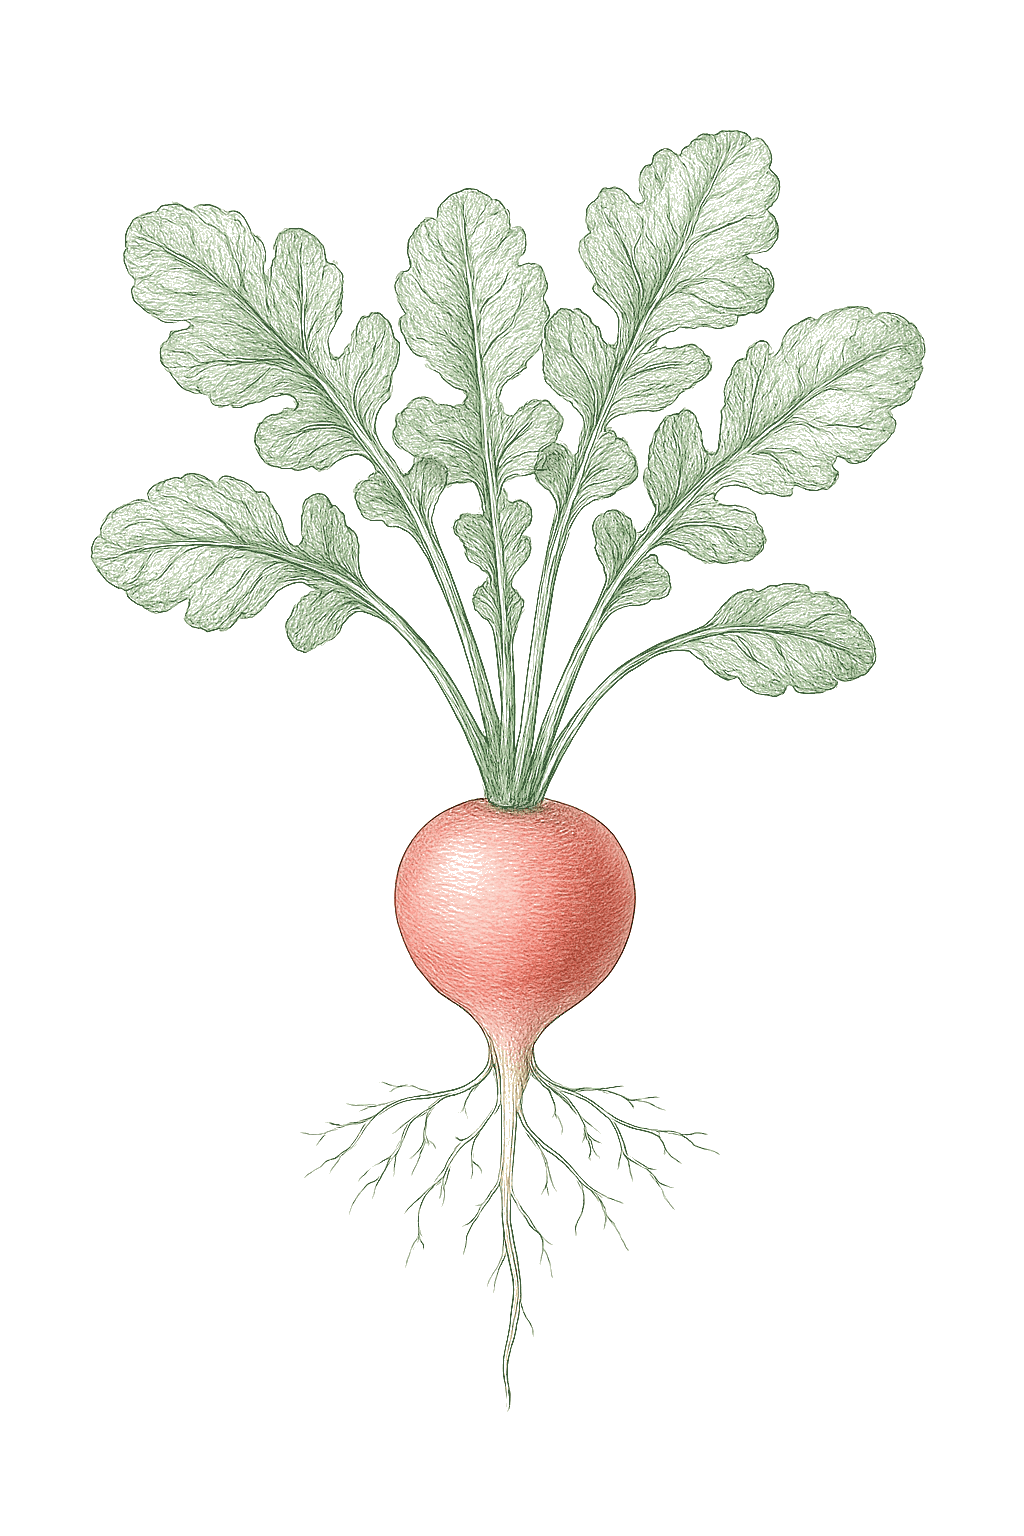
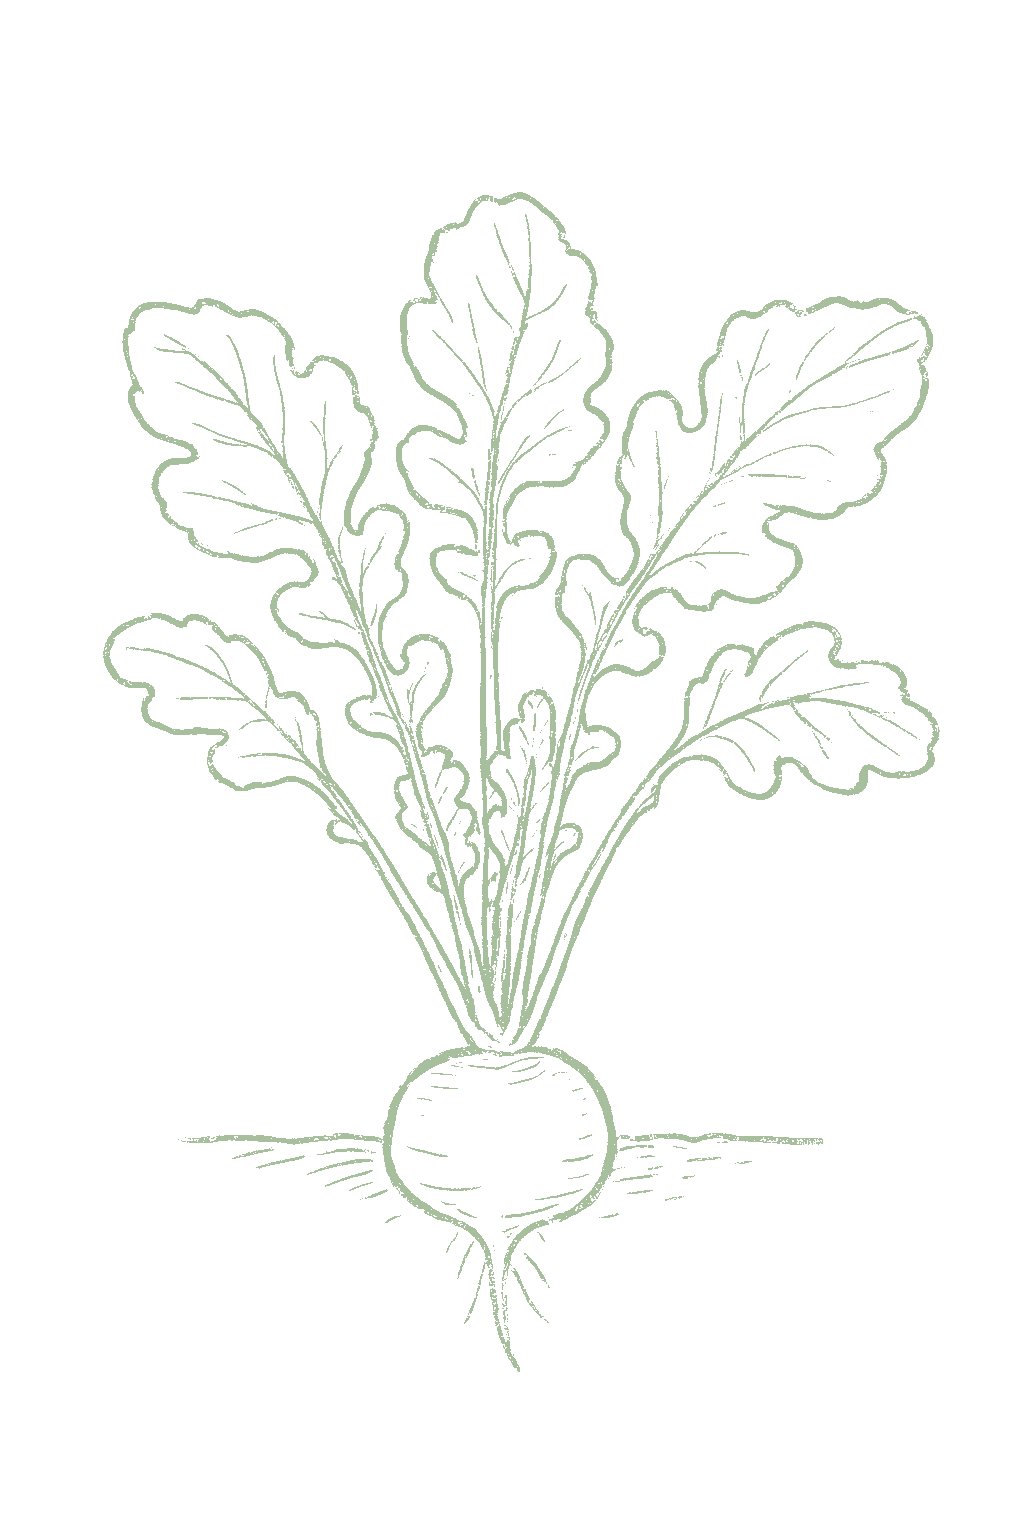
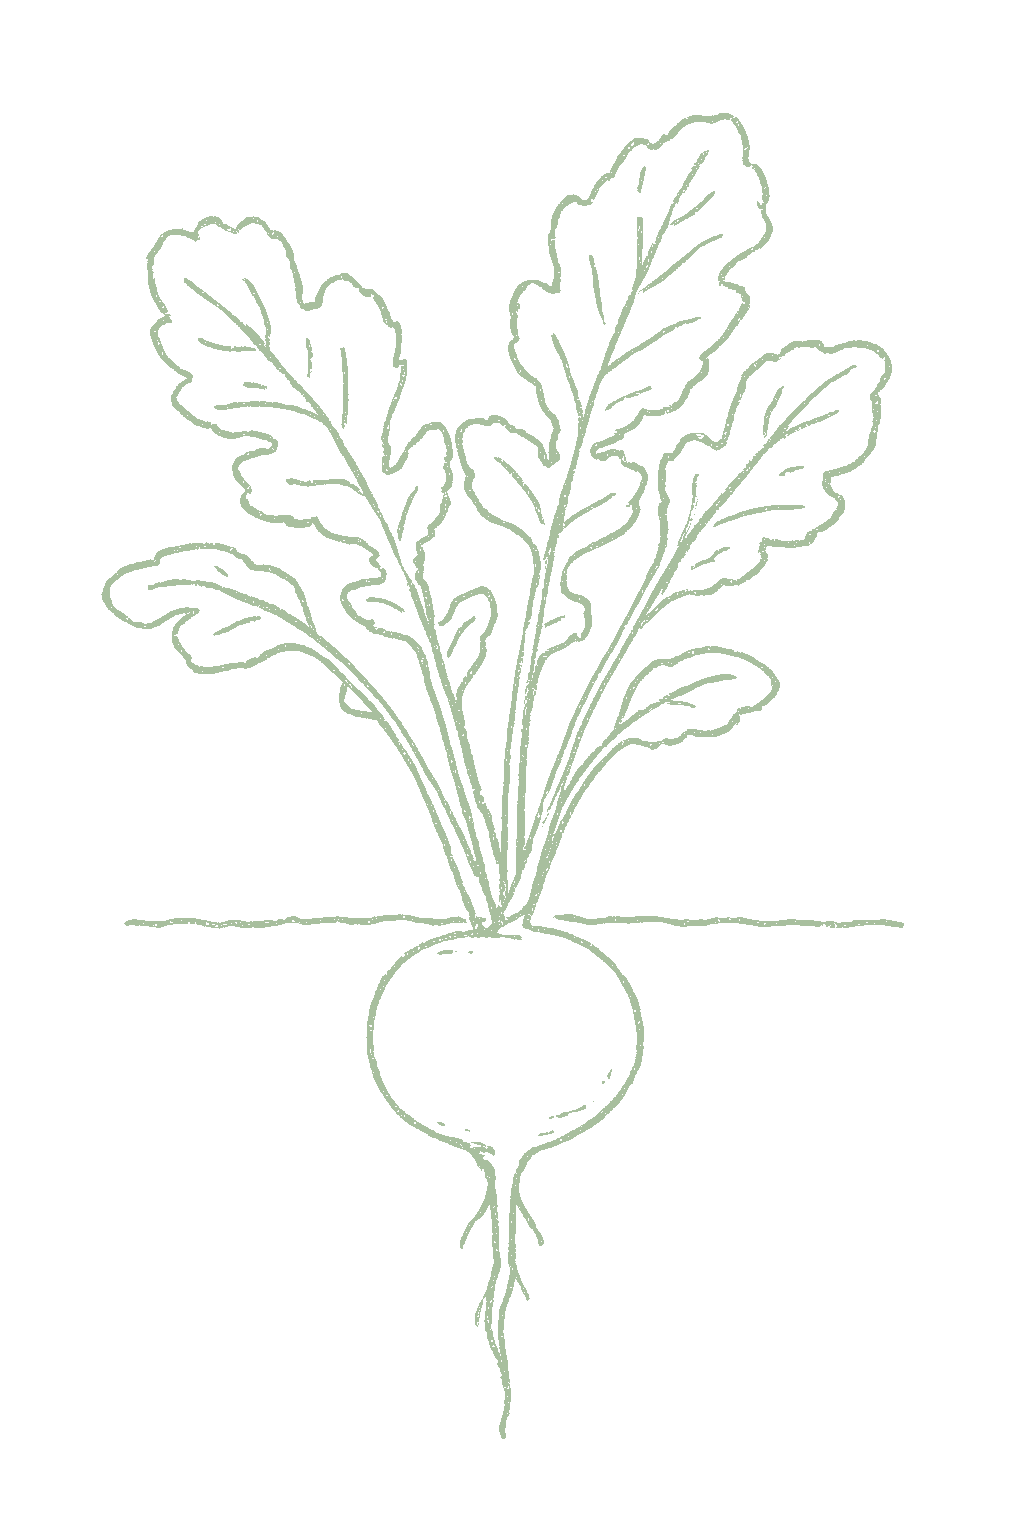
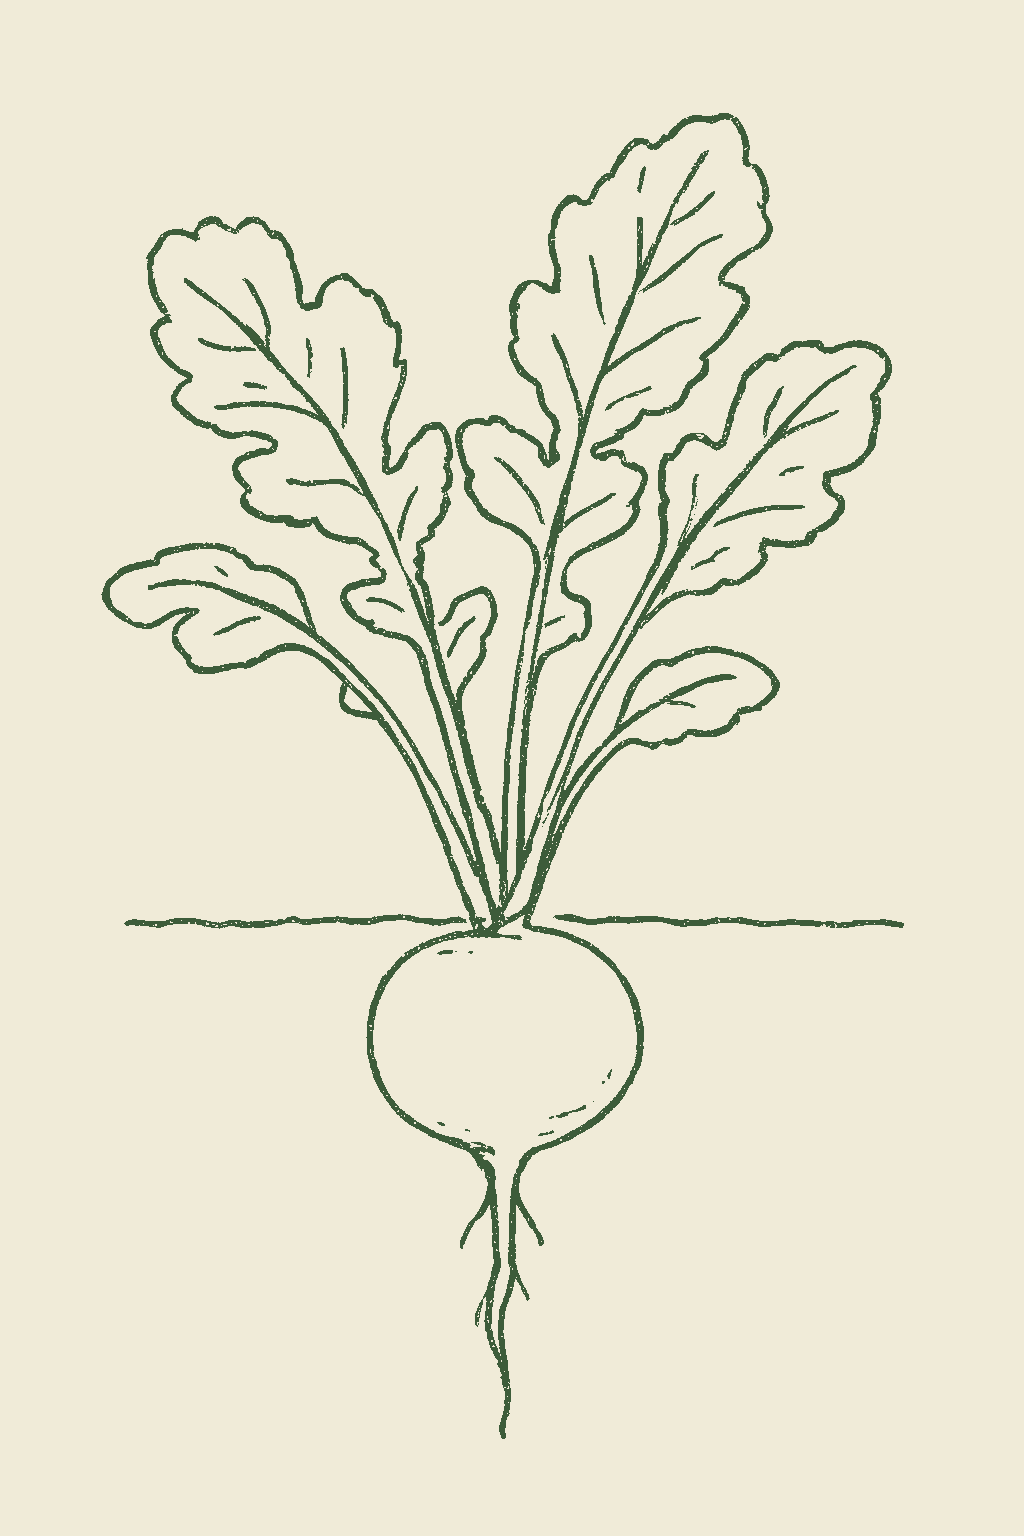
Radish mature plant
Fig. 01 · Radish, mature Zone 8
Mature in
22-30d
from transplant
Sunlight
Full sun to partial shade
6-10 hrs daily
Water
Regular
1 inch / week
Spacing
2-4"
between plants
Soil pH
6-6.8
slightly acidic
Today · in your zone

What's happening right now

July 24 · Zone 8 · Stage 01 · Germination

Off-season for radish in zone 8.

Your climate region in Zone 8
The season at a glance

Planting calendar

In Zone 8, radish can be planted January through March, then again August through November, skipping the summer heat. Harvest runs February through December.

Jan
Feb
Mar
Apr
May
Jun
Jul
Aug
Sep
Oct
Nov
Dec
plant
plant
plant
plant
too hot
too hot
too hot
too hot
plant
plant
plant
plant
too late
harvest
harvest
harvest
harvest
harvest
harvest
harvest
indoors
plant out
harvest
Above-ground cropBest planted on a waning moon
Seasoned
Stagger your sowings

Succession planting

Instead of planting all your radishes at once, sow a short row every week or so. That way they are ready a few at a time over several weeks rather than all on the same day, and none sit too long and turn hollow. In places with cool summers, start in spring and keep going, then sow again in late summer for fall. In places with hot summers, grow them in fall, winter, and early spring and skip the summer heat, since radishes bolt and turn hot in warm weather. Stop spring sowings before the hottest part of the year.Radishes are the textbook succession crop: sow a short row every week to ten days through the cool window rather than one large planting, so roots mature in sequence instead of all at once and none over-mature waiting to be pulled. In cool-summer climates that means spring through early summer, then a late-summer-into-fall run; in hot-summer climates it means fall through early spring, skipping the heat. Stop spring sowings before sustained heat and long days arrive, since radishes bolt and turn pithy and hot in warm weather. The number of sowings per season is set by the length of your cool window, not a fixed cap.

Every 1 weeks · sow a short new rowUp to 12 sowings a seasonToo hot to sow midsummer
Jan
Feb
Mar
Apr
May
Jun
Jul
Aug
Sep
Oct
Nov
Dec
sow
harvest
keep sowing
too hot
continuous harvest
The season, mapped

Seed to garden

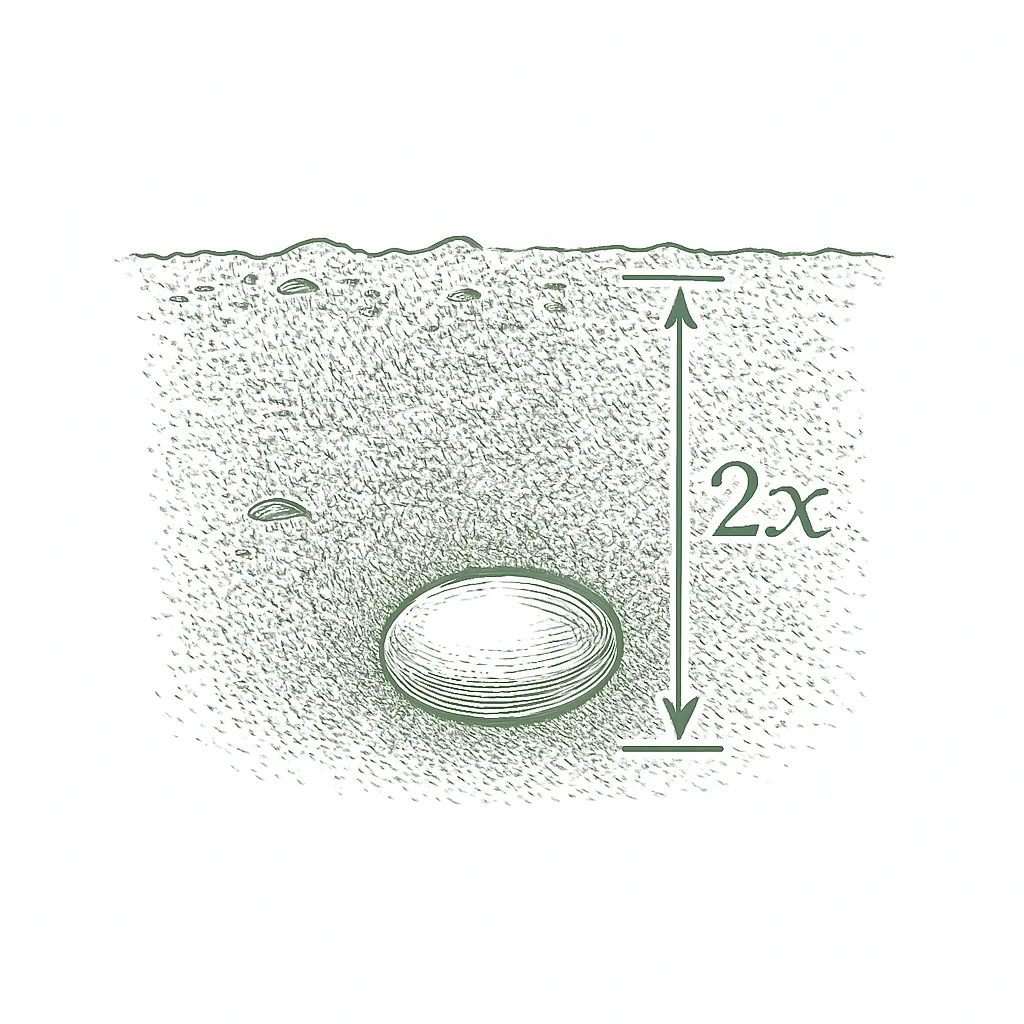
Plant radish seeds right in the garden where they will grow; do not start them in pots. Radishes make their root fast and do not like being moved. Cover the seeds about 1/4 to 1/2 inch deep (up to 1 inch for big daikon types), spacing them about an inch apart. They sprout fast, often in 3 to 7 days, so there is no need to start them indoors or harden them off. Thin the little seedlings soon after they come up, because crowded radishes never make good roots, and plant a new short row every week or so for a steady supply.Always direct-sow radishes into the garden; they are a root crop and resent transplanting. Sow seed about 1/4 to 1/2 inch deep for small garden types and up to 1 inch for large daikon types, spacing seed about 1 inch apart in rows or broadcasting in a wide band. Germination is fast, often 3 to 7 days, so there is no indoor-start or hardening-off step. Thin promptly once seedlings are up, since crowded radishes fail to form usable roots, and sow small batches every week to ten days for a continuous supply through the cool windows.
  1. 01
    Sow outside
    Aug - Sep, Dec - Feb
  2. 02
    First harvest
    From Feb 1
    22-30 days from sowing
Start method
Direct
Soil temp
45-85°F
From seed to fruit

The growing journey

Stage 01 · Germination
01
Germination
Days 0-7 · current stage
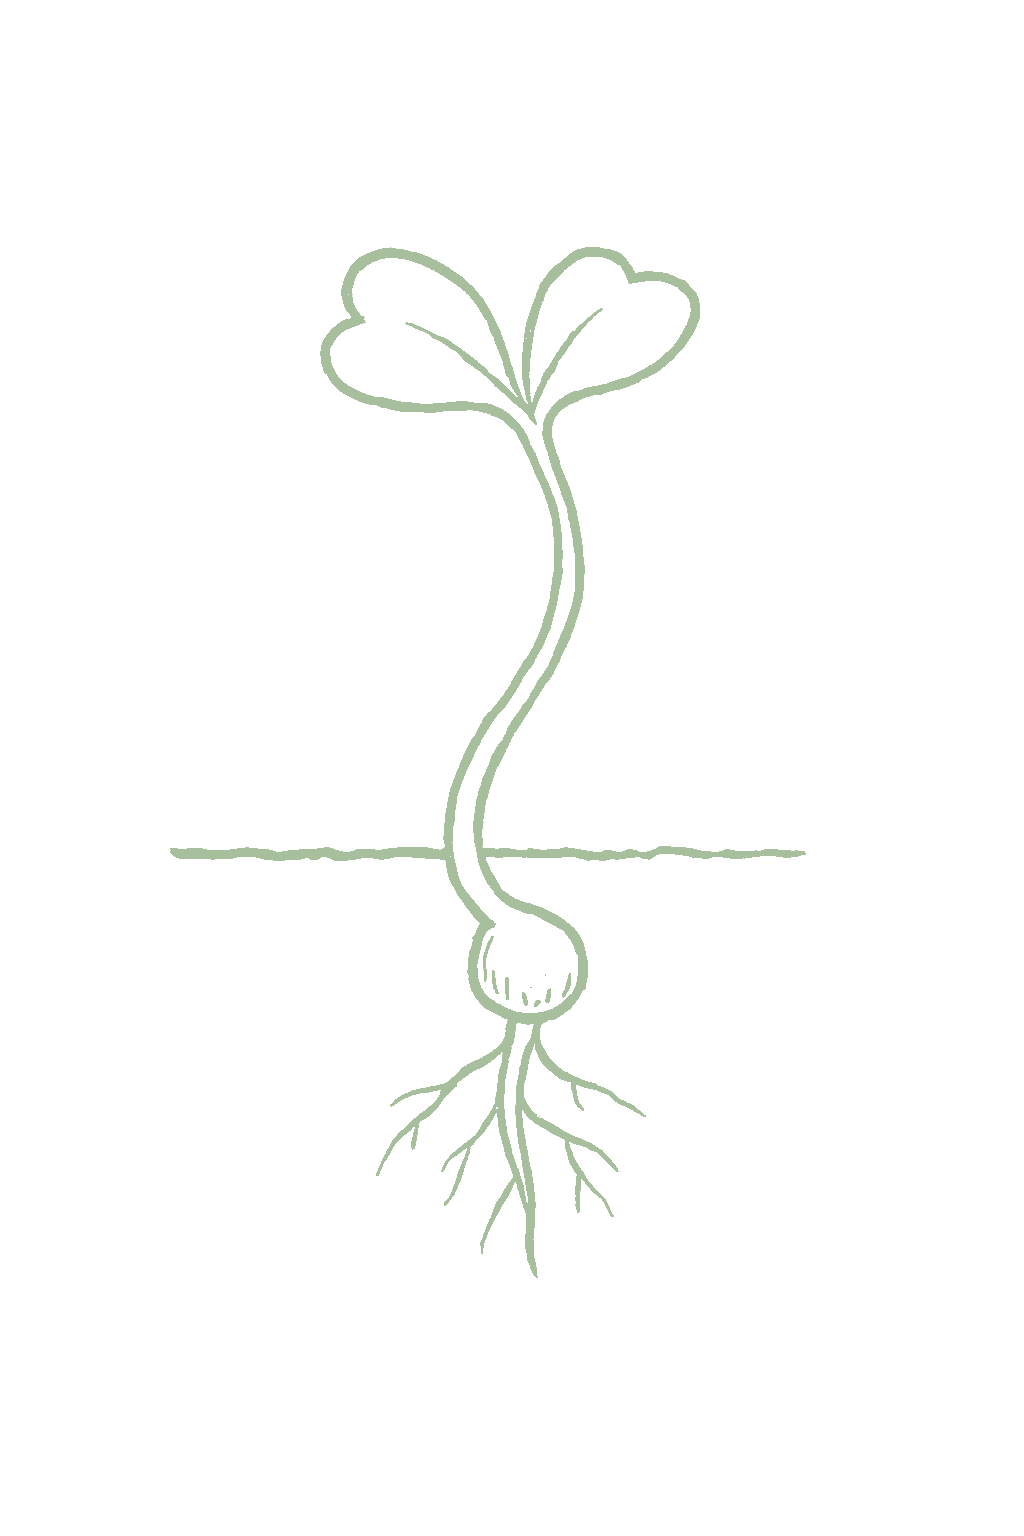
Quick sprouts, often in just 3 to 7 days: two fat little first leaves shaped like hearts or capital Bs, the typical cabbage-family seedling. Radishes come up fast and evenly, but a dry, crusted surface can still keep some from breaking through.Fast emergence, often within 3 to 7 days: pairs of fleshy, heart- or B-shaped seed leaves (cotyledons) pushing up, the classic cabbage-family seedling. Radishes are quick and even, unlike slow crops, but a dried or crusted surface can still slow or thin the stand.
Keep the top of the soil damp until the sprouts appear. It is a short wait since radishes are fast, but do not let the bed dry out or form a hard crust; if it crusts over, lightly sprinkle it to soften it.Keep the surface evenly moist until emergence. Because germination is fast, this is a short window, but do not let a fresh seedbed dry out or crust; if a crust forms, a light sprinkling softens it.
FROM PLANT · Radish seeds sprout fast, often in 3 to 7 days, so you only need to keep the soil damp for a short time. Keep the surface moist and free of a hard crust until they come up, and plant the seeds shallow, about 1/4 to 1/2 inch deep.Radish seed germinates fast, often in 3 to 7 days, so the seedbed only needs to stay moist for a short window. Keep the surface evenly damp and crust-free until the seedlings break through; sow shallowly, about 1/4 to 1/2 inch deep.
FROM PLANT · Because radishes pop up so fast, sprinkling a few seeds in a row of slow crops like carrots marks where the row is and helps break up any crust. Just pull the radishes before they crowd the slower plants.Radishes are so quick to emerge that a few seeds sown in a row of carrots, beets, or other slow germinators mark the row and break any crust; pull the radishes before they crowd the slower crop.
02
Seedling
Days 7-14
The first real leaves coming in beyond the first two, sometimes a little hairy. The seedlings will be crowded, and now is the time to thin them so the radishes have room. Also watch for tiny holes in the leaves from flea beetles.The first true leaves appearing beyond the seed leaves, sometimes slightly hairy. Because seed is sown thickly, the stand will be too crowded for good root development if left alone, and this is the moment to thin. Watch for shot-hole flea-beetle damage on the young leaves.
Thin the seedlings now to about 2 inches apart (4 to 6 for daikons), snipping the extras at the soil line. Keep the soil evenly damp, and if flea beetles are chewing the little leaves, cover the row with a light fabric.Thin promptly to a final 2 inches for garden types (4 to 6 for daikons) at the one-to-two true-leaf stage, snipping extras at the soil line. Keep moisture even, and protect young seedlings from flea beetles with a row cover if pressure is heavy.
FROM PLANT · Thin the seedlings as soon as they have their first true leaves: about 2 inches apart for round radishes, 4 to 6 inches for daikons. Crowded radishes grow leaves but never make a good root, so this step is essential.Thin without delay once seedlings reach the one-to-two true-leaf stage: a final 2 inches for round garden types, 4 to 6 inches for daikons. Crowded radishes put their energy into leaves and never form a usable root.
FROM PLANT · Young spring seedlings are what flea beetles love most, leaving tiny shot-holes in the leaves. A light row cover laid over the bed at planting keeps them off, and a healthy, well-watered patch usually grows right through minor damage.Young spring seedlings are the most vulnerable to flea beetles, which riddle leaves with shot-holes. A floating row cover set at sowing keeps them off; a vigorous, well-watered stand usually outgrows light feeding.
03
Established
Days 14-22
The leaves growing fast and the radish starting to bulb up, with the top of the root often poking out of the soil. This is when the radish is sizing up, so steady watering matters most now to keep it crisp and unsplit.Rapid leaf growth and the root beginning to swell, with the shoulders often starting to push up out of the soil. This is the root-sizing window, when even moisture matters most for crisp, crack-free roots.
Keep the soil evenly damp so the radishes do not crack or turn hot, and pull weeds. Keep an eye on the weather: a warm stretch can make radishes bolt, so be ready to pull them a bit early if it heats up.Hold even moisture to prevent cracking and sharp flavor, and keep the bed weeded. Watch the weather: a warm spell as days lengthen can trigger bolting, so be ready to harvest a little early.
FROM PLANT · As the radishes bulb up, keep the watering steady, about 1 inch a week. Letting the soil dry out and then soaking it makes radishes crack and taste hot, and letting them get too dry makes them woody and hollow.As roots size up, hold even moisture, about 1 inch per week. A dry-then-soaked cycle makes radishes crack and turn sharply hot, and drought stress alone turns them woody and pithy.
FROM PLANT · Keep an eye on warm spells as spring days get longer: heat and long days make radishes bolt, sending up a flower stalk and turning the root hollow and hot. If hot weather is on the way, pull them a bit early.Watch for warm spells as spring days lengthen: heat and long days push radishes to bolt, sending up a flower stalk and turning the root pithy and hot. If a heat wave is coming, harvest a little early.
04
Harvest
Days 22-35
Radishes at a usable size, about an inch across for the round red kinds and a little less for white ones, with the tops showing at the soil surface. The window is short, radishes go downhill fast, so pull them on time before they turn hollow, hot, and cracked.Roots at usable size, roughly 1 inch across at the shoulder for round red garden types and a bit less for white types, with shoulders visible at the soil surface. Radishes over-mature fast, so this window is short; a root left too long turns pithy, woody, and hot, and may crack or bolt.
Pull one to check, then harvest the rest within a week or two; do not leave ready radishes in warm soil. For long daikons, loosen the soil with a fork first. If it is still cool, plant the empty space again.Pull a test radish to judge, then harvest the row promptly over a week or two; do not leave mature roots in warm soil. Lift long daikons with a fork. Re-sow the cleared space if your cool window is still open.
FROM PLANT · Harvest on time and go by size, not the date: pull round red radishes at about an inch across, white ones a little smaller. Radishes go downhill fast, turning hollow, woody, and hot if you leave them in the ground too long.Harvest on time and check by size, not the calendar: round red types are best pulled at about 1 inch across, white types a bit smaller. Radishes over-mature fast, turning pithy, woody, and hot if left in the ground.
FROM PLANT · Plant the empty space again right away if it is still cool out. Sowing a short row every week or so gives you a steady supply instead of a big batch that all gets too old at the same time.Re-sow the cleared space right away if your cool window is still open. Sowing a short row every week to ten days gives a steady supply instead of a glut that over-matures all at once.
FROM PLANT · For long daikon and winter radishes, loosen the soil with a fork before pulling so the long root does not break off. Cut off the leafy tops before putting them in the fridge, since the tops pull water out of the root.Lift long daikon and winter types with a fork, loosening the soil alongside so the long root does not snap. Remove the tops before refrigerating, since leaving them on pulls moisture from the root.
Beginner
Know your soil

Your soil

Identify yours

Not sure what soil you have? Grab a small handful of damp soil from your garden bed and squeeze it. If it crumbles apart easily, it's sandy. If it holds together but breaks when you poke it, it's loam (what most vegetables want). If it stays in a hard, slippery ball, it's clay.

What this crop wants

Radishes want loose, well-drained soil with no rocks or hard clumps. The looser the soil, the faster and rounder the radish grows, and growing fast is what keeps radishes mild and crunchy instead of woody and hot. Loosen the soil about 6 inches deep for the small round kinds, and a foot or more for the long daikon types. Heavy clay or packed soil makes small, twisted roots. Mix in some compost, but go easy on fertilizer that is high in nitrogen (the first number on the bag), because too much grows big leafy tops and can make the roots fork while the radish stays small. Aim for a soil pH around 6.0 to 6.8, which is slightly acidic. If your soil is heavy clay, grow short round radishes or use a raised bed or a deep pot of loose mix.

If your soil doesn't match

You have sandy soil

Mix 2-3 inches of compost into the top 6 inches of your bed before planting. Compost holds moisture (which sandy soil drains too fast) and adds the nutrients sandy soil tends to lack. Repeat each season. Compost breaks down over time.

You have clay soil

Mix 2-3 inches of compost AND a few inches of coarse sand or perlite into the top 6 inches of your bed. The compost feeds the plants; the sand breaks up the clay so air and water can move through. Don't add sand without compost. It can compact like concrete.

Containers and raised beds

If amending your soil sounds like too much work, or if your soil is heavy clay, full of rocks, or contaminated, build over it. A raised bed at least 12 inches deep filled with a 50/50 mix of compost and sandy loam gives you ideal growing soil with no battles. A 5-gallon container with quality potting mix does the same for one plant at a time. Both bypass your native soil entirely.

Learn more about your soil
The specs

Care guide

The numbers that matter, at a glance.

Sunlight
Full sun to partial shade · 6-10 hrs/day
Water
Regular
Spacing
2-4 inches
Soil
sandy loam, loam
Days to maturity
22-30 days from transplant
Soil pH
6 to 6.8
Container OK?
Yes · 1+ gal pot
Germination temp
45-85°F
Soil chemistry

Soil pH for radish

Preferred
6 to 6.8
Tolerated
5.5 to 7

Soil pH measures how acidic or alkaline your soil is, on a scale from 1 to 14 where 7 is neutral. Radishes like it right around 6.0 to 6.8, slightly acidic, and they are not fussy as long as the soil is not packed hard. Do not stress over pH if your radishes are coming out fine, getting the soil loose and growing them fast matters more. If you want to know your number for certain, a cheap soil test from your local extension office will tell you, and let you know whether to add anything before planting.Radishes grow best in slightly acidic to neutral soil, roughly pH 6.0 to 6.8; Clemson recommends liming to a pH of 6.0 to 6.5 for root crops, and Minnesota gives a workable range of 6 to 7 as long as the soil is not compacted. pH is rarely the first thing that limits a home radish crop, since loose soil, cool temperatures, and fast, even growth matter more, but a $10 to $15 soil test from your local extension office removes the guesswork and tells you whether lime or sulfur is warranted before sowing.

Verified · 2 sources View
Steady hand on the hose

Watering

When & how much
Frequency
Keep the soil evenly damp the whole time. Radishes crack and split if the soil goes dry and then gets soaked, and they turn hot and woody if they dry out. Give about 1 inch of water a week, counting rain, and more in hot weather or sandy soil. Because radishes grow so fast, steady moisture from start to finish is what makes them mild and crisp.Even, consistent moisture is the rule, since radishes crack and split when soil swings from dry to wet and turn hot and woody under drought stress. Radish taproots reach for moisture but the feeder roots stay shallow, so the top few inches must not dry out. Aim for about 1 inch of water per week including rain, more in heat or sandy soil, keeping the bed evenly moist through the short, fast growing cycle.
Amount
About 1 inch of water a week, including rain, and more in hot weather or sandy soil. To check, dig down a couple of inches with a trowel; if it is dry below the surface, keep watering.Roughly 1 inch per week including rainfall, adjusted up in heat or sandy soil. An inch of water wets a sandy soil to about 10 inches deep and a heavy clay to about 6; check with a trowel and keep watering if only the top inch or two is moist.
Method
Water gently at soil level, using a soft spray, soaker hose, or drip line. A hard blast can wash the shallow seeds around or pack the soil into a crust the sprouts struggle through. If a hard crust forms before the seedlings are up, lightly sprinkle it to soften it.Water at the base with a gentle setting, soaker hose, or drip line to keep the surface evenly moist without crusting the seedbed or washing out the shallow seed. Avoid hard overhead bursts on a fresh seedbed, which can crust the surface; if a crust forms before emergence, a light sprinkling softens it.
Signs of trouble
Too much water
If the soil stays soaking wet, radishes can rot and attract root maggots. Watch for yellow leaves, soft or mushy roots, and a constantly wet, sour-smelling bed. If you see these, water less and make sure the soil drains well.Constantly saturated soil invites damping-off, cabbage maggot, and root rot; yellowing leaves, soft or rotting roots, and a sour, waterlogged bed are signs to back off. Poorly drained ground is the usual cause, which is why loose, well-draining soil matters.
Too little water
Dry, cracked soil on top, droopy leaves, slow growth, and radishes that come out tough and very hot mean they need more water. The bigger problem is letting the soil go bone dry and then soaking it, which makes radishes crack open. Keep the watering steady.Dry, cracked surface soil, wilting or dull tops, slow growth, and roots that turn woody and sharply hot signal too little water. The sharper risk is an irregular dry-then-soaked cycle, which makes the roots take up water fast and split.
Feeding rhythm

Feeding

Frequency
low
Type
Balanced low-nitrogen
When to start
Work compost into the bed before sowing; for slower types, one light side-dressing once tops are established.

Radishes do not need much feeding, and the fast little round kinds usually need none if your soil has compost mixed in. If you grow the slower daikon types, you can mix a little balanced fertilizer into the bed before planting and give one light feeding once the tops fill in. Never use fresh manure or high-nitrogen lawn fertilizer, because too much nitrogen grows big leafy tops and can make the roots fork or stay small.Radishes are light feeders and most garden types finish so fast they need no supplemental feeding at all in decent, compost-amended soil. Clemson suggests working a 5-10-10 fertilizer into the bed before planting and side-dressing root crops once plants are about 4 inches tall, which matters mainly for the slower winter and daikon types. Avoid fresh manure and high-nitrogen feeds entirely: excess nitrogen grows lush tops and can cause the roots to branch or stay small while the leaves take off.

N · P · K = 5-10-10

The three numbers on a fertilizer bag are nitrogen, phosphorus, and potassium (N-P-K). Radishes do not want much of the first one: too much nitrogen grows big leafy tops and small or forked roots. Pick a fertilizer that is low in the first number, like a 5-10-10, and mostly just mix compost into the soil before planting.Radishes are light feeders, and excess nitrogen is the classic mistake: it drives leafy top growth and can leave you with all greens and a small or forked root. Favor a low-nitrogen blend with adequate phosphorus and potassium, such as a 5-10-10, worked into the bed before sowing. Most of the feeding is done by mixing modest, well-finished compost into the bed; the fast garden types rarely need more.

Try 5-10-10
Who grows well together

Companion planting

Radishes are easygoing, fast neighbors. Their most useful trick is the opposite of most companions: scatter a few radish seeds in a row of a slow crop like carrots, and the radishes pop up in days to mark the row, then you pull and eat them before they crowd anything. Radishes (and their spicy cousins like arugula and mustard) can also be planted as bait to draw flea beetles away from other crops. The main plants to keep away from radishes are their own cabbage-family relatives (cabbage, broccoli, kale, turnip), since they share the same pests and a root disease called clubroot. Do not trust every companion chart online; many claims have not held up when tested. Radishes are easy, fast neighbors and earn their keep mostly through timing. Their best-documented role is the reverse of most companions: sown down a row of a slow crop like carrots, they germinate in days, mark the row, and are pulled before they compete, a space-saving trick UMN Extension presents as research-backed. Radishes and other spicy crucifers also work as trap crops to pull flea beetles off other plants. The clearest avoids are radish's own family, the other brassicas (cabbage, broccoli, kale, turnip), which share its pests and the soilborne clubroot, so keep them separate and rotate. Treat most other companion-chart claims with skepticism: university reviews find many are not backed by evidence.

Other
Carrots and other slow-germinating root crops
Radishes sprout in just a few days, while carrots, beets, and parsnips can take weeks. Scatter a few radish seeds in the same row and they mark where the slow crop is, let you weed and cultivate early, and are pulled and eaten before they crowd the slower roots. This is a proven space-saving trick from university gardening guides.This is radish's best-supported pairing, and it runs the opposite direction from most companion advice: the radish is the helper, not the protected crop. Radishes germinate in days while carrots, beets, and parsnips can take two to three weeks, so a light scatter of radish seed down the slow row marks the line, lets you cultivate and weed before the slow crop is up, and is pulled out well before it needs the room. UMN presents radish-and-carrot interplanting as a research-backed space-saver. Research-backed
Lettuce and other leafy greens
Lettuce and other quick, shallow-rooted greens share a bed easily with fast radishes, and both finish before the heat. A handy way to fit more into a small garden and harvest a mix from one space.Lettuce and radish work as a classic cool-season interplant on timing and space. Both are quick and shallow, both prefer the cool windows, and a radish finishes and clears out fast, so the two share a bed and a succession rhythm without much competition. This is a space-and-timing benefit rather than a pest one, and it is one of the more reliable interplants for that reason. Traditional
Beans, peas, and cucumbers
Radishes are often tucked among beans, peas, and cucumbers, where they mature and are pulled long before those larger plants need the space. Some gardeners also believe radishes help deter cucumber beetles, though that part is folklore rather than proven.Radishes interplant easily with beans, peas, and cucumbers: sown at the same time, they size up and are pulled before those crops need the room, making efficient use of the bed. The frequently repeated claim that radishes repel cucumber beetles or squash pests is companion-planting tradition rather than a measured effect, so treat the value as timing and space-sharing, not protection. Traditional
Keep apart from
Other cabbage-family crops (broccoli, cabbage, kale, turnip) Broccoli, cabbage, kale, turnips, and other cabbage-family plants are radish's close relatives and share its pests, the flea beetle and the cabbage maggot, plus the soilborne disease clubroot. Growing them right next to radishes lets those problems build up, so give them separate spots and rotate where each goes.Radishes are brassicas, so the other cabbage-family crops, broccoli, cabbage, kale, turnips, share their exact pest and disease spectrum: flea beetles, the cabbage maggot, and the soilborne clubroot pathogen. Clustering the family in one bed sustains and concentrates that pressure, the same reason extension sources advise rotating among brassicas rather than planting them together year after year. Traditional
Provenance tagged inline · see methodology for the labeling system Key
Harvest signals

When to pick

Radishes are ready quickly and then go downhill fast, so check by size and pull them on time. The small round kinds are usually ready about 22 to 30 days after planting, when the radish is about an inch across. The tops of the radishes often poke up out of the soil, so you can see how big they are; pull one to check. Do not leave ready radishes sitting in the ground, especially in warm weather, or they turn hollow, woody, and very hot, and may crack. Pull round red radishes before they get bigger than about an inch, and white ones a little smaller. The long daikon kinds take longer, around 50 to 60 days; loosen the soil with a fork before pulling so the long root does not snap.Radishes are ready fast and over-mature even faster, so check by size and on time rather than by a fixed date. Small round garden types are usually ready about 22 to 30 days from sowing, when the root is roughly 1 inch across at the shoulder; the shoulders often push up out of the soil, so you can see the width. Pull a test radish to judge. Do not leave mature radishes in the ground: held too long, or in warm weather, they turn pithy, woody, and sharply hot, and can crack. Round red types are best pulled before they exceed about an inch, white types before about three-quarters of an inch. Long daikon and winter types take longer, around 50 to 60 days; lift them with a fork to avoid snapping the long root.

Verified · 3 sources View
Yield

What to expect

Each radish plant gives you one radish, the single root it grows. So it helps to think about how much row or bed you plant. Spaced a couple of inches apart, a foot of row gives you roughly 4 to 6 radishes, and a wide band gives a lot more in a small space.One root per plant. Radishes are not a cut-and-come-again crop, so yield is best thought of by row length: at a 2 to 3 inch final spacing, a foot of row gives roughly 4 to 6 radishes, and a wide band yields many more in a small area.

Radishes do not keep producing after you pick them, since each plant makes just one root. A planting is ready in about 22 to 30 days for the fast kinds and you harvest it over a week or two before they get too big. For a steady supply, plant a new short row every week or so instead of one big batch.There is no repeat harvest; a sowing matures over a short window, roughly 22 to 30 days for garden types, and is pulled over just a week or two before the roots over-mature. Continuous supply comes from succession sowing every week to ten days, not from a single planting. Radishes are grown fresh from seed each time, so your very first planting can do just as well as any later one. The main things that decide your results are loose soil, steady moisture, and growing them fast in cool weather.Radishes are an annual grown fresh from seed every season, so there is no first-year-versus-later distinction as there is with perennials; the first sowing performs as well as any, provided the soil is loose and moisture stays even and the crop grows fast in cool weather.

What changes yield
Temperature and timing: heat and lengthening days cause bolting and hot, woody roots, so the cool windows matter most.Final spacing after thinning: crowded radishes fail to form usable roots and grow only tops.Even moisture: drought-then-flood cycles split roots and sharpen flavor.Soil looseness: compaction and heavy clay cause small or misshapen roots, especially for long types.Harvest timing: radishes over-mature fast, turning pithy and strong if left in the ground too long.
Verified · 3 sources View
Pick your variety

Recommended varieties

Pick your radish type to match the season and your soil. The fast round red kinds (Cherry Belle, Scarlet Globe) are the easiest for a first try and are ready in about three to four weeks. French Breakfast and White Icicle are mild, fun shapes. If you plant late in spring, look for heat-tolerant or slow-to-bolt kinds. The big daikon and Asian radishes are planted in late summer for fall, take longer, and need deep, loose soil, so in heavy or shallow soil stick with the small round kinds.Match the radish type to your season and soil. Fast round garden types (Cherry Belle, Scarlet Globe, Cherriette) are the easiest for a first crop, maturing in roughly three to four weeks; oblong French Breakfast and long White Icicle are mild garden alternatives. For late-spring sowings, choose heat-tolerant or slow-bolt varieties to dodge bolting. The large daikon and Asian winter radishes (April Cross, Summer Cross) are sown in late summer for fall, take longer, and need deep, loose soil to size up; in heavy or shallow ground, stick to short round types.

Cherry Belle: fast, round, mild red garden radish, an easy and forgiving first choice
Scarlet Globe (Early Scarlet Globe): classic round red, quick and reliable
French Breakfast: oblong red-and-white type, mild and crisp
White Icicle: long, tapered white garden radish
Daikon and Asian winter types (April Cross, Summer Cross): large, long, milder roots sown in late summer for fall, needing deep, loose soil
Off the vine

Storing your harvest

Room temp
Not good for more than a day or two. Left out, radishes dry out and go soft and bendy. Keep out only what you will eat in the next day or two and refrigerate the rest.Poor for more than a day or two. At room temperature radishes lose moisture fast and go limp and rubbery, and the tops pull moisture from the root. Counter storage is only for what you will use within a couple of days; everything else belongs in the refrigerator.
Fridge
This is the best way for everyday storage. First twist or cut off the leafy green tops, because leaving them on draws water out of the root and makes the radish go limp in a few days. Put the roots in a loosely closed or vented plastic bag in the crisper drawer. Small round radishes stay crisp for about one to two weeks; big daikon types can last up to about two months.The best everyday option. Twist or cut off the green tops first, since leaving them on pulls moisture from the root and the radish goes limp within days. Store the roots in a perforated or loosely closed plastic bag in the crisper drawer at high humidity, where small garden radishes keep crisp for about one to two weeks. Long Asian daikon types hold longer, up to about two months.
Freezer
Freezing is not a good option for radishes. They are mostly water, so they turn mushy and lose their crunch after thawing. Radishes are best fresh, or pickled if you want to keep them longer.Not recommended for fresh use. Radishes are very high in water, so freezing ruptures the cells and they thaw mushy with a changed texture. Radishes are best eaten fresh; if preserved at all, they are usually pickled rather than frozen.
Verified · 3 sources View
When something goes wrong

Common problems

Bolting (flower stalk instead of a radish)Bolting (flower stalk, no root)
01 of 06
What happened The radish shot up a tall flower stalk instead of making a good root, because the weather warmed up and the days got longer. Once it bolts, the root stays small, woody, and very hot.The plant sent up a flower stalk instead of sizing a root, because warm temperatures and lengthening spring days triggered bolting. The root stays small, woody, and sharply hot once the plant shifts to flowering. Next season Plant radishes in the cool parts of the year and stop spring planting before it gets hot; fall is easier. Keep them growing fast with steady water, and pick heat-tolerant or slow-to-bolt kinds if you plant late in spring.Grow radishes in the cool windows and stop spring sowings before sustained heat and long days; favor fall plantings. Keep plants growing fast with even moisture, and choose heat-tolerant or slow-bolt varieties for late-spring sowings.
Hollow, woody, or super-hot radishesPithy, woody, or sharply hot roots
02 of 06
What happened The radishes came out spongy and hollow inside, woody, or so hot they are hard to eat. This usually means they grew too slowly or sat too long, from heat, dry soil, crowding, or being left in the ground too long.The roots grew slowly or sat too long, becoming pithy (spongy and hollow), woody, and strongly pungent. The usual causes are heat, drought stress, crowding, or simply leaving mature radishes in the ground past their short window. Next season Grow them fast in cool weather, water evenly, give them room, and harvest on time, because radishes go downhill fast. Pull round radishes at about an inch and do not leave them in warm soil.Grow them fast in cool weather with even moisture and correct spacing, and harvest on time, since radishes over-mature quickly. Pull round types at about 1 inch and do not hold them in warm soil.
Cracked or split radishesCracked or split roots
03 of 06
What happened The radishes split open because the soil went dry and then got soaked. After a dry spell, a big watering or rain makes the radish drink fast and crack. Old, over-ready radishes crack more easily too.The roots split because soil moisture swung from dry to wet: after a dry spell, heavy watering or rain made the root take up water fast and crack. Over-mature roots crack more readily. Next season Keep the soil evenly damp the whole time instead of letting it dry out and then soaking it, and harvest on time. If a big rain is coming and the radishes are nearly ready, pull them first.Keep moisture even through the short cycle rather than letting the bed swing dry-then-wet, and harvest on time. If a heavy rain is coming and radishes are near size, pull them first.
All leaves, no radishAll tops, no root (failure to bulb)
04 of 06
What happened You got plenty of leaves but no radish underneath. This usually means the seedlings were too crowded and not thinned, or there was too much nitrogen fertilizer, or heat and stress pushed leaf growth instead of a root.The plants grew lush leaves but never formed a usable root. The most common causes are crowding (seedlings not thinned), excess nitrogen, and heat or stress that pushes top growth over root development. Next season Thin the seedlings to about 2 inches apart (4 to 6 for daikons), go easy on fertilizer and skip fresh manure, and grow them in cool weather with steady water so they make a root instead of just leaves.Thin promptly to a final 2 inches (4 to 6 for daikons), go easy on nitrogen and fresh manure, and grow in cool weather with even moisture so the plant puts energy into the root.
Forked or branched radishesForked or branched roots
05 of 06
What happened The radish split into several prongs because it hit something hard as it grew (a rock, clod, or packed soil), or because fresh manure or strong fertilizer made it branch. The long daikon kinds fork most in heavy soil.The root split into prongs because it met an obstruction (a stone, clod, or hardpan) as it swelled, or because fresh manure or concentrated nitrogen stimulated branching. Long daikon types are most affected in heavy or compacted soil. Next season Loosen the soil and pull out rocks and clumps before planting, skip fresh manure and heavy fertilizer, and grow short round kinds or use a deep pot of loose mix if your soil is heavy or rocky.Work the bed loose and stone-free to an appropriate depth for the type, avoid fresh manure and heavy nitrogen, and use short round types or a deep loose container in heavy or rocky ground.
Tiny holes all over the leavesShot-hole leaf damage (flea beetles)
06 of 06
What happened The leaves are full of tiny round holes from flea beetles, worst on young spring seedlings. A healthy fast radish usually still makes a fine root, but badly chewed seedlings slow down.The leaves are riddled with small round holes from flea beetles, worst on young spring seedlings. On a fast, vigorous radish the root is usually fine, but a heavily fed-on seedling slows down. Next season Cover early spring plantings with a light row cover at planting, clean up old plants so fewer beetles survive winter, and keep the radishes growing fast; planting a little arugula or mustard nearby as bait helps too.Cover early spring sowings with a floating row cover at planting, clean up crop debris to cut overwintering, and keep the stand growing fast; a trap crop of arugula or mustard can pull beetles away.
Verified · 4 sources View
The usual suspects

Pests & diseases

Pests
Flea beetles
P · 01
Symptoms Lots of tiny round holes peppering the leaves, like someone fired birdshot at them. The beetles are very small, shiny, and dark, with big back legs, and they jump away like fleas the moment you get close. They are worst on young radish seedlings in spring. The holes look alarming but a fast-growing radish usually shrugs them off; the real worry is a small seedling losing too many leaves, which slows it down and makes the root tougher and hotter.Tiny, round, shot-hole punctures riddling the leaves, the classic flea-beetle signature. The beetles themselves are minute (about 1/16 to 1/8 inch), shiny black, bronze, or bluish, with enlarged hind legs, and they spring away like fleas when disturbed. Damage is worst on young spring seedlings and along bed edges, and a heavily fed-on stand can be stunted or wilted. The leaf damage is mostly cosmetic on a fast garden radish that grows through it, but a seedling losing a large share of its leaf area slows down, which for radishes means a tougher, hotter root. Cause Small beetles that spend the winter in leaf litter and weeds and come out in early spring hungry for cabbage-family leaves. Radishes and their relatives (arugula, mustard) are among their favorite foods, so much so that gardeners sometimes plant radishes on purpose to lure flea beetles away from other crops. They do the most damage in spring and early summer and ease off as it gets hotter.Adult flea beetles (several species, including crucifer and striped flea beetles) that overwinter in leaf litter and field edges and emerge in early spring to feed on Brassica-family foliage. Radish, arugula, mustard, and other crucifers are highly preferred hosts, which is also why these crops are used as trap crops to pull beetles off other vegetables. They are most damaging in spring and early summer and taper off as the season warms. Organic treatment A healthy, well-watered radish patch usually grows right through light flea-beetle damage. If the little seedlings are getting hammered, cover the row with a floating row cover (a light fabric) right after planting and tuck in the edges so the beetles cannot get under it. Dusting with kaolin clay helps, and sprays like spinosad or pyrethrin are options if seedlings are losing a lot of leaf. Check in the cool morning, when the beetles are slow.On a fast garden radish, a vigorous, well-watered stand usually outgrows light feeding without intervention. Where pressure is heavy on seedlings, a floating row cover set at sowing and sealed at the edges excludes the beetles entirely. Kaolin clay can reduce feeding, and spinosad or pyrethrin products are labeled options if a seedling stand is losing more than roughly a quarter to a third of its leaf area; cool mornings are the easiest time to scout, since the beetles are sluggish. Prevention Clear away old plants and weeds at the end of the season so fewer beetles survive the winter nearby. Covering the seedbed with a row cover is the surest fix for early spring radishes. Planting a bit later, after the first wave of beetles, and keeping the radishes growing fast with steady water also help. You can even plant a little arugula or mustard nearby as bait to draw the beetles away.Clean up crop debris and weeds at the end of the season to cut overwintering sites. A row cover over the seedbed is the most reliable defense for early spring sowings. Planting a little later, once the first beetle flush has passed, and keeping the stand growing fast with even moisture both reduce the impact. A sacrificial trap crop of arugula or mustard can pull beetles off the main planting.
Cabbage maggot
P · 02
Symptoms The trouble is underground. Small white legless maggots tunnel into the radish, leaving winding brown trails that spoil the root and let rot set in. Aboveground the plant may look pale, wilted, or stunted. It shows up most in cool, wet springs and in soil full of un-rotted material. A tunneled radish is ruined, but pulling and tossing it right away gets the maggots out before they can turn into the next generation of flies.The damage is underground: small, white, legless maggots tunnel and score the surface and interior of the root, leaving winding brown trails that ruin the radish and open the door to rot. Aboveground, infested plants may look off-color, wilted, or stunted. It is most common in cool, wet springs and in soil rich in undecomposed organic matter. A scored radish is unsalable but a useful sentinel, since pulling and destroying it removes maggots before they pupate. Cause The maggots (young larvae) of the cabbage maggot fly, a small gray fly. It spends the winter as pupae in the soil, and in spring the females lay lots of tiny white eggs at the base of cabbage-family plants. The eggs hatch in about a week and the maggots burrow into the roots for three to four weeks. It goes after the whole cabbage family, radishes, turnips, cabbage, broccoli, and kale, and is worst in cool, damp spring weather.Larvae of the cabbage maggot (Delia radicum), a small gray fly that overwinters as pupae in the soil. In spring the adults emerge and females lay 50 to 200 white eggs at the base of crucifer stems and in nearby soil cracks; the eggs hatch within about a week and the maggots feed on roots for three to four weeks before pupating. It attacks the whole cabbage family, including radish, turnip, cabbage, broccoli, and kale, with several generations a year and the worst damage in cool, moist spring weather. Organic treatment You cannot save a radish that is already tunneled. Pull up and throw away (do not compost) the affected ones so the maggots cannot grow into more flies. There is no good home spray for this, and sprays do nothing once the maggots have already left the root, so prevention is the real fix.There is no rescue for a root already tunneled. Pull and destroy infested radishes (do not compost them) to keep maggots from completing their cycle; a damaged early sowing can act as a trap crop if removed promptly. Insecticide drenches are difficult and rarely worthwhile in a home garden, and are pointless once the maggots have left the root to pupate. Prevention The best home defense is a row cover (a light fabric) laid over the bed right after sowing and tucked in at the edges, so the flies cannot reach the plants to lay eggs, just make sure the soil is not already carrying them from an earlier crop. Move radishes away from spots that grew cabbage-family crops recently, avoid fresh manure and freshly dug-in plant material that attract the flies, and lean toward fall planting, which usually has fewer maggots than cool wet spring.A floating row cover sealed at the edges at sowing is the most effective home defense, since it blocks the egg-laying flies; be sure no flies are already in the soil from a previous crop. Rotate radishes and other crucifers away from beds that grew them recently, avoid fresh manure and freshly turned-under cover crops or residue that attract the flies, and time spring sowings to dodge the main egg-laying flush or favor fall plantings, which see less pressure.
Wireworms
P · 03
Symptoms Narrow, clean holes drilled into the radish. If you dig around, you may find skinny, hard, yellowish-brown worms in the soil. It is most common in ground that was recently lawn or grass.Narrow, clean tunnels bored straight into the root, distinct from the surface scoring of cabbage maggot. The culprits are slender, hard-bodied, yellow-brown larvae found in the soil. Damage is most common in beds recently converted from sod or grass, where wireworm populations are high. Cause Wireworms are the larvae of click beetles. They live in the soil for years and chew on roots and seeds of many plants. They are most common in soil that used to be lawn or grassy ground.Wireworms, the soil-dwelling larvae of click beetles, which feed on roots, tubers, and germinating seed across many crops. They persist for years in soil and are most abundant in ground newly broken from grass or sod. Organic treatment There is no fast fix once they are in the soil. Harvest radishes on time so they sit in the ground less, and over a season or two, working the soil and not planting roots right after grass helps bring numbers down.There is no quick home cure once they are present. Harvest promptly so roots spend less time exposed, and reduce populations over time by cultivating the soil and avoiding planting root crops in freshly broken sod. Prevention Do not plant radishes in ground that was lawn or grass last year, since that is where wireworms gather. Turning over and working the soil, and moving root crops to a different spot, brings numbers down over time.Avoid sowing radishes and other root crops in beds just converted from lawn or pasture. Cultivating the soil exposes wireworms to predators and weather, and rotating away from heavily infested ground reduces damage over seasons.
Diseases
Clubroot
D · 01
Symptoms Aboveground the plant looks stunted and yellow and wilts in the afternoon sun, then perks up at night. Underground is the giveaway: instead of a clean radish, the roots swell into lumpy, distorted clubs and galls that eventually rot. It lives in the soil and builds up when you grow cabbage-family crops in the same spot over and over, especially in wet, acidic soil.Aboveground, plants are stunted, yellowish, and wilt in the heat of the day even in moist soil, recovering overnight. The diagnostic sign is below ground: the roots are swollen, distorted, and clubbed into gnarled galls rather than forming a clean radish, and they later rot. It is a soilborne disease that builds up where crucifers are grown repeatedly, and it is favored by wet, acidic soil. Cause A soil organism (Plasmodiophora brassicae) that attacks the roots of cabbage-family plants and survives in the soil for years. Wet, poorly drained, acidic soil makes it worse, and it spreads on dirty tools and soil moved from an infected bed.Plasmodiophora brassicae, a soilborne pathogen that infects the roots of cabbage-family plants and persists in soil as resting spores for many years. Wet, poorly drained, acidic soils favor infection, and the disease spreads on contaminated soil, tools, and transplants. Organic treatment There is no way to cure a plant that has it, so pull and throw away (do not compost) the affected ones. The fix is for next time: improve drainage, raise the soil pH closer to neutral with lime, which holds the disease back, and keep cabbage-family crops out of that spot for a few years.There is no cure once a plant is infected; remove and destroy affected plants and do not compost them. Management is preventive across seasons: improve drainage and raise soil pH toward neutral, which suppresses the pathogen, and rotate crucifers out of the bed for several years. Prevention Do not grow radishes or other cabbage-family crops in the same bed year after year; move them around on a few-year cycle. Keep the soil well drained and add lime to bring the pH closer to neutral, and avoid carrying soil from an infected bed on your tools. A raised bed with clean soil avoids it where it is a known problem.Rotate radishes and other crucifers on a multi-year cycle, since the pathogen builds in soil grown to the family. Keep soil well drained and limed toward a neutral pH, start with clean soil and tools, and avoid moving soil from an infested bed. Raised beds with clean mix sidestep the problem where it is established.
Black rot
D · 02
Symptoms Yellow, V-shaped patches creeping in from the edges of the leaves, with the point of the V aimed at the center vein, and the veins in those patches turning dark. The leaves yellow and die, and a bad case can rot the plant. It is a bacterial disease that hits the whole cabbage family in warm, wet weather.Yellow, V-shaped lesions advancing inward from the leaf margins, with the V pointing toward the midrib and the veins in the affected area turning dark. Infected leaves yellow and die, and severe infection can rot the plant. It is a bacterial disease of the whole cabbage family, spread in warm, wet conditions. Cause A bacterium (Xanthomonas campestris) that can travel on seed and splashing water and gets into the leaves through their edges and any wounds. Warm, humid, wet weather brings it on, and it spreads on infected seed, water, tools, and old plant debris among cabbage-family plants.Xanthomonas campestris pv. campestris, a seedborne and splash-spread bacterium that enters through leaf margins and wounds. It is favored by warm, humid, wet conditions and spreads on contaminated seed, water, tools, and crop debris across cabbage-family crops. Organic treatment You cannot cure leaves that are already infected. Pull and throw away affected plants, stay out of the bed when the leaves are wet, and clean up old plant material. Radishes grow so fast they usually finish before it gets bad, so clean seed and good habits handle most of it.There is no cure for infected tissue. Remove and destroy affected plants, avoid working among plants when the foliage is wet, and clear crop debris. Because the fast radish crop usually finishes before severe disease develops, cultural control and clean seed do most of the work. Prevention Use clean, disease-free seed, do not grow cabbage-family crops in the same spot repeatedly, and clear away old plant debris. Water at the soil instead of overhead, do not handle wet plants, and give them room so the leaves dry fast.Start with clean, disease-free seed, rotate crucifers out of the bed, and clear debris that harbors the bacterium. Water at the base rather than overhead, avoid handling wet plants, and space for airflow so foliage dries quickly.
Alternaria leaf spot
D · 03
Symptoms Dark, round spots on the leaves, sometimes ringed or with a yellow edge, that grow and run together in wet weather. It mostly affects the leaves and is rarely a big deal on fast radishes you grow for the root, though a bad case can slow the plant down.Dark, roughly circular spots on the leaves, sometimes with concentric rings or a yellow halo, that enlarge and merge in wet weather. It is primarily a foliar disease and rarely a problem on a fast garden radish harvested for its root, but heavy infection can reduce vigor. Cause Alternaria fungi that travel on seed and survive on old plant debris, spreading in splashing water and needing wet leaves to take hold. Warm, humid weather with wet foliage brings it on.Alternaria fungi that are seedborne and survive on crop debris, spreading in splashing water and needing leaf wetness to infect. Warm, humid weather and prolonged wet foliage drive it. Organic treatment Pick off the worst leaves, water at the soil in the morning so leaves dry quickly, and clean up debris. Radishes usually grow faster than the disease can spread, so clean seed and good airflow are enough.Remove badly spotted leaves, water at the base in the morning so foliage dries, and clear debris. The fast crop usually outpaces serious damage; clean seed and airflow are the main levers. Prevention Use clean seed, water at the base instead of overhead, give plants room so the leaves dry, and clear away old plant material between plantings.Use clean seed, avoid overhead watering, space for airflow, and rotate crucifers and clear debris that carry the fungi between seasons.
Damping-off
D · 04
Symptoms Seeds that never come up, or tiny seedlings that flop over and die soon after sprouting, with a dark, pinched, water-soaked spot on the stem right at the soil line. You see it as bare gaps in the row. Because radishes sprout and grow so fast, this is much less of a worry than with slow crops, but cold, soggy, poorly drained soil can still bring it on.Seeds that fail to emerge, or young seedlings that topple and collapse soon after emergence with a dark, water-soaked pinch at the stem base right at the soil line. Losses appear as bare gaps in the row. Because radishes germinate fast and grow quickly, damping-off is far less of a threat than in slow-germinating crops, but cold, wet, poorly drained seedbeds still invite it. Cause Soil organisms (mostly Pythium and Rhizoctonia) that attack sprouting seeds and baby seedlings. They thrive in cold, wet, poorly drained soil and when you overwater.Soilborne pathogens, chiefly Pythium and Rhizoctonia, that attack germinating seed and young seedlings. They are favored by cold, wet, poorly drained soil and overwatering. Organic treatment Seedlings that have collapsed will not recover. Ease off watering and let the soil surface dry out a bit, and re-sow the bare spots once it is warmer and drains better. Mostly this one is about prevention.Affected seedlings cannot be saved. Stop overwatering and let the surface dry somewhat, and re-sow gaps in warmer, better-drained conditions. Prevention is the real control. Prevention Wait to sow until the soil is warm enough and not cold and soggy, use fresh seed, do not plant too deep, and improve drainage or use a raised bed if your soil is heavy. Do not overwater while seeds are sprouting.Sow into warm-enough, well-drained soil rather than cold, wet ground, use fresh seed, avoid sowing too deep, and improve drainage or use raised beds on heavy soil. Do not overwater the seedbed.
Verified · 4 sources View
Seasoned
Where to plant next year

Crop rotation

Move your radishes to a different spot each year and do not put them, or their relatives like cabbage, broccoli, and kale, back in the same bed for a few years. This stops the cabbage maggot, flea beetle, and clubroot disease from piling up in the soil. It is best to plant radishes after a crop like beans or peas, and to avoid beds that got heavy manure, since leftover nitrogen grows leaves instead of roots.Rotate radishes on a multi-year cycle, keeping them and all other cabbage-family crops out of a bed for several seasons after they are grown there. This breaks the buildup of the soilborne clubroot pathogen and the root pests the family shares. Following a legume or a nitrogen-depleting crop is ideal; following a heavily manured crop is not, because residual nitrogen pushes tops over roots and can cause branching.

Family
Brassicaceae
Years between
3 years
in the same bed
Avoid following
Do not grow radishes in a spot where you grew radishes, turnips, cabbage, broccoli, cauliflower, kale, arugula, or mustard last year. These are all in the same cabbage family and share the same soil pests (cabbage maggot, flea beetle) and a root disease called clubroot, which build up over time. Also avoid beds that got a lot of manure for the last crop, since the extra nitrogen grows leafy tops and can make the roots branch. Wait a few years before cabbage-family crops go back into the same bed.Do not plant radishes where another cabbage-family crop (Brassicaceae) grew the previous season, including radish, turnip, cabbage, broccoli, cauliflower, kale, Brussels sprouts, kohlrabi, arugula, or mustard, since they share soilborne diseases (notably clubroot) and root pests (cabbage maggot, flea beetle) that build up where the family is grown repeatedly. Avoid beds heavily manured for the previous crop, because the readily available nitrogen drives leafy top growth and can cause the roots to branch. A multi-year gap before crucifers return to a bed is the standard guideline.
Plant after
Legumes such as beans and peasFruiting crops that have used up available nitrogen, such as tomatoesAlliums such as onions and garlic
Verified · 2 sources View
In the app · pre-launch

When plant taps you on the shoulder

The plant app sends a timely reminder at every critical moment of your radish season. The wording adjusts to whichever you pick: beginner or seasoned. Here are three you'll see in Zone 8.

p
plant
2 weeks before last frost
Time to plant radishes
Plant radish seeds right in the garden a few weeks before your last frost, once the ground is workable. Plant them shallow, about 1/4 to 1/2 inch deep, and keep the surface damp. They come up in just days.
p
plant
10 days after planting date
Time to thin your radishes
Once the seedlings have their first true leaves, thin them to about 2 inches apart (4 to 6 for daikons). Snip the extras at the soil line. Crowded radishes make leaves but no radish.
p
plant
2 weeks after planting date
Water your radishes evenly
As the radishes grow, water evenly, about 1 inch a week. Letting the soil dry out then soaking it makes radishes crack and taste hot.
Get personalized alerts.

plant sends the right notification at exactly the right moment, for your zone, your weather, your crops. Founding members lock the rate forever.

Back the Kickstarter →
Ask the gardener

Common questions

Got a question we missed?

We're building this guide with real growers. Got a question we missed? Ask here. We read every one and add the best answers right to this page.

Grown this before?

Share a tip

Learned something the hard way? Pass it on. Real growers' tips make this guide better for the next person, and we credit you by name when yours goes live.

Seasoned
Spot something wrong?

Report a problem

If you've grown this crop and you see a date, a temperature, a companion claim, or a recommendation that doesn't match your experience, tell us. Real growers' corrections make this guide better for the next person.

How we built this guide

Methodology & sources

Every date, temperature, spacing, and recommendation on this page is sourced from university cooperative extension publications, peer-reviewed agricultural research, NOAA climate data, and direct extension calendars. Where claims are softer (traditional gardening wisdom not formally documented), we say so.

Research-backed Documented in cooperative extension publications or peer-reviewed research
Well-grounded A known agronomic principle, but not formally tested for this specific pair
Traditional Time-tested gardening wisdom, limited formal research support
Last reviewed
June 29, 2026
Data version
crops_data_final · v1.0 · schema 2.9
Sources cited on this page
16 publications
Verified entries
Companion-planting claims tagged inline · zone dates verified against 5+ extensions
See all sources cited on this page
  • University of Minnesota Extension umn_ext
  • University of Maryland Extension umd_ext
  • Cornell Cooperative Extension cornell_ext
  • Iowa State University Extension iastate_ext
  • Michigan State University Extension msu_ext
  • NC State Extension ncsu_ext
  • Penn State Extension psu_ext
  • U. of Illinois Urbana-Champaign Extension uiuc_ext
  • UC Davis Postharvest Center ucd_postharvest
  • Texas A&M AgriLife Extension tamu_agrilife
  • Virginia Cooperative Extension 426-331 vce_426_331
  • Piedmont Master Gardeners piedmont_mg
  • UGA Vegetable Garden Calendar uga_calendar
  • Clemson Home & Garden Information Center clemson_hgic
  • UC IPM Statewide IPM Program uc_ipm
  • NOAA 1991-2020 Climate Normals noaa_normals

Growing notes, weekly.

Zone-aware seasonal nudges, what's worth planting now, and the occasional recipe from the harvest. No spam, ever.

Vol. 003 · Radish · plant.lifestyle