Today · in your zone
What's happening right now
Off-season for shallot in zone 9.
A shallot is a small, mild onion relative that grows in a cluster. Here is the fun part: you plant one little bulb (called a set) and it splits underground into a bunch of 6 to 12 bulbs, so you dig up a whole clump from each one you planted. Shallots taste sweeter and gentler than regular onions, with a hint of garlic, and they keep for many months once dried. They are the same species as the onion, so like onions they start making bulbs based on how long the days are, not on the calendar. The traditional kinds grown from sets are easygoing about this, but it still helps to pick a type suited to where you live. Give them rich, loose soil and full sun, water them steadily, and they are one of the easiest alliums to grow. Shallot (Allium cepa, Aggregatum group) is a cool-season allium grown for the small, fine-grained bulbs prized for their mild, sweet, faintly garlicky flavor. Its signature is multiplication: plant one set and it divides underground into a cluster of 6 to 12 bulbs, so you lift a whole clump where an onion gives a single bulb. Like the bulb onion it shares a species with, shallot is photoperiodic, a cluster sizes up only once day length crosses a cultivar threshold, which is why the right type tracks your latitude. Traditional set-grown shallots are more forgiving about day length than seed onions, but matching the type to your region still pays off. Grow it like an onion otherwise: a heavy-feeding, shallow-rooted plant in loose, fertile soil, kept evenly moist while the clump fills, then eased off water as the tops fall to begin curing. Well-cured shallots store for months, often longer than onions.
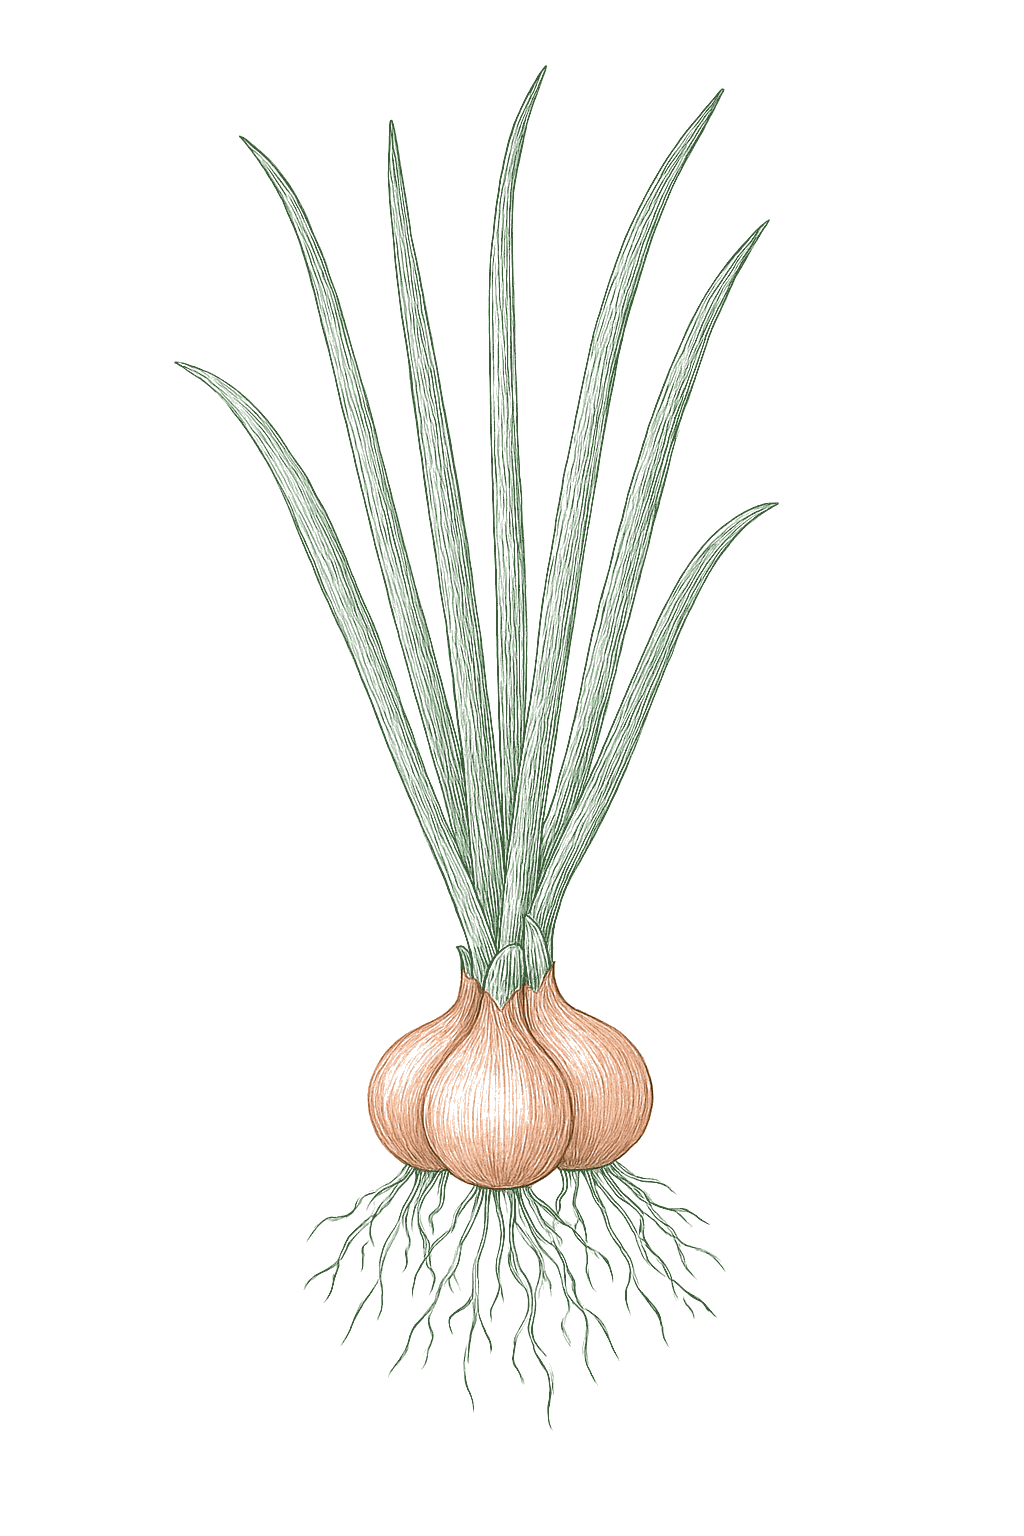
Off-season for shallot in zone 9.
Zone 9 averages a last frost around March 1. Within Zone 9, the colder half (9a, winters down to 20°F) runs about a week later. The warmer half (9b, winters down to 25°F) runs about a week earlier. The plant app picks your subzone from your ZIP.
| Subzone | Last spring | First fall | Growing days | Winter min | Fruits reliably |
|---|---|---|---|---|---|
| 9a | Mar 8 | Nov 24 | ~261 | 20-25°F | Yes · two seasons |
| 9b | Feb 28 | Nov 30 | ~275 | 25-30°F | Yes · two seasons |
Averages from 8 weather stations per subzone, drawn from NOAA 1991-2020 Climate Normals. Your actual frost date can vary by up to two weeks based on elevation, proximity to water, and local topography.
Shallots are the same species as onions, so like onions they decide to start making bulbs based on how long the days are, not on a date. The types are sorted the same way: long-day kinds suit the North, short-day kinds suit the South (where they are planted in fall or winter), and intermediate kinds suit the middle of the country. One nice thing: the traditional shallots grown from sets are more easygoing about day length than seed onions, so they are forgiving for beginners. Still, picking a type that matches where you live gives you the fullest clumps. Day length decides when the bulbs form, but it does not change when you plant, which still depends on frost and soil temperature.Shallot is the same species as the bulb onion (Allium cepa), so it is photoperiodic: the clump stops adding leaves and starts dividing into bulbs only once day length crosses a cultivar threshold. Types fall into the same classes by latitude, long-day at 14 to 16 hours, intermediate-day at 12 to 14 hours, and short-day at 10 to 12 hours. Long-day types fit northern latitudes, short-day types fit the South where they are fall or winter planted, and intermediate types span the middle. One important nuance: traditional set-grown shallots are widely reported as more day-length forgiving, closer to day-neutral, than seed onions, while modern seed-grown hybrids behave like day-length-typed onions. Matching the type to your latitude still gives the fullest clumps. Day length triggers bulbing only; it never moves your planting date, which stays anchored to frost and soil temperature.
Intermediate-day shallots suit the middle of the country, and most set shallots do well here. They are easygoing about day length, so this is a forgiving spot to grow them.These central latitudes suit intermediate-day shallots, which bulb around 12 to 14 hours. Most widely sold set shallots adapt well here, and the day-length response is genuinely soft for the set types.
In Zone 9, shallot can be planted October through March. Harvest runs June through July.
Shallots are the same species as onions, so like onions they decide to start making bulbs based on how long the days are, not on a date. The types are sorted the same way: long-day kinds suit the North, short-day kinds suit the South (where they are planted in fall or winter), and intermediate kinds suit the middle of the country. One nice thing: the traditional shallots grown from sets are more easygoing about day length than seed onions, so they are forgiving for beginners. Still, picking a type that matches where you live gives you the fullest clumps. Day length decides when the bulbs form, but it does not change when you plant, which still depends on frost and soil temperature.Shallot is the same species as the bulb onion (Allium cepa), so it is photoperiodic: the clump stops adding leaves and starts dividing into bulbs only once day length crosses a cultivar threshold. Types fall into the same classes by latitude, long-day at 14 to 16 hours, intermediate-day at 12 to 14 hours, and short-day at 10 to 12 hours. Long-day types fit northern latitudes, short-day types fit the South where they are fall or winter planted, and intermediate types span the middle. One important nuance: traditional set-grown shallots are widely reported as more day-length forgiving, closer to day-neutral, than seed onions, while modern seed-grown hybrids behave like day-length-typed onions. Matching the type to your latitude still gives the fullest clumps. Day length triggers bulbing only; it never moves your planting date, which stays anchored to frost and soil temperature.
Short-day shallots suit the South. Plant them in fall or winter so they bulb as the days slowly lengthen. The traditional Southern multiplier kinds are a good fit; northern seed types may not bulb well here.This latitude suits short-day shallots, which bulb at 10 to 12 hours, planted in fall or winter to size up as days lengthen. Southern multiplier set types are adapted to the lower latitudes; long-day seed types may barely bulb here.
In Zone 9, shallot can be planted November through February. Harvest runs April through May.
Shallots are the same species as onions, so like onions they decide to start making bulbs based on how long the days are, not on a date. The types are sorted the same way: long-day kinds suit the North, short-day kinds suit the South (where they are planted in fall or winter), and intermediate kinds suit the middle of the country. One nice thing: the traditional shallots grown from sets are more easygoing about day length than seed onions, so they are forgiving for beginners. Still, picking a type that matches where you live gives you the fullest clumps. Day length decides when the bulbs form, but it does not change when you plant, which still depends on frost and soil temperature.Shallot is the same species as the bulb onion (Allium cepa), so it is photoperiodic: the clump stops adding leaves and starts dividing into bulbs only once day length crosses a cultivar threshold. Types fall into the same classes by latitude, long-day at 14 to 16 hours, intermediate-day at 12 to 14 hours, and short-day at 10 to 12 hours. Long-day types fit northern latitudes, short-day types fit the South where they are fall or winter planted, and intermediate types span the middle. One important nuance: traditional set-grown shallots are widely reported as more day-length forgiving, closer to day-neutral, than seed onions, while modern seed-grown hybrids behave like day-length-typed onions. Matching the type to your latitude still gives the fullest clumps. Day length triggers bulbing only; it never moves your planting date, which stays anchored to frost and soil temperature.
Short-day shallots suit the South. Plant them in fall or winter so they bulb as the days slowly lengthen. The traditional Southern multiplier kinds are a good fit; northern seed types may not bulb well here.This latitude suits short-day shallots, which bulb at 10 to 12 hours, planted in fall or winter to size up as days lengthen. Southern multiplier set types are adapted to the lower latitudes; long-day seed types may barely bulb here.
In Zone 9, shallot can be planted October through November. Harvest runs March through May.
Shallots are the same species as onions, so like onions they decide to start making bulbs based on how long the days are, not on a date. The types are sorted the same way: long-day kinds suit the North, short-day kinds suit the South (where they are planted in fall or winter), and intermediate kinds suit the middle of the country. One nice thing: the traditional shallots grown from sets are more easygoing about day length than seed onions, so they are forgiving for beginners. Still, picking a type that matches where you live gives you the fullest clumps. Day length decides when the bulbs form, but it does not change when you plant, which still depends on frost and soil temperature.Shallot is the same species as the bulb onion (Allium cepa), so it is photoperiodic: the clump stops adding leaves and starts dividing into bulbs only once day length crosses a cultivar threshold. Types fall into the same classes by latitude, long-day at 14 to 16 hours, intermediate-day at 12 to 14 hours, and short-day at 10 to 12 hours. Long-day types fit northern latitudes, short-day types fit the South where they are fall or winter planted, and intermediate types span the middle. One important nuance: traditional set-grown shallots are widely reported as more day-length forgiving, closer to day-neutral, than seed onions, while modern seed-grown hybrids behave like day-length-typed onions. Matching the type to your latitude still gives the fullest clumps. Day length triggers bulbing only; it never moves your planting date, which stays anchored to frost and soil temperature.
Intermediate-day shallots suit the middle of the country, and most set shallots do well here. They are easygoing about day length, so this is a forgiving spot to grow them.These central latitudes suit intermediate-day shallots, which bulb around 12 to 14 hours. Most widely sold set shallots adapt well here, and the day-length response is genuinely soft for the set types.
In Zone 9, shallot can be planted November through March. Harvest runs June through July.
Shallots are the same species as onions, so like onions they decide to start making bulbs based on how long the days are, not on a date. The types are sorted the same way: long-day kinds suit the North, short-day kinds suit the South (where they are planted in fall or winter), and intermediate kinds suit the middle of the country. One nice thing: the traditional shallots grown from sets are more easygoing about day length than seed onions, so they are forgiving for beginners. Still, picking a type that matches where you live gives you the fullest clumps. Day length decides when the bulbs form, but it does not change when you plant, which still depends on frost and soil temperature.Shallot is the same species as the bulb onion (Allium cepa), so it is photoperiodic: the clump stops adding leaves and starts dividing into bulbs only once day length crosses a cultivar threshold. Types fall into the same classes by latitude, long-day at 14 to 16 hours, intermediate-day at 12 to 14 hours, and short-day at 10 to 12 hours. Long-day types fit northern latitudes, short-day types fit the South where they are fall or winter planted, and intermediate types span the middle. One important nuance: traditional set-grown shallots are widely reported as more day-length forgiving, closer to day-neutral, than seed onions, while modern seed-grown hybrids behave like day-length-typed onions. Matching the type to your latitude still gives the fullest clumps. Day length triggers bulbing only; it never moves your planting date, which stays anchored to frost and soil temperature.
Intermediate-day shallots suit the middle of the country, and most set shallots do well here. They are easygoing about day length, so this is a forgiving spot to grow them.These central latitudes suit intermediate-day shallots, which bulb around 12 to 14 hours. Most widely sold set shallots adapt well here, and the day-length response is genuinely soft for the set types.
In Zone 9, shallot can be planted November through February. Harvest runs May through July.
Shallots are the same species as onions, so like onions they decide to start making bulbs based on how long the days are, not on a date. The types are sorted the same way: long-day kinds suit the North, short-day kinds suit the South (where they are planted in fall or winter), and intermediate kinds suit the middle of the country. One nice thing: the traditional shallots grown from sets are more easygoing about day length than seed onions, so they are forgiving for beginners. Still, picking a type that matches where you live gives you the fullest clumps. Day length decides when the bulbs form, but it does not change when you plant, which still depends on frost and soil temperature.Shallot is the same species as the bulb onion (Allium cepa), so it is photoperiodic: the clump stops adding leaves and starts dividing into bulbs only once day length crosses a cultivar threshold. Types fall into the same classes by latitude, long-day at 14 to 16 hours, intermediate-day at 12 to 14 hours, and short-day at 10 to 12 hours. Long-day types fit northern latitudes, short-day types fit the South where they are fall or winter planted, and intermediate types span the middle. One important nuance: traditional set-grown shallots are widely reported as more day-length forgiving, closer to day-neutral, than seed onions, while modern seed-grown hybrids behave like day-length-typed onions. Matching the type to your latitude still gives the fullest clumps. Day length triggers bulbing only; it never moves your planting date, which stays anchored to frost and soil temperature.
Long-day shallots, or just about any set type from the garden center, work well here. Set-grown shallots are easygoing about day length compared to onions, so this is a forgiving crop to start with.These central-to-far-north latitudes suit long-day shallots, which bulb around 14 to 16 hours of daylight; the traditional set-grown types are also genuinely more day-length forgiving than seed onions, so most widely sold sets adapt well here regardless of strict long-day typing.
In Zone 9, shallot can be planted January through May. Harvest runs June through July.
Shallots are the same species as onions, so like onions they decide to start making bulbs based on how long the days are, not on a date. The types are sorted the same way: long-day kinds suit the North, short-day kinds suit the South (where they are planted in fall or winter), and intermediate kinds suit the middle of the country. One nice thing: the traditional shallots grown from sets are more easygoing about day length than seed onions, so they are forgiving for beginners. Still, picking a type that matches where you live gives you the fullest clumps. Day length decides when the bulbs form, but it does not change when you plant, which still depends on frost and soil temperature.Shallot is the same species as the bulb onion (Allium cepa), so it is photoperiodic: the clump stops adding leaves and starts dividing into bulbs only once day length crosses a cultivar threshold. Types fall into the same classes by latitude, long-day at 14 to 16 hours, intermediate-day at 12 to 14 hours, and short-day at 10 to 12 hours. Long-day types fit northern latitudes, short-day types fit the South where they are fall or winter planted, and intermediate types span the middle. One important nuance: traditional set-grown shallots are widely reported as more day-length forgiving, closer to day-neutral, than seed onions, while modern seed-grown hybrids behave like day-length-typed onions. Matching the type to your latitude still gives the fullest clumps. Day length triggers bulbing only; it never moves your planting date, which stays anchored to frost and soil temperature.
Where you live, plant intermediate-day shallot sets. Day length is how many hours of sunlight there are, and shallots form a bulb when days reach about 12 to 14 hours in spring, the same as their onion relatives. A northern long-day type planted here would struggle to bulb, and a far-southern short-day one bulbs too early.At the Las Vegas Valley's latitude, about 36 degrees N, grow intermediate-day shallot sets, which bulb at around 12 to 14 hours of daylight, the same trigger their close onion relatives use. Sets go into the ground in fall and bulb as days lengthen through spring. A long-day (northern) type here rarely reaches its longer daylength trigger and bulbs poorly, while a short-day type may bulb too early and small.
In Zone 9, shallot can be planted October through November. Start indoors Aug 15 - Sep 30. Harvest runs May through June.
Shallots are the same species as onions, so like onions they decide to start making bulbs based on how long the days are, not on a date. The types are sorted the same way: long-day kinds suit the North, short-day kinds suit the South (where they are planted in fall or winter), and intermediate kinds suit the middle of the country. One nice thing: the traditional shallots grown from sets are more easygoing about day length than seed onions, so they are forgiving for beginners. Still, picking a type that matches where you live gives you the fullest clumps. Day length decides when the bulbs form, but it does not change when you plant, which still depends on frost and soil temperature.Shallot is the same species as the bulb onion (Allium cepa), so it is photoperiodic: the clump stops adding leaves and starts dividing into bulbs only once day length crosses a cultivar threshold. Types fall into the same classes by latitude, long-day at 14 to 16 hours, intermediate-day at 12 to 14 hours, and short-day at 10 to 12 hours. Long-day types fit northern latitudes, short-day types fit the South where they are fall or winter planted, and intermediate types span the middle. One important nuance: traditional set-grown shallots are widely reported as more day-length forgiving, closer to day-neutral, than seed onions, while modern seed-grown hybrids behave like day-length-typed onions. Matching the type to your latitude still gives the fullest clumps. Day length triggers bulbing only; it never moves your planting date, which stays anchored to frost and soil temperature.
Grow short-day shallots here: they bulb on the short winter days the Valley gets, the same type used for short-day onions.At this far-south Valley latitude, grow short-day shallots: they begin bulbing at 10 to 12 hours of daylight, which the Valley reaches in winter, the same photoperiod band as the region's short-day onions.
In Zone 9, shallot can be planted October through November. Harvest runs January through April.
Shallots are the same species as onions, so like onions they decide to start making bulbs based on how long the days are, not on a date. The types are sorted the same way: long-day kinds suit the North, short-day kinds suit the South (where they are planted in fall or winter), and intermediate kinds suit the middle of the country. One nice thing: the traditional shallots grown from sets are more easygoing about day length than seed onions, so they are forgiving for beginners. Still, picking a type that matches where you live gives you the fullest clumps. Day length decides when the bulbs form, but it does not change when you plant, which still depends on frost and soil temperature.Shallot is the same species as the bulb onion (Allium cepa), so it is photoperiodic: the clump stops adding leaves and starts dividing into bulbs only once day length crosses a cultivar threshold. Types fall into the same classes by latitude, long-day at 14 to 16 hours, intermediate-day at 12 to 14 hours, and short-day at 10 to 12 hours. Long-day types fit northern latitudes, short-day types fit the South where they are fall or winter planted, and intermediate types span the middle. One important nuance: traditional set-grown shallots are widely reported as more day-length forgiving, closer to day-neutral, than seed onions, while modern seed-grown hybrids behave like day-length-typed onions. Matching the type to your latitude still gives the fullest clumps. Day length triggers bulbing only; it never moves your planting date, which stays anchored to frost and soil temperature.
Short-day shallots suit the South. Plant them in fall or winter so they bulb as the days slowly lengthen. The traditional Southern multiplier kinds are a good fit; northern seed types may not bulb well here.This latitude suits short-day shallots, which bulb at 10 to 12 hours, planted in fall or winter to size up as days lengthen. Southern multiplier set types are adapted to the lower latitudes; long-day seed types may barely bulb here.
In Zone 9, shallot can be planted November through February. Harvest runs April through May.
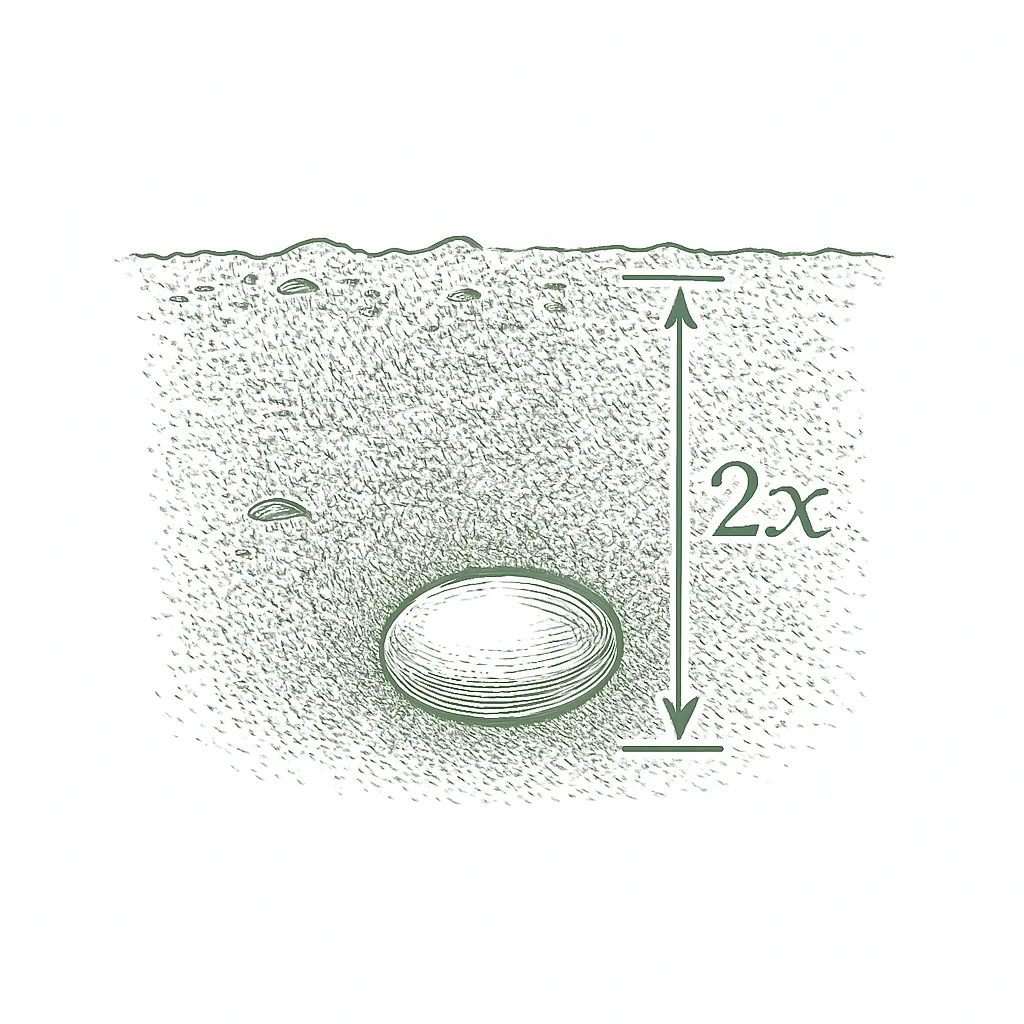
The easy way to grow shallots is from sets, which are small bulbs you buy and plant. Each set splits into a clump of several bulbs. Push each set in pointy-end up so the tip just shows at the soil surface, and space them at their final distance because shallots are not thinned. Pick firm sets and avoid big or already-sprouting ones, which tend to flower instead of dividing. You can also grow shallots from seed, started indoors about 8 to 10 weeks early, which gives single bulbs rather than clumps.Sets are the classic and easiest route: each one divides into a clump of 6 to 12 bulbs. Push sets root-end down with the tip just at or above the surface, 1 to 2 inches deep, at final spacing, since shallots are not thinned. Choose firm, healthy sets; oversized or already-sprouted sets are primed to bolt rather than divide cleanly. Seed is the other path and gives single, uniform bulbs from modern hybrids, started about 8 to 10 weeks before set-out for the largest plants.


Not sure what soil you have? Grab a small handful of damp soil from your garden bed and squeeze it. If it crumbles apart easily, it's sandy. If it holds together but breaks when you poke it, it's loam (what most vegetables want). If it stays in a hard, slippery ball, it's clay.
Shallots like loose, rich, well-drained soil. Mix in compost before you plant. They do poorly in heavy clay or in soil that forms a hard surface crust, because their roots stay shallow and the multiplying clump needs air and steady moisture right near the surface.
Mix 2-3 inches of compost into the top 6 inches of your bed before planting. Compost holds moisture (which sandy soil drains too fast) and adds the nutrients sandy soil tends to lack. Repeat each season. Compost breaks down over time.
Mix 2-3 inches of compost AND a few inches of coarse sand or perlite into the top 6 inches of your bed. The compost feeds the plants; the sand breaks up the clay so air and water can move through. Don't add sand without compost. It can compact like concrete.
If amending your soil sounds like too much work, or if your soil is heavy clay, full of rocks, or contaminated, build over it. A raised bed at least 12 inches deep filled with a 50/50 mix of compost and sandy loam gives you ideal growing soil with no battles. A 5-gallon container with quality potting mix does the same for one plant at a time. Both bypass your native soil entirely.
The numbers that matter, at a glance.
Shallots grow well in pots because their roots stay shallow. Use a wide container at least 10 inches deep with drainage holes, and space the sets 6 inches apart. Pots dry out faster than garden beds, so check the soil often and do not let it stay dry, or the clumps will be small.Shallots are shallow-rooted and container-friendly. A wide, well-drained pot at least 10 inches deep, roughly 5 gallons or more, holds a few sets spaced 6 inches apart, each dividing into its own clump. Containers dry fast, so water before the surface crusts and feed a touch more often than in the ground; interrupted growth shrinks the clumps.
Where winters are mild, you can plant shallot sets in pots in fall and let them grow over winter for a spring harvest. Move or cover the pots during hard freezes, because roots in a container get colder than roots in the ground.In mild-winter zones, fall-set container shallots overwinter for a spring clump; protect pots from hard freezes since roots in a container chill faster than in open ground.
Ask what your balcony or roof can carry
A balcony or roof can only hold so much weight. Before you set heavy pots there, ask a building architect what it can safely carry.Illinois Extension's guidance is to consult a building architect about weight limits before placing heavy pots on a balcony or rooftop garden. It gives no weight figure.
Never grow food in a container with anything toxic in it
Many kinds of containers can be used. Whatever you choose, keep anything toxic out of it, especially if you are growing food.Colorado State accepts nearly any container material but warns against using a container that holds toxic materials, especially for edible plants. Illinois adds that a vegetable container should be free of chemicals toxic to plants or people, and urges caution with treated lumber when growing food. If you cannot account for what a repurposed container once held, that alone is a reason to keep food out of it.
Secure hanging containers well
Fasten hanging baskets and window or rail boxes securely. Think about what is below them too, since they can drip on people or things underneath.Illinois Extension asks growers to secure hanging containers well and to think through the safety issues of hanging them. Placement matters too, since a hanging container can drip onto people or belongings below.
Shallots like soil close to neutral, about pH 6.0 to 7.0, and will tolerate roughly 5.5 to 7.5. They do not like sour (acidic) soil. A simple soil test takes the guesswork out, and garden lime helps if the test comes back too low.Shallots grow best near neutral, roughly pH 6.0 to 7.0, tolerating about 5.5 to 7.5. They dislike strongly acid soil; below about pH 6.0 a liming amendment helps. Confirm with a soil test before adjusting.
Shallots are hungry plants. Feed them nitrogen while the leaves are growing, because strong leaves now mean a fuller clump of bulbs later. Feed about a month after planting and again a month after that, then stop feeding by about mid-July. Feeding late makes thick necks and soft shallots that do not keep well.Shallots are heavy feeders. Drive leaf growth early with nitrogen, side-dressing at about 30 and 60 days after planting, because the leaf canopy built before bulbing sets the size and number of bulbs in the clump. Then stop: hold off on nitrogen after about mid-July. Late, excess nitrogen delays maturity and produces thick necks and soft bulbs that store poorly.
Use a feed higher in the first number (nitrogen) early on, then stop the nitrogen once the bulbs start forming.Higher first-number (N) feeds early; ease off nitrogen as the clump starts to bulb.
Shallots are good neighbors for carrots, beets, lettuce, and cabbage-family plants, mostly because their strong allium smell is thought to keep some pests away. The main thing to avoid is planting them next to beans or peas, since alliums can slow those down. These are helpful traditions, not sure things, so do not worry if your garden does a little differently. Shallots earn their companion reputation mostly through allium scent, which is traditionally credited with deterring aphids and the carrot rust fly, so they pair well with carrots, beets, lettuce, and brassicas. The one firm caution is the legume conflict: alliums are widely held to inhibit beans and peas, so keep shallots away from them. Most of these claims are traditional rather than trial-proven; treat them as low-risk suggestions, not guarantees.
Your shallots are ready to dig when most of the leafy tops have flopped over and turned yellow and the necks feel soft, usually about 3 to 4 months after planting sets in spring. Dig up the whole clump on a dry day, then dry (cure) the bulbs before storing. If you want fresh green shallots sooner, you can pull a few young plants at around 50 to 60 days and use them like green onions.A shallot clump is ready when most of the tops have yellowed and fallen over on their own and the necks have started to soften and dry, usually 90 to 120 days from a spring set. Lift the whole cluster on a dry day, brush off loose soil, and cure before storing. You can also pull green shallots early, at 50 to 60 days, for fresh use like scallions.
Each set you plant gives you a clump of about 6 to 12 shallots. Spacing them wider makes bigger clumps; planting close makes fewer, larger single bulbs. A 10-foot row gives several pounds in a good year.One set yields a clump of about 6 to 12 bulbs; wider spacing makes larger clumps, denser spacing makes fewer, bigger single bulbs. A 10-foot row at 6-inch spacing returns roughly several pounds of cured shallots in a good season.
Shallots of the same kind all finish around the same time, so you harvest most of them together rather than a few at a time.All clumps of a variety size up and mature together as day length triggers bulbing, so the harvest comes in one main flush rather than over a long window. The biggest things for a good first harvest are picking a type suited to where you live and giving each set room to make a full clump. Crowding gives lots of tiny bulbs.Matching variety type to your latitude and giving each clump room are the biggest first-year yield levers; crowded clumps make many tiny bulbs, and a mismatched type bulbs too early or barely divides.
The ladder troubleshoots from the gentlest solution to the strongest. Start with the gentlest option and only move on when and if it doesn't work.
When the shallots come out, do not leave the bed to itself. Pull every onion-family plant still standing, volunteers included (the stray onions that sprout from bulbs missed at harvest), and rake up the dead tops and trimmings. Thrips spend the winter in exactly that kind of leftover onion-family material lying on the soil, so a bed cleared in fall has far less to hand the next crop in spring. Carry the debris away instead of stacking it at the edge of the bed.Thrips tabaci overwinters in allium material left on the soil surface and in volunteer alliums, so the season-end cleanup sets the size of the population that starts building through the first warm, dry spell of the next season. Rogue out volunteers, clear the tops and trimmings, and move the material off the bed rather than leaving it at the margin. The other carryover source sits outside the bed, in grain, alfalfa or clover stands, and is handled by siting rather than by sanitation.
Feed shallots enough nitrogen, the nutrient that drives leafy growth, to grow well, and no more. Heavy feeding makes thrips worse, so skip any extra dose meant to push bigger tops. Keep the plants watered as well as fed, because a strong plant shrugs off the feeding better; that is tolerance, though, not fewer insects, so it goes alongside the other steps here rather than in place of them.Hold nitrogen at adequate rather than heavy. Excess nitrogen promotes onion thrips, and the population it builds shelters in the leaf axils where sprays miss it. Pair the restraint with steady water: vigor buys tolerance of the rasping rather than a lower count, so a well-grown clump loses less size to the same number of thrips but does nothing to thin them.
Catch this early. While the silvery streaks are still few, knock the thrips loose with a hard spray from the hose, pointing the nozzle down into the crease where each leaf meets the next, since that is where they sit and a spray across the top of the clump misses most of them. Do it in the morning so the leaves are dry by evening. If the streaking keeps spreading anyway, your local extension office can tell you what is worth using.A hard jet of water aimed down into the leaf folds knocks a light infestation back; Thrips tabaci shelters in the axils, so a stream that only sweeps the outside of the clump leaves most of the population where it sits. It is a knock-back for low numbers, not an answer to an outbreak. Work in the morning so the foliage dries quickly, and hand a persistent outbreak to your local extension office rather than escalating on your own.
Minute pirate bugs and lacewings eat thrips, and they will do part of the job for you if you let them. The way to keep them is to stay away from broad-spectrum insecticides, the sprays that kill most insects they touch, because those take out the helpers along with the thrips. Watch for the silvery streaks through warm, dry weather, when thrips multiply fastest, and let the predators work before reaching for anything stronger.Minute pirate bugs and lacewings help against onion thrips where broad-spectrum sprays are avoided, which makes this less a step you take than one you protect. A broad-spectrum material kills the predators along with whatever thrips it reaches, and it does not reach the ones sheltered in the leaf axils. Keep the bed unsprayed while the count is light and the predators are present, and go to extension advice only for a persistent outbreak.
No spray for this one. Prevention is the control.
The ladder troubleshoots from the gentlest solution to the strongest. Start with the gentlest option and only move on when and if it doesn't work.
Give shallots a bed that had no onions, garlic, leeks or shallots in it last year, and put the new bed well away from the old one. The fly spends the winter as pupae, its resting stage, in the soil where last year's onion-family crop grew, so planting into that same soil, or right next to it, sets the crop down where the flies come up in spring. Cool, wet springs are when getting this wrong costs the most.Delia antiqua pupates in the soil around last season's shallots and onions, so a bed that carried alliums last year has the spring flight built into it. Rotate off that ground and site the new planting at a distance from it, not just beside it, since the flies emerge from the old bed regardless of what is growing there now. Cull piles and volunteer alliums keep the fly going between crops, so the rotation is only as good as the sanitation around it.
Clear away anything the fly can breed in. That means the small or damaged bulbs you set aside (culls), any onion-family plants that sprout on their own, and the rotting leftovers of last year's crop. Keep fresh manure out of the bed in spring, and do not turn a green cover crop under just before planting either; rotting organic matter is what draws the fly to lay its eggs there. Put culls in the trash, not on a pile beside the bed.Culls, cull piles and volunteer alliums carry Delia antiqua between crops, and rotting organic matter draws its egg-laying, so sanitation works on both ends of the cycle. Remove culls and volunteers from the bed and its surroundings, and keep spring manure and green manure out of the ground shallots are going into, since a bed rich in fresh, decomposing material attracts the females to lay. The manure part is settled before planting; the cull and volunteer part runs all season.
Where your season is long enough, wait to plant until the first wave of flies has come and gone in spring, so the young plants are not standing there while eggs are being laid. Ask your extension office when that first flight usually ends where you live, because it shifts with the region and the year, and treat a published date as a starting point rather than a promise. This only works if a later start still leaves enough season to grow a bulb.Where the season allows, planting after the first flight has passed reduces damage, since the spring generation lays at the base of plants that are already up. This moves the crop in time where rotation moves it in space, and it pays only where the delayed start still leaves room to bulb. Emergence dates shift with region and year, so a published window is a starting point to confirm locally, not a date to carry across regions.
Floating row cover is a thin, light fabric that sunlight and rain pass through and insects cannot. Spread it over the bed the day you plant, before the spring flies are out, and weigh the edges down all the way around, because the fly lays at the base of the plant and slips through any gap along the edge. One warning: a bed that grew onions or shallots last year must not be covered, because the flies coming up out of that soil would be sealed in with the crop.The row cover goes on at planting and stays sealed until the spring flight is over; Delia antiqua lays at the base of the plant, so the fabric has to be down before the first females are out, not after wilting shows. Use it on rotated ground only. The pupae overwinter in the soil of last year's allium bed, and fabric laid over a bed that carried alliums last year seals those flies in with the crop as they emerge.
No spray for this one. Prevention is the control.
The ladder troubleshoots from the gentlest solution to the strongest. Start with the gentlest option and only move on when and if it doesn't work.
Move your onion-family plantings to fresh ground each year instead of putting shallots back where alliums grew. The grubs bore down out of the leaves into the bulb and pass the winter there as pupae, the resting stage, so an old allium bed is where the next spring's flies come from. Rotating does not replace covering the plants; it means you are not planting right on top of the problem.Rotate away from alliums. Phytomyza gymnostoma pupates in the bulb it mined, so ground that carried an infested crop holds the pupae that produce the spring flight, and a planting set back into it meets the adults as they emerge. Rotation sits beside the covers rather than in place of them: it reduces what the bed itself contributes, while the cover handles the adults in flight.
Cover the plants with row-cover fabric or fine insect netting before the flies show up, once in spring and again in fall, and seal the edges down so none can get in. Put on in time, the cover comes close to full control of this pest; put on after the rows of white dots appear, it is late. Do not put a cover over a bed that grew alliums last year, or you seal the flies coming out of the old bulbs in with the crop.Row cover or insect netting installed before each flight and sealed at the edges comes close to full control. Phytomyza gymnostoma has two adult flights, roughly March into May and again September into October, and the cover has to be down ahead of each, since the eggs go into the leaf and the larvae are inside the tissue from then on. Its pupae overwinter in the bulb, so cover rotated ground only; fabric over a bed that carried alliums last year seals the spring emergence in with the crop.
If you cannot cover the plants, a spinosad spray is the fallback. Spinosad is an organically acceptable insecticide used against leafminers, thrips and caterpillars, and it stands in for the cover rather than adding to it. It is toxic to bees while wet and for about a day after, so keep it off anything in flower and spray at dusk when bees have gone in. Use it in spring or fall once the grubs are in the leaves, rather than on a calendar date.Spinosad is the option where covers are not practical; under a cover that went on in time it adds little. It penetrates the leaf to reach the larvae mining inside it, so time it to the larvae rather than the calendar in either generation: the rows of white dots along a leaf edge are the egg-laying scars, and the larvae behind them are what the spray meets. It is toxic to bees when sprayed and for roughly a day afterward: apply at dusk and keep it off flowering plants.
The bottom rungs are products with label rules: timing, pollinators, and days to wait before harvest. Before you spray →
The ladder troubleshoots from the gentlest solution to the strongest. Start with the gentlest option and only move on when and if it doesn't work.
Buy shallot sets from a source you trust and look them over before planting. This fungus travels on infested sets and on soil that comes along with them, and there is no cure once it shows up, so keeping it out of your garden is where the effort goes.Infested sets, and the soil that moves with them, are how Sclerotium cepivorum reaches clean ground, so screening what you plant acts before the pathogen has anywhere to persist. There is no rescue once it appears and no treatment that reverses an infection, which is what puts the purchase decision ahead of everything else on this disease.
If a clump does go down with it, dig it out along with the soil that comes up on the roots and put it in the trash rather than the compost pile. Those tiny black specks at the rotted base are survival bodies, and composting spreads them through the garden.Rogue affected clumps and dispose of them away from the garden rather than composting them. The sclerotia, the poppyseed-sized black resting bodies on the rotted base, are what persist, so tissue routed through a compost heap returns them to ground you use. Handle soil moved off that bed the same way.
Keep shallots and other alliums out of that bed for as many years as you can manage. The survival specks last decades in the ground, so a season or two away does not clear it and the bed stays a problem for a long stretch.Rotate alliums out of an infested bed for as long as is practical. Sclerotia survive in the ground for over 20 years, so the organism sets the length of the break rather than any normal rotation interval, and infested ground is best treated as carrying the disease indefinitely. Sclerotium cepivorum attacks only alliums, so any other crop can use the bed in the meantime.
No spray for this one. Prevention is the control.
The ladder troubleshoots from the gentlest solution to the strongest. Start with the gentlest option and only move on when and if it doesn't work.
Set the plants far enough apart at planting that air can move between them. This mildew races through a crowded bed where the leaves stay damp, and the fuzzy gray-purple coating shows up on mornings when the air is still and humid. Room between plants lets a breeze in and lets the leaves dry, and it is the one thing you cannot add once the sets are in.Peronospora destructor spreads fastest in crowded, poorly aired plantings, and it sporulates on the leaf in humid mornings when the foliage has stayed wet, so spacing is set at planting for one effect: a canopy that airs out and dries sooner after dew, which takes away the lingering wetness the pathogen needs to infect and sporulate. There is no resistant shallot to lean on, which leaves layout decisions like this one carrying the defense together with watering and rotation.
Water the soil, not the leaves. This mildew needs leaves that stay wet, and a sprinkler or a hose played over the tops gives it exactly that. Run the water along the ground at the base of the plants and keep the foliage dry. Cool, wet, humid weather already suits the mildew; overhead watering adds to it on the days the weather does not.Irrigate at the base to keep the foliage dry. Lingering leaf wetness is the condition Peronospora destructor infects and sporulates under, and overhead watering supplies it on demand in weather that would otherwise have dried the canopy. Dew and cool, humid mornings stay outside your control, which is why this pairs with spacing: one shortens how long the leaves stay wet, the other limits how often you make them wet.
Where downy mildew has shown up, do not grow shallots or their onion-family relatives in that bed again for at least three years. The disease carries over in sick leaves left behind, in piles of reject bulbs, and in the volunteer plants that sprout from them, so a bed that had it last year is the likeliest place to get it again. Choose the new bed before planting; it cannot be changed later.Rotate away from alliums for three years or longer where the disease has occurred. Peronospora destructor persists between seasons in infected debris, cull piles and volunteer alliums, so the length of the break matters as much as the fact of it; one year off returns the crop before the carryover has died out. With no resistant variety available, the rotation and the cleanup are what stand between an infested bed and the next planting.
Pick off leaves that have gone pale and fuzzy and get them out of the bed, and get rid of them rather than leaving them lying there or burying them. At the end of the season clear the leftover tops, any pile of reject bulbs, and every onion-family plant that came up on its own nearby, because volunteers carry the disease over from one year to the next.Destroy infected debris, cull piles and volunteer alliums, since all three carry Peronospora destructor across seasons and volunteers do it in a living host that no rotation touches. In season, removing affected leaves as they yellow and collapse takes sporulating tissue out of the canopy; at season's end the cleanup is what makes the rotation mean anything, because a volunteer left standing beside the new bed resets the clock.
Go easy on nitrogen, the fertilizer that drives leafy growth. A heavy dose gives shallots a mass of soft, sappy leaves, and that is the kind of growth this mildew does best on. Feed enough for the plants to grow normally and stop there, and skip any extra feeding meant to push bigger tops.Hold nitrogen back to what the crop needs. An overproduction of succulent leaves promotes Peronospora destructor, and a dense, soft canopy holds the leaf wetness the pathogen depends on, so heavy feeding works against the spacing and the basal watering at the same time. With no resistant variety, fertility restraint is one of the few levers still in hand once the layout is fixed.
No spray for this one. Prevention is the control.
The ladder troubleshoots from the gentlest solution to the strongest. Start with the gentlest option and only move on when and if it doesn't work.
Ease off fertilizer as the season goes on. Nitrogen, the nutrient that pushes leafy growth, keeps the tops soft and green late into the year, and shallots pushed late end up with necks that stay green and do not tighten, which is where this mold gets in. Feed early, then let the plants finish and dry down on their own.Cut late nitrogen. Excess feeding late in the season keeps the neck immature at harvest, and Botrytis infection of immature or insufficiently cured necks is what this disease is; the fertilizer decision is made weeks before the curing one and shapes how well the curing can go. Feed for bulb growth early, then let the tops mature and fall on their own instead of pushing them.
Let the tops go over on their own instead of knocking them down to hurry bulbing, then dry (cure) the shallots until the necks are tight before putting them somewhere cool and dry. Bulbs lifted while still green, or dried too little, are the ones that go soft at the neck weeks later.Let the tops mature and fall naturally, do not knock green tops down to force bulbing, and cure until the necks are tight before storing cool and dry. Botrytis enters through necks that were immature at harvest or insufficiently cured, so the cure is the control and the bent-over green top is the shortcut that defeats it. Storage conditions protect a sound, well-cured bulb; they do not rescue one whose neck was soft going in.
No spray for this one. Prevention is the control.
The ladder troubleshoots from the gentlest solution to the strongest. Start with the gentlest option and only move on when and if it doesn't work.
Plant shallots in a bed that has not grown onions, garlic, leeks or shallots for three to six years, and count the years honestly. This fungus builds up a little more with every onion-family crop on the same ground, and it hangs on in the soil for years, so rotating brings it down without wiping it out; a bed that had bad pink root is still a bed to be careful with after the break.Rotate off allium ground for three to six years, and treat the rotation as reducing Setophoma terrestris rather than clearing it, since the fungus persists in soil for years and builds with every allium crop on the same ground. It penetrates roots directly, without a wound, and is most active at soil temperatures of 75 to 85°F, so a warm bed with a long allium history is where the stunting reads worst. The rotation lowers what the next crop meets; it does not zero it.
If water stands in the bed after rain or the soil is heavy and stays wet for days, improve the drainage before planting shallots there, or give them a different bed that drains. Weak, stressed plants in heavy, wet ground are the ones this fungus takes hardest, and stunted plants with pink, shriveled roots are the result. Getting water away from the roots is one fix still open on ground that carries the fungus; keeping the plants watered and fed so the roots stay strong is the other.Improve drainage on heavy ground before planting. Setophoma terrestris takes weak or stressed plants in heavy, wet soil most readily, and once the fungus is in the ground a rotation only reduces it, so the drainage of the bed is the condition you can still change on infested soil. Pair it with keeping the crop vigorous through the season, since weak roots are the ones it takes; the fungus needs no wound to enter, and a stressed root gives it the least resistance.
No spray for this one. Prevention is the control.
Shallots do well planted after leafy greens or beans and peas. Just do not plant beans or peas right next to shallots, since alliums can slow them down.Shallots follow well after a leafy or legume crop and pair poorly before beans and peas, which alliums tend to inhibit.
The plant app sends a timely reminder at every critical moment of your shallot season. The wording adjusts to whichever you pick: beginner or seasoned. Here are three you'll see in Zone 9.
plant sends the right notification at exactly the right moment, for your zone, your weather, your crops. Founding members lock the rate forever.
We're building this guide with real growers. Got a question we missed? Ask here. We read every one and add the best answers right to this page.
Learned something the hard way? Pass it on. Real growers' tips make this guide better for the next person, and we credit you by name when yours goes live.
If you've grown this crop and you see a date, a temperature, a companion claim, or a recommendation that doesn't match your experience, tell us. Real growers' corrections make this guide better for the next person.
Every date, temperature, spacing, and recommendation on this page is sourced from university cooperative extension publications, peer-reviewed agricultural research, NOAA climate data, and direct extension calendars. Where claims are softer (traditional gardening wisdom not formally documented), we say so.
Spot a data point that doesn't match your experience? Submit a correction; accepted corrections earn full author credit on the page.
Zone-aware seasonal nudges, what's worth planting now, and the occasional recipe from the harvest. No spam, ever.