Today · in your zone
What's happening right now
Off-season for spaghetti squash in zone 9.
Spaghetti squash is a warm-season squash grown for its unusual flesh: once cooked, it pulls apart into long strands like spaghetti. You harvest it once in the fall, when the oblong fruit turns a deep, even yellow and the skin is too hard to dent with a thumbnail, unlike summer squash that you pick young all season. It grows on vines that spread about 6 to 8 feet, so it needs a good amount of room, though compact bush types like Tivoli and Small Wonder fit smaller gardens and pots. Each plant has both male and female flowers and needs plenty of bee visits to set fruit. The main things to know: give it a warm season of about 90 to 100 days and space to run, water steadily while the fruit grows, watch for squash bugs, squash vine borers, beetles, and mildew, and harvest when the squash are fully yellow with hard, dull skin and a dry stem, before frost. Stored in a cool, dry spot it keeps for a couple of months, much longer than summer squash. Spaghetti squash is a warm-season winter squash (Cucurbita pepo, the same species as zucchini and acorn) grown for its mature, hard-rind fruit, whose cooked flesh separates into long, pale strands like spaghetti, which is the whole point of growing it. Unlike its summer-squash cousin zucchini, it is harvested once, at full maturity in fall, when the oblong rind turns a deep, even yellow and a thumbnail cannot dent it. It is a moderate keeper: after an optional short cure it stores about 1 to 3 months, not as long as a butternut but far longer than any summer squash. Plants are moderately vigorous vines that run roughly 6 to 8 feet, so they need real room, though compact bush and semi-bush types like Tivoli and Small Wonder suit small gardens and containers. Spaghetti squash is monoecious, carrying separate male and female flowers on one plant, and fruit set is strongly pollinator-dependent. As a pepo, it is susceptible to the squash vine borer, so managing that pest is part of growing it. The season's shape is set by three things: a warm runway of 90 to 100 frost-free days to mature the crop, moderate pest and disease pressure (squash bug, squash vine borer, cucumber beetle and the bacterial wilt it spreads, plus powdery and downy mildew), and the single fall harvest, timed at a hard, fully yellow rind, before frost.
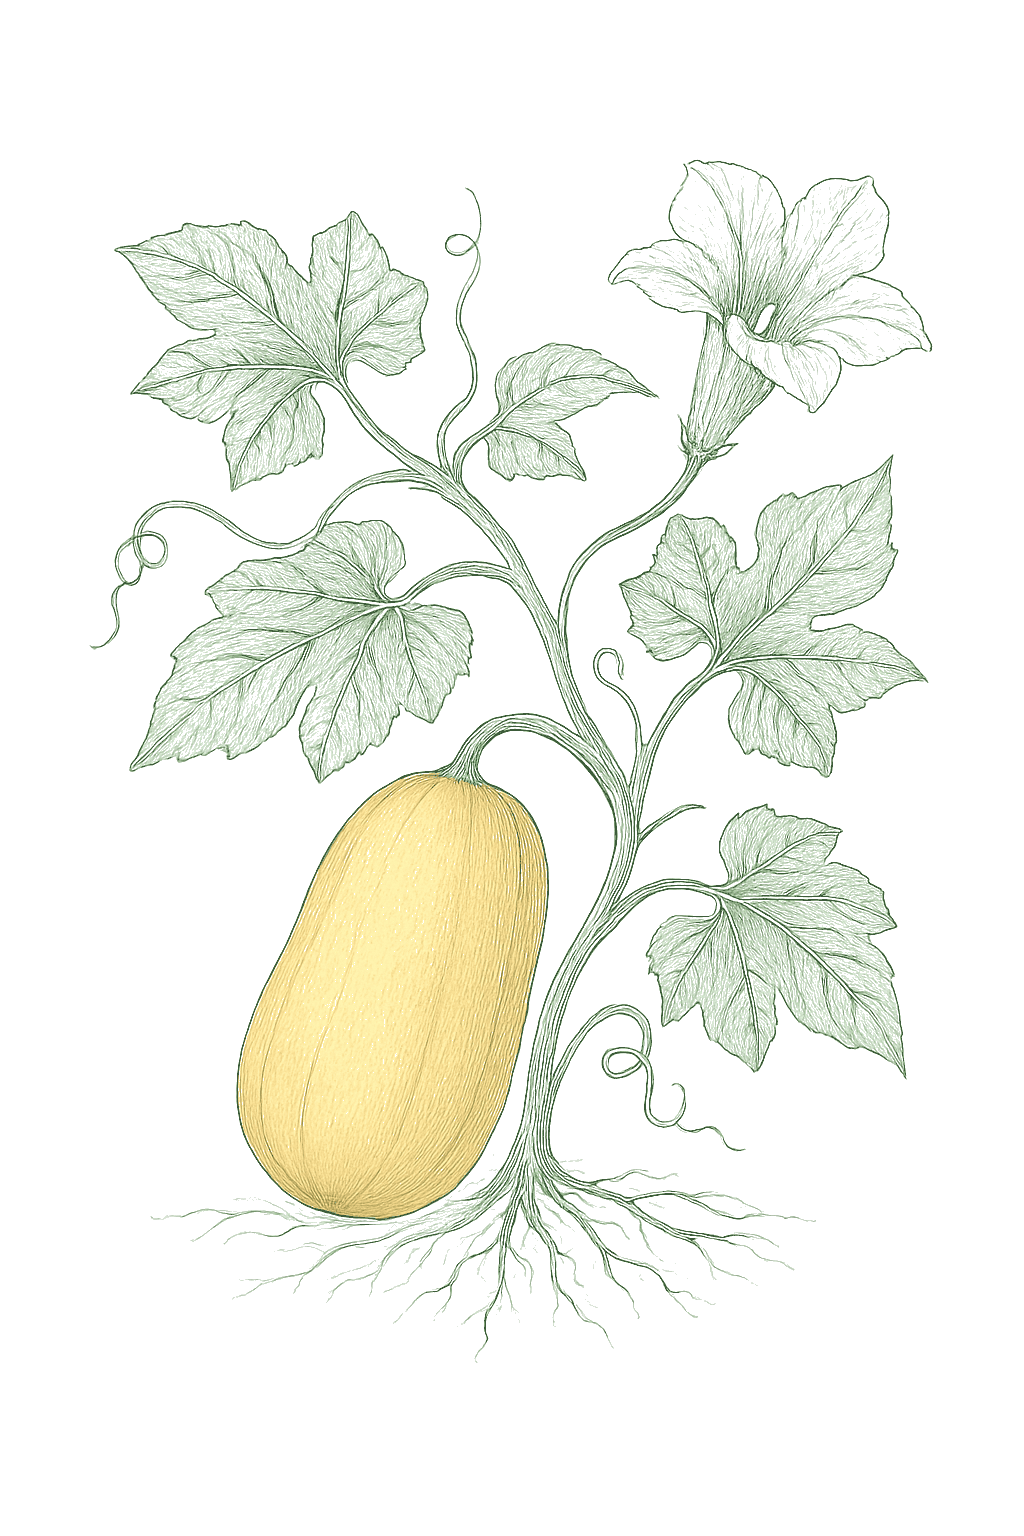
Off-season for spaghetti squash in zone 9.
Zone 9 averages a last frost around March 1. Within Zone 9, the colder half (9a, winters down to 20°F) runs about a week later. The warmer half (9b, winters down to 25°F) runs about a week earlier. The plant app picks your subzone from your ZIP.
| Subzone | Last spring | First fall | Growing days | Winter min | Fruits reliably |
|---|---|---|---|---|---|
| 9a | Mar 8 | Nov 24 | ~261 | 20-25°F | Yes · two seasons |
| 9b | Feb 28 | Nov 30 | ~275 | 25-30°F | Yes · two seasons |
Averages from 8 weather stations per subzone, drawn from NOAA 1991-2020 Climate Normals. Your actual frost date can vary by up to two weeks based on elevation, proximity to water, and local topography.
In Zone 9, spaghetti squash can be planted April through June. Harvest runs August through October.
In Zone 9, spaghetti squash can be planted February through March, then again July. Harvest runs June through June.
You plant spaghetti squash once for the season. It grows all summer and ripens together in the fall for a single harvest, so there is no need to replant every few weeks. In most places a later planting would be caught by frost before the squash could ripen. Only in very warm, nearly frost-free areas can you fit a second planting, and that is really a separate season.Spaghetti squash is not a succession crop. It is a single, long-season planting that sets fruit through summer and matures together for one fall harvest, so you sow once per season rather than at intervals. In most zones a second sowing would be killed by frost before its 90 to 100 day crop could ripen. Only in the warmest, frost-free or near-frost-free zones, or the low desert where a summer sowing is the fall crop, is a second seasonal window viable, and that is a separate season, not a succession.
In Zone 9, spaghetti squash can be planted February through March, then again July. Harvest runs May through June.
You plant spaghetti squash once for the season. It grows all summer and ripens together in the fall for a single harvest, so there is no need to replant every few weeks. In most places a later planting would be caught by frost before the squash could ripen. Only in very warm, nearly frost-free areas can you fit a second planting, and that is really a separate season.Spaghetti squash is not a succession crop. It is a single, long-season planting that sets fruit through summer and matures together for one fall harvest, so you sow once per season rather than at intervals. In most zones a second sowing would be killed by frost before its 90 to 100 day crop could ripen. Only in the warmest, frost-free or near-frost-free zones, or the low desert where a summer sowing is the fall crop, is a second seasonal window viable, and that is a separate season, not a succession.
In Zone 9, spaghetti squash can be planted May through June. Harvest runs September through October.
In Zone 9, spaghetti squash can be planted April through June. Harvest runs August through October.
In Zone 9, spaghetti squash can be planted May. Start indoors Apr 3 - Apr 17. Harvest runs August through October.
In Zone 9, spaghetti squash can be planted March through July. Harvest runs June through October.
In Zone 9, spaghetti squash can be planted March through April, then again August through September. Harvest runs May through August.
You plant spaghetti squash once for the season. It grows all summer and ripens together in the fall for a single harvest, so there is no need to replant every few weeks. In most places a later planting would be caught by frost before the squash could ripen. Only in very warm, nearly frost-free areas can you fit a second planting, and that is really a separate season.Spaghetti squash is not a succession crop. It is a single, long-season planting that sets fruit through summer and matures together for one fall harvest, so you sow once per season rather than at intervals. In most zones a second sowing would be killed by frost before its 90 to 100 day crop could ripen. Only in the warmest, frost-free or near-frost-free zones, or the low desert where a summer sowing is the fall crop, is a second seasonal window viable, and that is a separate season, not a succession.
In Zone 9, spaghetti squash can be planted May through June. Harvest runs September through October.
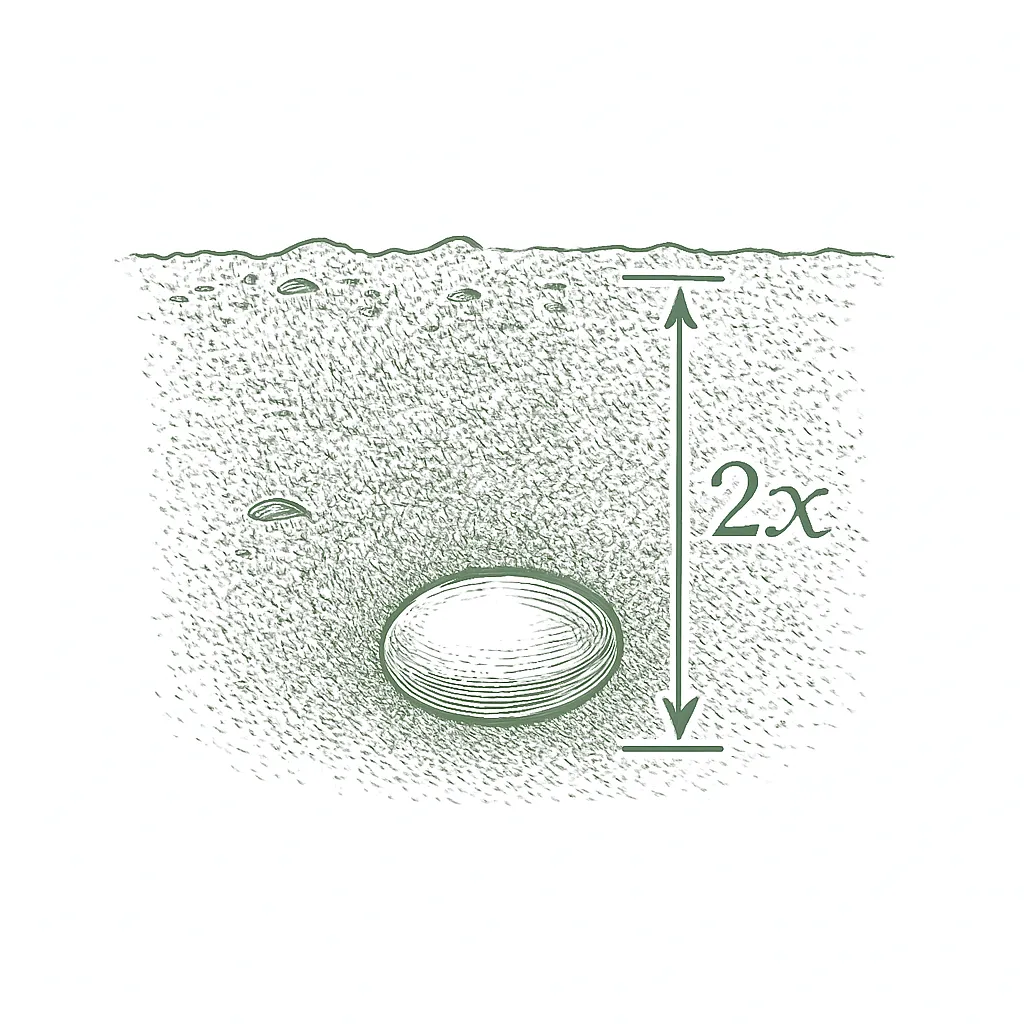
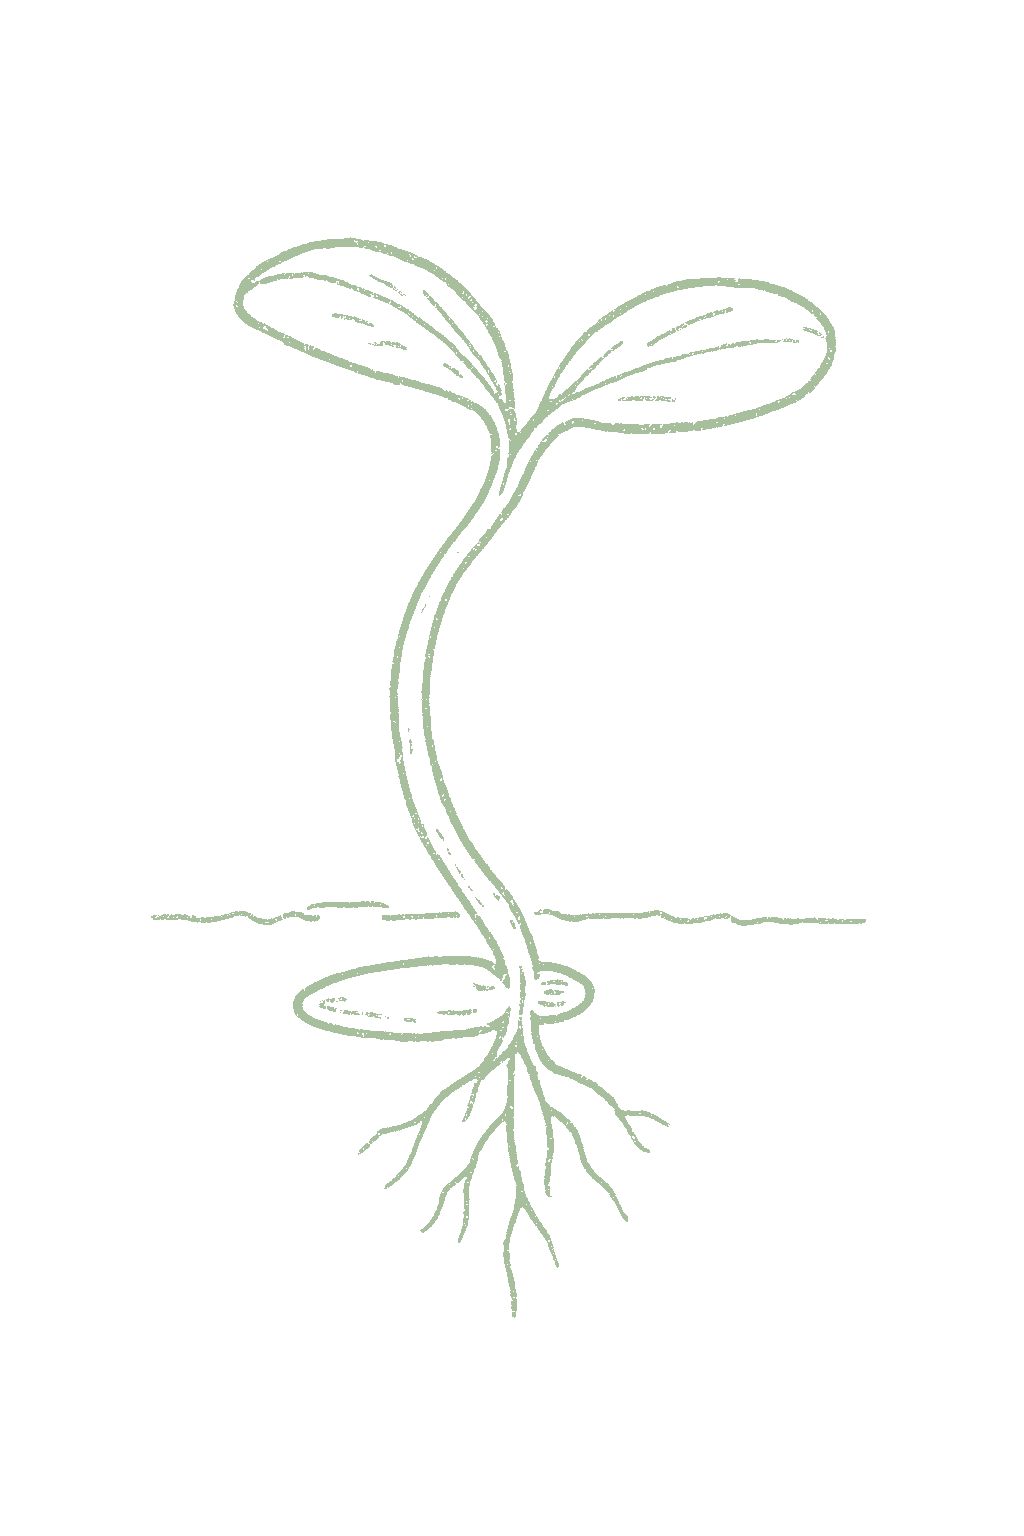
The easiest way to grow spaghetti squash is to sow seeds right where they will grow, once the soil is warm (about 70°F). Plant a few seeds 1 inch deep in each hill and keep the strongest. Start seeds indoors only if your season is short, about three weeks before planting out, and move them outside while they are still small. In cold areas, use transplants and a fast-maturing variety like Small Wonder so the fruit ripens before frost.Because cucurbits resent root disturbance, direct sowing once the soil is reliably warm (at least 65°F, ideally 70°F, at 2 inches) is the simplest, most reliable method, and direct-sown plants quickly catch up. Sow several seeds about 1 inch deep per hill and thin to the strongest. Start seeds indoors only to gain two to three weeks in a short season, sowing in large cells and setting plants out before they outgrow the pot. In the coldest zones, transplants and an early-maturing variety such as Small Wonder are what make a fall crop possible.







Not sure what soil you have? Grab a small handful of damp soil from your garden bed and squeeze it. If it crumbles apart easily, it's sandy. If it holds together but breaks when you poke it, it's loam (what most vegetables want). If it stays in a hard, slippery ball, it's clay.
Plant spaghetti squash in rich, well-drained soil with plenty of compost mixed in. It is a large, long-season plant, so give it a generous, fertile bed. Many gardeners plant on low hills or mounds, which warm up faster and drain better. If your soil is heavy or stays wet, build up mounds or use raised beds so the roots and developing fruit do not sit in water.
Mix 2-3 inches of compost into the top 6 inches of your bed before planting. Compost holds moisture (which sandy soil drains too fast) and adds the nutrients sandy soil tends to lack. Repeat each season. Compost breaks down over time.
Mix 2-3 inches of compost AND a few inches of coarse sand or perlite into the top 6 inches of your bed. The compost feeds the plants; the sand breaks up the clay so air and water can move through. Don't add sand without compost. It can compact like concrete.
If amending your soil sounds like too much work, or if your soil is heavy clay, full of rocks, or contaminated, build over it. A raised bed at least 12 inches deep filled with a 50/50 mix of compost and sandy loam gives you ideal growing soil with no battles. A 5-gallon container with quality potting mix does the same for one plant at a time. Both bypass your native soil entirely.
The numbers that matter, at a glance.
You can grow spaghetti squash in a container, but choose a compact or bush type like Tivoli or Small Wonder, since full-size vining spaghetti squash is too big for a pot. Use a large container, at least 10 gallons and 12 inches deep, put it in full sun, keep it well watered (pots dry out fast), and feed it regularly. Give the vines room to trail out of the pot, and water the soil, not the leaves, to help avoid mildew.Spaghetti squash is a marginal container crop because it is a long-season vine, but the bush and semi-bush varieties make it workable. Choose a compact type (Tivoli, Small Wonder, or Orangetti) and give it a big pot: at least 10 gallons and 12 inches deep, larger is better. Give it full sun, let the vines trail out over the rim or up a sturdy support, water at the base daily in heat, and feed regularly, since a small soil volume dries and depletes fast over a long season. The container figures here follow general container-vegetable guidance; spaghetti-squash-specific container numbers are modeled.
TivoliAn All-America Selections winner with a compact bush habit rather than long vines, making it the pick for small beds and large containers. Uniform yellow fruit about 3 to 4 pounds with good strand quality on a space-saving plant.
Small WonderA compact semi-bush type bred for single-serving fruit, about 1 to 2 pounds, that ripen earlier than full-size spaghetti squash. The go-to for short seasons, small gardens, and pots, and productive for its size.
OrangettiA semi-bush hybrid with orange, higher-beta-carotene flesh that is a bit sweeter and denser than standard spaghetti squash while still stranding. A compact, productive choice for smaller gardens.
Ask what your balcony or roof can carry
A balcony or roof can only hold so much weight. Before you set heavy pots there, ask a building architect what it can safely carry.Illinois Extension's guidance is to consult a building architect about weight limits before placing heavy pots on a balcony or rooftop garden. It gives no weight figure.
Never grow food in a container with anything toxic in it
Many kinds of containers can be used. Whatever you choose, keep anything toxic out of it, especially if you are growing food.Colorado State accepts nearly any container material but warns against using a container that holds toxic materials, especially for edible plants. Illinois adds that a vegetable container should be free of chemicals toxic to plants or people, and urges caution with treated lumber when growing food. If you cannot account for what a repurposed container once held, that alone is a reason to keep food out of it.
Secure hanging containers well
Fasten hanging baskets and window or rail boxes securely. Think about what is below them too, since they can drip on people or things underneath.Illinois Extension asks growers to secure hanging containers well and to think through the safety issues of hanging them. Placement matters too, since a hanging container can drip onto people or belongings below.
Spaghetti squash likes soil that is slightly acidic to neutral, about pH 6.0 to 6.8, and most garden soil is already close. An inexpensive soil test tells you where you stand and whether you need to adjust it before planting.Spaghetti squash does best in slightly acidic to neutral soil, around pH 6.0 to 6.8, with a sweet spot near 6.0 to 6.5. It still grows across a wider band, roughly 5.8 to 7.5, but uptake of some nutrients tightens as the soil turns alkaline. Test before planting and lime or add sulfur only on the test's advice rather than by guess.
Spaghetti squash grows for a long time and likes steady feeding. Mix a balanced fertilizer into the soil before planting, then feed with a little extra nitrogen about three to four weeks later as the vines start to run, and again when flowers appear. Once the squash begin to form, go easy on the nitrogen, because too much makes leafy vines instead of fruit.Spaghetti squash is a moderate feeder over a long season. Work a complete fertilizer such as 10-10-10 into the bed before planting, then side-dress with nitrogen about three to four weeks after planting as the vines begin to run, and again as flowering starts. Ease off heavy nitrogen once fruit has set, since late, lush vine growth comes at the expense of fruit and draws pests. Pair feeding with even moisture, because the nutrients only help a plant that is not also drought-stressed.
Use a balanced fertilizer like 10-10-10 at planting, then a little nitrogen as the vines spread. Do not overdo the nitrogen once fruit forms.A complete fertilizer such as 10-10-10 worked in at planting, then a nitrogen side-dress while vines run, easing off once fruit sets. Avoid pushing high nitrogen late, which gives vine at the expense of fruit.
The most useful spaghetti squash companions are flowers that bring in bees, since spaghetti squash needs lots of bee visits to set fruit, and the traditional Three Sisters partners, corn and beans. Nasturtiums can lure pests away. The one rule that really matters is to keep spaghetti squash away from other squash, cucumbers, and melons, which all share the same pests and diseases. Most spaghetti squash companion pairings are traditional rather than trial-tested, and the ones worth acting on serve two practical ends: pollination and pest pressure. Because cucurbit fruit set is pollinator-limited, with each female flower needing many bee visits, flowering insectary plants like borage near the patch are a genuine help. The Three Sisters partners, corn and beans, give the sprawling vines structure and a nitrogen boost while sharing none of spaghetti squash's pests, and a trap planting of nasturtium can divert squash bugs and beetles. The firmest rule is a rotation one: keep spaghetti squash away from other cucurbits, which share the full squash pest and disease complex, including the squash vine borer this pepo squash is prone to.
Unlike summer squash, you pick spaghetti squash once, when it is fully ripe. Look for a deep, even yellow color with no green, a hard rind you cannot dent with a thumbnail, and a dry, woody stem. The skin also goes from shiny to dull when ready, and the pale spot where it sits on the ground turns yellow. A ripe squash is what makes those nice spaghetti-like strands; picked too early it comes out mushy instead. Cut the squash off the vine with a knife, leaving a short piece of stem attached. Bring them in before a hard frost. You can eat it right away, or let it cure in a warm, dry place for about 10 days so the skin toughens for storage.Harvest spaghetti squash once at full maturity, not young: wait for a deep, even golden-yellow rind with no green or cream tint, a hard rind a thumbnail cannot dent, and a dried, corky stem. The skin turns from glossy to dull at ripeness, and the ground spot where the fruit rests turns from white to a deep yellow. A mature spaghetti squash is what strands well when cooked; picked immature it stays pale and cooks up mushy rather than into distinct strands. Cut the fruit from the vine with shears or a knife, leaving a 1 to 2 inch handle of stem, and avoid carrying it by the stem. Get the crop in before a hard frost, which damages the rind and shortens storage. A short cure of about 10 days in a warm, dry spot hardens the skin, though as a Cucurbita pepo it is also fine to eat straight from the vine.
A spaghetti squash plant usually gives you several squash, often 4 to 5, each 2 to 4 pounds. Bush types like Tivoli make fewer but take much less room. Plan on one or two plants going a long way, since each one spreads widely.A healthy spaghetti squash vine typically yields 4 to 5 oblong fruit of 2 to 4 pounds each; compact and bush types set fewer, smaller fruit on far less space. Vining types need plenty of room per plant, and even moisture and feeding through sizing build full, well-formed squash that strand cleanly.
Unlike summer squash, spaghetti squash does not keep producing all season. The plant sets its fruit over the summer and they all ripen together in fall, when you harvest once. Removing the latest tiny fruit helps the rest grow bigger before frost.Spaghetti squash does not produce continuously; the plant sets fruit through summer and then the crop matures together in fall for a single harvest. Once several fruit have set, removing the latest small fruit and pinching vine tips channels energy into sizing and ripening the keepers before frost. The big first-year surprise is how far spaghetti squash vines spread, often 6 to 8 feet. Give them more room than you think, and grow flowers nearby to bring in bees, since the plant needs lots of bee visits to set fruit.The usual first-year surprises are how much room the vines take (6 to 8 feet) and how pollinator-dependent fruit set is. Give plants more space than seems necessary, and grow some flowers nearby to draw bees.
Pick a spaghetti squash variety by your season and space. For a full-size, reliable squash, grow Vegetable Spaghetti. If your garden or season is small or short, grow the compact Tivoli or Small Wonder. Orangetti has sweeter, orange flesh on a smaller plant, and Stripetti stores the longest and stands up to mildew better if those are problems where you live.Choose by season length and space. Where there is room, the open-pollinated Vegetable Spaghetti is the dependable full-size standard. For small beds or containers, the bush Tivoli and the compact semi-bush Small Wonder stay tidy, and Small Wonder ripens earliest for short seasons. Orangetti offers sweeter, orange flesh on a semi-bush plant, and where powdery mildew or a long storage life matters, the striped Stripetti keeps best and holds up better to mildew.
The ladder troubleshoots from the gentlest solution to the strongest. Start with the gentlest option and only move on when and if it doesn't work.
Put spaghetti squash in a bed that did not grow squash-family crops the year before. It moves the planting away from the ground where last season's bugs settled in.Cucurbit rotation is named together with end-of-season cleanup as the pair that lowers carryover, shifting the crop off the ground that produced this season's adults.
Clear the old vines and plant litter out of the bed once you have harvested. Squash bugs pass the winter as adults tucked into that debris, so hauling it off leaves them fewer places to shelter.Taking vines and litter off the bed after harvest strips the shelter the adult stage uses to get through winter, and that stage is the seed of next year's numbers. This is the between-season lever, working with rotation rather than instead of it.
Lay row cover, a light fabric, over the young plants and keep it there until they bloom. It shuts the bugs out through the stretch when the plants are smallest.Cover excludes colonizing adults through establishment and comes off at flowering, so scouting has to pick up from that point rather than the fabric carrying the season.
Go over the plants by hand, taking off the adults and scraping away the bronze egg clusters stuck under the leaves. A board left flat on the ground overnight gives the bugs somewhere to gather, so turn it over in the morning and destroy what is underneath. Look under the leaves from early in the season, because once these bugs are grown they are much harder to get on top of.Removing adults and destroying the egg masses laid along the leaf veins is the in-season backbone, with an overnight board used to concentrate adults and nymphs into a single morning collection. Early scouting of leaf undersides buys the window that matters, since mature nymphs and adults resist control.
If you do spray, insecticidal soap works best on the young bugs, the small pale ones. The larger ones and the adults are tough to kill with it, so when you treat counts for more than how much you put on.Aim soap at small nymphs. Large nymphs and adults are hard to kill, so a program begun after the population has matured tends to underperform, and since the material acts on contact, coverage of the clustered undersides decides the rest.
The bottom rungs are products with label rules: timing, pollinators, and days to wait before harvest. Before you spray →
The ladder troubleshoots from the gentlest solution to the strongest. Start with the gentlest option and only move on when and if it doesn't work.
Do not plant where squash-family crops grew last year. The beetles that matter most are the early arrivals, and rotating puts your seedlings somewhere other than where they come out.Rotating out of ground that carried cucurbits lowers pressure from the early-season colonizers, and that is the group worth aiming at, because they are the ones moving the wilt bacterium.
Clear weeds and old plants from around the patch, and keep at it through the season rather than saving it all for fall cleanup.Weed and debris removal is listed alongside rotation as standing prevention. It trims shelter around the planting and supports exclusion at the seedling stage rather than standing in for it.
Cover seedlings with row cover, a light fabric laid over the plants, right from the start, and take it off once the flowers open.Cover over seedlings excludes colonizing adults through the stage where the plants are most exposed, which is also the stage where wilt infection takes hold. It lifts at flowering, so beetle management has to run on from there.
Pick the beetles off the plants whenever you spot them. On a small patch this keeps their numbers down, and it counts for the most early on while the plants are still young.Hand-collection suits a garden-scale planting and is worth the most against the early colonizers, since seedlings are the vulnerable stage and plants with several leaves tolerate a degree of feeding.
Hang yellow sticky traps, glue-coated cards, near the plants. They tell you when beetles are about and take some out of circulation. Where the wilt disease shows up in your garden, holding beetle numbers down is what avoids it, because a plant that catches it cannot be saved.Traps serve monitoring first and adult reduction second. Where bacterial wilt is a known problem, suppressing the vector is the effective route to disease control, since infection cannot be reversed once a plant has it.
No spray for this one. Prevention is the control.
The ladder troubleshoots from the gentlest solution to the strongest. Start with the gentlest option and only move on when and if it doesn't work.
At seed-buying time, semi-bush types are worth a try. Some growers find those recover better after a borer gets in. It is a matter of bouncing back, not of being passed over, so plan on the other steps as well.Semi-bush selections are reported by some growers to recover better from an attack, which is tolerance rather than resistance. Treat it as a modest pre-season lever on a host the moth prefers, not as a substitute for exclusion.
Pull out and destroy vines that are badly damaged, and clear the old plants after harvest. The borers spend the winter in what gets left behind, so clearing it cuts down how many turn up next year.Destroying infested vines in season and removing residue after harvest both reduce the following year's brood by stripping the overwintering stage out of the bed.
Cover the plants with row cover, a light fabric laid over the bed, from planting until they bloom. This is the step that works best here, because the moths cannot reach the stems to lay their eggs. Take it off at bloom so bees can get to the flowers.Cover from planting through flowering excludes the egg-laying moths and is described as the most reliable defense available. It has to come off at bloom for pollination, which reopens the window and puts the weight back onto stem-base scouting.
From early summer, watch the stem bases for frass, the damp sawdust-like specks a grub pushes out. Where you find it, slit the stem, lift the grub out, and mound damp soil over the opening so the vine can put down fresh roots.Frass at the stem base is the trigger. Cut lengthwise, take out the larva, then mound moist soil over the node to encourage re-rooting. Note that it is destroying infested vines, not the re-rooting, that reduces next year's brood.
No spray for this one. Prevention is the control.
The ladder troubleshoots from the gentlest solution to the strongest. Start with the gentlest option and only move on when and if it doesn't work.
Go easy with nitrogen fertilizer. Overfed plants push out soft new growth, and soft growth is what aphid numbers build on fastest.Excess nitrogen drives the succulent flush melon aphid colonizes, so restrained feeding is a prevention habit rather than a rescue step. Stressed plants also let populations build, which makes steadiness the aim rather than leanness.
A reflective mulch, meaning a silver or foil sheet spread over the soil, discourages aphids from landing on small plants. Get it down early, because once the leaves close over it there is nothing left to reflect.Reflective mulch deters incoming aphids from small plants, and the useful window closes as the canopy shades the sheet. It carries extra weight here because several aphid species move cucurbit mosaic viruses.
Knock the colonies off with a hard jet of water from the hose, aimed at the undersides of the leaves and the growing tips where they gather.A hard jet strips colonies off the undersides and the growing points where they sit. It is the physical pass ahead of anything sprayed, run off the same scouting that found them.
Ladybugs, lacewings and parasitic wasps feed on aphids and will usually settle a colony without your help. Let them work, and hold off on broad sprays that would take them out along with the aphids.Conserving lady beetles, lacewings and parasitic wasps is what usually brings an aphid run to an end, and broad spraying removes exactly that pressure. Support the natural enemies before reaching for any material.
If the colonies keep building, spray insecticidal soap and work it onto the undersides of the leaves where the aphids are actually sitting. Go back over the plants every few days, because it acts on contact and anything it misses carries on.There is no residual, so what gets wetted is what dies. Coverage of the undersides is the whole job, and the repeat at intervals of a few days is part of the treatment rather than an optional follow-up.
Horticultural oil does the same job and is used the same way, so pick one or the other: cover the leaf undersides thoroughly and repeat every few days.Oil is the alternative material at this rung, killing by smothering on contact, so it carries the same demand for coverage of the undersides and the same few-day repeat.
The bottom rungs are products with label rules: timing, pollinators, and days to wait before harvest. Before you spray →
The ladder troubleshoots from the gentlest solution to the strongest. Start with the gentlest option and only move on when and if it doesn't work.
Look for a variety sold as mildew-tolerant when you buy seed. Some spaghetti squash hybrids, Stripetti among them, hold up better than others.Mildew-tolerant selections, where they are offered, are the highest-leverage choice against one of the most common late-season winter-squash diseases, with Stripetti named among the hybrids that hold up better. Tolerance, not immunity.
Set the plants far enough apart that air can move through the patch, and pick a spot in full sun. Tight spacing and shade both push this along.Spacing and siting are settled at planting. Crowded, shaded, poorly ventilated plantings favor it, and these fungi work in humid air without needing free water on the leaf, so ventilation counts for more here than foliage drying time.
Aim the hose at the soil around the plants rather than wetting the leaves from above.Overhead watering is called out as something to avoid, though the mechanism is weaker for this pathogen than for the wet-leaf diseases, since it can infect without leaf wetness. Keep it as a standing habit for the bed.
Strip off the leaves that are worst hit as you come across them.Pulling the most heavily coated leaves lowers what is left to sporulate from. Once the fungus is general across the canopy this is damage limitation rather than a fix.
Start looking the plants over in midsummer, and at the first white patches put on a labeled fungicide such as sulfur, getting it onto both sides of the leaves. Once the coating has spread across the plant there is little left to do, so the early treatment is the one that counts.Sulfur at first symptom with both leaf surfaces covered is the window that pays, and midsummer scouting is what makes that timing possible. Missing it costs early defoliation, which shortens the season, cuts fruit size and the sugars, and leaves fruit open to sunscald.
The bottom rungs are products with label rules: timing, pollinators, and days to wait before harvest. Before you spray →
The ladder troubleshoots from the gentlest solution to the strongest. Start with the gentlest option and only move on when and if it doesn't work.
Where downy mildew is a regular visitor in your area, look for a variety described as resistant and pick that one if it suits what you want to grow.Resistant selections, where they exist, are the pre-season lever, and they earn their place in regions where humid spells arrive reliably enough to drive infection year after year.
Leave enough gap between plants that the foliage dries out quickly after rain or dew. Drying time is what you are buying, since this disease needs wet leaves before it can infect.Wider spacing cuts how long the foliage stays wet, and that duration is what governs infection. A crowded planting that holds moisture is where it moves through fastest.
Deliver the water down at soil level. Sprinkling over the canopy leaves the foliage wet, and wet foliage is what this disease needs to take hold.Leaf wetness is the infection requirement, and overhead irrigation is the input you control, so putting water in at the soil line takes it out. Dew and rainfall keep supplying the rest.
Take off the leaves that are badly spotted, and wait until the vines have dried before you go in among them.Strip the heavily infected leaves and stay out of wet foliage while working. This reduces the inoculum on hand, but the spores arrive on the wind, so sanitation will not hold the disease by itself.
No spray for this one. Prevention is the control.
The ladder troubleshoots from the gentlest solution to the strongest. Start with the gentlest option and only move on when and if it doesn't work.
An infected plant cannot be saved, so take the wilting ones out of the bed and destroy them rather than leaving them where they stand. Before you pull one, cut a wilted stem and ease the two cut ends apart slowly. If it is this disease, the sap draws out into thin, sticky white threads.Removal and destruction of collapsing vines is the move left in season, since infection cannot be reversed in the plant. Use the stem-sap strand test to confirm before pulling. Winter squash such as spaghetti squash are described as less susceptible than cucumber and melon, but that is a matter of degree and losses still occur.
What actually controls this is keeping cucumber beetles off the plants, because they carry the germ and pass it on while they feed. Put row cover, a light fabric, over the seedlings and take it off once the flowers open.Excluding the vector from the seedling stage is where control of the disease actually happens, since the bacterium is introduced during feeding. Removal at flowering for pollination means beetle suppression has to carry on unaided from bloom forward.
No spray for this one. Prevention is the control.
Try not to grow spaghetti squash or its relatives in the same spot more than once every 3 years or so. Moving them around the garden each year helps avoid a buildup of pests and disease. Clean up old vines at the end of the season too.Rotate cucurbits on a 3 year cycle, returning spaghetti squash to a given bed no sooner than the third or fourth year, to break the buildup of squash bug, beetle-vectored wilt, and soilborne disease. Clear and remove spent vines at season's end rather than tilling them in, which removes overwintering pest and disease sites and makes rotation more effective.
The plant app sends a timely reminder at every critical moment of your spaghetti squash season. The wording adjusts to whichever you pick: beginner or seasoned. Here are three you'll see in Zone 9.
plant sends the right notification at exactly the right moment, for your zone, your weather, your crops. Founding members lock the rate forever.
We're building this guide with real growers. Got a question we missed? Ask here. We read every one and add the best answers right to this page.
Learned something the hard way? Pass it on. Real growers' tips make this guide better for the next person, and we credit you by name when yours goes live.
If you've grown this crop and you see a date, a temperature, a companion claim, or a recommendation that doesn't match your experience, tell us. Real growers' corrections make this guide better for the next person.
Every date, temperature, spacing, and recommendation on this page is sourced from university cooperative extension publications, peer-reviewed agricultural research, NOAA climate data, and direct extension calendars. Where claims are softer (traditional gardening wisdom not formally documented), we say so.
Spot a data point that doesn't match your experience? Submit a correction; accepted corrections earn full author credit on the page.
Zone-aware seasonal nudges, what's worth planting now, and the occasional recipe from the harvest. No spam, ever.