Today · in your zone
What's happening right now
Off-season for turnip in zone 9.
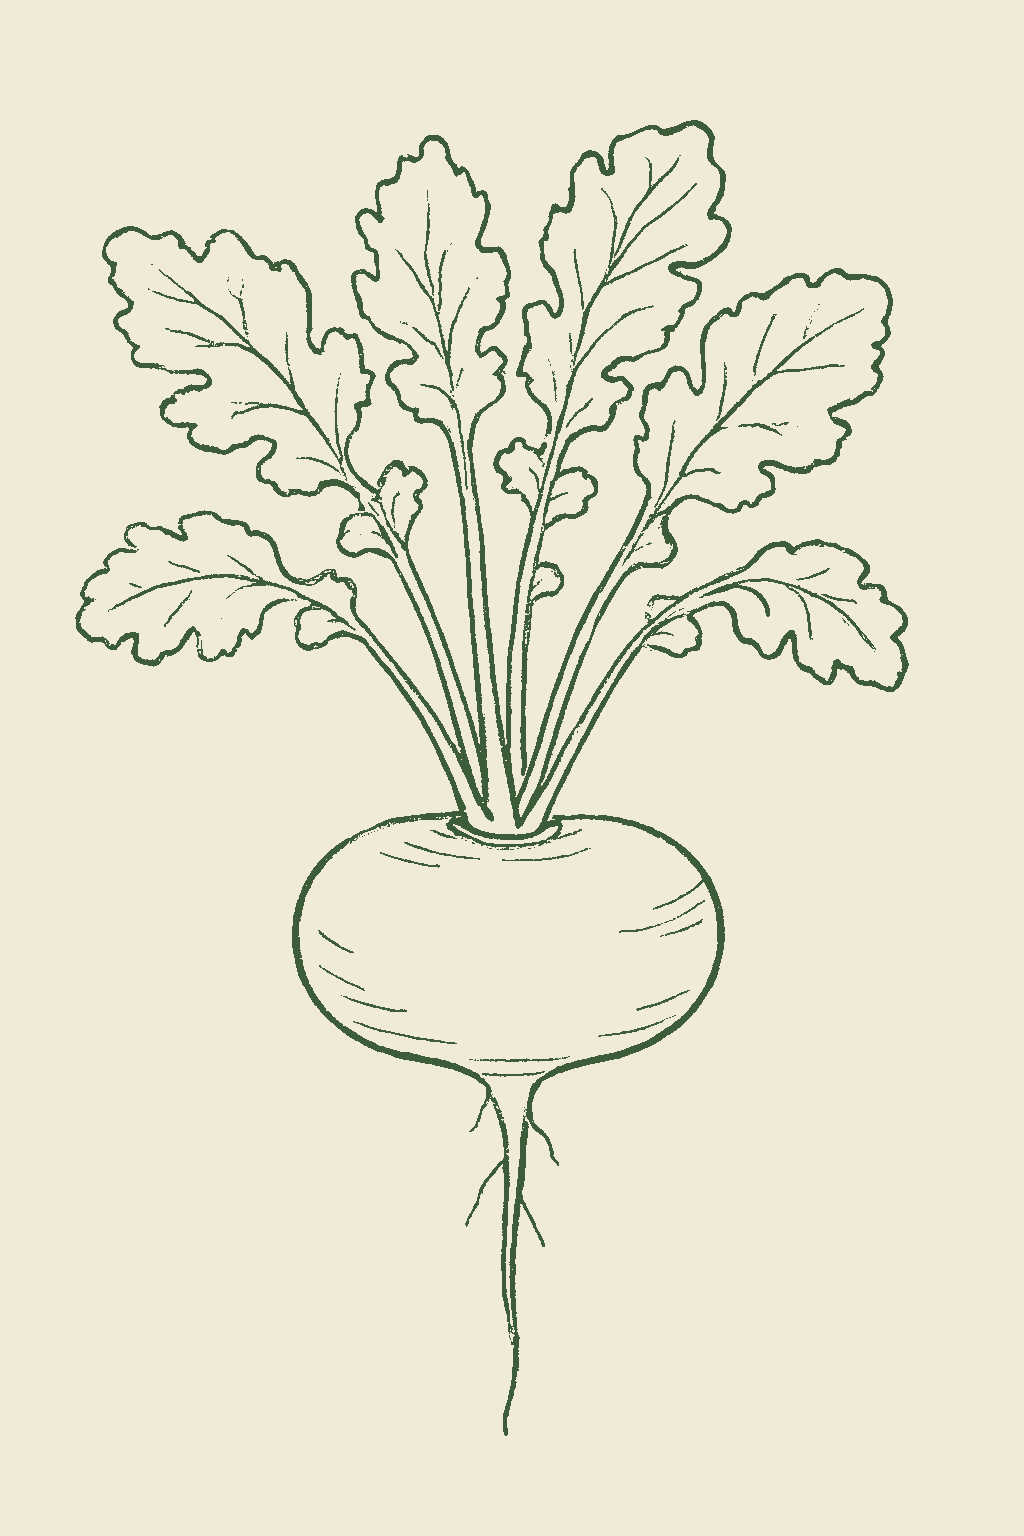
Turnips are a fast cool-weather crop in the cabbage family that you grow for two foods at once: the round root and the leafy greens, which you cook like collards or spinach. You plant the seeds right in the garden, and they are quick: they sprout in about a week to ten days, and most are ready in roughly 40 to 60 days, with fast salad kinds ready in about 35 days and greens sooner. Roots taste best pulled small, about 2 to 3 inches across; in heat above about 75°F they turn woody and strong-tasting, and hot, long days make the plant flower (bolt), so the fall crop is usually the best one. Turnips handle frost and get sweeter in cool weather. Because turnips are a cabbage-family plant, their bugs and diseases are the cabbage-family ones (flea beetle, cabbage maggot, aphids, harlequin bug, plus clubroot and some leaf diseases), so you rotate and group them with cabbage and kale, not with carrots. When you plant depends on your climate: spring and fall where summers are cool, and fall through early spring where summers are hot. Turnip (Brassica rapa) is a fast, cool-season, dual-purpose crop in the cabbage family (Brassicaceae), grown for both its swollen root and its edible leaves, the turnip greens cooked like collards or spinach. It is direct-sown and quick: seed germinates in about 7 to 10 days, and most varieties size a usable root in roughly 40 to 60 days, with fast salad types ready in about 35 days and greens harvestable sooner. Roots are sweetest, mildest, and most tender pulled at about 2 to 3 inches across; sustained heat above about 75°F turns them woody, pithy, and sharp, and long days plus heat push the plant to bolt, so the fall crop is the prime one in most climates. Turnips tolerate frost and sweeten in cool weather. As a brassica, turnip's pests and diseases are the cabbage-family set, flea beetle, cabbage maggot, aphids, and harlequin bug, with clubroot, white rust, downy mildew, Alternaria leaf spot, and black rot, so it is rotated and grouped with the cole crops, not with carrots. The planting season inverts by climate: spring and fall where summers are cool, and fall through early spring where summers are hot.
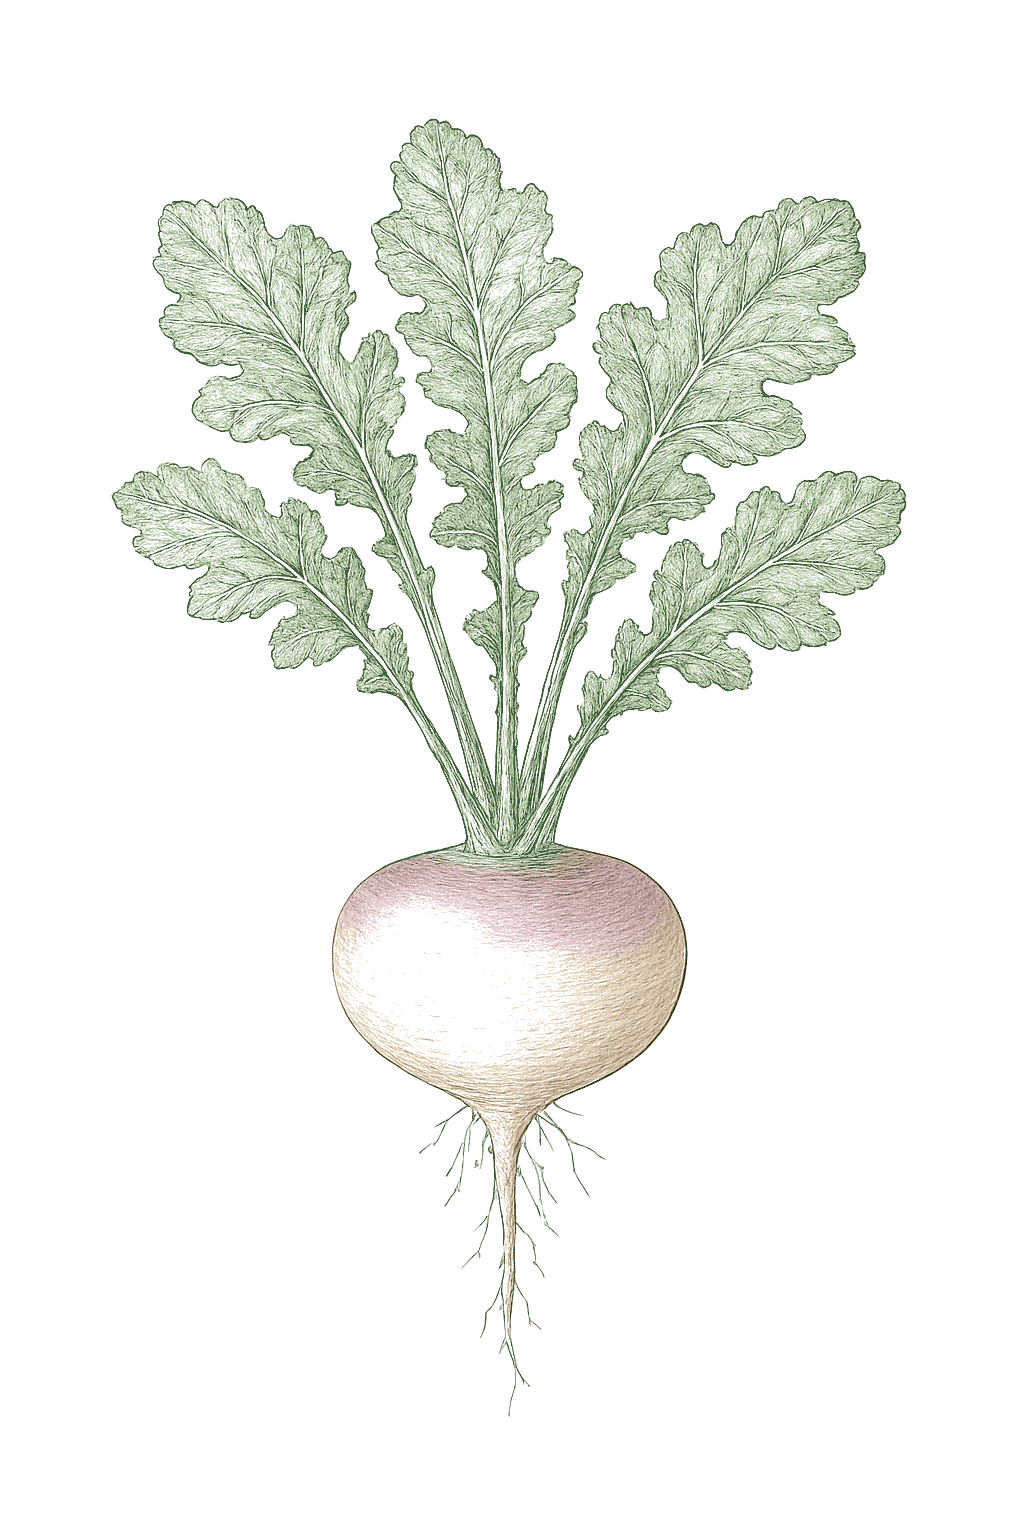
Off-season for turnip in zone 9.
Zone 9 averages a last frost around March 1. Within Zone 9, the colder half (9a, winters down to 20°F) runs about a week later. The warmer half (9b, winters down to 25°F) runs about a week earlier. The plant app picks your subzone from your ZIP.
| Subzone | Last spring | First fall | Growing days | Winter min | Fruits reliably |
|---|---|---|---|---|---|
| 9a | Mar 8 | Nov 24 | ~261 | 20-25°F | Yes · two seasons |
| 9b | Feb 28 | Nov 30 | ~275 | 25-30°F | Yes · two seasons |
Averages from 8 weather stations per subzone, drawn from NOAA 1991-2020 Climate Normals. Your actual frost date can vary by up to two weeks based on elevation, proximity to water, and local topography.
In Zone 9, turnip can be planted February through May, then again September, skipping the summer heat. Harvest runs April through December.
Instead of planting all your turnips at once, sow a short row every 3 to 4 weeks. That way they are ready a few at a time over several weeks. In places with cool summers, start in spring and keep going into early summer, then sow again in late summer for the main fall crop. In hot-summer places, grow them in fall, winter, and early spring and skip the summer heat. The fall crop is usually the best one.Turnips succession well: sow a short row every 3 to 4 weeks through the cool-season window rather than one large planting, so roots mature in sequence. In cold-summer climates that means spring through early summer, then a late-summer sowing for the main fall crop; in hot-summer climates it means fall through early spring, skipping the heat. Stop spring sowings before sustained heat, since turnips maturing in hot soil turn woody, pithy, and strong and tend to bolt. The fall crop is the prime one in most regions.
In Zone 9, turnip can be planted August through March, skipping the summer heat. Harvest runs October through April.
Instead of planting all your turnips at once, sow a short row every 3 to 4 weeks. That way they are ready a few at a time over several weeks. In places with cool summers, start in spring and keep going into early summer, then sow again in late summer for the main fall crop. In hot-summer places, grow them in fall, winter, and early spring and skip the summer heat. The fall crop is usually the best one.Turnips succession well: sow a short row every 3 to 4 weeks through the cool-season window rather than one large planting, so roots mature in sequence. In cold-summer climates that means spring through early summer, then a late-summer sowing for the main fall crop; in hot-summer climates it means fall through early spring, skipping the heat. Stop spring sowings before sustained heat, since turnips maturing in hot soil turn woody, pithy, and strong and tend to bolt. The fall crop is the prime one in most regions.
In Zone 9, turnip can be planted September through January, skipping the summer heat. Harvest runs November through April.
Instead of planting all your turnips at once, sow a short row every 3 to 4 weeks. That way they are ready a few at a time over several weeks. In places with cool summers, start in spring and keep going into early summer, then sow again in late summer for the main fall crop. In hot-summer places, grow them in fall, winter, and early spring and skip the summer heat. The fall crop is usually the best one.Turnips succession well: sow a short row every 3 to 4 weeks through the cool-season window rather than one large planting, so roots mature in sequence. In cold-summer climates that means spring through early summer, then a late-summer sowing for the main fall crop; in hot-summer climates it means fall through early spring, skipping the heat. Stop spring sowings before sustained heat, since turnips maturing in hot soil turn woody, pithy, and strong and tend to bolt. The fall crop is the prime one in most regions.
In Zone 9, turnip can be planted February through September. Harvest runs April through November.
Instead of planting all your turnips at once, sow a short row every 3 to 4 weeks. That way they are ready a few at a time over several weeks. In places with cool summers, start in spring and keep going into early summer, then sow again in late summer for the main fall crop. In hot-summer places, grow them in fall, winter, and early spring and skip the summer heat. The fall crop is usually the best one.Turnips succession well: sow a short row every 3 to 4 weeks through the cool-season window rather than one large planting, so roots mature in sequence. In cold-summer climates that means spring through early summer, then a late-summer sowing for the main fall crop; in hot-summer climates it means fall through early spring, skipping the heat. Stop spring sowings before sustained heat, since turnips maturing in hot soil turn woody, pithy, and strong and tend to bolt. The fall crop is the prime one in most regions.
In Zone 9, turnip can be planted September through May, skipping the summer heat. Harvest runs November through May.
Instead of planting all your turnips at once, sow a short row every 3 to 4 weeks. That way they are ready a few at a time over several weeks. In places with cool summers, start in spring and keep going into early summer, then sow again in late summer for the main fall crop. In hot-summer places, grow them in fall, winter, and early spring and skip the summer heat. The fall crop is usually the best one.Turnips succession well: sow a short row every 3 to 4 weeks through the cool-season window rather than one large planting, so roots mature in sequence. In cold-summer climates that means spring through early summer, then a late-summer sowing for the main fall crop; in hot-summer climates it means fall through early spring, skipping the heat. Stop spring sowings before sustained heat, since turnips maturing in hot soil turn woody, pithy, and strong and tend to bolt. The fall crop is the prime one in most regions.
In Zone 9, turnip can be planted January through August. Harvest runs September through March.
Instead of planting all your turnips at once, sow a short row every 3 to 4 weeks. That way they are ready a few at a time over several weeks. In places with cool summers, start in spring and keep going into early summer, then sow again in late summer for the main fall crop. In hot-summer places, grow them in fall, winter, and early spring and skip the summer heat. The fall crop is usually the best one.Turnips succession well: sow a short row every 3 to 4 weeks through the cool-season window rather than one large planting, so roots mature in sequence. In cold-summer climates that means spring through early summer, then a late-summer sowing for the main fall crop; in hot-summer climates it means fall through early spring, skipping the heat. Stop spring sowings before sustained heat, since turnips maturing in hot soil turn woody, pithy, and strong and tend to bolt. The fall crop is the prime one in most regions.
In Zone 9, turnip can be planted February through March, then again August through September, skipping the summer heat. Harvest runs April through May.
Instead of planting all your turnips at once, sow a short row every 3 to 4 weeks. That way they are ready a few at a time over several weeks. In places with cool summers, start in spring and keep going into early summer, then sow again in late summer for the main fall crop. In hot-summer places, grow them in fall, winter, and early spring and skip the summer heat. The fall crop is usually the best one.Turnips succession well: sow a short row every 3 to 4 weeks through the cool-season window rather than one large planting, so roots mature in sequence. In cold-summer climates that means spring through early summer, then a late-summer sowing for the main fall crop; in hot-summer climates it means fall through early spring, skipping the heat. Stop spring sowings before sustained heat, since turnips maturing in hot soil turn woody, pithy, and strong and tend to bolt. The fall crop is the prime one in most regions.
In Zone 9, turnip can be planted October through December. Harvest runs December through February.
Instead of planting all your turnips at once, sow a short row every 3 to 4 weeks. That way they are ready a few at a time over several weeks. In places with cool summers, start in spring and keep going into early summer, then sow again in late summer for the main fall crop. In hot-summer places, grow them in fall, winter, and early spring and skip the summer heat. The fall crop is usually the best one.Turnips succession well: sow a short row every 3 to 4 weeks through the cool-season window rather than one large planting, so roots mature in sequence. In cold-summer climates that means spring through early summer, then a late-summer sowing for the main fall crop; in hot-summer climates it means fall through early spring, skipping the heat. Stop spring sowings before sustained heat, since turnips maturing in hot soil turn woody, pithy, and strong and tend to bolt. The fall crop is the prime one in most regions.
In Zone 9, turnip can be planted September through March, skipping the summer heat. Harvest runs November through April.
Instead of planting all your turnips at once, sow a short row every 3 to 4 weeks. That way they are ready a few at a time over several weeks. In places with cool summers, start in spring and keep going into early summer, then sow again in late summer for the main fall crop. In hot-summer places, grow them in fall, winter, and early spring and skip the summer heat. The fall crop is usually the best one.Turnips succession well: sow a short row every 3 to 4 weeks through the cool-season window rather than one large planting, so roots mature in sequence. In cold-summer climates that means spring through early summer, then a late-summer sowing for the main fall crop; in hot-summer climates it means fall through early spring, skipping the heat. Stop spring sowings before sustained heat, since turnips maturing in hot soil turn woody, pithy, and strong and tend to bolt. The fall crop is the prime one in most regions.
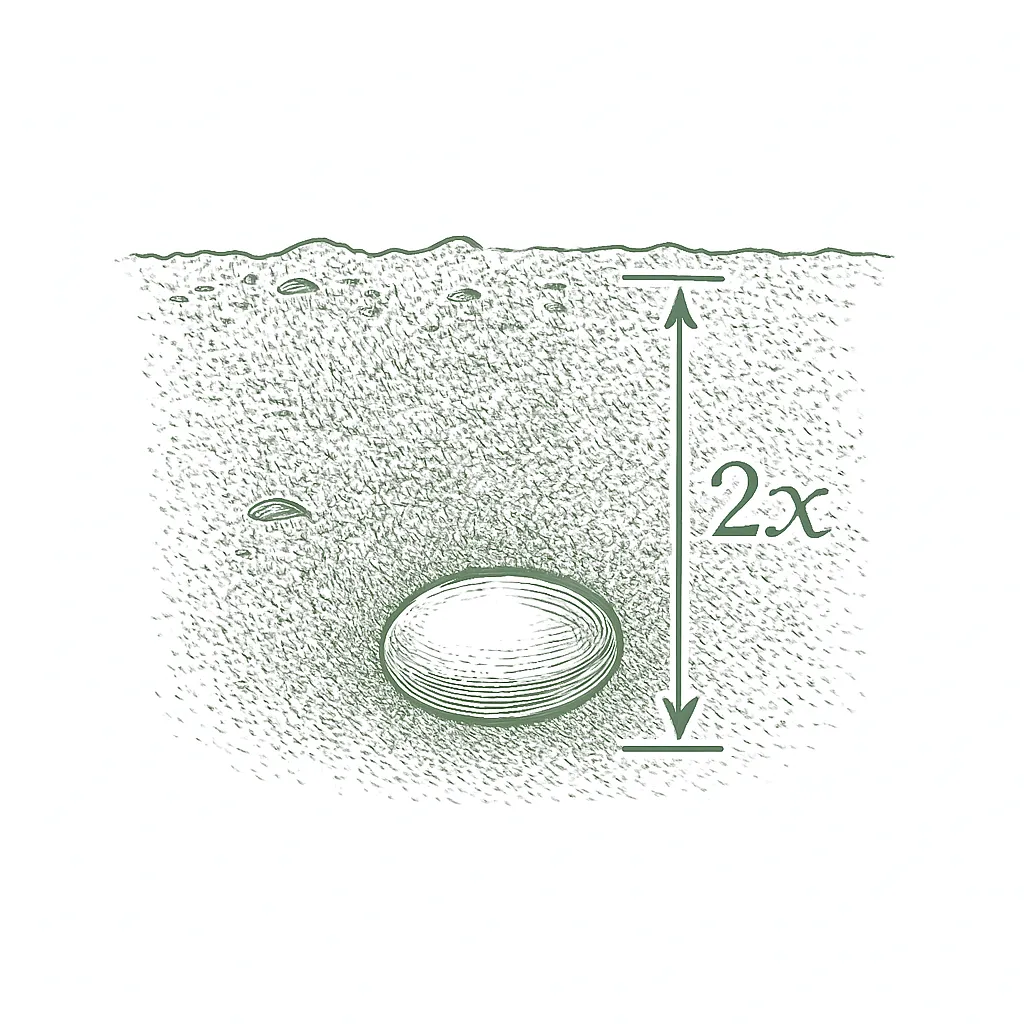
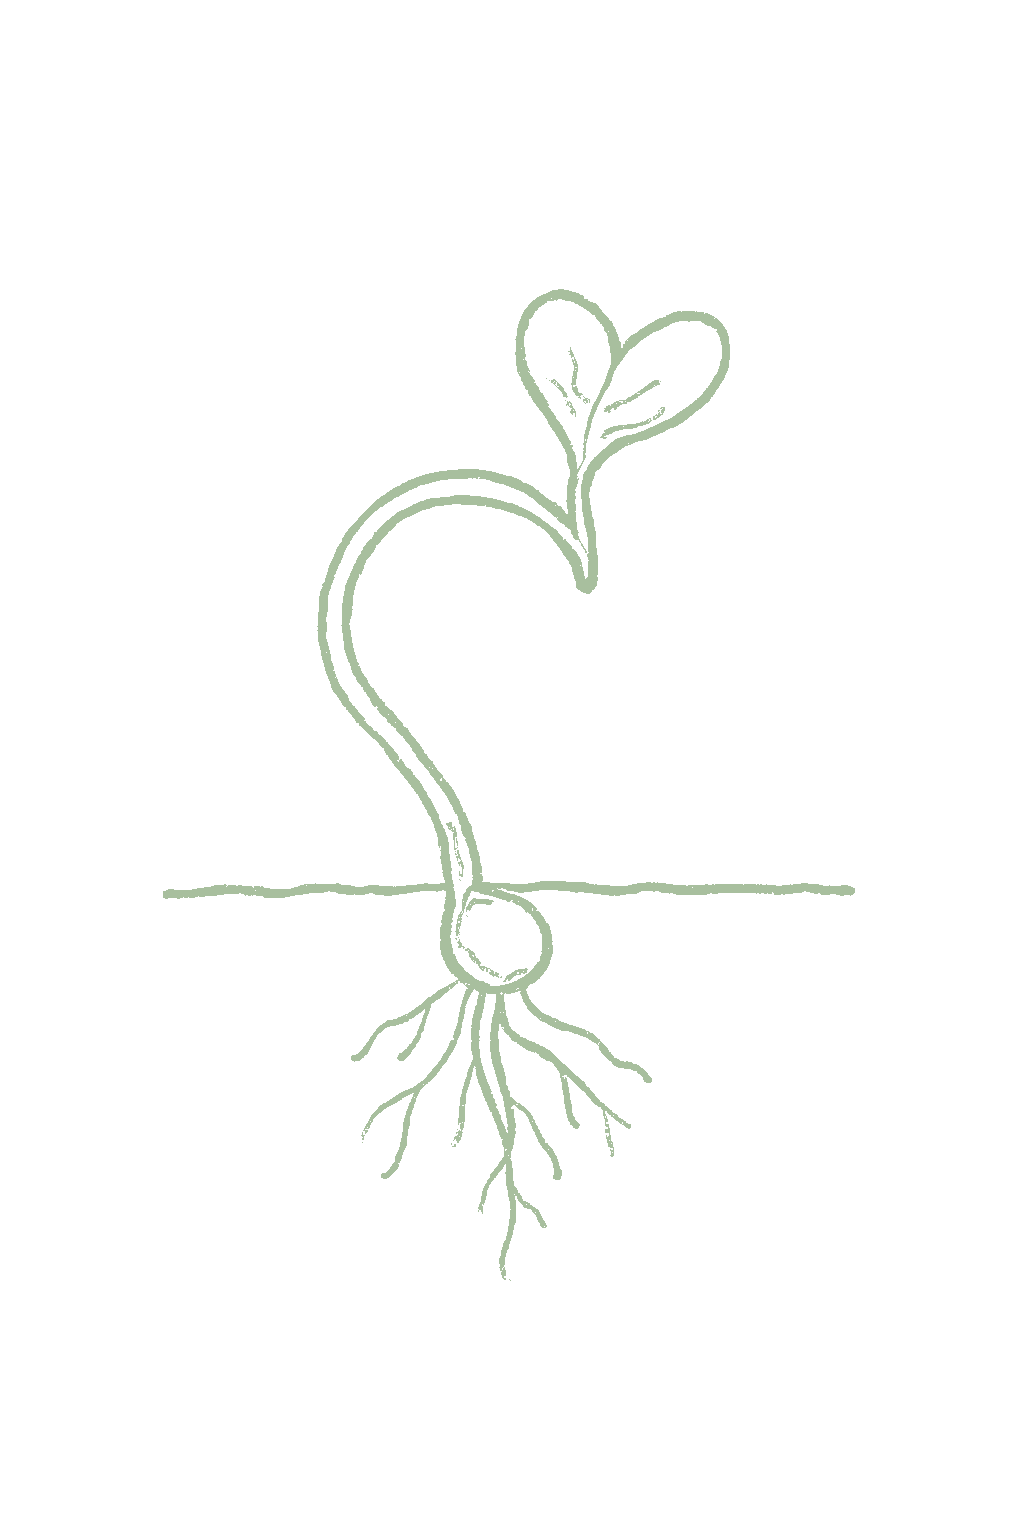
Plant turnip seeds right in the garden where they will grow, since turnips do not like being moved. Sow them about 1/4 to 1/2 inch deep once the soil is no longer frozen or soggy (about 40 to 45°F), roughly 2 to 3 weeks before your last spring frost, and again in late summer for a fall crop, which is usually the best crop. They sprout in about 7 to 10 days. Plant a little thick and plan to thin them later; the little plants you pull out are tasty baby greens. Keep the soil surface damp until the sprouts appear.Direct-sow turnips into the garden; they grow fast from seed in place and, like most root crops, do not transplant well. Sow about 1/4 to 1/2 inch deep once the soil is workable and at least 40 to 45°F, roughly 2 to 3 weeks before the last spring frost, and again in late summer for the fall crop, which is the better crop in most climates. Seeds germinate best at about 60 to 85°F and emerge in roughly 7 to 10 days. Sow a little thick and plan to thin: the thinnings are edible baby greens. Keep the surface moist and uncrusted until the seedlings emerge.




Not sure what soil you have? Grab a small handful of damp soil from your garden bed and squeeze it. If it crumbles apart easily, it's sandy. If it holds together but breaks when you poke it, it's loam (what most vegetables want). If it stays in a hard, slippery ball, it's clay.
Turnips like loose, fertile, well-drained soil with no hard layer underneath. Loosen the bed about 8 to 10 inches down and rake out rocks and clods, because the root grows rounder and smoother in loose soil and comes out forked or lumpy in packed, stony ground. Mix in some compost or well-rotted (never fresh) manure, since fresh manure can make the roots branch and grow hairy. Aim for a soil pH around 6.0 to 6.8. If clubroot, a disease that swells and deforms the roots, has been a problem in your garden, adding lime to raise the pH closer to 7.0 to 7.2 helps hold it back.
Mix 2-3 inches of compost into the top 6 inches of your bed before planting. Compost holds moisture (which sandy soil drains too fast) and adds the nutrients sandy soil tends to lack. Repeat each season. Compost breaks down over time.
Mix 2-3 inches of compost AND a few inches of coarse sand or perlite into the top 6 inches of your bed. The compost feeds the plants; the sand breaks up the clay so air and water can move through. Don't add sand without compost. It can compact like concrete.
If amending your soil sounds like too much work, or if your soil is heavy clay, full of rocks, or contaminated, build over it. A raised bed at least 12 inches deep filled with a 50/50 mix of compost and sandy loam gives you ideal growing soil with no battles. A 5-gallon container with quality potting mix does the same for one plant at a time. Both bypass your native soil entirely.
The numbers that matter, at a glance.
Turnips are a good container crop, even better than carrots for shallow pots, because the root sits near the surface. Use a pot at least 8 inches deep with drainage holes and loose potting mix, keep the soil evenly moist, and thin the seedlings to about 3 to 4 inches apart. A wide, shallow tub also makes a nice greens-only crop you can snip and let regrow.Turnips suit containers well and tolerate shallower pots than carrots since the round root swells near the surface. Use a container at least 8 inches deep with drainage holes and a loose potting mix, keep moisture even to keep roots tender and mild, and thin to a final 3 to 4 inches apart. A wide, shallow tub is also well suited to a cut-and-come-again greens crop, and a loose soilless mix avoids introducing clubroot.
Ask what your balcony or roof can carry
A balcony or roof can only hold so much weight. Before you set heavy pots there, ask a building architect what it can safely carry.Illinois Extension's guidance is to consult a building architect about weight limits before placing heavy pots on a balcony or rooftop garden. It gives no weight figure.
Never grow food in a container with anything toxic in it
Many kinds of containers can be used. Whatever you choose, keep anything toxic out of it, especially if you are growing food.Colorado State accepts nearly any container material but warns against using a container that holds toxic materials, especially for edible plants. Illinois adds that a vegetable container should be free of chemicals toxic to plants or people, and urges caution with treated lumber when growing food. If you cannot account for what a repurposed container once held, that alone is a reason to keep food out of it.
Secure hanging containers well
Fasten hanging baskets and window or rail boxes securely. Think about what is below them too, since they can drip on people or things underneath.Illinois Extension asks growers to secure hanging containers well and to think through the safety issues of hanging them. Placement matters too, since a hanging container can drip onto people or belongings below.
Soil pH measures how acidic or alkaline your soil is, on a scale from 1 to 14 where 7 is neutral. Turnips like it slightly acidic to neutral, about 6.0 to 6.8, though they grow across a fairly wide range. A cheap soil test from your local extension office tells you your number and whether to add lime. One turnip-specific point: a root disease called clubroot is worse in acidic soil, so if your turnips have come out swollen and deformed, raising the pH toward 7.0 to 7.2 with lime helps hold the disease back.Turnips grow best at a slightly acidic to neutral pH of about 6.0 to 6.8; Clemson recommends maintaining roughly 6.0 to 6.5, and Minnesota gives a workable range of about 6.0 to 7.5. The brassica-specific reason to watch pH is clubroot: the pathogen is favored by acidic soil, and the standard cultural control is to lime the bed toward a neutral to slightly alkaline pH of about 7.2 to 7.5 where the disease is established. There is thus a mild tension between the ideal growing pH and the clubroot-suppressing pH, resolved by liming only on a clubroot-prone bed. A standard soil test from your local extension office removes the guesswork before sowing.
Turnips do not need heavy feeding. Mix a balanced fertilizer and some compost into the bed before planting, and give one light feeding later only if the plants look weak and pale. Go easy on nitrogen if you want good roots, because too much grows big leafy tops and small roots. If you are growing turnips mainly for the greens, a little extra nitrogen is fine, since the leaves are what you are after. Do not use fresh manure, which makes the roots hairy and forked.Turnips are light to moderate feeders. Work well-finished compost and a balanced fertilizer into the bed before sowing, then side-dress lightly once the tops are established if growth is weak. The key brassica-root caution is nitrogen: excess nitrogen grows lush tops at the expense of the root and can leave roots small and poorly formed, so go easy where you want good roots. A crop grown mainly for greens tolerates and even rewards more nitrogen, since the leaves are the harvest. Avoid fresh manure, which both over-supplies nitrogen and causes hairy, branched roots.
The three numbers on a fertilizer bag are nitrogen, phosphorus, and potassium (N-P-K). Turnips do well with a balanced blend where the numbers are about even, like a 10-10-10, mixed into the soil before planting along with compost. Do not pile on high-nitrogen fertilizer if you want roots, since it grows leaves instead. If you are after the greens, a bit more nitrogen is okay.Turnips want steady phosphorus and potassium for root development plus modest nitrogen, so a balanced blend such as a 10-10-10 worked into the bed before sowing suits a root crop, with most of the feeding coming from incorporated compost. Hold back on nitrogen for roots, since it pushes leafy tops over the root; a greens crop can take more. Skip fresh manure, which over-supplies nitrogen and branches the roots.
Turnips are easygoing neighbors. They share a bed nicely with leafy greens like lettuce, with onions and other alliums, which grow upright and shallow and do not crowd the roots, and they do well following beans or peas that added nitrogen to the soil. The main plants to keep away from turnips are their own cabbage-family relatives: cabbage, broccoli, kale, radish, and mustard. These cousins share the turnip's pests, the flea beetle and the cabbage maggot, plus the soil disease clubroot, so growing them together lets those problems build up. As always, do not trust every companion chart online, since many of their claims have never been tested. Turnips fit easily into mixed beds, and their clearest companion rule is the brassica avoid: keep them away from the other cabbage-family crops (cabbage, broccoli, kale, radish, mustard), which share the turnip's flea beetles, cabbage maggot, and the soilborne clubroot pathogen, so clustering the family concentrates that pressure. On the positive side, leafy greens like lettuce and shallow-rooted alliums share the surface layer while the turnip swells just below, and a legume grown the season before leaves nitrogen behind. Treat the good pairings as sensible defaults rather than proven effects: as University of Minnesota's research review stresses, most companion-planting claims are tradition rather than tested science, so use them as a starting point and watch your own results.
Turnips give you two harvests. You can pick the leaves young all along, taking a few outer ones per plant so the root keeps growing, and the seedlings you thin out are your first baby greens. The roots are ready by size, not a set date: brush the soil off a shoulder and pull when the turnip is about 2 to 3 inches across, the sweet, tender stage, usually around 50 to 60 days, sooner for salad kinds. Do not let them get too big or sit through hot weather, which makes them woody and strong. There is no rush in cool weather: they get sweeter after a light frost and hold in the ground. In cold areas, pile straw over the row and dig them into early winter until the ground freezes. Pull by hand, or loosen with a fork in heavy soil, and cut off the tops, keeping the greens to cook and storing the roots separately.Turnips are a dual harvest. The leaves can be picked young throughout, taking a few outer leaves per plant so the root keeps sizing; the thinnings at the seedling stage are the first baby greens, and greens-type varieties are cut and allowed to regrow. The roots are ready by size rather than the calendar: brush soil from a shoulder and pull when it is about 2 to 3 inches across, the sweet, tender, mild stage, which for most main-crop varieties lands near 50 to 60 days and for salad types sooner. Do not let roots oversize or sit in heat, which turns them woody, pithy, and strong. There is no rush in cool weather: flavor sweetens after light frost, and roots hold in the ground. In cold regions a heavy straw mulch lets you dig through early winter until the ground freezes hard. Lift by hand, or loosen with a fork in heavier soil, and cut off the tops, keeping the greens for the kitchen and storing the roots separately.
Each plant gives you one turnip root, plus leaves you can eat as it grows. It helps to think by row length: a 10-foot row gives roughly 5 to 10 pounds of turnips depending on size, plus greens picked as outer leaves and thinnings.One root per plant, plus a flush of edible leaves along the way. Yield is best thought of by row length: at a 2 to 3 inch final spacing, a 10-foot row yields roughly 5 to 10 pounds of roots depending on size at harvest, alongside greens taken as outer leaves and thinnings. A greens-only crop yields more leaf per foot of row.
Turnips do not regrow a new root after you pull them, since each plant makes one root. A planting is ready about 50 to 60 days after sowing and you harvest it over a couple of weeks, while the leaves give a longer, light harvest. For a steady supply, plant a new short row every 3 to 4 weeks.There is no repeat root harvest; a sowing matures over a short window roughly 50 to 60 days after planting and is pulled over a couple of weeks. The greens give a longer, light pick-as-you-go harvest. Continuous supply comes from succession sowing every 3 to 4 weeks through the cool-season window. Turnips are grown fresh from seed each year, so your very first planting can do just as well as any later one. The main things that decide your results are loose soil, thinning the seedlings, and keeping the bed evenly damp.Turnips are an annual grown fresh from seed every season, so there is no first-year-versus-later distinction as with perennials; the first sowing performs as well as any, provided the soil is loose, the stand is thinned, and moisture stays even.
There are turnips for different uses. Purple Top White Globe is the dependable classic for both roots and greens, ready in about 50 to 55 days. For sweet, mild turnips you can eat raw, look for fast salad types like Hakurei or Tokyo, ready in about 35 to 40 days. If you mainly want the leafy greens, grow Shogoin or Seven Top (which makes greens but no real root). Golden Ball has sweet yellow flesh and Scarlet Queen has red skin. Plant salad and greens kinds a bit thicker and pick them young; let regular turnips grow to about 2 to 3 inches across.Turnip variety choice splits by purpose and speed. Purple Top White Globe is the dependable all-rounder for roots and greens, maturing in about 50 to 55 days; for a sweet, mild root eaten raw, the fast white salad types (Hakurei, Tokyo Cross) are ready in roughly 35 to 40 days. Greens growers choose leafy types such as Shogoin or the rootless Seven Top, which put their energy into abundant tops. For color and flavor, Golden Ball offers sweet yellow flesh and Scarlet Queen a red skin. Sow salad and greens types thicker and harvest young; let main-crop and storage types size to about 2 to 3 inches. Full-size storage roots can take 60 to 80 days.
The ladder troubleshoots from the gentlest solution to the strongest. Start with the gentlest option and only move on when and if it doesn't work.
When the season winds down, clear out the old plants and nearby weeds. The beetles spend the winter hiding in leftover leaf litter and weedy spots, so removing that shelter means fewer of them show up hungry next spring.Adults overwinter in leaf litter and along weedy field edges; removing crop debris and weeds at season's end cuts the overwintering population that emerges onto early spring crucifers.
Lean on fall plantings where you can. These beetles do most of their damage in spring and early summer and ease off as the weather heats up, so a fall turnip crop usually faces fewer of them. Whenever you plant, keep the patch growing fast with steady water so it can grow through light chewing.Pressure peaks in spring and early summer and tapers as the season warms, so favoring fall sowings sidesteps the heaviest feeding window. A vigorous, evenly watered stand typically outgrows light feeding in any season; the vulnerable stage is the seedling.
For early spring sowings, lay a floating row cover, a light fabric that lets in light and water but keeps insects out, over the bed right at sowing and tuck the edges into the soil. Sealed well, it keeps the beetles off entirely, and it is the surest home defense. This matters most if you are growing turnips for greens, since the chewed leaves are the part you eat.A cover set at sowing and sealed at the edges excludes the beetles outright and is the most reliable home defense for spring seedbeds. It protects the two things at stake: seedlings that lose leaf area slow down, and on a greens crop the riddled foliage is the harvest itself.
Dusting the plants with kaolin clay, a fine white clay coating, can cut down on the beetles' feeding. It reduces damage rather than wiping the beetles out, so use it alongside the other steps.A kaolin coating reduces feeding pressure on exposed plantings. It is a repellent barrier rather than a knockdown, so treat it as a supplement to exclusion and timing rather than a substitute.
If seedlings are losing a lot of leaf despite everything else, roughly a quarter to a third of their leaf area, a spinosad spray is a labeled option. Check the plants in the cool of the morning, when the beetles are slow and easier to size up, and follow the label.Spinosad is a labeled option when a seedling stand is losing more than roughly a quarter to a third of its leaf area. Scout in the cool morning while the beetles are sluggish to judge whether that threshold has actually been crossed before spraying.
The bottom rungs are products with label rules: timing, pollinators, and days to wait before harvest. Before you spray →
The ladder troubleshoots from the gentlest solution to the strongest. Start with the gentlest option and only move on when and if it doesn't work.
Plant turnips away from spots that grew cabbage-family crops recently. The fly's pupae, its resting stage, wait in the soil where those crops were, so moving the bed keeps the new crop away from them.The insect overwinters as pupae in soil that carried crucifers, so rotating turnips and their relatives away from recent brassica ground reduces the carryover population emerging under the new planting.
Favor fall plantings where you can. This pest is at its worst in cool, damp spring weather, and fall crops usually see fewer maggots.Damage concentrates in cool, moist spring conditions, so shifting the crop to a fall sowing puts it outside the period of heaviest pressure.
A turnip that is already tunneled cannot be fixed, but do not just leave it. Pull it and throw it away, not in the compost, so the maggots inside never get the chance to turn into the next round of flies. Think of a ruined root as an early warning that tells you to protect the rest.There is no rescue for a scored root, but pulling and destroying infested turnips before the larvae pupate removes them from the cycle; do not compost them. A tunneled root is unsalable but useful as a sentinel that the bed is carrying the pest.
The best home defense is a floating row cover, a light fabric sheet, laid over the bed right after sowing with the edges tucked in, so the flies can never reach the plants to lay their eggs. One catch: make sure the soil is not already carrying flies from an earlier cabbage-family crop, or you seal them in with your turnips.A cover sealed at the edges at sowing blocks the egg-laying flies and is the most effective home defense. It only works over clean ground; confirm no flies are carrying over in the soil from a previous crucifer crop, or the cover traps them with the plants.
No spray for this one. Prevention is the control.
The ladder troubleshoots from the gentlest solution to the strongest. Start with the gentlest option and only move on when and if it doesn't work.
Go easy on nitrogen fertilizer. Over-fed plants push out soft, lush growth, and that is exactly what these aphids multiply on fastest.Populations build quickest on lush, over-fertilized growth, so a restrained nitrogen program removes the flush that fuels colony buildup without starving the crop.
Pull up cabbage-family weeds growing near the bed. The turnip and cabbage aphids feed only on this plant family, and winged ones fly in from those weeds to start new colonies.Both the turnip aphid and cabbage aphid are crucifer specialists, and winged forms colonize from cruciferous weeds and neighboring brassica crops; controlling those weed hosts removes a standing source of reinfestation.
Check the undersides of the leaves and the new growth now and then so you catch colonies while they are still small, and clear away the old plants at the end of the season. Catching them early matters more here because they can also spread plant viruses, especially if you are eating the greens.Inspect new growth and leaf undersides so colonies are caught small, and clear crop debris at season's end. Early removal earns extra weight on this crop because the aphids can transmit virus, and fall greens crops are where they tend to be most troublesome.
Blast the clusters off with a strong jet of water from the hose. In a home garden that is often all it takes.A forceful water jet dislodges colonies from the foliage and is often sufficient at garden scale; it is a purely physical knockdown that leaves the natural-enemy complex intact.
Let the helpful insects do their share. Ladybugs, lacewings, and tiny parasitic wasps usually bring aphid numbers down on their own, so avoid broad sprays that would kill these helpers along with the pests.Ladybugs, lacewings, and parasitic wasps usually regulate these colonies if conserved; avoiding broad-spectrum sprays is what keeps that service running, since removing the enemies is how a minor aphid problem becomes a persistent one.
If the softer steps are not holding, spray insecticidal soap on the undersides of the leaves where the aphids cluster. Take extra care to soak the dusty-looking cabbage aphid colonies, whose waxy coating shelters them, since the spray only works where it touches.Soap applied to the leaf undersides is effective when knockdown and predators have not held. Coverage is the whole game: the cabbage aphid's waxy bloom protects its colonies, so spray deliberately into them rather than misting the plant in general.
Horticultural oil, a light spray oil, is the other option for coating the colonies. Aim for the undersides of the leaves and the protected clusters, the same as with soap, and avoid spraying in high heat.Horticultural oil is the alternative contact spray, applied to the same targets: leaf undersides and the wax-protected cabbage aphid colonies. Whichever contact material you choose, thoroughness of coverage decides the result.
The bottom rungs are products with label rules: timing, pollinators, and days to wait before harvest. Before you spray →
The ladder troubleshoots from the gentlest solution to the strongest. Start with the gentlest option and only move on when and if it doesn't work.
Clean up old cabbage-family plants and weeds at the end of the season. That is the single biggest help, because the adults spend the winter in exactly that kind of garden trash. During the season, pull and destroy any plant that is badly overrun rather than trying to save it.Adults overwinter in garden debris in warmer regions, so clearing brassica debris and weeds at season's end removes the overwintering sites and is the single most useful step. Removing and destroying heavily infested plants during the season is part of the same discipline.
Change where you plant your cabbage-family crops from year to year rather than using the same bed every time.Rotate brassica plantings so the bugs emerging from last year's site do not find this year's crop waiting in the same spot.
Where this bug comes back year after year, sow a patch of mustard or another cabbage-family plant it prefers, and let the bugs gather on it so you can take them out together. This crop's guidance treats the patch as a way to concentrate them for removal, so plan on pulling it rather than keeping it, and see this method's cautions for when.A mustard stand, or another preferred crucifer, concentrates the bugs where they can be taken out in one pass, which is how this crop's guidance frames it: a tactic for a recurring problem rather than a routine step. Removal is the payoff, and this method's cautions set when it has to happen.
Check the plants and pick off the showy black-and-orange bugs and their young, and look under the leaves for the odd barrel-shaped eggs laid in two neat striped rows. Drop everything into soapy water. Started early, this works well in a home garden.Handpicking adults, nymphs, and the distinctive double rows of barrel-shaped eggs into soapy water is effective at garden scale when started early; scouting the leaf undersides for the egg rows is what makes the pass thorough.
Insecticidal soap can help against the young bugs, called nymphs, which are softer than the shield-backed adults. It only works on the ones it actually wets, so spray the insects directly.Soap helps on nymphs, the soft-bodied stage; expect much less from it against the armored adults. It is strictly a contact material, so direct the spray onto the insects rather than the foliage.
The bottom rungs are products with label rules: timing, pollinators, and days to wait before harvest. Before you spray →
The ladder troubleshoots from the gentlest solution to the strongest. Start with the gentlest option and only move on when and if it doesn't work.
Do not grow turnips or their cabbage-family relatives in the same bed year after year. This organism survives in the soil for years, so where it has shown up, keep the whole family out of that spot on a multi-year cycle.The pathogen persists in soil as resting spores for many years and builds wherever crucifers are grown repeatedly, so rotate the family out of an affected bed on a multi-year cycle; where the disease is established, a long rotation of several years is advised.
Add lime to raise the soil pH, a measure of how acidic the soil is, toward 7.2 to 7.5, which is neutral to slightly alkaline. Acidic soil favors this disease, and liming to that range holds it back. Save this treatment for the affected bed rather than liming the whole garden.Liming toward a pH of about 7.2 to 7.5 suppresses the pathogen, which is favored by acidic soil. Confine the treatment to the affected ground; most vegetables prefer soil closer to neutral-acidic, so this is a targeted clubroot measure, not general practice.
Fix wet spots before planting. This disease is worst in soil that stays wet and drains poorly, so better drainage takes away the conditions it likes.Wet, poorly drained soil favors infection, so improving drainage in the bed removes one of the two soil conditions, alongside acidity, that drive the disease.
There is no cure once a plant has it, so pull the stunted, clubbed-root plants and throw them away, never in the compost. Clean the soil off your tools afterward, since the disease travels on dirt carried from an infected bed.Infected plants cannot be cured; remove and destroy them without composting. The pathogen also moves on contaminated soil, tools, and transplants, so clean equipment after working an infested bed and avoid transferring its soil elsewhere.
No spray for this one. Prevention is the control.
The ladder troubleshoots from the gentlest solution to the strongest. Start with the gentlest option and only move on when and if it doesn't work.
If white rust keeps coming back in your garden, choose a tolerant variety at seed-buying time, one bred to hold up better against the disease.Where the disease recurs, tolerant varieties are the seed-time defense; on a crop grown for greens, foliage that stays cleaner is the harvest protected.
Move your cabbage-family plantings around instead of using the same spot repeatedly, since the disease carries over where those crops have grown.The pathogen survives as thick-walled resting spores on crop debris and in soil, so rotating crucifers out of the bed breaks the carryover between plantings.
Clear away wild mustard and other cabbage-family weeds near the bed. This disease lives only on that plant family, and those weeds keep it going between your crops.The water mold is specific to crucifers, and cruciferous weeds carry it near the crop; clearing them removes a standing reservoir the rotation alone does not touch.
Give the plants room, and thin crowded rows, so air moves through and the leaves dry quickly. Cool, damp conditions are what this disease needs.Space and thin for airflow so foliage dries fast; the disease is favored by cool, moist conditions, and drying time is the lever spacing controls.
Water at the soil instead of over the leaves. The spores spread in splashing water, so keeping the foliage dry slows it down.Spores spread by splash as well as air, so basal irrigation instead of overhead watering removes the splash route and shortens leaf wetness.
Pick off infected leaves, and pull the worst plants, and throw them away to slow the spread. Clear old plant debris too, since the disease survives on it. There is no spray for this in a home garden, so these habits are the whole fix.Remove and destroy infected leaves and badly affected plants to reduce spread, and clear the crop debris that carries the resting spores between seasons. No fungicides are registered for home-garden use against it, so the cultural steps carry the entire load.
No spray for this one. Prevention is the control.
The ladder troubleshoots from the gentlest solution to the strongest. Start with the gentlest option and only move on when and if it doesn't work.
Plant turnips away from where cabbage-family crops grew recently. The disease survives on old plant debris and on related plants, so moving the crop helps break the cycle.The pathogen survives on crop debris and related crucifer hosts, so rotating away from recent brassica ground reduces the inoculum waiting under the new planting.
If downy mildew shows up year after year, pick a tolerant variety when you buy seed.Where the disease recurs, tolerant varieties chosen at seed time reduce the pressure the in-season steps have to carry, which matters most on a fall greens crop growing through its favored cool, wet weather.
Space the plants out, and thin crowded spots, so air can move through and dry the leaves. This disease thrives in cool, damp conditions, which is also rainy fall weather, right when turnip greens are growing.Space and thin for airflow so foliage dries quickly. Infection is favored in cool, moist conditions around 50 to 60°F, which lines up with the fall greens season, so drying time is worth real attention.
Water at the soil rather than sprinkling over the leaves. The disease spreads in damp air and splashing water, so dry leaves are your friend.The pathogen spreads in moist air and splashing water, so basal irrigation removes the splash route and keeps the leaf-wetness periods that drive infection as short as possible.
Stay out of the bed while the leaves are wet from rain, dew, or watering. Brushing through wet plants helps carry the disease from leaf to leaf.Avoid working among wet plants; movement through wet foliage spreads the pathogen. This governs when you enter the bed and still applies after rain or dew, which no irrigation choice controls.
Infected leaves cannot be cured, so pick off and throw away the worst ones to slow the spread, and clear old plant debris between seasons since the disease carries over on it.There is no cure for infected tissue; removing and destroying affected leaves reduces spread, and clearing crop debris removes the material the pathogen survives on between crops.
In a stretch of weather that stays wet for weeks, a copper fungicide is a last resort if the steps above are not holding. It works by protecting leaves before the disease lands on them, so it earns little once the disease is everywhere. Keep the spray away from ponds and drains, since copper is harmful to fish, and follow the label.Copper is the last resort for a persistently wet season when cultural control is not holding. It is protectant in action, so it belongs early in an outbreak rather than after spread. Copper is highly toxic to aquatic life and accumulates in surface soil with repeat use, so keep it away from water, limit how often you rely on it across seasons, and follow the label rate to avoid foliage injury.
The bottom rungs are products with label rules: timing, pollinators, and days to wait before harvest. Before you spray →
The ladder troubleshoots from the gentlest solution to the strongest. Start with the gentlest option and only move on when and if it doesn't work.
Start with clean seed from a trusted supplier. These fungi can travel on the seed itself, so a clean packet keeps the disease from arriving with the crop.The Alternaria fungi are seedborne, so clean seed is the first control and one of the main home levers; it is set once, at purchase, before anything else matters.
Move turnips and their cabbage-family relatives to a different spot between plantings, since the fungi carry over where those crops grew.The fungi survive on crop debris between seasons, so rotating crucifers out of the bed separates the new crop from the carryover inoculum.
Give the plants room so air moves through and the leaves dry quickly. The spots need wet leaves to take hold, so drying time is most of the battle.Infection requires leaf wetness, so spacing for airflow shortens the wet periods that let spots establish, enlarge, and merge. Alongside clean seed, this is a main home lever.
Water at the soil, in the morning, so any splash dries off fast. The disease spreads in splashing water and needs wet leaves to grow.The fungi spread in splashing water and infect only through wet foliage, so basal morning irrigation removes the splash route and gives leaves the day to dry.
Pick off the worst-spotted leaves as you see them, and clear away old plant material between plantings, since that debris is where the fungi wait for the next crop.Remove badly spotted leaves during the season and clear crop debris between plantings; debris is where the fungi persist, and on a greens crop the spotted foliage is quality lost directly.
In a very wet spell, a copper fungicide can help if you start early, before the spots are widespread. Keep it away from ponds and drains, since copper harms fish, and follow the label.Copper can help in a persistently wet season if started early; as a protectant it offers little once lesions are merging. Copper is highly toxic to aquatic life and builds up in soil with repeated use, so keep it out of waterways, limit reliance on it across seasons, and follow the label rate.
The bottom rungs are products with label rules: timing, pollinators, and days to wait before harvest. Before you spray →
The ladder troubleshoots from the gentlest solution to the strongest. Start with the gentlest option and only move on when and if it doesn't work.
Start with clean, disease-free seed. This bacterium can ride in on the seed itself, and along with rotation it does most of the work of keeping the disease out of a home garden.The bacterium is seedborne, so clean, disease-free seed is the foundational control; together with rotation it carries most of the home-garden defense.
Keep cabbage-family crops out of the affected spot for at least a year or more. The disease hits the whole family and waits in the bed between crops.Rotate crucifers out of the bed for at least a year or more; the bacterium attacks the whole cabbage family and persists locally in debris, so the entire family counts in the rotation.
Space the plants so air moves through and the leaves dry quickly. Warm, humid, wet conditions are what this disease needs to spread.The disease is favored by warm, humid, wet conditions, so spacing for airflow shortens the leaf-wetness periods that let it advance.
Water at the soil instead of over the leaves. The bacterium travels in splashing water and slips into leaves through their edges and any wounds.The pathogen spreads by splash and enters through the leaf-margin water pores and wounds, so basal irrigation removes the dispersal route overhead watering provides.
Stay out of the bed while the plants are wet, and do not handle wet leaves. Working among wet plants helps spread the bacterium from one to the next.Avoid working among or handling wet plants; the bacterium moves readily on wet foliage and tools, so choosing when you enter the bed limits plant-to-plant spread.
Leaves that already show the yellow V-shaped patches cannot be cured, so pull affected plants and throw them away, and clean up old plant material, which shelters the bacterium between crops.There is no cure for infected tissue; remove and destroy affected plants and clear the crop debris that harbors the bacterium. It also moves on contaminated water and tools, which is one more reason roguing beats leaving a sick plant standing.
No spray for this one. Prevention is the control.
Move your turnips to a different spot each year, and do not put them, or their relatives like cabbage, broccoli, radish, and kale, back in the same bed for several years (Minnesota says about four). This keeps the cabbage maggot, flea beetle, and clubroot disease from piling up. Turnips do well following beans or peas, which add nitrogen, but not right after a bed that got heavy manure, since leftover nitrogen grows leaves instead of roots.Rotate turnips on a multi-year cycle, keeping them and all other cabbage-family crops out of a bed for several seasons after they are grown there; Minnesota recommends a four-year gap, and a longer one where clubroot is present. This breaks the buildup of the soilborne clubroot pathogen and the root pests the family shares. Following a legume that has added nitrogen, or another nitrogen-depleting crop, suits turnips well; avoid following a heavily manured crop, whose residual nitrogen pushes tops over roots and branches them.
The plant app sends a timely reminder at every critical moment of your turnip season. The wording adjusts to whichever you pick: beginner or seasoned. Here are three you'll see in Zone 9.
plant sends the right notification at exactly the right moment, for your zone, your weather, your crops. Founding members lock the rate forever.
We're building this guide with real growers. Got a question we missed? Ask here. We read every one and add the best answers right to this page.
Learned something the hard way? Pass it on. Real growers' tips make this guide better for the next person, and we credit you by name when yours goes live.
If you've grown this crop and you see a date, a temperature, a companion claim, or a recommendation that doesn't match your experience, tell us. Real growers' corrections make this guide better for the next person.
Every date, temperature, spacing, and recommendation on this page is sourced from university cooperative extension publications, peer-reviewed agricultural research, NOAA climate data, and direct extension calendars. Where claims are softer (traditional gardening wisdom not formally documented), we say so.
Spot a data point that doesn't match your experience? Submit a correction; accepted corrections earn full author credit on the page.
Zone-aware seasonal nudges, what's worth planting now, and the occasional recipe from the harvest. No spam, ever.