Pick your zone and the dates re-calibrate.
The Guide Crops Vol. 003

Bell Pepper

in Zone 3, this week

Bell pepper is a warm-season vegetable in the same family as tomatoes and eggplant, grown for its sweet, blocky fruit. The nice thing about peppers is you can pick them at two stages: green and full-size, or left on the plant to ripen to red, orange, yellow, or purple and turn sweeter. Peppers pollinate themselves, so one plant will fruit, and they love warmth, so you grow them from transplants set into warm soil once the nights are mild. They are only light feeders, so going heavy on fertilizer gives you a big leafy plant with few peppers. The two things to watch are blossom-end rot, a dark sunken spot on the bottom of the fruit caused by uneven watering, and sunscald, a pale burned patch on peppers left exposed to strong sun. In very hot weather the flowers drop and the plant stops setting fruit for a while, so in hot climates peppers are grown in spring and fall with a summer break. The main things to get right are warmth, steady and even watering with mulch, modest fertilizer, full sun, and rotating peppers away from where tomatoes, potatoes, or eggplant grew. Bell pepper is a warm-season fruiting vegetable (Capsicum annuum) in the nightshade family, a close relative of tomato and eggplant grown for its sweet, thick-walled, blocky fruit. Its defining trait among the fruiting vegetables is that the fruit can be harvested at two stages: green and full-size, or left on the plant to ripen through to red, orange, yellow, or purple, growing sweeter and richer in vitamins. Peppers are self-fertile and largely self-pollinating, so a single plant sets fruit. They are warm-loving and grown from transplants set into warm soil once nights are reliably mild, and they are only moderate feeders, easily pushed to leaf by excess nitrogen. Two disorders define the crop's troubles: blossom-end rot, a dark sunken patch on the fruit caused by uneven watering interfering with calcium delivery, and sunscald on fruit exposed by thin foliage. Fruit set itself fails in extreme heat, when daytime highs past about 90 to 95°F and warm nights drop the blossoms, so across the hot South and the deserts the crop splits into a spring and a fall planting around a midsummer pause. The pest and disease complex, aphids (and the mosaic viruses they carry), flea beetles, pepper maggot, hornworms, and the pepper weevil, plus bacterial leaf spot, Phytophthora blight, and anthracnose, is held off by even moisture, warm well-drained soil, and rotation away from its nightshade relatives.
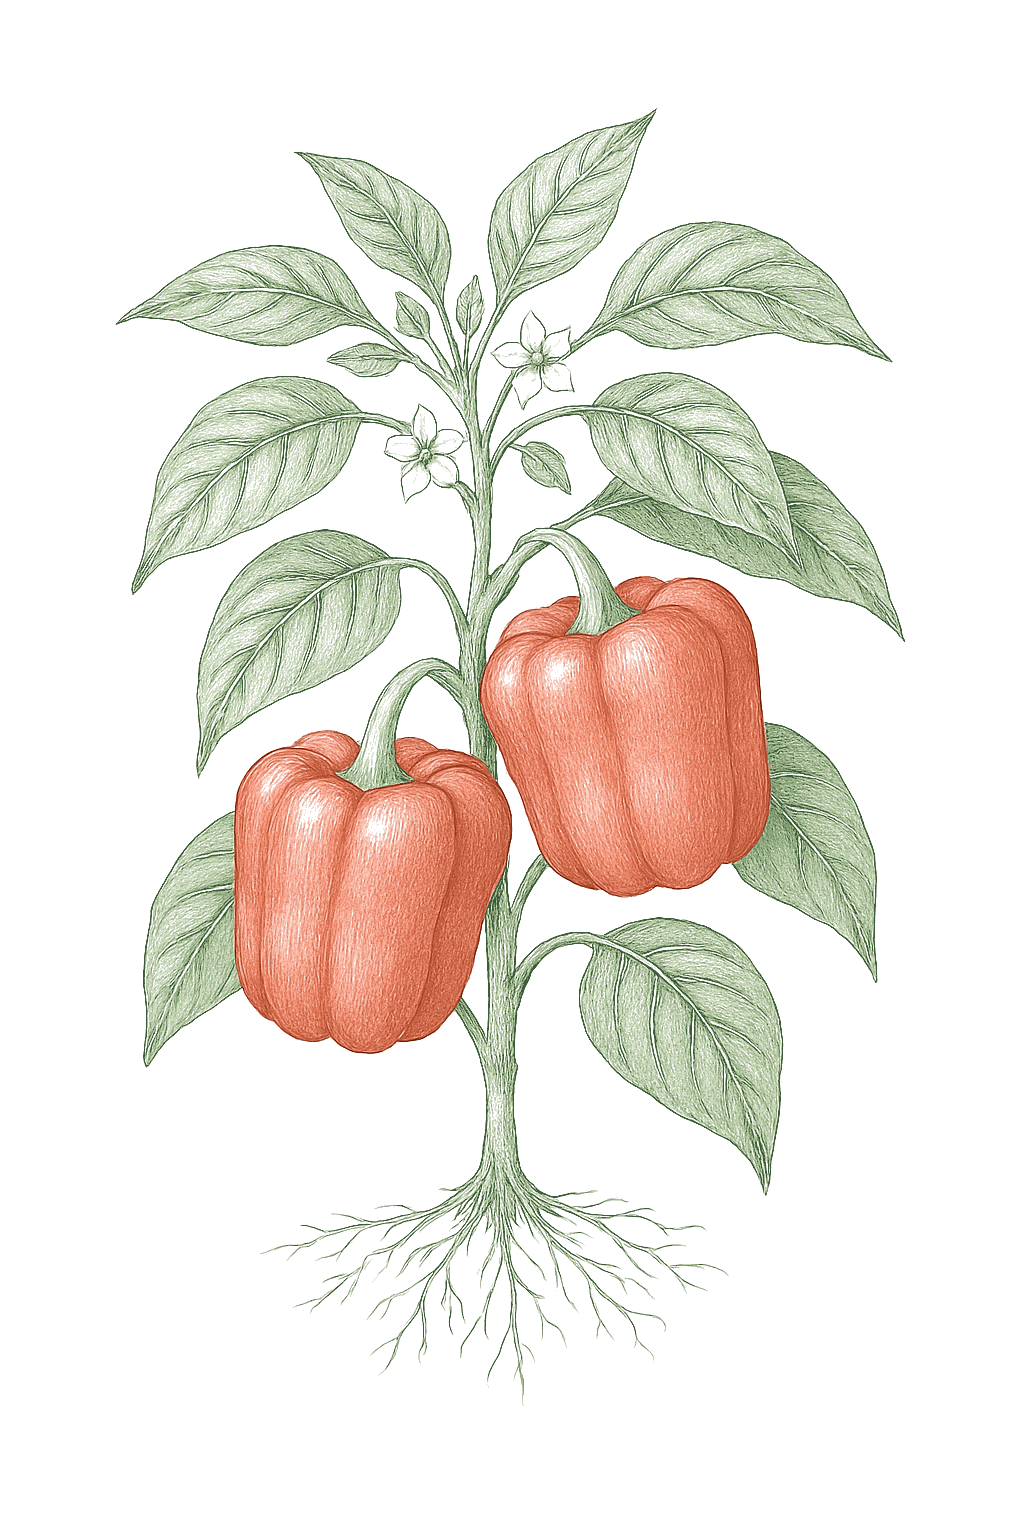
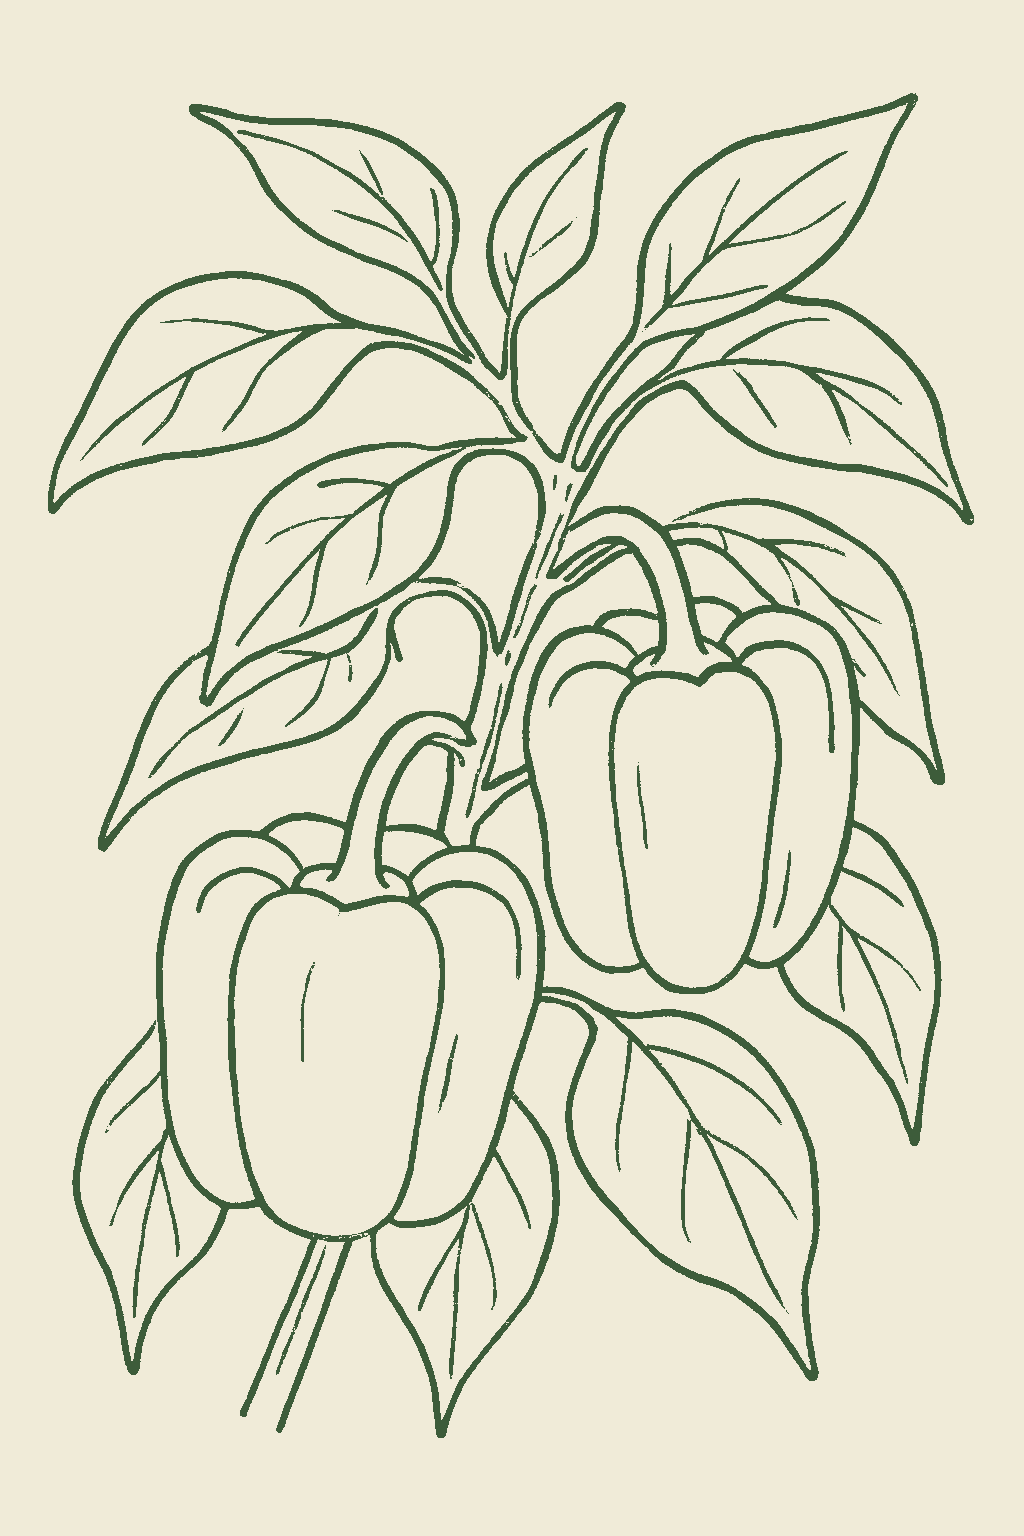
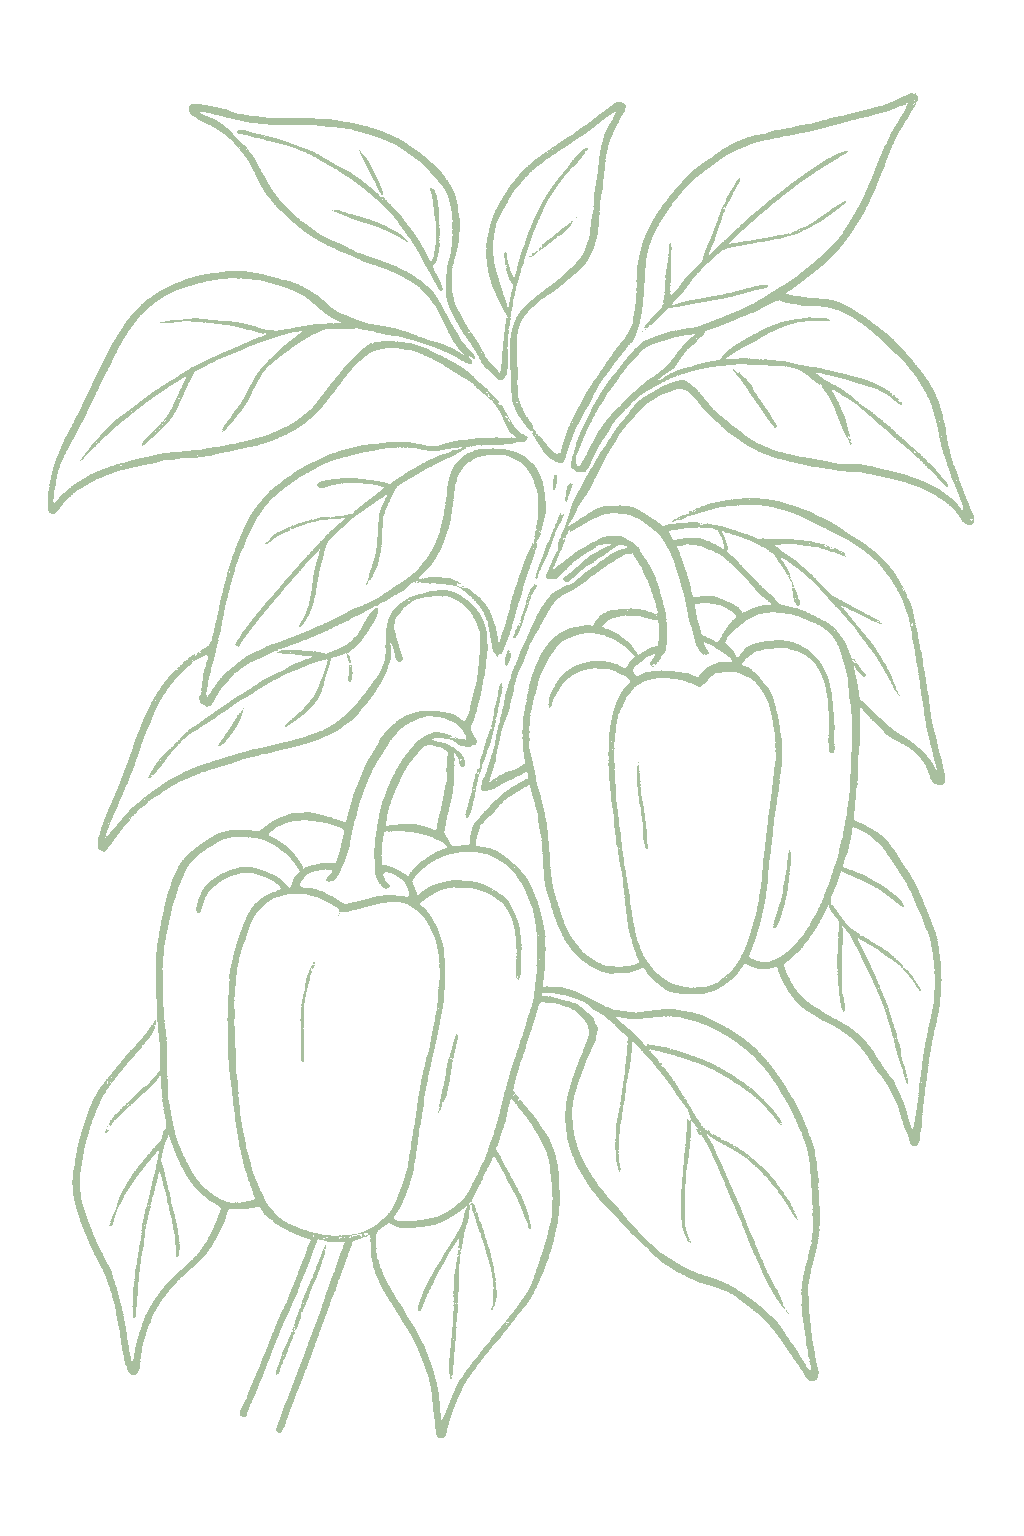
Bell Pepper mature plant
Fig. 01 · Bell Pepper, mature Zone 3
Mature in
60-90d
from transplant
Sunlight
Full sun
6-8 hrs daily
Water
Regular
2 inches / week
Spacing
18-24"
between plants
Soil pH
6-6.8
slightly acidic
Today · in your zone

What's happening right now

July 24 · Zone 3 · Stage 01 · Germination

Off-season for bell pepper in zone 3.

The season at a glance

Planting calendar

In Zone 3, bell pepper can be planted June. Start indoors Apr 1 - Apr 15. Harvest runs August through September.

Jan
Feb
Mar
Apr
May
Jun
Jul
Aug
Sep
Oct
Nov
Dec
plant
too cold
too cold
too cold
indoors
too late
plant
too late
too late
too late
too cold
too cold
too cold
harvest
harvest
harvest
indoors
plant out
harvest
Above-ground cropBest planted on a above ground moon
The season, mapped

Seed to garden

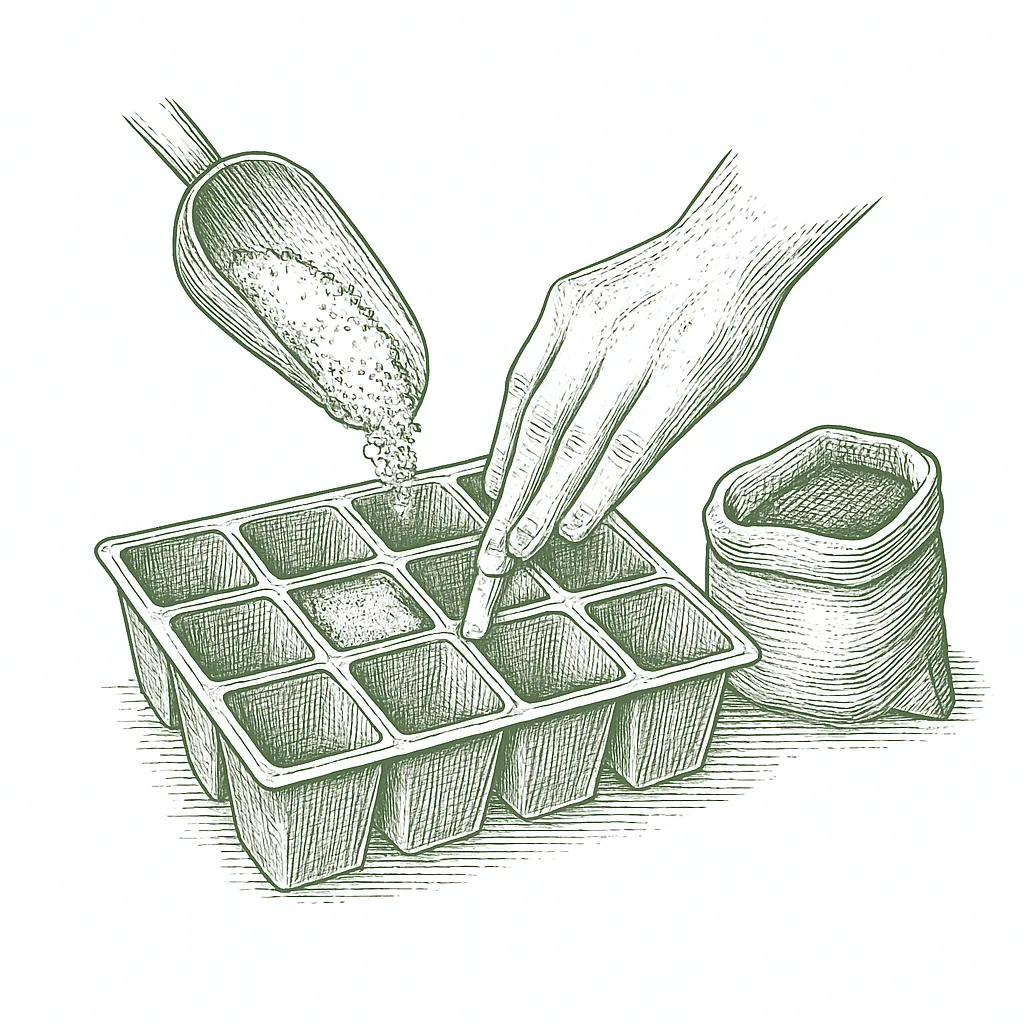
Start pepper seeds indoors about 8 weeks before you plan to plant out, keeping them warm (80 to 90°F) to sprout well. Peppers need more warmth and a longer head start than many crops, and they go outside only once the soil is warm (about 65°F) and nights stay above 55 to 60°F. Use stocky transplants and space them 18 to 24 inches apart.Start pepper seeds indoors about 8 weeks before transplanting (Maryland uses 8 to 10 weeks; certain slow cultivars 12), with bottom heat of 80 to 90°F for fast, even germination. Peppers need warmth and a longer indoor head start than many vegetables and are set out after the soil has warmed to 65°F and nights hold above 55 to 60°F. Choose sturdy transplants and set them 18 to 24 inches apart in rows 30 to 36 inches apart. Direct sowing is practical only in the longest, warmest regions; nearly everywhere this is a transplant crop.
  1. 01
    Sow indoors →
    Apr 1 - Apr 15
    Start about 8 weeks before your last frost
  2. 02
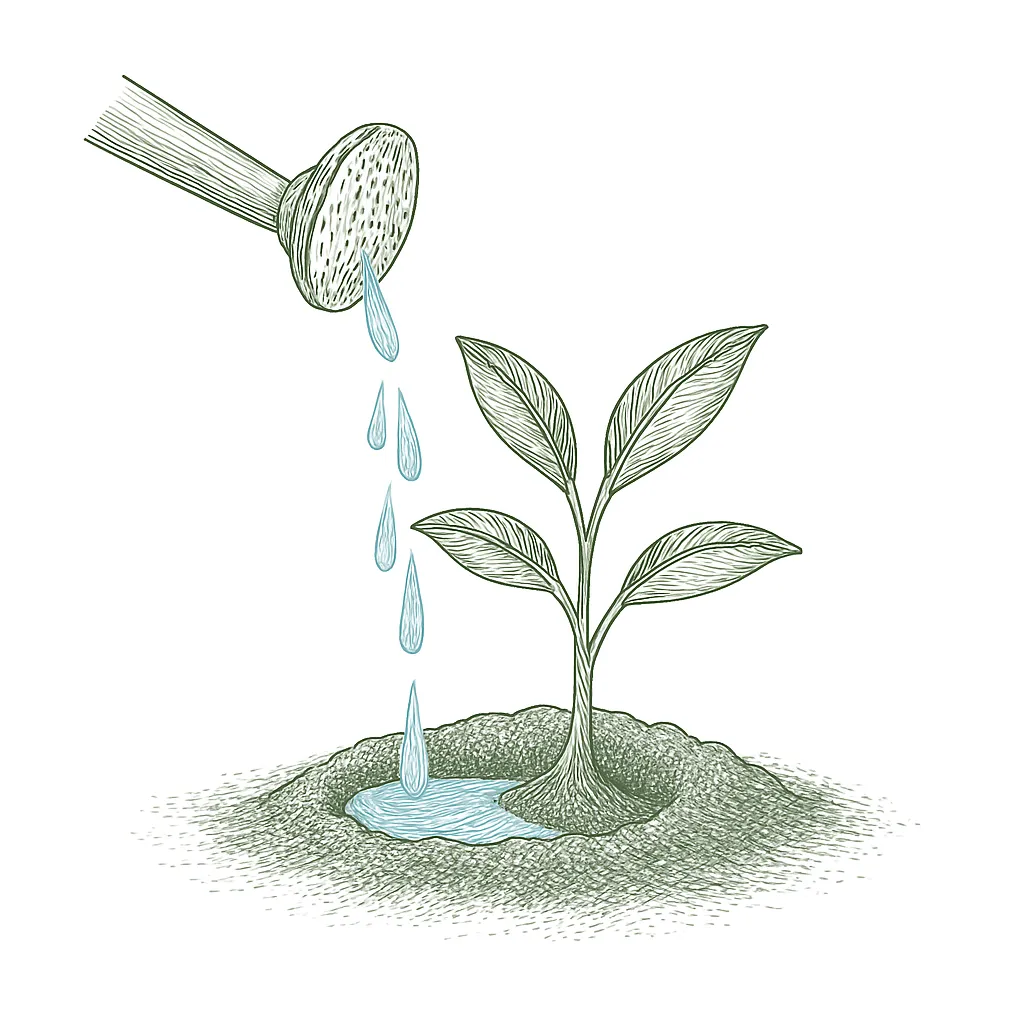
    Transplant out →
    Jun 1 - Jun 15
    After hardening off
  3. 03
    First harvest
    From Aug 1
    60-90 days from transplant
Start method
Indoors
Soil temp
70-90°F
Hardening off
7-10 days
Peppers dislike the cold, so harden plants off over about a week to ten days, giving them more time outside each day, and do not set them out until nights stay above 55 to 60°F and the soil is warm, at least 65°F. Planting too early into cold ground stalls peppers, so it pays to wait until it is truly warm.
From seed to fruit

The growing journey

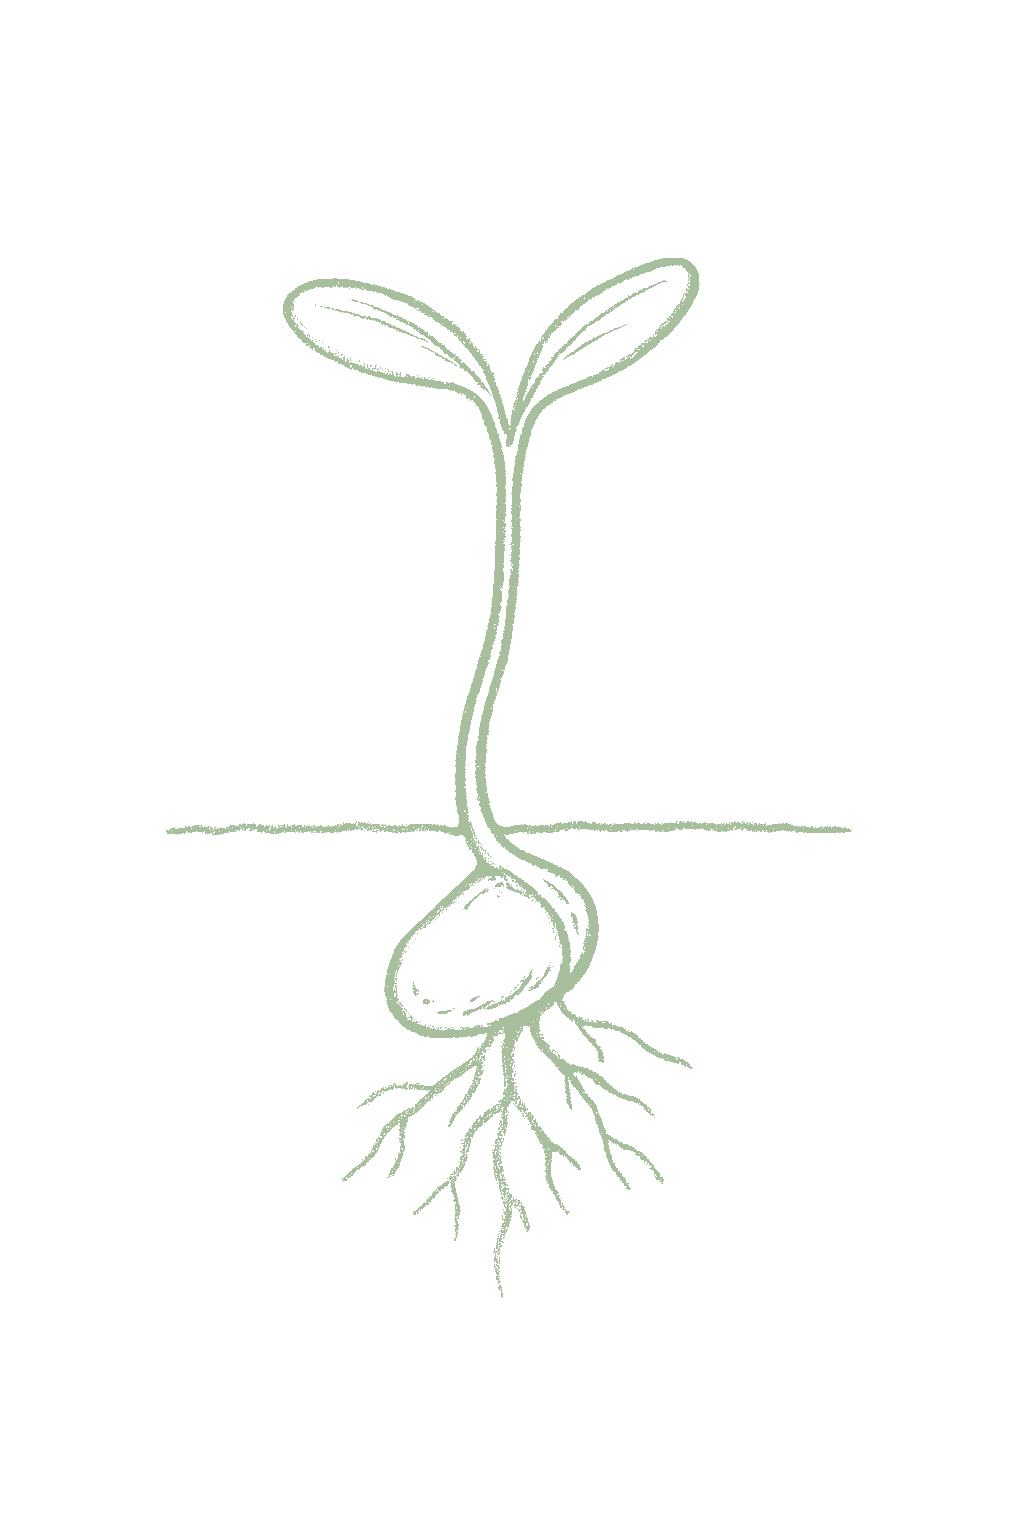
Stage 01 · Germination
01
Germination
Days 7-14 · current stage
In warm conditions, seeds sprout in roughly one to two weeks, sending up two seed leaves first. Cool soil makes them slow or fail.Seeds sprout in about 8 to 14 days in warm conditions; bottom heat of 80 to 90°F is ideal, and cool soil delays or prevents germination. Two seed leaves emerge first.
Plant seeds about a quarter inch deep in a warm spot, ideally on a heat mat, and keep the soil damp until they sprout. Peppers like it warm to come up and can be slow.Sow about a quarter inch deep in warm flats with bottom heat (80 to 90°F), keeping the mix evenly moist, not soggy. Peppers germinate slowly and warm, so give them heat and patience.
FROM PLANT · Pepper seeds like it warm and can be slow to sprout. A heat mat at 80 to 90°F helps a lot. Start them about 8 weeks before you will plant out.Peppers germinate slowly and warm. Give them bottom heat of 80 to 90°F and patience; cool flats sit and sulk. Start about 8 weeks before your warm transplant date.
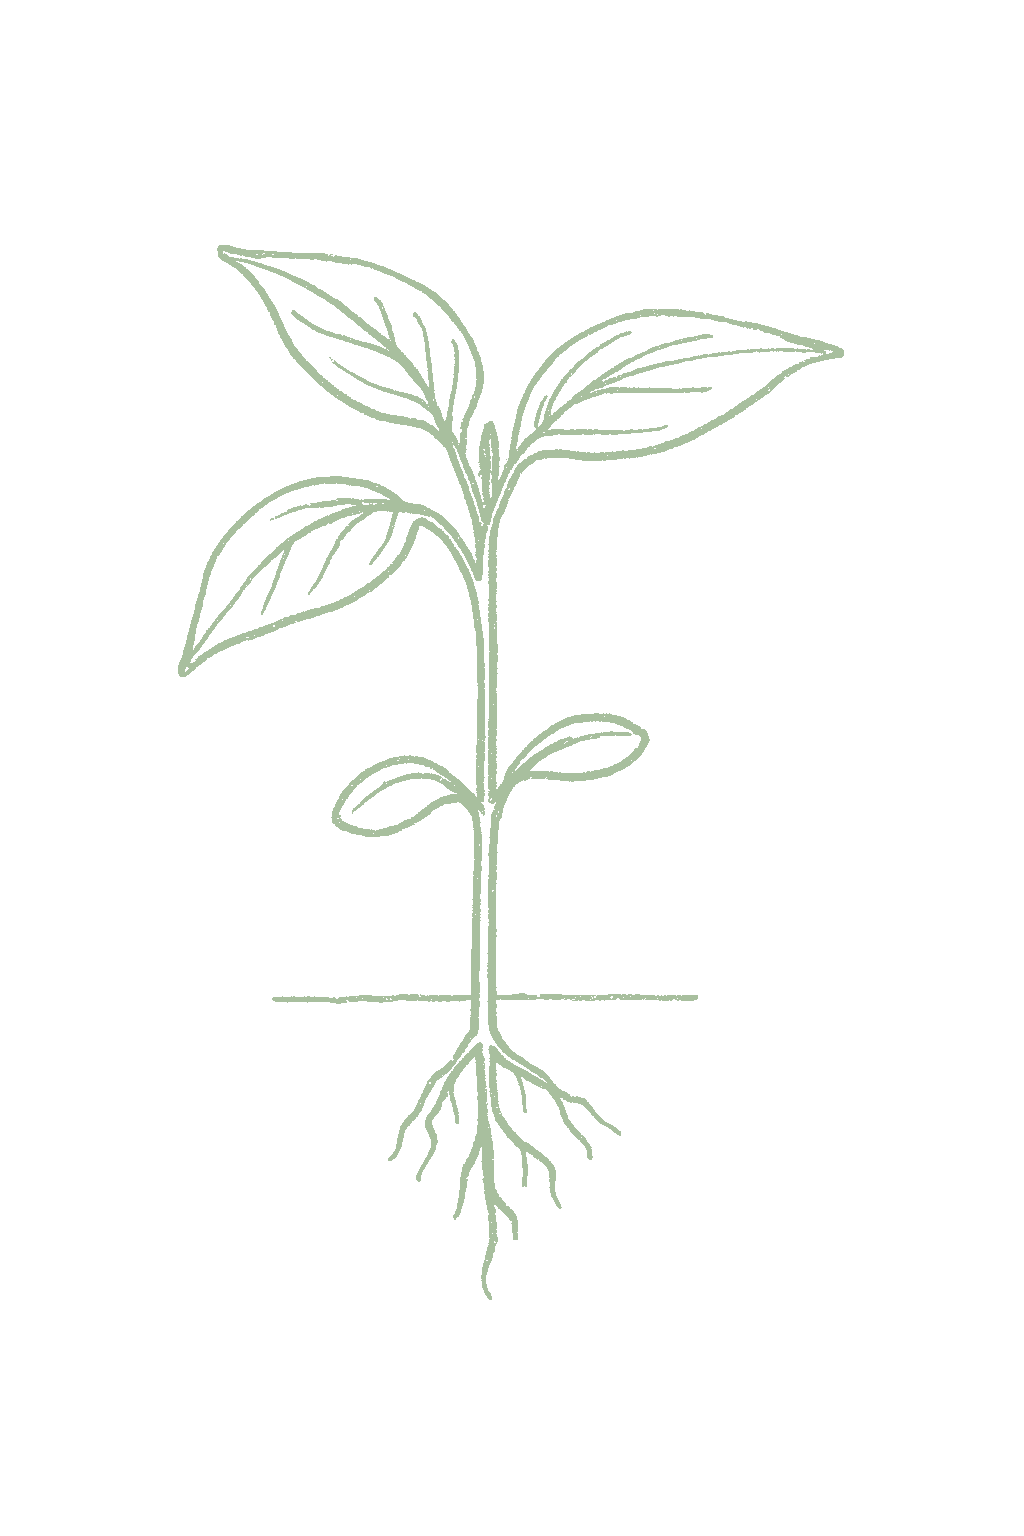
02
Seedling
Days 14-56
After the first two rounded leaves, true leaves appear and the plant grows slowly but steadily in warmth. Watch for seedlings toppling from damping-off if the mix stays too wet.After the seed leaves, true leaves appear and growth is steady but unhurried in warmth. Watch for damping-off in soggy mix and for early flea beetles or aphids once plants are out.
Keep the seedlings warm and in bright light so they grow stocky, and do not overwater. Do not be in a hurry to plant them out; wait for warm weather.Keep seedlings warm and in strong light to avoid legginess, water carefully to avoid damping-off, and pot up as needed. Grow stocky transplants and do not rush them outside before warmth arrives.
FROM PLANT · Keep seedlings in bright light so they grow stocky, and do not overwater. Keep them warm inside until the weather is truly warm before planting out.Grow stocky transplants in strong light, and water carefully, since a soggy mix invites damping-off. There is no rush; peppers resent cold, so keep them warm indoors until real warmth arrives.
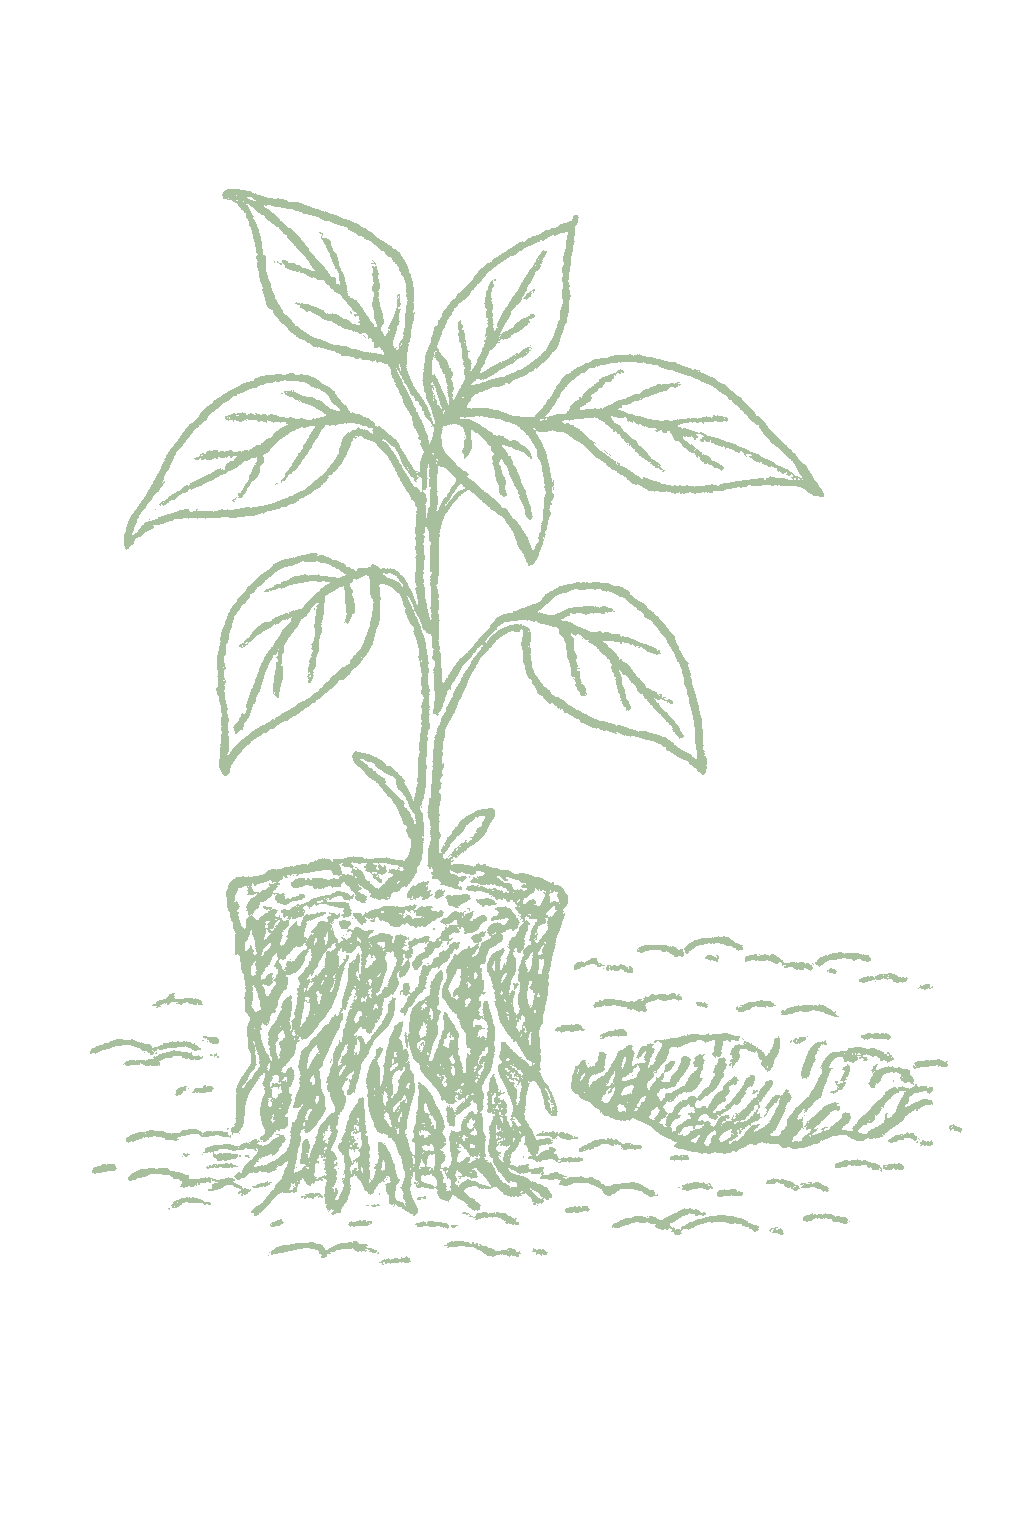
03
Transplanting
Days 49-63
Strong young plants ready to go outside only when nights stay above 55 to 60°F and the soil is warm. Planting too early into cold soil stalls them.Sturdy transplants ready to set out only once nights hold above 55 to 60°F and the soil has warmed to at least 65°F. Planting into cold, wet ground is the classic pepper setback.
Harden the plants off over about a week, then plant them 18 to 24 inches apart into warm soil. A sheet of black plastic mulch warms the soil, and mulch of any kind helps keep watering even.Harden off over 7 to 10 days, then transplant into warm soil, 18 to 24 inches apart in rows 30 to 36 inches apart. Black plastic or fabric mulch warms the soil and gives a warm-season crop a head start; mulch also steadies moisture against blossom-end rot.
FROM PLANT · Do not rush peppers outside. Planting into cold soil stalls them. Wait until nights stay above 55 to 60°F and the soil is warm, and mulch when you plant to keep the watering even.Patience beats the calendar: peppers set out into cold, wet soil sulk. Wait until nights hold above 55 to 60°F and the soil is 65°F, a week or two after your last frost, and mulch at planting to steady moisture against blossom-end rot.
04
Flowering
Days 70-95
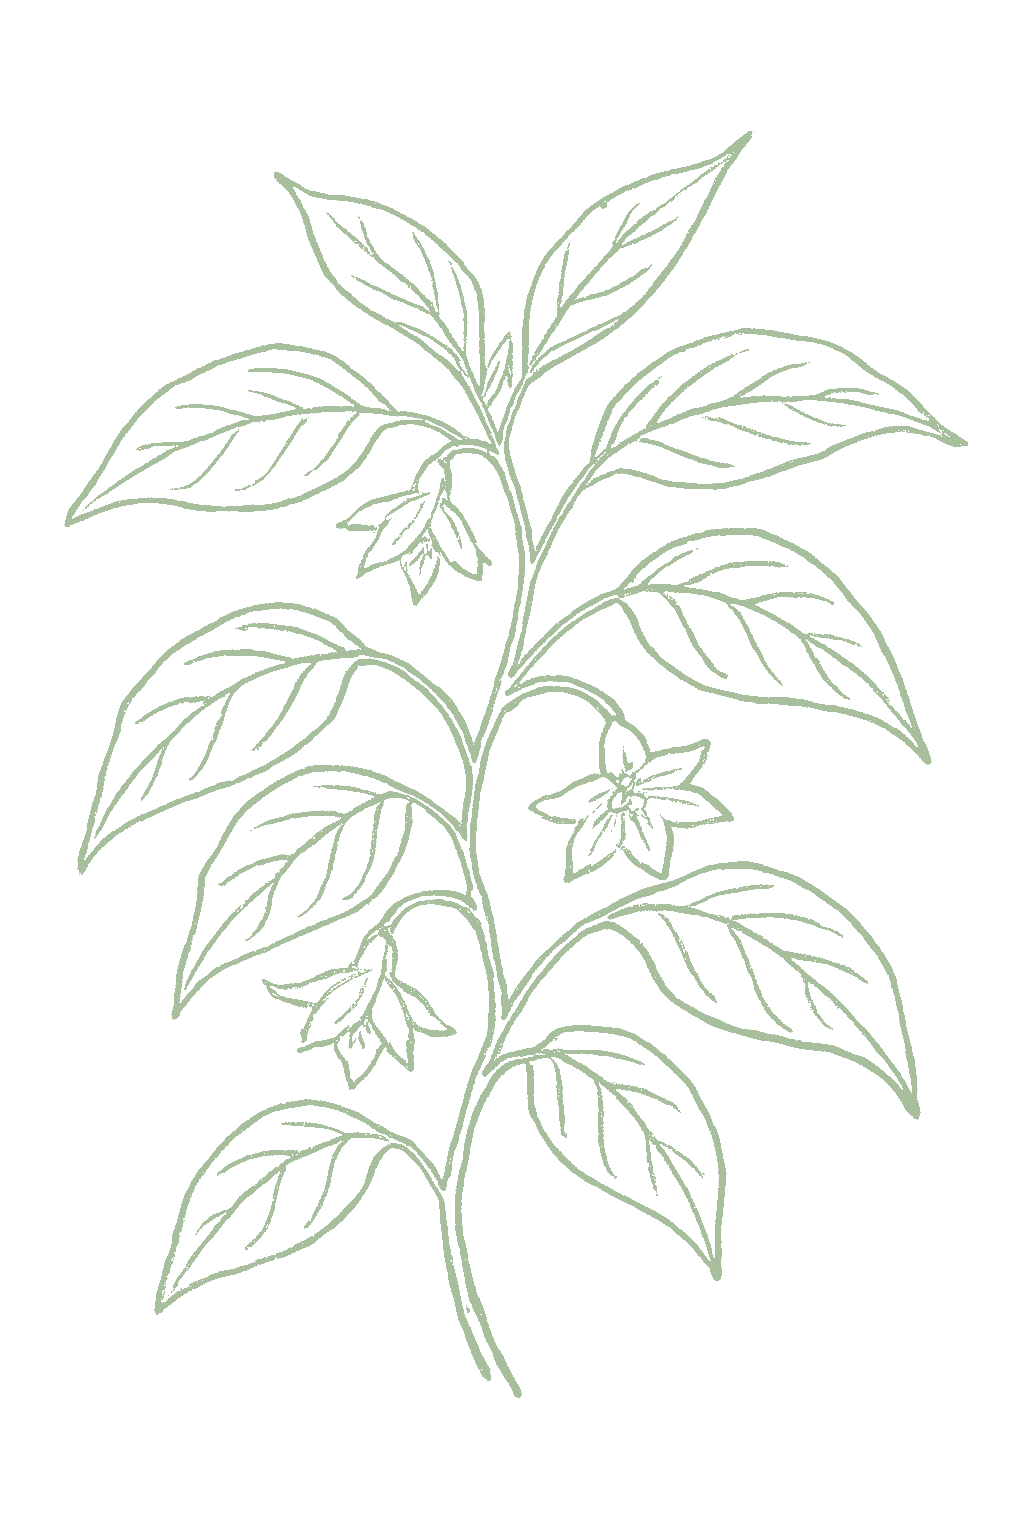
Small white flowers appear where the branches fork. Pepper flowers pollinate themselves, so you do not need more than one plant. A tiny pepper forms behind each flower that sets. Some flowers drop in very hot or cold spells, which is normal.Small white, star-shaped flowers open singly or in clusters at the branch forks. Pepper flowers are self-fertile and largely self-pollinating, so a single plant sets fruit; a tiny pepper swells behind each pollinated bloom. Blossom drop in cold snaps or, more often, in extreme heat is normal and temporary.
Keep the plant evenly watered as it flowers to prevent blossom-end rot, and feed it once the first fruit sets. If flowers drop during a hot or cold spell, do not worry, it picks back up when the weather settles.Keep moisture steady and even through flowering to prevent blossom-end rot on the first fruit, and side-dress with calcium nitrate as fruit sets. If blossoms drop in a heat wave or cold snap, wait it out; set resumes as conditions moderate, and a gentle tap on the plant can aid pollination on still days.
FROM PLANT · Pepper flowers pollinate themselves, so a single plant will fruit. If flowers fall off during very hot or cold spells, that is normal and it picks back up. Keep the plant evenly watered to prevent blossom-end rot.Pepper flowers are self-fertile and self-pollinating, so one plant sets fruit. Blossom drop during a heat wave or a cold snap is normal and temporary; keep moisture steady and even, which also guards the first fruit against blossom-end rot.
05
Fruiting
Days 90-120
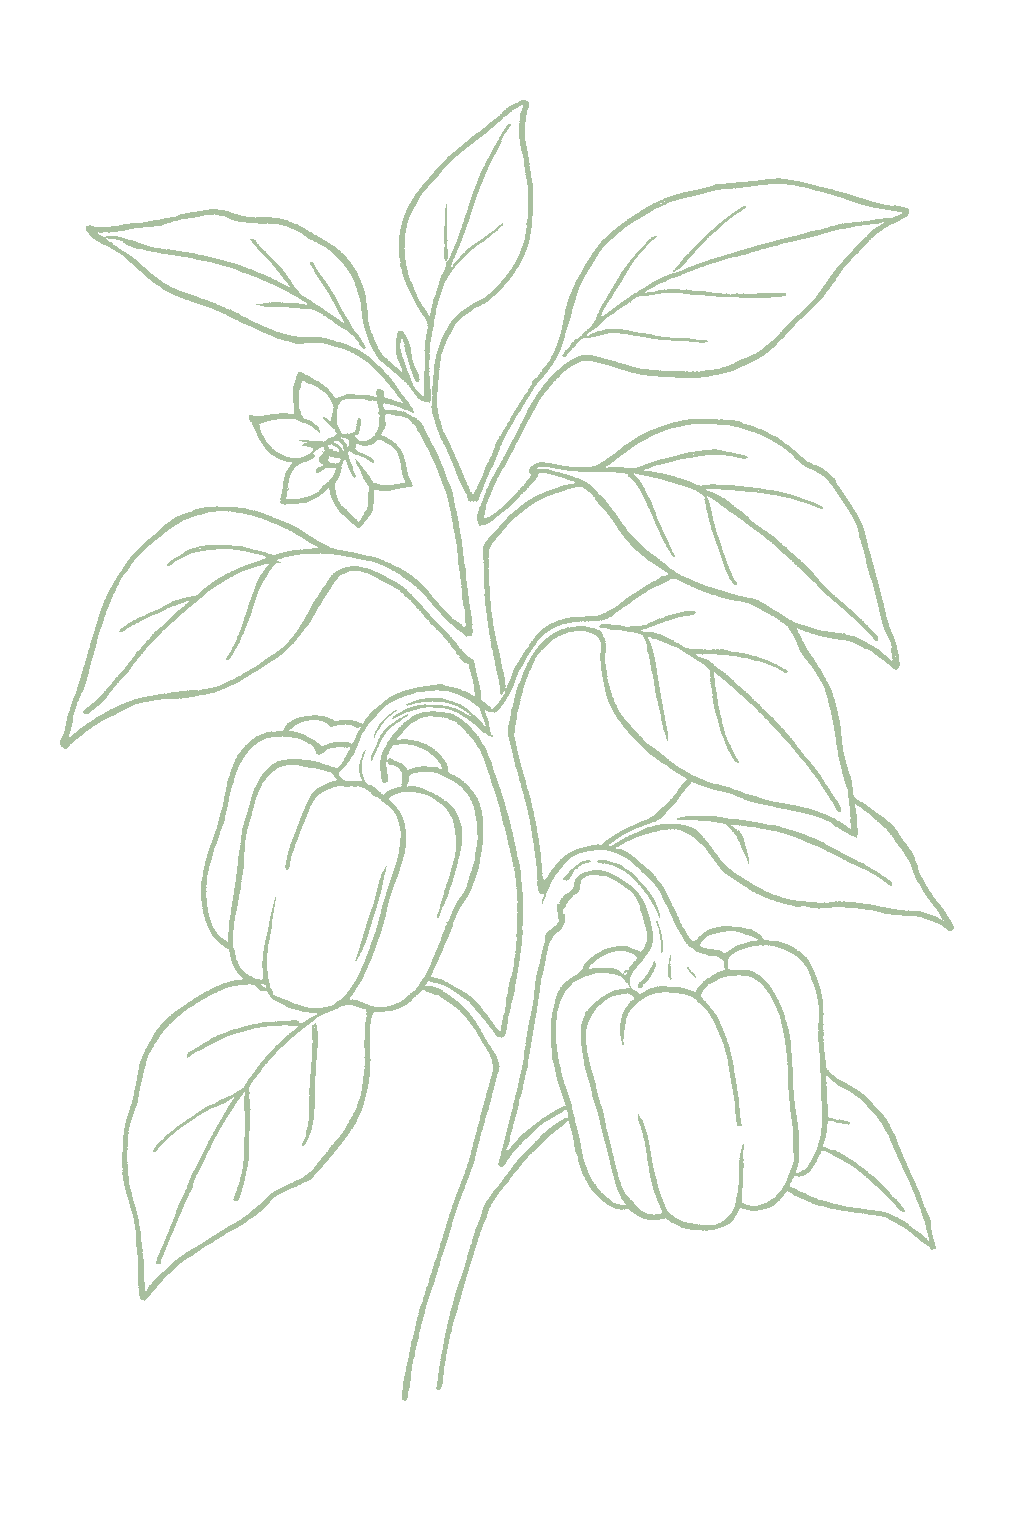
The little peppers grow into firm, blocky green bells. Check the bottom of the fruit for a dark sunken spot (blossom-end rot from uneven watering) and check sun-exposed peppers for pale sunburned patches. Peppers can wait on the plant once they are full-size.Set fruit swell into firm, blocky green bells. Watch the blossom end for the dark, sunken patch of blossom-end rot, the sign of uneven moisture, and watch exposed fruit for the pale, papery patch of sunscald where foliage is thin. Peppers hold well on the plant, so there is no rush once they are full-size.
Keep watering evenly and mulch to prevent blossom-end rot, do not overdo the fertilizer, and keep the plant leafy enough to shade the peppers from sunburn. Decide whether to pick them green or wait for color, and stake a heavy plant.Keep moisture even and mulched through fruiting to head off blossom-end rot, keep nitrogen moderate, and make sure foliage shades the fruit to prevent sunscald. Decide whether to pick green or let fruit color up, and support heavy plants with a stake.
FROM PLANT · Now is when steady watering matters most. Uneven water causes blossom-end rot, the dark spot on the bottom of the pepper. Mulch, water evenly, go easy on fertilizer, and keep the plant leafy so the peppers do not sunburn.This is where even watering pays off: the swings between dry and soaked that stress a fruiting pepper are what cause blossom-end rot. Mulch, water steadily, keep nitrogen moderate, and keep foliage over the fruit to prevent sunscald.
06
Harvest
Days 116-146
Firm, full-size green peppers with thick shiny walls, or peppers left on the plant until they turn fully red, orange, yellow, or purple and get sweeter. Picking green keeps the plant making more; letting them color slows it down.Firm, full-size, blocky fruit with thick, glossy walls for a green harvest, or fully colored red, orange, yellow, or purple fruit for a sweeter, riper harvest two to three weeks later. Green picking keeps the plant setting more; leaving fruit to color slows further set.
Cut peppers off with scissors or a knife, leaving a little stem, instead of pulling, because the branches break easily. Pick green ones regularly to keep the plant producing, and bring in all the peppers before the first frost, which kills the plant.Cut fruit with pruners or a knife, leaving a short stem, rather than pulling, since the brittle branches snap easily. Harvest green types regularly to keep production up; watch ripening colored fruit for anthracnose and sunscald in hot, wet, or intensely sunny weather, and bring the crop in before the first frost ends the plant.
FROM PLANT · Pick peppers green to keep the plant making more, or let a few ripen to color for extra sweetness. Cut them off with a little stem instead of pulling, because the branches snap easily.Pick peppers green and firm to keep the plant setting more, or leave some to ripen to red, orange, or yellow for extra sweetness, knowing that ties up the plant. Cut with a short stem rather than pulling, since the branches are brittle.
Beginner
Know your soil

Your soil

Identify yours

Not sure what soil you have? Grab a small handful of damp soil from your garden bed and squeeze it. If it crumbles apart easily, it's sandy. If it holds together but breaks when you poke it, it's loam (what most vegetables want). If it stays in a hard, slippery ball, it's clay.

What this crop wants

Bell peppers like rich, well-drained soil that warms up in the sun, since they are warm-season plants that dislike cold, soggy ground. Mix in 2 to 3 inches of compost before planting. If your soil is heavy clay or slow to warm, a sheet of black plastic or fabric mulch laid down before planting warms the soil and gives peppers the head start they want. Aim for soil that stays evenly moist but never waterlogged, because uneven watering is what causes the dark, sunken blossom-end rot on the bottom of the fruit.

If your soil doesn't match

You have sandy soil

Mix 2-3 inches of compost into the top 6 inches of your bed before planting. Compost holds moisture (which sandy soil drains too fast) and adds the nutrients sandy soil tends to lack. Repeat each season. Compost breaks down over time.

You have clay soil

Mix 2-3 inches of compost AND a few inches of coarse sand or perlite into the top 6 inches of your bed. The compost feeds the plants; the sand breaks up the clay so air and water can move through. Don't add sand without compost. It can compact like concrete.

Containers and raised beds

If amending your soil sounds like too much work, or if your soil is heavy clay, full of rocks, or contaminated, build over it. A raised bed at least 12 inches deep filled with a 50/50 mix of compost and sandy loam gives you ideal growing soil with no battles. A 5-gallon container with quality potting mix does the same for one plant at a time. Both bypass your native soil entirely.

Learn more about your soil
The specs

Care guide

The numbers that matter, at a glance.

Sunlight
Full sun · 6-8 hrs/day
Water
Regular
Spacing
18-24 inches
Soil
loam, sandy loam
Days to maturity
60-90 days from transplant
Soil pH
6 to 6.8
Container OK?
Yes · 3+ gal pot
Germination temp
70-90°F
Soil chemistry

Soil pH for bell pepper

Preferred
6 to 6.8
Tolerated
5.5 to 7.5

Bell peppers like slightly acidic soil, about pH 6.0 to 6.8, and a lot of garden soil is already close. The pH scale runs from acidic to alkaline, and this range is where peppers take up nutrients best, including the calcium that prevents blossom-end rot. If your soil runs alkaline, common in the dry interior West, you may need to add sulfur before planting. An inexpensive soil test from your local extension office tells you where you stand.Bell pepper grows best at a soil pH of about 6.0 to 6.8, with Clemson placing the sweet spot near 6.0 to 6.5 and Minnesota noting peppers do well up to about 7.0. In that band the nutrients peppers need, including the calcium that guards against blossom-end rot, stay most available. Peppers tolerate a somewhat wider range, roughly 5.5 to 7.5, but uptake of iron, manganese, and other micronutrients tightens as the soil turns alkaline, showing as yellowing between the veins of the youngest leaves. Alkaline soils common across the interior West often need sulfur worked in ahead of planting; most Eastern and Midwestern soils sit naturally near the target. A soil test from your local extension office settles it before you plant.

Verified · 2 sources View
Steady hand on the hose

Watering

When & how much
Frequency
Give peppers a steady 1 to 2 inches of water a week, more when it is hot and dry. The most important thing is to keep it even. Letting the soil go bone-dry and then soaking it is what causes the dark, sunken rot on the bottom of the peppers.Aim for a steady 1 to 2 inches of water per week from rain plus irrigation, more in heat or on sandy soil, delivered deeply and evenly rather than in erratic bursts. Consistency matters more for peppers than sheer quantity: the wide swings between dry and soaked that irregular watering produces are the direct cause of blossom-end rot on the fruit.
Amount
About 1 to 2 inches of water a week, soaking the soil down at least 6 inches so the roots grow deep. Keep it even and steady, especially while the plant is flowering and setting peppers, since uneven water causes blossom-end rot and dropped flowers.Around 1 to 2 inches per week is the working range, wetting the soil to a depth of at least 6 inches so roots follow the moisture down, and leaning higher through flowering and fruit sizing. Even, deep watering is what prevents blossom-end rot and dropped blossoms; a thorough soak once or twice a week beats a light daily sprinkle.
Method
Water the soil, not the leaves, with a soaker hose or by holding the hose at the base. Keeping the leaves dry helps prevent disease. If you must use a sprinkler, do it in the morning so the leaves dry by evening. Mulch is a big help: it keeps the soil evenly moist, which is the best way to prevent blossom-end rot.Water at the base with a soaker hose or drip line, keeping the foliage as dry as possible, since wet leaves favor the bacterial leaf spot and anthracnose peppers are prone to. If overhead watering is unavoidable, do it in the morning so leaves dry before evening. A layer of mulch buffers soil moisture, the single most useful habit for preventing blossom-end rot, and blocks soilborne spores from splashing onto the lower leaves and fruit.
Signs of trouble
Too much water
If the lower leaves yellow, the plant wilts even though the soil is wet, or the stem goes soft near the base, it is getting too much water or the soil drains poorly. Soggy soil invites root and stem rots.Yellowing lower leaves, wilting even when the soil is wet, and soft, rotting stems point to overwatering or poor drainage. Saturated soil starves the roots of oxygen and invites the Phytophthora blight peppers are highly susceptible to, especially on heavy ground and in low, wet spots.
Too little water
Some midday wilting in hot weather is normal and passes by evening. Leaves that stay wilted mean the plant is too dry. The clearest sign of uneven watering is blossom-end rot, a dark sunken patch on the bottom of the pepper, which comes from the soil drying out and flooding rather than from a lack of fertilizer.Midday wilting that recovers by evening is common in heat and not alarming, but leaves that stay limp signal real drought. The clearest sign of uneven watering is blossom-end rot: a dark, sunken, leathery patch on the blossom end of the fruit, caused not by a soil calcium shortage as such but by the plant's inability to move calcium to the fruit when moisture swings. Drought during flowering also drops blossoms and gives small fruit.
Feeding rhythm

Feeding

Frequency
At planting, then side-dress after fruit set
Type
Balanced at planting, then calcium nitrate at fruit set
When to start
Work into the bed before transplanting, then side-dress about three to four weeks after transplanting and again once fruit sets

Bell peppers like steady but modest feeding, and going heavy on nitrogen backfires. Mix a balanced fertilizer such as 5-10-10 into the soil before planting. Then, a few weeks after planting and again once the first peppers set, feed with a nitrogen fertilizer like calcium nitrate. Do not overdo it: too much nitrogen gives you a large leafy plant with few peppers. Calcium nitrate also supplies calcium, which, along with even watering, helps prevent blossom-end rot.Bell pepper is a moderate feeder that rewards restraint with nitrogen. Work a balanced fertilizer such as 5-10-10, or 2 to 3 pounds of it per 100 square feet, into the bed before transplanting, then side-dress with a nitrogen source such as calcium nitrate about three to four weeks after transplanting and again as the first fruits set. Hold nitrogen back early and never overdo it: too much drives a big, bushy, dark-green plant that flowers late and sets little fruit. The calcium nitrate side-dress does double duty, feeding the plant while supplying the calcium that, paired with even watering, heads off blossom-end rot.

N · P · K = 5-10-10

Use a balanced fertilizer like 5-10-10 at planting, then a nitrogen feed such as calcium nitrate once the plant is growing well and setting fruit. Do not overdo the nitrogen or you get all leaves and few peppers.A balanced fertilizer such as 5-10-10 worked in at planting, then a calcium nitrate (15.5-0-0) side-dress three to four weeks after transplanting and again at fruit set. Avoid heavy nitrogen, which gives leaf at the expense of fruit.

Try 5-10-10 at planting, then calcium nitrate (15.5-0-0) as a side-dress
Who grows well together

Companion planting

The most useful pepper companions are strong-smelling herbs and flowers like basil, marigold, and nasturtium, which can help deter or lure away aphids and other pests. The one rule that really matters is to keep peppers away from tomatoes, potatoes, and eggplant, which are all close relatives and share the same pests and soil diseases. Most pepper companion pairings are traditional rather than trial-tested. The aromatic-herb and flower companions (basil, marigold, nasturtium, alliums) are grown to deter or trap the aphids and thrips that trouble peppers and to draw beneficial insects, a plausible, habitat-based effect rather than an isolated one. The single firmest rule is a rotation one: keep peppers away from their Solanaceae relatives, tomatoes, potatoes, and eggplant, which share the full pepper pest and disease complex.

Other
Basil
Basil is a classic pepper neighbor. Its strong scent is thought to help confuse soft-bodied pests like aphids and thrips, and it tucks neatly between young pepper plants. A pleasant, low-risk companion.A traditional interplanting with peppers; the aromatic foliage is thought to deter aphids and thrips and to draw pollinators and beneficial insects. The effect is habitat-based and traditional rather than trial-isolated for pepper. Traditional
Marigold
Marigolds are a classic companion flower for peppers, grown to help keep pests down. Mostly tradition, but cheerful and low-risk.A long-standing companion tradition near peppers; French marigold grown as a cover crop has documented nematode-suppressive effects, though the interplanted marigold-pepper pest benefit is traditional rather than trial-isolated. Traditional
Nasturtium
Nasturtiums are often planted near peppers to lure aphids away from the crop. A helpful, low-risk neighbor.Planted as a trap and deterrent for aphids, drawing them off the peppers. Trap cropping is a documented principle, though the specific nasturtium-pepper effect is not formally isolated, so treat it as a plausible aid. Well-grounded
Onions and other alliums
Onions, garlic, and chives have a strong smell that gardeners traditionally use to confuse pests around peppers, and they take up little room. A low-risk, space-saving neighbor.Pungent alliums are a traditional interplant said to mask the crop and deter soft-bodied pests; the effect is habitat-based and traditional rather than trial-isolated for pepper. Traditional
Keep apart from
Tomatoes, potatoes, and eggplant Keep peppers away from tomatoes, potatoes, and eggplant. They are all close relatives that share the same soil diseases and pests, so planting them together makes those problems worse.All are Solanaceae and share pepper's pest and disease complex, including bacterial leaf spot, the mosaic viruses, Phytophthora blight, anthracnose, and aphids. Grouping them concentrates that pressure and lets soilborne problems build. A real epidemiology and rotation principle rather than a tested adjacency effect: spread the nightshades out and rotate them on at least a 3 year cycle. Well-grounded
Fennel Many gardeners keep fennel away from peppers and most other vegetables, since it is said to stunt their growth. This is more tradition than a proven rule.A widely repeated caution that fennel inhibits the growth of many garden vegetables and is best kept to its own corner. There is no strong T1 mechanism for a pepper-fennel antagonism, so it persists mostly as garden lore. Traditional
Provenance tagged inline · see methodology for the labeling system Key
Harvest signals

When to pick

You can pick bell peppers at two stages, whichever you like. Most people pick them green, once they are full-size, firm, and blocky with thick, shiny walls; you do not have to wait for them to turn color. If you leave them on the plant, they ripen to red, orange, yellow, or purple and get sweeter over the next couple of weeks. Picking peppers green keeps the plant making more, while letting them color up slows it down. Cut peppers off with scissors or a knife, leaving a little stem on, instead of pulling, because the branches break easily. If you let peppers ripen in very hot or sunny weather, watch for sunburned patches and rot.Bell peppers can be picked at TWO stages, and the choice is yours. Most are harvested GREEN and full-size, once the fruit is firm, blocky, and has thick, glossy walls; you do not need to wait for color. Left on the plant, the same fruit ripens through to its final red, orange, yellow, or purple, growing noticeably sweeter and richer in vitamins over the next two to three weeks. Ripening on the plant ties up the plant's energy, so picking peppers green keeps it flowering and setting more, while letting fruit color up slows further production. Cut peppers with pruners or a knife leaving a short stub of stem, rather than pulling, because the branches are brittle and snap easily. Harvest green types regularly, and watch colored fruit for anthracnose and sunscald if you leave it to ripen in hot, wet, or intensely sunny weather.

Verified · 3 sources View
Yield

What to expect

A healthy bell pepper plant usually gives you about 5 to 10 peppers over the season, more for small snacking types. Keeping it warm, evenly watered, and in full sun, and picking peppers green so the plant keeps setting more, makes the difference.A healthy full-size bell pepper plant typically yields about 5 to 10 fruit over the season, and often more for the smaller-fruited and snacking types, which set heavily. Iowa State puts good-management yields at roughly 15 to 20 pounds per 10-foot row. Steady warmth, even moisture, full sun, and picking green fruit regularly carry a plant to the upper end; heat that drops blossoms, uneven water that brings blossom-end rot, or too much nitrogen pulls it down.

Once it gets going, a pepper plant keeps setting fruit through the warm months, though very hot spells make the flowers drop for a while before it picks back up. Picking peppers green keeps the plant making more, while letting them ripen to red slows it down. In hot areas you often get a spring crop and a fall crop with a summer lull in between.Peppers set fruit through the warm months once established, but production is punctuated by heat: extreme summer heat drops blossoms and pauses set, which resumes as things moderate. Picking fruit green keeps the plant flowering and setting more, while letting peppers ripen fully to color on the plant ties up its energy and slows new set. In hot regions the crop naturally splits into a spring and a fall flush around midsummer. The things that trip up first-year pepper growers are uneven watering (which causes blossom-end rot), planting too early or through a heat wave (which drops the flowers), and sunburned fruit. Water evenly with mulch, wait for warm weather, do not overdo the fertilizer, and keep picking.First-season growers most often lose bell pepper yield to three things: blossom-end rot from uneven watering, blossom drop when heat or cold spoils fruit set, and sunscald on fruit exposed by sparse foliage. Wait for real warmth to plant, mulch and water evenly, keep nitrogen moderate, and the rest is full sun and regular picking.

What changes yield
Warmth: peppers need warm soil and warm (not extreme) weather; cold checks stall them and extreme heat drops blossoms and pauses set.Even moisture: steady watering with mulch prevents blossom-end rot and dropped blossoms, the single biggest lever on pepper yield.Full sun and calcium: full sun and adequate calcium (paired with even water) build thick-walled, sound fruit and limit sunscald and blossom-end rot.Moderate nitrogen: too much nitrogen gives a big leafy plant with few fruit, so feed modestly and shift to fruiting.Regular green harvest: picking fruit green keeps the plant setting more, while letting peppers color up on the plant slows production.
Verified · 2 sources View
Pick your variety

Recommended varieties

Pick a bell pepper variety to match your space and season. For the classic green-to-red bell, grow California Wonder or Big Bertha. For color, try Golden California Wonder (yellow) or Purple Beauty (purple). If your summer is short or cool, choose an early type like King of the North, which ripens more reliably. For a pot or small garden, a compact variety like Redskin is ideal. If disease has been a problem, look for varieties labeled as resistant to bacterial leaf spot or viruses.Choose by color, season, and space. For the classic blocky bell, grow California Wonder or Big Bertha and let it ripen from green to red, or pick green for firm walls. Colored bells (Golden California Wonder for yellow, Purple Beauty for purple) add variety and extra sweetness when fully ripe. Where the season is short or cool, early types like King of the North set and ripen fruit far more reliably. For containers and small spaces, the compact Redskin and the small snacking bells are the safest choices. Many modern hybrids also carry resistance to bacterial leaf spot and the mosaic viruses, worth seeking where those are a problem.

California Wonder
The classic large, blocky, four-lobed green bell that ripens to red, and the standard open-pollinated home-garden variety. Thick-walled, sweet, and dependable, and the benchmark against which other bells are measured.
Big Bertha
A vigorous hybrid bearing very large, elongated green-to-red bells on a productive plant. Popular for its size and yield, and a good choice where you want big peppers for stuffing and slicing.
King of the North
An early, cold-tolerant open-pollinated red bell bred for short seasons, setting and ripening fruit reliably where summers are cool or brief. The go-to blocky bell for northern gardens.
Purple Beauty
An open-pollinated bell with striking deep-purple fruit that ripens to red, on a compact, sturdy plant. Ornamental as well as edible, mild and sweet, and a colorful addition to the garden.
Golden California Wonder
A golden-yellow sport of the California Wonder type, with the same thick-walled blocky shape ripening from green to deep gold. Sweet and mild when fully colored; a reliable yellow bell.
Redskin
A compact hybrid bred for containers and small gardens, bearing full-flavored red bells on a dwarf, tidy plant. One of the best choices for a pot or a patio, and productive for its size.
Off the vine

Storing your harvest

Room temp
Bell peppers keep at room temperature for a few days if kept out of the sun. For anything longer than that, put them in the fridge. Red, orange, and yellow ripe peppers do not last quite as long as green ones, so use them first.Bell peppers keep at room temperature for several days out of direct sun, staying firm and glossy longer than most summer fruit. For a short hold a cool spot on the counter is fine; for longer than a few days the refrigerator is better. Colored ripe peppers are more perishable than green ones and are best used sooner.
Fridge
Keep peppers in the crisper drawer, loosely bagged, and they last one to two weeks. Do not store them in the coldest part of the fridge, since peppers can get pitted and soft if kept too cold. Put them away dry, not wet, so they do not rot.Store peppers in the crisper at about 45 to 50°F with high humidity, loosely bagged, for one to two weeks. Peppers are mildly chilling-sensitive: held below about 40°F for long they develop surface pitting and softening, so the crisper rather than the coldest part of the refrigerator is the right spot. Store them dry, since surface moisture speeds decay.
Freezer
Peppers are one of the easiest vegetables to freeze, and you do not even need to blanch them first. Just wash, remove the seeds, chop them up, freeze on a tray, then pour into a bag. They keep for months and are great for cooking, though they go soft once thawed so they are not for salads.Bell peppers freeze unusually well and, unlike most vegetables, do not need blanching first. Simply wash, core, chop or slice, spread on a tray to freeze, then bag; they keep their flavor for many months and go straight into cooked dishes. The texture softens on thawing, so frozen peppers are for cooking, not fresh eating.
Verified · 2 sources View
When something goes wrong

Common problems

Dark rotten spot on the blossom end of the pepperDark, sunken, leathery patch on the bottom of the fruit
01 of 04
What happened Blossom-end rot. The bottom of the pepper goes dark, sunken, and leathery. It is not a bug or a disease; it happens when the plant cannot get enough calcium to the fruit, usually because the watering was uneven.Blossom-end rot, the signature pepper disorder. A dark, sunken, leathery patch forms on the blossom (bottom) end of the fruit. It is not a disease and not a pest; it is a calcium-delivery failure, the plant unable to move enough calcium to the fruit, almost always because soil moisture swung between dry and soaked. Next season Water evenly and mulch to keep the soil from drying out and flooding, go easy on fertilizer, and do not dig close to the roots. Steady watering is the real answer.Water evenly and deeply and mulch to hold steady moisture, keep nitrogen moderate, avoid disturbing the roots, and make sure soil pH and calcium are adequate (a soil test and, if needed, lime or a calcium nitrate feed). Even water is the main fix.
Flowers keep dropping and no peppers formLots of flowers but few or no peppers setting
02 of 04
What happened The flowers drop off without making peppers. This usually comes from temperature: peppers do not set fruit well in extreme heat (days above about 90°F with warm nights) or when nights are cold. Too much fertilizer or dry soil makes it worse.Blossom drop. The flowers open but fall without setting fruit, most often because of temperature: bell peppers set poorly when daytime highs run past about 90 to 95°F with warm nights, and also when nights fall below about 60°F. Excess nitrogen and drought stress add to it. It is usually temporary and resolves as conditions moderate. Next season Plant at the right time for your area (not too early, not into the worst heat), keep the watering steady and the fertilizer modest, and shade the plants during a heat wave. In hot climates, grow peppers in spring and fall and expect a summer pause.Plant after real warmth but before peak heat, choose heat-setting or early varieties for your climate, keep nitrogen moderate and water steady, and use light shade cloth during extreme heat waves. In hot regions, time plantings for spring and fall around the midsummer heat.
Sunburned white patch on the pepperPale, papery, sunburned patch on the fruit
03 of 04
What happened Sunscald. A pale, papery, sunburned patch forms on the sunny side of the pepper and can rot. It happens when peppers that were shaded get suddenly exposed to strong sun, usually after the plant loses leaves.Sunscald. A pale, papery, sometimes blistered patch develops on the side of the fruit facing the sun, which can then rot. It happens when fruit that grew shaded is suddenly exposed to intense sun, typically after a plant loses leaves to disease, pests, or pruning, or on small plants carrying fruit in strong sun. Next season Keep the plant leafy so it shades its own peppers: manage leaf diseases and pests, do not over-prune, and add light shade cloth where the sun is intense. Leave the leaves that cover the fruit.Keep plants healthy and leafy so foliage shades the fruit: control leaf-spotting diseases and defoliating pests, avoid heavy pruning, space and feed for a full canopy, and use light shade cloth in intense-sun regions. Do not remove leaves that shade developing fruit.
Large bushy plant but very few peppersBig, leafy, dark-green plant with hardly any peppers
04 of 04
What happened Too much nitrogen fertilizer. The plant grows big, bushy, and dark green but makes few peppers, because heavy nitrogen makes leaves instead of fruit.Too much nitrogen. The plant is lush, tall, and dark green but flowers late and sets little fruit, because excess nitrogen drives vegetative growth at the expense of flowering and fruiting. Peppers are only moderate feeders and are easily pushed to leaf. Next season Use less nitrogen. Mix in a modest balanced fertilizer at planting, then wait until the plant is setting fruit before feeding again, and go light. Compost and a small feed at fruit set are plenty.Go easy on nitrogen: work in a modest balanced fertilizer at planting, hold off until fruit sets, then side-dress lightly. Use a phosphorus- and potassium-balanced feed rather than a high-nitrogen one, and rely on compost plus a fruit-set side-dress.
The usual suspects

Pests & diseases

Pests
Aphids
P · 01
Symptoms Tiny soft green insects gather on new growth and the undersides of leaves, making them curl and yellow, often with a sticky film and black mold. They can also spread plant viruses to peppers.Colonies of small soft-bodied insects, most often green peach aphid, cluster on growing tips and the undersides of leaves, curling and yellowing the foliage, with sticky honeydew and sooty mold following. Beyond direct feeding, aphids transmit the mosaic viruses that mottle and distort pepper leaves, which is their most serious effect on the crop. Cause Small sap-sucking insects that multiply quickly in warm weather, especially on soft, over-fertilized growth. They also carry viruses from plant to plant.Several aphid species, predominantly green peach aphid, that suck sap and reproduce rapidly in warm weather, building up fast on the soft growth that excess nitrogen produces. As virus carriers they matter out of proportion to the feeding damage they do. Organic treatment Blast them off with a strong spray of water and treat the undersides of the leaves with insecticidal soap, repeating every few days. Ladybugs and other helpful insects eat aphids, so welcome them.Knock colonies off with a strong jet of water and spray insecticidal soap or horticultural oil with thorough coverage of the leaf undersides, repeating every few days. Conserve ladybugs, lacewings, and parasitic wasps, which usually bring aphids under control. Prevention Do not over-fertilize with nitrogen, check the undersides of leaves regularly, and let helpful insects do their work. A silver reflective mulch under young plants helps keep aphids off.Avoid excess nitrogen, which drives the soft growth aphids favor, scout leaf undersides and growing tips, and support natural enemies rather than spraying broadly. Reflective mulch deters aphids from young plants and slows virus spread.
Flea beetles
P · 02
Symptoms The leaves are peppered with lots of tiny round holes, as if hit by birdshot. It hits young plants hardest. Touch the plant and you will see tiny dark beetles jump away.Tiny shot-hole punctures riddle the leaves, a scatter of small round holes that is the classic flea-beetle signature. Damage is worst on seedlings and young transplants, whose small leaf area a heavy infestation can shred; established peppers tolerate considerable feeding. Brush a plant and the small dark beetles spring away like fleas. Cause Small dark beetles that jump like fleas and chew tiny holes in the leaves. They are most active in spring and target young plants early in the season.Several flea beetle species that feed on pepper foliage, overwintering as adults in debris and emerging to attack the earliest, most vulnerable plants in spring. Young transplants are far more at risk than large, established plants. Organic treatment Cover young plants with a light row cover until they are big and strong, then take it off when they flower. Setting out larger transplants helps them outgrow the damage. For heavy attacks, an organic spray such as spinosad helps.Protect transplants with floating row cover until they are large and vigorous, removing it at flowering so pollinators can reach the blooms. Set out stout, well-hardened transplants so plants can outgrow the damage, and treat heavy early infestations with spinosad or kaolin clay. Prevention Cover plants early with row cover, set out larger transplants into warm soil so they grow quickly, and clear away weeds and old plant debris where the beetles hide over winter.Use row cover from transplanting, delay setting plants out until soil and air are warm so they grow away fast, and clean up crop debris and weeds that harbor overwintering adults.
Pepper maggot
P · 03
Symptoms Some peppers turn red too early and rot from the inside, and cutting one open reveals a small white maggot tunneling through the flesh. It is mainly a problem in the Northeast and Mid-Atlantic.Fruit that colors up early and unevenly, sometimes with a soft, rotting spot and a pinhole scar on the skin, and a white, legless maggot tunneling in the flesh inside. Cut the pepper open and the winding feeding channels and the maggot give it away. It is a regional pest, most troublesome in the Northeast and Mid-Atlantic. Cause A fly that lays its eggs in young peppers in summer; the maggot that hatches feeds inside the fruit, causing early ripening and rot. It is worst where the pest is established locally.The larva of the pepper maggot fly, which lays eggs in developing fruit through mid to late summer, leaving a tiny egg-puncture scar. The maggot feeds inside, and infested fruit ripens prematurely and often rots. Organic treatment You cannot save an infested pepper, so pick off and destroy any that ripen early or show a pinhole scar to stop the next generation. Removing wild host weeds like horsenettle nearby helps.There is no rescue for an infested fruit, so control targets the egg-laying flies: remove and destroy affected peppers promptly to break the cycle, and where pressure is high time labeled sprays to the egg-laying period. A yellow sticky trap helps confirm when the flies are active. Prevention Clear away wild nightshade weeds nearby, move peppers to a new spot each year, and destroy any infested fruit. In areas where it is a known problem, a floating row cover put on before fruit forms keeps the flies out.Remove nearby wild solanaceous weeds such as horsenettle that host the fly, rotate peppers away from last year's bed, clean up and destroy infested fruit, and in problem areas protect fruit with a labeled spray timed to the flight or with row cover before fruit set.
Tomato and tobacco hornworms
P · 04
Symptoms Whole leaves vanish, leaving just the veins, with dark droppings on the leaves below. The cause is a large green caterpillar that hides against the stems, easier to spot by its droppings than by sight.Large sections of leaf, and sometimes whole shoots, are stripped down to the veins, with dark pellet droppings on the leaves below. The culprits are big green tomato or tobacco hornworms, up to four inches long, that blend into the stems and are easiest to find by their frass. Cause Big green caterpillars, the young of large moths, that feed on pepper leaves and fruit mostly in mid to late summer. Even a few can strip a lot of foliage.Tomato and tobacco hornworms, the larvae of large sphinx moths, which feed on solanaceous foliage including pepper from midsummer on. A few caterpillars can do conspicuous damage given their size, and they will chew into fruit as well as leaves. Organic treatment Pick the caterpillars off by hand and drop them in soapy water. If you find one covered in small white capsules, leave it, those are parasitic wasps that will do the work for you. An organic Bt spray works on the smaller caterpillars.Hand-pick the caterpillars, which is effective in a home garden, and apply Bacillus thuringiensis to younger larvae where numbers are high. Leave any hornworm studded with white parasitic-wasp cocoons in place, since the wasps will kill it and breed more. Prevention Turn the soil at the end of the season to destroy the pupae, watch for droppings and missing leaves from midsummer, and welcome the helpful wasps that attack hornworms.Till the soil in fall to destroy overwintering pupae, scout for frass and stripped leaves from midsummer, and encourage the parasitic wasps and other natural enemies that keep hornworms in check.
Pepper weevil
P · 05
Symptoms Flower buds and little peppers drop off the plant, and peppers that hold on are black and rotten inside. A tiny dark, long-nosed beetle is the cause. It is mainly a problem in the warm South.Buds and small fruit drop from the plant, and cut-open fruit is black and frass-filled inside, its core rotted where a grub has fed. The dark, long-snouted adult weevil, about an eighth of an inch, feeds on buds and leaves. It is a serious pest of the warm South and, once established, is very hard to shake. Cause A small weevil whose grubs develop inside pepper buds and fruit, causing them to drop and rot. It builds up quickly in warm weather and survives on leftover pepper plants and weeds.Anthonomus eugenii, a small weevil whose larvae develop inside pepper buds and fruit. Adults feed on foliage and lay eggs in buds and young fruit, causing them to drop; multiple overlapping generations build fast in warm climates, and the pest overwinters on volunteer peppers and nightshade weeds. Organic treatment You cannot save infested peppers, so gather and destroy every dropped bud and fruit to stop the next generation, and pull up old pepper plants and nearby nightshade weeds at season's end. Keeping the area clean is the main defense.There is no home-garden cure for infested fruit, so sanitation is central: pick up and destroy all dropped buds and fruit promptly to break the breeding cycle, remove volunteer peppers and nightshade weeds, and end the season by pulling and destroying spent plants. Where established, labeled sprays are timed to the adults. Prevention Buy healthy transplants, keep the garden free of leftover pepper plants and nightshade weeds, clean up dropped buds and fruit, and do not plant peppers in the same spot as last year.Start with clean transplants (the weevil moves on infested plants), remove volunteer peppers and solanaceous weeds that harbor it, destroy dropped fruit through the season, and rotate away from last year's pepper ground.
European corn borer
P · 06
Symptoms Little holes near the top of the pepper, sometimes with sawdust-like droppings, and a caterpillar tunneling inside that makes the fruit rot. It is common where field corn is grown.Small entry holes near the stem-end cap of the fruit, often with crumbly frass, and a caterpillar tunneling inside that leads to premature ripening and rot. The borer also tunnels stems, which can wilt or break. It is a common pepper pest in the corn-growing Midwest and East. Cause A caterpillar, the young of a moth, that bores into peppers near the cap and into the stems, causing rot and breakage. It has more than one generation each summer.The larva of the European corn borer moth, which lays eggs on peppers (and corn) in summer; the caterpillar bores into fruit through the cap and into stems. Two or more generations a season are common in the Midwest and East. Organic treatment Catch it early: an organic Bt or spinosad spray works on the young caterpillars before they tunnel in, but does nothing once they are inside a pepper. Pick off and destroy any bored fruit.Scout for eggs and early larvae and apply Bacillus thuringiensis or spinosad to young caterpillars before they bore into the fruit, since once inside they are protected. Remove and destroy infested fruit, and clean up crop and nearby corn debris at season's end. Prevention Clean up old pepper and corn stalks at the end of the season, watch for the caterpillars from midsummer, and treat while they are small. Cleaning up where they overwinter is the biggest help.Destroy crop debris and nearby cornstalks where the borer overwinters, scout from midsummer when moths are flying, and time treatment to newly hatched larvae. Choosing an earlier variety can dodge the worst of the flight in some areas.
Diseases
Bacterial leaf spot
D · 01
Symptoms Small dark, water-soaked spots on the leaves that spread and turn brown or black, often ringed in yellow, with rough scabby spots on the peppers too. Bad cases drop leaves and expose the fruit to sunburn. It thrives in warm, wet weather.Small, water-soaked spots on the leaves that turn brown to black with a slightly raised, scabby center and a yellow halo; badly spotted leaves yellow and drop, and raised, cracked, scabby lesions form on the fruit. Defoliation exposes the remaining fruit to sunscald. It is one of the most common and damaging pepper diseases, worst in warm, wet, splashy weather. Cause A bacterial disease carried on seed and in old plant debris that spreads in splashing water during warm, wet weather. It often comes in on infected seed or transplants.Xanthomonas bacteria that are both seedborne and carried on crop debris, spreading in splashing water and on hands and tools. Warm, humid, rainy conditions favor it, and infected seed or transplants often start an outbreak, so clean seed and rotation are central to control. Organic treatment There is no cure, so pull off badly spotted leaves and avoid handling the plants when they are wet. A copper spray can slow it down but will not cure it, so prevention matters most.There is no cure once plants are infected; remove the worst-affected leaves and avoid working among wet plants. Copper-based sprays can slow spread but do not eradicate it, so the emphasis is on preventing it in the first place. Prevention Use clean seed and healthy transplants, look for resistant varieties, do not plant peppers in the same spot for a few years, mulch the soil, water at the base instead of over the leaves, and clean up old plants in fall.Start with certified disease-free or hot-water-treated seed and clean transplants, choose resistant varieties where available, rotate peppers out of the bed for two to three years, mulch to limit soil splash, water at the base rather than overhead, and remove crop debris at season's end.
Phytophthora blight
D · 02
Symptoms The plant wilts and collapses suddenly, often with a dark rotten patch on the stem near the soil, and the roots and even the fruit can rot. It strikes in warm, wet, soggy ground and moves fast. It is one of the worst pepper diseases.Dark, water-soaked lesions girdle the stem at or near the soil line and the plant wilts and collapses suddenly, sometimes with a white cottony growth; roots rot, and fruit can develop a firm, white-mold rot. It flares in warm, wet, poorly drained ground and after heavy rain or flooding, and is the most serious pepper disease in much of the country. Cause A mold-like disease that lives in wet soil and spreads in splashing and running water, attacking peppers in warm, soggy conditions. It moves fast once it starts and lives in the soil for years.Phytophthora capsici, a water mold that thrives in saturated soil and spreads in splashing and running water. It survives in soil and debris for years and moves fast in warm, wet weather, especially on heavy or poorly drained ground and in low spots that stay wet. Organic treatment Pull and destroy affected plants and fruit, and fix the drainage. There is no good home cure once it takes hold, so prevention is what matters.Remove and destroy affected plants and fruit promptly, and improve drainage immediately. There is no effective home-garden cure once plants collapse, so control is preventive and drainage-based. Prevention Plant on raised beds or mounds so water drains away, avoid wet low spots, water at the soil and do not overwater, and rotate away from peppers for several years. Keeping the ground from staying soggy is the key.Plant on raised, well-drained beds or hills, avoid low spots that stay wet, water at the soil rather than overhead, do not overwater, mulch to limit splash, rotate away from peppers and other susceptible crops for at least three to four years, and keep fruit up off saturated soil.
Anthracnose
D · 03
Symptoms Sunken round spots on the peppers, often with rings of tiny dark or pinkish specks, that spread into a soft rot. It is worst on ripening red peppers in warm, wet weather.Sunken, circular lesions on the fruit that enlarge and develop concentric rings of small dark or salmon-colored spore masses, rotting the pepper; it hits ripening and colored fruit hardest. Warm, wet, humid weather drives it, and it can ruin a fall crop of red peppers left on the plant to color. Cause A fungus carried on seed and in old plant debris that spreads in splashing water during warm, wet weather. Ripening peppers left on the plant are hit hardest.Colletotrichum fungi that are seedborne and survive on crop debris, spreading in splashing water. Warm, humid, rainy conditions favor it, and fruit left to ripen fully on the plant in such weather is especially vulnerable. Organic treatment Pick off and throw away infected peppers right away, and keep the plants dry by watering at the soil. A labeled fungicide can protect the healthy fruit, but rotten ones cannot be saved.Remove and destroy infected fruit promptly to limit spread, and keep foliage and fruit as dry as possible. Where the disease is active a labeled fungicide can help protect healthy fruit, but rotted peppers cannot be saved. Prevention Use clean seed, do not plant peppers in the same spot for a few years, water at the base, give plants room for air to move, pick ripe peppers promptly, and clean up old plants at the end of the season.Start with clean, disease-free seed, rotate peppers out of the bed for two to three years, water at the soil rather than overhead, mulch to limit splash, space for airflow, harvest ripe fruit promptly rather than letting it sit in wet weather, and remove crop debris at season's end.
Mosaic and other viruses
D · 04
Symptoms Leaves turn mottled light and dark green, crinkled or misshapen, and the plant is stunted with fewer, deformed peppers. Several viruses cause this, spread mostly by aphids and thrips. There is no cure once a plant has it.Leaves are mottled light and dark green, often puckered, narrowed, or distorted, and the plant is stunted with reduced, sometimes bumpy or ringspotted fruit. Several viruses, including cucumber mosaic, tobacco mosaic, and tomato spotted wilt, affect peppers, spread mainly by aphids and thrips or by handling. Symptoms are permanent, since there is no cure. Cause Plant viruses spread mostly by aphids and thrips, and some by touch. They cannot be cured, so they are managed by keeping the carriers down and removing infected plants.A group of viruses (including cucumber mosaic, tobacco mosaic, and tomato spotted wilt) transmitted mainly by aphids and thrips, and some, like tobacco mosaic, also by handling and on tools. They overwinter in weeds and perennials and are moved into the crop by their insect carriers. Organic treatment There is no cure, so pull and destroy any plant that shows mosaic symptoms so it does not spread to others, and wash your hands and tools. Keeping aphids and thrips down is the best defense.There is no cure; remove and destroy infected plants promptly so they do not serve as a virus reservoir, and wash hands and tools after handling them. Managing the aphids and thrips that spread the viruses is the real lever, along with controlling weed hosts. Prevention Look for resistant varieties, keep aphids, thrips, and weeds under control, do not handle plants right after using tobacco, and pull out infected plants as soon as you spot them.Choose resistant varieties where available (many peppers carry virus resistance), control aphids and thrips, keep weeds down around the garden, avoid handling plants after tobacco use (tobacco mosaic), use reflective mulch to repel aphids, and remove infected plants early.
Southern blight
D · 05
Symptoms The plant wilts and dies suddenly, and at the base of the stem you find white fuzzy threads and tiny tan balls like mustard seeds. It happens in hot weather and is mainly a problem in the warm, humid South.A sudden wilt with a brown, rotting lesion girdling the stem right at the soil line, where a fan of white fungal threads and small tan, mustard-seed-sized resting bodies appear. The plant collapses and dies. It strikes in hot weather on many crops and is most damaging in the warm, humid South. Cause A soil fungus that attacks the base of the stem in hot weather. It lives in the soil for years and affects many kinds of plants, so it builds up where susceptible crops are grown repeatedly.Sclerotium rolfsii, a soilborne fungus with a very wide host range that survives in soil for years as tough resting bodies. It is favored by hot weather and high soil moisture, and by crop debris and mulch in contact with the stem. Organic treatment There is no cure, so pull and destroy any plant that collapses from it, taking some of the soil around the base with it. Prevention is the real answer for next season.There is no cure for an infected plant; remove and destroy it along with the soil immediately around the stem to carry off the resting bodies. Because it persists in soil, management is preventive. Prevention Rotate your crops, clean up or bury old plant debris, keep heavy mulch from piling against the stems, and improve drainage. In beds where it keeps appearing, solarizing the soil in summer helps.Rotate away from susceptible crops on a long cycle, bury crop debris deeply or remove it, keep mulch and soil pulled back from direct contact with the stem, improve drainage, and in problem beds deep plowing or soil solarization lowers the fungus.
Verified · 5 sources View
Seasoned
Where to plant next year

Crop rotation

Move peppers to a different part of the garden each year, and do not return them, or their relatives tomato, potato, and eggplant, to the same spot for about three years, longer if you have had Phytophthora blight. Soil diseases build up where nightshades grow, and rotation is the main tool to keep them in check. Clean up old plants and dropped fruit at the end of the season too.Rotate peppers on at least a 3 year cycle, longer where Phytophthora blight has appeared, to break the buildup of bacterial leaf spot, Phytophthora, anthracnose, and southern blight in the soil. The wider Solanaceae, tomato, potato, and eggplant, share that complex, so rotate as a group and avoid following any of them. Clear and remove spent plants at season's end rather than tilling them in, which removes overwintering disease and pest sites, including the dropped fruit that harbors pepper weevil and pepper maggot.

Family
Nightshade family (Solanaceae)
Years between
3 years
in the same bed
Avoid following
Do not plant peppers where you grew tomatoes, potatoes, eggplant, or peppers recently. They are all in the same family and share the same soil diseases and pests, which build up and carry over.Tomatoes, potatoes, eggplant, and peppers, which share bacterial leaf spot, the mosaic viruses, Phytophthora blight, anthracnose, and the aphids that vector the viruses. These soilborne diseases and shared pests build up wherever a nightshade has grown.
Plant after
Legumes (beans, peas), brassicas, sweet corn, alliums (onions, garlic), and leafy greens make good preceding crops, since they do not share the nightshade pest and disease complex, and a legume leaves a little nitrogen behind for the pepper crop.
Verified · 2 sources View
In the app · pre-launch

When plant taps you on the shoulder

The plant app sends a timely reminder at every critical moment of your bell pepper season. The wording adjusts to whichever you pick: beginner or seasoned. Here are three you'll see in Zone 3.

p
plant
NaN days after transplanting
Wait for warm weather to plant peppers
Peppers dislike the cold. Wait to plant them out until nights stay above 55 to 60°F and the soil is warm, a week or two after your last frost. Mulch after planting to keep the watering even.
p
plant
NaN days after fruiting
Time to feed your peppers
Your pepper is starting to set fruit. Feed it with a nitrogen fertilizer such as calcium nitrate a few inches out from the stem, water it in, and keep the watering even to prevent blossom-end rot.
p
plant
NaN days after harvest
Your peppers are ready to pick
Your peppers are full-size and firm. Pick them green now, or leave them to turn red, orange, or yellow and get sweeter. Cut them off with a little stem, and keep picking green ones so the plant makes more.
Get personalized alerts.

plant sends the right notification at exactly the right moment, for your zone, your weather, your crops. Founding members lock the rate forever.

Back the Kickstarter →
Ask the gardener

Common questions

Got a question we missed?

We're building this guide with real growers. Got a question we missed? Ask here. We read every one and add the best answers right to this page.

Grown this before?

Share a tip

Learned something the hard way? Pass it on. Real growers' tips make this guide better for the next person, and we credit you by name when yours goes live.

Seasoned
Spot something wrong?

Report a problem

If you've grown this crop and you see a date, a temperature, a companion claim, or a recommendation that doesn't match your experience, tell us. Real growers' corrections make this guide better for the next person.

How we built this guide

Methodology & sources

Every date, temperature, spacing, and recommendation on this page is sourced from university cooperative extension publications, peer-reviewed agricultural research, NOAA climate data, and direct extension calendars. Where claims are softer (traditional gardening wisdom not formally documented), we say so.

Research-backed Documented in cooperative extension publications or peer-reviewed research
Well-grounded A known agronomic principle, but not formally tested for this specific pair
Traditional Time-tested gardening wisdom, limited formal research support
Last reviewed
June 30, 2026
Data version
crops_data_final · v1.0 · schema 2.9
Sources cited on this page
16 publications
Verified entries
Companion-planting claims tagged inline · zone dates verified against 5+ extensions
See all sources cited on this page
  • University of Minnesota Extension umn_ext
  • University of Maryland Extension umd_ext
  • Cornell Cooperative Extension cornell_ext
  • Iowa State University Extension iastate_ext
  • Michigan State University Extension msu_ext
  • NC State Extension ncsu_ext
  • Penn State Extension psu_ext
  • U. of Illinois Urbana-Champaign Extension uiuc_ext
  • UC Davis Postharvest Center ucd_postharvest
  • Texas A&M AgriLife Extension tamu_agrilife
  • Virginia Cooperative Extension 426-331 vce_426_331
  • Piedmont Master Gardeners piedmont_mg
  • UGA Vegetable Garden Calendar uga_calendar
  • Clemson Home & Garden Information Center clemson_hgic
  • UC IPM Statewide IPM Program uc_ipm
  • NOAA 1991-2020 Climate Normals noaa_normals

Growing notes, weekly.

Zone-aware seasonal nudges, what's worth planting now, and the occasional recipe from the harvest. No spam, ever.

Vol. 003 · Bell Pepper · plant.lifestyle