Pick your zone and the dates re-calibrate.
The Guide Crops Vol. 003

Celery

in Zone 9, this week

Celery is a cool-weather vegetable in the carrot family, grown for its crisp stalks, and it is honestly one of the trickier crops to grow well. It came from a wild marsh plant, so it wants steady dampness, rich soil, lots of food, and mild weather, all at the same time, over a long season (about 80 to 120 days after you plant it out). You start it indoors 8 to 10 weeks early and plant it outside only after hard frosts are over, because young celery that gets too cold will bolt (run to seed). The big secret is to keep it growing steadily and never let it get dry, hungry, too hot, or too cold. Any of those makes the stalks stringy, bitter, hollow, or cracked. Get the steady care right, grow it in the cooler parts of the year, and homegrown celery is far more tender and flavorful than what you buy. Celery (Apium graveolens) is a cool-season member of the carrot family grown for its crisp leaf stalks, and it has a reputation as one of the more demanding vegetables for good reason. Descended from a wild marsh plant, it wants what few crops want all at once: a long, mild growing season of roughly 80 to 120 days from transplant, constant and even moisture, rich heavily fed soil, and freedom from both hard cold and summer heat. It is started indoors 8 to 10 weeks ahead and transplanted out only after hard-frost danger passes, because young plants chilled for a couple of weeks near 50°F will bolt. The through-line of celery culture is steadiness: any check from drought, hunger, heat, or cold shows up directly as stringy, bitter, hollow, or cracked stalks, and calcium starved by uneven watering blackens the growing heart. Grown with that steadiness, in the cool shoulders of the year, it rewards the effort with tender, flavorful stalks far better than the store offers.
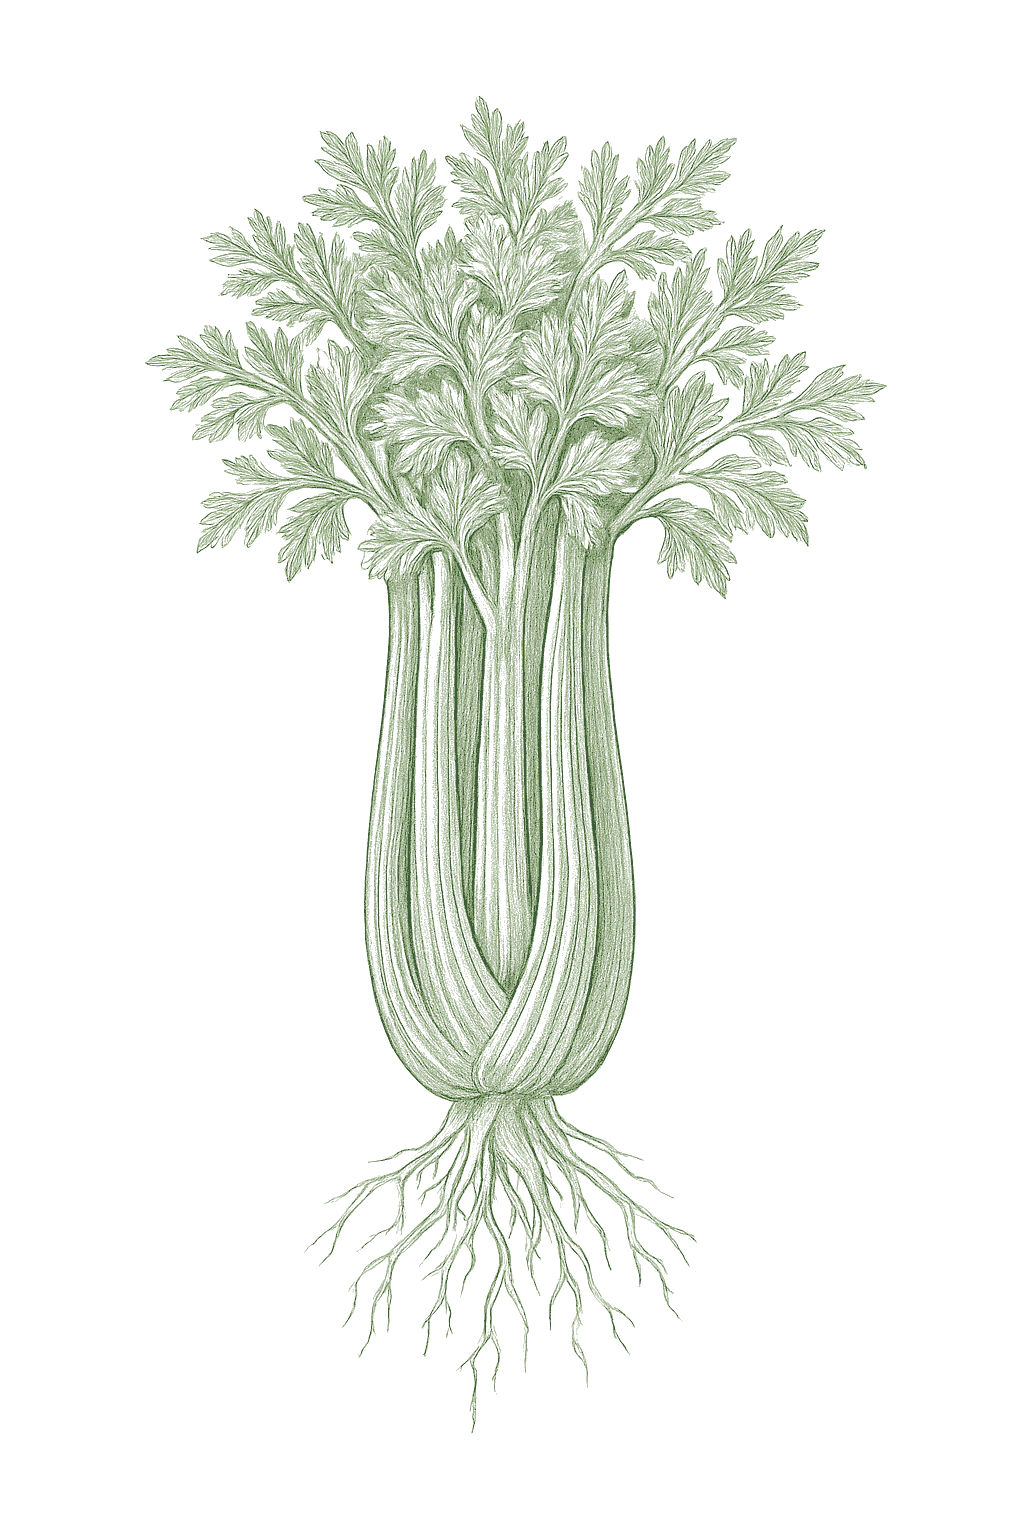
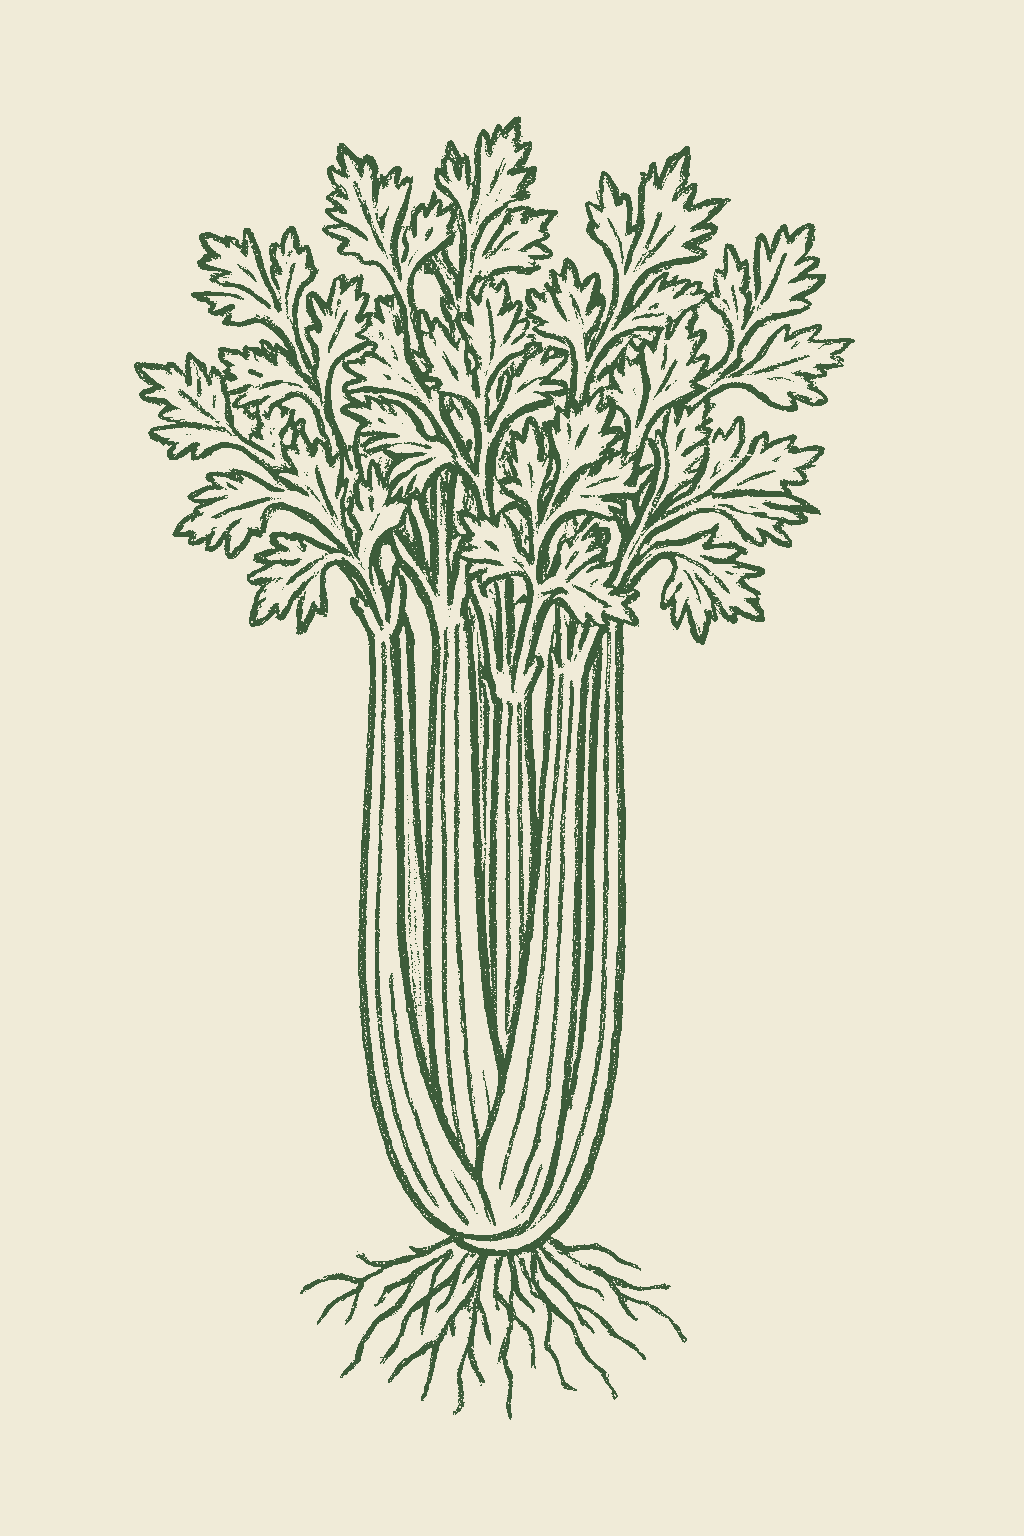
Celery mature plant
Fig. 01 · Celery, mature Zone 9
Mature in
80-120d
from transplant
Sunlight
Full sun to partial shade
6-8 hrs daily
Water
High
2 inches / week
Spacing
6-10"
between plants
Soil pH
6-6.8
slightly acidic
Today · in your zone

What's happening right now

July 24 · Zone 9 · Stage 01 · Germination

Off-season for celery in zone 9.

Seasoned
Microclimate · Zone 9a vs 9b

Your zone, at a finer grain

Zone 9 averages a last frost around March 1. Within Zone 9, the colder half (9a, winters down to 20°F) runs about a week later. The warmer half (9b, winters down to 25°F) runs about a week earlier. The plant app picks your subzone from your ZIP.

SubzoneLast springFirst fallGrowing daysWinter minFruits reliably
9aMar 8Nov 24~26120-25°FYes · two seasons
9bFeb 28Nov 30~27525-30°FYes · two seasons

Averages from 8 weather stations per subzone, drawn from NOAA 1991-2020 Climate Normals. Your actual frost date can vary by up to two weeks based on elevation, proximity to water, and local topography.

Source: NOAA 1991-2020 Climate Normals Methodology
Your climate region in Zone 9
The season at a glance

Planting calendar

In Zone 9, celery can be planted February through May, then again September, skipping the summer heat. Start indoors Jul. Harvest runs November through May.

Jan
Feb
Mar
Apr
May
Jun
Jul
Aug
Sep
Oct
Nov
Dec
plant
too cold
plant
plant
plant
plant
too hot
indoors
too hot
plant
too late
too late
too early
harvest
harvest
harvest
harvest
harvest
indoors
plant out
harvest
Get a head start indoors It is too hot for celery to grow well outside right now, but you can start seeds indoors now for a fall crop. Move them outside once daytime highs cool to around 75°F.Too hot for celery to grow well outside now. Start seeds indoors for a fall crop. Set transplants out once daytime highs cool to about 75°F.
Above-ground cropBest planted on a waxing moon
Seasoned
Stagger your sowings

Succession planting

Celery takes a long time to grow, so you do not replant it every couple of weeks like lettuce. Instead, set out plants a week or two apart within a planting window, and in milder areas grow a spring crop and a fall crop. In cold-summer areas you usually get one main summer crop; in hot areas you grow it in fall, winter, and early spring to dodge the heat. Aim for the crop to finish in cool weather, and never let it dry out.Celery is a long-season crop, so it does not succession-sow rapidly the way salad crops do, but you can stagger transplants a couple of weeks apart within a window and grow both a spring and a fall crop in milder climates. In cold-summer regions that usually means a single main crop transplanted after frost and grown through summer; in warm regions it means a fall and a late-winter or spring crop bracketing the summer heat. Time each window so the long crop matures in cool, not hot, weather and never goes short of water.

Every 3 weeks · sow a short new rowUp to 4 sowings a seasonToo hot to sow midsummer
Jan
Feb
Mar
Apr
May
Jun
Jul
Aug
Sep
Oct
Nov
Dec
sow
harvest
keep sowing
too hot
continuous harvest
The season, mapped

Seed to garden

Start celery indoors from seed, or buy young plants, because it is too slow to plant straight in the garden in most areas. Sow the seed about 8 to 10 weeks before you plan to set plants out. Barely cover the tiny seeds, since they need light and warmth (around 70°F) to sprout, and be patient, they can take 2 to 3 weeks. Plant out only after the risk of hard frost and long cold spells is over: cold-shocked young celery often bolts (runs to seed) later instead of making good stalks. Harden the plants off over a week or so by watering a little less, not by putting them out in the cold.Always start celery as a transplant; it is too slow and too long-season to direct sow in most of the country. Sow seed indoors about 8 to 10 weeks before the target transplant date, barely covering the fine seed (it needs light and warmth, ideally about 70°F, to germinate, and is slow, often 2 to 3 weeks). Grow the seedlings on and transplant out when they have several true leaves and, critically, only after the danger of a hard frost or a prolonged cold snap has passed: young celery exposed to roughly two or more weeks of temperatures near or below 50°F can vernalize and bolt later instead of forming usable stalks. Harden off over 7 to 10 days by easing water, not by chilling.
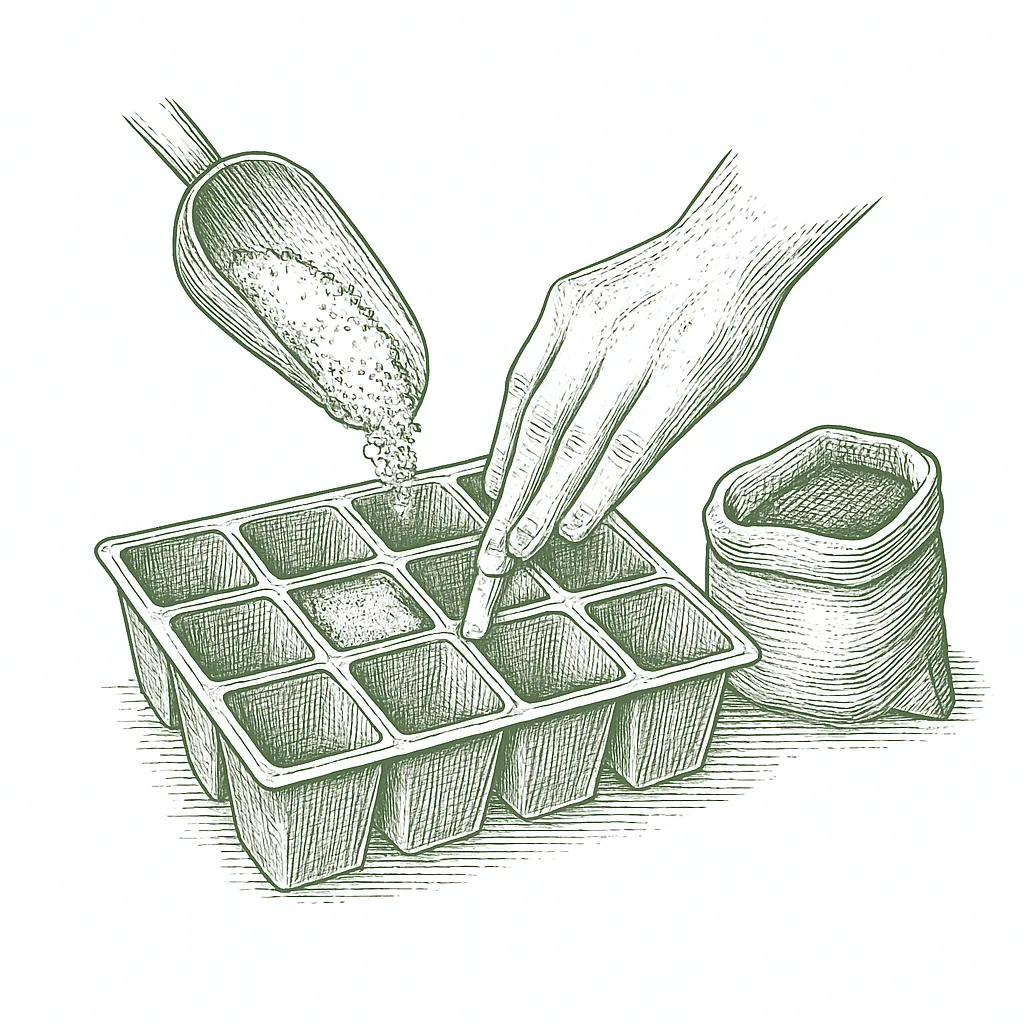
  1. 01
    Sow indoors →
    Jul, Dec
    Start about 10 weeks before your last frost
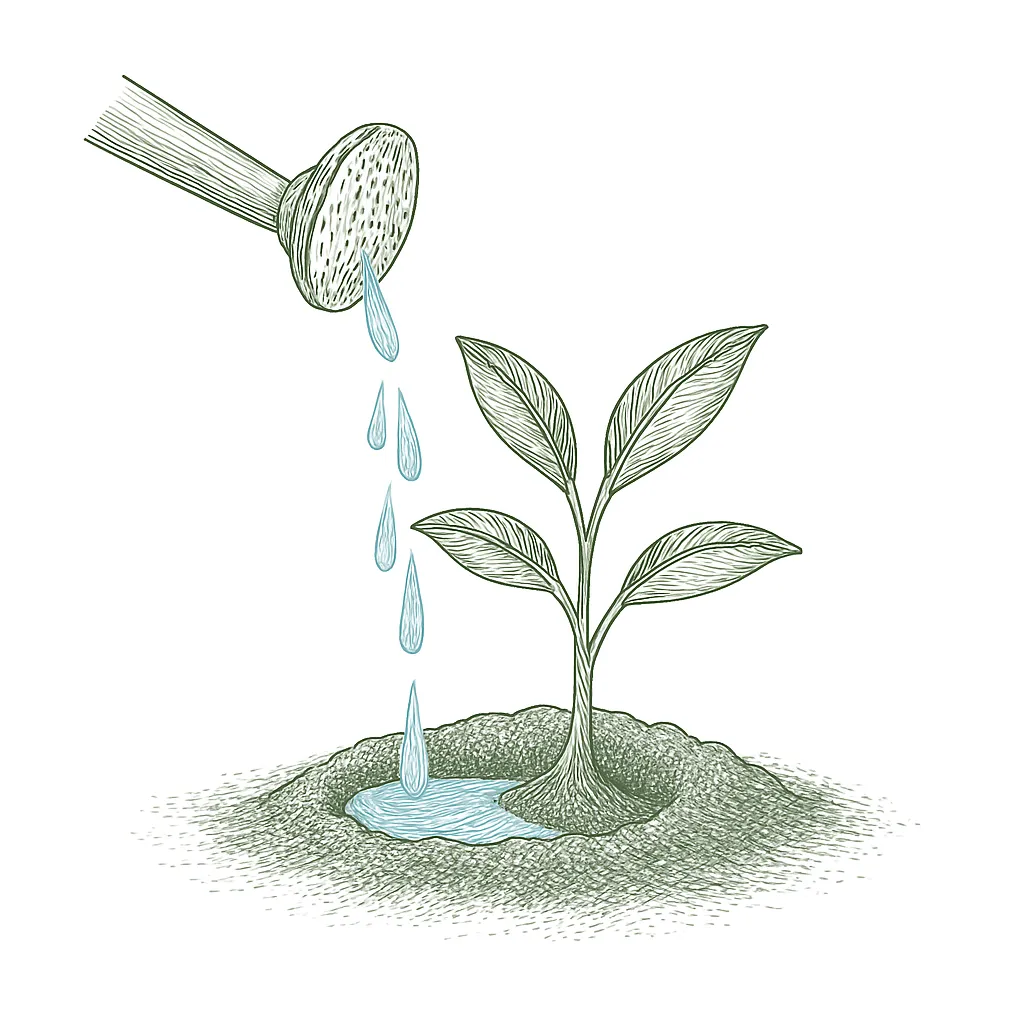
  2. 02
    Transplant out →
    Sep, Feb
    After hardening off
  3. 03
    First harvest
    From Nov
    80-120 days from transplant
Start method
Transplant
Soil temp
60-70°F
Hardening off
7-10 days
Yes, harden celery off before transplanting, but do it by gradually reducing water rather than by exposing the plants to cold. Celery is unusual here: chilling the seedlings to toughen them can backfire and make them bolt later, so ease them outdoors over 7 to 10 days into mild, not cold, conditions.
From seed to fruit

The growing journey

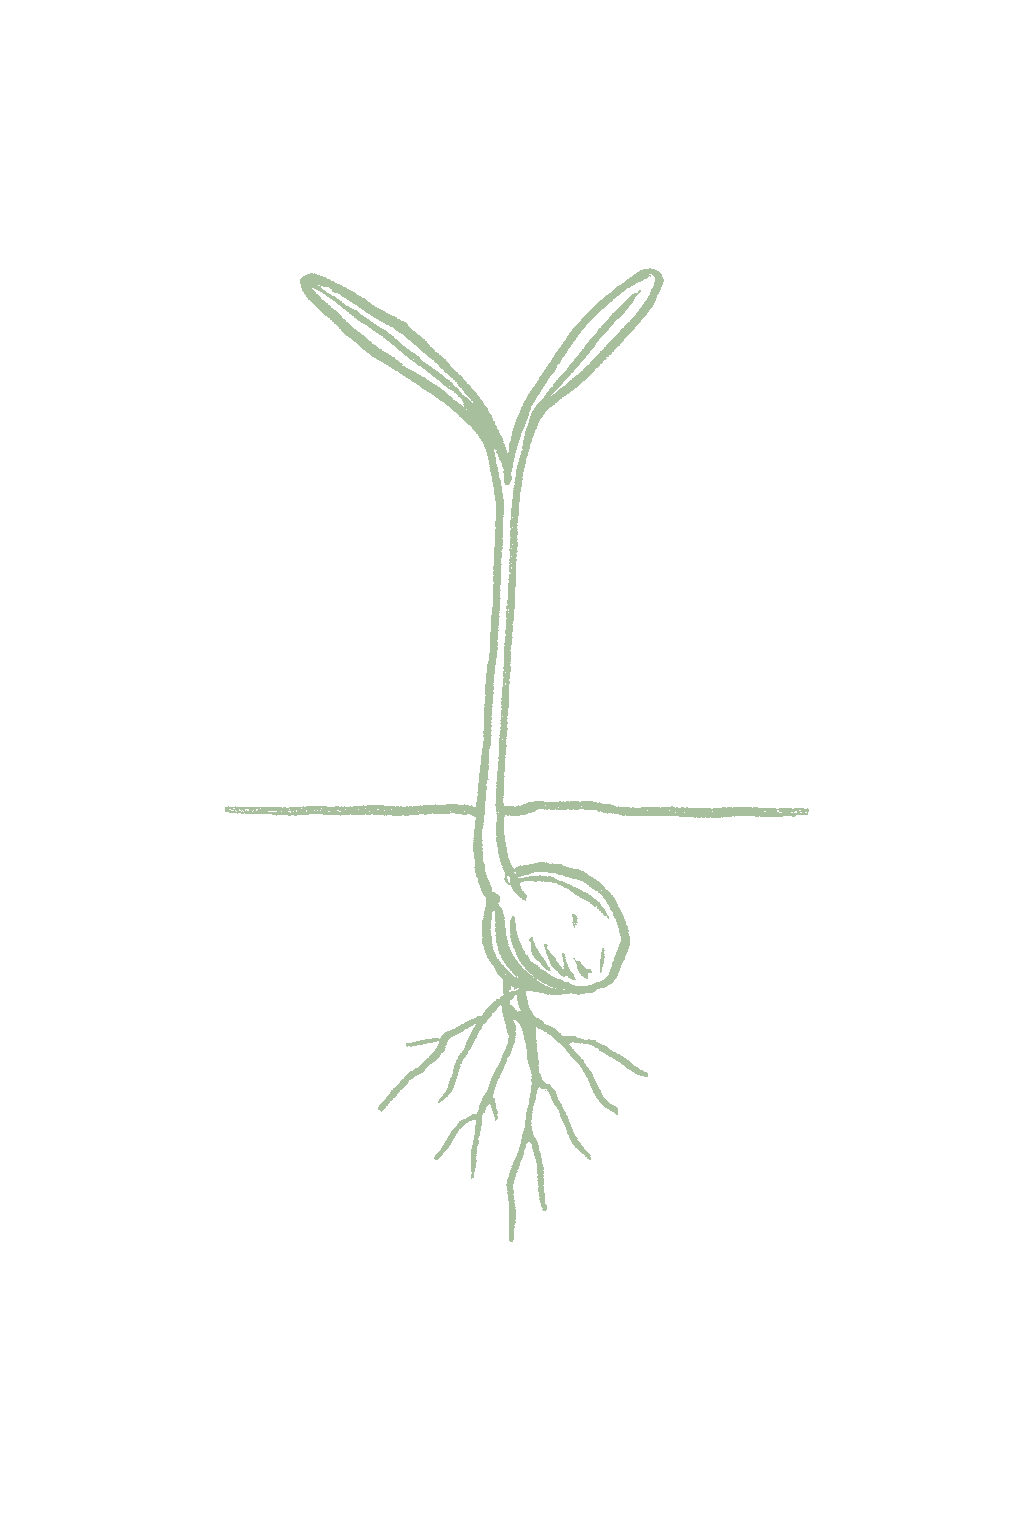
Stage 01 · Germination
01
Germination
Days 0-21 · current stage
Empty seed trays for a while, then very small, thin seedlings with two narrow first leaves. Celery is slow to come up, often 2 to 3 weeks, and needs warmth, light, and a surface that never dries out. If little comes up, the seed was probably buried too deep, dried out, or was too cold.Bare flats for a long time, then tiny, thread-fine seedlings with two narrow seed leaves. Celery germinates slowly and unevenly, often 2 to 3 weeks, needs light and warmth (about 70°F) and a surface that never dries, so patchy or no emergence usually traces to drying out, burying the fine seed too deep, or cold.
Sow the seeds on top of the mix or barely cover them, keep them warm (around 70°F), give them light, and never let the surface dry out. A clear cover and a warm spot help. Be patient, since they are slow.Sow on the surface or barely covered, keep the medium constantly moist and around 70°F, and provide light. Bottom heat and a humidity dome help. Do not let the surface dry during the long germination window.
FROM PLANT · Celery seeds are tiny and need light to sprout, so sow them on top of the mix or barely cover them. Keep them warm (around 70°F) and never let the surface dry out. They are slow, often 2 to 3 weeks, so be patient.Celery seed is fine and needs light to germinate, so surface-sow it or barely cover it, and hold the medium warm (about 70°F) and constantly moist. Germination is slow and erratic, often 2 to 3 weeks, so do not give up early or let the surface dry.
FROM PLANT · Celery takes about 8 to 10 weeks to grow big enough to plant out, plus a long season after that, so start the seeds early, around 10 to 12 weeks before you plan to plant outside.Because celery needs roughly 8 to 10 weeks indoors before transplant and a long season after, start seed early, on the order of 10 to 12 weeks before your intended set-out date, to make the most of the cool growing window.
02
Seedling
Days 21-75
Small plants slowly growing their real, divided celery leaves over many weeks indoors. Celery takes its time, about 8 to 10 weeks, to reach a size big enough to plant out.Slow-growing seedlings developing true, divided celery leaves over many weeks indoors. Growth is gradual; celery spends roughly 8 to 10 weeks reaching transplant size with several true leaves and a developing root system.
Keep the seedlings damp, warm, and in good light, and give a weak feeding once they have real leaves. Keep them above about 50°F, because cold seedlings often bolt later. Before planting out, harden them off over a week by watering a little less, and wait until hard frosts are past.Keep seedlings evenly moist, warm, and well lit, and feed lightly once true leaves appear. Hold them above roughly 50°F, since prolonged chilling of seedlings can vernalize and later bolt them. Harden off over 7 to 10 days by easing water, not by chilling, before transplanting after hard-frost danger passes.
FROM PLANT · Do not toughen up celery seedlings by making them cold, and do not put them out while it is still cold. About two weeks near or below 50°F can make young celery bolt (run to seed) later. Keep them warmer than 50°F and harden them off by watering less, not by chilling them.Do not chill celery seedlings to harden them, and do not rush them outdoors during cold weather: roughly two or more weeks near or below 50°F can vernalize young plants and make them bolt later. Hold seedlings above 50°F and harden off by easing water, not temperature.
FROM PLANT · Keep the seedlings damp, in good light, and give a weak feeding once they have real leaves so they keep growing. A stunted, stressed seedling does not transplant well.Keep seedlings evenly moist, well lit, and lightly fed once true leaves appear, so they grow on steadily; a stalled, hardened seedling transplants poorly and is more prone to bolting.
03
Established
Days 75-150
After planting out, the plants put on leaves and the bundle of stalks thickens and stands up. This long stretch is when steady water and feeding matter most, because going dry or hungry now makes the stalks tough and bitter for good.After transplanting, steady leafy growth and a thickening cluster of upright stalks. This long bulking-up period is when even moisture and steady feeding matter most: any check from drought or hunger here sets in stringiness and bitterness that will not reverse.
Keep the soil evenly moist all the time and feed with nitrogen every 3 to 4 weeks; mulch helps. Water at the soil so the leaves stay dry, which limits leaf-spot diseases. If you want milder, paler stalks, blanch (block the light) in the last couple of weeks before harvest.Maintain constant even moisture (1 to 2 inches per week or more) and side-dress nitrogen every 3 to 4 weeks. Mulch to hold moisture. Watch for leaf blights in wet weather and keep foliage dry by watering at the base. Begin blanching self-blanching or green types in the last 2 weeks before harvest if you want milder, paler stalks.
FROM PLANT · Steady water is the single most important thing for good celery: at least 1 to 2 inches a week, more in heat, and never let it dry out. A dry spell makes it stringy and bitter for good, so water at the soil and mulch around the plants.Even, uninterrupted moisture is the heart of growing good celery: at least 1 to 2 inches per week and more in heat, with no dry-down. A check from drought sets in the stringiness and bitterness that cannot be reversed, so water at the base and mulch the shallow roots.
FROM PLANT · Celery is a hungry plant. Feed it with a nitrogen fertilizer every 3 to 4 weeks to keep it growing fast and tender. Not feeding it enough, like not watering it enough, makes it tough and bitter.Celery is a heavy feeder: side-dress nitrogen every 3 to 4 weeks to keep growth fast and the stalks tender. Underfeeding, like underwatering, produces tough, bitter celery, so do not skimp.
FROM PLANT · To prevent blackheart (when the inside center turns black and dead), keep the water steady and the soil pH and calcium in a good range. Usually the soil has enough calcium, but uneven watering stops the plant from using it, so steady water is the main fix.Guard against blackheart (the death of the growing center) by keeping moisture even and pH and calcium adequate, since the disorder is triggered mostly by interrupted calcium delivery rather than truly low soil calcium. Even watering is the main lever.
04
Harvest
Days 150-200
Plants that have grown to a good size, about 3 inches or more across the base with stalks at least 6 to 8 inches tall, usually 80 to 120 days after planting out. The stalks should be firm and crisp. Cracking, hollow centers, or a flower stalk shooting up mean it is past its best.Plants reaching usable size, roughly 3 inches or more across the base with stalks 6 to 8 inches or taller, generally 80 to 120 days after transplanting. Stalks should be firm and crisp; cracking, pithiness, or seed-stalk formation (bolting) signal it is past prime or stressed.
Cut the whole plant off at the base, or just snap off the outer stalks as you need them and let the middle keep growing. Pick before a hard freeze (a light frost is fine and can sweeten it). Do not leave grown celery sitting in hot weather, which makes it tough.Harvest whole plants by cutting at the base, or take outer stalks as needed and let the center keep growing. Harvest before a hard freeze; light frost is tolerated and can sweeten the stalks. Do not leave mature plants in hot soil, which coarsens them and risks bolting.
FROM PLANT · Harvest by size, not a set date: a base about 3 inches across with firm, crisp stalks is ready, usually 80 to 120 days after planting out. You can snap off the outer stalks as you need them and let the middle keep growing, or cut the whole plant at the base.Harvest by size and need rather than a strict date: a base roughly 3 inches across with firm, crisp stalks is ready, generally 80 to 120 days after transplant. Take outer stalks as you need them and let the center keep growing, or cut the whole plant at the base.
FROM PLANT · Celery handles a light frost, and it can taste a little sweeter after, but a hard freeze ruins it, so pick or cover it before one. To store, keep it cold and damp; many gardeners find wrapping it in aluminum foil keeps it crisp longer than a plastic bag.Celery tolerates light frost (which can mildly sweeten it) but is damaged by a hard freeze, so harvest or protect plants before one. For storage, keep it cold and humid; wrapping in foil is a well-regarded trick for holding crispness longer than a plastic bag.
Beginner
Know your soil

Your soil

Identify yours

Not sure what soil you have? Grab a small handful of damp soil from your garden bed and squeeze it. If it crumbles apart easily, it's sandy. If it holds together but breaks when you poke it, it's loam (what most vegetables want). If it stays in a hard, slippery ball, it's clay.

What this crop wants

Celery is a marsh plant at heart, so it wants soil that stays damp and rich. Give it a loam or silt loam with lots of compost or rotted manure mixed in, the kind of soil that holds water without turning to swamp. Light, sandy soil is the hardest place to grow celery, because it dries out fast and celery hates drying out: that is what gives you stringy, bitter stalks. If your soil is sandy, dig in plenty of compost first, or grow celery in a raised bed or a big container with a moisture-holding mix. Celery is a heavy feeder, so a rich soil to start with makes the whole season easier.

If your soil doesn't match

You have sandy soil

Mix 2-3 inches of compost into the top 6 inches of your bed before planting. Compost holds moisture (which sandy soil drains too fast) and adds the nutrients sandy soil tends to lack. Repeat each season. Compost breaks down over time.

You have clay soil

Mix 2-3 inches of compost AND a few inches of coarse sand or perlite into the top 6 inches of your bed. The compost feeds the plants; the sand breaks up the clay so air and water can move through. Don't add sand without compost. It can compact like concrete.

Containers and raised beds

If amending your soil sounds like too much work, or if your soil is heavy clay, full of rocks, or contaminated, build over it. A raised bed at least 12 inches deep filled with a 50/50 mix of compost and sandy loam gives you ideal growing soil with no battles. A 5-gallon container with quality potting mix does the same for one plant at a time. Both bypass your native soil entirely.

Learn more about your soil
The specs

Care guide

The numbers that matter, at a glance.

Sunlight
Full sun to partial shade · 6-8 hrs/day
Water
High
Spacing
6-10 inches
Soil
loam, silt loam
Days to maturity
80-120 days from transplant
Soil pH
6 to 6.8
Container OK?
Yes · 3+ gal pot
Germination temp
60-70°F
Soil chemistry

Soil pH for celery

Preferred
6 to 6.8
Tolerated
5.8 to 7

Soil pH measures how acidic or alkaline your soil is, on a scale from 1 to 14 where 7 is neutral. Celery likes it slightly acidic to near neutral, roughly 6.0 to 6.8. It is not extremely fussy, but very acidic soil can lock up calcium, and celery already struggles with calcium, that is what causes the black, dead centers called blackheart. A cheap soil test from your local extension office tells you your number and whether to add lime before planting.Celery grows best in slightly acidic to near neutral soil, roughly pH 6.0 to 6.8, and tolerates a band of about 5.8 to 7.0. Holding pH toward the upper end of that range matters more for celery than for most vegetables, because adequate calcium availability is central to preventing blackheart (the calcium-related death of the growing tip), and strongly acidic soil reduces calcium uptake. A standard extension soil test removes the guesswork and tells you whether lime is warranted before transplanting.

Verified · 2 sources View
Steady hand on the hose

Watering

When & how much
Frequency
Celery needs more water, more steadily, than almost anything else in the garden. Keep the soil evenly damp all the time and never let it dry out. Give it at least 1 to 2 inches of water a week, counting rain, and more in hot weather or sandy soil. With celery, steady is the whole game.Celery is the thirstiest of the common garden vegetables and the least forgiving of a dry spell. It is shallow-rooted and descends from a marsh plant, so it wants the soil kept evenly and constantly moist, never swinging from dry to wet. Plan on at least 1 to 2 inches of water per week from rain or irrigation, and more in heat or on light soil, delivered often enough that the surface root zone never dries.
Amount
At least 1 to 2 inches a week, and more when it is hot or your soil is sandy. It is better to water a bit more often than to soak it once and let it dry out. A layer of mulch helps keep the soil damp.A minimum of 1 to 2 inches per week, increased in heat, wind, or fast-draining soil, applied frequently enough to avoid any dry-down. Mulch helps hold moisture and moderate soil temperature for the shallow roots.
Method
Water at the soil with a drip line or soaker hose so the roots stay damp but the leaves and the crowded base of the plant stay dry. Wet leaves bring on the leaf-spot diseases and stalk rot, so avoid spraying the plants from overhead, especially in the evening.Water at the base with drip or a soaker hose to keep the root zone constantly moist while keeping the foliage and the dense plant base dry, since wet leaves and a damp crown favor the leaf blights and pink rot. Avoid overhead sprinkling, especially late in the day and late in the season.
Signs of trouble
Too much water
Soil that stays soaking wet, not just damp, can rot the base of the plant and turn the leaves yellow. You want steady moisture in rich soil that still drains, not a swamp. Mushy stalk bases and a sour, wet bed mean ease off.Constantly saturated, poorly drained soil invites pink rot and damping-off and yellows the foliage. The goal is steady moisture in well-amended, draining soil, not standing water; a sour, waterlogged bed and soft rotting stalk bases are the warning signs.
Too little water
Letting celery go dry, even once, is the most common mistake. It makes the stalks stringy, tough, hollow, and bitter, and the damage does not undo itself. Droopy, dull leaves and stalled growth mean you waited too long, so keep the water steady rather than catching up after the fact.Even brief drought is the classic celery failure: the petioles turn stringy, tough, pithy or hollow, and bitter, and the plant may bolt under combined heat and water stress. Wilting, dull foliage and slow growth signal that the crop has already been checked, and the quality loss from a dry spell is not reversible.
Feeding rhythm

Feeding

Frequency
high
Type
Nitrogen-rich balanced
When to start
Mix compost and a balanced fertilizer into the bed before transplanting, then side-dress with nitrogen every 3 to 4 weeks through the season.

Celery is a hungry plant, the opposite of carrots. Mix lots of compost and a balanced fertilizer into the soil before you plant, then feed it again with a nitrogen fertilizer about every 3 to 4 weeks all season. The goal is to keep celery growing fast and without a pause. If it runs short of food or water, even for a while, the stalks turn tough, stringy, and bitter instead of crisp.Celery is a heavy feeder with a high nitrogen demand, the opposite of its low-nitrogen relative the carrot. Work plenty of compost or rotted manure plus a balanced fertilizer into the bed before transplanting, then side-dress with nitrogen every 3 to 4 weeks through the season, on the order of a quarter cup of a high-nitrogen source such as 21-0-0 per 10 feet of row each application. Steady feeding and steady water together drive the fast, uninterrupted growth that produces tender stalks; any check from hunger or drought shows up as tough, stringy, bitter petioles.

N · P · K = 10-10-10

The three numbers on a fertilizer bag are nitrogen, phosphorus, and potassium (N-P-K). Celery wants plenty of all three to start, like a 10-10-10, plus extra nitrogen (the first number) fed through the season. Mix compost in too. With celery you cannot easily overfeed the way you can with carrots: too little food is the bigger danger, because hungry celery grows tough and bitter.Celery is nitrogen-hungry and benefits from rich, steadily fed soil. Start with a balanced blend such as 10-10-10 worked in with compost at transplanting, then carry the crop with regular nitrogen side-dressings. Unlike root crops, celery will not fork or run to leaf from generous feeding: with celery the risk runs the other way, since underfeeding is a direct cause of stringy, bitter stalks. Keep calcium adequate as well, because calcium shortage, often triggered by uneven watering rather than truly low soil calcium, causes blackheart.

Try 10-10-10
Who grows well together

Companion planting

Celery is an easygoing neighbor that fits well among cabbage-family crops, bush beans, and onions or leeks, which many gardeners pair with it by tradition. The clearest plants to keep apart from celery are its own carrot-family relatives, carrot, parsnip, parsley, dill, and fennel, because they share the same pests and diseases. As always, treat most companion-planting charts with some skepticism, since many of their claims have not held up when tested. Celery slots easily into a mixed cool-season bed. The traditional pairings are with brassicas (cabbage, broccoli), bush beans, and alliums (onion, leek), all long-standing companion-planting lore rather than tested relationships, useful but not guaranteed. The best-grounded avoids are celery's own family, the Apiaceae: carrot, parsnip, parsley, dill, and fennel share its pest and disease spectrum (carrot rust fly, leaf blights, aster yellows), so clustering them concentrates that pressure. As with carrot, most companion-chart claims for celery rest on tradition rather than extension trials, so weight them accordingly.

Other
Cabbage-family crops (cabbage, broccoli)
Celery and cabbage-family plants are a classic old-time pairing. They like the same cool weather and rich, moist soil, so they make easy bed-mates. This is traditional garden wisdom rather than a tested rule, but it is harmless and convenient.Celery and the cabbage family share a culture, cool weather, rich soil, and steady moisture, so they make compatible neighbors, and the pairing is a fixture of traditional companion-planting guides. Treat the benefit as cultural compatibility and efficient bed use rather than a measured pest effect, since the relationship has not been demonstrated in controlled trials. Traditional
Bush beans
Bush beans are a traditional celery companion. Beans add some nitrogen to the soil, which suits hungry celery, and the two do not compete for the same space. A popular pairing, though more tradition than proven fact.The bean-celery pairing rests on the familiar legume rationale: beans fix nitrogen and are thought to share some with neighbors, which suits a nitrogen-hungry crop like celery. The in-season transfer is modest and not celery-specific in any controlled work, so treat this as traditional companion lore rather than a measured boost. Traditional
Onions and leeks
Onions, leeks, and other alliums are a traditional companion for celery, valued for their strong scent that some gardeners believe helps confuse pests. The evidence is thin, but they share a bed without trouble.Alliums are a traditional aromatic companion, credited with masking the scent of neighboring crops from pests. The mechanism is the same one cited for the carrot-onion pairing and is plausible against the shared carrot rust fly, but it is not demonstrated for celery specifically. A harmless, space-sharing pairing best treated as tradition. Traditional
Keep apart from
Carrots, parsnips, and parsley These are all celery's close cousins in the carrot family, and they catch the same pests and diseases, like the carrot rust fly and leaf blights. Growing them right next to celery lets those problems build up, so spread them around the garden instead.Carrot, parsnip, and parsley are fellow Apiaceae and share celery's pests and diseases, including carrot rust fly, the leaf blights, and aster yellows. Clustering the family concentrates that pressure, the same reason extension sources advise rotating related crops apart. Give each its own area rather than running them side by side. Traditional
Dill and fennel Dill and fennel are also carrot-family relatives and share celery's pests. Fennel in particular is a poor neighbor to most vegetables, so keep both well away from your celery.Dill and fennel are carrot-family relatives that share celery's pest spectrum, and fennel additionally carries a near-universal reputation as a poor companion to most garden crops, attributed to root compounds that suppress neighbors. The lab work behind fennel's allelopathy targets weeds rather than celery, but between the shared pests and the tradition, the simple handling is to keep both well away from the celery bed. Traditional
Fennel An Apiaceae relative with the same pest spectrum and a long-standing reputation for releasing compounds that inhibit nearby plants. Traditional lore treats fennel as antagonistic to most crops; for celery the concern is shared pests plus that reputation. Traditional
Provenance tagged inline · see methodology for the labeling system Key
Harvest signals

When to pick

Celery is ready when it has grown to a good size: a base about 3 inches or more across, with firm, crisp stalks at least 6 to 8 inches tall, usually 80 to 120 days after you planted it out. Cut the whole plant off at the base, or just snap off the outer stalks as you need them and let the middle keep growing. Pick before a hard freeze (a light frost is fine and can sweeten it). Stalks that are cracking, hollow, or shooting up a flower stalk are past their best.Celery is ready when the plant has reached usable size, judged by feel rather than a strict date: a base roughly 3 inches or more across, with firm, crisp, upright stalks generally 6 to 8 inches or taller, usually 80 to 120 days after transplanting. Harvest the whole plant by cutting at the soil line, or take outer stalks as needed and let the center keep growing. Harvest before a hard freeze; light frost is tolerated and can sweeten the stalks, but stalks that are cracking, going hollow or pithy, or sending up a seed stalk are past their best.

Verified · 2 sources View
Yield

What to expect

Each plant gives you one head of celery, which you usually cut whole. You can also snap off the outer stalks a few at a time and let the middle keep growing. A good plant gives a bunch of maybe 10 to 20 usable stalks; stressed plants give less.One head per plant, typically harvested whole, though you can also take outer stalks over time and let the center keep growing. A well-grown plant yields a bunch of perhaps 10 to 20 usable stalks; expect less from stressed or under-watered plants.

A celery planting is ready over a few weeks and then it is done, apart from picking outer stalks. For a steady supply, plant a spring crop and a fall crop, and stagger a couple of batches a week or two apart, instead of one big planting.There is no repeat harvest from a single planting beyond taking outer stalks; a planting matures over a window and is cut over a few weeks. Continuous supply comes from a spring and a fall planting (and successive batches a couple of weeks apart) rather than one long-bearing crop. You grow celery fresh from seed every year, so your first planting can do just as well as any later one. (Celery is naturally a two-year plant that flowers in its second year, which is why a cold spell that feels like winter to a young plant makes it bolt.) The keys to success are steady water and feeding.Celery is grown fresh from seed each season as an annual crop (it is botanically a biennial, flowering in its second year, which is why a cold snap that mimics winter makes it bolt), so there is no first-year-versus-later distinction; the first planting performs as well as any when moisture and feeding stay steady.

What changes yield
Even moisture: any dry-down makes stalks stringy, bitter, and pithy, the single biggest factor in celery quality.Steady feeding: celery is a heavy nitrogen feeder, and underfeeding directly toughens the stalks.Temperature window: prolonged cold on young plants causes bolting, while sustained heat above about 75°F coarsens and bitters the stalks.Calcium and pH: interrupted calcium delivery, often from uneven water, causes blackheart in the growing center.Season length: celery needs a long, mild stretch (about 80 to 120 days from transplant plus the indoor start), so timing the crop to the cool window is essential.
Verified · 2 sources View
Pick your variety

Recommended varieties

Celery comes in two main styles. Green types (like Tall Utah, Tango, and Conquistador) stay green and are what most people grow. Golden or self-blanching types make paler, milder stalks with less fuss. For your first try, pick an easier green variety like Tango or the more heat-tolerant Conquistador rather than the big old Pascal types, which are harder to grow well. (Leaf celery and celeriac are relatives grown differently and not covered here.)Celery varieties split into two broad styles. Green, self-blanching types (the Utah and Pascal lineages, plus Tango and Conquistador) keep their green color and are the standard for most home gardens; the so-called self-blanching trait means they need less manual blanching than old trench types, not none. Golden or yellow self-blanching types naturally produce paler, milder stalks with minimal effort. For a first crop, choose a forgiving green type such as Tango or the heat-tolerant Conquistador over the larger, fussier Pascal types. There is also leaf celery (cutting celery) and celeriac (root celery), which are grown differently and are not covered here.

Tall Utah 52-70 and its strains: the standard green, self-blanching home and market type, crisp and stringless when grown well
Tango: vigorous, relatively fast and more forgiving than most, a good first choice
Conquistador: more tolerant of heat and less-than-ideal conditions, easier than classic types
Golden Self-Blanching: a compact, pale-stalked self-blanching type that needs little or no manual blanching
Giant Pascal and other Pascal types: traditional green trench-blanched celery, larger but more demanding
Off the vine

Storing your harvest

Room temp
Not good. Left out, celery goes limp and bendy in a day or two as it dries out. Keep out only what you will use right away and refrigerate the rest.Poor. At room temperature celery wilts and goes limp and rubbery within a day or two as it loses moisture, fastest if the stalks are cut. Keep only what you will use within a day on the counter and refrigerate the rest.
Fridge
This is the best way, and celery stores well cold. Keep it in the crisper drawer, wrapped to hold moisture. A popular trick many gardeners swear by is to wrap celery in aluminum foil instead of a plastic bag, which keeps it crisp longer. It will last from two weeks to a month or more.The best everyday option, and celery keeps unusually well cold. Store whole heads or stalks in the crisper, ideally wrapped to hold humidity; many growers find wrapping celery in aluminum foil keeps it crisp markedly longer than a plastic bag, since the foil lets the plant's natural ethylene escape while holding moisture. At high humidity near 32°F celery holds two weeks to a month or more.
Freezer
You can freeze celery, but only for cooking, not for eating raw, since it goes limp once thawed. Chop it, dip it in boiling water for about 3 minutes, cool it fast in ice water, drain, and freeze. Use it in soups and stews. It keeps for several months.Workable for cooking use only, after blanching. Frozen celery loses its crunch and is best reserved for soups, stocks, and stews. Chop, blanch in boiling water about 3 minutes, cool quickly in ice water, drain, and freeze; quality holds for several months. Raw-frozen celery turns limp and watery on thawing.
Verified · 2 sources View
From the garden to the kitchen

Recipes to try

When something goes wrong

Common problems

Stringy, tough, bitter celeryStringy, tough, bitter stalks
01 of 05
What happened The stalks turned tough, stringy, and bitter. This almost always comes from the plant going dry at some point, or from not enough food, too much heat, or just slow growth. Celery has to grow fast and steady to stay crisp, and once it goes stringy it stays that way.The petioles came out fibrous, tough, and strong or bitter in flavor. The dominant cause is a growth check, almost always a dry spell, but also underfeeding, heat, or simply slow growth from cold or crowding. Celery must grow fast and without interruption to stay tender; once stringiness sets in it does not reverse. Next season Never let it dry out (1 to 2 inches of water a week, more in heat), feed it every 3 to 4 weeks, grow it in cool weather, and pick an easier variety like Tango or Conquistador. Mulch helps keep the soil evenly damp.Keep moisture constant (1 to 2 inches per week or more, never a dry-down), feed nitrogen every 3 to 4 weeks, grow in the cool season so heat does not coarsen the crop, and choose a more forgiving variety such as Tango or Conquistador. Mulch to steady soil moisture.
Celery bolted (sent up a flower stalk)Bolting (premature seed stalk)
02 of 05
What happened The plant shot up a tall flower stalk instead of making a good head, and the stalks went tough and bitter. The usual cause is cold: young plants that sat through a couple of weeks of cold weather (near or below 50°F) think winter has passed and try to flower. Hot, dry stress can also cause it.The plant sent up a tall flowering stalk instead of forming a usable head, and the stalks turned tough and bitter. The usual trigger is vernalization: young transplants exposed to roughly two or more weeks near or below 50°F read it as winter and flower. Heat-plus-drought stress can also push stressed plants to bolt. Next season Plant out only after the cold is truly past, cover young plants during cold snaps, do not toughen seedlings by making them cold, and keep them well watered in heat. Pick a bolt-resistant variety if your spring is cold.Transplant only after hard-frost danger and prolonged cold are past, protect early transplants from cold snaps with row cover, do not chill seedlings to harden them, and keep moisture even in heat. Choose bolt-resistant varieties where spring is cold.
Black, dead center (blackheart)Blackheart (blackened center)
03 of 05
What happened The inside center of the plant turned brown or black and died, even though the outer stalks looked okay, and it may have gone slimy. It is caused by the growing tip running short of calcium, usually because watering was uneven, not because the soil truly lacked calcium.The young leaves and growing point in the center died and turned brown to black while the outer stalks looked fine, often followed by a slimy secondary soft rot. It is a localized calcium deficiency in the fast-growing tissue, usually caused by interrupted calcium delivery (uneven watering, growth surges, high salts, or acidic soil) rather than genuinely low soil calcium. Next season Most of all, keep watering steady. Keep the soil pH in the right range so calcium is available, do not push soft growth with too much nitrogen, and only add calcium (lime) if a soil test says you need it.Keep moisture even above all, hold soil pH in the slightly acidic to neutral range so calcium stays available, avoid forcing soft growth with excess nitrogen, and add calcium only where a soil test shows a real shortfall. Some growers foliar-feed calcium to the heart under risky conditions.
Cracked or hollow stalksCracked or hollow, pithy stalks
04 of 05
What happened The stalks split open or came out hollow and spongy inside. This usually comes from uneven growth, the plant speeding up and slowing down because water or food was not steady, or from leaving it too long. A shortage of the nutrient boron can also cause cracking.Stalks split lengthwise or came out hollow and pithy inside. Hollow, pithy petioles trace to uneven growth from inconsistent water or nutrition and to over-maturity; boron deficiency can also cause cracked, brittle stalks. As with stringiness, the root issue is usually an interrupted, uneven growth pattern. Next season Keep water and feeding steady so the plant grows evenly, harvest on time instead of leaving it too long, and if cracking keeps happening, have your soil tested for boron and add it only if a test says to (too much is harmful).Keep water and feeding steady to maintain even growth, harvest at maturity rather than holding plants too long, and where cracking recurs have soil tested for boron, correcting only on a confirmed deficiency since excess boron is toxic.
Spotty leaves and stalks (blight)Leaf and stalk spotting (blight)
05 of 05
What happened Yellow then gray or tan spots spread over the leaves, and with late blight onto the stalks too, sometimes with tiny dark dots. These are celery's leaf-spot diseases (early and late blight). They often come in on the seed and spread when the leaves stay wet.Yellow then gray or tan spots spread across the leaves, and in the case of late blight onto the stalks, sometimes speckled with tiny dark fruiting bodies. These are the early (Cercospora) and late (Septoria) blights, both often seedborne and spread by wet foliage. Heavy infection blights the foliage and downgrades the stalks. Next season Use clean, tested seed and healthy plants, do not grow celery (or carrots and parsley) in the same spot two years running, water at the soil so leaves stay dry, give plants room, pull off spotted leaves, and keep out of the bed when it is wet.Start with disease-indexed (tested) seed and clean transplants, rotate out of celery and its relatives for at least a year, water at the base to keep foliage dry, space for airflow, remove infected leaves, and stay out of the bed when plants are wet.
Verified · 4 sources View
The usual suspects

Pests & diseases

Pests
Celery leafminer
P · 01
Symptoms You will see pale, squiggly trails winding through the leaves, like someone drew on them with a white pen. Those are tunnels made by tiny maggots feeding inside the leaf. Badly hit leaves look blotchy and dried out. A little is just cosmetic, but a lot weakens the plant.Pale, winding, snakelike tunnels (mines) trace through the leaf tissue, and heavier infestations leave leaves blotched, blistered, and partly dried. The damage is the larvae feeding between the upper and lower leaf surfaces; pinprick stippling on the foliage marks where adult females punctured leaves to feed and lay eggs. Light mining is cosmetic, but a heavy attack reduces the plant's vigor and the eating quality of the leafy tops. Cause The young (larvae) of small leafminer flies (Liriomyza). The adult fly lays eggs in the leaf, and the maggots that hatch tunnel around inside it. They like warm weather and attack lots of different plants. Tiny wasps usually keep them down on their own, unless heavy spraying kills off those helpers.Larvae of leafminer flies in the genus Liriomyza (notably Liriomyza trifolii and L. huidobrensis), small flies whose maggots mine within the leaf. Populations build in warm weather and can run through several overlapping generations; the pest also attacks many other vegetables and ornamentals, and natural enemies usually hold it in check unless broad-spectrum insecticides flare it up. Prevention Lay a light row cover over young celery to keep the flies from laying eggs, keep the plants growing strongly, and let the natural helper insects do their job by not spraying. Check the leaves often, and pull off the first tunneled ones before they multiply.Cover young plants with floating row cover to exclude egg-laying adults, keep plants vigorous, and rely on conservation of natural enemies rather than spraying. Remove crop debris that can harbor pupae, and scout the leaves for the first stippling and mines so light infestations can be hand-removed before they build.
The control ladder

The ladder troubleshoots from the gentlest solution to the strongest. Start with the gentlest option and only move on when and if it doesn't work.

  1. Clear crop debris that shelters the pupae, and pull the first mined leaves before the maggots multiply.

  2. Lay a light cover over young celery to keep the egg-laying flies off.

  3. Pick off and destroy heavily tunneled leaves; the maggots are inside them.

  4. Tiny parasitic wasps usually keep leafminers in check. Avoid broad-spectrum sprays, which kill those helpers and often make outbreaks worse.Conserve the parasitic wasps that control leafminers; broad-spectrum insecticides flare this pest, so no chemical rung belongs here.

No spray for this one. Prevention is the control.

Aphids
P · 02
Symptoms Little soft insects, usually green or gray, clustered on the newest leaves and in the crevices of the stalks, often leaving a sticky film. The bigger worry is that aphids spread a virus (celery mosaic) that yellows, mottles, and twists the leaves, which cannot be cured.Clusters of small soft-bodied insects, often green or gray, gather on the youngest growth and in the leaf and stalk crevices, leaving the plant sticky with honeydew that may turn black with sooty mold. Beyond direct feeding, aphids are the main concern as a vector: they transmit celery mosaic virus, which yellows, mottles, twists, and stunts the foliage with no cure. Cause Several kinds of aphids (small sap-sucking insects) feed on celery and multiply fast in mild weather. The main reason to care is that they carry a virus from plant to plant, so even a few can do harm beyond their feeding.Several aphid species colonize celery, including the bean aphid and foxglove aphid. They reproduce rapidly in mild weather and are spread further when winged forms move between plants; their role in moving celery mosaic virus from infected weeds and old celery makes even modest populations worth watching. Prevention Keep weeds down and clear out old celery and carrot-family plants nearby, since they shelter aphids and the virus. Encourage natural helpers by not spraying harshly, and use a row cover on young plants. Reflective (silver) mulch helps keep aphids away where the virus is common.Control nearby weeds and remove old celery and carrot-family volunteers that host both aphids and the virus, use reflective mulch to deter colonizers where mosaic is a problem, and keep natural enemies active by minimizing insecticide use. Row cover protects young plants.
The control ladder

The ladder troubleshoots from the gentlest solution to the strongest. Start with the gentlest option and only move on when and if it doesn't work.

  1. Aphids spread celery mosaic virus, so pull any plant with yellow, mottled, twisted leaves right away, and clear old celery and carrot-family weeds that host both.Remove mosaic-symptom plants promptly as virus reservoirs, and eliminate volunteer celery and carrot-family weeds that host aphids and the virus.

  2. A cover keeps colonizing aphids off young plants.

  3. Knock colonies off with a hard jet of water, hitting the newest growth and the stalk crevices.

  4. Ladybugs, lacewings, and parasitic wasps hold aphids down if you do not spray them off.

  5. For heavy infestations, coat the aphids directly.

The bottom rungs are products with label rules: timing, pollinators, and days to wait before harvest. Before you spray →

Carrot rust fly
P · 03
Symptoms Rusty-brown tunnels and scars low on the stalks and roots, and weak or off-color plants when it is bad. It is the same pest that tunnels carrots, and it goes after celery too where it is common.Rusty-brown tunnels and scarring in the lower stalk bases and roots, sometimes with a rusty residue, and aboveground stunting or off-color foliage in heavier attacks. As a shared carrot-family pest, the same fly that mines carrots will work celery's crown and root zone where its populations are active. Cause The maggots of the carrot rust fly, a small fly that attacks the whole carrot family, including celery. The female lays eggs near the base of the plant and the maggots tunnel into the lower stalks and roots. It is mainly a problem in cool, damp, coastal areas.Larvae of the carrot rust fly (Psila rosae), whose females are drawn to the scent of carrot-family foliage and lay eggs near the crown; the maggots burrow into the lower stalks and roots. It is most damaging in cool, humid, maritime regions and far less of a problem in hot-summer areas. Prevention A row cover laid over the bed and tucked in at the edges is the best defense, because the low-flying fly cannot reach the plants to lay eggs. Also keep celery away from where you grew carrots or parsnips last year, and do not plant it right next to them.Floating row cover sealed at the edges at planting is the most reliable home defense, since the low-flying females cannot reach the crowns. Rotate celery away from where carrot-family crops grew last year, and avoid planting it next to carrots or parsnips.
The control ladder

The ladder troubleshoots from the gentlest solution to the strongest. Start with the gentlest option and only move on when and if it doesn't work.

  1. Keep celery away from where carrots, parsnips, or celery grew last year.

  2. Remove and do not compost infested plants, and clear wild carrot-family weeds that keep the fly going.

  3. Seal the cover at the edges at planting. The fly flies low and cannot reach the crowns to lay eggs, which makes this the most reliable home defense.Edge-sealed row cover at planting is the most reliable home control, since the low-flying females cannot reach the crown.

No spray for this one. Prevention is the control.

Diseases
Early blight (Cercospora leaf spot)
D · 01
Symptoms Small yellow spots show up on both sides of the leaves, then grow into gray, round patches about a quarter inch to three quarters of an inch wide. As they spread the leaf turns papery and cracks. Unlike late blight, the stalks often stay fairly clean even when leaves are spotty. A badly blighted plant grows poorly.Small yellow spots appear on both surfaces of the leaves and enlarge into gray, roughly circular lesions about 1/4 to 3/4 inch across; as they multiply the tissue between them turns papery and often splits and cracks, and severe spotting blights the foliage. In contrast to late blight, the petioles often stay relatively clean even when the leaves are heavily spotted. Badly blighted plants size up poorly. Cause A fungus (Cercospora apii) that can ride in on the seed and survive on old celery debris. It likes warm weather, about 60 to 86°F, together with wet leaves from rain, dew, fog, or overhead watering. The spores spread in wind and splashing water.The fungus Cercospora apii, which is seedborne and also survives on celery debris in the field. It is favored by warm conditions, roughly 60 to 86°F, with leaf wetness from rain, dew, fog, or overhead irrigation; spores spread on wind and splashing water. Prevention Use clean, tested seed and healthy transplants, do not grow celery (or its relatives) in the same spot two years running, clear away old debris, water at the soil in the morning, and give plants room so leaves dry fast. Stay out of the bed when the plants are wet.Start with disease-indexed (Cercospora-tested) seed and disease-free transplants, rotate celery and other carrot-family crops out of the bed for at least a year, clear crop debris, water at the base in the morning, and space plants for airflow. Avoid working among plants while the foliage is wet.
The control ladder

The ladder troubleshoots from the gentlest solution to the strongest. Start with the gentlest option and only move on when and if it doesn't work.

  1. Do not grow celery or its carrot-family relatives in the same spot two years running.

  2. Clear old celery debris, which carries the fungus over, and start with clean, tested seed.

  3. Space plants and water at the soil in the morning so the leaves dry fast.

  4. In a wet year a copper fungicide started early can slow spread. It does not cure leaves that are already spotted.A protectant copper, begun at first symptoms in wet weather, suppresses spread but does not cure infected tissue.

The bottom rungs are products with label rules: timing, pollinators, and days to wait before harvest. Before you spray →

Late blight (Septoria leaf spot)
D · 02
Symptoms Small yellow spots on the leaves and stalks that enlarge, run together, and turn tan and papery, speckled with tiny dark dots (the telltale sign). Unlike early blight, this one spots the stalks too, which ruins the part you eat. It is usually the worse of the two blights.Small, discrete yellow spots appear on leaves and petioles and enlarge, often coalescing, then turn tan and dry to a papery texture; tiny dark fruiting bodies (pycnidia) speckle the lesions, the diagnostic sign that separates it from early blight. Unlike early blight, late blight readily lesions the stalks themselves, downgrading the harvest. It is usually the more damaging of the two celery blights. Cause A fungus (Septoria apiicola, not the same as potato or tomato late blight). It usually arrives on the seed and survives on old debris. It needs wet leaves and stops growing below about 55°F, getting worse above 70°F with rain, dew, fog, or overhead watering, which splash the spores around.The fungus Septoria apiicola (unrelated to the potato and tomato late blight). It is seedborne, the primary inoculum source, and survives on infected debris. Development stops below about 55°F and is favored above 70°F with leaf wetness from rain, heavy dew, fog, or sprinkler irrigation; splashing water disperses the spores. Prevention The most important thing is to start with tested, clean seed, because the disease usually comes in on the seed. Use healthy transplants, water at the soil instead of overhead, do not grow celery in the same place two years in a row, clear away infected leftovers, and keep out of the bed when the plants are wet.The single most important step is Septoria-indexed (tested) seed, since seed is the main source; plant only disease-free transplants, avoid overhead sprinkling, rotate out of celery for at least a year, plow under or remove infected residue, and stay out of the bed when foliage is wet.
The control ladder

The ladder troubleshoots from the gentlest solution to the strongest. Start with the gentlest option and only move on when and if it doesn't work.

  1. Rotate out of celery for at least a year.

  2. Seed is the main source, so start with tested, disease-free seed and clear away infected residue.Septoria-indexed seed is the single most important step; also remove or plow under infected debris.

  3. Avoid overhead watering and keep the foliage as dry as you can.

  4. A copper spray at the first spots can slow it in wet weather, but cannot cure infected tissue.

The bottom rungs are products with label rules: timing, pollinators, and days to wait before harvest. Before you spray →

Pink rot
D · 03
Symptoms Brown, water-soaked spots low on the stalks near the soil that turn into soft, mushy, rotted areas, sometimes covered in fluffy white mold with hard black specks in it. It rots the base of the plant, and plants short on calcium are hit hardest.Brown, water-soaked lesions develop on the petioles at or near the soil line and expand into soft, watery, decayed areas; in humid conditions a white cottony mold grows over them, later bearing hard black resting bodies (sclerotia) the size of small seeds. Plants weakened by calcium deficiency are especially susceptible. It is a rot of the dense, moist plant base rather than a leaf disease. Cause A soil fungus (Sclerotinia) that lives for years in the ground and attacks many plants. It thrives in cool, wet, crowded conditions where the base of the plant stays damp, so over-tight planting and overhead watering make it worse.The soilborne fungus Sclerotinia sclerotiorum, which survives in soil as long-lived sclerotia and attacks many crops. It is favored by cool, wet conditions, prolonged leaf wetness, fog, dense canopies that stay damp, and overhead irrigation, which is why crowded, constantly wet celery is at greatest risk. Prevention Move celery to a fresh spot each year, give plants enough room so air moves through and the bases dry out, water at the soil with drip instead of overhead, and keep calcium and watering steady so the plants are not weakened and easy to infect.Rotate away from celery and other susceptible crops to lower soil inoculum, space plants and rows for good airflow so the canopy and plant bases dry, use drip rather than sprinkler irrigation, avoid late-season overhead watering, and ensure adequate calcium and even moisture to keep plants from being predisposed.
The control ladder

The ladder troubleshoots from the gentlest solution to the strongest. Start with the gentlest option and only move on when and if it doesn't work.

  1. Rotate away from celery and other susceptible crops to lower the long-lived soil fungus.

  2. Remove and destroy affected plants; do not compost them, since the hard black resting bodies survive for years.

  3. Space plants and rows and water at the soil with drip so the dense plant base can dry. There is no home spray for pink rot.Open the canopy and switch from overhead to drip so the plant base dries; management is cultural, with no effective home fungicide.

No spray for this one. Prevention is the control.

Blackheart (calcium deficiency)
D · 04
Symptoms The inside center of the plant, the youngest leaves and the growing tip, turns brown or black and dies, while the outer stalks can still look fine, so you often do not see it until you cut the plant open. Rot bacteria then move into the dead part and make it slimy and smelly.The young leaves and growing point in the center of the plant turn brown to black and die, while the outer stalks may still look healthy, so the damage is hidden until the plant is cut open. Secondary soft-rot bacteria often invade the dead tissue, producing a slimy, foul interior. It is a physiological disorder, not an infection, though it opens the door to one. Cause The growing center runs short of calcium. Usually the soil has enough, but the plant cannot move calcium to its fast-growing tip when watering is uneven, growth is too rushed, or the soil is too acidic. Celery is especially prone because it is shallow-rooted and needs so much water.A localized calcium deficiency in the fastest-growing tissue. It is usually not caused by truly calcium-poor soil but by anything that interrupts calcium delivery to the growing point: uneven or insufficient watering, rapid growth surges, high salts, or strongly acidic soil that limits calcium uptake. Celery's heavy water demand and shallow roots make it particularly prone. Prevention The main fix is steady, even watering, never letting the soil swing from dry to soaked, because uneven water is what usually triggers it. Keep the soil pH in the right range so calcium stays available, do not push soft growth with too much nitrogen, and add calcium (like lime) only if a soil test shows you need it.The core prevention is even, uninterrupted moisture, since erratic watering is the usual trigger; keep soil pH in the recommended slightly acidic to neutral range so calcium stays available, avoid forcing soft, rapid growth with excessive nitrogen, and maintain adequate soil calcium where tests show it is low. Some growers find a calcium foliar spray to the developing heart helps under risky conditions.
The control ladder

The ladder troubleshoots from the gentlest solution to the strongest. Start with the gentlest option and only move on when and if it doesn't work.

  1. Steady, even moisture is the core fix. Erratic watering is what starves the growing tip of calcium. Keep the soil pH in range so calcium stays available, and do not force soft growth with too much nitrogen.Uninterrupted moisture is the key lever, since erratic watering triggers the disorder; hold pH in the recommended range and avoid excess nitrogen that forces soft, rapid growth.

  2. Some celery varieties tolerate blackheart better; choose one where the disorder keeps recurring. No spray cures it.

No spray for this one. Prevention is the control.

Verified · 3 sources View
Seasoned
Where to plant next year

Crop rotation

Move celery to a new spot each year and keep it and its relatives (carrot, parsley, dill) out of the same bed for about three years, to stop shared diseases and pests from piling up. Planting celery after beans or peas is ideal, since they leave nitrogen behind for this hungry crop. Avoid beds where white mold has been a problem.Rotate celery on a three-year cycle, keeping it and all other carrot-family crops out of a bed for two seasons after celery grows there, to break the buildup of the shared leaf blights, aster yellows, and root pests. Because the blights are also seedborne, rotation works alongside clean seed rather than replacing it. Following a nitrogen-leaving legume crop suits celery's heavy appetite; avoid following crops that left a Sclerotinia (white mold) problem in the soil.

Family
Apiaceae
Years between
3 years
in the same bed
Avoid following
Do not grow celery where you grew celery, carrot, parsnip, parsley, dill, or fennel last year, because they are all in the same family and share the same soil pests and diseases. Also avoid spots where white mold (pink rot) has been a problem, since it lingers in the soil and attacks many crops. Wait about three years before celery or its relatives go back in the same bed.Do not plant celery where another carrot-family crop (Apiaceae) grew the previous season, including celery, carrot, parsnip, parsley, dill, or fennel, since they share soilborne diseases and pests, including the leaf blights, aster yellows, and carrot rust fly. Also avoid beds with a recent history of Sclerotinia (pink rot, white mold), which has a wide host range and persists in soil. A three-year gap before celery or its relatives return to a bed is the standard guideline.
Plant after
Legumes such as beans and peas, which leave nitrogen for this heavy feederBrassicas such as cabbage and broccoliAlliums such as onions and garlic
Verified · 2 sources View
In the app · pre-launch

When plant taps you on the shoulder

The plant app sends a timely reminder at every critical moment of your celery season. The wording adjusts to whichever you pick: beginner or seasoned. Here are three you'll see in Zone 9.

p
plant
10 weeks before last frost
Time to start celery seeds inside
Start celery seeds indoors about 8 to 10 weeks before you plan to plant out. Barely cover the tiny seeds, keep them warm and damp with light, and be patient, they take 2 to 3 weeks to sprout.
p
plant
7 days after last frost
Time to plant celery out
Plant celery outside only after hard frosts are over, because cold young plants often bolt later. Space them 6 to 10 inches apart in rich, damp soil, and harden them off first by watering a little less.
p
plant
3 weeks after planting date
Never let celery dry out
Keep the soil evenly damp, at least 1 to 2 inches of water a week, more when hot. Letting celery dry out, even once, makes it stringy and bitter. Water at the soil and mulch to hold the moisture.
Get personalized alerts.

plant sends the right notification at exactly the right moment, for your zone, your weather, your crops. Founding members lock the rate forever.

Back the Kickstarter →
Ask the gardener

Common questions

Got a question we missed?

We're building this guide with real growers. Got a question we missed? Ask here. We read every one and add the best answers right to this page.

Grown this before?

Share a tip

Learned something the hard way? Pass it on. Real growers' tips make this guide better for the next person, and we credit you by name when yours goes live.

Seasoned
Spot something wrong?

Report a problem

If you've grown this crop and you see a date, a temperature, a companion claim, or a recommendation that doesn't match your experience, tell us. Real growers' corrections make this guide better for the next person.

How we built this guide

Methodology & sources

Every date, temperature, spacing, and recommendation on this page is sourced from university cooperative extension publications, peer-reviewed agricultural research, NOAA climate data, and direct extension calendars. Where claims are softer (traditional gardening wisdom not formally documented), we say so.

Research-backed Documented in cooperative extension publications or peer-reviewed research
Well-grounded A known agronomic principle, but not formally tested for this specific pair
Traditional Time-tested gardening wisdom, limited formal research support
Last reviewed
June 30, 2026
Data version
crops_data_final · v1.0 · schema 2.9
Sources cited on this page
16 publications
Verified entries
Companion-planting claims tagged inline · zone dates verified against 5+ extensions
See all sources cited on this page
  • University of Minnesota Extension umn_ext
  • University of Maryland Extension umd_ext
  • Cornell Cooperative Extension cornell_ext
  • Iowa State University Extension iastate_ext
  • Michigan State University Extension msu_ext
  • NC State Extension ncsu_ext
  • Penn State Extension psu_ext
  • U. of Illinois Urbana-Champaign Extension uiuc_ext
  • UC Davis Postharvest Center ucd_postharvest
  • Texas A&M AgriLife Extension tamu_agrilife
  • Virginia Cooperative Extension 426-331 vce_426_331
  • Piedmont Master Gardeners piedmont_mg
  • UGA Vegetable Garden Calendar uga_calendar
  • Clemson Home & Garden Information Center clemson_hgic
  • UC IPM Statewide IPM Program uc_ipm
  • NOAA 1991-2020 Climate Normals noaa_normals

Growing notes, weekly.

Zone-aware seasonal nudges, what's worth planting now, and the occasional recipe from the harvest. No spam, ever.

Vol. 003 · Celery · plant.lifestyle