Pick your zone and the dates re-calibrate.
The Guide Crops Vol. 003

Sugar Snap Peas

in Zone 6, this week

Sugar snap peas are the plump, sweet peas you eat whole, pod and all. Unlike flat snow peas, which you pick while the pod is still flat, you let snap peas fill out until the peas inside are round and the pod is fat, crisp, and sweet. They are a cool-weather crop: plant the seeds straight in the garden as soon as you can work the soil in spring, and again in late summer for fall. Some kinds grow into tall vines that need a trellis, like Sugar Snap; others, like Sugar Ann, stay short and bushy and hold themselves up. Older kinds have a stringy seam you peel off before eating; newer kinds are stringless. Sugar snap peas are an edible-pod pea grown for plump, rounded pods eaten whole, pod and peas together, while the pod is still crisp, bright, and sweet. They are the plump-podded cousin of the flat snow pea: where a snow pea is picked young and flat before its seeds develop, a snap pea is left until the peas inside have swelled and nearly filled the pod, giving the crunchy, sugary pod that names the type. Like all peas they are a cool-season legume, sown as early as the ground can be worked in spring and again for a fall crop, and they fix much of their own nitrogen. Types range from tall climbing vines that need a trellis, such as the original Sugar Snap, to compact bush types like Sugar Ann that stand on their own; older varieties carry a string along the pod that is pulled off before eating, while newer ones are stringless.
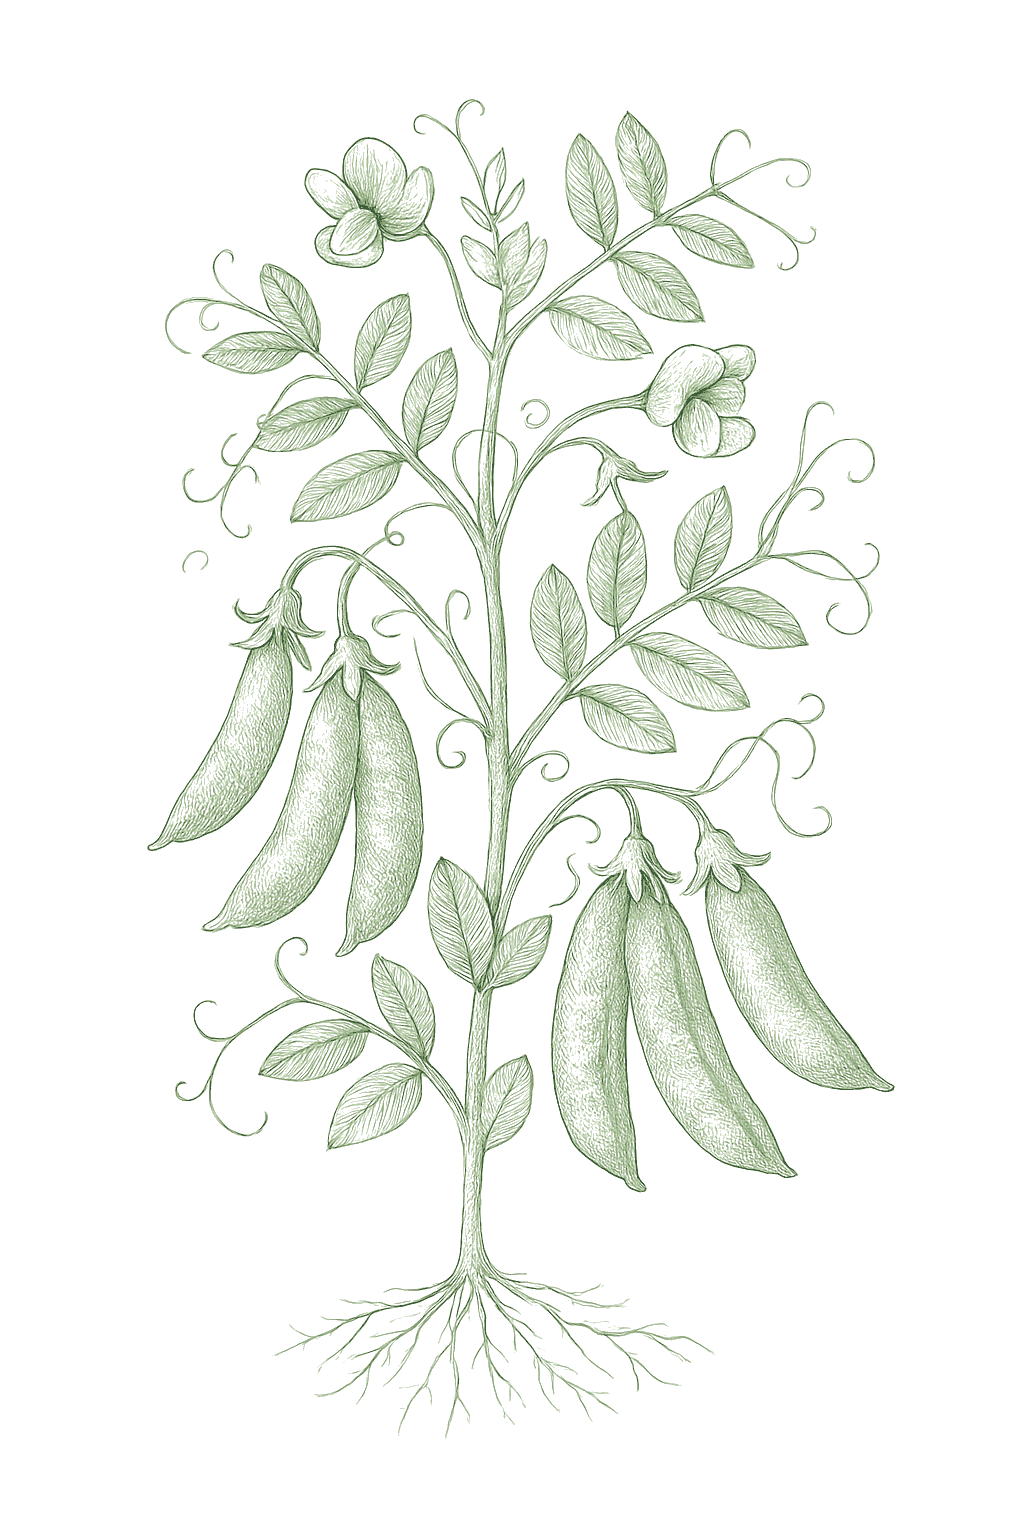
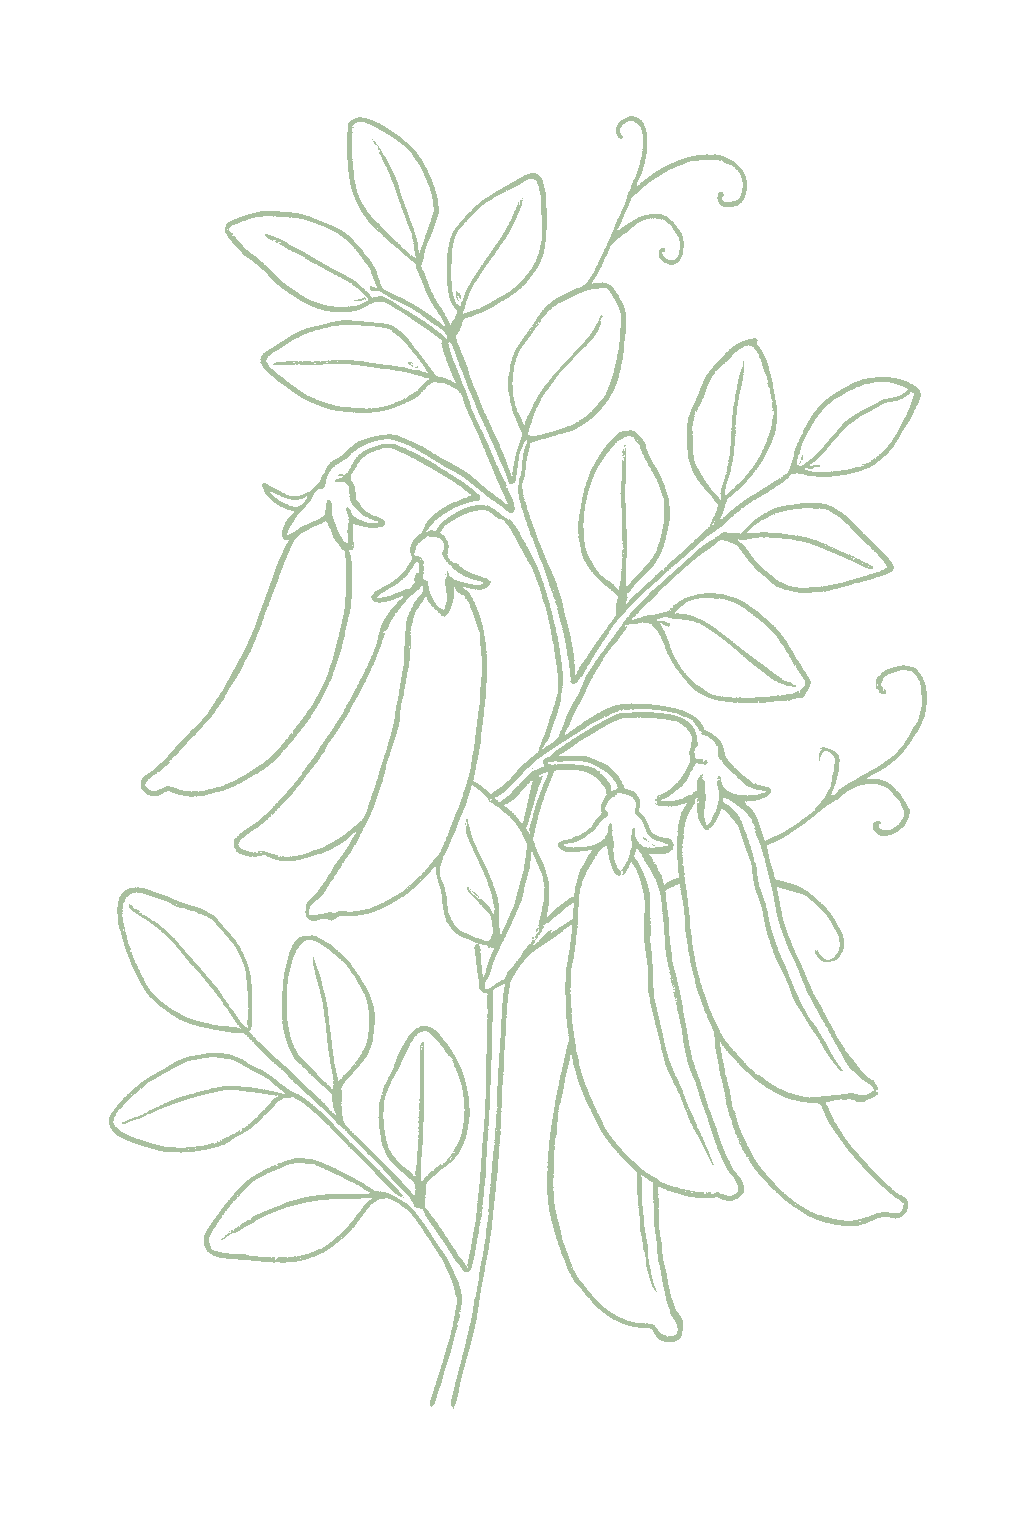
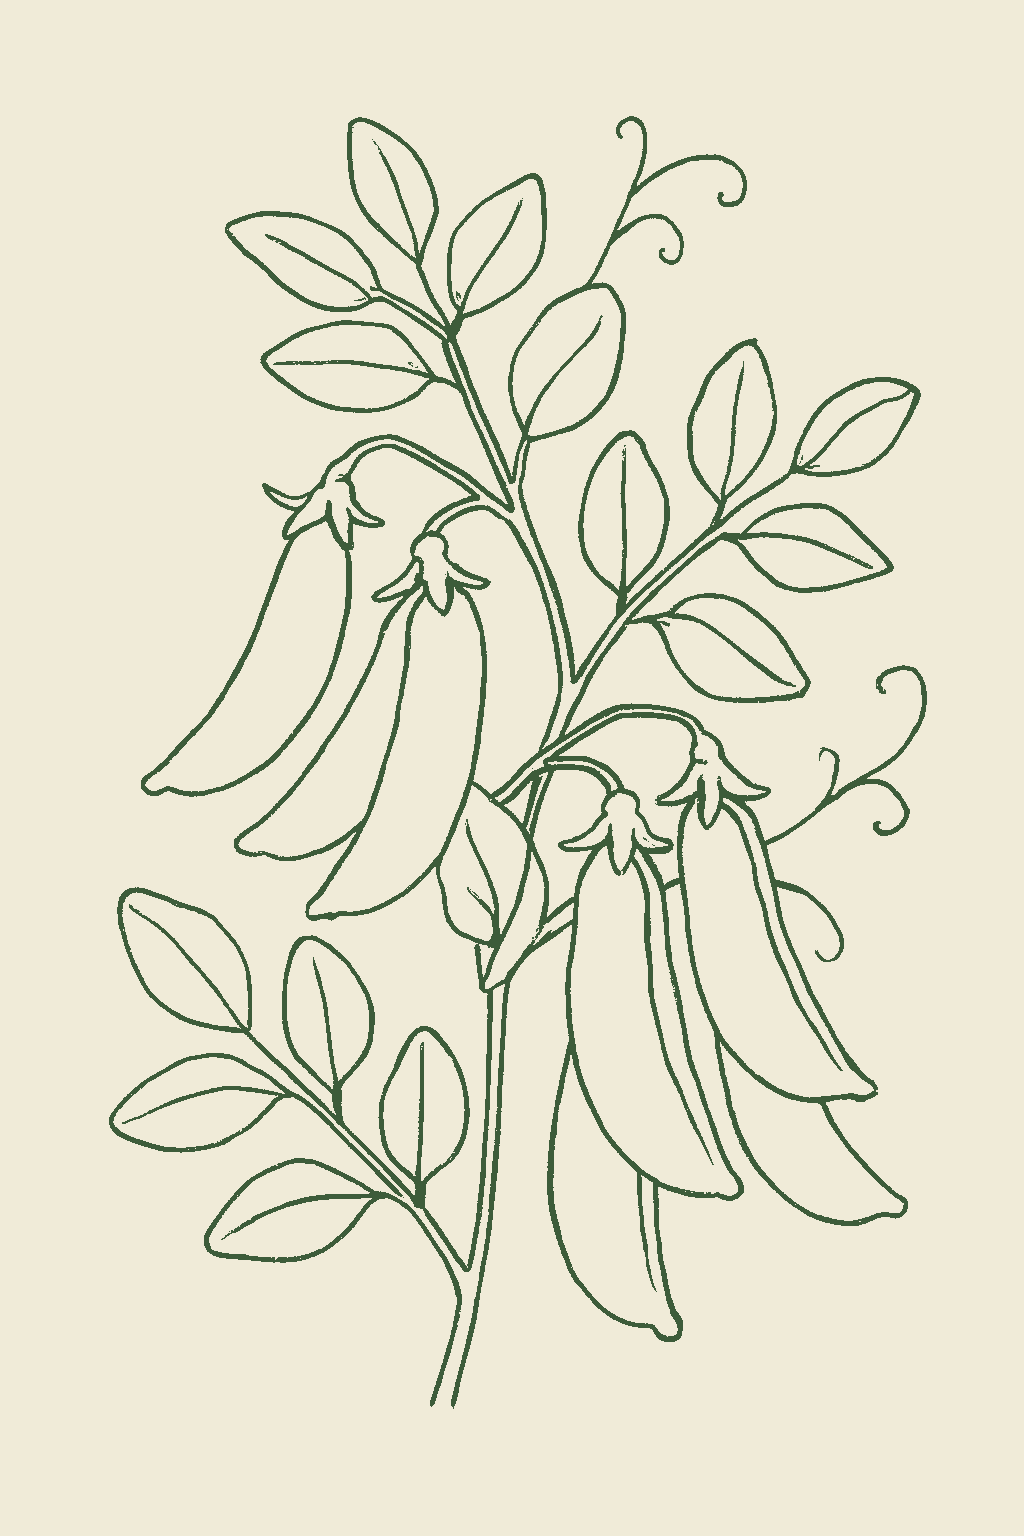
Sugar Snap Peas mature plant
Fig. 01 · Sugar Snap Peas, mature Zone 6
Mature in
58-70d
from transplant
Sunlight
Full sun
6-8 hrs daily
Water
Moderate
6 inches / week
Spacing
1-2"
between plants
Soil pH
6-7
slightly acidic
Today · in your zone

What's happening right now

July 24 · Zone 6 · Stage 01 · Germination

Off-season for sugar snap peas in zone 6.

The season at a glance

Planting calendar

In Zone 6, sugar snap peas can be planted March through May, then again September, skipping the summer heat. Harvest runs April through November.

Jan
Feb
Mar
Apr
May
Jun
Jul
Aug
Sep
Oct
Nov
Dec
plant
too cold
too cold
plant
plant
plant
too hot
too hot
too hot
plant
too late
too late
too cold
harvest
harvest
harvest
harvest
harvest
indoors
plant out
harvest
Above-ground cropBest planted on a none moon
Seasoned
Stagger your sowings

Succession planting

Snap peas crop for a few weeks from one planting, so you may not need many sowings. Plant a second short row a week or two after the first to stretch the supply, and again in late summer for fall where it works. In hot areas, skip summer and sow through the cool months.Sugar snap peas, especially the tall indeterminate types, crop over a longer window than snow peas, so one sowing often carries the spring crop; add a second sowing a week or two later only to stretch the supply, and a separate fall crop where summers allow. In hot regions skip summer entirely and sow through the cool fall, winter, and early spring.

Every 2 weeks · sow a short new rowUp to 7 sowings a seasonToo hot to sow midsummer
Jan
Feb
Mar
Apr
May
Jun
Jul
Aug
Sep
Oct
Nov
Dec
sow
harvest
keep sowing
too hot
continuous harvest
The season, mapped

Seed to garden

Plant snap pea seeds right where they will grow, as soon as the soil can be worked in spring and again in late summer for fall. Peas do not like their roots disturbed, so skip starting them indoors. Plant about 1 to 1.5 inches deep and 1 to 2 inches apart.Direct-sow into cool, workable soil as early as the ground can be prepared in spring, and again for a fall crop. Peas resent root disturbance and germinate readily in cool soil, so transplanting offers no advantage. Sow about 1 to 1.5 inches deep and 1 to 2 inches apart in rows roughly 18 to 24 inches apart; some growers presoak seed overnight to speed emergence.
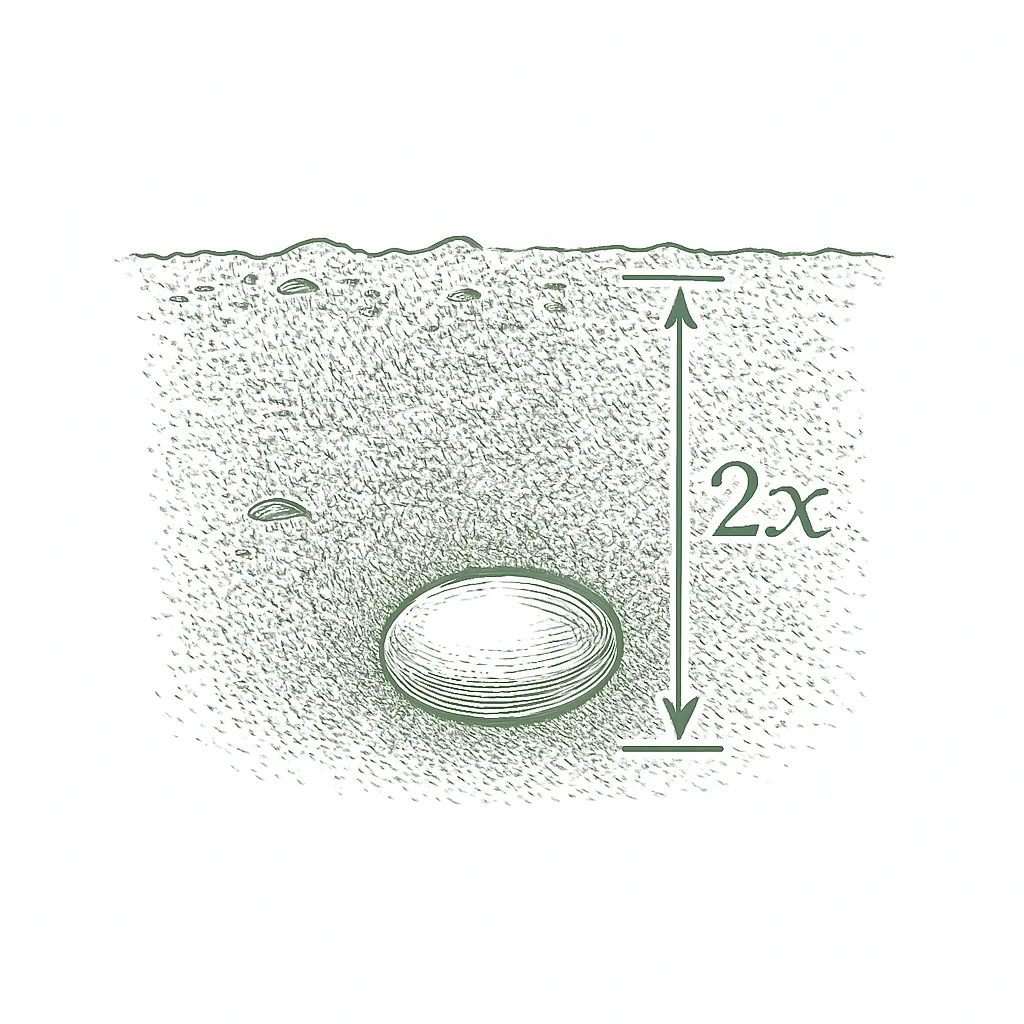
  1. 01
    Sow outside
    Mar, Sep
  2. 02
    First harvest
    From Apr 1
    58-70 days from sowing
Start method
Direct
Soil temp
40-75°F
From seed to fruit

The growing journey

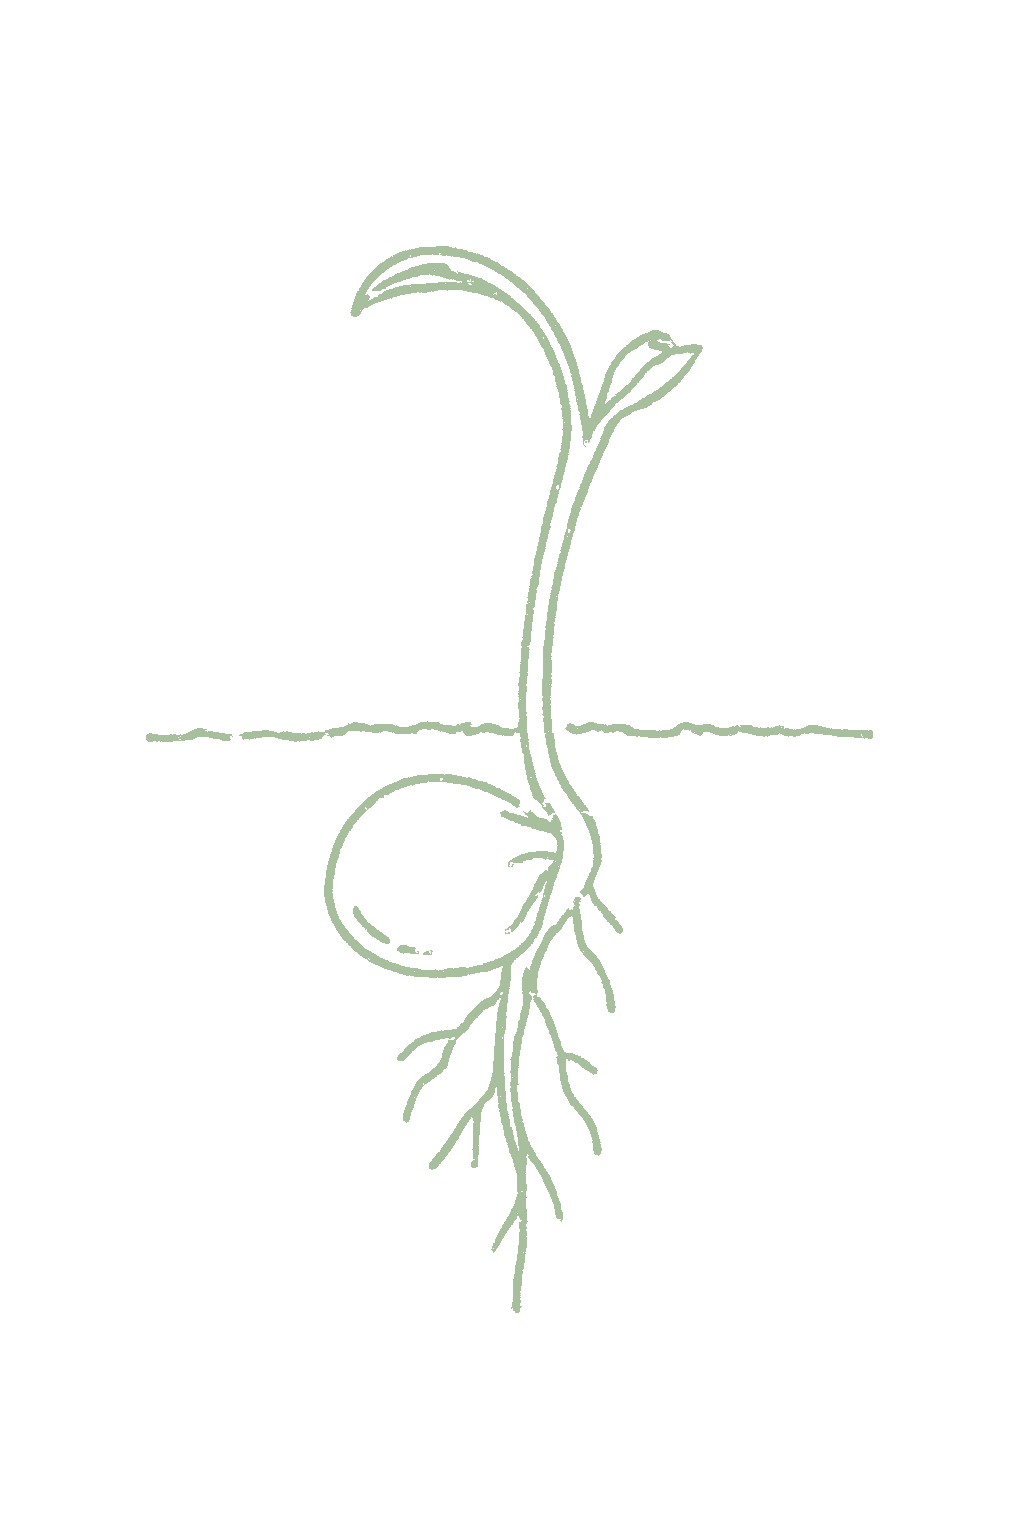
Stage 01 · Germination
01
Germination
Days 0-14 · current stage
Bare soil for a week or so, then the little plants push up. Peas come up in cool soil and can go in very early, but seed planted in cold, soggy ground rots instead of sprouting. They come up fastest when the soil is around 55 to 65°F.Bare soil for about a week to ten days, then the seedling pushes up through the surface. Peas germinate in cool soil and can be sown as soon as the ground is workable, but seed sown into cold, saturated ground rots before it emerges. Emergence is quickest in soil around 55 to 65°F and slows below that; the lower limit for germination is about 40°F.
Plant as soon as you can work the soil, about 1 to 1.5 inches deep, in moist but well-drained ground. Do not keep the bed soggy after planting, since that rots the seed. Soaking the seeds overnight before planting can speed things up.Sow as early as the soil can be worked, about 1 to 1.5 inches deep, into a moist but well-drained bed; do not sow into waterlogged ground. There is no benefit to soaking the bed afterward, which suffocates the seed and feeds root rot. An optional overnight presoak of the seed speeds emergence, and a pea inoculant helps nodulation where peas are new to the bed.
FROM PLANT · Plant peas as early as you can work the soil, but make sure it drains well and is not soggy. Pea seeds sprout in cool soil but rot in cold, wet mud, which is the usual reason for gaps in the row. Good drainage matters more than planting on an exact date.Sow peas as soon as the soil can be worked, but into moist, well-drained ground, not cold mud. Pea seed germinates from about 40°F up and fastest at 55 to 65°F, yet it rots in cold, saturated soil, the most common cause of a thin stand. Raised beds and good drainage matter more than calendar date.
FROM PLANT · Peas make their own nitrogen with the help of tiny bacteria on their roots. If peas or beans have grown in your bed before, the bacteria are already there. In a brand-new bed you can coat the seed with a pea inoculant powder to help, but it is optional.Peas fix their own nitrogen with Rhizobium bacteria on their roots. Where peas or beans have grown before, those bacteria are already present; in a new bed, an inexpensive seed inoculant can improve nodulation. It is optional, not required, and no substitute for good drainage and tilth.
02
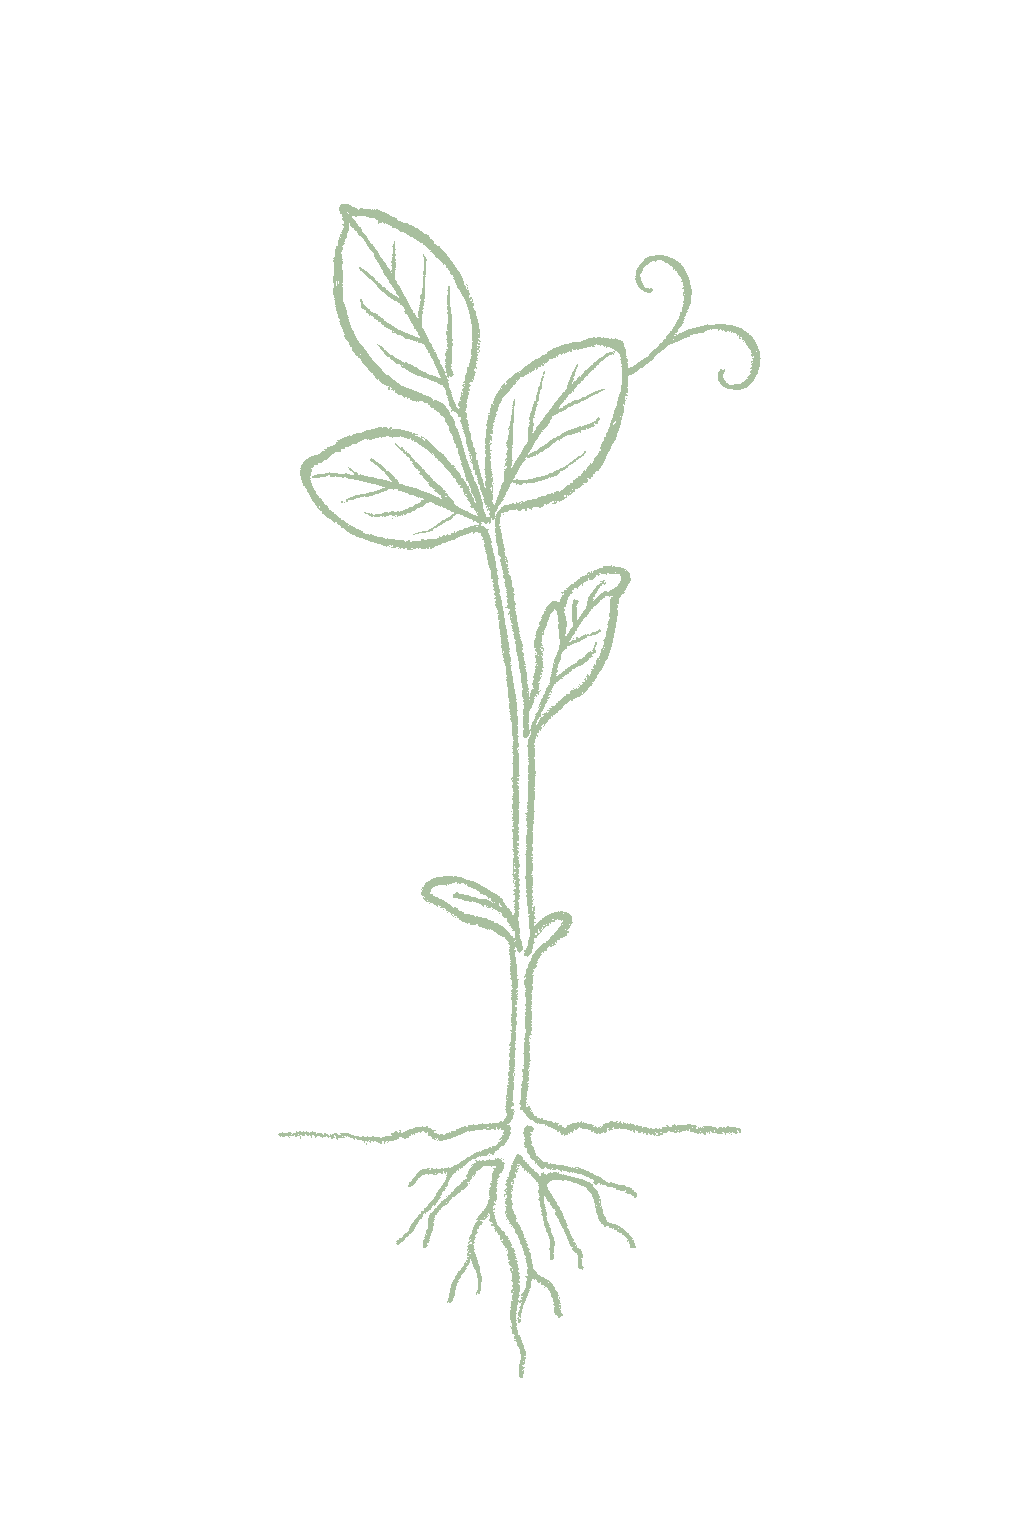
Seedling
Days 10-25
Small plants a few inches tall with their first leaves and the little curling tendrils that peas use to climb. Young peas handle light frost fine, but this is when cutworms can cut them off at the ground and slugs can chew them in wet weather.Young plants a few inches tall putting out their first leaves and, soon, the curling tendrils that mark a climbing crop. Pea seedlings are cold-hardy and shrug off light spring frost, but they are the stage most vulnerable to cutworms, which sever them at the soil line, and to slugs in wet weather.
Put up the support now, before the vines sprawl: a trellis, netting, or twiggy branches alongside the row, even for short types. Keep the soil evenly moist, pull weeds early, and weed shallowly so you do not damage the roots. Check for plants cut off at the ground, which means cutworms.Set up support now, before the vines flop: push twiggy branches or a trellis or netting in alongside even bush types, which crop better held up. Keep the bed evenly moist and weed-free, cultivate shallowly since pea roots run near the surface, and watch for toppled seedlings that signal cutworms.
FROM PLANT · Put up the trellis or netting early, when you plant or right after. Even short peas do better held up off the ground, and tall ones need support before they start to flop. If you wait too long you can tear the vines or hurt the roots putting it in.Put the support in early, at or just after sowing. Even bush peas crop better and stay cleaner held up off the ground, and tall types must have a trellis or netting before the vines start to sprawl. Setting it up later risks tearing the brittle vines and damaging shallow roots.
03
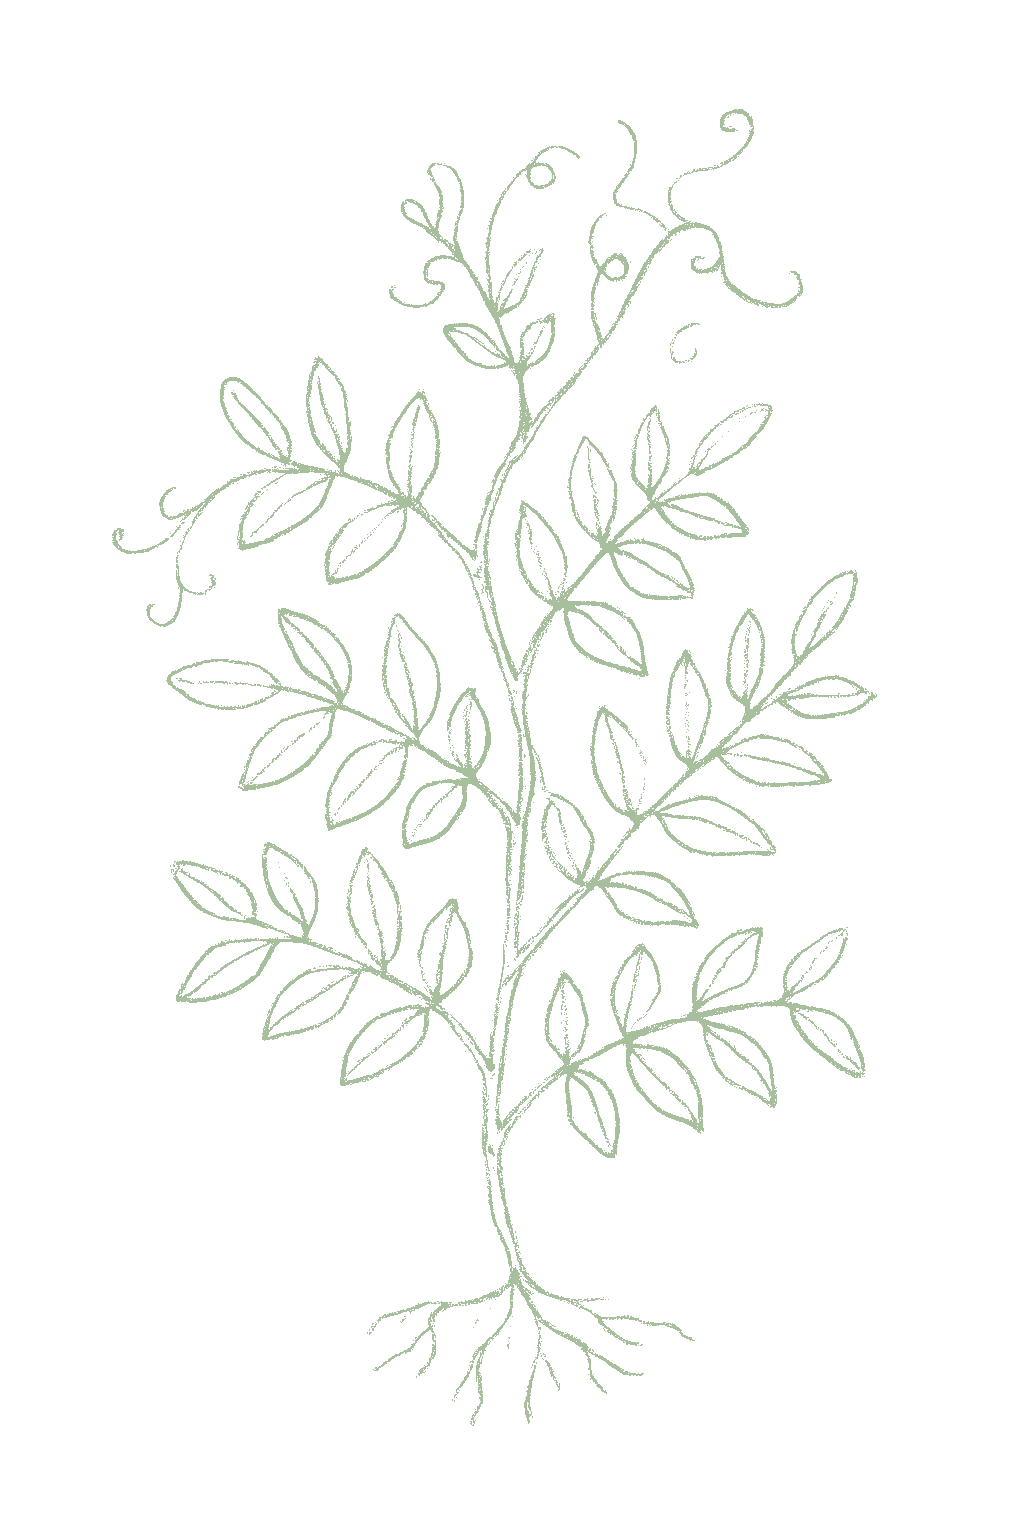
Vine growth
Days 20-45
The vines climb and fill in, their tendrils grabbing the support as they go. Short bush types reach about two feet, tall types five to six. Peas make much of their own food (nitrogen) at this stage, so you want healthy green growth, not huge dark leafy vines, which usually mean too much fertilizer and fewer pods.Steady growth as the vines climb and fill their support, tendrils gripping as they go. Bush types like Sugar Ann reach about two feet and stand together; tall types like Sugar Snap climb to five or six feet. The plants are fixing much of their own nitrogen now through root nodules, so vigorous green growth, not dark, overfed lushness, is the goal.
Keep the watering steady and do not add fertilizer now. Peas need very little, and extra just gives you big leafy vines with fewer pods. Help the first tendrils find the trellis, and keep the plants from getting crowded so air moves through them.Keep moisture steady and resist the urge to feed; peas need little nitrogen and extra now pushes foliage at the expense of pods. Guide the first tendrils onto the support, and keep the rows open for airflow to hold off powdery mildew as the weather warms.
FROM PLANT · Do not add nitrogen fertilizer now. Peas make much of their own from the air, and extra fertilizer just gives you big leafy vines with fewer peas. A little compost mixed into the bed before planting is all they need.Hold off on nitrogen. As legumes, peas fix much of their own through root nodules, and extra nitrogen now drives leafy vine growth at the expense of flowers and pods. A little compost or balanced fertilizer worked in before sowing is all peas need.
04
Flowering
Days 42-62
Small white (sometimes pink or purple) flowers open along the vines. This is an important time for water: if the plants dry out or it stays hotter than about 80 to 85°F, the flowers drop without making pods. The flowers and tiny pods are much more sensitive to frost than the young plants were.Small white (sometimes pink or purple) pea flowers open along the vines. This is a moisture-critical stage: water stress now aborts blossoms, and sustained heat above about 80 to 85°F causes the plant to drop flowers instead of setting pods. The flowers and tiny pods are far more frost-tender than the hardy seedlings were.
Keep the water steady and generous while the plants flower, because dry soil now means fewer peas. Water the soil, not the leaves. Cover the plants overnight if a frost threatens the open flowers, and water deeply before a heat wave. The plants set pods again once it cools, but the spring crop is running out of cool weather by now.Keep moisture steady and ample through bloom; this is where water stress directly cuts the crop. Avoid overhead watering on the dense canopy. If a late frost threatens open flowers, cover the planting overnight, and in a heat wave water deeply ahead of time; the plant will set again when it cools, but the spring crop is racing the heat at this point.
FROM PLANT · Keep the water steady and generous while the plants flower. Flowering and pod-filling are when peas most need water, and letting them dry out now means fewer peas. Water the soil in the morning, not the leaves, to keep disease down.Keep moisture steady and ample through bloom. Flowering and pod fill are the moisture-critical stages, and water stress now aborts blossoms and shrinks the crop. Water at the soil in the morning, not overhead, to keep the canopy dry and slow powdery mildew.
FROM PLANT · The spring crop is in a race with the heat. Once it stays above about 80°F, peas drop their flowers instead of making pods, so a planting that flowers as summer arrives makes few peas. Plant early, and where summer comes fast, pick the earliest, quickest snow peas.The spring crop is racing the heat. Once sustained temperatures pass about 80°F, peas drop blossoms instead of setting pods, so a planting that flowers into early summer heat sets poorly. Sow early, and where summers come on fast, lean to the earliest, shortest-season snow peas.
05
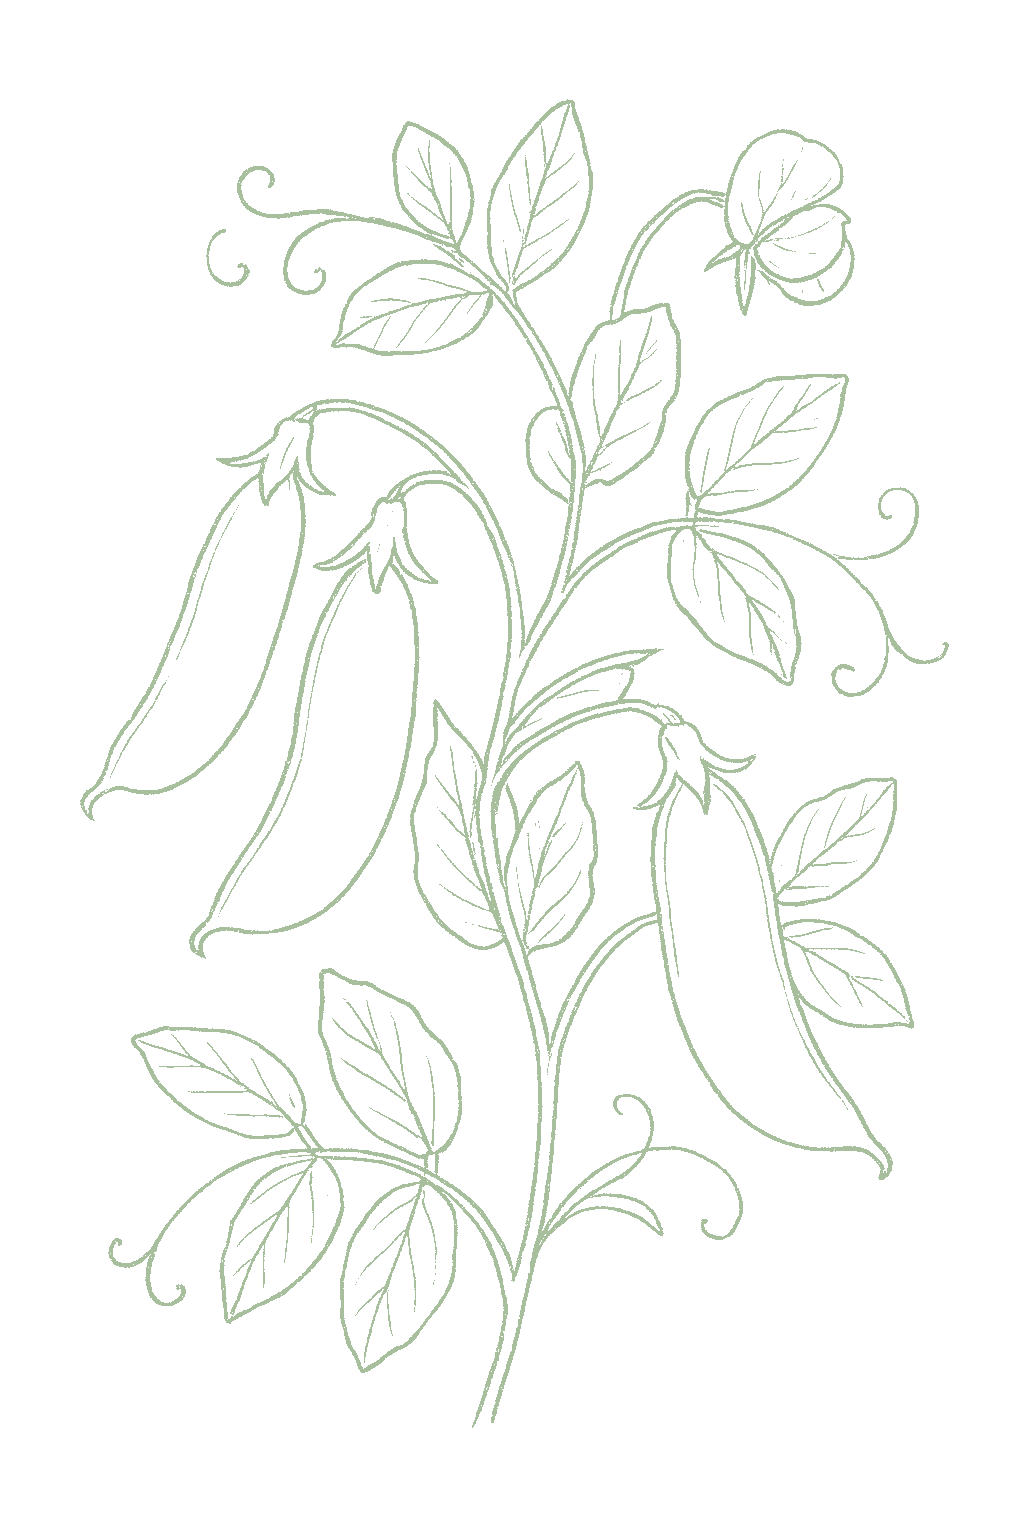
Pod fill
Days 50-72
Pods form where the flowers were and then fatten up as the peas inside fill them, unlike flat snow peas. With snap peas you want a plump, rounded pod that is still bright green, crisp, and sweet, ready about 5 to 8 days after the flowers open. If you wait too long the pod gets dull and tough and the peas turn starchy, so the window is short.Pods form where the flowers were and then swell and round out as the peas inside fill them, unlike a snow pea, which is picked flat. For snap peas the aim is a plump, rounded, full pod that is still bright green, crisp, and tender, reached about 5 to 8 days after flowering. Left too long the seeds bulge, the pod dulls and toughens, and the sugars turn starchy, so the pickable window is short.
Keep the soil evenly moist while the pods fill, which is what lets them plump up. Start checking the vines every day once the first pods start to round out, because snap peas go from sweet and crisp to tough and starchy in just a few days.Maintain even moisture right through pod fill, the payoff stage for steady watering and the stage that decides whether pods plump up properly. Begin checking the vines daily as the first pods start to round out, since the snap-pea window from full-and-sweet to tough-and-starchy is only a few days.
FROM PLANT · Pick snap peas when the pods are plump and rounded and the peas have filled out, but the pod is still crisp and sweet, about a week after flowering. Snow peas are picked flat, but snap peas you let fill; just catch them before they get dull and tough. Start checking early, because the window is short.Pick sugar snap peas when the pods are plump and rounded, with the peas inside full but the pod still bright, crisp, and tender, about 5 to 8 days after flowering. Unlike a snow pea, which is picked flat, a snap pea is left to fill out; but pick before the seeds bulge and the pod dulls and toughens, when it turns starchy. Start checking early, because the window is short.
06
Harvest
Days 58-78
Plump, rounded, crisp pods picked while the peas inside are full but the pod is still bright and sweet, about 5 to 8 days after flowering. Pick every one to three days: regular picking keeps more pods coming, while pods left to get starchy tell the plant to quit. Snap peas crop for a few weeks, longer than snow peas, then fade as it warms up.Plump, rounded, crisp pods snapped from the vine while the peas inside are full but the pod is still bright and tender, about 5 to 8 days after flowering. Picking every one to three days is essential: regular harvest keeps the vines flowering and producing, while pods left to go starchy signal the plant to stop. Snap types crop over a longer window than snow peas, often three to four weeks, then decline as the heat builds.
Pick in the cool morning, holding the vine with one hand and pulling the pod with the other so you do not tear the stem, and peel the string off older kinds before eating. Pick every one to three days, because old pods left on the plant make it stop producing. When the vines fade in the heat, pull them up and compost them.Pick in the cool of the morning, holding the vine with one hand and the pod with the other so you do not tear the brittle stems, and pull the string off older, stringed varieties before eating. Harvest every one to three days; leaving overmature pods on the vine ends the crop early. Pull the planting once it declines in the heat and add the vines to the compost, roots left to return their nitrogen.
FROM PLANT · Pick every one to three days. Snap peas crop for a few weeks, and leaving old pods on the vine tells the plant to quit. Picking often keeps more pods coming and catches them while they are plump, sweet, and crisp.Pick every one to three days. Snap peas crop over a few weeks, and leaving overmature pods on the vine signals the plant to stop flowering and ends the crop early. Frequent picking keeps the vines producing and catches the pods at their plump, sweet, crisp best.
Beginner
Know your soil

Your soil

Identify yours

Not sure what soil you have? Grab a small handful of damp soil from your garden bed and squeeze it. If it crumbles apart easily, it's sandy. If it holds together but breaks when you poke it, it's loam (what most vegetables want). If it stays in a hard, slippery ball, it's clay.

What this crop wants

Snap peas like loose, fertile soil that drains well, with some compost mixed in. The main thing they care about is good drainage, because peas planted in cold, soggy soil tend to rot before they sprout. If water sits on your bed for a long time after rain, work in compost or plant on a raised bed first.

If your soil doesn't match

You have sandy soil

Mix 2-3 inches of compost into the top 6 inches of your bed before planting. Compost holds moisture (which sandy soil drains too fast) and adds the nutrients sandy soil tends to lack. Repeat each season. Compost breaks down over time.

You have clay soil

Mix 2-3 inches of compost AND a few inches of coarse sand or perlite into the top 6 inches of your bed. The compost feeds the plants; the sand breaks up the clay so air and water can move through. Don't add sand without compost. It can compact like concrete.

Containers and raised beds

If amending your soil sounds like too much work, or if your soil is heavy clay, full of rocks, or contaminated, build over it. A raised bed at least 12 inches deep filled with a 50/50 mix of compost and sandy loam gives you ideal growing soil with no battles. A 5-gallon container with quality potting mix does the same for one plant at a time. Both bypass your native soil entirely.

Learn more about your soil
The specs

Care guide

The numbers that matter, at a glance.

Sunlight
Full sun · 6-8 hrs/day
Water
moderate
Spacing
1-2 inches
Soil
loam, sandy loam
Days to maturity
58-70 days from transplant
Soil pH
6 to 7
Container OK?
Yes · 5+ gal pot
Germination temp
40-75°F
Soil chemistry

Soil pH for sugar snap peas

Preferred
6 to 7
Tolerated
6 to 7.5

Snap peas grow best in soil from about 6.0 to 7.0, which is slightly acidic to neutral. They do poorly in strongly acidic soil below 6.0, so if a soil test reads low, mix in some lime before planting. Most garden beds are already in a good range.Aim for a soil pH of about 6.0 to 7.0. Clemson targets 6.0 to 6.5 for peas, and growth is inhibited on acid soils at pH 6.0 and below, so lime an acid plot the season before sowing. Peas tolerate up to roughly 7.5, and a soil test is the reliable way to confirm both pH and fertility before the season starts.

Verified · 3 sources View
Steady hand on the hose

Watering

When & how much
Frequency
Water regularly so the soil stays evenly moist but not soggy. Pay closest attention while the plants are flowering and the pods are filling out.Regular and even through the season, keeping the soil moist but never waterlogged. The need peaks during flowering and pod fill; before that, established vines in cool weather ask relatively little.
Amount
Water deeply enough to wet the soil about 6 inches down. Deep, less frequent watering beats a daily light sprinkle.Enough to wet the root zone roughly 6 inches down; watering deeply and less often builds deeper roots than frequent light sprinkles. Clemson advises watering to moisten the soil to a depth of 6 inches.
Method
Water the soil, not the leaves, and do it in the morning so the plants dry off during the day. Wet leaves, especially overnight, help spread disease.Water at the soil level in the morning so the foliage dries before evening; this limits the powdery mildew and Ascochyta the crop is prone to. Avoid overhead watering on a trellised crop in particular.
Signs of trouble
Too much water
If the soil is wet but the plants still wilt or the lower leaves turn yellow, you may be overwatering. Soggy soil rots pea roots.Yellowing lower leaves, wilting despite wet soil, and stunted vines point to waterlogged roots and the onset of the root rots peas are prone to in cold, wet ground.
Too little water
If plants dry out while flowering, they drop their flowers and the pods stay small and never fill out. Keep the water steady at that stage.Drought stress during and after flowering aborts blossoms and leaves the pods small and poorly filled, so they never plump up into a proper snap pod; it also hastens the late-season decline as heat arrives.
Feeding rhythm

Feeding

Frequency
low
Type
balanced pre-plant, little to no nitrogen
When to start
work a little balanced fertilizer or compost into the bed before sowing

Peas make much of their own food from the air, so they barely need fertilizer. Mix a little compost or balanced fertilizer into the bed before you plant and that is enough. Too much fertilizer gives you big leafy vines but fewer pods. If you like, you can coat the seed with a pea inoculant powder, which helps the roots make nitrogen, but it is optional.Sugar snap peas are light feeders. As legumes they fix much of their own nitrogen through root nodules, so heavy nitrogen drives leafy vine growth at the expense of pods. Without a soil test, work a little balanced fertilizer or compost into the bed before sowing; that is usually all peas need. An inoculant of the right Rhizobium bacteria is optional and can help nodulation where peas have not been grown before. Avoid high-nitrogen feeds, which delay flowering and cut pod set.

N · P · K = 5-10-10

A balanced vegetable fertilizer like 5-10-10 mixed into the bed before planting is plenty.A balanced 5-10-10 worked in before sowing if no soil test is available; skip extra nitrogen, which peas supply themselves.

Try 5-10-10 pre-plant
Who grows well together

Companion planting

Snap peas get along with most cool-season vegetables. They grow happily beside carrots, radishes, and lettuce, and because they leave nitrogen in the soil, they are a good crop to grow before a leafy green. The pairing to avoid is planting peas right next to onions or garlic. As a nitrogen-fixing legume, sugar snap peas leave the soil richer for what follows and sit comfortably among the other cool-season crops grown in the same early-spring and fall windows: carrots, radishes, and lettuce are classic bed-mates. The long-standing caution is to keep peas away from the alliums (onion, garlic), which are widely held to suppress legumes through the same root-bacteria interference seen with beans.

Other
Carrot
A classic cool-season neighbor that shares snap peas' early-spring and fall timing; the carrots root deep while the peas climb, so they use the bed without crowding.Carrots and peas grow in the same cool windows and use the bed in complementary ways: the carrot works the soil deep while the pea climbs above it, and the peas' nitrogen fixation lightly benefits the carrot. The pairing is traditional and compatibility-based rather than a measured pest defense, so expect easy cohabitation more than active protection. Traditional
Radish
Radishes sprout fast and mark the pea rows while the slower peas come up, then are pulled long before the peas need the space.Radishes germinate in days and mark the rows while the peas emerge, and they finish and come out weeks before the vines size up, so they never compete. Both are cool-season crops sown at the same time, which makes them a tidy, low-risk interplant rather than a measured protective pairing. Traditional
Lettuce
Lettuce shares snap peas' cool-season timing and stays low, tucking in along the base of the pea row or trellis.Lettuce slots in below a pea trellis or alongside a bush row, sharing the same cool-season window and water needs while occupying a different layer of the bed. As the peas leaf out they offer the lettuce a little light afternoon shade that delays bolting. It is a compatibility pairing on sound shared-conditions grounds rather than a measured protective one. Well-grounded
Keep apart from
Onion Onions and other alliums are traditionally kept away from peas, which are said to grow poorly near them.Onions next to peas is the better-grounded of the 'bad' pairings. Alliums release antibacterial sulfur compounds that are widely held to interfere with the Rhizobium bacteria on pea roots, the bacteria the plant relies on to fix nitrogen, so pea growth tends to stall near onions. Keep them in separate parts of the bed. The useful corollary is that peas grown before an allium crop leave the soil better for it. Well-grounded
Garlic Like onions, garlic is a traditional bad neighbor for peas.Garlic acts on peas the way onions do. As an allium it gives off antibacterial sulfur compounds held to disrupt the nitrogen-fixing bacteria on pea roots, slowing the vines. Treat garlic and peas as bed-mates to keep apart, and use the pea-then-allium rotation to your advantage instead. Well-grounded
Provenance tagged inline · see methodology for the labeling system Key
Harvest signals

When to pick

Snap peas are ready when the pods are plump and rounded and the peas inside have filled out, but the pod is still bright green, crisp, and sweet, about a week after the flowers open. Pick them before the pod gets dull, yellow, or tough. Check the vines every one to three days and pick often, because leaving old pods on the plant makes it stop making new ones. Hold the vine with one hand and pull the pod with the other so you do not tear the plant, and peel the string off the seam of older kinds before eating.Sugar snap peas are ready when the pods have plumped up and rounded out, with the peas inside nearly full but the pod still bright green, crisp, and tender, roughly 5 to 8 days after flowering. Pick before the seeds bulge and stand out individually along the pod and before the pod dulls, yellows, or turns fibrous, the point at which it goes tough and starchy. Pick every one to three days: frequent picking keeps the vines flowering and producing, while overmature pods left on the plant signal it to stop. Snap the pod off with two hands so you do not tear the brittle vine, and pull the string along the seam of older, stringed varieties before eating.

Yield

What to expect

Each pea plant gives only a modest amount, so peas are grown in rows, not one at a time. A 10-foot row of snap peas gives about 3 to 4 pounds of pods over its picking weeks.Sugar snap peas yield modestly per plant, so they are grown in rows or blocks rather than singly. Utah State puts a snap or snow pea crop at about 3 to 4 pounds of pods per 10 feet of row over its cropping window; a trellised double row in a small bed gives a steady picking for several weeks.

Snap peas crop for three to four weeks, then slow down as it heats up. Because one planting keeps going for a while, you often need only one or two sowings, plus a fall crop where it works.Snap peas come on over three to four weeks, a longer window than snow peas, and then decline as the weather warms. Because a single sowing crops for a while, one or two sowings usually suffice, with a separate fall crop where summers allow. Snap peas are a great first-year crop. You plant the seed straight into cool spring soil, and in about two months you are picking plump, sweet pods. The main things that affect your harvest are planting early before the heat, giving tall vines a trellis, and picking often once the pods fill out.Sugar snap peas are a rewarding first-year crop: cold-hardy seed sown straight into early-spring soil, quick to a plump, sweet pod in about 58 to 70 days, and forgiving of cool weather. The main levers on yield are sowing early enough to beat the heat, giving climbing types a trellis, and picking often once the pods plump up.

What changes yield
Sowing early enough to flower and fill pods before summer heat (the spring crop is racing the heat; pods do not set or plump above about 80 to 85°F)Steady moisture through flowering and pod fill (drought here aborts blossoms and leaves pods thin instead of plump)Support for climbing types (held up, tall snap vines crop better, stay cleaner, and resist mildew through better airflow)Regular picking every one to three days (leaving overmature pods on the vine signals the plant to stop flowering and ends the crop early)
Verified · 1 source View
Pick your variety

Recommended varieties

These are snap peas, the plump, sweet kind you eat whole once the pods fill out, different from flat snow peas and from shelling peas you pop open for the seeds. Pick a type to fit your space: tall kinds like Sugar Snap need a trellis, while short bush kinds like Sugar Ann hold themselves up and do well in pots. If powdery mildew or wilt is common where you garden, choose a resistant variety like Super Sugar Snap, Cascadia, or Sugar Sprint. Older kinds have a stringy seam you peel off; Sugar Ann, Cascadia, and Sugar Sprint are stringless.These are snap (sugar snap) peas, bred for plump, rounded, edible pods eaten whole once the peas have filled out; do not confuse them with flat snow peas, which are picked young and flat, or with shelling peas grown only for the seed. Match the variety to your support: tall climbers like Sugar Snap and Super Sugar Snap reach several feet and need a sturdy trellis, while bush types like Sugar Ann stand on their own and suit containers and small beds. Where powdery mildew or wilt recur, lean on the resistant varieties: Super Sugar Snap, Cascadia, and Sugar Sprint carry powdery mildew resistance, and Cascadia adds Fusarium wilt and pea enation mosaic virus resistance. Older varieties carry a string along the pod seam that is pulled before eating; Sugar Ann, Cascadia, and Sugar Sprint are stringless.

Sugar Ann
Compact bush snap pea about 2 feet tall that stands on its own without a trellis; early, sweet, stringless pods and resistance to powdery mildew and common wilt. An All-America Selections winner and the easiest choice for containers and small beds.
Sugar Snap
The original tall climbing snap pea, reaching 5 to 6 feet and needing a sturdy trellis; large, plump, very sweet pods with a string to pull, and resistance to common and Fusarium wilt. The heirloom standard that defined the type.
Super Sugar Snap
An improved tall Sugar Snap, similar height and sweetness but earlier and higher-yielding, with added resistance to powdery mildew and pea leaf roll virus. Needs a trellis.
Cascadia
Semi-dwarf climber around 2.5 to 3 feet with thick, sweet, stringless pods and broad disease resistance, including Fusarium wilt, powdery mildew, and pea enation mosaic virus. A dependable, lower-support choice.
Sugar Sprint
Early, stringless semi-dwarf snap pea with resistance to powdery mildew and pea enation mosaic virus; quick to crop and easy to pick, a good short-season variety.
Off the vine

Storing your harvest

Room temp
Do not leave snap peas out on the counter. They go limp and lose their sweetness quickly, so cool them soon after picking.Not recommended. Sugar snap peas lose sweetness and crispness fast at room temperature and should be cooled promptly after picking rather than held on the counter.
Fridge
Cool the pods right after picking, then keep them in the fridge in a loosely closed bag. They stay best for only about two to three days; the longer they sit, the less sweet and crisp they get.Cool sugar snap peas immediately after harvest to shed field heat, then refrigerate in a perforated bag. They hold good quality for only about two to three days kept cold and humid, near 32 to 40°F at high humidity; the sugars convert to starch quickly, so use them sooner rather than later.
Freezer
Snap peas freeze well for keeping longer. Give them a quick dip in boiling water (blanch), cool them, and freeze within a few hours of picking for the best result.Sugar snap peas freeze well for longer storage. Blanch briefly to set the color and texture, cool, and freeze within a few hours of picking for the best quality.
Verified · 2 sources View
From the garden to the kitchen

Recipes to try

Mains

Sugar Snap Pea Stir Fry

Mains · 20m · Serves 2

More recipes
arriving with the harvest
When something goes wrong

Common problems

Flowers fell off without making podsFlowers dropped or no pods set
01 of 04
What happened The plants flowered but made few or no pods, or the pods never filled out, because it got too hot. Once it stays above about 80 to 85°F, peas drop their flowers instead of making pods, and the few that form stay thin and tough. This usually happens to a spring crop planted too late that runs into summer heat. It is a weather problem, not a disease.The vines flowered but set few or no pods, or set pods that never plumped up, because the weather turned too warm. Once sustained temperatures pass about 80 to 85°F, peas abort their blossoms instead of setting pods, and any pods that form stay thin and tough. It is the classic fate of a spring crop sown too late, caught by early-summer heat, and it is a weather problem, not a disease. Next season Plant as early as you can work the soil so the peas flower and fill in cool weather, before the heat. Where summer comes fast, pick the quickest snow peas, and try a fall planting timed to finish as it cools down.Sow as early as the soil can be worked so the crop flowers and fills pods in cool weather, well before summer heat. Where summers come on fast, choose the earliest short-season snow peas, and add a fall sowing timed so the crop matures in cooling weather.
Seeds rotted or did not come upSeed rotted or came up poorly
02 of 04
What happened The seed went into cold, soggy soil and rotted instead of sprouting, or came up thin and patchy. Peas like cool soil, but wet, poorly drained ground rots the seed and lets soil fungi get to it. Planting too early into a wet bed is the usual reason for gaps.The seed was sown into cold, saturated soil and rotted before emerging, or came up as a thin, patchy stand. Peas tolerate cool soil, but waterlogged ground starves the seed of oxygen and feeds the soilborne root rots, so a too-early sowing into a wet, poorly drained bed is the usual cause of gaps. Next season Plant in well-drained soil or raised beds instead of cold, wet, low spots, and wait until the soil is workable, not muddy. Plant about 1 to 1.5 inches deep, do not keep the bed soggy, and soaking the seeds overnight helps them come up faster.Sow into well-drained ground or raised beds rather than cold, low, wet spots, and wait for the surface to be workable rather than muddy. Plant about 1 to 1.5 inches deep, do not keep the bed soggy, and an overnight presoak helps the seed get up and out of harm's way faster.
White powdery dust on the leaves and podsWhite powdery coating late in the crop
03 of 04
What happened A white to gray powdery dust spread over the leaves and pods as the weather warmed up and the nights stayed cool. This is powdery mildew, the classic late-season pea disease. It weakens the plants and spoils the pods, and it is hard to stop once it has spread.A white to gray powdery film spread over the leaves, stems, and pods as the crop ran into warm days and cool nights, the conditions that favor powdery mildew. It is the classic end-of-season pea disease; it weakens the vines, taints the pods, and is hard to stop once it has covered the foliage. Next season Plant a resistant variety, which works best (Super Sugar Snap, Cascadia, and Sugar Sprint resist mildew), and plant early so the crop finishes before mildew weather arrives. Give the vines a trellis and room to breathe, water at the soil, and pull the old plants once the spring crop is done.Plant powdery-mildew-resistant varieties, the most effective step (Super Sugar Snap, Cascadia, and Sugar Sprint all resist it), and sow early so the crop finishes before the mildew weather. Give the vines a trellis and room for airflow, water at the soil, and pull a spent spring planting promptly.
Pods came out tough and starchyPods tough, overmature, or starchy
04 of 04
What happened The pods came out tough and starchy instead of plump, crisp, and sweet, usually because they were left on the vine too long, until the peas overfilled, or because heat and dry soil hit while the pods were filling. Snap peas are best picked at the plump-but-tender stage and go from sweet to starchy in just a few days.The snap pods came out tough and starchy rather than plump, crisp, and sweet, usually because they were left on the vine past their short pickable window, when the over-full seeds toughen the pod and the sugars turn to starch, or because heat and drought stress hit during pod fill. Snap peas are best caught at the plump-but-tender stage and go from sweet to starchy in a few days. Next season Pick every one to three days while the pods are plump and still crisp, before the peas overfill, starting about 5 to 8 days after the flowers open. Keep the water steady while the pods fill, and plant early so they grow in cool weather, not heat.Pick every one to three days while the pods are plump, rounded, and still bright and crisp, before the seeds overfill and the pod dulls, starting about 5 to 8 days after flowering. Keep moisture steady through pod fill, and sow early so the pods size up in cool rather than hot weather.
Verified · 5 sources View
The usual suspects

Pests & diseases

Pests
Pea aphid
P · 01
Symptoms Clusters of small, soft green insects packed onto the growing tips, flower stems, and undersides of the leaves. They curl and yellow the new growth and stunt the plants, and they leave a sticky residue. The bigger problem is that pea aphids spread virus diseases from plant to plant, so they are worth catching early.Colonies of soft, pinhead-sized green aphids clustered on the growing tips, flower stalks, and leaf undersides. Heavy feeding curls and yellows the new growth, stunts the vines, and can drop blossoms; a sticky honeydew and sooty mold may follow. Most important, pea aphids transmit the virus diseases of peas, including pea enation mosaic, so even modest numbers matter. Cause The pea aphid, a large green aphid that multiplies quickly in the cool weather of spring and fall when peas are growing. It builds up fast, before helpful insects like ladybugs catch up.The pea aphid (Acyrthosiphon pisum), a large green aphid that builds up fast in the cool, mild weather of spring and fall, exactly the seasons peas grow. It reproduces rapidly, so colonies form before natural enemies catch up. Organic treatment Blast the colonies off with a strong spray of water, or use insecticidal soap, which works on contact. Start as soon as you see them, while there are only a few. Ladybugs and other helpful insects usually finish the job. Since aphids spread viruses, it is worth dealing with them early.Knock colonies off with a strong spray of water, or treat with insecticidal soap, which controls aphids on contact; begin as soon as colonies are found, while numbers are low. Ladybugs, lacewings, and parasitic wasps usually bring populations down on their own. Because the real risk is virus transmission, act early rather than waiting for visible damage. Prevention Lay down reflective mulch, which confuses aphids and cuts the viruses they spread, and pull nearby weeds that shelter them. Do not overfeed with fertilizer, since the soft new growth is exactly what aphids like. Where pea viruses are common, plant a resistant variety like Cascadia or Sugar Sprint.Lay reflective mulch, which disorients aphids and reduces both feeding and virus spread, and control nearby weeds and clover that harbor them. Avoid overfeeding with nitrogen, which produces the soft, lush growth aphids favor, and choose virus-resistant snap varieties such as Cascadia or Sugar Sprint where pea viruses are a known problem.
Pea weevil
P · 02
Symptoms Little notches chewed out of the leaf edges of young plants, and beetles on the flowers in spring. The hidden damage is worse: the grubs tunnel into the peas forming inside the pods, leaving tiny round holes in the dried seeds. Since you eat snap peas pod and all, infested pods are especially unwelcome. Holes in saved seed are the tell, and the pea weevil eats only peas.Small notches chewed from the leaf margins of young plants in spring, and adults feeding on the blossoms. The real damage is hidden: larvae bore into the developing seeds inside the pods and feed there, leaving tiny round exit holes in the dried peas. Because snap peas are eaten pod and all, weevil-infested pods are especially unwelcome. Saved seed with holes is the giveaway, and the pea weevil feeds only on peas (Pisum). Cause The pea weevil, a small brown beetle that feeds only on peas. The adults spend the winter in garden trash, move in when the peas flower to lay eggs on the young pods, and the grubs grow up inside the seeds. There is one generation each year.The pea weevil (Bruchus pisorum), a small brownish beetle whose host range is peas alone. Adults overwinter in debris and trash, move into the crop at bloom to lay eggs on young pods, and the larvae develop inside the seeds. There is one generation a year. Organic treatment Watch for the beetles while the peas are flowering, which is when they lay eggs. Picking them off and covering the plants with a light row cover at flowering both help. At the end of the season, check dried peas for tiny round holes before you save seed, and freezing saved seed for a few days kills any grubs inside.Monitor for adults during bloom, when egg-laying begins. In a home patch, handpicking and floating row cover over the crop at flowering reduce egg-laying. At season's end, inspect dried peas for the small round exit holes before storing seed; freezing saved seed for several days kills any larvae inside. Prevention Clear away and destroy the old pea plants after harvest so the beetles have nowhere to overwinter, and move your peas to a new spot each year. Do not save seed that has holes in it. Planting early so the pods finish before the beetles get busy also helps.Clean up and destroy pea debris after harvest to remove overwintering shelter, and rotate peas away from last year's bed. Do not save or replant seed showing exit holes. Where the weevil is established, an early sowing that finishes pod fill before peak adult activity escapes the worst.
Armyworms and cutworms
P · 03
Symptoms Cutworms cut off young pea seedlings right at the soil line overnight, so you find plants toppled over and gaps in the row. Armyworms are smooth caterpillars that chew the leaves and sometimes the pods, and they can show up in numbers. Both feed at night and hide during the day.Cutworms sever young seedlings at or just below the soil line overnight, leaving toppled plants and thinned rows in spring. Armyworms are smooth caterpillars that chew foliage and can move through a planting in numbers, skeletonizing leaves and nicking pods. Both feed mostly at night and hide in the soil or debris by day. Cause Several kinds of night-feeding caterpillars: cutworms and armyworms, the young of different moths. They come in from weedy or grassy areas, and young seedlings are the most at risk.Several night-feeding caterpillars, including cutworms (the larvae of various moths) and beet or western yellowstriped armyworms. They overwinter or move in from weedy ground and grassy cover, and seedlings are the most vulnerable stage. Organic treatment Pick the caterpillars off in the evening or early morning, and dig a little around fallen seedlings to find the curled-up cutworm. A collar of cardboard or foil around a seedling blocks cutworms, and a Bt spray controls young armyworms on the leaves. A light row cover keeps the moths from laying eggs.Handpick caterpillars in the evening or early morning, and check the soil around toppled seedlings for the curled cutworm. A cardboard or foil collar around a seedling stops cutworms; Bacillus thuringiensis (Bt) controls young armyworms on the foliage. A floating row cover keeps egg-laying moths off the planting. Prevention Clear weeds and tall grass before planting so the moths have fewer places to lay eggs, and turn the soil a couple of weeks before sowing to expose the grubs. Keep the edges of the bed weeded, and cover young seedlings with a row cover if these caterpillars are a problem where you are.Clear weeds and grassy cover before sowing to remove egg-laying sites, and turn the bed a couple of weeks ahead of planting to expose and dry out resident larvae. Keep row edges weed-free through the season, and protect emerging seedlings, the vulnerable stage, with a row cover where these caterpillars are a known problem.
Thrips
P · 04
Symptoms Fine silvery streaks and pale flecks on the leaves and pods, with tiny dark specks, where the slender insects scrape the surface and feed. Bad infestations twist the new growth and leave scars on the pods. Thrips can also spread some viruses.Fine silvery or whitish scarring and flecking on leaves and pods, with tiny dark specks of excrement, as the slender insects rasp the surface and feed on the released sap. Heavy feeding distorts new growth and can scar pods cosmetically. Thrips also vector some plant viruses. Cause Thrips, slender insects much smaller than an aphid that build up in warm, dry weather toward the end of the pea season. They scrape the surface of the plant and feed on the sap.Several thrips species, slender insects a fraction the size of an aphid that build up in warm, dry stretches late in the pea season. They rasp the plant surface and feed on the sap that wells up. Organic treatment Peas usually shrug off a little thrips damage. If they build up, a strong spray of water and insecticidal soap knock them back, and helpful insects pitch in. Keep the plants watered and unstressed, since dried-out peas are more likely to be hit.Peas usually outgrow light thrips feeding without treatment. Where numbers climb, a strong spray of water and insecticidal soap reduce them, and natural enemies such as minute pirate bugs and lacewings help. Keep plants unstressed and well watered, since drought-stressed peas are more prone. Prevention Pull nearby weeds that shelter thrips, lay reflective mulch to confuse them, and keep the soil evenly moist so the plants are not stressed. Most home pea crops are done before thrips become a real problem.Control weeds that harbor thrips, lay reflective mulch to disorient them and reduce virus spread, and keep moisture even so plants are not drought-stressed. Most home pea crops finish before thrips become a real problem.
Diseases
Powdery mildew
D · 01
Symptoms A white to gray powdery dust that starts as spots on top of the leaves and spreads over the leaves, stems, and pods. The leaves yellow and dry out, the vines weaken, and the pods get spotted, which matters more when you eat the whole pod. It is the classic late-season pea problem, showing up as the weather warms and dries toward the end of the spring crop.A white to grayish powdery coating that starts as small spots on the upper leaf surfaces and spreads to cover leaves, stems, and pods. Affected leaves yellow and dry, vines lose vigor, and pods are spotted and off-flavored, which matters more for a snap pea eaten pod and all. It is the classic late-season pea disease, arriving as the spring crop runs into warmer, drier weather. Cause A fungus (Erysiphe pisi) that thrives in warm days, cool nights, and dry leaves, which is exactly the weather at the end of the pea season. It spreads on the wind and moves fast once it starts, so catching it early and planting resistant varieties matter most.The fungus Erysiphe pisi, favored by warm days, cool nights, and dry foliage, the conditions that arrive late in the pea season. Spores spread on the wind, and the disease moves fast once established, which is why early control and resistant varieties matter most. Organic treatment Powdery mildew is easiest to handle the moment you first see it; once it covers the leaves, it is hard to stop. Pick off the worst leaves and open up the planting for airflow. A sulfur spray started early and repeated per the label helps. If the spring crop is nearly finished, the simplest move is to pick what is ready and pull the plants.Powdery mildew is best managed at the very first signs; once it covers the leaves and yellowing sets in, control is difficult. Remove the worst-affected leaves and improve airflow. Sulfur or a labeled biofungicide, begun early and repeated per the label, suppresses it. On a spring crop that is nearly done, harvesting promptly and pulling the planting is often the practical choice. Prevention Plant a resistant variety, which is the best defense: Super Sugar Snap, Cascadia, and Sugar Sprint resist powdery mildew. Plant early so the crop finishes before the mildew weather arrives, give the plants room and a trellis so air moves through them, and stay out of the patch when the vines are wet.Choose resistant varieties, the single most effective step: Super Sugar Snap, Cascadia, and Sugar Sprint all carry powdery mildew resistance. Sow early so the crop finishes pod fill before the late-season mildew weather, give plants room and a trellis for airflow, and avoid working among wet vines.
Fusarium wilt
D · 02
Symptoms The lower leaves turn yellow and the yellowing creeps up the plant, which becomes stunted, curls, and wilts. If you cut the lower stem, the tissue inside is stained reddish or orange. Affected plants often die before making a crop. It shows up in patches and gets worse as the soil warms.A yellowing of the lower leaves that progresses up the plant, with downward curling, stunting, and wilting; a cut through the lower stem shows a reddish or orange discoloration of the water-conducting tissue. Plants often die before pod fill. Symptoms appear in patches and worsen as the soil warms. Cause A fungus that lives in the soil and enters through the roots, clogging the plant's plumbing. It survives in the soil for years and likes warm soil. Once it is in a bed you cannot get rid of it, so the answer is resistant varieties and moving your peas around.The soilborne fungus Fusarium oxysporum f. sp. pisi, which enters through the roots, plugs the vascular system, and persists in the soil for years. Several races exist. Warm soil favors it, and once a bed is infested the fungus cannot be eradicated, so resistant varieties and rotation are the management. Organic treatment There is no cure once a plant is infected; pull and throw away (do not compost) the affected plants. You manage this one by preventing it, with resistant varieties and rotation, not by spraying.There is no cure for infected plants; remove and destroy them to limit buildup. Management is preventive: the disease is handled through resistant varieties and rotation, not treatment. Prevention Plant a wilt-resistant snap variety such as Sugar Snap or Cascadia. Move your peas to a new spot on a three-to-four-year cycle, improve drainage, and avoid carrying infected soil from bed to bed.Plant Fusarium-resistant varieties, which are widely available among snap peas: Sugar Snap and Cascadia both carry wilt resistance. Rotate peas on a three-to-four-year cycle away from infested ground, improve drainage, and avoid moving infested soil between beds.
Root rots and damping-off
D · 03
Symptoms Seeds that rot before they come up, and seedlings that flop over at a pinched, water-soaked spot near the soil. On bigger plants the roots rot, the vines stunt, and the lower leaves yellow and die. It is worst in cold, wet, poorly drained soil that makes the seed sit too long before sprouting.Seed that rots before emerging, and seedlings that damp off, collapsing at a water-soaked, pinched stem base. On older plants the root rot complex stunts the vines, yellows and kills the lower leaves, and rots the roots and lower stem brown. Damage is worst in cold, wet, poorly drained soil that slows germination and keeps seedlings vulnerable. Cause A group of soil fungi and water molds (including Pythium, Rhizoctonia, and Aphanomyces) that attack seeds, roots, and seedlings. Cold, soggy soil and damaged roots at planting let them in, and they build up where peas are grown too often in the same spot.A complex of soilborne fungi and water molds, chiefly Pythium, Rhizoctonia, Fusarium solani, and Aphanomyces euteiches. Cold, saturated soil and root injury at planting set the stage; Aphanomyces in particular builds up in beds cropped to peas too often and severe infections kill plants outright. Organic treatment There is no saving seed or seedlings that have rotted; replant once the soil is warmer and drains better. Pulling affected plants and improving drainage help, but the main thing is preventing it, since these organisms live in the soil.There is no rescue for rotted seed or collapsed seedlings; replant into warmer, better-drained conditions once the soil has dried. Removing affected plants and improving drainage limits further loss, but prevention is the real lever since the organisms are already in the soil. Prevention Plant in well-drained soil or raised beds instead of cold, wet, low spots, and never sow peas into soggy ground. Avoid damaging the roots when planting, move your peas around the garden on a three-to-four-year cycle, and clear away the old plants after harvest.Sow into well-drained ground or raised beds rather than cold, low, wet spots, and do not sow peas into waterlogged soil. Avoid root injury at planting, rotate peas on a three-to-four-year cycle to keep Aphanomyces down, and clear crop debris after harvest. Some varieties offer partial root-rot tolerance.
Ascochyta blight
D · 04
Symptoms Brown to purple-black spots and streaks on the leaves, stems, and pods, sometimes with a blackened stem base. Sunken spots on the pods can carry the disease into the seed. It shows up in cool, wet spring and fall weather and rides in on infected seed and old plant debris.Brown to purplish-black spots and streaks on leaves, stems, and pods, often with darker margins; a blackening at the base of the stem (foot rot) in one form, and sunken lesions on the pods that can carry the fungus into the seed. It develops in cool, wet spring and fall weather and is carried on infected seed and debris. Cause A group of related fungi that survive on infected seed and on old pea plants left in the soil. Cool, wet weather and splashing water spread them. Once they are on the seed, they travel with it to the next planting.A complex of related fungi (the Ascochyta blight complex). The fungi survive on infected seed and on pea debris in the soil, and cool, wet conditions with splashing water drive infection and spread. Organic treatment You cannot cure tissue that is already infected; pull and throw away (do not compost) affected plants and all the old debris to slow it down. For a home garden, prevention does most of the work, since the disease travels on seed and old plants.There is no cure for infected tissue; remove and destroy affected plants and all debris to limit spread. Cultural control is the mainstay for a home crop, since the disease is seed- and debris-borne. Prevention Plant certified disease-free seed and do not save seed from an infected crop. Clear away all the old pea plants after harvest, and do not grow peas in that spot for at least three to four years. Water at the base, not overhead, and stay out of the patch when the vines are wet.Plant certified disease-free seed and do not save seed from an infected crop. Remove all pea debris after harvest and rotate peas off the ground for a minimum of three to four years before returning. Avoid overhead watering and working among wet vines, which splash and carry the fungus.
Verified · 6 sources View
Seasoned
Where to plant next year

Crop rotation

Move your peas to a new spot each year, on about a three-year rotation, and longer if you have had disease trouble. Because peas feed the soil with nitrogen, whatever you plant there next will benefit.Rotate peas on a roughly three-year cycle, longer where Ascochyta blight or root rot have shown up. Their nitrogen-fixing habit makes them a good predecessor for nitrogen-hungry crops.

Family
Fabaceae (legume)
Years between
3 years
in the same bed
Avoid following
Do not plant snap peas where peas or beans grew last year. Diseases build up in the soil and hit the next crop. If you have had root rot or blight, wait even longer, up to four years, before peas return.Avoid following peas with peas or other legumes in the same bed; rotate to break the soilborne disease cycle (root rots, Fusarium, Ascochyta) that peas are prone to. Where Ascochyta or Aphanomyces root rot have appeared, extend the rotation toward four years.
Plant after
Peas are an excellent crop to grow before a heavy feeder. As a legume they fix nitrogen and leave the soil in better shape for a following crop such as a leafy green, a brassica, or corn.
Verified · 2 sources View
In the app · pre-launch

When plant taps you on the shoulder

The plant app sends a timely reminder at every critical moment of your sugar snap peas season. The wording adjusts to whichever you pick: beginner or seasoned. Here are three you'll see in Zone 6.

p
plant
Last frost arrives
Time to plant peas
Plant snap peas as soon as you can work the soil in spring, even weeks before the last frost, since young peas handle cold. Plant about 1 to 1.5 inches deep and 1 to 2 inches apart in moist, well-drained soil, and put up a trellis for tall types when you plant.
p
plant
2 weeks after last planting
Plant your next row of peas
Snap peas give a crop over a few weeks, then slow down in the heat. Plant a new short row now, about two weeks after the last one, to keep peas coming, and stop early enough that the last batch finishes before it gets hot.
p
plant
8 weeks after planting
Start checking your snow peas every day
Most snap peas are ready about 58 to 70 days from planting, about a week after they flower. Start checking every day and pick the pods while they are plump and crisp, before they get tough. Pick every one to three days to keep more coming.
Get personalized alerts.

plant sends the right notification at exactly the right moment, for your zone, your weather, your crops. Founding members lock the rate forever.

Back the Kickstarter →
Ask the gardener

Common questions

Got a question we missed?

We're building this guide with real growers. Got a question we missed? Ask here. We read every one and add the best answers right to this page.

Grown this before?

Share a tip

Learned something the hard way? Pass it on. Real growers' tips make this guide better for the next person, and we credit you by name when yours goes live.

Seasoned
Spot something wrong?

Report a problem

If you've grown this crop and you see a date, a temperature, a companion claim, or a recommendation that doesn't match your experience, tell us. Real growers' corrections make this guide better for the next person.

How we built this guide

Methodology & sources

Every date, temperature, spacing, and recommendation on this page is sourced from university cooperative extension publications, peer-reviewed agricultural research, NOAA climate data, and direct extension calendars. Where claims are softer (traditional gardening wisdom not formally documented), we say so.

Research-backed Documented in cooperative extension publications or peer-reviewed research
Well-grounded A known agronomic principle, but not formally tested for this specific pair
Traditional Time-tested gardening wisdom, limited formal research support
Last reviewed
July 2, 2026
Data version
crops_data_final · v1.0 · schema 2.9
Sources cited on this page
16 publications
Verified entries
Companion-planting claims tagged inline · zone dates verified against 5+ extensions
See all sources cited on this page
  • University of Minnesota Extension umn_ext
  • University of Maryland Extension umd_ext
  • Cornell Cooperative Extension cornell_ext
  • Iowa State University Extension iastate_ext
  • Michigan State University Extension msu_ext
  • NC State Extension ncsu_ext
  • Penn State Extension psu_ext
  • U. of Illinois Urbana-Champaign Extension uiuc_ext
  • UC Davis Postharvest Center ucd_postharvest
  • Texas A&M AgriLife Extension tamu_agrilife
  • Virginia Cooperative Extension 426-331 vce_426_331
  • Piedmont Master Gardeners piedmont_mg
  • UGA Vegetable Garden Calendar uga_calendar
  • Clemson Home & Garden Information Center clemson_hgic
  • UC IPM Statewide IPM Program uc_ipm
  • NOAA 1991-2020 Climate Normals noaa_normals

Growing notes, weekly.

Zone-aware seasonal nudges, what's worth planting now, and the occasional recipe from the harvest. No spam, ever.

Vol. 003 · Sugar Snap Peas · plant.lifestyle