Pick your zone and the dates re-calibrate.
The Guide Herbs Vol. 003

Chives

in Zone 13, this week

Chives are one of the easiest and hardiest herbs you can grow. They are a perennial in the onion family, so you plant them once and they come back every year on their own. The plant dies back over winter, then sends up fresh, thin, grassy green leaves very early in spring, and it carries pretty pink-purple flowers in early summer that you can eat too. Chives like full sun to a little shade, decent soil, and regular water, but they forgive a lot. The clump gets bigger each year, so dig it up and split it every few years. They have a mild oniony taste and hardly any pests. There is also a relative called garlic chives, with flat leaves and a mild garlic flavor. Chives (Allium schoenoprasum) are a hardy, clump-forming perennial in the onion family (Amaryllidaceae), grown for their slender, hollow, grass-like leaves and their edible pink to pale purple pom-pom flowers. Unlike the annual and biennial kitchen herbs, chives are planted once and come back on their own year after year: the clump dies back to the ground over winter, rests dormant, and pushes up fresh green blades as one of the very first herbs of spring. They are among the hardiest herbs grown, reliable to roughly USDA zone 3, and among the easiest, with a mild onion flavor and few real pests. Give them full sun to light shade, average to rich well-drained soil, and steady moisture, though an established clump tolerates short dry spells. The clumps slowly widen from year to year and are best lifted and divided every 2 to 3 years to keep them vigorous. Chives are cool-preferring: in cold regions they run right through the northern summer, while in the hot South and desert they are a cool-season herb that slows or rests in the worst summer heat and revives as it cools. A close relative, garlic chives (Allium tuberosum), is a distinct species with flat leaves, a mild garlic flavor, and white late-summer flowers.
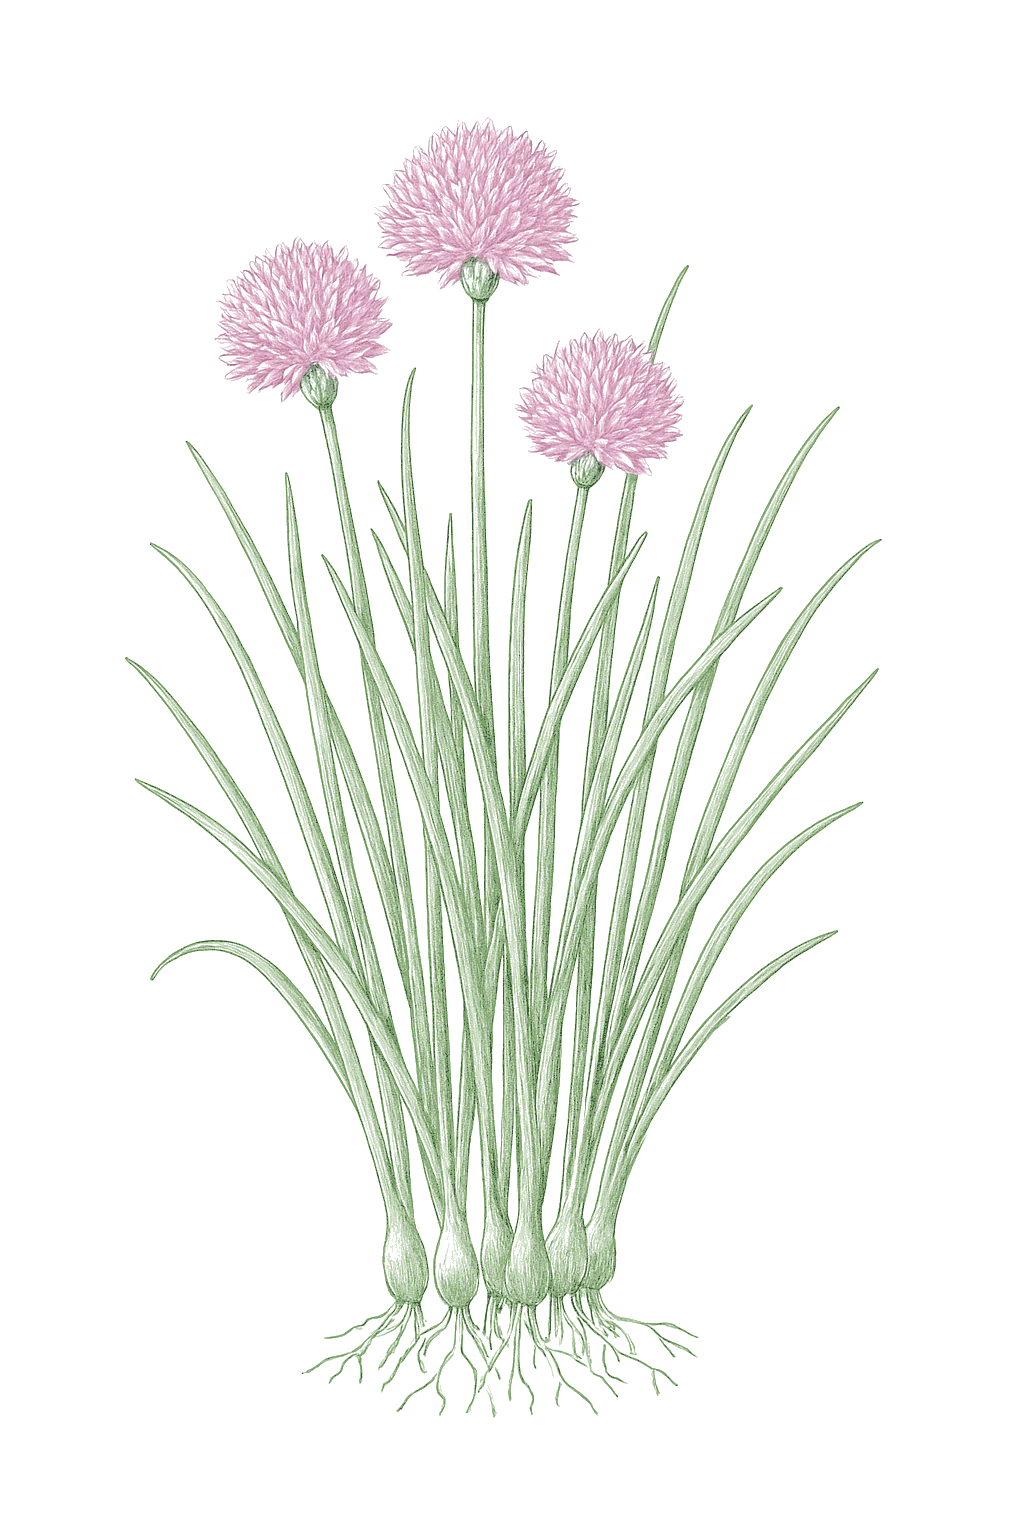
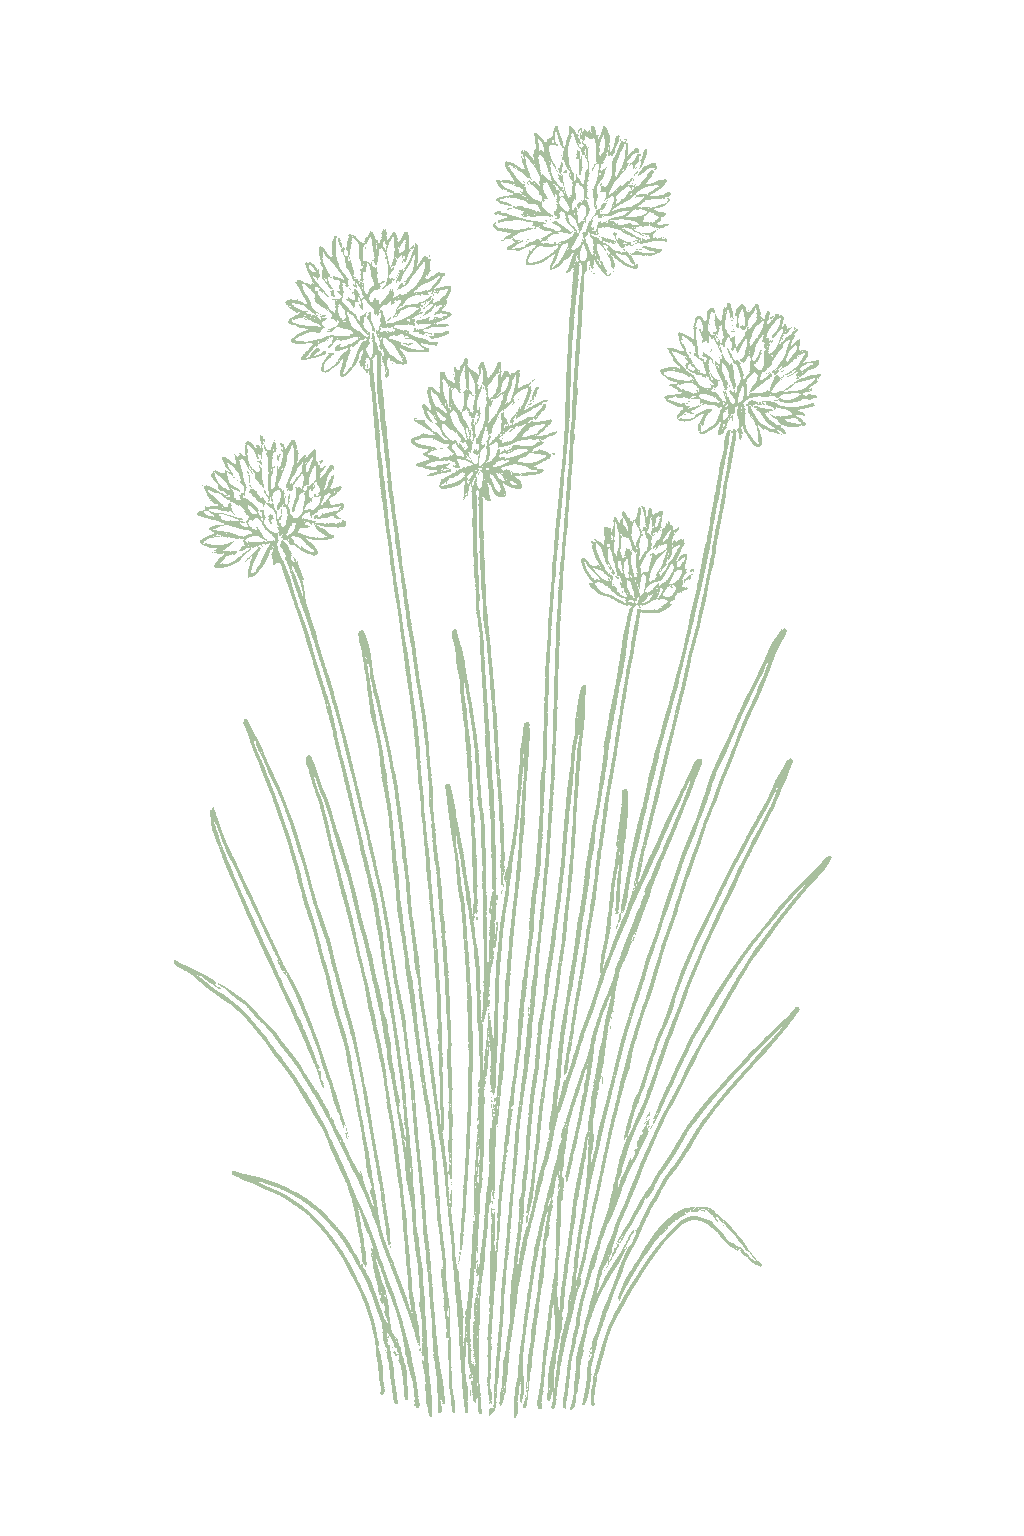
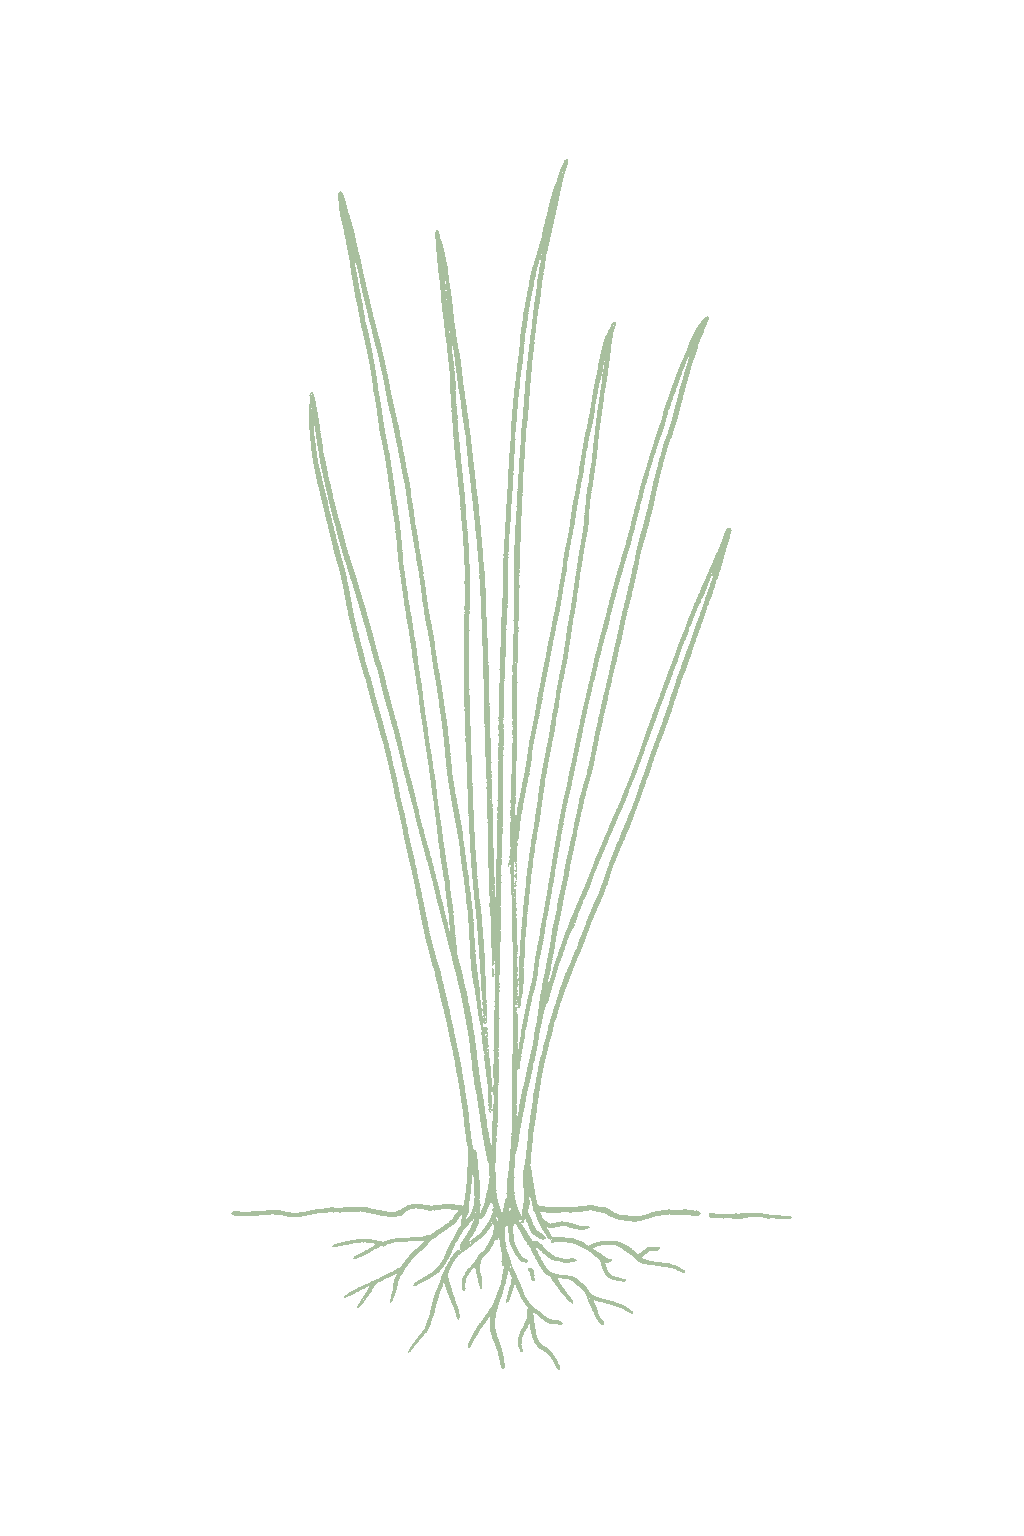
Chives mature plant
Fig. 01 · Chives, mature Zone 13
Mature in
60-90d
from transplant
Sunlight
Full sun to partial shade
6-8 hrs daily
Water
Regular
1 inch / week
Spacing
8-12"
between plants
Soil pH
6-7
slightly acidic
Today · in your zone

What's happening right now

July 24 · Zone 13 · Stage 01 · Germination

Off-season for chives in zone 13.

The season at a glance

Planting calendar

In Zone 13, chives can be planted January through February. Harvest runs March through December.

Jan
Feb
Mar
Apr
May
Jun
Jul
Aug
Sep
Oct
Nov
Dec
plant
plant
plant
too late
too late
too late
too late
too late
too early
too early
too early
too early
too early
harvest
harvest
harvest
harvest
harvest
harvest
harvest
harvest
harvest
harvest
harvest
indoors
plant out
harvest
Above-ground cropBest planted on a none moon
The season, mapped

Seed to garden

The easiest way to start chives is to buy a small pot or split a clump from a friend, which is ready to cut almost right away. You can also grow them from seed, but the seed is slow, taking a couple of weeks or more, so start it indoors about 6 to 8 weeks before the last frost, sowing a small pinch of seeds in each cell and growing them on as a little clump that you plant out whole without separating, or sow it outside once the soil is warm. Plant outside in spring in cold areas, or in fall through winter where summers are hot. Space plants about 8 to 12 inches apart, and remember one clump can be split into many.Chives are easiest to establish from a division or a nursery clump, which gives a cuttable plant in weeks, but they also grow readily from seed. The seed is slow, germinating over about 2 to 3 weeks (up to 4 to 6 in cool soil), so start it indoors 6 to 8 weeks before the last frost, sowing a pinch of about 8 to 10 seeds per cell and growing them on as an undivided clump that transplants out whole after hardening off, with no thinning (RHS), or direct-sow once the soil warms. Plant outdoors in spring after hard-frost danger passes in cold regions, or in fall through late winter in mild and hot regions. Set clumps 8 to 12 inches apart; they widen over the years and are the easiest herb to propagate by simply lifting and splitting an established clump.
Start method
Both
Soil temp
60-70°F
From seed to fruit

The growing journey

Stage 01 · Germination
01
Germination
Days 14-42 · current stage
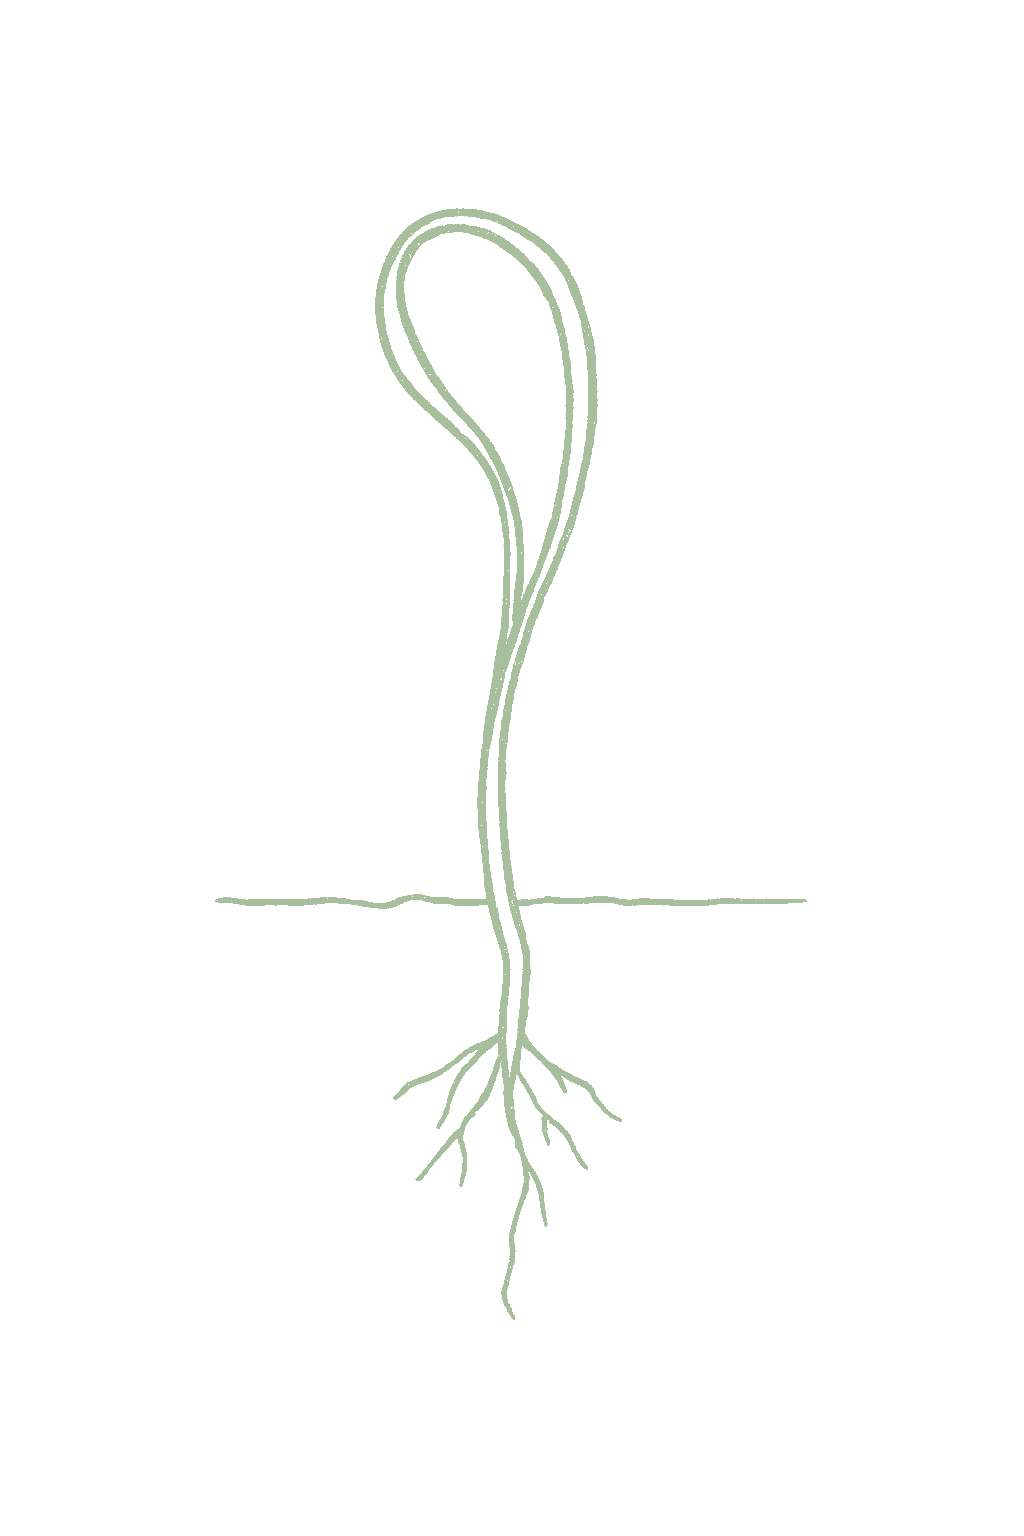
If you sowed seed, the first thin little green blades. Chive seed is slow, often a couple of weeks or more, so be patient. A bought or divided clump skips this step.From seed, the first thin, grassy blades pushing up. Chive seed is slow and can take 2 to 3 weeks, up to 4 to 6 in cool soil, and emergence is uneven. A division or nursery clump skips this stage entirely.
Keep the soil damp but not soggy until the seedlings appear, which can take a few weeks. For a quicker start, plant a small pot or a split clump instead of seed.Keep the surface evenly moist through the long germination and do not let it crust or dry. If you want a faster start, set out a division or nursery clump instead of sowing seed.
FROM PLANT · Chive seeds are slow, often taking a couple of weeks or more. Sow them shallowly, keep the soil moist, and do not give up too soon. For a fast start, plant a small pot or a split clump instead.Chive seed is slow, germinating over about 2 to 3 weeks (4 to 6 in cool soil) and unevenly. Sow shallowly, keep the surface from drying or crusting, and be patient, or skip the wait entirely by planting a division or nursery clump.
02
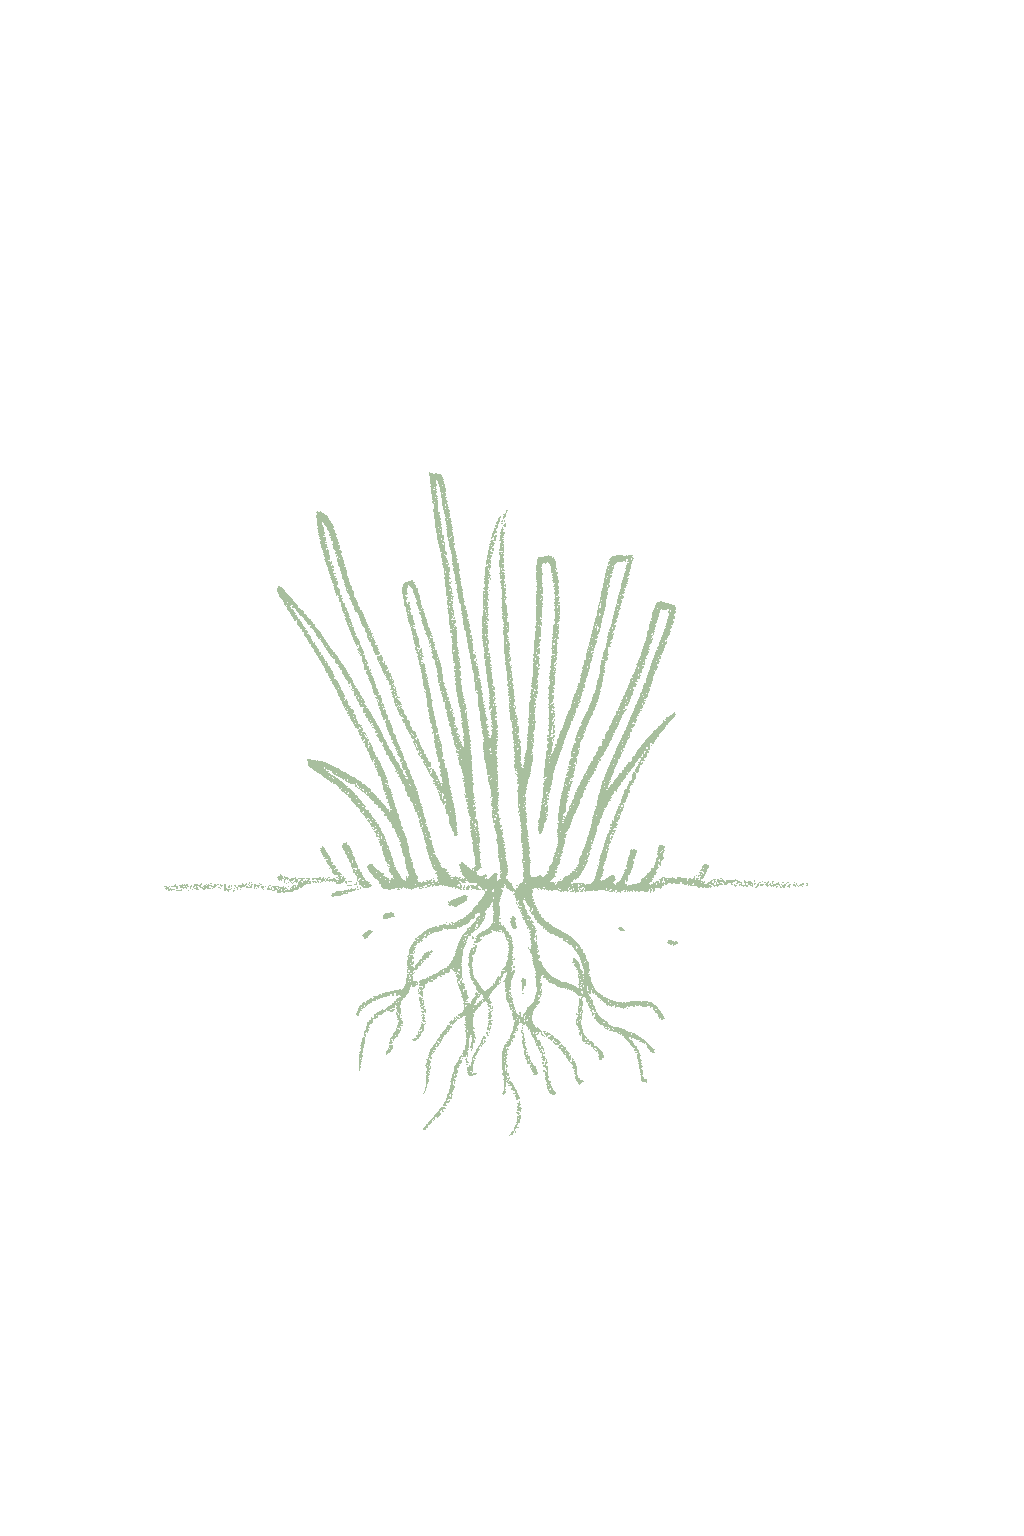
Establishment (first year)
Days 30-120
A small clump of grassy leaves getting fuller. In its first year the plant is putting energy into its roots so it comes back next spring.A young clump filling out with several upright blades. In the first year it is building the root and bulblet reserves it needs to overwinter and return.
Go easy on cutting the first year and keep the soil moist so the plant gets strong for winter. Space plants about 8 to 12 inches apart.Harvest sparingly the first year and keep moisture steady so the clump can bank strength for winter; a light feeding helps a weak plant. Thin or space seedlings to about 8 to 12 inches.
FROM PLANT · Go easy cutting chives the first year, since taking too much weakens the young plant before winter. Keep the soil moist and space plants about 8 to 12 inches apart.Do not over-harvest first-year chives: taking too many leaves weakens a young clump and hurts its ability to overwinter. Cut lightly, keep moisture steady, and space plants about 8 to 12 inches so the clumps have room to widen.
03
Harvest (cut-and-come-again)
Days 60-300
Full clumps about 6 inches tall you can keep cutting from. Snip the leaves to about 1 to 2 inches above the soil and they grow back again and again.Full clumps 6 inches or more tall that you cut from repeatedly: shear the outer blades to about 1 to 2 inches and the clump regrows for months, spring through fall in cold regions and through the cool season where summers are hot.
Cut the leaves to about 1 to 2 inches, leaving some green behind, and they grow back. Cutting often keeps them tender. After the flowers fade, cut the whole clump back to freshen it.Cut blades near the base, leaving some green so the clump keeps feeding itself, and never shear it fully bare. Regular cutting keeps tender new growth coming; shear the whole clump hard after flowering to renew it.
FROM PLANT · Cut chives down to about 1 to 2 inches above the soil, not just the tips, and leave some green behind. This keeps the leaves tender and the plant grows right back for more cutting.Harvest chives by shearing blades near the base, down to about 1 to 2 inches, taking some from each clump rather than shearing it bare; leaving green keeps the plant feeding itself. Cutting low, not just tipping, keeps leaves tender and pushes fresh bulblets and regrowth.
04
Flowering
Days 300-420
Round pink-purple flowers on stalks above the leaves in late spring or early summer. They are pretty and edible, but the leaves near them get tougher.Round pink to pale purple flower globes rising above the leaves in late spring to early summer (white in late summer for garlic chives). The blooms are edible, but foliage near the scapes coarsens.
Pick a few flowers to eat, then cut the whole clump back to about 1 to 2 inches. This stops it from seeding everywhere and brings back fresh, tender leaves.Enjoy or harvest some flowers just as they open, then shear the clump to about 1 to 2 inches to remove spent scapes before they seed and to force a fresh flush of tender leaves. Deadhead to prevent prolific self-seeding.
FROM PLANT · When chives flower, eat a few blooms, then cut the whole clump back to about 1 to 2 inches. That stops the seeds from spreading everywhere and brings back fresh, tender leaves.When chives bloom, harvest a few flowers to eat, then shear the whole clump to about 1 to 2 inches to remove the scapes before they set seed and to force a fresh flush of tender leaves. Deadheading also prevents prolific self-seeding, which is heaviest in garlic chives.
05
Winter dormancy and spring return
Days 240-400
In cold areas the leaves die back and the plant rests over winter, then greens up again very early in spring. In mild areas it may stay green most of the year.In cold regions the foliage yellows and dies back to the ground with hard frost, and the clump rests dormant over winter, pushing up fresh blades as one of the first herbs of spring. In mild regions it may stay semi-evergreen.
Leave the plant alone as it dies back; clean up the old leaves in late winter. It will come back on its own in spring. Split crowded clumps in early spring.Let the clump die back naturally; tidy old remains in late winter and mulch in the coldest zones. Do nothing to force it; it returns on its own. Divide overgrown clumps in early spring as growth resumes.
FROM PLANT · Chives come back every year. Let the leaves die back in fall, clean them up in late winter, and the plant returns in spring. Every few years, dig up a big or thinning clump in early spring and split it to keep it healthy.Chives are a hardy perennial: let the foliage die back on its own in fall, remove old remains in late winter, and mulch in the coldest zones. The clump returns each spring for years. Lift and divide an overgrown or hollow-centered clump in early spring to keep it vigorous.
Beginner
Know your soil

Your soil

Identify yours

Not sure what soil you have? Grab a small handful of damp soil from your garden bed and squeeze it. If it crumbles apart easily, it's sandy. If it holds together but breaks when you poke it, it's loam (what most vegetables want). If it stays in a hard, slippery ball, it's clay.

What this crop wants

Chives are not fussy about soil and grow in almost any kind, but they do best in loose, fertile ground with some compost mixed in, kept evenly moist but never soggy. Good drainage matters most: an established clump handles a short dry spell, but ground that stays wet through winter can rot the roots and crown.

If your soil doesn't match

You have sandy soil

Mix 2-3 inches of compost into the top 6 inches of your bed before planting. Compost holds moisture (which sandy soil drains too fast) and adds the nutrients sandy soil tends to lack. Repeat each season. Compost breaks down over time.

You have clay soil

Mix 2-3 inches of compost AND a few inches of coarse sand or perlite into the top 6 inches of your bed. The compost feeds the plants; the sand breaks up the clay so air and water can move through. Don't add sand without compost. It can compact like concrete.

Containers and raised beds

If amending your soil sounds like too much work, or if your soil is heavy clay, full of rocks, or contaminated, build over it. A raised bed at least 12 inches deep filled with a 50/50 mix of compost and sandy loam gives you ideal growing soil with no battles. A 5-gallon container with quality potting mix does the same for one plant at a time. Both bypass your native soil entirely.

Learn more about your soil
The specs

Care guide

The numbers that matter, at a glance.

Sunlight
Full sun to partial shade · 6-8 hrs/day
Water
Regular
Spacing
8-12 inches
Soil
loam, sandy loam
Days to maturity
60-90 days from transplant
Soil pH
6 to 7
Container OK?
Yes · 1+ gal pot
Germination temp
60-70°F
Soil chemistry

Soil pH for chives

Preferred
6 to 7
Tolerated
5.5 to 7.5

Chives grow best in slightly acidic to neutral soil, about 6.0 to 7.0. Most garden soil is fine, and a simple soil test tells you where you stand.Aim for a soil pH of about 6.0 to 7.0, slightly acidic to neutral, the range the University of Minnesota and Michigan State both list as best for chives; they still do fine across roughly 5.5 to 7.5. Chives are not pH-sensitive, so in most gardens no adjustment is needed beyond a soil-test baseline.

Verified · 2 sources View
Steady hand on the hose

Watering

When & how much
Frequency
Water about once a week so the soil stays evenly moist, roughly 1 inch a week. Established chives handle a dry spell, but even water keeps the leaves tender.About 1 inch of water per week, kept even; chives are drought tolerant once the clump is established, but steady moisture keeps the leaves tender and green over the long cutting season. Do not let established plants sit in constantly wet soil.
Amount
Aim for about 1 inch of water a week, a bit more when it is hot and dry. Mulch helps keep the soil evenly moist.Roughly 1 inch per week, more in hot, dry spells; the University of Minnesota advises watering deeply when rainfall is sparse so the soil does not dry out around the roots. A mulch helps hold even moisture for a clump you cut from for years.
Method
Water at the base of the plants rather than over the leaves, which helps prevent leaf diseases.Water at the soil line with drip or a soaker hose; keeping the foliage dry checks the leaf diseases (downy mildew, rust, botrytis) chives can catch in cool, wet, crowded conditions.
Signs of trouble
Too much water
Leaves go yellow and floppy and the base can rot in soggy soil, especially over winter.Yellowing, floppy foliage and crown or root rot in constantly wet, poorly drained ground, especially over winter; downy mildew and botrytis also flare in cool, saturated, crowded conditions.
Too little water
Wilting leaves that taste sharper and tougher, and slowed growth when the soil dries out for too long.Wilting, slowed growth, and tougher, sharper foliage in prolonged drought; established clumps recover quickly once watered, but a dry, hot spell can push them toward summer dormancy.
Feeding rhythm

Feeding

Frequency
light, once or twice per season
Type
Balanced or low-nitrogen fertilizer
When to start
compost worked in before planting, then an optional light feeding in spring or after a heavy cutting

Chives do not need much feeding. Mix some compost into the soil before planting, and that is often enough. If a clump looks weak or you cut it hard, give it a light feeding to bring back fresh green leaves. In a pot, feed lightly with a diluted liquid fertilizer every few weeks, since watering washes nutrients out.Chives are light feeders with low nutrient needs and rarely need regular fertilizer. The University of Minnesota suggests only a very light application of a 5-10-5 fertilizer once each spring if a clump looks weak, on top of compost worked in before planting. A clump you cut from repeatedly benefits from a light feeding after a hard shearing to push fresh tender regrowth; in containers, where frequent watering leaches nutrients, a dilute liquid feed every four to six weeks keeps leaves green. Avoid heavy nitrogen, which softens the flavor.

N · P · K = 5-10-5

Use a balanced fertilizer such as 5-10-5, a little worked into the soil before planting, then feed lightly only if the plant looks weak or after you cut it hard.Light, balanced feeding for a low-demand perennial: a little 5-10-5 or balanced fertilizer worked in before planting, then an optional light feed in spring or after a hard cutting. Go easy on nitrogen, which softens flavor on a crop eaten fresh.

Try 5-10-5 or a balanced vegetable fertilizer, or fish emulsion for a gentle boost
Who grows well together

Companion planting

Chives are a classic companion herb: their oniony scent is said to help keep aphids and some other pests off nearby plants, and their early flowers feed pollinators and helpful insects. Gardeners traditionally tuck them at the base of roses (for black spot and aphids) and apple trees (for scab), and near carrots and tomatoes. The one plant to keep them away from is beans and peas, which onion-family plants can slow down. Much of the chive companion tradition rests on two real mechanisms: allium sulfur compounds that deter aphids and some fungal problems, and the flowering umbels' pull on hoverflies, ladybugs, and parasitoid wasps. Michigan State, citing Penn State, passes along the traditional pairings of chives at the base of apple trees (to help suppress apple scab) and roses (black spot), plus a reputed boost to carrots. These are hedged tradition with a plausible mechanism, not measured trials. The one well-grounded caution is the allium-legume antagonism: onions and their relatives are widely documented to inhibit beans and peas, so keep chives away from legumes.

Other
Roses
Chives planted around roses are a traditional pairing said to help keep aphids away and reduce black spot, and their early flowers bring in helpful insects.A traditional aromatic-companion pairing: chives are long grown at the base of roses to deter aphids and reduce black spot, with allium sulfur volatiles the plausible mechanism. MSU relays it from Penn State as tradition, not a measured effect. Traditional
Apple trees
Chives grown at the base of an apple tree are traditionally said to help prevent apple scab.A traditional orchard pairing relayed by MSU (citing Penn State): chives ringing an apple trunk are said to help suppress apple scab. Folklore with an antifungal-allium rationale, not a documented trial. Traditional
Carrots and tomatoes
Chives are a traditional good neighbor for carrots and tomatoes; their scent is said to help keep pests down, and they take up little room.A traditional aromatic interplant: chives are said to improve carrots and to help repel pests around tomatoes, tucking neatly into small gaps. Widely taught tradition with an aromatic-deterrent rationale, not a measured pairwise effect. Traditional
Keep apart from
Beans and peas Keep chives away from beans and peas. Onion-family plants tend to slow the growth of legumes when grown close together.A well-grounded antagonism: alliums, chives included, inhibit the growth of beans and peas, so they should not be interplanted. Documented extension guidance for onions and their relatives, not folklore. Traditional
Provenance tagged inline · see methodology for the labeling system Key
Harvest signals

When to pick

You can start cutting chives once the clump is about 6 inches tall. From seed that takes a couple of months, but a bought or divided plant is ready much sooner. Snip the leaves down to about 1 to 2 inches above the soil, taking some from each clump, and they grow right back so you can keep cutting all season. Always leave some green behind so the plant stays healthy, and go easy the first year. Cut in the cool morning and use the leaves fresh. The flowers are edible too.Start cutting chives once an established clump is 6 inches or more tall, which from seed is roughly 60 to 90 days but from a division or nursery clump can be just a few weeks. Harvest by shearing the outer leaves down to about 1 to 2 inches above the soil with scissors, taking some blades from each clump rather than shearing it bare; the leaves regrow and you can cut the same plant again and again through the season. Leave enough green so the plant keeps feeding itself, and in the first year cut sparingly so the young clump can build strength to overwinter. Pick in the cool morning, and use the leaves fresh for the best flavor. The pink-purple flowers are edible too and are best picked just as they open.

Verified · 3 sources View
Yield

What to expect

One chive clump gives you leaves for years and only gets bigger, so a plant or two is plenty for a kitchen. You can split a big clump into several new ones for free.A single established chive clump yields fresh leaves for years, cut repeatedly through each season; one clump supplies a kitchen, and it multiplies into many as you divide it. Yield builds as the clump widens, so a two- or three-year-old plant gives far more than a first-year one.

Chives are most productive in cool spring and fall weather. In cold areas they keep going through summer; in hot areas they slow down in the worst heat and pick back up when it cools.Production peaks in the cool of spring and again in fall. In cold regions chives run through the northern summer; in hot regions they slow or rest in peak heat and rebound as it cools. Cutting the clump back after flowering renews a flush of tender leaves. In its first year, go easy on cutting chives so the plant gets strong for winter; the big harvests come in later years. Cut low, not just the tips, and snip off flowers before they seed so you do not get seedlings everywhere.Chives are a rewarding, low-effort perennial, but the first year is about establishment: harvest sparingly so the young clump banks strength to overwinter, and expect the big yields from year two on. The main beginner mistakes are over-cutting a new clump, shearing only the tips instead of cutting low, and letting the flowers seed a lawn of volunteers.

What changes yield
Age and division: a clump yields more as it widens, and dividing every 2 to 3 years keeps it vigorous and prevents a dead, hollow center.Harvest method: shearing low (to 1 to 2 inches), not tipping, keeps leaves tender and pushes fresh regrowth and bulblets.Cool weather and even moisture: chives crop hardest in the cool of spring and fall and with steady water; extreme heat slows them.Post-bloom shearing: cutting the whole clump back after flowering renews a flush of tender leaves and prevents self-seeding.Type: common chives for onion flavor and fine leaves; garlic chives for garlic flavor and greater heat and drought tolerance.
Verified · 2 sources View
Pick your variety

Recommended varieties

There are really two kinds. Common chives have thin, hollow leaves and pink-purple flowers and taste mildly of onion; the named types just vary in how fine or sturdy the leaves are. Garlic chives are a different plant with flat leaves, a mild garlic taste, and white flowers in late summer, and they take heat well but spread by seed a lot. They all grow the same way, so pick by flavor and looks, and cut off the flowers if you do not want seedlings everywhere.Chives come in two distinct plants. Common chives (Allium schoenoprasum) are the familiar fine, hollow-leaved clump with pink-purple spring flowers and a mild onion taste; named selections differ mostly in leaf fineness and vigor, from the slender Fine Leaf and Grolau strains favored for pots and forcing, to the thick, easy-cutting Staro, to taller showy-flowered Forescate. Garlic chives (Allium tuberosum) are a separate species with flat leaves, a garlic flavor, and white late-summer flowers; they are tougher in heat and drought but self-sow aggressively. All are grown much the same way, so choice comes down to flavor (onion versus garlic), leaf form, and how much you value the flowers, while any chive self-seeds if you let the blooms set seed.

Common Chives
The standard Allium schoenoprasum: fine, hollow, grass-like leaves in tidy clumps 8 to 14 inches tall, with edible pink to pale purple pom-pom flowers in late spring. Mild onion flavor, extremely hardy, and the workhorse kitchen chive.
Fine Leaf (Grolau types)
Selections with especially fine, slender, dark green leaves and vigorous regrowth; a favorite for forcing and for growing in pots on a windowsill because it recovers quickly from cutting.
Staro
A thicker-leaved Swiss selection bred for uniform, upright, easily cut blades that hold their form; prized for kitchen cutting and for freezing, since the sturdier leaves handle handling well.
Forescate
A taller ornamental-leaning selection, roughly 18 to 20 inches, with showy rosy-pink flowers; grown as much for the bloom and pollinators as for the kitchen.
Garlic Chives (Allium tuberosum)
A distinct species, not a variety of common chives: flat, strap-like gray-green leaves with a mild garlic flavor and white star-shaped flowers in late summer to early fall. Hardy in roughly zones 3 to 9 and very heat, cold, and drought tolerant once established, but it self-seeds prolifically and can become weedy, so remove spent flower stalks.
Off the vine

Storing your harvest

Room temp
Do not leave cut chives out on the counter, where they wilt fast. Chill them and use them soon after cutting.Fresh chives wilt quickly at room temperature, so refrigerate promptly after cutting; the leaves lose their delicate onion aroma fast once cut, so use them soon.
Fridge
Store fresh chives unwashed in a loose bag in the fridge, where they keep about a week. Wash them only when you are ready to use them.Refrigerate fresh chives unwashed in a loose or perforated bag, or wrapped in a slightly damp paper towel, in the crisper; they hold about 1 week. Wash only at use, since trapped moisture speeds breakdown.
Freezer
Chives are best frozen rather than dried. Chop the clean leaves and freeze them loose or in an ice-cube tray with a little water, then use them straight from the freezer without thawing. Drying works but loses most of the flavor.Chives freeze better than they dry: snip the washed leaves and freeze them loose or in ice-cube trays with a little water; the University of Minnesota notes you can use the frozen pieces straight from the freezer without thawing. Drying is the weakest option, since dried chives lose most of their delicate flavor, so freezing is preferred for keeping.
Verified · 2 sources View
When something goes wrong

Common problems

01 of 05
What happened Your chive seed came up thin, very late, or not at all. Chive seed is slow by nature, often 2 to 3 weeks or more, and does poorly in cold, dry soil. Next time, keep the surface moist, use fresh seed, and wait longer, or just start with a division or a nursery pot, which is much faster.Stand was thin, delayed, or failed. Chive germination is intrinsically slow (2 to 3 weeks, up to 4 to 6 in cool soil) and is inhibited by cold, dry, or crusted soil. Next time sow into warm, evenly moist soil, keep the surface from crusting, use fresh viable seed, and allow the full window, or bypass seed with a division or nursery clump. Next season Keep the surface moist, use fresh seed, be patient, or plant a division instead of seed.Sow into warm moist soil, keep the surface from crusting, use fresh seed and the full window, or establish from divisions.
02 of 05
What happened Your chives sent up flower stalks and the leaves got tough and hollow. That is normal: chives flower in late spring or early summer. Next time, enjoy some flowers, then cut the whole clump back to about 1 to 2 inches to bring back fresh, tender leaves and to stop it from seeding everywhere.The clump bolted into flower scapes and the surrounding foliage coarsened and turned hollow. This is the normal late-spring to early-summer bloom of a perennial allium, not a heat or care failure. Next time harvest some flowers, then shear the clump hard (to 1 to 2 inches) to remove scapes before seed set and force a fresh flush of tender leaves. Next season Shear the whole clump back to 1 to 2 inches after it flowers to renew tender leaves.Shear the whole clump to 1 to 2 inches after bloom to renew tender leaves and prevent self-seeding.
03 of 05
What happened Your chive leaves showed silvery streaks, orange spots, or wavy pale tunnels. Those are onion-family troubles: thrips, rust, or allium leafminer. Chives usually shrug them off. Next time, shear a marked-up clump to the base to regrow clean, give plants airflow and even water, and use row cover in spring and fall against the leafminer.Silvery stippling (onion thrips), bright orange pustules (rust), or white oviposition dots and mines (allium leafminer) marked the foliage. Chives are usually trouble-free, so these are occasional. Next time reset the clump by shearing to the base, open crowded stands by dividing, water at the soil line, moderate nitrogen (rust), and row-cover through the leafminer's spring and fall flights. Next season Shear the clump to regrow clean, space plants for airflow, and use row cover against the leafminer.Shear to reset the clump, divide for airflow, water low, moderate nitrogen, and row-cover against the leafminer.
04 of 05
What happened Your chive clump got crowded and the middle went thin or died out, with weaker growth. That is a sign it is overdue for dividing. Next spring, dig up the whole clump, pull or cut it into several smaller pieces (each with a handful of little bulbs), and replant them with fresh spacing.The clump crowded itself, vigor fell, and the center thinned or died out, a classic sign an established perennial chive is overdue for division. Next spring lift the clump and split it into divisions of at least several bulblets each, discarding a dead center, and replant at 8 to 12 inch spacing in refreshed soil. Next season Dig and divide the clump in early spring every 2 to 3 years to keep it vigorous.Lift and divide every 2 to 3 years in early spring, discarding the dead center and replanting vigorous divisions.
Are chives safe for pets and cookingChives, pets, and the kitchen
05 of 05
What happened Chives are in the onion family, which is toxic to cats and dogs (and horses), even though it is perfectly fine for people to eat. Keep the plants and any trimmings away from pets.Important safety note: chives are in the onion (allium) family, and all alliums are toxic to cats, dogs, and horses. They contain organosulfur compounds (N-propyl disulfide) that damage red blood cells and can cause hemolytic anemia, with cats the most sensitive, and raw, cooked, and dried parts are all toxic. Chives are safe for people in normal culinary amounts, but unlike a pet-safe herb such as rosemary, keep the plant and its trimmings away from pets. NC State lists Allium schoenoprasum as a problem for cats, dogs, and horses. Next season Keep chives and their clippings away from cats and dogs, and call a vet if your pet eats a lot.Grow chives where pets do not graze, and dispose of clippings where cats and dogs cannot reach them; if a pet eats a significant amount, contact a veterinarian.
The usual suspects

Pests & diseases

Pests
Onion thrips
P · 01
Symptoms Tiny, slender pale-yellow to brown insects hiding down in the leaf folds, leaving silvery or whitish streaks and flecks on the green blades. Bad infestations make the foliage look bleached and papery.Onion thrips (Thrips tabaci) feeding in the leaf axils and folds, producing silvery-white stippling, streaking, and a bleached, papery look on heavy pressure; they favor hot, dry weather. On chives the damage is usually cosmetic, but a severe year degrades a leaf crop. Cause Thrips are minute sap-sucking insects, common on onion-family plants, that rasp the leaves and are worst in hot, dry weather. Chives usually shrug them off, but a heavy year can mark the leaves.Thrips tabaci, the principal allium thrips, rasps leaf surfaces and feeds on the sap; populations build fast in hot, dry conditions and on stressed plants. Organic treatment Hose the plants down to knock thrips off, shear a badly streaked clump to the base so it regrows clean, and use insecticidal soap on the leaves if needed. Rinse cut leaves before use.Dislodge with a strong water jet, shear a heavily infested clump to the base to remove the population and force clean regrowth, and spray insecticidal soap or spinosad if warranted; conserve natural enemies (minute pirate bugs, lacewings). Keeping plants unstressed and watered blunts outbreaks. Prevention Keep plants watered in hot spells, welcome helpful insects like lacewings and pirate bugs, and cut a marked-up clump back to force fresh leaves.Avoid drought stress, conserve natural enemies, cut back streaked foliage to reset the clump, and avoid siting chives beside heavily thrips-pressured onion or garlic plantings.
Allium leafminer
P · 02
Symptoms Rows of white dots punched down a leaf where the adult fly fed, then wavy pale mines inside the leaves, with small maggots or brown seed-like pupae tucked into the leaf bases. It shows up in spring and again in fall.Allium leafminer (Phytomyza gymnostoma): lines of white oviposition punctures down the distal leaf, followed by larval mines and brown puparia lodged in leaf sheaths and bulbs. The University of Maryland lists chive (A. schoenoprasum) among its hosts; wounds open the door to secondary bacterial and fungal rots. Cause The allium leafminer is a small fly whose larvae tunnel inside onion-family leaves, including chives, and burrow toward the base. It is a newer pest in parts of the eastern United States.Phytomyza gymnostoma, an invasive allium-specific fly with a spring flight (roughly March into May) and a fall flight (September into October); larvae mine toward the leaf base and bulb, with up to dozens of pupae per plant in severe cases. Organic treatment Cover plants with floating row cover in early spring and again in fall to keep the flies off, cut off and destroy mined leaves, and clean up plant debris.Exclude the adults with floating row cover timed to the spring and fall flights, remove and destroy mined foliage, and sanitize crop debris; spinosad or azadirachtin can help where pressure is high. Rotation away from recently infested allium ground reduces carryover. Prevention Use row cover during the spring and fall flights, remove mined leaves, and keep the bed clean.Row-cover through both flight periods, remove infested leaves, sanitize residue, and separate new plantings from pressured allium beds.
Onion maggot
P · 03
Symptoms Yellowing, wilting, and stunted growth as small white maggots tunnel into the base of the plant and the bulbs below the soil, sometimes rotting the crown. Worst in cool, wet springs.Onion maggot (Delia antiqua) larvae mining into the basal plate, roots, and bulbs, causing wilting, yellowing, stunting, and crown rot; damage is worst in cool, moist springs and where allium debris accumulates. Established chive clumps are seldom destroyed but can be set back. Cause Onion maggots are the larvae of a fly that lays eggs at the base of onion-family plants; the maggots eat into the roots and bulbs. Chives are rarely hit hard, but a clump can be damaged.Delia antiqua overwinters as pupae in the soil; spring flies lay eggs at plant bases and successive generations attack roots and bulbs, favored by cool wet weather and by cull and debris that lure egg-laying. Organic treatment There is no rescue for a maggot-riddled crown, so remove badly affected plants. Use row cover to keep the flies off, and clean up debris and culls that attract them.Remove and destroy infested plants, exclude flies with floating row cover, and sanitize debris and culls; rotation and avoiding dense allium plantings limit buildup. No effective organic rescue exists once larvae are in the crown. Prevention Cover plants with row cover in spring, avoid leaving old bulbs and debris around, and do not crowd alliums together.Row-cover early, sanitize allium residue, rotate, and avoid clustering chives with other alliums that concentrate the fly.
Aphids
P · 04
Symptoms Clusters of tiny soft green or gray insects on the leaves and flower stalks, sometimes with sticky residue. Chives rarely get them badly, and their scent even helps keep aphids off nearby plants.Occasional aphid colonies on foliage and scapes; chives are among the most aphid-free herbs (their odor is credited with repelling aphids from neighbors), so infestations are minor and sporadic rather than a standing threat. Cause Aphids are small sap-sucking insects that breed fast on soft growth. They are an occasional, minor visitor on chives.Several aphid species may alight on chives in flushes of soft growth, but the plant's sulfur compounds make it an inhospitable host, so colonies rarely persist. Organic treatment Blast them off with a strong spray of water or use insecticidal soap, and rinse cut leaves before use. It is seldom needed.A water jet or insecticidal soap handles the rare colony; conserve ladybugs, lacewings, and hoverflies, which the chive umbels also feed when in bloom. Prevention Welcome ladybugs and lacewings, go easy on nitrogen, and check flower stalks now and then.Avoid excess nitrogen, conserve natural enemies, and monitor scapes; control is seldom warranted on chives.
Diseases
Downy mildew
D · 01
Symptoms Pale, fuzzy gray-violet patches on the leaves in cool, damp weather, with the blades yellowing and collapsing. It spreads fastest in wet, crowded, poorly drained plantings.Downy mildew (Peronospora destructor) producing pale oval patches that turn violet-gray with sporulation under moisture, with leaves paling, yellowing, and collapsing; it is favored by cool (below about 75°F), humid, wet conditions and affects chives among many alliums. Cause A fungus-like disease of the onion family, favored by cool, humid, wet conditions, that can affect chives along with onions, garlic, and leeks.Peronospora destructor, an oomycete spread by wind and splashing water and favored by cool, moist weather and long leaf-wetness periods; crowded, poorly drained plantings hold it. Organic treatment Remove affected leaves, improve airflow by dividing crowded clumps, water at the base rather than over the leaves, and cut a badly hit clump back so it regrows in drier weather.Manage culturally: divide crowded clumps and space for airflow, irrigate at the soil line, remove infected foliage, and shear a heavily affected clump to regrow under drier conditions. The home garden has no reliable cure once it is established. Prevention Space and divide plants for airflow, water at the soil line, and avoid soggy, shaded, crowded spots.Open the canopy by dividing, water at the base, site in well-drained sun, and avoid the cool, wet, crowded conditions the pathogen needs.
Rust
D · 02
Symptoms Bright orange raised spots or streaks (pustules) scattered on the leaves. Heavily rusted blades yellow and dry up. It is more common in wet seasons and on crowded, over-fed plants.Allium rust (Puccinia species) forming bright orange to rusty raised pustules on leaves and scapes, with chlorosis and dieback of heavily infected foliage; it is favored by moist conditions, crowding, and lush high-nitrogen growth, and affects chives along with garlic, leeks, and onions. Cause Rust is a fungal disease of the onion family, including chives, that shows as orange pustules on the leaves and spreads by airborne spores in damp weather.Puccinia rust fungi spread by airborne urediniospores in humid weather; dense stands and excess nitrogen worsen it. Organic treatment Cut off and destroy rusty leaves or shear the clump to the base to regrow clean, thin crowded plantings for airflow, and avoid overhead watering and heavy nitrogen.Shear infected foliage (a hard cut to the base removes the pustules and regrows clean), divide to open crowded clumps, avoid overhead irrigation and heavy nitrogen, and remove debris. Fungicides are rarely warranted in a home planting. Prevention Give plants room and airflow, water at the base, go easy on nitrogen, and remove rusty foliage promptly.Divide for airflow, moderate nitrogen, irrigate at the soil line, and cut out rust early before it spreads.
White rot
D · 03
Symptoms Yellowing, wilting plants whose roots and crown rot, with a fluffy white mold and tiny black specks (like poppy seeds) at the base. Affected plants do not recover, and the disease stays in the soil for many years.White rot (Sclerotium cepivorum) causing yellowing, wilting, and a soft rot of roots and crown, with a fluffy white mycelium and abundant tiny black sclerotia at the base; the sclerotia persist in soil for many years, and the disease affects chives with onions, garlic, and leeks. Cause White rot is a serious soil fungus of the onion family that rots the roots and crown. Once it is in the soil it lasts a very long time, so keeping it out is the whole game.Sclerotium cepivorum, a soilborne fungus favored by cool, moist soil; its long-lived sclerotia make an infested site unusable for alliums for a decade or more, so exclusion and sanitation are the only real controls. Organic treatment There is no cure. Remove and destroy affected plants along with the soil around the roots, and do not plant chives, onions, or garlic in that spot again. Never move infected soil or plants to a clean bed.No rescue: rogue out affected plants with surrounding soil, avoid spreading infested soil on tools or transplants, and do not replant alliums in the site. Long rotation is the standing management. Prevention Start with clean plants, do not bring in soil from an infected garden, and rotate onion-family plants to fresh ground.Plant clean, sclerotia-free stock, quarantine infested ground from alliums, sanitize tools, and never import garden soil of unknown history.
Botrytis (leaf blight and neck rot)
D · 04
Symptoms Small whitish sunken spots on the leaves in cool, wet weather that can run together and brown out the tops, sometimes with a gray fuzzy mold. It is worst in humid, crowded plantings.Botrytis leaf blight and neck rot (Botrytis species) producing small white sunken leaf spots that coalesce into blast and tip dieback under cool, moist conditions, sometimes with gray sporulation; humid, crowded stands favor it, and it affects chives among the alliums. Cause Botrytis is a gray-mold fungus of the onion family that spots and blights the leaves in cool, damp, crowded conditions.Botrytis fungi favored by cool, wet, humid weather and dense canopies; splashing water and leaf wetness spread the spores. Organic treatment Remove spotted leaves or shear the clump to regrow, open up crowded plantings for airflow, and water at the base instead of over the leaves.Cull spotted foliage or shear the clump to regrow, divide to open the stand, irrigate at the soil line, and remove senescing debris. Fungicides are seldom needed on a home chive planting. Prevention Space and divide for airflow, water at the soil line, and clean up dead foliage.Divide for airflow, water low and early, and sanitize dead foliage to cut inoculum.
Verified · 5 sources View
Seasoned
Where to plant next year

Crop rotation

Chives are in the onion family, so they can pick up the same soil diseases as onions and garlic. Since a chive clump stays in one place for years, just choose a spot where you have not grown onion-family plants recently, ideally after leafy greens or beans. Chives that flower drop seed, so pull up stray seedlings where you do not want them.Chives are an allium, so they share the onion family's soilborne diseases (white rot, pink root) and pests (onion maggot, thrips, allium leafminer). Standard allium guidance keeps the family off the same ground for several years, but chives are a permanent perennial, so the practical rule is to establish a new clump in ground that has not recently grown onions, garlic, or leeks, and to follow a leafy or legume crop rather than another allium. A clump left to flower self-sows freely, so pull stray seedlings that come up out of place.

Family
Onion / allium family (Amaryllidaceae)
Years between
3 years
in the same bed
Avoid following
Do not plant chives where you recently grew onions, garlic, or leeks, since onion-family plants share soil diseases and pests that build up. Because chives stay put for years, this mainly matters when you first choose the spot.Avoid establishing chives where onions, garlic, leeks, shallots, or other chives grew recently: the alliums share soilborne troubles, above all white rot (whose sclerotia persist for years), plus pink root, onion maggot, and thrips. Because chives are a long-lived perennial planted once and left in place, rotation matters mainly when you first site a clump or replace an old one; keep new plantings out of recently cropped allium ground.
Plant after
Leafy greens or legumes (peas, beans).
Verified · 2 sources View
In the app · pre-launch

When plant taps you on the shoulder

The plant app sends a timely reminder at every critical moment of your chives season. The wording adjusts to whichever you pick: beginner or seasoned. Here are three you'll see in Zone 13.

p
plant
NaN days after last frost
Let new chives get established
Your chives are young. Cut only a little this first year so the plant gets strong for winter.
p
plant
NaN days after last frost
Time to start snipping chives
Your chives are big enough to snip. Cut the leaves to about 1 to 2 inches and leave some green, and they grow back.
p
plant
NaN days after last frost
Your chives are blooming
Your chives have flowers. Eat a few, then cut the whole clump back to about 1 to 2 inches so it does not seed everywhere and grows back tender.
Get personalized alerts.

plant sends the right notification at exactly the right moment, for your zone, your weather, your crops. Founding members lock the rate forever.

Back the Kickstarter →
Ask the gardener

Common questions

Got a question we missed?

We're building this guide with real growers. Got a question we missed? Ask here. We read every one and add the best answers right to this page.

Grown this before?

Share a tip

Learned something the hard way? Pass it on. Real growers' tips make this guide better for the next person, and we credit you by name when yours goes live.

Seasoned
Spot something wrong?

Report a problem

If you've grown this crop and you see a date, a temperature, a companion claim, or a recommendation that doesn't match your experience, tell us. Real growers' corrections make this guide better for the next person.

How we built this guide

Methodology & sources

Every date, temperature, spacing, and recommendation on this page is sourced from university cooperative extension publications, peer-reviewed agricultural research, NOAA climate data, and direct extension calendars. Where claims are softer (traditional gardening wisdom not formally documented), we say so.

Research-backed Documented in cooperative extension publications or peer-reviewed research
Well-grounded A known agronomic principle, but not formally tested for this specific pair
Traditional Time-tested gardening wisdom, limited formal research support
Last reviewed
July 2, 2026
Data version
crops_data_final · v1.0 · schema 2.9
Sources cited on this page
16 publications
Verified entries
Companion-planting claims tagged inline · zone dates verified against 5+ extensions
See all sources cited on this page
  • University of Minnesota Extension umn_ext
  • University of Maryland Extension umd_ext
  • Cornell Cooperative Extension cornell_ext
  • Iowa State University Extension iastate_ext
  • Michigan State University Extension msu_ext
  • NC State Extension ncsu_ext
  • Penn State Extension psu_ext
  • U. of Illinois Urbana-Champaign Extension uiuc_ext
  • UC Davis Postharvest Center ucd_postharvest
  • Texas A&M AgriLife Extension tamu_agrilife
  • Virginia Cooperative Extension 426-331 vce_426_331
  • Piedmont Master Gardeners piedmont_mg
  • UGA Vegetable Garden Calendar uga_calendar
  • Clemson Home & Garden Information Center clemson_hgic
  • UC IPM Statewide IPM Program uc_ipm
  • NOAA 1991-2020 Climate Normals noaa_normals

Growing notes, weekly.

Zone-aware seasonal nudges, what's worth planting now, and the occasional recipe from the harvest. No spam, ever.

Vol. 003 · Chives · plant.lifestyle