Pick your zone and the dates re-calibrate.
The Guide Crops Vol. 003

Strawberry

in Zone 12, this week

Strawberries are low, leafy plants that come back year after year. There are three kinds: June-bearing, which gives one big batch of berries in early summer; day-neutral, which gives a few berries at a time all season and does great in pots; and everbearing, which gives two smaller batches. One plant makes fruit on its own, and a strawberry patch keeps producing for about three to four years before you start a fresh one. The garden strawberry is a low-growing herbaceous perennial with a short, compressed stem called the crown, from which leaves, flowers, and runners arise. It is grown in three types: June-bearing (one concentrated early-summer flush, the matted-row backbone of US backyard growing), day-neutral (fruiting through the season, compact, ideal for containers), and everbearing (two lighter flushes). Plants are self-fertile, set from dormant bare-root crowns or potted plugs, and a bed stays productive for about three to four fruiting seasons before it is replaced.
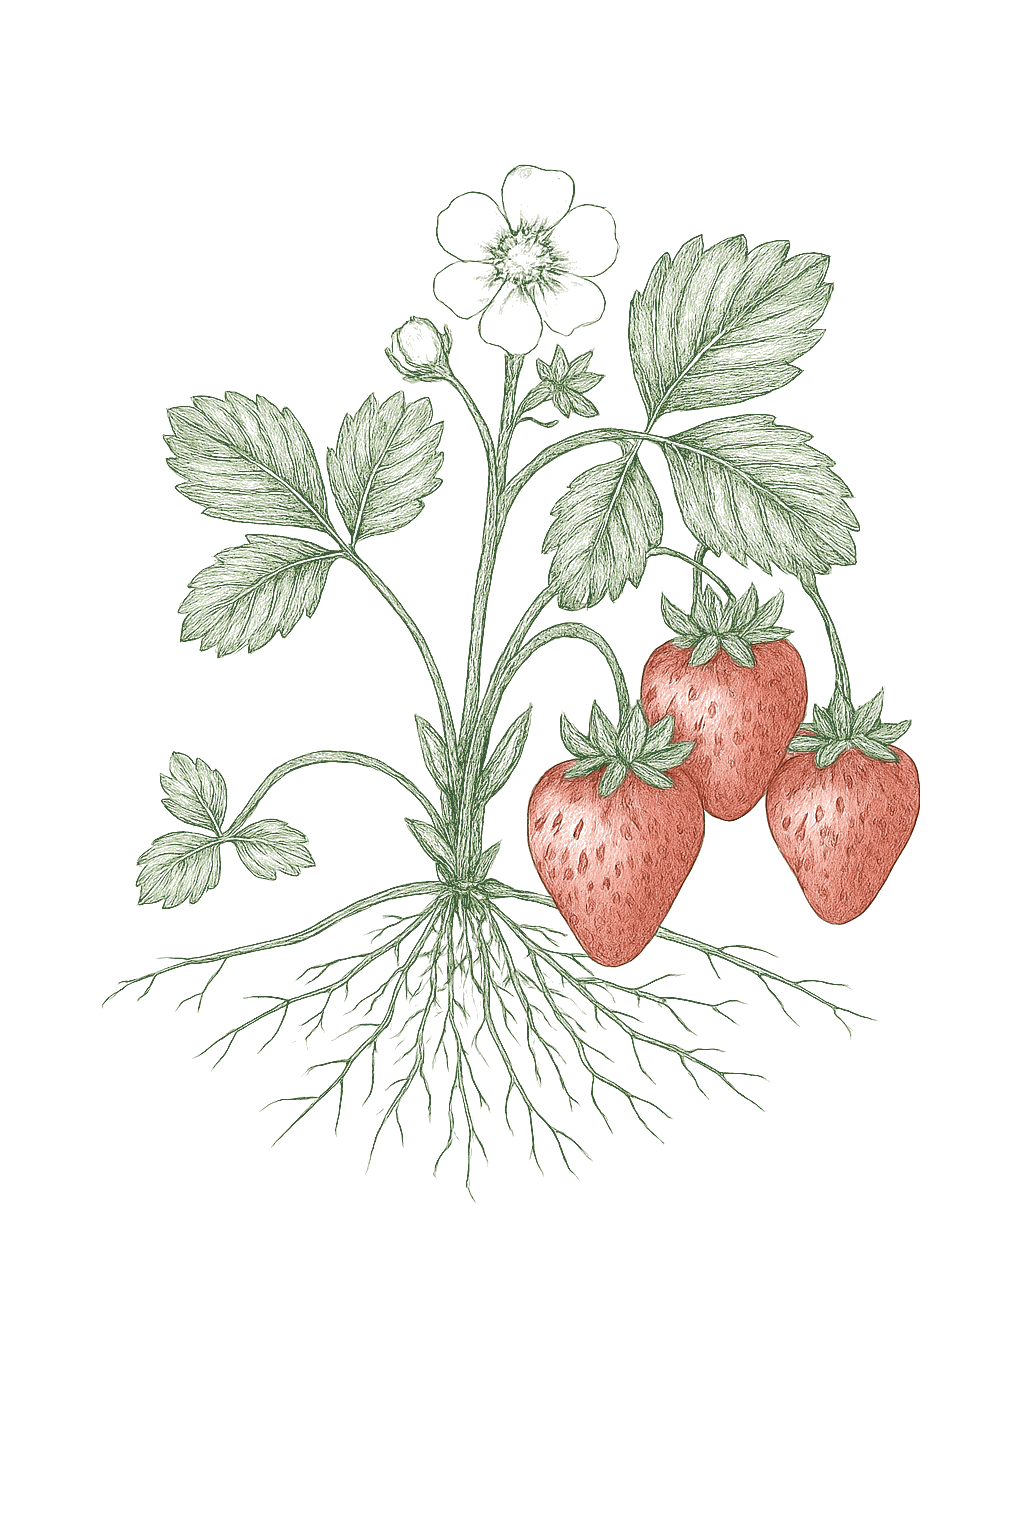
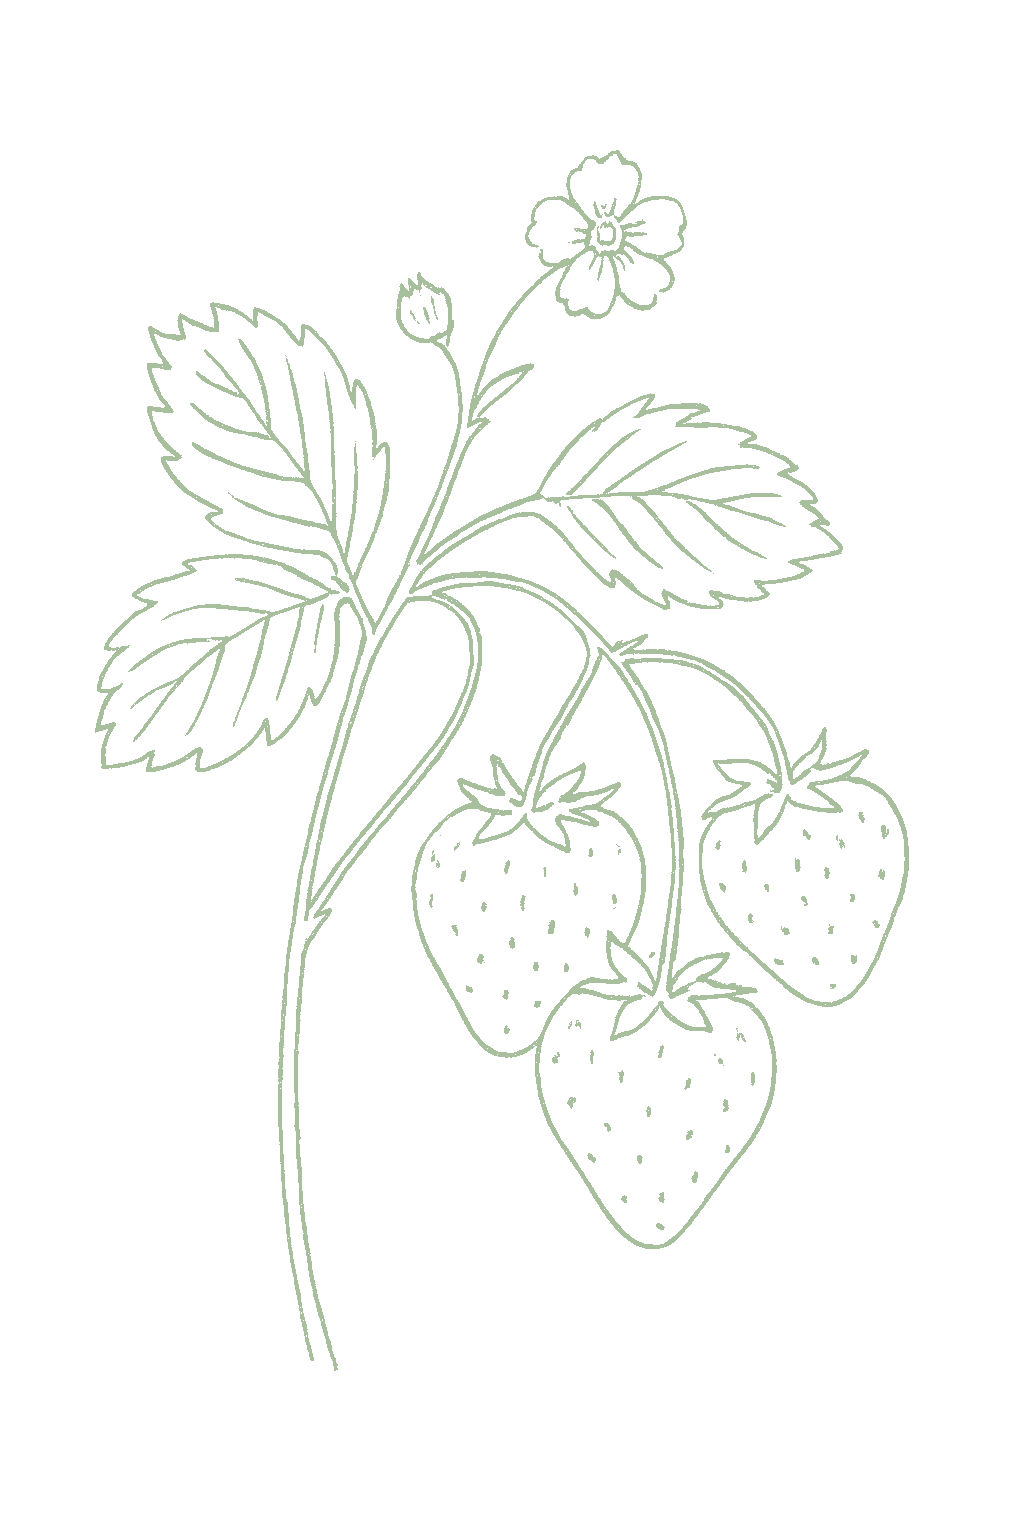
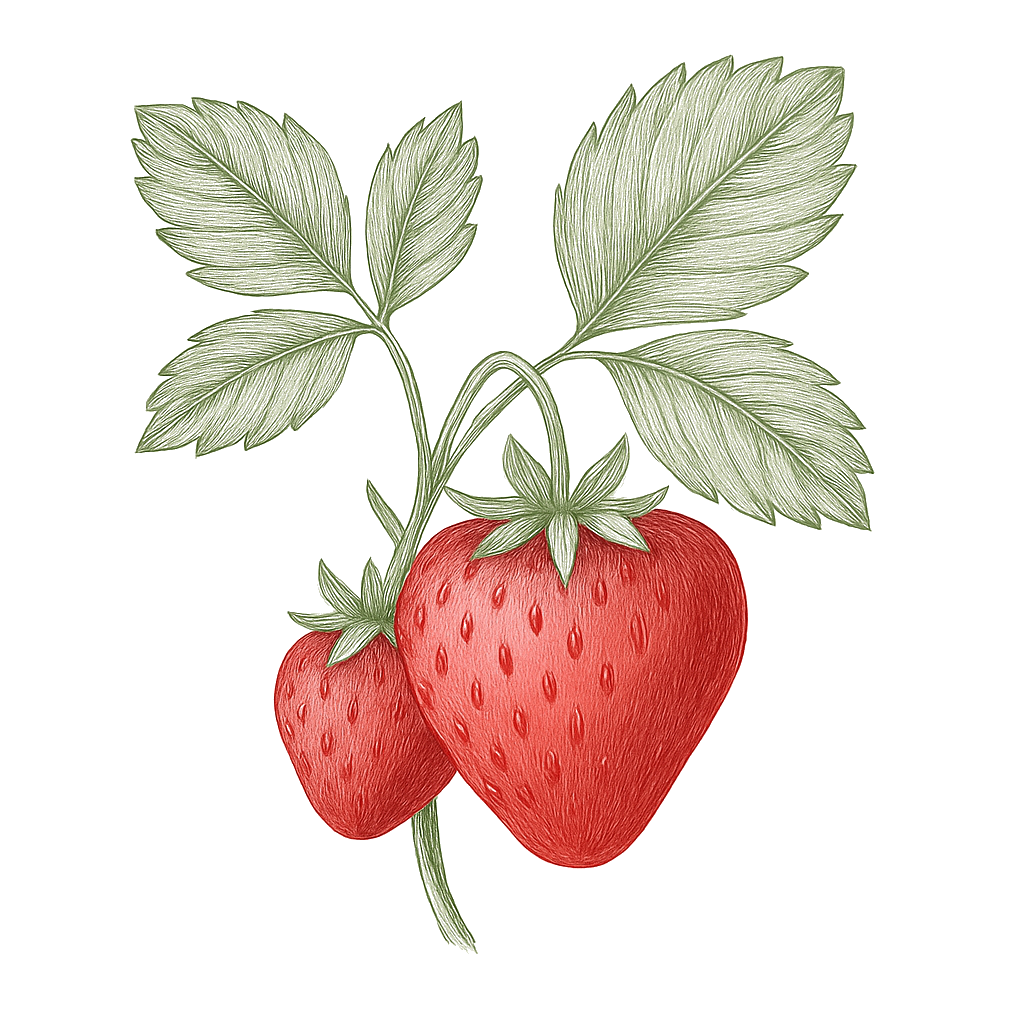
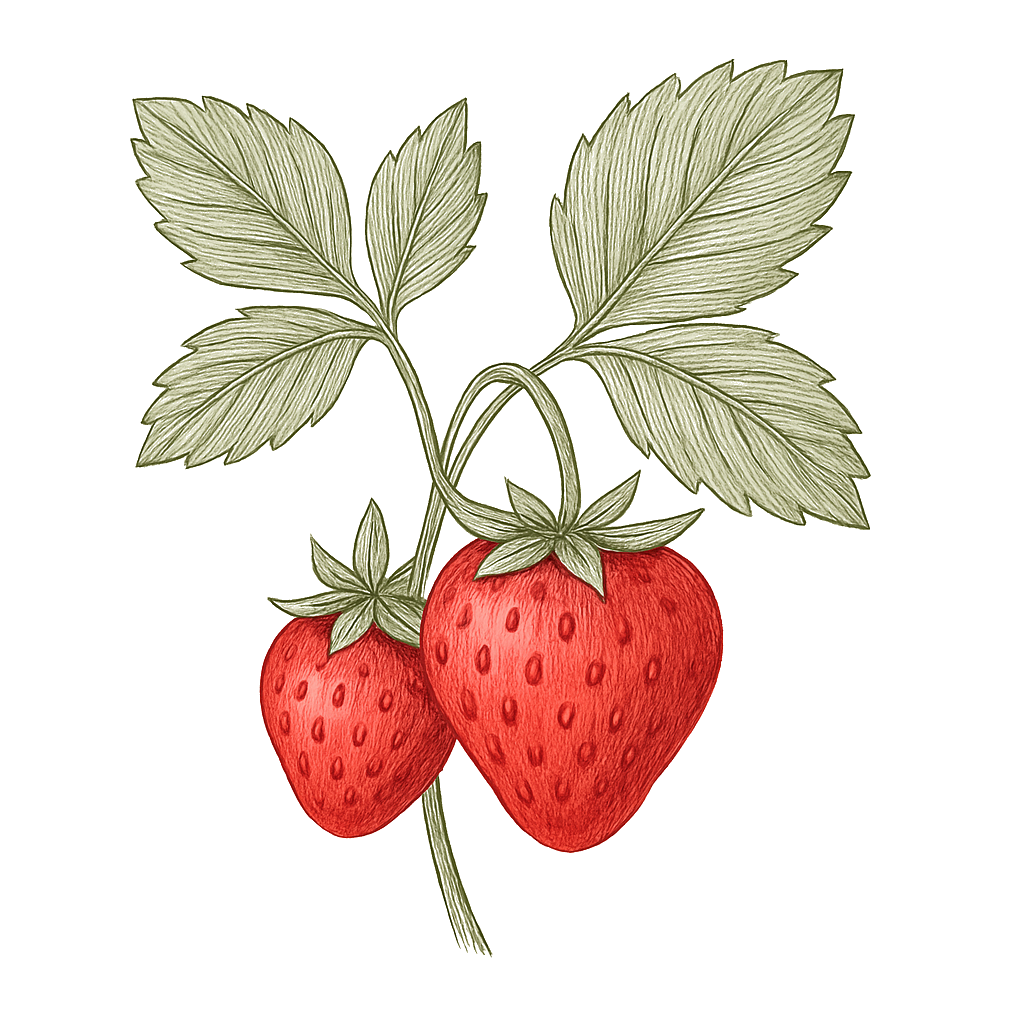
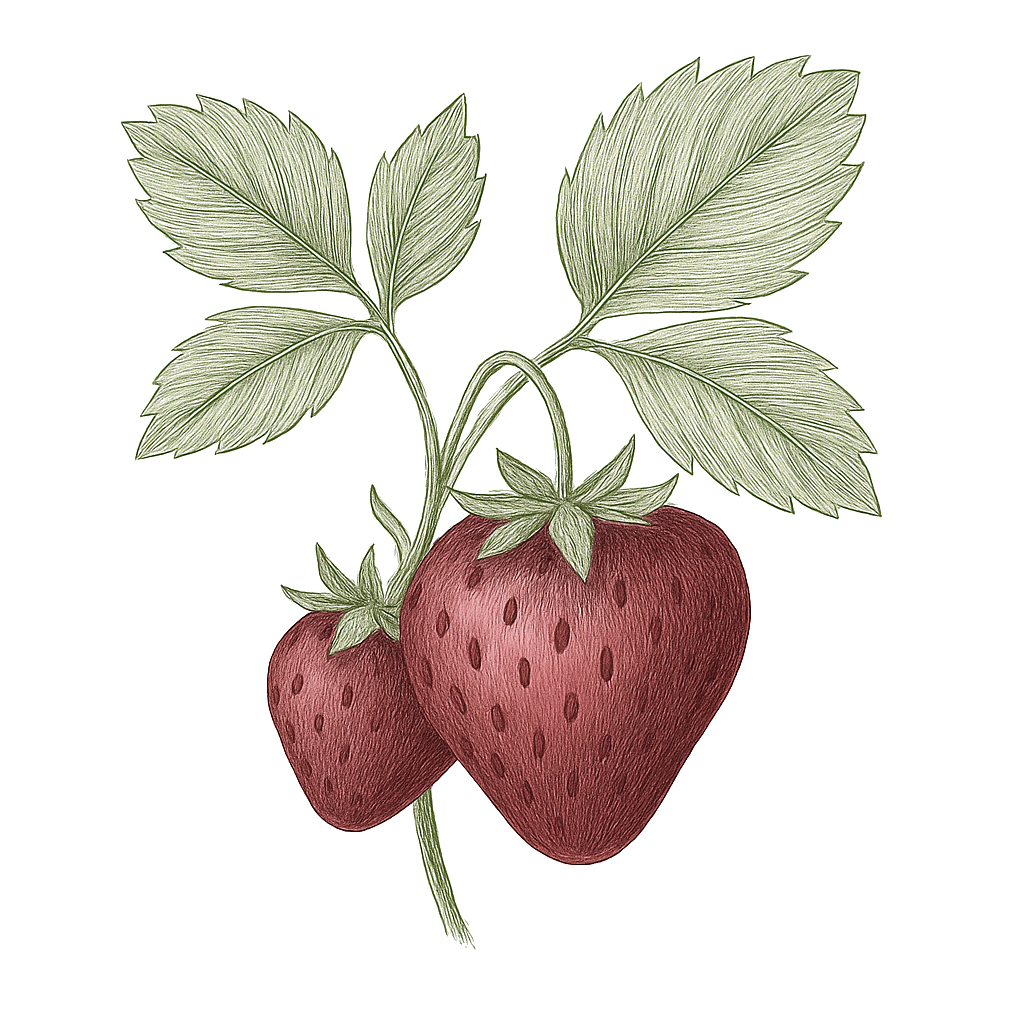
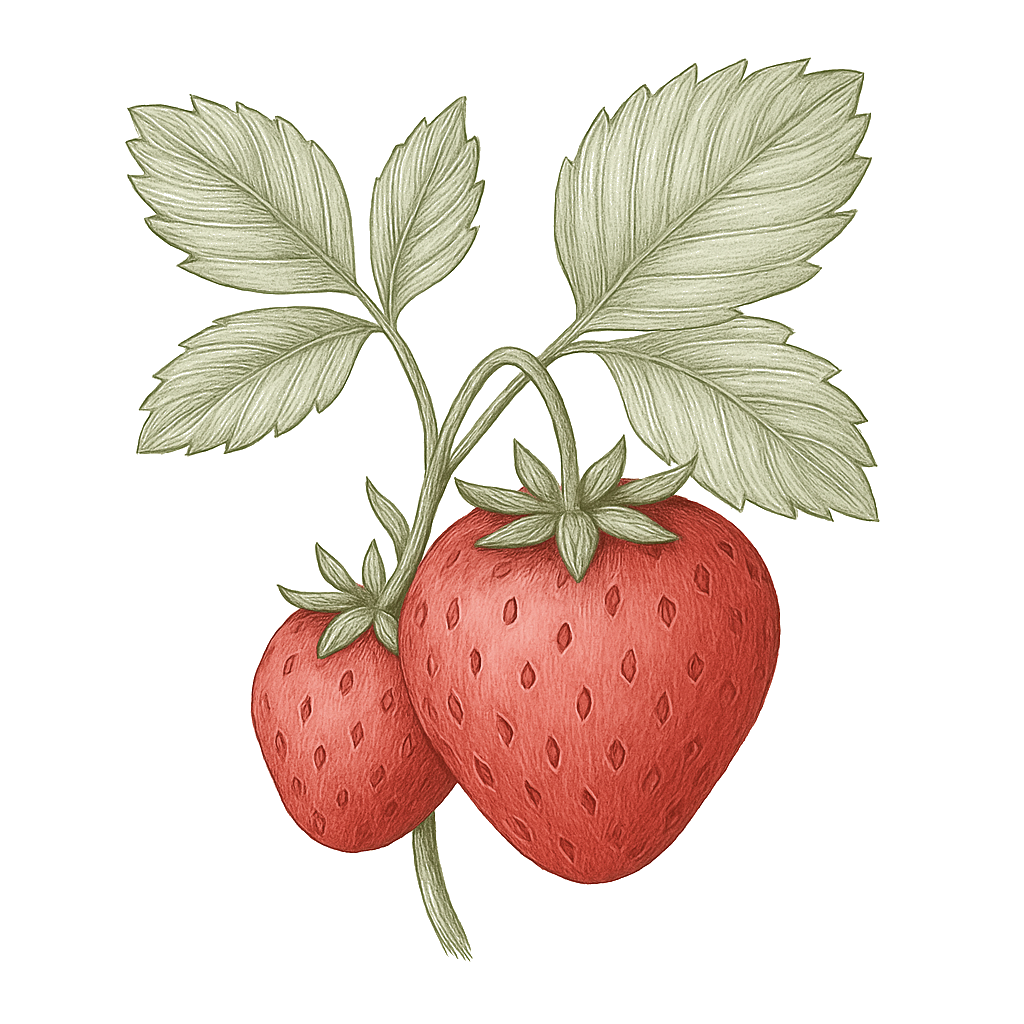
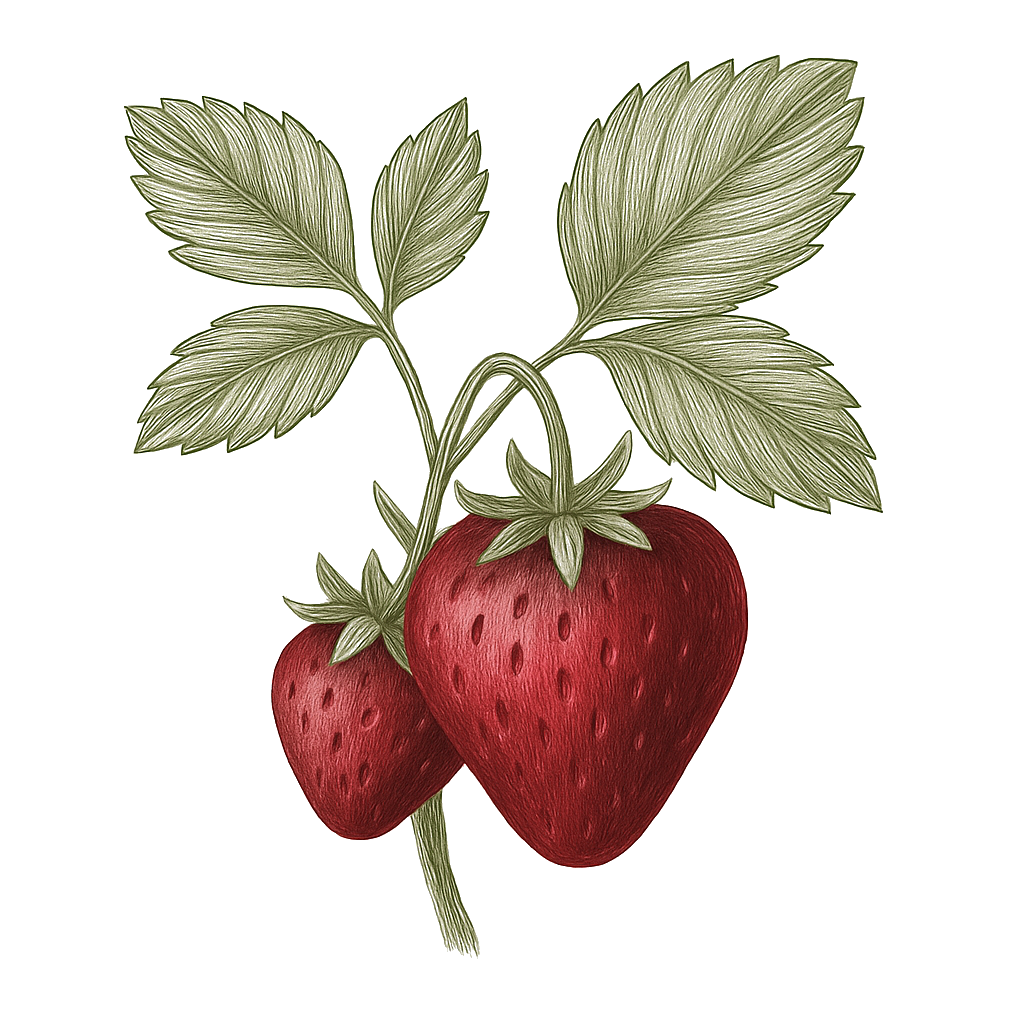
Strawberry mature plant
Fig. 01 · Strawberry, mature Zone 12
Container
7 gal
min 5 gal pot
Sunlight
Full sun
6-10 hrs daily
Water
Moderate
6 inches / week
Spacing
15-24"
between plants
Soil pH
5.6-6.5
slightly acidic
Today · in your zone

What's happening right now

July 24 · Zone 12 · Stage 01 · Planting

Off-season for strawberry in zone 12.

The growing year

Your strawberry year, month by month

Grown as a perennial HI: Tropical, Zone 12

In Hawaii, strawberries grow best up in the cool higher country, like Kula on Maui, not down in the warm lowlands. Plant in the cool fall months and you will get berries through winter and spring. The big farms have berries all year because they move up and down the mountain with the seasons, but in a home garden at one spot you will get a cool-season crop, not year-round fruit.In Hawaii (zone 11), strawberries are a cool-elevation niche crop, not a warm-lowland year-round one. They are grown upcountry, on the cool slopes of Haleakala (around Kula) and at Waimea on Hawaii Island, where conditions stay mild. At a fixed upcountry site, treat the bed as a short-lived perennial: set plants in the cool fall months for a main crop through winter and spring. Year-round supply exists in Hawaii only because commercial farms move harvest up and down the mountain with the seasons, which a single home garden cannot replicate. In the warm lowlands strawberries perform poorly.

A strawberry bed runs on the same rhythm every year: winter rest, spring bloom, an early-summer harvest, then renovation to set up next year's crop.

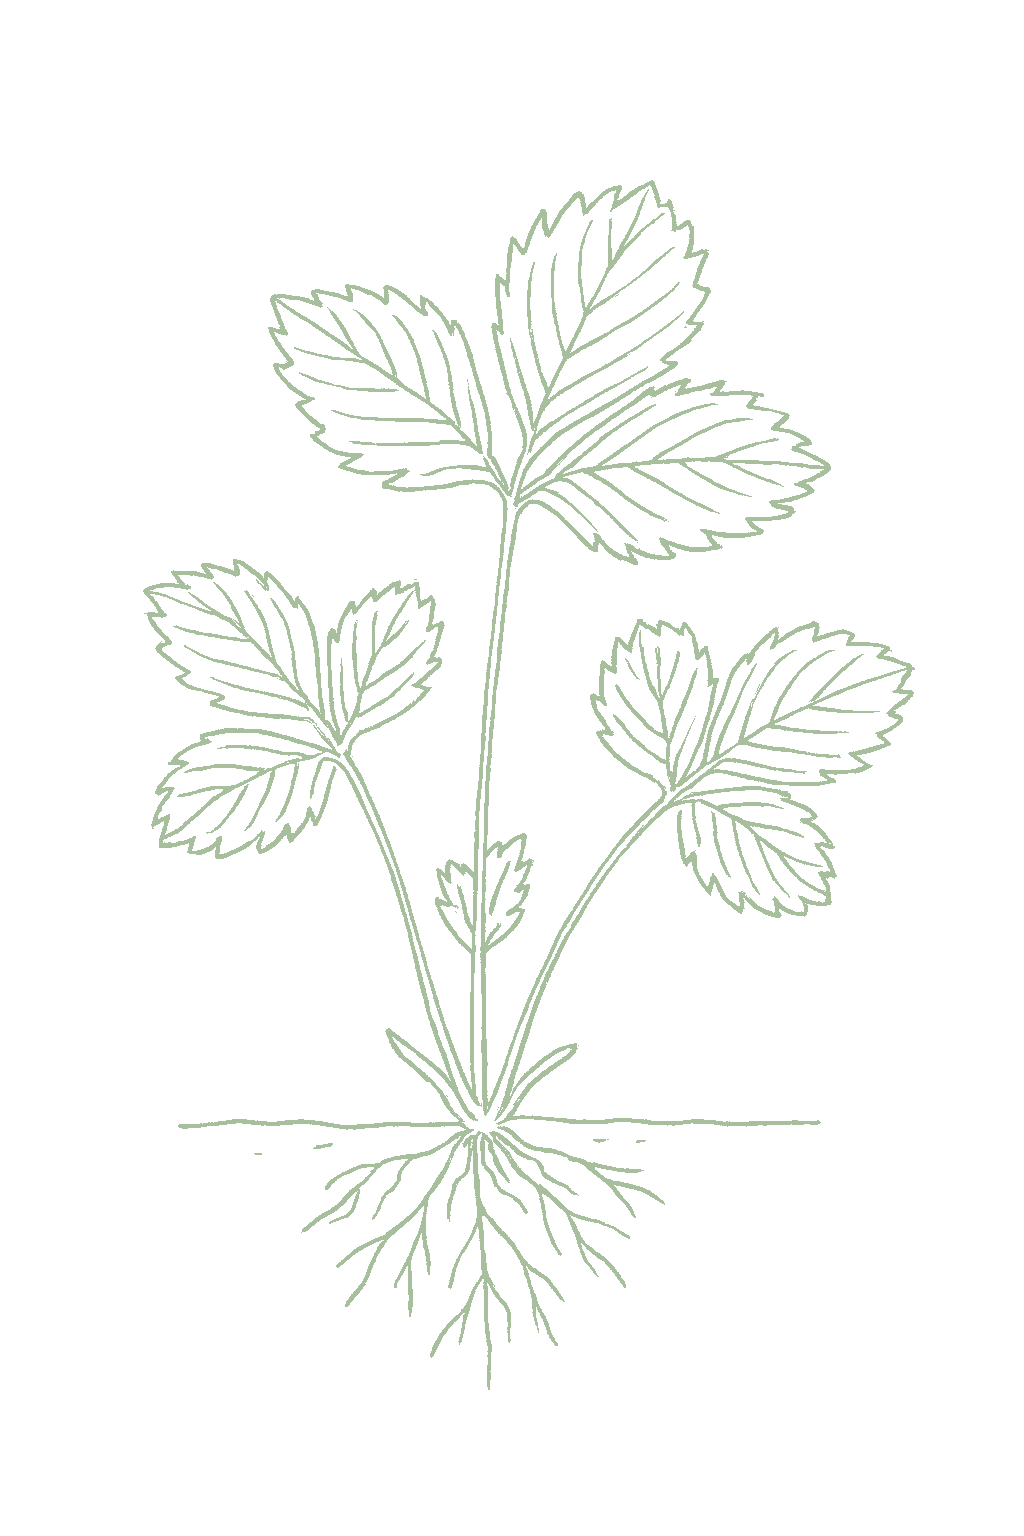
Jan
Feb
Mar
Apr
May
Jun
Jul
Aug
Sep
Oct
Nov
Dec
▲ We are here
Bed’s year
growing
harvest
renovate
growing
bloom
growing
Plant crowns
plant
plant
plant
BloomGrowingHarvestRenovate
Plant crowns
Sep - Nov
Bloom
Nov - Mar
Harvest
Feb - Jun
Protect the blossoms Upcountry Hawaii (zone 11) is frost-free, so freeze injury to blossoms is not a concern. The practical season is set by the mild upcountry temperatures and elevation rather than by cold; warm spells, not frost, end the crop at a given site.
Renovation, right after harvest Renovation is a once-a-year tidy-up for June-bearing strawberries, done a week or two after the last berries are picked. Mow or cut the old leaves down to about 2 inches above the crowns (the thick stems at soil level), being careful not to cut into the crowns. Rake away the cut leaves, narrow the row back to about a hand's width by removing plants from the edges, then feed and water so the plants put out fresh leaves before winter. Skip this for day-neutral and everbearing types, since they are still making fruit in late summer.Renovation applies to June-bearing matted rows. Do it within a week or two of picking the final berries, while the plants still have time to regrow before fall. Mow or shear the old leaves to roughly 2 inches above the crowns without cutting into the crowns themselves, rake out the debris to cut next spring's fruit rot, narrow the row back to about 10 to 12 inches by tilling or hoeing the edges, then fertilize and water to push fresh leaf and runner growth. Leave day-neutral and everbearing plants alone, since they are still fruiting in late summer.
From seed to fruit

The growing journey

Stage 01 · Planting
01
Planting
A small bud at the top of each crown sitting in the light, with roots tucked just under the soil.Newly set plants with the growing tip exposed and roots just below the surface; no top growth yet on bare-root crowns.
Press the soil down around the roots and water. Make sure the little bud on top is not buried and the roots are not poking out.Firm the soil around the roots and water in to settle it. Check that the crown is still at the right depth after watering and adjust if it has sunk or heaved.
FROM PLANT · Plant so the crown, the spot where leaves meet roots, sits level with the soil. Bury the roots but leave that crown on top. Too deep rots it, too shallow dries it out.Set each crown so the midpoint sits right at the soil line: roots fully buried, the growing tip fully exposed. Plant too deep and the crown rots, too shallow and the roots dry out, and this one detail decides whether a bare-root plant takes.
FROM PLANT · Keep bare-root plants damp and in the shade until you plant them, and plant on a cool or cloudy day if possible. Dried-out roots may not survive.Soak bare-root crowns and keep them shaded and damp until they are in the ground, planting on a cool or overcast day if you can. Exposed strawberry roots dry out fast, and a crown that desiccates before planting often never establishes.
02
Establishment
Fresh leaves growing and small flower stalks appearing. On June-bearing plants you pick these flowers off.New leaves unfurling from the crown and the first flower stems emerging. On June-bearers these flowers are removed, not kept.
On June-bearing plants, pinch off all the flowers the first year so the plant grows strong. On day-neutral or everbearing plants, only pick off flowers for the first month or so. Water often and pull weeds. The roots are shallow, so weeds crowd them out fast.Pinch off every flower on June-bearers through the first season so the plant invests in establishment. On day-neutral and everbearing plants, remove flowers only for the first four to six weeks, then allow fruiting. Keep the bed evenly watered and weed-free; strawberries have shallow roots and lose out to weeds quickly.
FROM PLANT · In the first year, pick off the flowers on June-bearing plants. Letting them fruit too early weakens the plant. Removing the blooms now gives you a much bigger crop next year.On a matted-row or June-bearing planting, pinch off all the first-year flowers. Letting a new plant fruit in year one starves root and runner growth, and removing those blossoms is what builds the crown that carries a full crop the next season.
FROM PLANT · Water new plants often so they stay moist while they take root. Strawberries have shallow roots and dry out fast.Keep new plantings consistently moist while they root in. Strawberries are shallow-rooted and dry out quickly, so even, frequent watering through establishment is what gets crowns anchored before they have to support runners or fruit.
03
Runner and daughter-plant growth
Long stems creeping out sideways with little new plants on them that take root when they reach the ground.Above-ground stems arching out from the mother plant with small plantlets that root where they touch soil.
Let the runners root in your row to fill it in. If you are growing in a pot, snip the runners off, because they cannot root in a pot and just weaken the plant. Tuck the runners into your row so they root there, not in the path.Guide early runners into the row to build the matted bed. In containers or a hill system, remove runners instead, since daughter plants cannot root over a pot edge and only drain the mother. Direct early runners into the row before they root in the aisle; remove late runners that will not fruit next year.
FROM PLANT · As runners take root and make new little plants, keep the strongest and pull out crowded extras. A bed packed too tight gives small berries and more rot.Space the daughter plants as runners root in, keeping the strongest and removing the crowded extras to hold roughly the matted-row density your source recommends. A bed left to fill in solid yields small, hard-to-pick berries and traps the moisture that feeds fruit rot.
FROM PLANT · If you have everbearing or day-neutral strawberries, snip off the runners. These kinds fruit on the main plant, so runners just steal energy from the berries.On day-neutral or everbearing types, remove early runners instead of letting them root. These types fruit on the mother plant through the season, so energy spent on runners is energy taken from the berries you actually want.
04
Bloom
White flowers with yellow centers opening up. Each one can turn into a berry.White five-petaled flowers opening across the bed, with yellow centers that become the fruit.
Keep an eye on the weather while the plants flower. If frost is coming, cover the flowers in the evening with a light cloth and take it off in the morning. If you covered the plants, open them up while they flower so bees can get to them.Watch the forecast during bloom. Cover open flowers with row cover in the late afternoon when frost is predicted and remove it the next morning once the danger has passed. If row cover is over the bed, pull it back as bloom opens so bees can reach the flowers and set well-shaped fruit.
FROM PLANT · Cover the plants if a late frost is coming while they are flowering. Open blooms are killed by frost, leaving a black center. A row cover or sheet protects them.Cover blooming plants when a late frost threatens; open strawberry flowers are killed at right around freezing, and the giveaway is a blackened center in the flower the next morning. A row cover or even a sheet over the bed saves that first set.
FROM PLANT · Water evenly and let bees visit while the plants flower. Each strawberry forms from many pollinated seeds, so poor pollination makes small, lumpy berries.Keep water steady and keep pollinators welcome through bloom. Each berry is built from many fertilized seeds on the flower, so poor pollination is what gives you small, lopsided, misshapen fruit even when the plant looks healthy.
05
Green fruit and ripening
Green berries getting bigger and starting to turn red. Good berries are plump and even; lumpy ones did not get pollinated well.Green berries enlarging and beginning to blush red. Well-pollinated fruit is plump and even; poorly pollinated fruit is grooved or pinched.
Water evenly, about 1 to 1.5 inches a week. Try to keep the ripening berries off wet ground so they do not rot. Keep watering and watch for the first berries to turn red.Keep moisture steady and even, about 1 to 1.5 inches of water a week, and keep ripening fruit off wet soil to limit gray mold. Maintain even watering and watch for the first blush of color to time your first picking.
FROM PLANT · Slip straw or mulch under the growing berries so they do not sit on bare dirt. Fruit touching wet soil rots, and the straw keeps it clean and dry.Tuck clean straw or mulch under the developing berries to keep fruit off bare soil. Berries resting on damp ground are where gray mold and rot start, and that simple barrier is where the name strawberry comes from.
FROM PLANT · Water the soil, not the berries, and do it in the morning so plants dry by night. Wet berries overnight grow gray mold.Water at the base and in the morning as fruit ripens, keeping the berries themselves dry. Wet fruit and wet foliage going into the night drive the gray mold that turns ripening berries fuzzy overnight.
06
Harvest
Bright red, sweet-smelling berries that come off easily. If you need them to last longer, pick when they are about three-quarters red.Fully red, fragrant berries that pull free easily. Color deepens after picking, so fruit picked at 75 percent red stores a little longer.
Pick in the morning when it is cool and get the berries into the fridge soon. If a lot of rain is coming, pick the riper berries first so they do not rot. Pick ripe berries every day or two, more often when it is hot. Toss any moldy ones so they do not spread.Harvest in the cool of the morning and refrigerate promptly. If a long rain is forecast, pick fruit that is 75 percent to fully red, since rain dilutes flavor and invites rot. Pick ripe fruit every one to three days, checking more often in warm weather; remove any rotting berries to protect the rest.
FROM PLANT · Pick the fully red berries every couple of days, snapping the stem instead of pulling. Strawberries do not get sweeter after picking, so let them ripen on the plant.Pick fully red, ripe berries every two to three days, pinching the stem rather than tugging the fruit. Strawberries do not sweeten further once picked, so color-up on the plant is the whole game, and frequent picking keeps the plant setting and keeps mold from spreading off overripe fruit.
FROM PLANT · Pick in the cool morning into a shallow tray, then refrigerate soon. Wash only right before eating, since wet berries spoil fast.Harvest into a shallow container in the cool of the morning and chill the berries promptly; leave them unwashed until you eat them. Strawberries are fragile and short-lived, and warmth plus surface moisture is what collapses them within a day.
07
Renovation
Worn-out leaves after harvest. Once you cut them back, the plants grow fresh leaves again in a few weeks.Tired, spotted foliage after the four-week harvest. After renovation the crowns regrow fresh leaves and new runners within a few weeks.
Cut the leaves but not the crowns, rake the cut leaves away, narrow the row, and feed the plants so they set up next year's crop. Renovate a week or two after the last berries, then feed and water.Mow without cutting into the crowns, remove the clippings to reduce next spring's fruit rot, narrow the matted row, and fertilize at the renovation rate to drive flower-bud development for next year. Renovate within one to two weeks of the final harvest; fertilize and water right after to encourage regrowth.
FROM PLANT · After the last berries on June-bearing plants, mow the leaves to about an inch above the crowns and thin the rows. This refreshes the bed for next year.Renovate a June-bearing matted row right after the last harvest: mow the old foliage about an inch above the crowns, then narrow and thin the rows. The planting fruits on new growth, so clearing the tired leaves now is what drives a vigorous, productive bed next year.
FROM PLANT · Right after cutting back, feed and water the bed so it grows back strong. That late-summer regrowth is what makes next year's berries.Feed and water right after renovating to push the regrowth that sets next year's flower buds. The new runners and leaves coming up now are forming the crowns you will harvest from, so do not let the bed coast through late summer.
08
Dormancy and winter
The plants stop growing and the leaves die back in cold places. In mild places they may stay a little green.Plants stop growing and leaves die back where winters are cold. In mild regions the plants may hold some green leaves through winter.
Put straw on after the first hard freeze, not before, or it will smother the plants. Take it off when growth starts in spring. Move pots into an unheated garage or bury them to the rim and cover with mulch. Cover the bed with straw for winter in cold areas and uncover it in spring. Protect pots, since roots in pots get colder than roots in the ground.Apply straw after plants harden off and the first hard freeze arrives, not earlier, which would smother the crowns. Remove it as growth resumes in spring. Move containers to an unheated garage or sink them to the rim and mulch. Mulch cold-region beds for winter and plan to remove it promptly in spring; protect container roots, which freeze harder than in-ground beds.
FROM PLANT · Once plants are dormant and the ground begins to freeze, cover the crowns with straw. It protects them from cold and from being pushed out of the soil by freezing and thawing. Do not mulch too early.Mulch over the crowns with straw once plants have gone dormant and the ground starts to freeze, not before. The mulch guards against winter cold and the freeze-thaw heaving that lifts shallow crowns out of the soil, but applied too early it can smother plants still trying to grow.
FROM PLANT · In early spring, rake the winter straw off the crowns and into the paths. Leaving it on top slows new growth, and it still keeps berries clean later.Pull the winter mulch back off the crowns in early spring as growth resumes, raking it into the paths to keep fruit clean later. Leaving it piled on the crowns once they want to grow slows green-up and traps dampness against the plant.
Beginner
Know your soil

Your soil

Identify yours

Not sure what soil you have? Grab a small handful of damp soil from your garden bed and squeeze it. If it crumbles apart easily, it's sandy. If it holds together but breaks when you poke it, it's loam (what most vegetables want). If it stays in a hard, slippery ball, it's clay.

What this crop wants

Strawberries grow best in loose, rich soil that drains well, like a sandy loam. Their roots are shallow, so they rot if the ground stays soggy. If your soil is heavy clay or puddles after rain, build a raised bed or a mounded row about 12 inches tall and plant into that. Mixing 1 to 2 inches of compost into the bed before planting gives the roots a good start.

If your soil doesn't match

You have sandy soil

Mix 2-3 inches of compost into the top 6 inches of your bed before planting. Compost holds moisture (which sandy soil drains too fast) and adds the nutrients sandy soil tends to lack. Repeat each season. Compost breaks down over time.

You have clay soil

Mix 2-3 inches of compost AND a few inches of coarse sand or perlite into the top 6 inches of your bed. The compost feeds the plants; the sand breaks up the clay so air and water can move through. Don't add sand without compost. It can compact like concrete.

Containers and raised beds

If amending your soil sounds like too much work, or if your soil is heavy clay, full of rocks, or contaminated, build over it. A raised bed at least 12 inches deep filled with a 50/50 mix of compost and sandy loam gives you ideal growing soil with no battles. A 5-gallon container with quality potting mix does the same for one plant at a time. Both bypass your native soil entirely.

Learn more about your soil
The specs

Care guide

The numbers that matter, at a glance.

Sunlight
Full sun · 6-10 hrs/day
Water
moderate
Spacing
15-24 inches
Soil
loam, sandy loam
Soil pH
5.6 to 6.5
Container OK?
Yes · 5+ gal pot
Soil chemistry

Soil pH for strawberry

Preferred
5.6 to 6.5
Tolerated
5.5 to 6.8

Strawberries prefer soil on the slightly acidic side, roughly pH 5.6 to 6.5. A cheap test kit shows where you are. Garden sulfur lowers a too-high number; garden lime raises a too-low one. Both take a few months to take effect, so test and adjust the season before you plant.Aim for slightly acidic soil in the range of pH 5.6 to 6.5. Test the bed a season ahead so there is time to adjust: elemental sulfur brings a high reading down, and ground dolomitic limestone raises a low one. Both amendments take months to move the soil, so apply them well before the crowns go in.

Verified · 2 sources View
Steady hand on the hose

Watering

When & how much
Frequency
Give strawberries about 1 to 1.5 inches of water a week while they are growing. Water more often in hot weather or sandy soil, and keep new plants well watered since their roots are still small.About 1 to 1.5 inches of water per week through the growing season, adjusted for vigor, growth stage, soil, and weather. On sandy soil and in heat, water more often and more lightly. Newly set plants have undeveloped roots and stress easily, so irrigate several times a week until established.
Amount
Water enough to wet the soil about 6 inches to a foot deep, so the roots stay moist but never soggy. Strawberry roots are shallow and rot if they sit in water, so do not overdo it.Wet the soil to a depth of about 6 inches to 1 foot with each irrigation, enough that the shallow root zone does not fully dry between waterings, but never so much that water stands. Standing water harms strawberries even for a day or two.
Method
The best way to water strawberries is at the base, not over the leaves, because wet leaves and fruit lead to mold. A drip line or soaker hose along the row works well; if you water by hand, water the soil rather than the plants.Drip irrigation is ideal: it keeps water off the foliage and fruit, which reduces gray mold and weeds. Run a single drip line per row with half-gallon emitters spaced about every 12 inches, or use a soaker hose while monitoring soil moisture.
Signs of trouble
Too much water
If the soil is wet but the plants still wilt, the leaves yellow, or the crowns turn soft and mushy, you are watering too much or the ground drains poorly. Soggy soil rots strawberry roots.Wilting despite wet soil, yellowing lower leaves, and soft or collapsing crowns signal waterlogging and the root and crown rots that follow. Standing water and slow-draining ground are the usual causes.
Too little water
Drooping, dull leaves with dry soil, and small berries, mean the plants need more water. Strawberries especially need water while the fruit is filling out, or the berries stay small.Dull, wilting leaves in dry soil and small, soft berries point to drought stress. Because fruit is mostly water, under-watering during fruit development directly cuts size and yield.
Feeding rhythm

Feeding

Frequency
At planting and through the first season for new plantings; for established June-bearing beds, once a year at renovation.
Type
Balanced granular
When to start
renovation

Strawberries mainly need nitrogen, and when you feed depends on the type. The first year, give a little fertilizer two or three times spread across the season rather than one big dose. After that, the rule for June-bearing plants is simple: do not feed in spring, because it grows lots of leaves but not more berries, and the thick leaves trap dampness that causes mold. Feed them once instead, right after harvest when you cut the plants back. Day-neutral and everbearing plants, which fruit all summer, get small amounts spread across the months instead. If your soil is sandy, feed smaller amounts more often.Strawberry feeding is nitrogen-driven and timed to the planting model. In the first year, apply a total of about 0.5 to 0.8 ounces of actual nitrogen per 10 feet of row, split across the season: a small dose one to two weeks after planting, a second about a month later, and a third roughly two months after planting. On established June-bearing beds, do not feed in spring; spring nitrogen drives leaf growth, not fruit, and a dense canopy traps moisture and promotes gray mold. Instead, fertilize once at renovation, just after harvest, to build the flower buds for next year. Established day-neutral and everbearing plants, which fruit all season, take the same total split into monthly doses through summer with an optional August feeding. On sandy soil, divide every rate into more frequent, lighter applications.

N · P · K = 16-16-16

A balanced fertilizer like 16-16-16 (the three numbers are nitrogen, phosphorus, and potassium) is a good all-purpose choice. Follow the label rate for the row length you are feeding, and water it in after spreading.A balanced analysis such as 16-16-16 works well. Rates are given as actual nitrogen per length of row, so divide the nitrogen you need by the decimal nitrogen fraction of your product: about 0.4 to 0.6 ounces of nitrogen per 10 feet at renovation works out to roughly 2.5 to 3.75 ounces of 16-16-16 per 10-foot row.

Try 16-16-16 balanced fertilizer (or a comparable all-purpose granular)
Who grows well together

Companion planting

The most important placement rule for strawberries is about what grew there before, not what you plant beside them. Do not put strawberries where tomatoes, peppers, eggplant, potatoes, raspberries, or blackberries grew recently. Those plants can leave a soil disease called Verticillium wilt behind, and it attacks strawberries too and stays in the soil for years. Also keep weeds out, since strawberries have shallow roots and lose out to weeds easily. The companion plants listed above are nice, low-risk neighbors, but they are garden tradition rather than a proven way to grow more fruit. The one firm rule for strawberry placement is rotation, not companionship: do not plant strawberries where tomatoes, peppers, eggplant, potatoes, raspberries, or blackberries have recently grown, because all of them host Verticillium wilt, a soilborne fungus that also attacks strawberries and lingers in the ground for years. Keep the same crops out of the bed for several years afterward. Beyond that, strawberries compete poorly with weeds because their roots are shallow, so the most valuable neighbor is bare, weed-free soil rather than any particular plant. The good-companion pairings above are traditional and low-risk, not documented yield boosters.

Other
Bush beans
Beans are an easy, friendly neighbor for strawberries. They do not compete much and add a little nitrogen to the soil, though do not expect them to make your berries bigger.Bush beans bring nitrogen fixation to the strawberry bed. Working with Rhizobium bacteria on their roots, they pull atmospheric nitrogen into a plant-available form that lightly benefits strawberries as moderate feeders, and their upright, shallow habit does not compete much with low-running strawberry crowns. As with most legume pairings, the nitrogen mostly reaches neighbors as the bean roots break down, so treat it as gentle soil-building across the season rather than an immediate feed. Well-grounded
Lettuce
Lettuce fits nicely along the edge of a strawberry bed while the berries are still small, using space the strawberries are not using yet.Lettuce makes good use of the open space in a strawberry planting, especially in the first season before the strawberries fill in and run. It is shallow-rooted and quick, so it crops and clears before the strawberries need the room, and its low canopy helps shade soil and suppress weeds between crowns. A space-and-timing pairing rather than a pest or flavor one. Traditional
Borage
Borage is a herb with blue flowers that bees love. A few plants near your strawberries can bring in more bees, which helps the flowers turn into well-shaped berries.Borage is the traditional strawberry companion, and it is worth separating what it reliably does from what is folklore. Reliably: borage is a powerful bee magnet, and better pollinator visitation gives strawberries more complete fruit set and fewer misshapen berries, a real, mechanism-backed benefit. The older claim that borage directly improves strawberry flavor and yield through the soil is widely repeated but unsupported by controlled study, so lean on borage for pollination, not as a flavor additive. Traditional
Provenance tagged inline · see methodology for the labeling system Key
Harvest signals

When to pick

A strawberry is ready when it is bright red all over, smells sweet, and comes off the plant easily. Berries taste best left to ripen on the plant. Pick every day or two, more often when it is hot, and pick before heavy rain so the berries do not get watery or moldy.Fruit is ready when it is fully red and fragrant and pulls free easily; flavor is best when berries ripen on the plant. Color deepens after picking, so fruit picked at about 75 percent red stores slightly longer. Pick every one to three days, more often in warm weather, and pick before forecast rain to protect flavor and limit rot.

Verified · 2 sources View
Yield

What to expect

Expect roughly 1 to 2 pounds of berries per plant, depending on the variety and how old the bed is.About 1 to 2 pounds per plant, or roughly 7 to 15 pounds per 10-foot row, varying with cultivar and planting age.

You will get the most berries the second year, the year after planting. After that the crop slowly tapers off in size and amount.Yield peaks the year after planting (year two). It is often similar or slightly lower in year three, and both berry size and total yield decline from years two to four. Do not expect berries the first year. On June-bearing plants you pick the flowers off on purpose, so no first-year crop is exactly what should happen.Expect little or no crop in the planting year. On June-bearers the flowers are pinned off the first season by design, so a missing first-year harvest is the plan working, not a failure.

What changes yield
Cultivar and type: June-bearers concentrate yield in one flush; day-neutrals spread a similar or smaller total across the season.Planting age: highest in year two, declining through year four as the bed ages.Pollination: cold or wet bloom weather and few bees give small, grooved, or pinched berries.Water during fruiting: fruit is mostly water, so moisture stress during sizing cuts yield and berry size directly.Renovation and weed control on June-bearers: timely renovation and a weed-free, well-spaced row sustain yield across seasons.
Verified · 2 sources View
Pick your variety

Recommended varieties

Pick the type that matches how you want to eat your berries first: a June-bearer if you want a big batch all at once for jam or freezing, a day-neutral if you want a few fresh berries at a time over a long season. After that, choose a variety known to grow well in your area, and feel free to plant two or three to see which you like best. Buy fresh plants labeled disease-free rather than digging up runners from an old bed.Choose by type first, then by season and local adaptation. Match cold hardiness to your winters and pick a fruiting pattern that fits how you want to harvest: one big flush from a June-bearer for preserving, or a steady trickle from a day-neutral for fresh eating. Within a type, cultivars differ in flavor, size, firmness, and disease tolerance, so trying two or three is the fastest way to find what thrives at your site. Always start from certified disease-free stock rather than runners off an old patch.
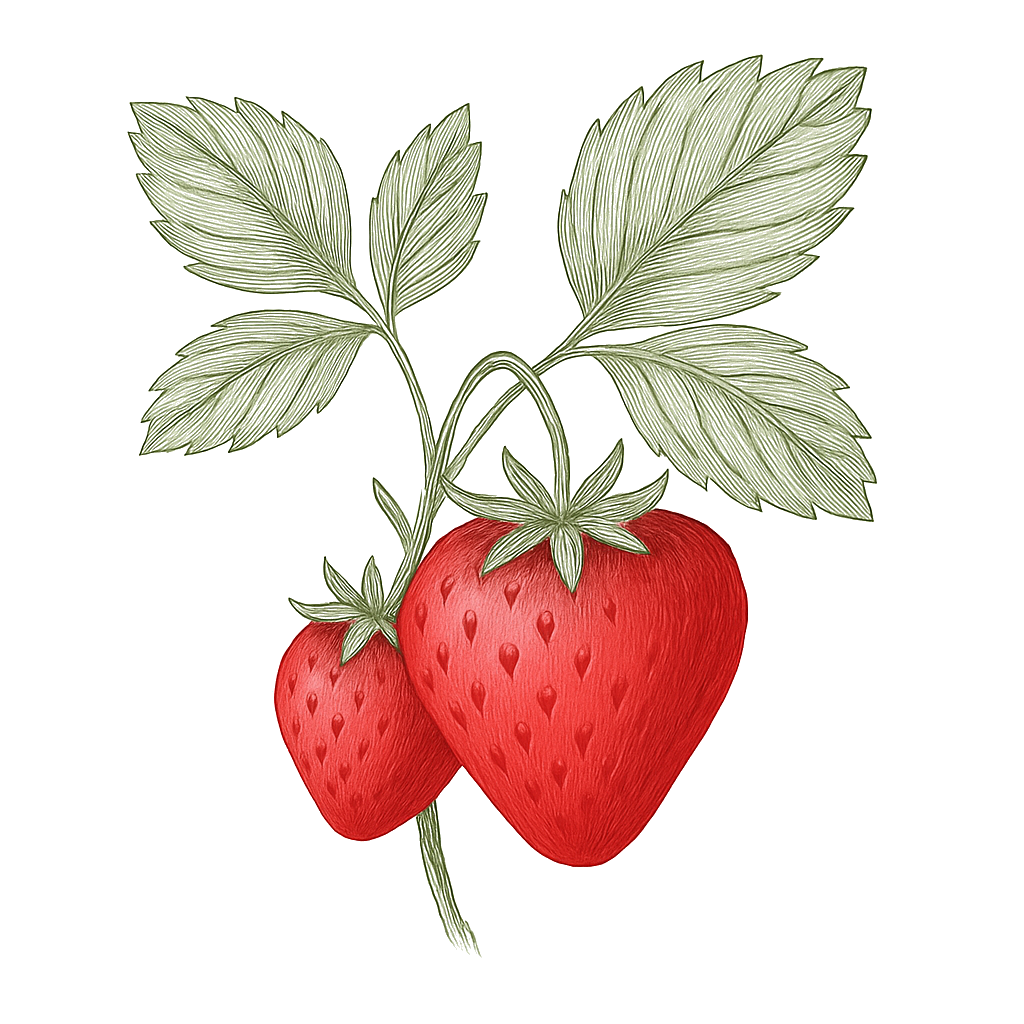
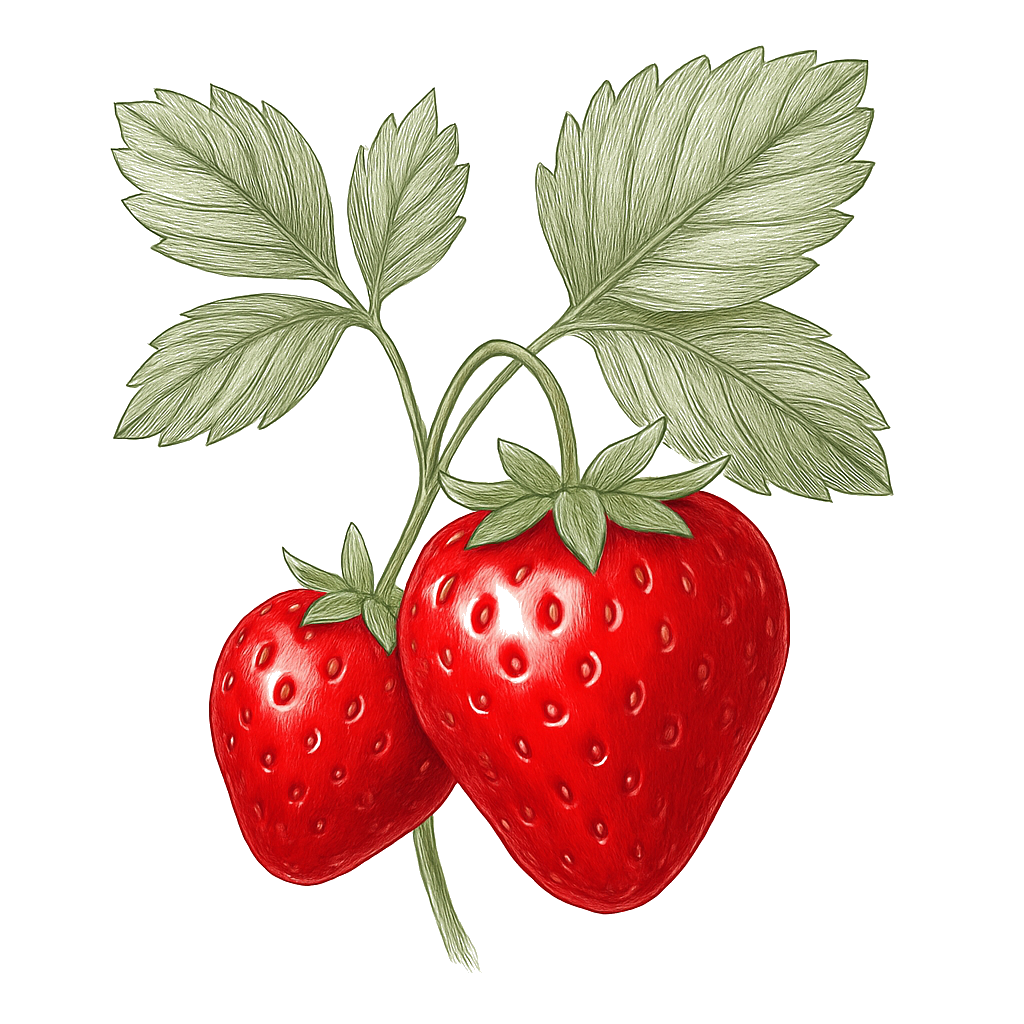
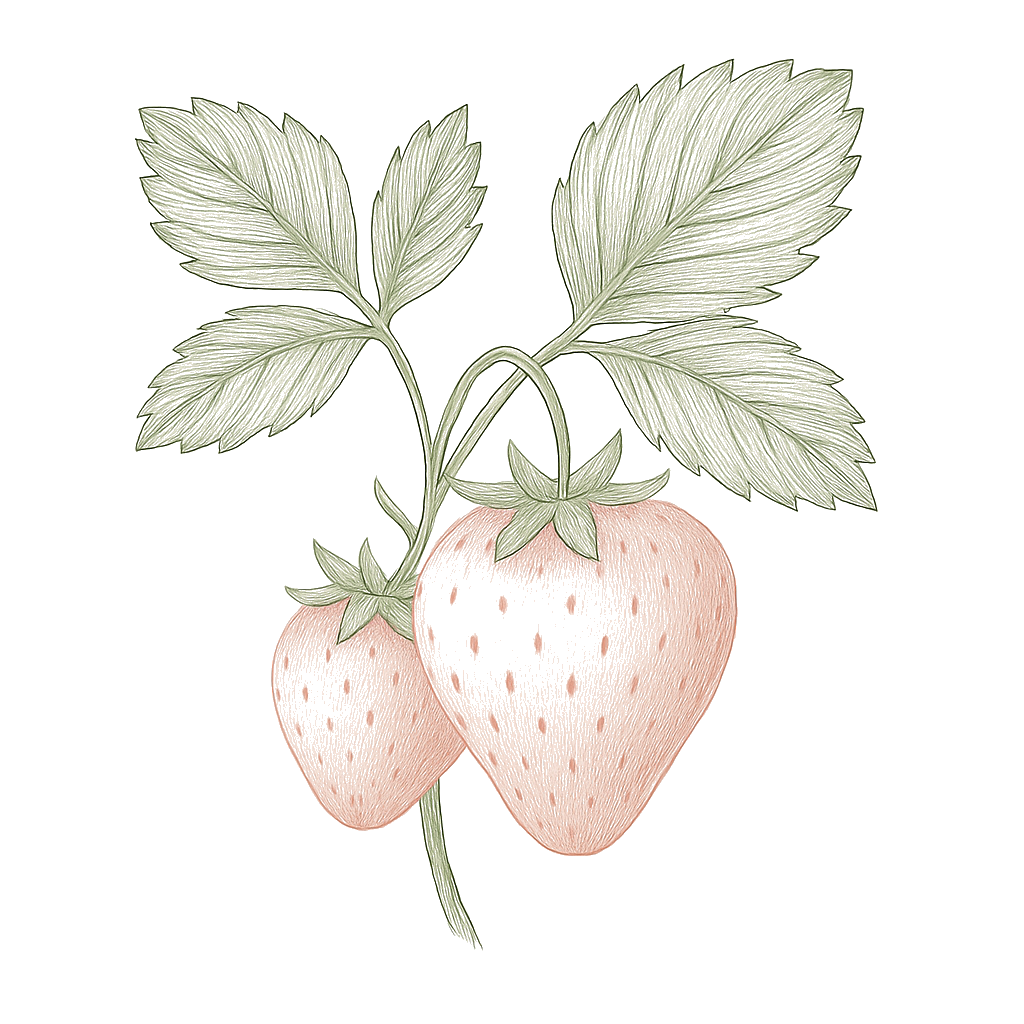
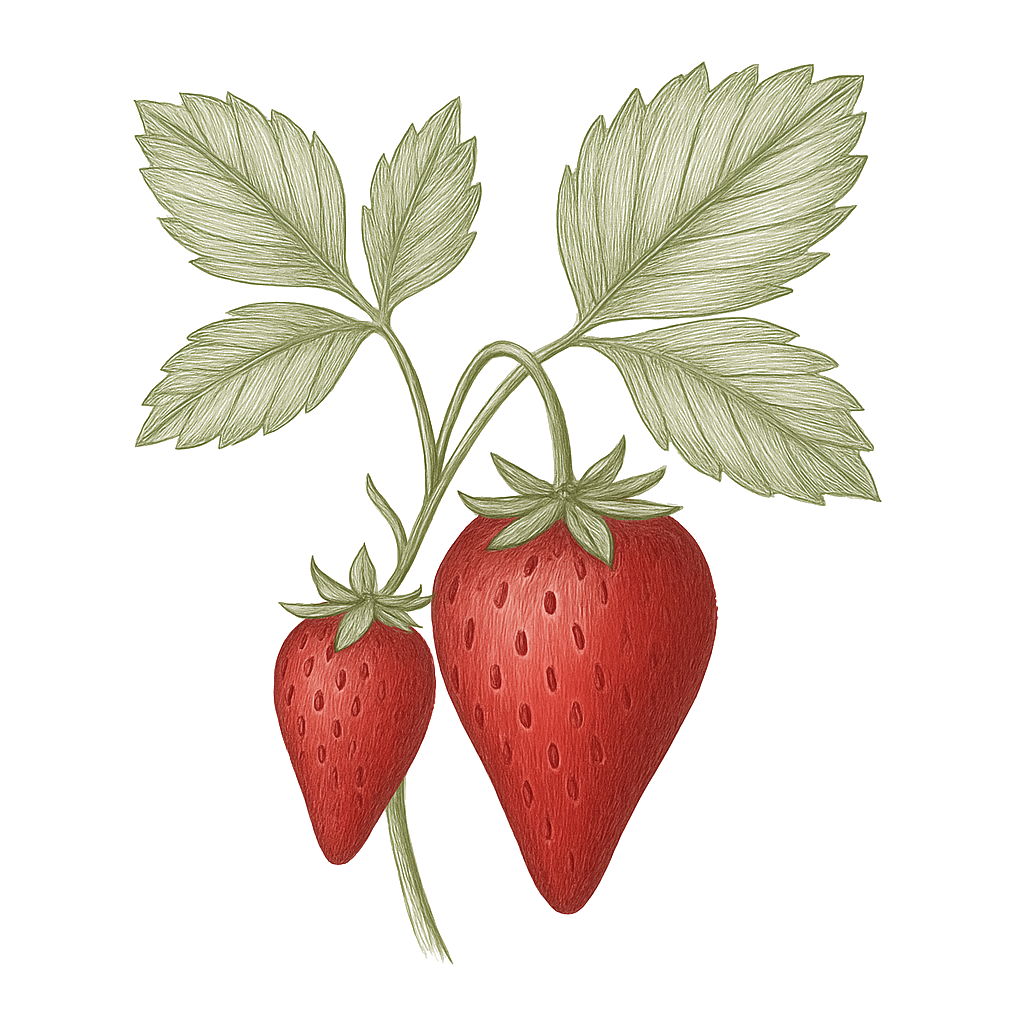
Honeoye illustration
Honeoye
fresh, freezing, jam
Earliglow illustration
Earliglow
fresh, jam
Jewel illustration
Jewel
fresh, freezing
Allstar illustration
Allstar
fresh
Albion illustration
Albion
fresh
Seascape illustration
Seascape
fresh, freezing
Tristar illustration
Tristar
fresh
Ozark Beauty illustration
Ozark Beauty
fresh, jam
Quinault illustration
Quinault
fresh
Choosing a type

Three kinds of strawberry, three kinds of season

June-bearing
one big early-summer crop
Everbearing
two flushes, spring and fall
Day-neutral
steady picking all season

There are three kinds of strawberries, and picking the right one matters more than picking a fancy variety. June-bearing types give you one big harvest over about four weeks in late spring or early summer, perfect if you want a pile of berries at once for jam or the freezer. They spread by sending out runners that fill in a wide row, and they give their first real crop the year after you plant them. Day-neutral types fruit a little at a time from late spring all the way to fall, give berries the first year, and stay compact, so they are the best choice for pots and small raised beds. Everbearing types fall in between, with one crop in early summer and another in late summer. This guide is built around the June-bearing kind grown in a wide row, since that is how most home gardeners grow strawberries, and it points out along the way where day-neutrals are handled differently. In mild coastal areas with gentle winters, day-neutral plants can give berries through much of the year, and gardeners there often plant fresh ones each year instead of keeping a bed for years.Strawberries come in three types, and the choice shapes your whole season. June-bearing cultivars set flower buds in the short days of fall and deliver one concentrated crop over about four weeks in late spring or early summer; they throw the most runners, so they suit a matted row and give a large flush ideal for freezing and jam. Their first real crop comes the season after planting. Day-neutral cultivars flower regardless of day length whenever temperatures sit between about 40 and 90°F, so they fruit from late spring through fall, bear in their first season, and throw few runners, which makes them the pick for containers, raised beds, and a steady supply of fresh berries. Everbearing cultivars give two lighter crops, one in early summer and one in late summer, and are generally less productive than day-neutrals. This guide follows the June-bearing matted-row model because it is the backbone of US backyard strawberry growing; the day-neutral notes throughout tell you where the care diverges. In mild-winter coastal regions, day-neutral plantings can fruit across much of the year and are often grown as a fall-set annual rather than a long-lived bed, which is why the warm-region notes treat them differently from the cold-region matted row.

Off the vine

Storing your harvest

Room temp
Strawberries do not get sweeter after picking and spoil fast, so only leave them out if you will eat them that day. Otherwise, get them into the fridge soon after picking.Strawberries are highly perishable and do not ripen further after picking, so hold them at room temperature only if eating within a day. For anything longer, refrigerate promptly; cool freshly picked fruit as soon as possible after harvest.
Fridge
Put the berries in the fridge unwashed, in their container or a loosely closed bag, and wash them only right before you eat them. Washing too early makes them mushy. Stored this way they last up to about a week, depending on how ripe they were.Refrigerate unwashed in the crisper drawer, kept in a closed clamshell or a partially open plastic bag to hold humidity near 90 to 95 percent. Do not wash until just before use, since surface moisture speeds spoilage. Under good conditions berries keep up to about a week, depending on ripeness at picking.
Freezer
To keep strawberries for months, remove the green tops, freeze them spread out on a tray first so they do not clump, then pack them into airtight bags. In the freezer they keep for up to about a year.For long-term storage, hull the berries, spread them on a tray to flash-freeze, then transfer to airtight containers or bags. Held at 0 °F they keep good quality for up to about a year.
Verified · 2 sources View
When something goes wrong

Common problems

Big leafy plants and lots of runners, but hardly any berriesLots of runners and leaves, but little or no fruit
01 of 05
What happened Too much nitrogen, or feeding a June-bearing bed in spring, pushes leaves and runners instead of berries. In the first year, no fruit is normal because you pinch the flowers off on purpose.Heavy leaf and runner growth at the expense of fruit usually means too much nitrogen, spring feeding on an established June-bearing bed, or, in year one, the normal result of pinching flowers to establish the plant. Next season Feed June-bearing plants only after harvest, not in spring, and do not overdo the fertilizer. And remember the first year is supposed to be fruitless, with the big crop the second year.Feed June-bearers only at renovation, not in spring, and keep total nitrogen modest. Remember that a fruitless first year on a June-bearing bed is the plan, with the real crop coming in year two.
Small, lumpy, or pinched berriesSmall, lumpy, or pinched-tip berries
02 of 05
What happened Lumpy or pinched berries usually mean the flowers were not pollinated well in cold or wet weather, or a small bug fed on them and deformed the tip.Misshapen or grooved fruit comes from poor pollination during cold or wet bloom weather, or from tarnished plant bug feeding that pinches the berry tip (catfacing). Next season Cover flowers only when frost threatens and open them up for bees otherwise, and keep weeds down to reduce the bugs that deform the tips.Protect bloom from frost, pull row covers back so bees can work the flowers, and control broadleaf weeds that host tarnished plant bug.
Berries rotting with gray fuzz
03 of 05
What happened Gray fuzzy rot on the berries is a mold that takes hold when things stay wet, the plants are crowded, or berries sit on damp ground.Soft fruit covered in gray fuzz is gray mold (Botrytis), driven by wet conditions, a dense canopy, fruit resting on wet soil, and rain during bloom and ripening. Next season Give the plants more air by not feeding June-bearers in spring, water at the soil, keep berries off wet ground, clear old leaves, and pick ripe berries quickly.Open up the canopy by skipping spring nitrogen on June-bearers, water at the base, keep fruit off wet soil, clean out old leaves, and pick ripe fruit promptly.
No berries the first yearNo fruit at all in the first year
04 of 05
What happened On June-bearing plants this is normal. You pick the flowers off the first year so the plant gets strong, and the first real crop comes the second year.On a June-bearing bed this is expected and correct: flowers are pinned off the first season so the plant builds roots, crown, and a matted row, with the first real crop in year two. Next season Keep pinching the flowers off June-bearing plants the first year and let the runners fill in. If you want berries the first year, grow a day-neutral type instead.Stay the course: pinch first-year flowers on June-bearers and let runners fill the row. For fruit the first year, grow a day-neutral type, which fruits in its planting season.
Plants dead or weak after winter, with dark mushy crownsPlants dead or stunted after winter, with blackened crowns
05 of 05
What happened Winter cold killed the crowns. This happens in cold areas when there is no snow or straw cover, or when the variety is not hardy enough for your winters.Winter cold injury: strawberry crowns are damaged between about 10 and 20 °F at the crown, especially without snow cover or winter mulch in cold regions, or with a poorly cold-hardy cultivar. Next season In cold places, cover the plants with 2 to 3 inches of straw after the first hard freeze and uncover them in spring, and pick a variety hardy for your area. In mild, rainy places, skip the straw, since it makes the crowns rot.In cold regions, apply 2 to 3 inches of loose straw after the first hard freeze and remove it in early spring, and choose cultivars rated for your hardiness zone. Skip straw in wet-winter regions, where it causes crown rot instead.
The usual suspects

Pests & diseases

Pests
Slugs
P · 01
Symptoms Ragged holes eaten in the berries and leaves, with shiny slime trails. Worst in damp, mulchy beds and wet weather.Ragged holes chewed in ripe fruit and leaves, with slime trails, worst in damp, heavily mulched beds and wet weather. Cause Slugs, which hide in damp mulch and eat the soft ripe berries at night.Slugs, which shelter in deep or wet mulch and feed at night on soft ripe fruit. Prevention Do not pile on thick straw in summer, keep the bed clean, and pick ripe berries quickly.Avoid deep straw mulch during the growing season, keep the bed tidy, and harvest ripe fruit promptly.
The control ladder

The ladder troubleshoots from the gentlest solution to the strongest. Start with the gentlest option and only move on when and if it doesn't work.

  1. Start here: clear away damp hiding places, do not pile on thick straw mulch in summer, and keep the bed tidy so slugs have nowhere cool and wet to shelter by day. Pick ripe berries promptly so there is less soft fruit to draw them.Removing daytime shelter, avoiding deep summer mulch, and prompt harvest cut the slug population at its source; keep ripening fruit up off wet ground.

  2. Hunt slugs after dark with a flashlight and pick them off, set board or beer traps for them to gather in, and ring the bed with copper strips they will not cross. Done regularly, handpicking alone can be very effective.Nighttime handpicking, board and beer-baited traps, and 2-inch copper barriers steadily lower numbers; empty and refresh traps every few days, and renew copper once it tarnishes.

  3. If traps and cleanup are not enough, scatter iron phosphate slug bait on the soil, not on the plants. It is much safer around pets, kids, and wildlife than the old metaldehyde baits, though slugs take several days to die.Iron phosphate bait makes slugs stop feeding and is safer around pets and wildlife than metaldehyde; it works best alongside habitat removal, not alone, and takes several days to a week to kill.

The bottom rungs are products with label rules: timing, pollinators, and days to wait before harvest. Before you spray →

Spotted wing drosophila
P · 02
Symptoms Soft, sunken spots on ripening berries, with tiny maggots inside. It gets worse later in the season.Soft, collapsing spots on ripening and ripe fruit; tiny larvae feed inside berries. Populations build through the season, so later fruit is hit hardest. Cause A small fruit fly that lays eggs in the berries as they start to color, and the maggots eat the fruit from inside.A vinegar fly that lays eggs in coloring fruit; the larvae feed inside as the berry ripens. Prevention Keep up with picking, never leave overripe berries on the plant, and use fine netting if the flies are bad.Harvest on a tight schedule, never leave overripe fruit on the plant, and exclude adults with fine netting where pressure is high.
The control ladder

The ladder troubleshoots from the gentlest solution to the strongest. Start with the gentlest option and only move on when and if it doesn't work.

  1. Start here: pick all the ripe berries often and completely, and remove and destroy any overripe or damaged fruit. Overripe berries left on the plant are where this fly breeds, so tight, clean picking is your strongest everyday tool.Frequent, complete harvest and destroying culls removes the ripening fruit SWD breeds in; sanitation is the backbone, since populations build through the season and hit later fruit hardest.

  2. Hang a cup of apple cider vinegar with a drop of dish soap near the berries to catch the flies. It tells you when they have arrived so you can time the other steps; it is a warning tool, not control.Vinegar traps checked weekly from before ripening detect adult arrival to time harvest and exclusion; monitoring, not control.

  3. Cover the planting with very fine mesh, fine enough to stop no-see-ums, before the first berries start to color, and seal it to the ground. It physically keeps the flies off the fruit.Fine mesh, about 1 mm, installed before fruit colors and sealed at every edge down to the ground, excludes adult SWD; put it on too late and you trap flies inside with the fruit.

  4. If pressure is high on a later crop, spinosad is the organic spray with the best track record on this fly, but it is hard on bees while wet, so spray at dusk and mind the days-to-harvest on the label.Spinosad is the most effective organic material against SWD; rotate it to slow resistance, spray at dusk to spare bees, and observe the pre-harvest interval on a crop you pick continuously.

  5. A last resort for heavy pressure only. It kills fast but hits bees and beneficials, and on a crop you pick every few days the days-to-harvest limit really matters, so read the label.Rescue-only; broad-spectrum and disruptive, with a pre-harvest interval that is limiting on continuously harvested strawberries. Time it to dusk, off bloom.

The bottom rungs are products with label rules: timing, pollinators, and days to wait before harvest. Before you spray →

Tarnished plant bug (lygus)
P · 03
Symptoms Lumpy, dented berries with a pinched, seedy tip. Most common on day-neutral plants in summer.Catfaced fruit, dimpled and pinched at the tip with seedy, woody patches; most noticeable on day-neutrals in summer. Cause A small bug that feeds on the flowers and young fruit, which makes the berry tip grow lumpy.Lygus bugs feeding on developing flowers and fruit, which disrupts seed and berry development at the tip. Prevention Pull broadleaf weeds near the bed, since the bugs breed on them, and keep the area tidy.Control broadleaf weeds that host lygus near the planting and keep the bed clean through the season.
The control ladder

The ladder troubleshoots from the gentlest solution to the strongest. Start with the gentlest option and only move on when and if it doesn't work.

  1. Start here, and this is the main control: keep broadleaf weeds down in and around the bed, since that is where these bugs breed and shelter. Watch the flowers while fruiting so you catch a buildup early.Removing the broadleaf weeds that host lygus in and around the planting is the primary lever; scout flowers through fruiting, since the damage that catfaces fruit is done at bloom.

  2. Minute pirate bugs, big-eyed bugs, and parasitic wasps feed on the young bugs, so avoid broad sprays that would kill them. Because lygus fly in from weeds and field edges, though, natural enemies only help so much on their own.Conserving natural enemies gives partial suppression, but lygus are mobile and reinvade from surrounding vegetation, so biological control is a supporting step, not a standalone fix; weed sanitation matters more.

  3. Only if the bugs are ruining a lot of fruit and weeding has not been enough. A fast synthetic that also kills bees and beneficials, so keep it off flowers and treat it as a last resort.Rescue-only; broad-spectrum and disruptive to the natural enemies above, with a label pre-harvest interval. Lygus are only moderately susceptible, so it does not substitute for weed control.

The bottom rungs are products with label rules: timing, pollinators, and days to wait before harvest. Before you spray →

Aphids
P · 04
Symptoms Groups of tiny soft bugs on new leaves and leaf undersides, leaving a sticky film. They can also spread plant viruses.Clusters of small soft-bodied insects on new growth and leaf undersides, with sticky honeydew and sometimes sooty mold; aphids can also transmit strawberry viruses. Cause Aphids, tiny bugs that suck plant juices and multiply fast on new leaves.Aphids feeding on plant sap, building up quickly on tender new growth. Prevention Start with clean plants, and do not over-feed, since lots of soft new growth attracts aphids.Start with clean, certified plants to limit virus introduction, and avoid excess nitrogen that flushes soft, aphid-prone growth.
The control ladder

The ladder troubleshoots from the gentlest solution to the strongest. Start with the gentlest option and only move on when and if it doesn't work.

  1. Start here: do not overfeed. Too much nitrogen pushes out soft new growth that aphids multiply on, so feed modestly. Starting with clean, certified plants also limits the viruses aphids can spread.Modest nitrogen keeps growth steady and less aphid-prone; clean certified stock limits virus introduction, since aphids also vector strawberry viruses.

  2. A strong jet of water knocks aphids off the leaves, and most cannot climb back on. Do it early in the day so the leaves dry quickly.A forceful spray dislodges colonies from sturdy plants; spray early so foliage dries and disease is not encouraged.

  3. Ladybugs, lacewings, and tiny parasitic wasps eat aphids and usually keep them in check for free. Protect them by not reaching for broad sprays.Resident ladybugs, lacewings, syrphid larvae, and parasitic wasps hold aphids down; avoiding broad-spectrum sprays and managing the ants that tend them is what keeps them working.

  4. For a heavy infestation, insecticidal soap kills the aphids you spray directly. It only works while wet, so coat them well, and it spares beneficials once dry.Contact soap smothers aphids with no residual, so coverage and repeat sprays matter; it spares dry-surface beneficials.

  5. Neem oil is another low-residue option that coats and disrupts aphids. Do not spray it in heat above 90°F or on a drought-stressed plant, and spray at dusk to avoid wetting bees.Neem works by contact smothering and as an antifeedant and growth regulator; low toxicity to bees but, as a contact spray, apply at dusk. Avoid above 90°F or on stressed plants.

  6. Rarely needed for aphids, and a last resort only. It kills fast but hits the ladybugs and other good bugs too, which can make aphids worse later, so keep it off flowers.Rescue-only and usually counterproductive on aphids, since it removes the natural enemies that regulate them and can trigger resurgence. Observe the label pre-harvest interval.

The bottom rungs are products with label rules: timing, pollinators, and days to wait before harvest. Before you spray →

Two-spotted spider mite
P · 05
Symptoms Leaves look speckled and bronzed, with fine webbing underneath. Worst in hot, dry, dusty weather, and bad cases weaken the plants.Fine stippling and bronzing of leaves with faint webbing on undersides, worst in hot, dry, dusty conditions; heavy infestations weaken plants and reduce yield. Cause Tiny mites under the leaves that multiply fast when it is hot and dry.Tiny mites that feed on the underside of leaves and multiply rapidly in hot, dry weather. Prevention Keep plants watered in hot weather and avoid letting them get dusty and dry.Avoid drought stress and dusty conditions, and keep plants well watered in heat.
The control ladder

The ladder troubleshoots from the gentlest solution to the strongest. Start with the gentlest option and only move on when and if it doesn't work.

  1. Start here: keep plants well watered, since spider mites flare on hot, dry, drought-stressed plants, and knock the mites back with a hard spray of water to the leaf undersides, which also raises the humidity they dislike. Keeping the bed from getting dusty helps too.Mites explode on drought-stressed, dusty plants, so steady watering is preventive; a forceful water spray to leaf undersides dislodges them and raises humidity. This foundation often keeps mites below the threshold that needs any spray.

  2. Predatory mites and other tiny good bugs feed on spider mites and often control them on their own. Avoid broad sprays, including too much sulfur, that would kill these helpers.Predatory mites are the key natural enemy; conserve them by avoiding broad-spectrum sprays and sulfur, which set them back.

  3. For a bad case, horticultural oil smothers the mites on contact. Cover the leaf undersides well, and do not spray in heat above 90°F or on a drought-stressed plant.Narrow-range oil knocks mites back by smothering; coverage of leaf undersides is everything. Avoid above 90°F, on stressed plants, or within 2 weeks of sulfur.

  4. Neem oil is another contact option that coats and disrupts the mites. Same rules: thorough coverage, not in high heat, and spray at dusk to avoid bees.Neem gives partial mite control by contact and as a growth disruptor; repeat coverage is needed, and avoid high heat and stressed plants.

  5. Sulfur is a last resort here. It does knock back spider mites, but it also harms the predatory mites that were helping you, so use it only if the softer steps have failed, and never in heat above 90°F.Sulfur is a protectant miticide but harms predatory mites, so it can trade a short knockdown for lost biological control; reserve it, keep a 2-week gap from any oil spray, and avoid above 90°F.

The bottom rungs are products with label rules: timing, pollinators, and days to wait before harvest. Before you spray →

Root and crown weevils (black vine weevil)
P · 06
Symptoms Leaf edges notched as if cut with pinking shears, and plants that wilt or collapse because grubs have eaten the roots and crown.Notched leaf margins from night-feeding adults, and stunted, wilting, or collapsing plants whose roots and crowns have been eaten by larvae. Cause Beetles whose adults chew the leaf edges at night and whose grubs eat the roots underground.Weevils whose adults notch leaves at night and whose larvae feed underground on roots and crowns. Prevention Start new beds in a fresh spot, since the grubs build up in old beds, and use clean plants.Rotate to a fresh site when starting a new bed, since larvae build up in older plantings, and start with clean stock.
The control ladder

The ladder troubleshoots from the gentlest solution to the strongest. Start with the gentlest option and only move on when and if it doesn't work.

  1. Start a new bed in a fresh spot away from old strawberry plantings, since the grubs build up in beds over the years. Begin with clean, healthy plants so you are not importing them.Siting a new planting away from older, infested beds starves the soil larvae, which build up over successive years; start with clean stock.

  2. Pull and destroy badly infested plants in the fall, when the grubs are feeding on the roots and crown, so they do not carry over.Removing and destroying heavily infested plants in fall reduces the overwintering larval population.

  3. On warm evenings the adult weevils come out to feed and notch the leaf edges. Go out with a flashlight and pick them off, since they cannot fly and are easy to catch by hand.The flightless adults feed at night; handpicking or shaking them onto a cloth after dark removes egg-laying females before the next generation of root-feeding larvae.

  4. Beneficial nematodes are microscopic good worms you water into moist, warm soil. They hunt the grubs underground and are safe for people and pets.Entomopathogenic nematodes drenched into moist soil at roughly 60°F to 90°F infect the root-feeding larvae; time it to when larvae are present and keep the soil moist.

  5. A last resort, and only against the adult beetles at night, since sprays cannot reach the grubs down in the soil. It hits bees and beneficials, so keep it off flowers and use it sparingly.Rescue-only and limited to adults, since foliar sprays do not reach soil larvae; broad-spectrum and disruptive, with a label pre-harvest interval. Nematodes are the better tool for the root-feeding stage.

The bottom rungs are products with label rules: timing, pollinators, and days to wait before harvest. Before you spray →

Birds
P · 07
Symptoms Ripe berries pecked or half-eaten, often the best red ones taken right before you pick them.Pecked and partly eaten ripe berries, often the first fully colored fruit taken just before you would pick it. Cause Birds that go for the ripe red berries.Birds attracted to ripening red fruit. Prevention Put netting on before the first berries ripen, not after the birds have already found them.Net the planting before the first fruit ripens rather than after birds find it.
The control ladder

The ladder troubleshoots from the gentlest solution to the strongest. Start with the gentlest option and only move on when and if it doesn't work.

  1. Shiny, moving, or noisy things like reflective tape and scare-eye balloons can frighten birds off for a while, but birds get used to them fast, so move them around and swap types at least weekly. On their own they do not reliably protect the fruit.Visual and noise deterrents reduce pressure but birds habituate; rotate device types and do not leave one combination up more than a week. Best paired with netting, not relied on alone.

  2. The reliable fix is bird netting draped over hoops so it sits off the berries, with the edges tucked to the ground so birds cannot get underneath. Put it on before the first berries ripen, not after the birds have found the patch.Netting on a hoop or PVC frame excludes birds; laid straight on the plants they still peck through it, so support it off the canopy, extend it to the ground, and tie the edges. Install before the first fruit colors.

No spray for this one. Prevention is the control.

Diseases
Gray mold (Botrytis fruit rot)
D · 01
Symptoms Berries turn soft and rot, then grow a gray fuzz. It often starts where a berry touches the ground or another berry, and spreads quickly.A soft, tan rot of green and ripe fruit that quickly becomes a fuzzy gray mold, often starting where berries touch soil, mulch, or another berry. It spreads fast through a picked basket. Cause A mold that lives on old dead leaves and takes hold when it is wet while the plants are flowering and fruiting.The fungus Botrytis cinerea, which overwinters on dead leaves and thrives when it rains during bloom and fruit development. Prevention Do not feed June-bearing plants in spring, since extra leaves trap dampness. Water at the soil, give plants room to breathe, and pick ripe berries often.Avoid spring nitrogen on June-bearers, which thickens the canopy and traps moisture. Water at the base rather than overhead, space plants for airflow, and pick fruit promptly and often.
The control ladder

The ladder troubleshoots from the gentlest solution to the strongest. Start with the gentlest option and only move on when and if it doesn't work.

  1. Start here: lay straw around and between the plants so the ripening berries sit up off the wet soil. Fruit that is not touching damp ground is far less likely to rot with gray mold.A good straw layer keeps fruit off wet soil and cuts rain splash, lowering Botrytis pressure; a foundational cultural step, though it reduces rather than eliminates rot.

  2. Give plants room and water at the soil rather than overhead so the canopy dries quickly. Gray mold takes hold in damp, crowded, still foliage.Wide spacing and base watering shorten leaf and fruit wetness, denying Botrytis the sustained moisture it needs; an open canopy dries fast after rain.

  3. Pick off and destroy moldy berries the moment you see them, since the mold spreads fast from one berry to the next, and clear away old dead leaves where it overwinters. Go easy on spring nitrogen, especially on June-bearers, since the extra soft leaves thicken the canopy and trap the dampness the mold loves.Remove infected fruit immediately and clean out old leaves at renovation and early spring; avoid spring nitrogen on June-bearers, which thickens the canopy and traps moisture. There is no home spray that cures it, so these cultural steps are the whole program.

No spray for this one. Prevention is the control.

Anthracnose fruit rot
D · 02
Symptoms Dark, sunken round spots on the berries. The disease can also rot the crown and runners, making plants wilt and die in warm, wet weather.Dark, sunken, circular lesions on fruit; the fungus can also infect crowns and runners, causing wilting and plant death in warm, wet spells. Cause A fungus that thrives in warm, wet, humid weather and splashes around in the rain.Colletotrichum fungi, favored by warm, humid, rainy conditions during fruit development and spread by splashing water. Prevention Buy clean, certified plants, water at the base, and avoid spots where this disease has been a problem before.Start with certified disease-free plants, avoid overhead watering, and do not plant into ground with a recent history of the disease.
The control ladder

The ladder troubleshoots from the gentlest solution to the strongest. Start with the gentlest option and only move on when and if it doesn't work.

  1. Start with clean, certified disease-free plants and, where anthracnose has been a problem, choose a resistant variety. Do not plant into ground with a recent history of the disease.Certified clean stock and resistant cultivars are the foundation, since the fungus arrives on infected transplants and persists in old sites; avoid replanting into a recent-history bed.

  2. Lay straw mulch to keep berries off the soil and cut down on rain splashing spores up onto the fruit, which is how this disease spreads.Mulch reduces the rain and irrigation splash that disperses Colletotrichum spores; water at the base rather than overhead.

  3. Pull off and destroy diseased berries and plants promptly, and give plants room so the canopy dries. Watering at the soil instead of overhead keeps spores from splashing around.Prompt removal of diseased fruit and plants lowers inoculum; base watering and airflow limit the warm, wet, splashing conditions the fungus needs.

  4. If the cultural steps are not holding in a warm, wet season, a copper spray can protect healthy fruit, but it must go on before infection and cannot cure berries already rotting. Copper is toxic to fish and builds up in the soil, so use it sparingly.Fixed copper is a protectant only, applied before infection during warm wet spells; it will not cure established rot. Copper accumulates in soil and harms aquatic life, so limit repeat use.

The bottom rungs are products with label rules: timing, pollinators, and days to wait before harvest. Before you spray →

Powdery mildew
D · 03
Symptoms Leaf edges curl upward and turn purple, with a white dusty coating. In some varieties the berries taste bitter.Upward cupping and purpling of leaf edges with a white powdery film; in some cultivars infected fruit tastes bitter. Cause A fungus that spreads when the air is humid but the leaves are dry.A fungus that, unlike most strawberry diseases, spreads in dry conditions with high humidity and moderate temperatures. Prevention Give plants room, keep them from getting crowded, and choose mildew-resistant varieties.Space plants well, avoid dense canopies, and select tolerant cultivars.
The control ladder

The ladder troubleshoots from the gentlest solution to the strongest. Start with the gentlest option and only move on when and if it doesn't work.

  1. The easiest fix is to grow a mildew-resistant variety, especially if it keeps coming back or if it makes your berries taste bitter.Cultivar resistance varies widely and is the lowest-effort durable control; worth choosing where mildew recurs, since some cultivars also develop off-flavored fruit.

  2. Give plants room and keep the canopy from getting crowded. Unlike most strawberry diseases, mildew spreads when the air is humid even if the leaves stay dry, so airflow still helps. Pick off the worst-affected leaves.Wide spacing and an open canopy lower the humidity mildew favors, since it spreads in dry-leaf, high-humidity conditions; remove badly affected leaves.

  3. If mildew is heavy, sulfur is the organic spray, applied before it takes hold. Some strawberry varieties are sensitive to it, so test a few plants first, and never spray in heat above 90°F.Sulfur is a protectant for powdery mildew, but some strawberry cultivars are sulfur-sensitive, so spot-test first; avoid above 90°F and within 2 weeks of oil, and note it harms predatory mites.

The bottom rungs are products with label rules: timing, pollinators, and days to wait before harvest. Before you spray →

Red stele (Phytophthora root rot)
D · 04
Symptoms Plants are stunted and wilt, then collapse in spring. If you cut a root open, the center is reddish-brown. It is worst in heavy, wet soil that drains poorly.Stunted, wilting plants that collapse in spring; roots are rotted and, when sliced lengthwise, show a reddish-brown core. Worst in heavy, wet, poorly drained soil. Cause A soil fungus that builds up in cold, soggy ground and stays in the soil for years.Soilborne Phytophthora fungi that thrive in cold, saturated soils and persist for years. Prevention Plant in well-drained soil or raised beds, buy certified plants, and pick resistant varieties if your ground stays wet.Plant only in well-drained soil or raised beds, start with certified plants, and choose red-stele-resistant cultivars on wet sites.
The control ladder

The ladder troubleshoots from the gentlest solution to the strongest. Start with the gentlest option and only move on when and if it doesn't work.

  1. This is a soilborne rot with no home cure, so prevention is everything. On wet ground, the single most important choice is a red-stele-resistant variety, and always start with certified disease-free plants.Red-stele-resistant cultivars are the primary control for a soilborne Phytophthora that persists for years and cannot be cured; pair with certified clean stock.

  2. Plant only in well-drained soil or raised beds, since this rot thrives in cold, soggy ground, and do not replant strawberries into a bed where it has struck, because the fungus lingers in the soil for years. Pull and destroy any collapsing plants.Improve drainage with raised beds and rotate off infested ground for years, since the pathogen is soilborne and persistent; there is no chemical rescue, so remove and destroy affected plants. Drainage, a fresh well-drained site, and resistant varieties are the whole game.

No spray for this one. Prevention is the control.

Verticillium wilt
D · 05
Symptoms The outer leaves wilt, dry at the edges, and flop down while the middle leaves stay up. Plants are stunted and may die, often as the berries are forming.Outer leaves wilt, dry at the margins, and collapse while inner leaves may stay upright; plants are stunted and may die. Symptoms often appear as fruit load increases. Cause A soil fungus that also attacks tomatoes, peppers, potatoes, and other berries, and stays in the soil for years.The soilborne fungus Verticillium, which also infects tomatoes, peppers, eggplant, potatoes, and brambles and persists in soil for years. Prevention Do not plant strawberries where you recently grew tomatoes, peppers, potatoes, or other berries, and start with certified clean plants.Do not plant strawberries after or near tomatoes, peppers, eggplant, potatoes, raspberries, or blackberries, and start with certified disease-free stock on a clean site.
The control ladder

The ladder troubleshoots from the gentlest solution to the strongest. Start with the gentlest option and only move on when and if it doesn't work.

  1. There is no cure once a plant wilts, so it comes down to variety and site. Choose a verticillium-resistant strawberry variety and start with certified disease-free plants.Resistant cultivars and certified clean stock are the primary controls for a soilborne fungus with no rescue treatment; variety choice does much of the work.

  2. Do not plant strawberries where you recently grew tomatoes, peppers, eggplant, potatoes, raspberries, or blackberries, since verticillium builds up on all of them and lingers in the soil for years. Pick a clean site with no recent history.The fungus infects many hosts, including tomato, pepper, eggplant, potato, and brambles, and persists for years, so rotate onto ground clear of those crops; site choice is the main lever.

  3. Pull and destroy plants as they wilt, so they do not add to what is in the soil, and keep the bed clean.Removing affected plants limits soil buildup; there is no spray, so sanitation supports the rotation and variety program rather than curing anything.

No spray for this one. Prevention is the control.

Seasoned
Where to plant next year

Crop rotation

Because a strawberry bed lasts a few years, the main thing is choosing a good spot at the start: somewhere that has not grown tomatoes, peppers, potatoes, or berries lately. When the bed slows down after three or four years, start a fresh one in a different part of the garden rather than replanting the same ground.Strawberries are a multi-year planting, so the rotation decision is mostly made once, at bed establishment: choose ground that has not grown a Verticillium host recently, and plan to move the next bed to fresh ground when this one declines after three to four fruiting seasons. Starting the replacement bed in a new spot during the old bed's last productive year keeps production continuous and breaks the soilborne pest cycle.

Family
Rosaceae (Fragaria)
Years between
4 years
in the same bed
Avoid following
Do not plant strawberries in a spot where you recently grew tomatoes, peppers, eggplant, potatoes, raspberries, or blackberries. Those crops can leave behind a soil disease (Verticillium wilt) that also harms strawberries and stays in the soil for years. It is also best not to replant strawberries right where old strawberries were.Do not plant strawberries after tomatoes, peppers, eggplant, potatoes, raspberries, or blackberries. All host Verticillium wilt, a soilborne fungus that infects strawberries and persists in soil for years; a strawberry bed following them is at real risk. Avoid replanting strawberries into ground where strawberries recently grew, too, since soilborne pests and viruses build up.
Plant after
legumes, leafy greens, alliums, or a cover crop
Verified · 2 sources View
In the app · pre-launch

When plant taps you on the shoulder

The plant app sends a timely reminder at every critical moment of your strawberry season. The wording adjusts to whichever you pick: beginner or seasoned. Here are three you'll see in Zone 12.

p
plant
0 days after last frost
Time to plant your strawberries
It is time to plant your strawberries. Set each plant so the middle of the crown sits right at soil height.
p
plant
0 days after last frost
Pick off the flowers this year
On June-bearing plants, pick off the flowers this first year so the plant grows strong and gives a big crop next year.
p
plant
0 days after last frost
Frost coming while plants are flowering
Frost is coming while your strawberries are flowering. Cover the plants with a light cloth in the evening and take it off in the morning.
Get personalized alerts.

plant sends the right notification at exactly the right moment, for your zone, your weather, your crops. Founding members lock the rate forever.

Back the Kickstarter →
Ask the gardener

Common questions

Got a question we missed?

We're building this guide with real growers. Got a question we missed? Ask here. We read every one and add the best answers right to this page.

Grown this before?

Share a tip

Learned something the hard way? Pass it on. Real growers' tips make this guide better for the next person, and we credit you by name when yours goes live.

Seasoned
Spot something wrong?

Report a problem

If you've grown this crop and you see a date, a temperature, a companion claim, or a recommendation that doesn't match your experience, tell us. Real growers' corrections make this guide better for the next person.

How we built this guide

Methodology & sources

Every date, temperature, spacing, and recommendation on this page is sourced from university cooperative extension publications, peer-reviewed agricultural research, NOAA climate data, and direct extension calendars. Where claims are softer (traditional gardening wisdom not formally documented), we say so.

Research-backed Documented in cooperative extension publications or peer-reviewed research
Well-grounded A known agronomic principle, but not formally tested for this specific pair
Traditional Time-tested gardening wisdom, limited formal research support
Last reviewed
June 18, 2026
Data version
crops_data_final · v1.0 · schema 2.9
Sources cited on this page
16 publications
Verified entries
Companion-planting claims tagged inline · zone dates verified against 5+ extensions
See all sources cited on this page
  • University of Minnesota Extension umn_ext
  • University of Maryland Extension umd_ext
  • Cornell Cooperative Extension cornell_ext
  • Iowa State University Extension iastate_ext
  • Michigan State University Extension msu_ext
  • NC State Extension ncsu_ext
  • Penn State Extension psu_ext
  • U. of Illinois Urbana-Champaign Extension uiuc_ext
  • UC Davis Postharvest Center ucd_postharvest
  • Texas A&M AgriLife Extension tamu_agrilife
  • Virginia Cooperative Extension 426-331 vce_426_331
  • Piedmont Master Gardeners piedmont_mg
  • UGA Vegetable Garden Calendar uga_calendar
  • Clemson Home & Garden Information Center clemson_hgic
  • UC IPM Statewide IPM Program uc_ipm
  • NOAA 1991-2020 Climate Normals noaa_normals

Growing notes, weekly.

Zone-aware seasonal nudges, what's worth planting now, and the occasional recipe from the harvest. No spam, ever.

Vol. 003 · Strawberry · plant.lifestyle