Pick your zone and the dates re-calibrate.
The Guide Herbs Vol. 003

Thyme

in Zone 13, this week

Thyme is a low, spreading herb with tiny fragrant leaves you cook with. It comes from the dry Mediterranean, so it wants full sun, poor dry soil, and very little water, and it actually does worse if you pamper it. It grows only about 6 to 12 inches tall and spreads into a low mat. Snip it often and give it a light trim after it flowers to keep it bushy; it gets woody as it ages, so replace or divide it every few years. It is tough and rarely bothered by pests, and bees love its little flowers. Thyme is a low, woody Mediterranean perennial in the mint family, grown for its tiny aromatic leaves that flavor soups, stews, sauces, meats, and fish. It forms a low, spreading, mat-like mound only about 6 to 12 inches tall and thrives on neglect in full sun and lean, sharply drained soil; wet, rich soil rots it and dulls its flavor. Frequent harvesting and a light shear after its summer bloom keep it bushy, though it goes woody with age and is best divided or replaced every few years. It is hardy and pest-resistant, and its small pink, lavender, or white flowers are a strong bee draw.
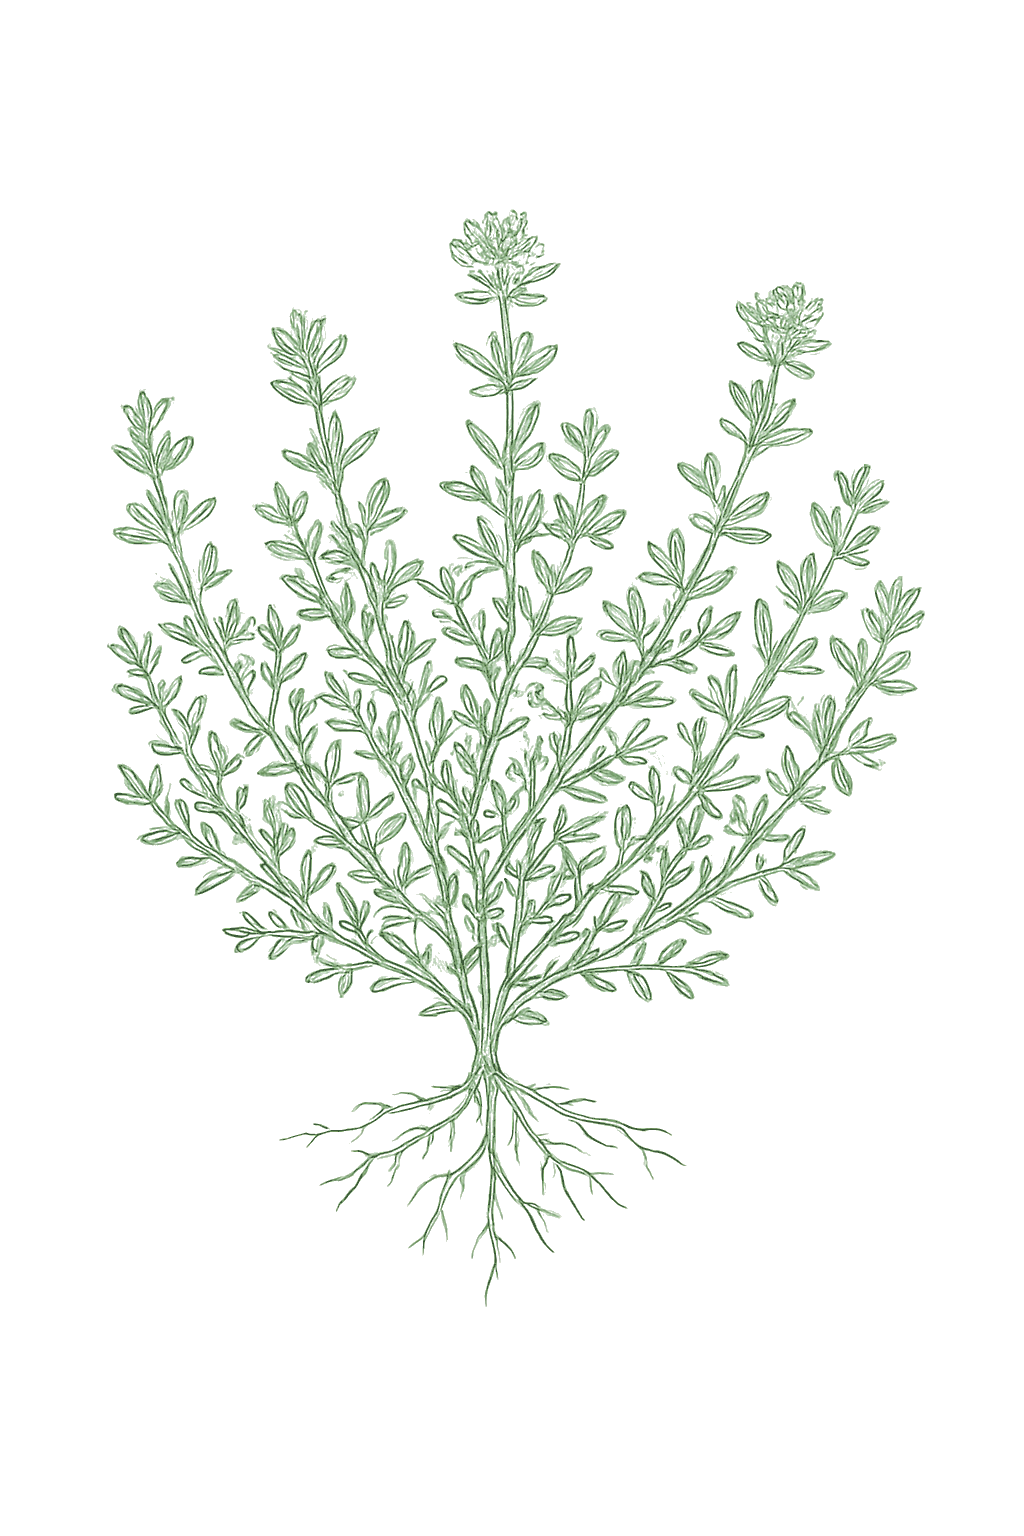
Thyme mature plant
Fig. 01 · Thyme, mature Zone 13
Container
2 gal
min 1 gal pot
Sunlight
Full sun
6-8 hrs daily
Water
Low
Spacing
8-12"
between plants
Soil pH
6-8
slightly acidic
Today · in your zone

What's happening right now

July 24 · Zone 13 · Stage 01 · Plant out

Off-season for thyme in zone 13.

The growing year

Your thyme year, month by month

Grown as a perennial HI: Tropical, Zone 13

Thyme does not grow well in most of Hawaii because the lowlands are too hot and humid, which rots it. In cool, dry, higher-elevation spots with cool nights it can grow as a low fragrant perennial in a sunny, fast-draining spot. In the humid lowlands, it is best to skip it.Marginal in Hawaii, and viable mainly in cool, dry upcountry microclimates rather than the humid lowlands where most gardening happens. Where it succeeds, at higher, drier elevations with cool nights, thyme behaves as a low fragrant perennial; give it full sun, very sharp drainage, and lean, infrequent water. In the warm, humid lowlands it rots and is not a sound choice.

Once established, lavender settles into the same rhythm year after year: a winter rest, fresh spring growth, an early-summer bloom you cut for fragrant bundles, then a hard cut-back that keeps the plant compact and flowering for years.

Jan
Feb
Mar
Apr
May
Jun
Jul
Aug
Sep
Oct
Nov
Dec
▲ We are here
Thyme’s year
growing
bloom
prune
growing
Plant
plant
plant
plant
BloomGrowingPrune
Plant
Sep - Nov or Feb - Apr
Bloom
Apr - Aug
Cut back after bloom Once the summer flowers fade, trim off the old flower stems and neaten the plant, cutting only into the leafy parts and not into the hard woody stems, which do not grow back well. Snipping thyme often plus this trim keeps it bushy, but it still gets woody with age, so replace or divide it every few years.After the summer flowers fade, shear off the spent flower stems and lightly reduce the plant, cutting into leafy growth only and never into the bare woody base, which resprouts poorly. Frequent harvesting through the season plus this post-bloom shear keeps thyme compact; even so, plants go woody with age and are best divided or replaced every few years.
The season, mapped

Seed to garden

The easy, reliable way to grow thyme is to buy a small plant, divide an existing clump, or root a cutting. You can grow it from seed, but the seed is tiny and slow and does not come up evenly, so most gardeners buy a plant instead. If you do start from seed, scatter the fine seed and barely cover it, and start indoors about 10 weeks before your last frost, keeping it warm and moist until it sprouts.Thyme is most reliably started from a nursery transplant, a division of an established clump, or a softwood cutting (cuttings root in about three to four weeks); it can be grown from seed, but the fine seed is slow and germination is uneven, so most gardeners skip it. Divide established plants in spring, and mixing the tiny seed with sand helps it spread evenly if you do direct-sow. To start seed indoors, scatter and barely cover the fine seed about 10 weeks before the last frost, and expect slow, uneven germination over two to three weeks.
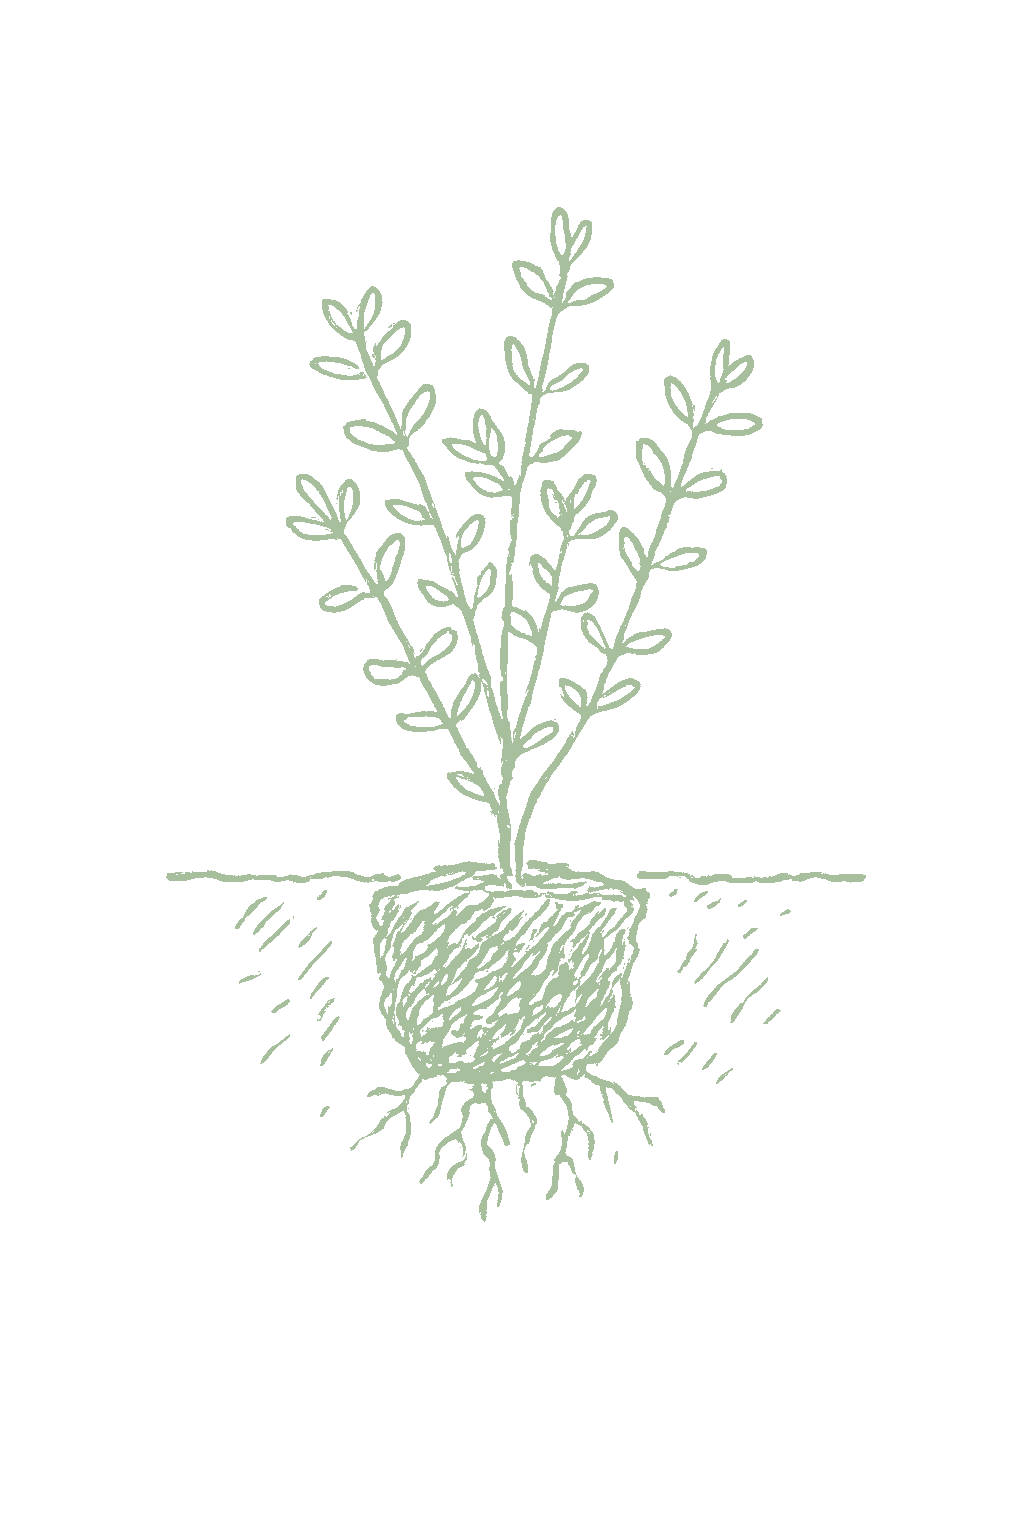

Start method
Nursery transplant
Soil temp
70-70°F
From seed to fruit

The growing journey

Stage 01 · Plant out
01
Plant out
A small, low bushy plant with tiny gray-green leaves and roots that hold the potting soil together when you slide it out.A compact young plant with fine gray-green foliage and firm roots filling the pot, ready to set out once frost has passed.
Gently loosen the roots, plant so the top of the rootball is level with the soil, and water once to settle it. Skip the fertilizer and rich compost.Loosen the rootball, set the crown level with the soil surface, and water in once to settle the roots. Do not amend with rich compost or fertilizer; thyme wants lean ground.
FROM PLANT · Thyme does best in poor, dry soil, so do not add fertilizer or rich compost. Give it your sunniest spot, and if your soil is heavy clay, plant on a little mound or raised bed so water drains away.Plant thyme lean and dry, not rich. Skip the compost-and-fertilizer routine, set it in the sunniest, sharpest-draining spot, and on clay build a mound or raised bed. Rich, wet soil weakens flavor and rots the roots.
FROM PLANT · Leave about 8 to 12 inches between plants. That space lets air move around each one, which helps prevent the leaf fungus thyme can get when it stays damp.Space plants 8 to 12 inches apart for airflow. Good air movement between plants is one of the simplest ways to head off the foliar fungus thyme can get in damp or humid conditions.
02
Establishment (year one)
New growth spreading low and wide as the plant fills in. Slow growth the first year is normal.Steady new growth low and outward as the plant begins to form a low, spreading mound. Light growth the first year is normal.
Water fairly often until the plant takes hold, then water less. Only snip a little, and do not feed it.Water until the plant is settled, then taper toward infrequent watering. Harvest only lightly, and hold off on fertilizer.
FROM PLANT · The first year is about growing roots. Water fairly often until it takes hold, then water less. Only pick a little this year. Thyme fills out by about year two.Year one is about roots, not harvest. Water until the plant is settled, then taper toward infrequent. Harvest only lightly this season; thyme reaches full size by about the second year.
FROM PLANT · Try not to feed it. Thyme needs very little, and too much fertilizer gives soft leaves with less flavor. The same is true for water, where more is not better.Resist the urge to feed. Thyme has low fertility needs, and over-fertilizing produces soft growth with weaker flavor. The same goes for water: more is not better.
03
Spring leaf-out and harvest
Soft new growth low on the plant in spring. That tells you it survived winter and is growing.New soft growth emerging along the stems and crown, signaling the plant came through winter and is growing again.
In early spring, once you see new growth and frost is over, you can lightly trim it to keep it neat. Start snipping sprigs to cook with, and water deeply but not often.Do any light shaping cut in early spring once growth resumes and frost has passed. Begin harvesting sprigs as needed, and settle into infrequent watering as the soil warms.
FROM PLANT · Once it is established, snip thyme often. Regular cutting keeps it bushy and slows it turning woody, and you can pick leaves anytime to cook with.Harvest little and often once the plant is established. Snipping sprigs regularly keeps thyme bushy and productive and slows it going woody; you can take leaves anytime for cooking.
FROM PLANT · If you want to tidy the plant, do it in early spring once new growth shows and frost is over. Cut only into the leafy parts, not the hard woody stems.Do any shaping cut in early spring once growth resumes and frost has passed. Cut into leafy growth, not the bare woody stems, which resprout poorly.
04
Bloom
Tiny flower clusters on the stem tips. For the best flavor, cut sprigs as the first flowers are just starting to open.Small flower clusters coloring up on the stem tips. For the best flavor and dried quality, harvest as the first flowers begin to open.
Cut thyme for drying as it starts to flower. Keep watering light and do not fertilize, since too much water or feeding dulls the flavor.Cut sprigs for drying as the flowers begin to open. Keep watering light and do not feed; over-watering and rich soil weaken the flavor.
FROM PLANT · For the best flavor, cut thyme to dry just before or as it starts to flower, when the oils are strongest. Cut in the morning after the dew dries.For the strongest flavor, cut thyme for drying just before or as the first flowers open, when the leaf oils peak. Harvest in the morning once the dew has dried.
FROM PLANT · You can leave some flowers for the bees, which love thyme blooms. To dry thyme, hang small bunches somewhere warm and airy, then store the leaves in a sealed jar.Let some flowers open for the bees if you like; thyme blooms are a strong pollinator draw. To dry thyme, hang small bundles in a warm, airy place, then store the stripped leaves sealed.
05
Shear back
Faded, brownish flowers and a plant done blooming. Notice the woody stems below the green; do not cut into those.Spent, browning flower stems and a plant finished with its main bloom. Below the leafy growth you will see bare woody stems; those are your no-cut zone.
Trim off the old flowers and neaten the plant, cutting only into the leafy parts and not into the hard woody stems. Frequent snipping plus this trim keeps thyme bushy, but it still gets woody with age, so replace or divide it every few years.Shear off the spent flowers and lightly reduce the plant, cutting into leafy growth only, never into bare wood, which resprouts poorly. Regular harvesting plus this shear keeps thyme from going woody; even so, plan to divide or replace it every few years.
FROM PLANT · After it flowers, trim off the old flower stems and neaten the plant, cutting only into the leafy parts, never the hard wood. Snipping often plus this trim keeps thyme bushy, but it still gets woody, so replace or divide it every few years.Shear off the spent flower stems after bloom and lightly reduce the plant, cutting into leafy growth and never into bare wood. Frequent harvest plus this shear keeps thyme compact, but it still goes woody with age, so divide or replace it every few years.
FROM PLANT · Do the main trim after it flowers, not in late fall. A hard trim just before winter can leave the plant weak, so wait until after bloom or early spring for heavy trimming.Time the main shaping after flowering rather than in fall. A late-fall hard cut can leave the plant vulnerable going into winter, so save heavy shaping for after bloom or early spring.
06
Dormancy (cold zones)
A plant that has slowed for the season. The hardy English and creeping kinds keep their leaves; less hardy types fade in hard cold.A plant that has slowed or stopped growing for the season. Hardy English and creeping types stay semi-evergreen; less hardy types decline in hard cold.
Stop watering and feeding, and save any big trim for spring. Shelter the less hardy types or bring potted plants somewhere protected. In very cold areas, good drainage and a sheltered spot help thyme survive.Stop watering and feeding, and leave any hard shaping for spring. Protect less hardy types or move container plants under cover. In the coldest zones, good drainage and a sheltered spot help thyme overwinter.
FROM PLANT · In winter, do almost nothing. Stop watering and feeding, and save the trim for spring. Thyme sitting in wet winter soil rots, so do not keep watering it.Over winter, do almost nothing: stop watering and feeding, and leave hard shaping for spring. A plant in wet winter soil rots, so the worst thing you can do is keep it watered.
FROM PLANT · Shelter the less hardy plants. English and creeping thyme are the toughest and can stay outside in cold areas if drainage is good and the spot is sheltered; grow tender types in pots you can bring under cover.Protect the less hardy plants. English and creeping thymes are the hardiest and overwinter outdoors through the cold zones with sharp drainage and a sheltered spot; grow tender types or cold-edge plants in pots you can move under cover.
Beginner
Know your soil

Your soil

Identify yours

Not sure what soil you have? Grab a small handful of damp soil from your garden bed and squeeze it. If it crumbles apart easily, it's sandy. If it holds together but breaks when you poke it, it's loam (what most vegetables want). If it stays in a hard, slippery ball, it's clay.

What this crop wants

Thyme likes poor, dry, gritty soil and full sun. That sounds backward, but it comes from the dry Mediterranean, so rich, damp soil actually makes it weak and rot-prone and dulls the flavor. If your soil is heavy clay, plant thyme in a raised bed or mound so water drains away fast, and skip the compost.

If your soil doesn't match

You have sandy soil

Mix 2-3 inches of compost into the top 6 inches of your bed before planting. Compost holds moisture (which sandy soil drains too fast) and adds the nutrients sandy soil tends to lack. Repeat each season. Compost breaks down over time.

You have clay soil

Mix 2-3 inches of compost AND a few inches of coarse sand or perlite into the top 6 inches of your bed. The compost feeds the plants; the sand breaks up the clay so air and water can move through. Don't add sand without compost. It can compact like concrete.

Containers and raised beds

If amending your soil sounds like too much work, or if your soil is heavy clay, full of rocks, or contaminated, build over it. A raised bed at least 12 inches deep filled with a 50/50 mix of compost and sandy loam gives you ideal growing soil with no battles. A 5-gallon container with quality potting mix does the same for one plant at a time. Both bypass your native soil entirely.

Learn more about your soil
The specs

Care guide

The numbers that matter, at a glance.

Sunlight
Full sun · 6-8 hrs/day
Water
low
Spacing
8-12 inches
Soil pH
6 to 8
Container OK?
Yes · 1+ gal pot
Germination temp
70-70°F
Soil chemistry

Soil pH for thyme

Preferred
6 to 8
Tolerated
6 to 8

Thyme is happy in soil that is neutral to a little bit chalky, about pH 6.0 to 8.0, and copes with slightly acidic soil too. It does not fuss over pH, so the main thing is to make sure the soil drains fast.Thyme grows well in neutral to slightly alkaline soil, roughly pH 6.0 to 8.0, and tolerates mildly acidic ground down to about 5.5. It is not fussy about pH as long as drainage is sharp; wet feet, not soil chemistry, is what limits it.

Verified · 2 sources View
Steady hand on the hose

Watering

When & how much
Frequency
Water deeply but not often. Water a new plant until it settles in, then let the soil dry out before watering again. An established thyme needs very little water. Pots dry faster, so check them, but still let them dry between waterings.Deep and infrequent. Water new plants until they are established, then let the soil dry between waterings; mature thyme needs little water and is quite drought-tolerant. Container plants dry faster and need checking, but should still dry out between drinks.
Amount
A regular soak for a new plant, then much less once it is established.Enough to settle new plants while establishing; once mature, only occasional deep watering in prolonged dry spells. Keep plants on the dry side to avoid root rot.
Method
Pour water at the base of the plant, not over the leaves, and let it dry out before watering again. Wet leaves and a soggy base are what make thyme rot.Water at the base and let the soil dry between waterings. Avoid wetting the foliage and crown, which invites rot in humid conditions.
Signs of trouble
Too much water
If leaves yellow and shoots wilt or die back even though you are watering, the problem is almost always too much water, not too little. Soggy roots rot.Yellowing leaves, wilting or dieback of whole shoots, and a plant that fails despite watering signal too-wet roots and likely root or crown rot, not drought. Flavor also weakens in soft, over-watered growth.
Too little water
Thyme almost never gets too little water once established. A little droop on a very hot afternoon that bounces back by morning is fine.Established thyme rarely shows true drought stress; light wilting in extreme heat that recovers overnight is normal and not a reason to increase watering.
Feeding rhythm

Feeding

Frequency
rarely
Type
None to minimal
When to start
At planting only

Thyme barely needs feeding, and too much fertilizer actually works against it. A little compost mixed in when you plant is enough, and after that you can usually skip feeding entirely. Feed it heavily and you get lots of soft leaves with weaker flavor.Thyme has very low fertility needs and is easy to over-feed. A little compost worked in at planting is plenty; established plants generally need no fertilizer at all. Over-fertilizing pushes soft, leafy growth at the expense of the concentrated oils that give thyme its flavor and aroma.

Lean soil, minimal feed

N/A. There is no fertilizer number to hit here, since the aim is to feed thyme as little as possible.N/A. Thyme is not fed by N-P-K targets; the goal is lean soil and minimal-to-no supplemental feed, so no fertilizer analysis applies.

Who grows well together

Companion planting

Plant thyme next to other plants that also like full sun and dry soil, such as rosemary, sage, oregano, and lavender. Many gardeners also tuck it near cabbage and its relatives, believing the scent helps keep pests away. Keep thyme away from plants that need a lot of water, because that wet soil will rot it. Thyme pairs naturally with other sun-loving, low-water Mediterranean herbs that share its lean, sharply drained conditions, such as rosemary, sage, oregano, and lavender; group these together so one dry, waterwise bed suits them all. Thyme is also a traditional companion in the vegetable garden, where growers have long planted it near cabbage-family crops in the belief its aroma helps deter cabbage pests. Keep it away from thirsty, rich-soil plants whose watering would rot it.

Other
Rosemary
Likes the same sunny, dry spot as thyme.Rosemary is a natural thyme partner because it asks for the same things: full sun, lean soil, and not much water. Grow them together and you can run one dry, waterwise bed rather than a watering compromise, which is exactly what keeps thyme from rotting at the roots. Both are woody Mediterranean herbs, so they age and look at home side by side. Traditional
Sage
Another sun-and-dry-soil herb that grows happily beside thyme.Sage wants the same dry, sunny, well-drained conditions as thyme, so the two share a bed with no fuss. Keeping them together means you water the whole group sparingly, which is what thyme needs to stay healthy. Both are tough Mediterranean herbs that shrug off heat and drought once established. Traditional
Oregano
Shares thyme's love of sun and dry soil.Oregano is a low, spreading Mediterranean herb that likes the same lean, dry, sunny spot as thyme, so the two make an easy, drought-tolerant pairing. Group them and you can keep the watering light for both, which is the key to not rotting thyme. They also look good together as a low, fragrant herb patch. Traditional
Lavender
Loves the same dry, sunny conditions and brings in pollinators.Lavender and thyme are classic dry-garden partners: both come from the Mediterranean and want full sun, sharp drainage, and very little water, so one lean bed suits them both. Both also draw bees and other pollinators when they flower. Plant them together in free-draining ground and resist the urge to pamper either. Traditional
Cabbage and other brassicas
A traditional pairing; many gardeners plant thyme near cabbage to help keep pests off.Setting fragrant thyme near the cabbage family is an old companion-planting habit, the idea being that its strong scent helps confuse or deter cabbage moths and worms. Treat this as grower tradition rather than proven fact. One honest caveat: cabbages want richer, moister soil than thyme's lean and dry ideal, so plant thyme at the dry edge of the bed rather than in the heart of it. Traditional
Keep apart from
Basil and other thirsty herbs Basil and similar moisture-loving herbs want steady water and richer soil, the opposite of thyme's lean, dry, sharply drained ideal. Grown together, the watering that keeps basil happy keeps thyme's roots too wet and invites rot, so give them separate conditions. Well-grounded
Provenance tagged inline · see methodology for the labeling system Key
Harvest signals

When to pick

You can snip thyme anytime once it is established: cut the top few inches of leafy stems, taking no more than about a third at once. The flavor is strongest just before and as it flowers, so that is the best time to cut thyme to dry. Cut in the morning after the dew dries. Snipping it often also keeps it from getting woody.Harvest thyme sprigs anytime once the plant is established: snip the top few inches of leafy growth, taking no more than about a third of the plant at once. Flavor is most concentrated just before and as the plant flowers, so cut for drying then, on a dry morning after the dew has lifted. Regular harvesting also keeps the plant from going woody.

Verified · 3 sources View
Yield

What to expect

A grown thyme plant gives you plenty of sprigs all season, enough to cook with fresh and to dry, especially once it is a couple of years old.A mature plant yields a steady supply of sprigs through the growing season, easily enough to keep a kitchen stocked with fresh thyme plus bundles to dry; productivity is best once the plant reaches full size at about the second year.

Do not expect much the first year. Picking lightly while the plant settles in gives you bigger harvests from year two.Expect only light harvests the first year; harvesting sparingly while the plant establishes pays off in fuller production from the second season on.

What changes yield
Plant age and size (full production at about the second year)Full sun and lean, sharply drained soilFrequent harvesting to keep growth soft and non-woodyType (upright culinary types yield more usable foliage than flat creeping ones)
Verified · 2 sources View
Pick your variety

Recommended varieties

There are a few kinds of thyme. English (common) thyme is the all-purpose cooking thyme, and French thyme is a milder version of it. German Winter thyme is a hardy, upright type. Lemon thyme tastes citrusy and is great with fish. Silver thyme is a pretty variegated type. Creeping thyme is a flat, spreading groundcover you plant between stepping stones; it is grown more for looks than for cooking. For cooking, pick English or French thyme.Thyme comes in several practical groups. Common or English thyme (Thymus vulgaris) is the standard broad-leaved culinary thyme, with French thyme a narrow-leaved, milder selection of the same species and German Winter a hardy, upright culinary selection. Lemon thyme (Thymus x citriodorus) adds a citrus note. Silver thyme is a variegated form grown as much for ornament. Creeping thyme (Thymus serpyllum, mother-of-thyme) is a flat, hardy groundcover used between pavers and as a lawn substitute, and is ornamental more than culinary. For the kitchen, start with English or French thyme; for a hardy groundcover, choose creeping thyme.

English (common) thyme
culinary + ornamental
French thyme
culinary
German Winter thyme
culinary
Lemon thyme
culinary (citrus)
Silver thyme
ornamental + culinary
Creeping thyme (mother-of-thyme)
ornamental groundcover
Off the vine

Storing your harvest

Room temp
Fresh sprigs last a few days standing in a little water on the counter. To keep thyme longer, dry it by hanging small bunches upside down somewhere warm and airy, then store the dried leaves in a sealed jar.Fresh cut sprigs hold for a few days in a glass of water on the counter. For long-term keeping, dry thyme: tie small bundles and hang them upside down in a warm, dry, airy place, then strip the leaves into a sealed jar out of the light.
Fridge
Keep fresh thyme in the fridge, loosely wrapped in a slightly damp paper towel inside a bag, for one to two weeks.Refrigerate fresh sprigs loosely wrapped in a slightly damp paper towel in a bag, where they keep for one to two weeks.
Freezer
You can freeze thyme: put whole sprigs in a bag, or freeze the leaves in water or oil in an ice-cube tray to drop into cooking later.Freeze whole sprigs in a bag, or strip the leaves and freeze them in water or oil in ice-cube trays for cooking; frozen thyme keeps its flavor well for months.
Verified · 2 sources View
When something goes wrong

Common problems

Leaves turning yellow or the plant dying backYellowing leaves or dieback
01 of 03
What happened For thyme, yellow leaves and dieback usually mean too much water, not too little. Overwatering and soggy soil are the biggest killer. The plant is drowning, not thirsty.With thyme, yellowing and dieback almost always mean too wet, not too dry. Overwatering and poor drainage are the number one killer, leading to root and crown rot. The plant is drowning, not thirsty. Next season Water much less and improve drainage. Use poor, well-draining soil in full sun, keep it on the dry side, and on heavy or humid ground plant on a mound. Never let it sit in soggy ground.Cut back on watering hard and fix drainage. Plant in lean, sharply drained soil in full sun, keep it on the dry side, and on clay or in humid areas use a mound or raised bed. Never let thyme sit in wet ground.
Woody and bare in the middleLeggy, woody, split-open center
02 of 03
What happened When thyme gets woody and bare in the middle, it is mostly just getting old. All thyme goes woody eventually; snipping often and trimming after bloom slows it down, but plants are best replaced or divided every few years.A thyme plant that has gone woody and bare or split open in the center is simply aging. Thyme goes woody with time even with good care; frequent harvest and a post-bloom shear slow it, but plants are best divided or replaced every few years. Next season Snip thyme often and trim it after it flowers, cutting only into the leafy parts. Every few years, split a healthy older plant or start a new one from a cutting so you always have a fresh, bushy plant.Harvest regularly and shear after bloom to keep growth soft, cutting into leafy growth only, never into bare wood. Divide a healthy older clump or start a fresh plant from a cutting every few years to keep a vigorous supply.
Not much flavor or soft, floppy growthWeak flavor or soft, floppy growth
03 of 03
What happened Thyme with little flavor and soft, floppy leaves usually has too much fertilizer or water, or too little sun. Thyme tastes strongest when it is grown lean, dry, and sunny.Bland thyme with soft, lush growth usually means too much feed, too much water, or too little sun. The concentrated oils that give thyme its flavor build up in lean, dry, sunny conditions and thin out in rich, wet, shady ones. Next season Stop feeding it, water less, and make sure it gets full sun. Poor, dry, sunny conditions give the best flavor, and picking just before it flowers captures the strongest taste.Stop fertilizing, water less, and give the plant full sun. Lean, dry, sunny conditions concentrate the oils and give the strongest flavor; harvesting just before bloom captures the peak.
The usual suspects

Pests & diseases

Pests
Spider mites
P · 01
Symptoms Tiny yellow speckles on the leaves and faint webbing on the stems, usually in hot, dry weather. Thyme rarely has pest trouble, so this is normally minor.Fine stippling or yellowing on the tiny leaves and faint webbing on the stems, most likely in hot, dry weather or on stressed or crowded plants. Thyme is generally pest-resistant, so this is usually a minor, weather-driven problem. Cause Very small sap-sucking mites that show up in hot, dry spells. Thyme has very few pest problems and rarely needs spraying.Tiny sap-feeding mites that flare in hot, dry conditions. Thyme has few pests overall and is typically grown with little or no pesticide. Organic treatment Spray them off with water, and use insecticidal soap if there are a lot. Cutting the plant back also removes most of them.Rinse plants with a strong spray of water, and use insecticidal soap if numbers climb. A hard harvest or shear removes much of the infested growth at once. Prevention Keep thyme in full sun with room around it, and do not let potted plants bake bone-dry in a heat wave. Healthy plants rarely get mites.Give plants full sun and good spacing for airflow and avoid drought-stressing container plants in heat. Vigorous, unstressed thyme rarely attracts mites.
Aphids
P · 02
Symptoms Now and then, small soft bugs on new growth, usually only on plants that are stressed or crowded. Rarely a big deal on thyme.Occasional clusters of small soft-bodied insects on tender new growth, most likely on stressed or overcrowded plants. Rarely a serious problem on thyme. Cause Small sap-sucking insects that sometimes appear. Thyme has very few pest problems and rarely needs spraying.Sap-feeding insects that occasionally find thyme. As with mites, thyme is fairly pest-resistant and seldom needs treatment. Organic treatment Spray them off with water, or use insecticidal soap if there are a lot. More air and less stress usually fixes it.Rinse them off with water or use insecticidal soap if numbers build. Improving airflow and removing stress usually resolves it. Prevention Keep thyme in full sun with room around it, dry lean soil, and not too much water. Healthy plants rarely get aphids.Full sun, lean soil, good spacing, and no overwatering keep thyme vigorous enough to shrug off aphids.
Diseases
Root and crown rot
D · 01
Symptoms Leaves yellow and the plant wilts and dies back even though the soil is wet, often with a dark, rotted spot at the base. This is the main thing that kills thyme, and it comes from staying too wet.Yellowing, wilting, and dieback that does not recover with watering, often with a darkened, decayed base at the soil line. It is the main way thyme is lost and is tied to wet, poorly drained soil rather than to cold. Cause A rot that takes hold when soil stays soggy and drains badly, attacking the roots and base. The real cause is wet soil, not cold weather.Soilborne rots that thrive in saturated, poorly drained soil and attack the roots and crown. Waterlogged ground, not cold, is the underlying cause; thyme is intolerant of wet feet. Organic treatment Once the base is rotting there is no fix, so pull out and throw away affected plants. The answer is preventing it with good drainage, not curing it.There is no cure once the crown is rotting; remove and discard affected plants. Focus everything on prevention through drainage rather than rescue. Prevention Plant in fast-draining soil in full sun, keep it on the dry side, and never let thyme sit in soggy ground. On heavy clay or in humid areas, plant on a mound or raised bed and give plants room.Plant in sharply drained, lean soil in full sun, keep plants on the dry side, and never let thyme sit in wet ground. On clay or in humid regions, use a mound or raised bed and space plants for airflow.
Foliar fungal problems in humid weather
D · 02
Symptoms A powdery white film, spots, or grayish mold on the leaves in warm, humid weather, more likely on crowded plants. A minor problem next to root rot.Powdery-white coating, spotting, or grayish moldy patches on the foliage, favored by warm, humid, still air and on crowded or overhead-watered plants. A minor issue next to root and crown rot. Cause Leaf fungi like powdery mildew that like damp, still, humid air and crowded plants. Thyme is fairly disease-resistant, so this is mostly a humid-weather problem.Foliar fungi such as powdery mildew that are favored by humidity, crowding, and poor air movement. Thyme is fairly disease-resistant, so these are mainly a humid-climate and overcrowding issue. Organic treatment Pick off affected leaves, give the plant more air, and water at the soil instead of over the top. Cutting it back also helps.Remove affected foliage, open up airflow, and water at the base rather than overhead. A hard harvest or post-bloom shear clears and renews the canopy. Prevention Give plants room for airflow, plant in full sun, and avoid watering over the leaves. In humid areas, the upright leafy types handle it better than the low fuzzy ones.Space plants for air circulation, site in full sun, avoid overhead watering, and favor the taller, smooth-leaved culinary types over low woolly ones where humidity is high. Good airflow is the main defense.
Seasoned
Where to plant next year

Crop rotation

N/A. Thyme is not rotated like a vegetable because it is a permanent plant that stays put for years. If you replace an old one, pick a fresh, well-draining spot.N/A. Thyme is a perennial that stays in place for several years, so annual crop rotation does not apply. When replanting an old thyme patch, choose a fresh, well-drained site to avoid carrying over soilborne root rot.

In the app · pre-launch

When plant taps you on the shoulder

The plant app sends a timely reminder at every critical moment of your thyme season. The wording adjusts to whichever you pick: beginner or seasoned. Here are three you'll see in Zone 13.

p
plant
0 days after last frost
Time to plant your thyme
It is time to plant your thyme. Put it in a sunny, well-draining spot now that frost has passed, leaving 8 to 12 inches between plants, and do not add fertilizer.
p
plant
0 days after last frost
Time to trim your thyme
Your thyme flowers are fading, so trim off the old flower stems and neaten the plant, cutting only into the leafy growth and staying above the hard woody stems. This keeps it bushy.
p
plant
0 days after last frost
Get your thyme ready for winter
Winter is coming. Stop watering and feeding, save any big trim for spring, and shelter the less hardy types or bring potted plants somewhere protected. Soggy soil, not the cold, is what usually kills thyme.
Get personalized alerts.

plant sends the right notification at exactly the right moment, for your zone, your weather, your crops. Founding members lock the rate forever.

Back the Kickstarter →
Ask the gardener

Common questions

Got a question we missed?

We're building this guide with real growers. Got a question we missed? Ask here. We read every one and add the best answers right to this page.

Grown this before?

Share a tip

Learned something the hard way? Pass it on. Real growers' tips make this guide better for the next person, and we credit you by name when yours goes live.

Seasoned
Spot something wrong?

Report a problem

If you've grown this crop and you see a date, a temperature, a companion claim, or a recommendation that doesn't match your experience, tell us. Real growers' corrections make this guide better for the next person.

How we built this guide

Methodology & sources

Every date, temperature, spacing, and recommendation on this page is sourced from university cooperative extension publications, peer-reviewed agricultural research, NOAA climate data, and direct extension calendars. Where claims are softer (traditional gardening wisdom not formally documented), we say so.

Research-backed Documented in cooperative extension publications or peer-reviewed research
Well-grounded A known agronomic principle, but not formally tested for this specific pair
Traditional Time-tested gardening wisdom, limited formal research support
Last reviewed
July 2, 2026
Data version
crops_data_final · v1.0 · schema 2.9
Sources cited on this page
16 publications
Verified entries
Companion-planting claims tagged inline · zone dates verified against 5+ extensions
See all sources cited on this page
  • University of Minnesota Extension umn_ext
  • University of Maryland Extension umd_ext
  • Cornell Cooperative Extension cornell_ext
  • Iowa State University Extension iastate_ext
  • Michigan State University Extension msu_ext
  • NC State Extension ncsu_ext
  • Penn State Extension psu_ext
  • U. of Illinois Urbana-Champaign Extension uiuc_ext
  • UC Davis Postharvest Center ucd_postharvest
  • Texas A&M AgriLife Extension tamu_agrilife
  • Virginia Cooperative Extension 426-331 vce_426_331
  • Piedmont Master Gardeners piedmont_mg
  • UGA Vegetable Garden Calendar uga_calendar
  • Clemson Home & Garden Information Center clemson_hgic
  • UC IPM Statewide IPM Program uc_ipm
  • NOAA 1991-2020 Climate Normals noaa_normals

Growing notes, weekly.

Zone-aware seasonal nudges, what's worth planting now, and the occasional recipe from the harvest. No spam, ever.

Vol. 003 · Thyme · plant.lifestyle