Pick your zone and the dates re-calibrate.
The Guide Crops Vol. 003

Beefsteak Tomato

in Zone 4, this week
Indeterminate

Beefsteak tomatoes are the big slicing tomatoes you see at farmers markets, the kind that fill an entire slice of bread. They take longer to ripen than cherry or roma types (most varieties need 75 to 100 days from transplant), so they need the full growing season. These are indeterminate plants, meaning they keep growing and setting new fruit until frost kills them, so they need a strong cage or stake from the start; plan for a plant that reaches 5 to 6 feet tall. They're more demanding than cherry tomatoes, but if you get the watering and support right, the payoff is big, meaty slices all summer. Good first choices include Celebrity (disease-resistant, widely adapted) and Early Girl (shorter maturity, better for short-season zones). Indeterminate, large-fruited tomatoes grown for slicing. The beefsteak label covers three biologically close sub-types: true beefsteak-shape varieties (Big Boy, Mortgage Lifter), oblate globe slicers commonly marketed as beefsteak (Celebrity), and large heirloom slicers (Brandywine), with uniform cultivation requirements across all. Indeterminate growth means the plant continues extending and setting fruit until frost kills it; this also means it requires strong caging or staking from the start. Large fruit mass places sustained calcium and water demand on the plant, which is the main reason blossom-end rot and cracking are more common in beefsteaks than in cherry or paste types. Requires a long frost-free window: most varieties need 75-100 days from transplant to first ripe fruit, making them marginal in short-season zones (3-4) without season-extension measures. In zones 9-11, the challenge reverses: summer heat above 90°F causes blossom drop, and fall planting is the standard workaround.
Growing Now · Harvest starts Aug 1
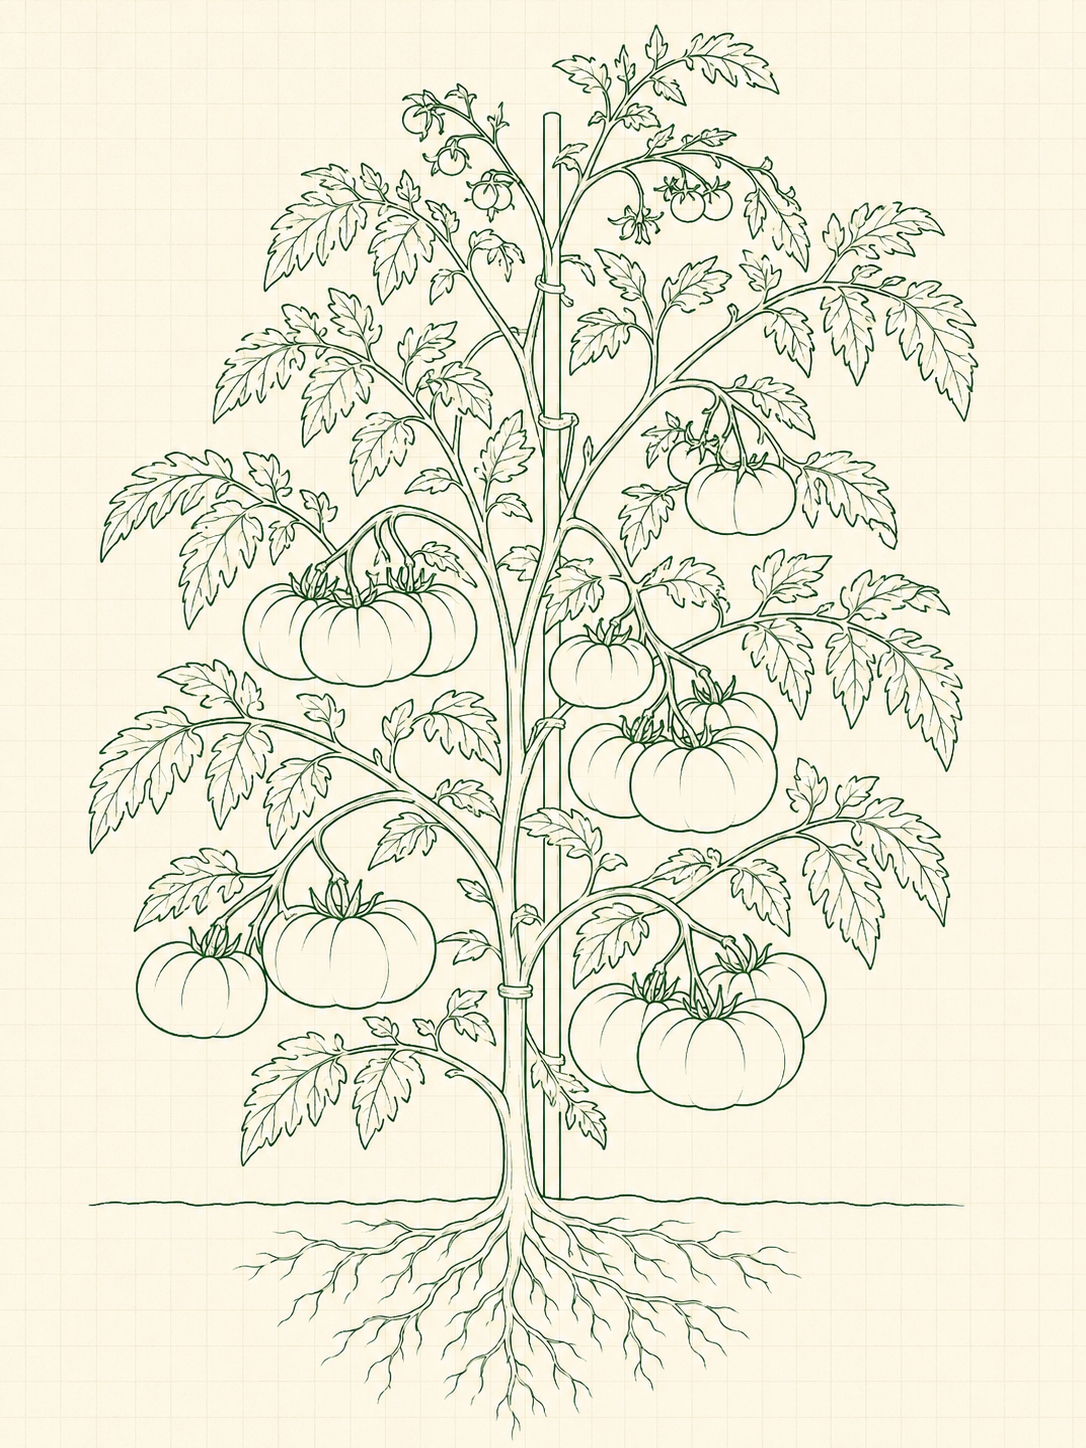
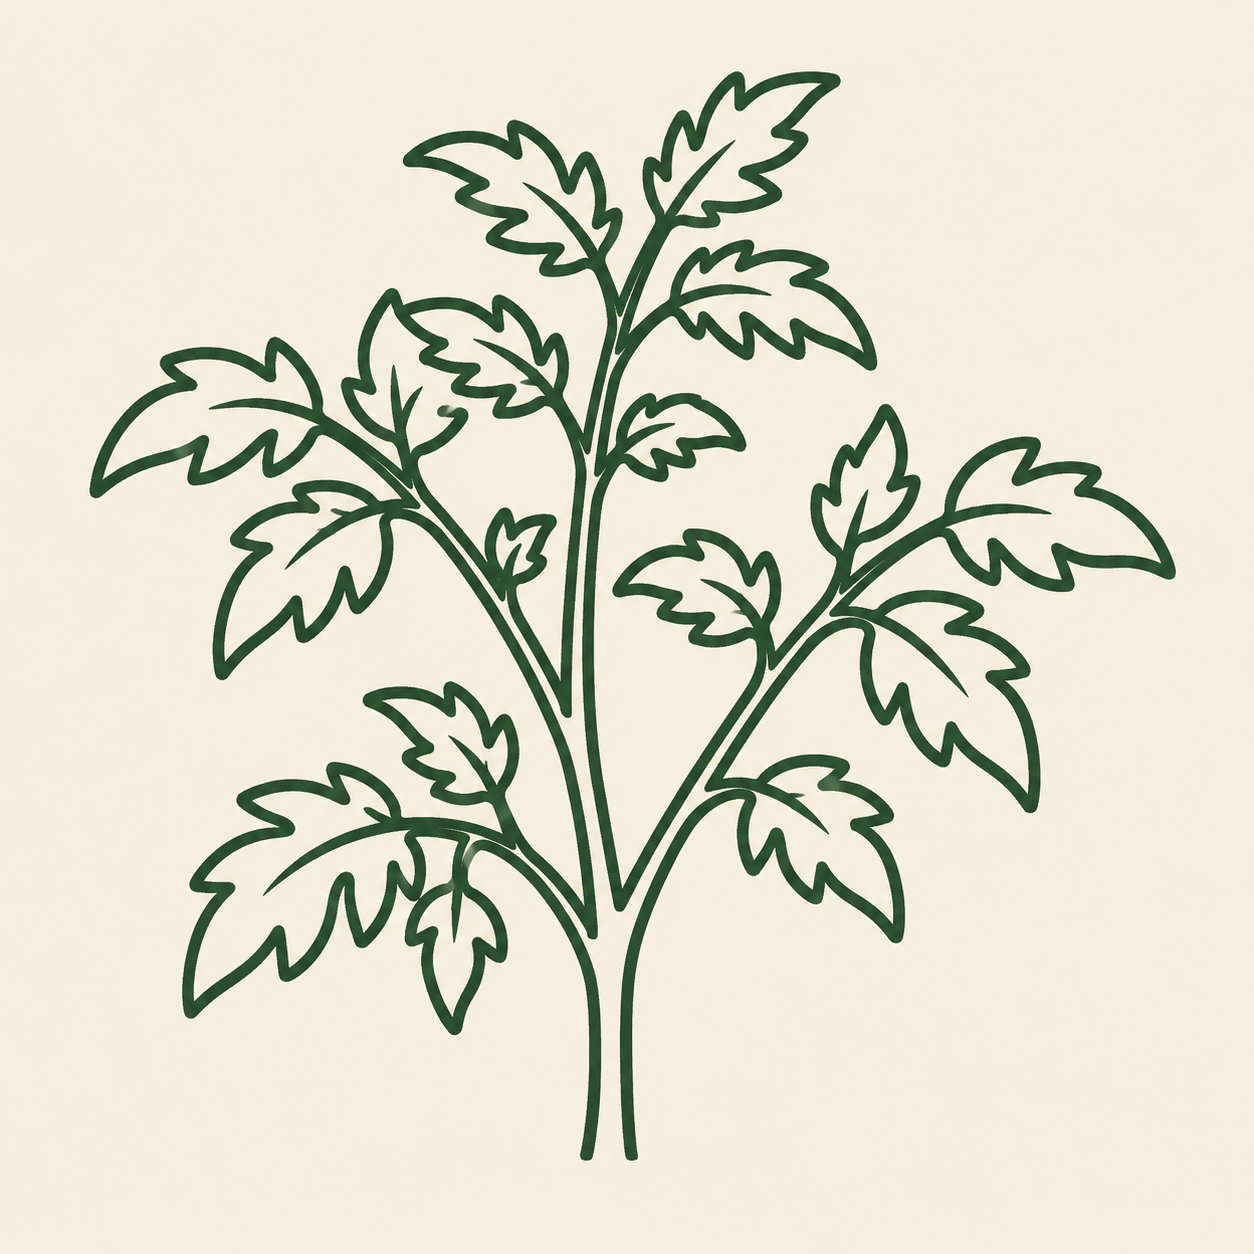
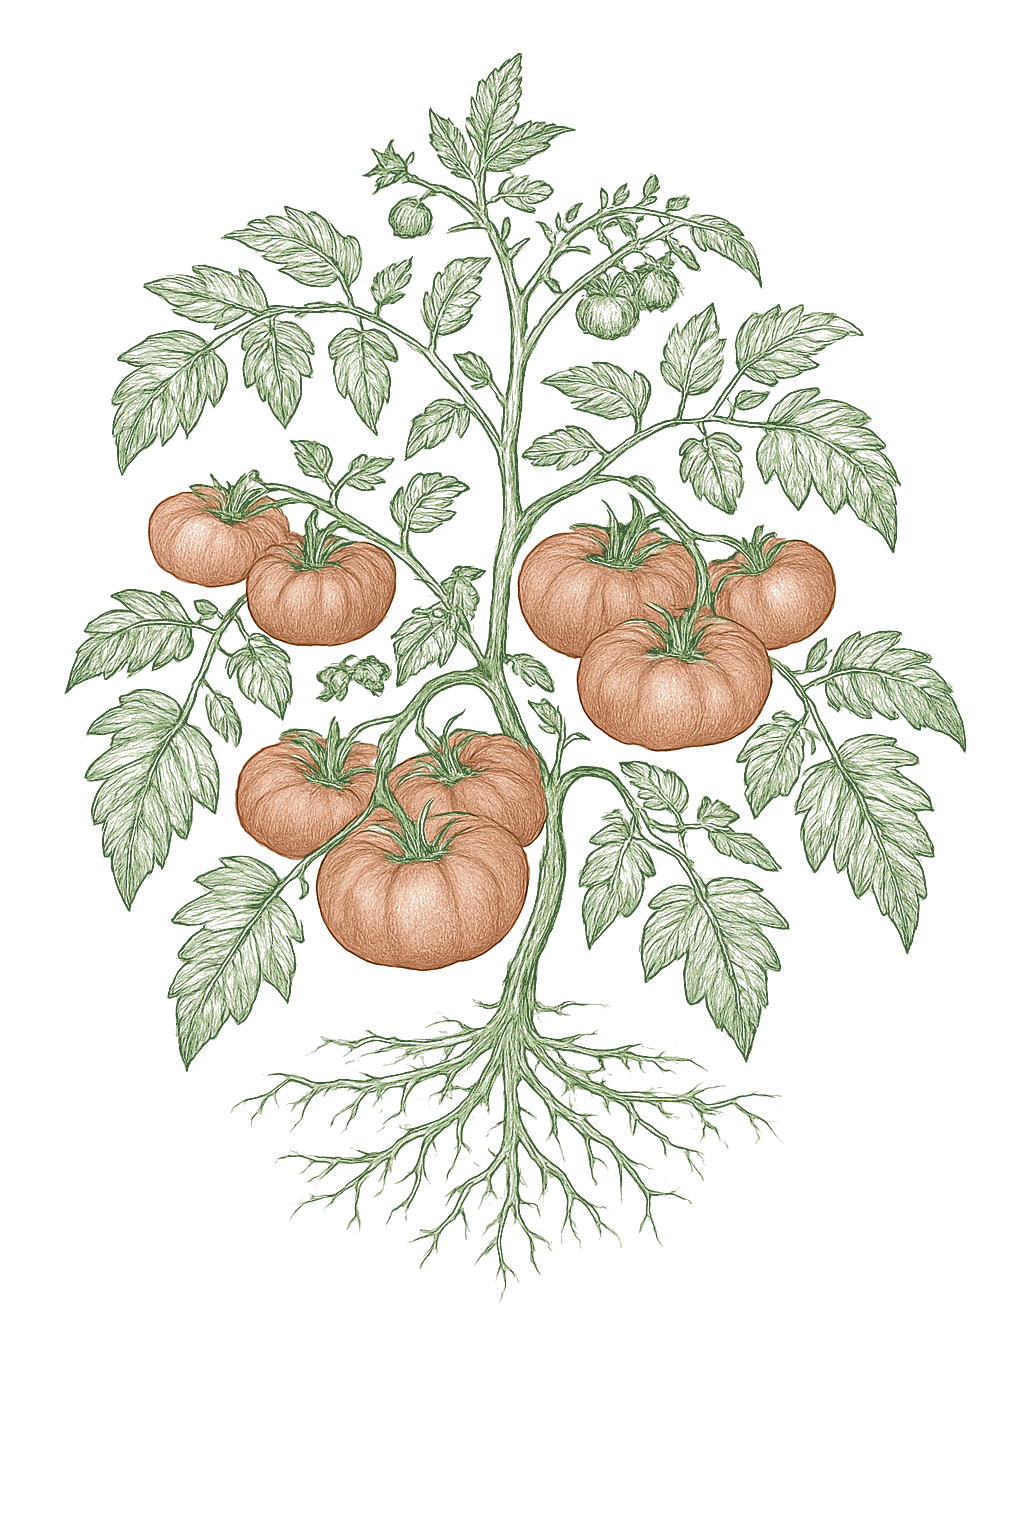
Beefsteak Tomato mature plant
Fig. 01 · Beefsteak Tomato, mature Zone 4
Mature in
75-90d
from transplant
Sunlight
Full sun
8-10 hrs daily
Water
Regular
1-2 inches / week
Spacing
36-48"
between plants
Soil pH
6-6.8
slightly acidic
Today · in your zone

What's happening right now

July 24 · Zone 4 · Stage 04 · Flowering

Plants are growing. Harvest opens Aug 1.

The season at a glance

Planting calendar

In Zone 4, beefsteak tomato can be planted May. Start indoors Mar 13 - Mar 20. Harvest runs August through September.

Jan
Feb
Mar
Apr
May
Jun
Jul
Aug
Sep
Oct
Nov
Dec
plant
too cold
too cold
indoors
too late
plant
too late
too late
too late
too late
too cold
too cold
too cold
harvest
harvest
harvest
indoors
plant out
harvest
Above-ground cropBest planted on a above ground moon
The season, mapped

Seed to garden

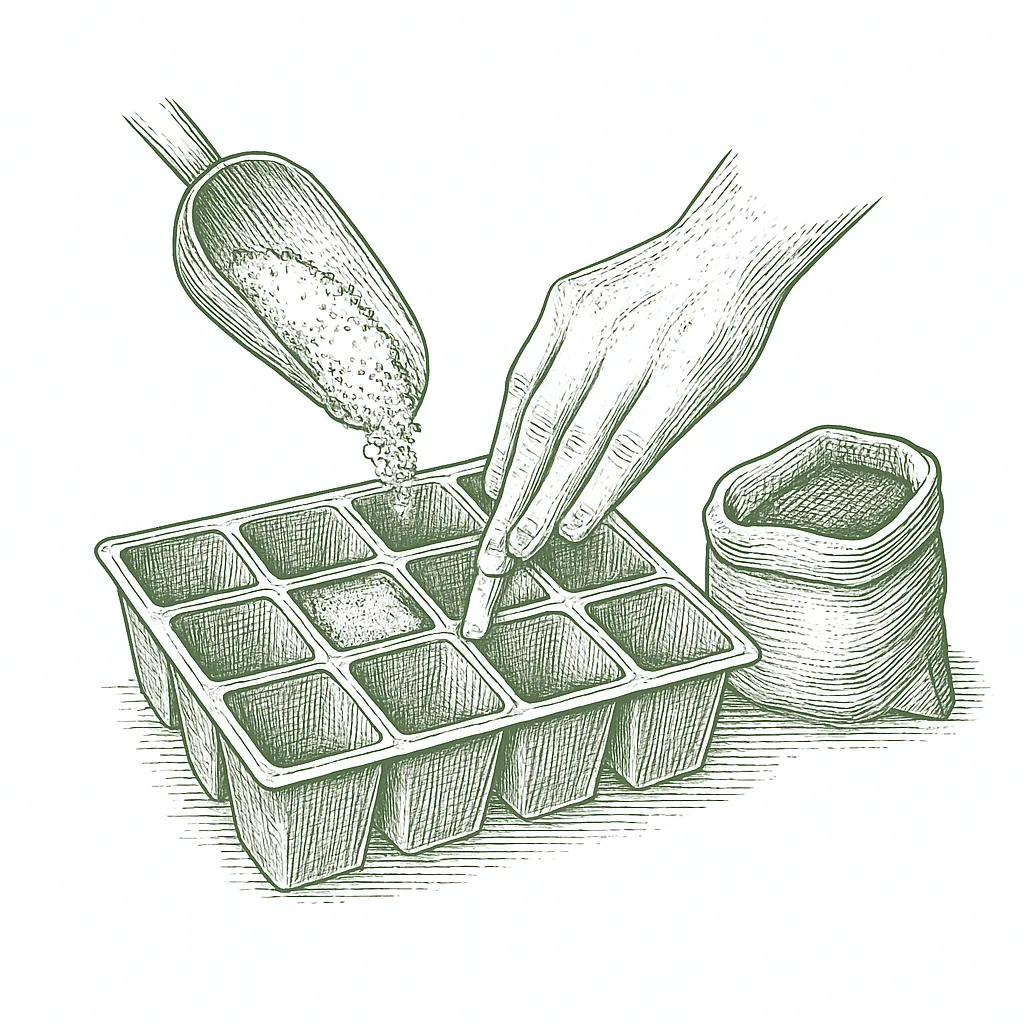
Start seeds 8 weeks before your last frost date; beefsteak tomatoes need a long season, so starting on time is important. Plant two seeds per cell about a quarter inch deep in seed-starting mix, somewhere warm (a heat mat helps a lot). At transplant time, bury the stem deeper than it sat in the pot: right up to the lowest set of leaves. New roots will form along the buried stem and give the plant a stronger, more drought-tolerant foundation.Start 8 weeks before last frost; beefsteaks need a long season. Harden off carefully. Bury stem deep at transplant.
  1. 01
    Sow indoors →
    Mar 13 - Mar 20
    Start about 8 weeks before your last frost
  2. 02
    Transplant out →
    May 8 - May 22
    After hardening off
  3. 03
    First harvest
    From Aug 1
    75-90 days from transplant
Start method
Indoors
Soil temp
70-85°F
Hardening off
7-10 days
Hardening off means gradually introducing your seedlings to outdoor conditions before transplanting. Start about a week before your planned transplant date: put the plants outside for a couple of hours in a sheltered, partly shaded spot, then bring them back in. Add more time and more direct sun each day. This helps the plant build up its waxy leaf coating and adjust to outdoor wind and temperature swings. Plants that skip this step often struggle for two to three weeks after transplanting.
From seed to fruit

The growing journey

Stage 04 · Flowering
01
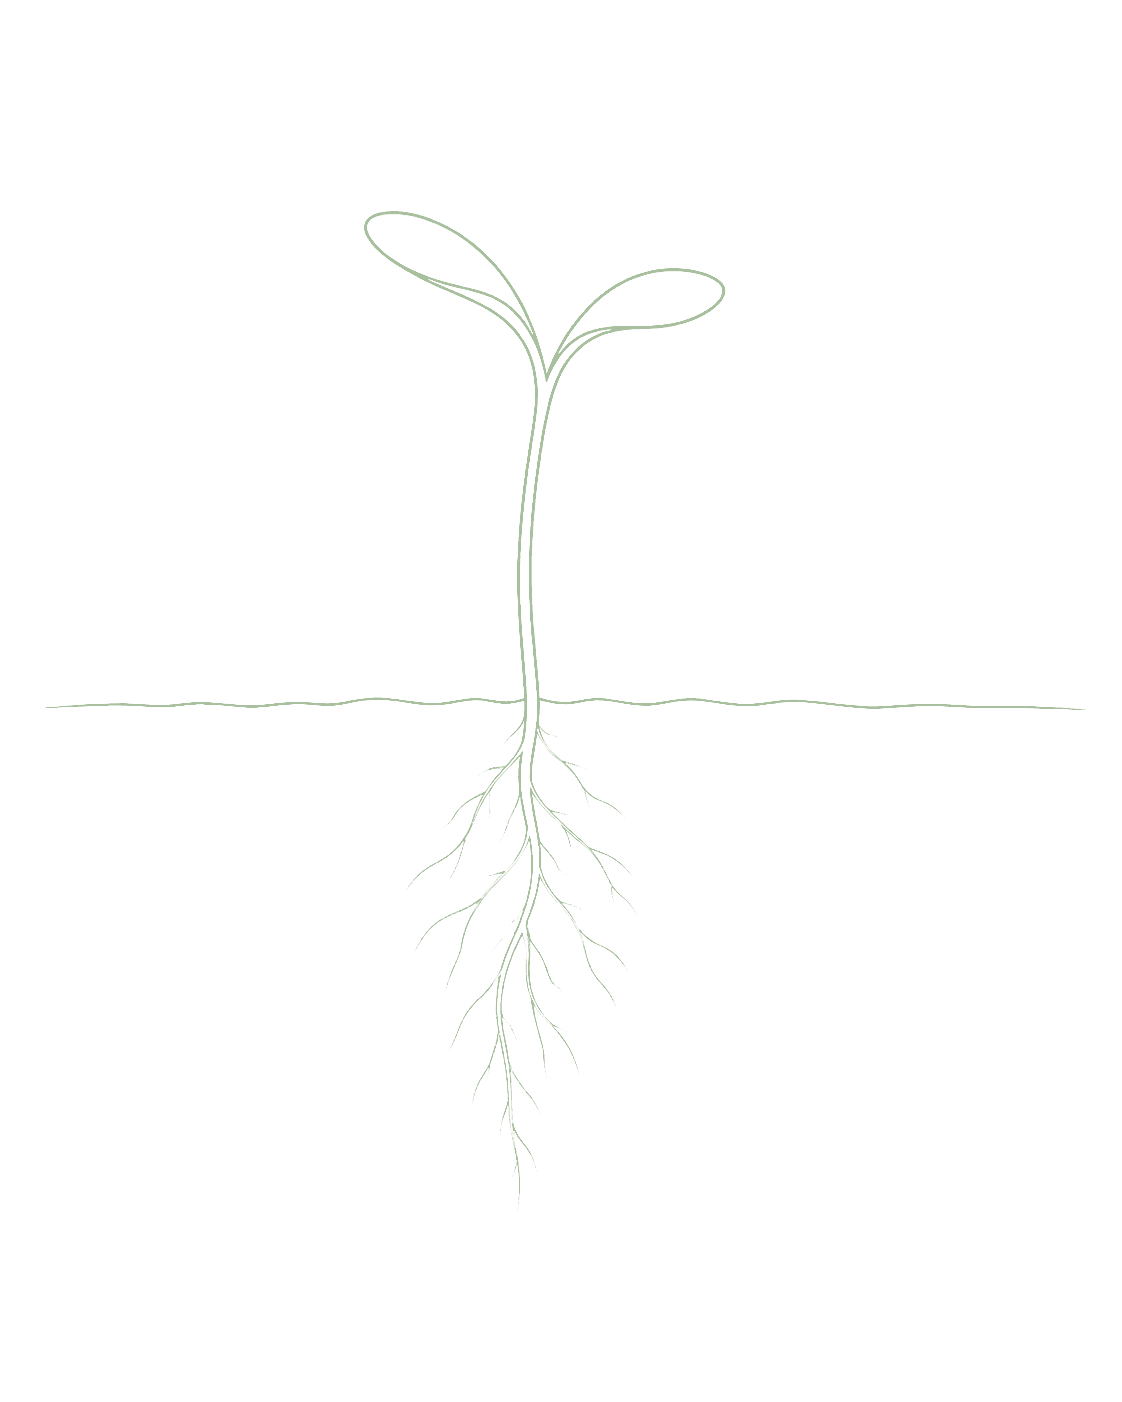
Germination
Days 5-10
A tiny white root emerging from the seed, then a pale curved shoot pushing upward through the soil. The shoot will straighten and the first two small leaves will unfold at the top.Tiny white root emerging from the seed, then a pale shoot pushing upward through the soil.
Tomato seeds need warm soil to sprout: around 75 to 85°F is ideal. A heat mat under the seed tray is the easiest way to get there; without one, try the top of your refrigerator or any consistently warm spot. Cover the tray with a clear plastic lid or cling wrap until the first sprout appears, then take it off right away.Keep soil temperature in the 70-85°F range. A heat mat makes a real difference for staying in the optimal zone. Cover with a humidity dome until sprouts appear.
FROM PLANT · Bottom heat is the single biggest factor in germination speed. If you have a heat mat, use it; if not, the top of a refrigerator or any spot that stays consistently around 75°F works well. Most beefsteak tomato seeds sprout within 5 to 7 days with steady warmth.Bottom heat is the single biggest factor in germination speed. A heat mat, the top of your refrigerator, or anywhere consistently warm works well. Most tomato seeds germinate in 5-7 days at 75°F.
FROM PLANT · Cover your seed tray with a plastic dome or cling wrap until the first sprout appears, then remove it right away. The dome traps humidity to keep the seed surface moist during germination; but once the shoot emerges, that same warm, still air is the ideal environment for damping off, a fungal problem that collapses the seedling stem at the soil line and kills it overnight with no recovery.Cover your tray with a humidity dome or cling film until the first sprout appears. Remove it immediately when you see growth; leaving it on causes damping off.
02
Seedling
Days 7-28
Two small flat leaves open first; those are the seed leaves. Then the first true leaves emerge between them; they'll have the distinctive jagged edges and tomato-leaf smell.Two seed leaves open flat, then the first true leaves emerging between them; they will look distinctly tomato-shaped.
Take off the plastic cover the moment you see the first green sprouts; leaving it on after emergence creates the warm, still, humid conditions that cause damping off, a fungal problem that collapses seedling stems at the soil line and kills them fast. Move the tray as close to your brightest light as possible. If seedlings grow tall and floppy instead of short and stocky, they need more light, not more water; that stretched-out look (called etiolation) means the seedling is reaching toward brighter light.Remove the humidity dome the moment sprouts appear; trapped moisture after emergence drives damping off (Pythium/Rhizoctonia fungal complex attacking the hypocotyl). Get seedlings as close to your brightest light source as possible. Leggy, etiolated growth is caused by light deficiency, not overwatering; the seedling is elongating its internode lengths to search for brighter light.
FROM PLANT · If your seedlings are tall and thin and look weak, they need more light, not less water. Move the tray right next to your brightest window, or set up a grow light to shine on them for 14 to 16 hours each day. Pale color is a sign of the same problem.Leggy, stretched seedlings almost always mean not enough light, not overwatering. Get them as close to a bright window as possible, or use a grow light 14-16 hours a day.
FROM PLANT · Once you have two sets of true leaves, pot up into individual cells or small 3-inch pots. You can bury the stem deeper than it was sitting; tomatoes form roots all along any buried stem tissue, so a deeper pot-up now means a stronger root system later.Once you have two sets of true leaves, pot up into individual cells or small 3-inch pots. Tomatoes root all along their stems, so you can bury them deeper than they were; it builds a stronger plant.
03
Established
Days 28-56
A strong, thick stem, 3 to 4 sets of true leaves, and a deep green color. The plant looks sturdy and compact rather than tall and floppy.Strong stem, 3-4 sets of true leaves, deep green color. Ready to pot up or transplant.
Start hardening off about a week before you plan to transplant: put the plant outside for a couple of hours in a sheltered spot, then bring it back in. Add more time and more direct sun each day. This gradual process thickens the plant's waxy leaf coating and helps it adjust to outdoor wind and temperature swings; plants that skip it tend to struggle for weeks after transplanting. When you plant, bury the stem deeper than it sits in the pot, right up to the lowest set of leaves; new roots will form all along the buried stem.Begin hardening off 7-10 days before transplant date: short outdoor exposures starting in a sheltered spot, progressively longer and less sheltered. Hardening triggers thicker cuticular wax deposition and stomatal adaptation to outdoor vapor pressure deficit; plants that skip this step show photoinhibition and sulk for 2-3 weeks post-transplant. Plant deep: bury the stem right up to the lowest leaves. Adventitious roots form all along buried stem tissue, building a substantially larger root system than transplanting at pot depth alone would produce.
FROM PLANT · Harden off properly: a week of outdoor time before transplanting, starting with just a couple of hours in a sheltered spot. Plants that skip this step often struggle for two to three weeks after transplanting, which eats into the long season beefsteak tomatoes need.Harden off properly: a week of outdoor time before transplanting, starting with just a couple of hours in a sheltered spot. Plants that skip this step sulk for weeks after transplanting.
FROM PLANT · Plant your tomatoes deeper than they sit in the pot: bury the stem right up to the lowest set of leaves. Every bit of buried stem becomes roots, and a larger root system means a more drought-tolerant, productive plant.Plant your tomatoes deeper than they sit in the pot. Bury the stem right up to the lowest set of leaves. Every bit of buried stem becomes roots.
04
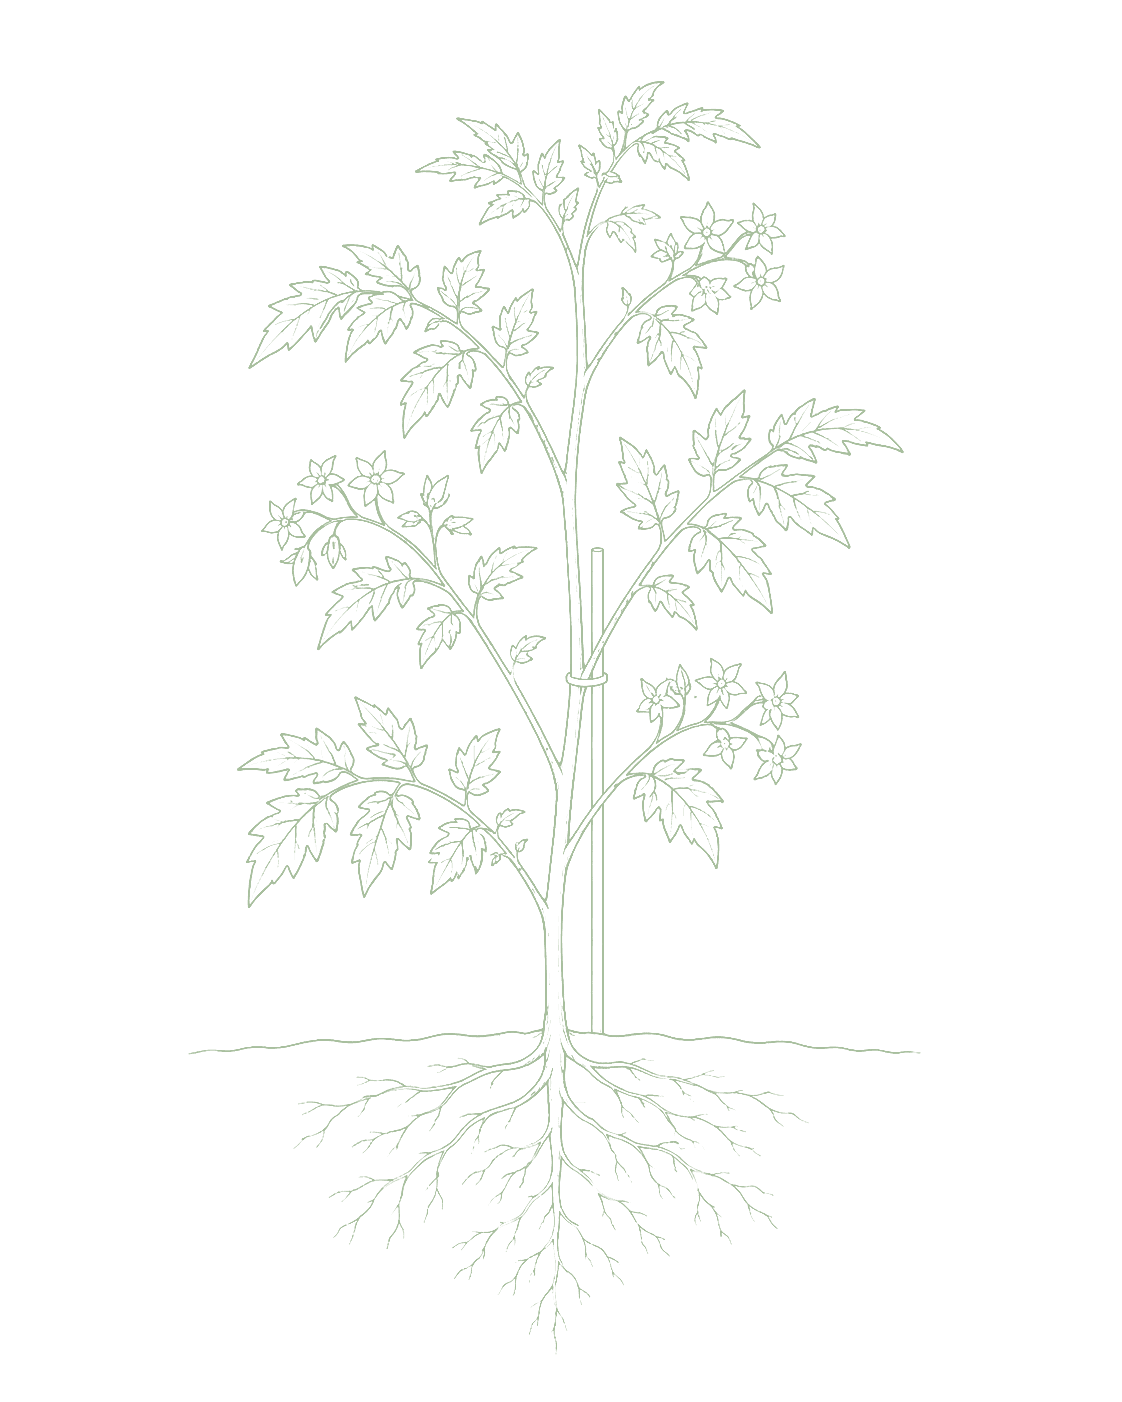
Flowering
Days 45-75 · current stage
Small yellow flowers appearing in clusters. Each flower is a potential tomato.Small yellow flowers in clusters. Each flower is a potential fruit.
Switch from a general fertilizer to one higher in potassium once flowers appear: look for 'tomato fertilizer' or a formula like 5-10-10. Too much nitrogen at this stage (the first number on the fertilizer bag) pushes the plant into producing more leaves instead of fruit. Give the flowering stems a gentle shake each morning to help pollen release and improve fruit set; beefsteak flowers are self-pollinating, but a little movement makes a real difference, especially in calm weather.Switch from a balanced feed to a high-potassium fertilizer when flowers appear. Nitrogen drives vegetative (leaf) growth via chlorophyll and cell division pathways; excess nitrogen at flower set pushes resources back into the canopy rather than into fruit development. Potassium supports sugar loading, cell turgor, and the hydraulic pressure that drives fruit fill. Gently tap or shake the flowering stems in the morning to assist pollination; beefsteak flowers are self-fertile but buzz pollination (vibration dislodging pollen from anthers) substantially improves fruit set, especially in still air.
FROM PLANT · Give the flowering stems a gentle shake each morning to help pollen transfer and improve fruit set. It sounds fussy, but it genuinely makes a difference, especially in a sheltered spot without much natural breeze. Each flower is a potential tomato.A gentle shake of the flowering stem in the morning helps pollen transfer and improves fruit set. It sounds fussy but it genuinely makes a difference, especially in a sheltered spot without much breeze.
FROM PLANT · Stop high-nitrogen fertilizing the moment flowers appear. Nitrogen drives leafy growth; what you want now is potassium. Switch to a tomato-specific feed or any formula with a higher third number; that third number on the fertilizer bag is the potassium.Stop high-nitrogen feeding the moment flowers appear. Nitrogen pushes leafy growth. What you want now is potassium: switch to a tomato-specific or high-K feed.
05
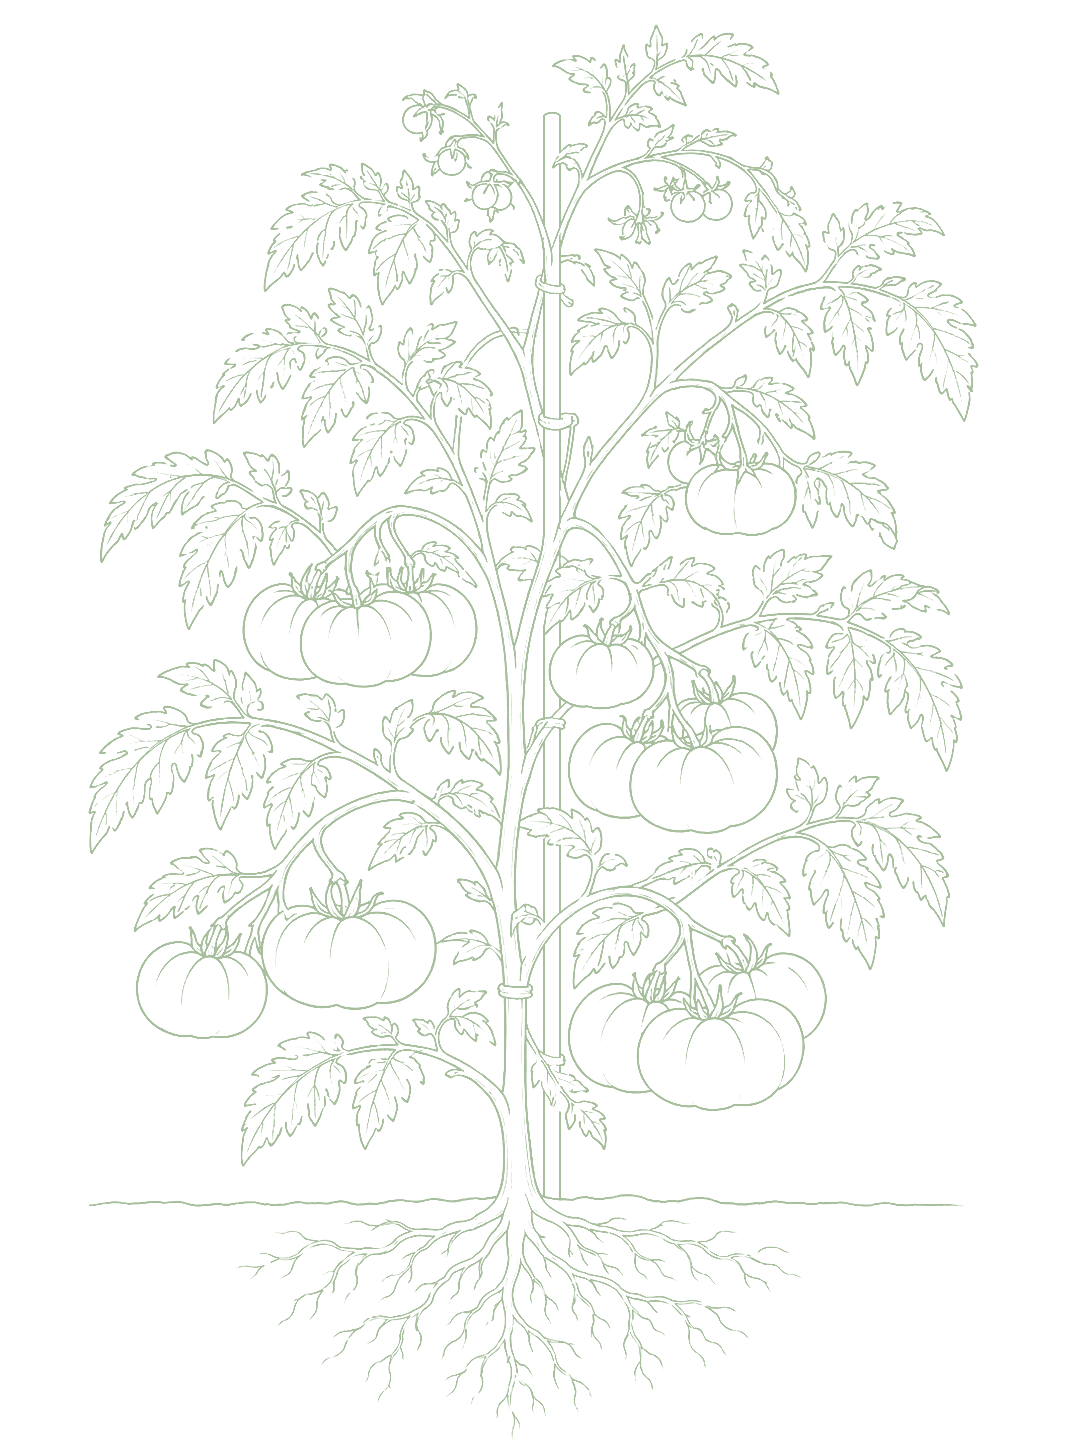
Harvest
Days 55-80
Fully colored fruit that gives slightly to a gentle squeeze. The skin may start to lose its shine when perfectly ripe.Fully colored fruit that gives slightly to a gentle squeeze. The skin may start to lose its sheen when perfectly ripe.
Pick every ripe tomato at each visit to the plant. Harvesting regularly signals the plant to keep producing; leaving ripe fruit on the vine slows that process down. Beefsteak tomatoes keep producing until frost on a healthy plant, so staying on top of harvesting is the single biggest thing you can do to keep production going.Pick every ripe tomato at each visit; the plant is an indeterminate sink that routes photosynthate toward existing fruit. Ripe fruit remaining on the vine is an energy sink that competes with new fruit development and reduces total yield. Harvest also removes the ethylene-producing ripe fruit that can accelerate ripening of nearby fruit faster than you want.
FROM PLANT · Pick every ripe tomato every time you visit the plant. The more you harvest, the more the plant produces. Leaving ripe fruit on the vine is the most common reason production slows mid-season; the plant has less reason to keep setting new fruit.Pick every ripe tomato you can find, every time you check the plant. The more you harvest, the more the plant produces. Leaving ripe fruit on the vine is the most common reason production slows mid-season.
FROM PLANT · Taste as you go. Beefsteak tomatoes peak at slightly different moments depending on the variety and the weather; some are best when just fully colored, others benefit from another day or two. Your palate is the best harvest indicator you have.Taste as you go. Different varieties peak at different moments; some are best just before fully ripe, others need a few more days. Your palate is the best harvest indicator you have.
06
End of Season
Days 120-180
The plant slows down: fewer new flowers, yellowing on the lower leaves, and nights cooling consistently below 50°F.Slowing production, yellowing lower leaves, nights cooling below 50°F.
When nights are reliably below 50°F, pinch out all the growing tips at the top of each stem. This stops the plant from putting energy into new growth and directs what's left into ripening the fruit already on the vine. Beefsteak tomatoes won't fully color below 50°F, so bring any threatened green tomatoes inside and let them ripen at room temperature, never in the refrigerator, which ruins the flavor.When nights drop regularly below 50°F, pinch out all growing tips (apical meristems). Removing the apical meristem ends auxin-driven vegetative extension and concentrates the remaining photosynthate into ripening existing fruit. Beefsteak fruit needs temperatures above 50°F to complete lycopene synthesis; fruit that stays on the vine below this threshold will not fully color. Bring threatened green tomatoes inside to ripen at room temperature; chilling injury below 50°F is irreversible.
FROM PLANT · When nights drop below 50°F regularly, pinch out all the growing tips at the top of each stem. This stops the plant from putting energy into new growth and channels everything into ripening the fruit already on the vine.When nights drop below 50°F regularly, pinch out all the growing tips. The plant will stop trying to set new fruit and put everything into ripening what is already there.
FROM PLANT · Green tomatoes left on the plant when frost threatens can be brought inside to ripen. Lay them in a single layer somewhere cool and dark, not the refrigerator, which damages the texture and kills the flavor.Green tomatoes left on the plant when frost threatens can be brought inside to ripen. Lay them in a single layer somewhere cool and dark, not the refrigerator, which kills flavor.
Beginner
Know your soil

Your soil

Identify yours

Not sure what soil you have? Grab a small handful of damp soil from your garden bed and squeeze it. If it crumbles apart easily, it's sandy. If it holds together but breaks when you poke it, it's loam (what most vegetables want). If it stays in a hard, slippery ball, it's clay.

What this crop wants

Beefsteaks do best in loose, well-draining soil with plenty of organic matter: think compost-rich garden beds rather than hard clay. Good drainage matters a lot: if water pools after rain and takes more than an hour to soak in, the bed needs improvement before planting. Working in 2 to 3 inches of compost before planting is the single most useful thing you can do for first-season beefsteaks. Avoid heavy clay soil if possible; if that's what you have, raised beds filled with a mix of topsoil and compost will work much better.

If your soil doesn't match

You have sandy soil

Mix 2-3 inches of compost into the top 6 inches of your bed before planting. Compost holds moisture (which sandy soil drains too fast) and adds the nutrients sandy soil tends to lack. Repeat each season. Compost breaks down over time.

You have clay soil

Mix 2-3 inches of compost AND a few inches of coarse sand or perlite into the top 6 inches of your bed. The compost feeds the plants; the sand breaks up the clay so air and water can move through. Don't add sand without compost. It can compact like concrete.

Containers and raised beds

If amending your soil sounds like too much work, or if your soil is heavy clay, full of rocks, or contaminated, build over it. A raised bed at least 12 inches deep filled with a 50/50 mix of compost and sandy loam gives you ideal growing soil with no battles. A 5-gallon container with quality potting mix does the same for one plant at a time. Both bypass your native soil entirely.

Learn more about your soil
The specs

Care guide

The numbers that matter, at a glance.

Sunlight
Full sun · 8-10 hrs/day
Water
Regular
Spacing
36-48 inches
Soil
loam, sandy loam
Days to maturity
75-90 days from transplant
Soil pH
6 to 6.8
Container OK?
Yes · 15+ gal pot
Germination temp
70-85°F
Soil chemistry

Soil pH for beefsteak tomato

Preferred
6 to 6.8
Tolerated
5.5 to 7

Beefsteaks want slightly acidic soil: a pH between 6.0 and 6.8. Outside that range, nutrients the plant needs get locked up in the soil even if they're there. Blossom-end rot (the dark sunken spot on the bottom of the fruit) is often triggered by pH problems limiting how much calcium the plant can absorb. If you've never tested your soil, an inexpensive test kit from a garden center is worth doing before your first season. Many extension offices also offer low-cost testing.Tomatoes are particularly sensitive to pH because it governs the solubility of phosphorus, calcium, and magnesium, three nutrients they consume in large quantities. At pH below 5.5, manganese and aluminum become increasingly available at phytotoxic levels; blossom-end rot risk rises as calcium uptake is impaired. Above 7.0, iron and manganese deficiencies drive interveinal chlorosis on younger leaves. In the alkaline soils common across the interior West and alkaline-irrigation regions, growers routinely need to acidify before planting. Eastern soils often run naturally in the preferred range; Pacific Northwest soils vary widely by parent material.

Verified · 5 sources View
Steady hand on the hose

Watering

When & how much
Frequency
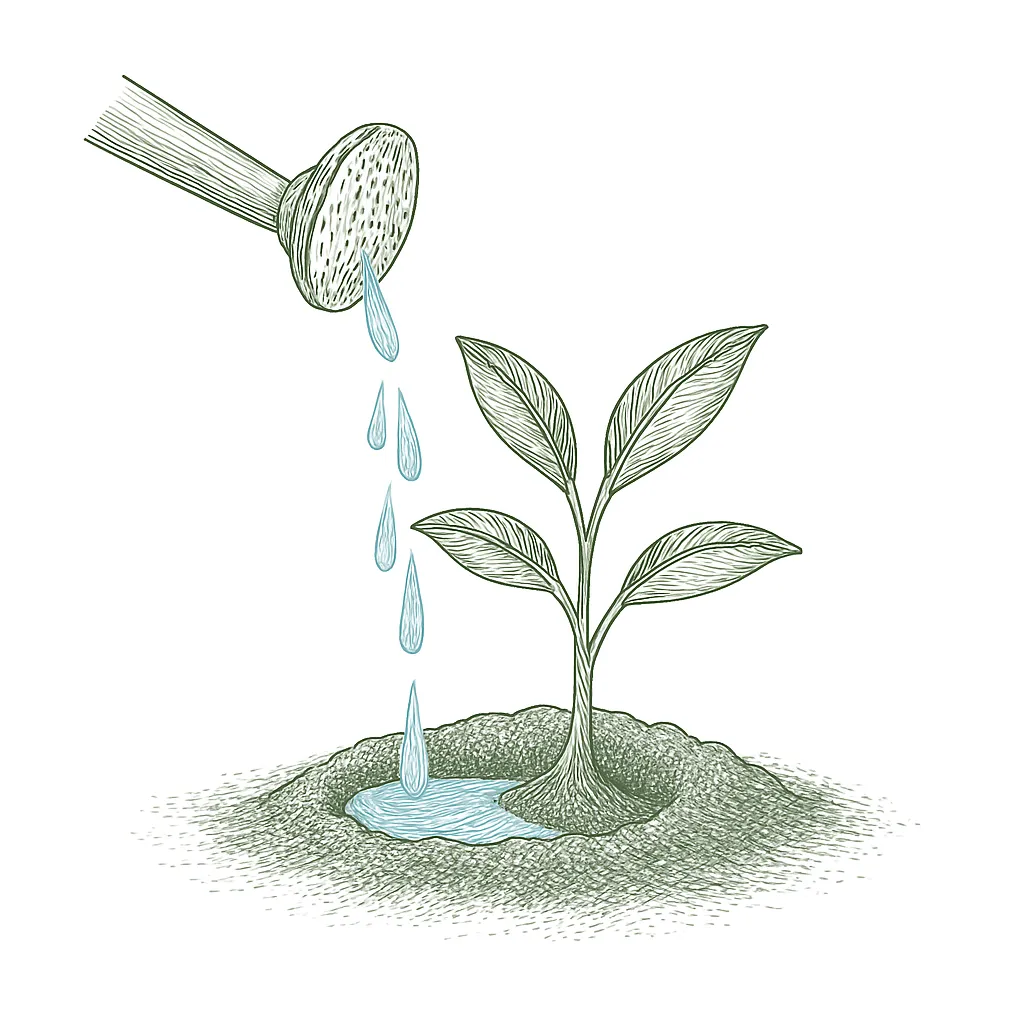
In the hottest part of summer, water about every 2 to 3 days; when it is cooler, once a week or less is plenty. Rather than following a strict schedule, check the soil a few inches down and water when it is starting to dry out.Every 2-3 days in peak summer heat; weekly or less when temperatures are moderate. The correct interval is driven by soil moisture at 2-3 inch depth, not a fixed schedule, as evapotranspiration rates in a beefsteak at full canopy can pull 1+ inch per week in hot weather.
Amount
Aim for about 1 to 2 inches of water a week, and water deeply so it soaks well down. Beefsteak roots go quite deep, and deep watering pulls them down where they handle heat and dry spells better; quick shallow sprinkles keep roots near the surface where they dry out fast.1-2 inches per week, delivered to depth. Beefsteak roots extend 18-24 inches in good soil; shallow frequent watering keeps roots near the surface where they are more vulnerable to heat and drought stress. Deep, infrequent watering drives root development downward.
Method
Water at the base of the plant, not over the top, using a drip line, soaker hose, or just the hose at the soil. Wet leaves invite leaf-spot diseases, so keeping the foliage dry helps. Watering in the morning is best, so any leaves that do get splashed dry off before night.At soil level: drip, soaker hose, or hand-water at the base. Overhead irrigation wets foliage and creates the leaf-surface moisture that Septoria leaf spot and early blight require for spore germination. Morning is preferred over evening: any foliage wetted accidentally dries before nightfall, narrowing the infection window.
Signs of trouble
Too much water
Yellow leaves on the lower part of the plant, especially if the soil stays wet for days at a time. Cracked fruit is another sign: the plant drinks unevenly when soil stays wet, then surges when it dries out, which splits the skin. If the soil feels wet to your finger 2 inches down and the plant still looks unhappy, too much water is the likely cause, not too little.Yellow lower leaves (nitrogen displaced from anaerobic root zone), cracked fruit (surge uptake after dry spell), and persistently soggy soil. In waterlogged soil, roots shift from aerobic respiration to fermentation, which impairs calcium and potassium uptake and accelerates the blossom-end rot cycle even when soil calcium is adequate.
Too little water
Leaves wilting in the morning and not recovering overnight; afternoon wilt on a hot day is normal and not a reliable indicator, but wilt that's still there at sunrise means the plant is stressed. Flowers dropping off before making fruit is the other big warning sign; water stress at flower time cuts your harvest. Dry, cracked soil that pulls away from the container or bed edge confirms the problem.Wilting in morning that does not fully recover overnight, blossom drop, dry cracked soil. Flower abscission is triggered by water stress at the abscission zone at the base of each pedicel; once flowers drop, that fruit set opportunity is gone for the season. Prolonged drought stress followed by heavy watering also causes fruit cracking and blossom-end rot via the same calcium-uptake disruption as overwatering.
Feeding rhythm

Feeding

Frequency
every 2 weeks
Type
Tomato fertilizer
When to start
start when first flowers appear

Beefsteak tomatoes are heavy feeders and need regular fertilizing throughout the season. Start with a balanced fertilizer at transplant time, then switch to a fertilizer higher in potassium once flowers appear: look for 'tomato fertilizer' or a formula where the third number on the bag (potassium) is the largest. Feed every two weeks through the fruiting period.Heavy feeder. Start with balanced feed at transplant, switch to high-potassium once flowering begins.

N · P · K = 5-10-10

Look for a high-potassium formula, often labeled 'tomato food' or showing a higher third number on the bag (like 5-10-10). That third number is the potassium, which supports fruit development.high K, e.g. 5-10-10

Try Miracle-Gro Tomato Plant Food
Who grows well together

Companion planting

The most reliable companion for beefsteak tomatoes is marigolds: plant them around the edges of the bed, not between the tomatoes, since beefsteak plants get large and will shade out anything too close. Nasturtiums at the bed perimeter draw aphids away from your tomatoes (aphids prefer the nasturtiums). Keep beefsteaks away from fennel, which stunts many neighboring plants, and away from potatoes and eggplant, which share the same diseases and pests. Basil is a popular choice to plant nearby and does well in the same sun and water conditions. Beefsteak tomato companions follow the same species-level lore as other tomatoes, with two beefsteak-specific nuances. First, beefsteak's large plant footprint (24-36 inch spacing, 6-foot cages) shades out many traditional companion candidates; prioritize companions that tolerate partial shade or position them at the drip-line edge rather than between plants. Second, the marigold/nematode connection is the best-documented pairing in this crop's companion set, effective as a dense pre-season cover crop, not as scattered concurrent interplanting. For most growers the practical guidance is: avoid fennel, avoid planting near potatoes or eggplant if disease pressure has been a problem, and consider nasturtiums as an aphid trap crop at the bed perimeter where they won't be shaded.

Pest deterrent
Basil
Basil is a classic tomato partner. Gardeners have grown the two together for generations, and basil's strong scent may put off some pest insects. It is not a proven effect for this exact pair, but it is harmless and worth trying.Long-established pairing; flavor-improvement claims are traditional. Basil's aromatic compounds may deter some pest insects, though not extension-documented for this specific pair, but widely practiced and low risk. Traditional
concurrent
Marigolds
French marigolds help fight root-knot nematodes (tiny soil worms that attack roots). They work best when grown as a thick patch a couple of months before you plant tomatoes, rather than just tucked in alongside them at the same time.French marigolds suppress root-knot nematodes, most effectively as a dense cover crop planted 2+ months before tomatoes, not as concurrent interplanting. Extension-documented mechanism. Research-backed
concurrent
Structural
Carrots
Carrots' deep taproot partitions the root zone differently from beefsteak's fibrous roots, theoretically reducing below-ground competition. This is a plausible root-zone partitioning inference, not an extension-tested pairing. Note: give carrots adequate distance from beefsteak's cage footprint (24-36 inch spacing), or they will be shaded out. Well-grounded
concurrent
Trap crop
Nasturtiums
Nasturtiums function as a trap crop for aphids, since aphids preferentially colonize nasturtiums, drawing them away from tomatoes. UC IPM documents trap-crop use of nasturtiums in vegetable gardens. Particularly useful for beefsteak plants, which are large and difficult to spray thoroughly once fully grown. Research-backed
concurrent
Pollinator
Borage
Borage flowers attract pollinators over an extended bloom period, coinciding with beefsteak's long indeterminate fruiting season. Beefsteak's larger flowers benefit from robust pollinator activity during the extended set window. Hornworm repellence is a traditional claim without T1 backing. Traditional
concurrent
Keep apart from
Fennel Fennel gives off natural chemicals that stunt the growth of many plants around it, so it is a poor neighbor for most vegetables, including tomatoes. It is best kept in its own spot away from the garden beds.Fennel is broadly allelopathic and suppresses growth of many neighboring plants. Extension literature documents fennel as a poor companion for most vegetables; the specific tomato interaction is traditional but consistent with fennel's known allelopathic properties. Traditional
Brassicas Cabbage-family plants (like broccoli, kale, and cabbage) and tomatoes are both hungry feeders, so planting them close together makes them fight over nutrients in the soil. It will not poison either one, but both end up less productive.Both brassicas and tomatoes are heavy feeders; close interplanting creates real competition for nitrogen, phosphorus, and potassium. Not a toxic pairing, but productivity of both crops is reduced under competition. Well-grounded
Corn Corn and tomatoes are attacked by the very same caterpillar (the tomato fruitworm, also called the corn earworm). Planting them side by side gives that pest two favorite foods in one place and makes the problem worse for both crops.Both crops host the tomato fruit worm / corn earworm (Helicoverpa zea, same species). Planting together creates a concentrated host reservoir that amplifies pest pressure on both crops. Research-backed
Potatoes Both are Solanaceae and share primary diseases (late blight, Phytophthora infestans; early blight, Alternaria solani) and several pests. Planting together creates a continuous host bridge that sustains inoculum across the season and into following years. Crop rotation separating Solanaceae is the standard extension recommendation for disease management. Research-backed
Eggplant Same family (Solanaceae), shares Colorado potato beetle pressure and early blight. Interplanting concentrates beetle and disease pressure; separating Solanaceae crops, even within a season, reduces crossover pest load. Research-backed
Provenance tagged inline · see methodology for the labeling system Key
Harvest signals

When to pick

Pick when the fruit is fully colored all the way up to the shoulders; a tomato that's red-sided but still greenish at the top isn't done yet. Give it a gentle squeeze; it should have a little give without feeling mushy. The skin will look slightly less shiny than when it was still ripening. Large beefsteak fruit (bigger than a baseball) takes a few extra days compared to smaller types; give it time. If you're not sure, check again the next day; slightly under-ripe picked tomatoes will continue to ripen on the counter.Pick when the fruit has reached full variety color all the way to the shoulders, yields to gentle pressure without feeling mushy, and the skin has transitioned from a hard glossy sheen to a softer, slightly matte surface. Skin sheen loss signals the completion of cell-wall softening as lycopene (or variety-appropriate anthocyanins for dark varieties) accumulates and pectin in the outer cell layers begins breaking down. The abscission zone at the stem attachment weakens as the fruit ripens; slight twist resistance is still present at peak eating quality; zero resistance means overripe. Shoulders turning color last: a fruit that is red-sided but green-shouldered is underripe. For large beefsteak fruit (12-16 oz), allow a few extra days compared to cherry or slicer types; mass slows the ripening front.

Verified · 5 sources View
Yield

What to expect

Expect roughly 10 to 20 pounds of tomatoes per plant over the season. You get fewer tomatoes than cherry or roma types, but each one is big (about 8 to 16 ounces, and some heirlooms top 2 pounds). In short-season cold areas the total is smaller simply because the season is shorter, while in warmer zones a well-tended plant can top 20 pounds.10-20 lbs over the season; fewer fruit than cherry or roma types, but each fruit is large (8-16 oz for most varieties; heirloom types may reach 2+ lbs). Yield is heavily variety- and zone-dependent: in short-season zones (3-5), total yield is constrained by season length, not productivity. In zones 7-9, a well-managed indeterminate plant at peak often exceeds 20 lbs.

At its peak, a healthy plant gives you 1 to 3 big tomatoes a week. Plants start slow while they grow their vines, hit a busy stretch of about 4 to 8 weeks in midsummer, then taper off as fall cools down. Fruit sets best when nights stay between about 55 and 75°F; colder or hotter nights than that and the flowers often fail to set fruit.A healthy indeterminate beefsteak at peak produces 1-3 large fruits per week per plant. Production follows a seasonal arc: slow start as the plant builds its vine structure, then a peak window of 4-8 weeks in mid-season, tapering as autumn cool-down slows ripening. The arc is distinct from cherry, which produces more continuously and maintains higher counts. Beefsteak fruit set is most reliable when nighttime temperatures stay between 55-75°F; below 55°F, pollen viability drops; above 75°F, pollen becomes sterile. Your first beefsteak season will probably feel slow. The plant spends the first half of summer building its root system and vine structure before it really starts setting fruit. Getting 3 to 5 large tomatoes in your first season is a real success; don't measure yourself against experienced gardeners who know every trick. Focus on two things: get a strong cage or stake in place early (before you think you need it), and keep the watering consistent when the plant starts flowering.First-season beefsteaks frequently disappoint on yield, not because of mistakes, but because the plant architecture is building for the first half of the season. Getting 3-5 large fruit in a first season is a genuine success. Focus on getting the support structure right early and on consistent watering at fruit set; those two factors drive the difference between a partial and a full-season harvest.

What changes yield
hours of direct sunlightconsistent wateringfeeding schedulestaking and airflow
Verified · 5 sources View
Pick your variety

Recommended varieties

If you're not sure which beefsteak variety to pick, Celebrity is a great starting point: it's widely available, disease-resistant, and more forgiving than many heirloom types. Mortgage Lifter and Big Boy are classic choices if you want a true heirloom flavor. Brandywine is delicious but takes longer to ripen and is less forgiving, so save it for once you have a season or two under your belt.Beefsteak-class tomatoes cover three rough sub-types: true beefsteak-shape large slicers (Big Boy, Mortgage Lifter), oblate globe slicers commonly sold under the beefsteak label (Celebrity), and large heirloom slicers (Brandywine). Cultivation is the same across all. Celebrity is the most disease-resistant option, great for beginners in humid climates.

Big Boy
Celebrity
disease resistant
Mortgage Lifter
heirloom, huge
Brandywine
classic heirloom
Off the vine

Storing your harvest

Room temp
Keep tomatoes on the counter for up to a week, stem-scar side down. They actually keep getting sweeter and tastier at room temperature, and resting them scar-side down helps them lose less moisture.Up to 1 week at room temperature, stem-scar side down. Ethylene continues to drive sugar development after harvest; room temperature keeps ethylene-sensitive receptors active, allowing flavor to continue developing. The stem scar is the primary permeability site for moisture loss; resting it downward reduces desiccation.
Fridge
Do not refrigerate tomatoes you plan to eat fresh. Cold below about 50 to 55°F permanently damages them, turning the flesh mealy and watery and dulling the flavor for good, even after they warm back up. Just a few hours in the fridge can leave a big beefsteak slice noticeably worse.Avoid refrigeration for any tomato intended for fresh eating. Below 50-55°F, chilling injury disrupts membrane integrity in mesocarp cells; the damage is irreversible and converts firm flesh to mealy, waterlogged texture. Flavor compounds (volatile esters and aldehydes) are also suppressed by cold and do not recover when the fruit warms. Even a few hours below the threshold causes detectable texture loss in large beefsteak fruit.
Freezer
To freeze, core and slice the tomatoes, freeze the slices on a parchment-lined tray until firm, then bag them up. Freezing makes them soft, so they are not good for fresh eating, but they are perfect for sauces, soups, and roasting where they get cooked down anyway.Core and slice before freezing; freeze on parchment-lined trays until firm, then bag. Cell walls rupture at freezing temperatures; thawed beefsteak will be soft and collapsed. This makes frozen beefsteak unsuitable for fresh eating but fully functional for sauces, soups, and roasting where texture is cooked out anyway. Large beefsteak slices freeze well and are convenient for winter sauce use.
Verified · 5 sources View
When something goes wrong

Common problems

Frost or cold damage
01 of 05
What happened You'll see the leaves turn black or dark brown and go limp, sometimes overnight after a single cold night. Tomatoes are tropical plants with no cold tolerance at all. Even without a hard freeze, temperatures below 50°F cause what's called chilling injury: the plant's cells start to break down, and young transplants are especially vulnerable because they haven't yet built up a protective waxy coating on their leaves. A plant hit hard by frost usually won't recover. For next time: both your nighttime air temperature AND your soil temperature need to be reliably above 60°F before you transplant.Tomatoes are tropical plants and suffer the moment temperatures drop near freezing. Even a brief cold night can blacken leaves and kill young plants. If it happened at transplant, the plant was likely moved out too early; soil temperature matters as much as air temperature. Next season Wait until nighttime temperatures are reliably above 50°F AND your soil is above 60°F before transplanting; check soil temperature 2 to 3 inches deep with an inexpensive probe thermometer. In Zones 3 to 5 this often means waiting until late May or early June regardless of what the calendar says.Wait until both night temperatures are reliably above 50°F and soil temperature is above 60°F before transplanting. A cheap soil thermometer removes the guesswork.
Pests or disease
02 of 05
What happened Beefsteak tomatoes can run into a few common problems. Blight is a leaf disease that starts on the lower leaves first and spreads fastest in wet, humid weather. Blossom end rot shows up as a dark, sunken patch on the bottom of the fruit; it looks like a nutrient problem, but it's almost always caused by uneven watering (dry for a stretch, then suddenly soaked). Adding extra calcium won't fix it. Consistent moisture will.Tomatoes are susceptible to blight, blossom end rot, and several common pests. Blight spreads fast in wet, humid conditions and usually starts at the lower leaves. Blossom end rot is caused by calcium deficiency triggered by irregular watering, not a nutrient problem. Next season Water at the base of the plant, not from overhead, and stake the plant for good airflow. Leaves that dry quickly after rain are much harder for blight to infect. Move your tomatoes to a different bed each year; blight spores can survive in the soil over winter. For blossom end rot: mulch heavily and water deeply and consistently rather than in small frequent amounts.Water consistently at the base, not overhead. Remove any affected leaves immediately. Rotate tomatoes to a different bed each year and stake plants to improve airflow.
Too much water
03 of 05
What happened Overwatered tomatoes show yellowing leaves starting at the bottom of the plant, and roots that can't get oxygen; waterlogged soil suffocates them. Inconsistent watering is actually more damaging than steady overwatering: if the soil dries out and then you flood it, the sudden change in moisture causes the fruit skin to expand faster than the inside, and the tomatoes crack. Blossom end rot (dark patches on the fruit bottom) can follow the same pattern.Overwatered tomatoes show yellowing lower leaves, cracked fruit, and roots that cannot get oxygen. Inconsistent watering, dry then suddenly wet, causes fruit splitting and blossom end rot. Next season Water deeply two or three times a week rather than a small amount every day. Deep watering encourages roots to grow down into the soil rather than staying shallow near the surface. A thick layer of mulch around the base of the plant evens out moisture and dramatically reduces the wet-dry swings that cause cracking.Water deeply twice a week rather than a little every day. Mulching around the base dramatically improves moisture consistency.
Too little water
04 of 05
What happened Drought stress during flowering causes blossom drop; the flowers fall off before fruit can set, and those potential tomatoes are gone for good. During fruiting, inconsistent moisture (dry spells followed by heavy watering) causes blossom end rot and cracked skin. Beefsteak tomatoes are large-fruited and especially water-hungry; they need steady moisture throughout the whole season.Drought stress during flowering causes blossom drop; no flowers, no fruit. During fruiting, inconsistent moisture causes blossom end rot and cracked skin. Next season Beefsteak tomatoes need about 1 to 2 inches of water per week. Mulch heavily around the base to hold moisture in the soil between waterings. Always water at the base of the plant, not the leaves; wet leaves in the evening invite disease.Tomatoes need 1-2 inches of water per week. Mulch heavily to retain moisture, and water at the base never the leaves.
Not enough sun
05 of 05
What happened Tomatoes need at least 6 to 8 hours of direct sun each day to produce fruit well. In a shady spot the plant will grow, sometimes quite lushly, but will set little or no fruit, and will be much more prone to fungal disease because the leaves stay damp instead of drying out. Beefsteak types in particular need full sun to develop their large, dense fruit properly.Tomatoes need a minimum of 6-8 hours of direct sun to produce well. In shade they grow leafy but set little or no fruit, and are much more prone to disease. Next season Tomatoes are one of the most sun-hungry vegetables in the garden. If your current spot is getting less than 6 hours of direct sun, move the tomatoes to your sunniest bed next season and plant something more shade-tolerant, like lettuce or spinach, in the shadier spot.Tomatoes are one of the most sun-hungry vegetables. If your current spot is marginal, prioritize this bed for tomatoes next season and move something more shade-tolerant elsewhere.
Verified · 9 sources View
The usual suspects

Pests & diseases

Pests
Aphids
P · 01
Symptoms Clusters of tiny soft green or black insects on the growing tips and the undersides of leaves, often so small they look like dots. Leaves may start to curl or feel sticky. You might notice ants walking up the stems; ants actually farm aphids for the sweet liquid they produce, so ants are a good early warning sign.Clusters of tiny soft insects on new growth and leaf undersides. Leaves curl, yellow, or become sticky with honeydew. Sooty black mold may follow. Cause Aphids are tiny soft-bodied insects that breed very fast in warm weather, so a few quickly turn into crowds on the soft new growth at the tips. Too much fertilizer makes that soft growth they love, so going easy on feeding helps keep them down.Several aphid species (most often green peach and potato aphids) colonize tomatoes. They reproduce asexually and explosively in warm weather, so a few founders become dense colonies on tender new growth within days. Soft, nitrogen-flush growth from over-fertilizing is especially attractive, which is why feeding history drives outbreak severity as much as weather. Organic treatment Spray the clusters directly with a strong jet of water from a hose; this dislodges most of them. For a persistent infestation, apply insecticidal soap or neem oil spray, making sure to coat the leaf undersides where the aphids cluster.Blast off with strong water jet. Apply insecticidal soap or neem oil directly to colonies. Introduce ladybugs or lacewings. Prevention Plant marigolds or nasturtiums near your tomatoes; both attract beneficial insects that feed on aphids. Avoid over-fertilizing with high-nitrogen fertilizer, which produces the soft, fast-growing shoots that aphids prefer.Plant marigolds and nasturtiums nearby. Avoid excess nitrogen fertilizer which creates soft, aphid-attractive growth. Encourage beneficial insects.
Tomato hornworm
P · 02
Symptoms Large sections of leaves or whole stems stripped very quickly, sometimes overnight. Look for fat green caterpillars up to 4 inches long that blend almost perfectly into the stems and leaves. The easiest way to find them is to look for the dark green or black droppings they leave on leaves below.Large green caterpillars (up to 4 inches) stripping foliage. Leaves disappear rapidly. Black droppings on leaves. Cause These are the caterpillars of a large moth. The moth lays eggs on the leaves in early summer, and the caterpillars grow big (up to about four inches) through mid and late summer, eating a lot of leaves fast. They spend the winter in the soil, so a bed left undug can carry them into next year.Larvae of the five-spotted hawk moth (Manduca quinquemaculata). Adult moths lay eggs on tomato foliage from early summer; the caterpillars feed and grow through mid-to-late summer, reaching up to about four inches and defoliating fast because a single large larva eats a great deal. They pupate in the soil over winter, so the prior season's population carries forward in an unworked bed. Organic treatment Hand-pick and drop them in a bucket of soapy water; it's simple but effective. If you find any with small white oval capsules stuck to their backs, leave those alone; parasitic wasps have already laid eggs on them and the wasps will take care of the rest.Hand-pick; they are well camouflaged but easy to remove. Apply Bt (Bacillus thuringiensis) spray. If white cocoons visible on back, leave them; parasitic wasps are doing the work. Prevention Turn or till the soil in autumn to expose and kill overwintering pupae. Planting dill or fennel nearby attracts predatory wasps that prey on hornworms.Till soil in autumn to kill overwintering pupae. Plant dill and basil nearby to attract predatory wasps.
Flea beetles
P · 03
Symptoms Lots of tiny round holes in the leaves, making them look like they've been peppered with a hole punch, most noticeable on seedlings and young plants. The beetles themselves are tiny, shiny, and black; they jump when disturbed, which is how they got their name.Tiny round shot-holes in leaves, especially on seedlings and young plants. Small shiny black beetles jump when disturbed. Cause Flea beetles are tiny black beetles that jump when you disturb them and chew small round holes in leaves. They come out in spring and hit young seedlings hardest, because small plants do not have many leaves to spare. Bigger, established plants shrug off the same chewing.Several flea beetle species. They overwinter as adults and emerge in spring, so pressure is heaviest early, on seedlings and freshly set transplants whose small leaf area makes the shot-hole feeding proportionally damaging. Established plants with ample foliage tolerate the same beetle numbers easily, which is why the timing of the attack matters more than its size. Organic treatment Cover seedlings with row cover fabric to keep beetles off young plants. Sprinkle diatomaceous earth (a fine powder made from fossilized algae) around the base and on the leaves; it damages soft-bodied insects on contact. Neem oil spray also works.Use row covers on seedlings. Apply diatomaceous earth. Neem oil spray. Prevention Wait to transplant until plants are large and well-established; flea beetles cause the most damage to small seedlings. Larger, established plants can usually tolerate some feeding without major harm.Delay transplanting until plants are large. Use transplants rather than seeds.
Spider mites
P · 04
Symptoms A fine stippling or scattering of tiny yellow or white dots across the upper surface of leaves, making them look dull and washed out. In heavier infestations you may see fine webbing on the undersides of leaves. Spider mites are barely visible to the naked eye; hold a white sheet of paper under a leaf and tap; if you see tiny dots moving, that's them. Worst in hot, dry weather.Fine stippling or yellow dots on leaves. Fine webbing on leaf undersides. Leaves may bronze, dry out, and drop. Worst in hot dry weather. Cause Spider mites are tiny mites (so small they look like moving dust) that love hot, dry, dusty weather and multiply incredibly fast, so they tend to flare up late in summer. Plants that are short on water suffer the most, so keeping plants watered and dust down is the best defense.Twospotted spider mite (Tetranychus urticae) and relatives. They thrive in hot, dry, dusty conditions and complete a generation in under a week in summer heat, so populations explode late in the season. Drought-stressed plants are far more vulnerable, which makes consistent watering and dust suppression the primary cultural controls rather than an afterthought. Organic treatment Spray the plant, especially the leaf undersides, with a strong jet of water repeatedly over several days to knock off mites and disrupt their colonies. Follow up with neem oil or insecticidal soap applied to the undersides of leaves.Blast with water repeatedly. Apply neem oil or insecticidal soap to leaf undersides. Increase humidity around plants. Prevention Keep plants well-watered in hot weather; water-stressed plants are far more vulnerable. Avoid dusty, dry conditions around the garden if possible.Keep plants well-watered in hot weather. Avoid dusty conditions. Introduce predatory mites.
Diseases
Early blight
D · 01
Symptoms Dark brown spots with a target-ring pattern (concentric rings, like a bullseye) appearing on the lower leaves first. Those leaves turn yellow and eventually drop. The disease works its way up through the plant over time.Dark brown spots with concentric rings on lower leaves first. Affected leaves yellow and drop. Spreads upward through plant. Cause Early blight is a fungus that lives in old plant debris and the soil and splashes up onto the lowest leaves in warm, wet weather, which is why it starts at the bottom and climbs. Planting tomatoes in the same spot year after year builds it up, so moving them and mulching the soil are the main ways to prevent it.The fungus Alternaria solani. It overwinters on infected plant debris and in the soil, then splashes up onto the lowest leaves in warm, wet weather, which is why infection starts low on the plant and moves upward. Repeated tomato plantings in the same bed build the soil inoculum, so rotation and mulch (to block soil splash) are the core preventions. Organic treatment Remove affected leaves as soon as you spot them and don't put them in your compost; bag and bin them. Apply a copper-based fungicide spray to slow the spread. Mulching around the base of the plant helps stop soil splash, which is one of the main ways the fungal spores travel from the ground up onto leaves.Remove affected leaves immediately. Apply copper-based fungicide preventively. Mulch soil to prevent splash-up. Prevention Move your tomatoes to a different spot in the garden each year; early blight spores persist in the soil. Water at the base of the plant, never from above. Stake or cage plants so leaves stay off the ground and get good airflow.Rotate tomatoes every 3-4 years. Water at soil level. Space plants for airflow. Stake to keep foliage off ground.
Blossom end rot
D · 02
Symptoms A dark, sunken, leathery patch on the bottom (the blossom end) of the tomato, the end opposite the stem. It affects the first fruits of the season most often and is not contagious.Dark, sunken, leathery patch at the bottom (blossom end) of fruit. Affects first fruits most. Not contagious. Cause Blossom end rot is not a bug or an infection. It happens when the fruit cannot get enough calcium, and that is almost always because watering went from wet to dry and back. Calcium travels with water, so steady, even watering, not adding calcium, is what prevents it. Even soils with plenty of calcium get it when watering is uneven.Not an infection but a calcium-delivery failure in the developing fruit. Calcium moves with water, so when soil moisture swings between wet and dry (or roots are damaged), the fast-growing blossom end of the fruit is starved of calcium and its cells break down, leaving the dark sunken patch. It tracks watering consistency, not soil calcium levels, which is why even calcium-rich soils produce it under irregular water. Organic treatment Mulch around the plant and water deeply and consistently; blossom end rot is caused by uneven moisture, not a nutrient deficiency, so steady watering is the actual fix. Remove affected fruit so the plant can focus on developing the next ones.Mulch to maintain even soil moisture. Water consistently. Foliar calcium spray provides some relief. Remove affected fruit. Prevention The single most important prevention is consistent watering. Avoid disturbing the roots around the base of the plant, and don't over-fertilize with high-nitrogen fertilizer.Consistent watering is the key prevention. Avoid root disturbance. Do not over-fertilize with nitrogen.
Septoria leaf spot
D · 03
Symptoms Small circular spots with a dark brown border and a pale gray or tan center, appearing first on the lower leaves. The spots may have a faint yellow ring around them. Over time, heavily spotted leaves turn yellow and drop.Small circular spots with dark borders and pale gray centers, starting on lower leaves. Spots may have yellow halos. Cause Septoria leaf spot is a very common tomato fungus. Like early blight it overwinters in old debris and soil and splashes onto the lower leaves in warm, humid weather, working its way up the plant. The same habits that stop early blight, moving the planting, watering low, and mulching, keep it in check too.The fungus Septoria lycopersici, one of the most common tomato leaf diseases. Like early blight it carries over on debris and infected soil and spreads by water splash onto lower foliage, favored by warm, wet, humid weather. It defoliates from the bottom up; the fix is the same set of moisture-management and sanitation practices rather than a single spray. Organic treatment Remove and discard affected leaves right away; don't compost them. Apply a copper-based fungicide. Make sure the plant has good airflow by keeping it staked and pruning any very dense growth.Remove affected leaves. Apply copper fungicide. Ensure good air circulation. Prevention Rotate your tomatoes to a new spot each year. Water at the base of the plant only, never from overhead. Mulch around the base to prevent soil splash.Rotate crops. Water at soil level. Mulch around plants.
Late blight
D · 04
Symptoms Water-soaked patches that turn brown and expand rapidly on the leaves and stems; this disease moves very fast and can destroy a plant in a matter of days. In humid conditions you may see white fuzzy growth on the undersides of leaves. Late blight is the most serious tomato disease in the garden.Water-soaked, rapidly expanding brown patches on leaves and stems. White fuzzy growth on undersides in humid conditions. Can destroy plants in days. Cause Late blight is a fast, destructive disease (the one that caused the Irish potato famine). Its spores blow in on wind and rain rather than starting from the soil, and in cool, wet weather it can kill a plant in just a few days. Because it arrives through the air, the best protection is choosing resistant varieties and pulling out any infected plant right away.The oomycete Phytophthora infestans, the same pathogen behind the Irish potato famine. Unlike the blights that start at the soil line, its spores travel on wind and rain over long distances and infect leaves, stems, and fruit directly, spreading explosively in cool, wet weather and able to kill a plant in days. Because the inoculum arrives airborne, resistant varieties and immediate removal of infected plants matter more than rotation. Organic treatment Remove and immediately bag and bin all affected plant material; do not compost any of it, as late blight spreads easily. Apply copper-based fungicide spray in wet periods as a preventive measure. If the plant is severely affected, remove it entirely.Remove and destroy all affected material immediately; do not compost. Apply copper fungicide preventively in wet conditions. Prevention Good airflow around the plant is your best defense: stake and space plants so air can move through. Never leave tomato plant debris in the garden over winter, as the pathogen can survive there. Plant resistant varieties if late blight has been a recurring problem in your area.Plant resistant varieties. Ensure excellent airflow. Never leave tomato debris in the garden over winter.
Verified · 4 sources View
Seasoned
Where to plant next year

Crop rotation

Don't plant tomatoes in the same bed two years in a row. Move them to a fresh spot every year if you can, and wait at least 3 years before coming back to the same location. The same rule applies to peppers, eggplant, and potatoes; they're all in the same family and share the same soil diseases, so rotating one without rotating the others doesn't help much. If you've had plants wilt and die even with good watering, look for disease-resistant varieties: a 'V' or 'F' on the seed packet means the variety is bred to resist the most common soilborne wilts.Rotate nightshades to a fresh bed every 3 years. Fusarium oxysporum and Verticillium dahliae, the two primary soilborne wilts in tomatoes, persist as chlamydospores in soil for 4-6 years and infect through root wounds. Rotation delays pathogen buildup but does not eliminate it; in beds with confirmed wilt history, resistant varieties (coded VF or VFN on seed packets) are the stronger intervention.

Family
Nightshade family (Solanaceae)
Years between
3 years
in the same bed
Avoid following
Do not plant beefsteak where tomatoes, peppers, eggplant, or potatoes grew recently. They are all in the same family and share the same soil diseases (mainly early blight and the wilt diseases), which build up in the soil over several years. Give the bed about three years off from this family before planting tomatoes there again.Tomatoes, peppers, eggplant, and potatoes. All four are nightshades and share the same soilborne diseases, chiefly early blight and the Fusarium and Verticillium wilts, whose spores persist in the soil for several years. Following one nightshade with another lets that inoculum build, so beefsteak does best on a bed that has been out of the family for about three years.
Plant after
Brassicas, legumes, corn, root vegetables
Verified · 4 sources View
In the app · pre-launch

When plant taps you on the shoulder

The plant app sends a timely reminder at every critical moment of your beefsteak tomato season. The wording adjusts to whichever you pick: beginner or seasoned. Here are three you'll see in Zone 4.

p
plant
6 weeks before last frost
Time to start your beefsteak tomatoes indoors
Your last frost date is about 6 weeks away, the right window to get beefsteak tomato seeds started. Fill small trays or cells with seed-starting mix, plant one or two seeds per cell about a quarter inch deep, and put them somewhere warm (70 to 80°F is ideal). Cover with a plastic dome or cling wrap until you see sprouts, then remove it right away. Beefsteak tomatoes need a long season, so starting on time really matters.
p
plant
10 days before last frost
Start introducing your tomatoes to the outdoors
Your last frost is 10 days away: time to start hardening off your seedlings. Put them outside for a couple of hours today in a sheltered, partly shaded spot, then bring them back in. Add more time and more direct sun each day over the next week. This gradual process helps the plant adjust to outdoor wind, temperature swings, and stronger sun before it goes out for good.
p
plant
Last frost arrives
Last frost has passed: time to transplant
Your beefsteak tomatoes are ready to go outside for good. Plant them deeper than they sit in the pot: bury the stem right up to the lowest set of leaves. New roots will form all along the buried stem, which gives the plant a larger, stronger root system and makes it more drought-tolerant through the season.
Get personalized alerts.

plant sends the right notification at exactly the right moment, for your zone, your weather, your crops. Founding members lock the rate forever.

Back the Kickstarter →
Ask the gardener

Common questions

Got a question we missed?

We're building this guide with real growers. Got a question we missed? Ask here. We read every one and add the best answers right to this page.

Grown this before?

Share a tip

Learned something the hard way? Pass it on. Real growers' tips make this guide better for the next person, and we credit you by name when yours goes live.

Seasoned
Spot something wrong?

Report a problem

If you've grown this crop and you see a date, a temperature, a companion claim, or a recommendation that doesn't match your experience, tell us. Real growers' corrections make this guide better for the next person.

How we built this guide

Methodology & sources

Every date, temperature, spacing, and recommendation on this page is sourced from university cooperative extension publications, peer-reviewed agricultural research, NOAA climate data, and direct extension calendars. Where claims are softer (traditional gardening wisdom not formally documented), we say so.

Research-backed Documented in cooperative extension publications or peer-reviewed research
Well-grounded A known agronomic principle, but not formally tested for this specific pair
Traditional Time-tested gardening wisdom, limited formal research support
Last reviewed
May 12, 2026
Data version
crops_data_final · v1.0 · schema 2.9
Sources cited on this page
16 publications
Verified entries
Companion-planting claims tagged inline · zone dates verified against 5+ extensions
See all sources cited on this page
  • University of Minnesota Extension umn_ext
  • University of Maryland Extension umd_ext
  • Cornell Cooperative Extension cornell_ext
  • Iowa State University Extension iastate_ext
  • Michigan State University Extension msu_ext
  • NC State Extension ncsu_ext
  • Penn State Extension psu_ext
  • U. of Illinois Urbana-Champaign Extension uiuc_ext
  • UC Davis Postharvest Center ucd_postharvest
  • Texas A&M AgriLife Extension tamu_agrilife
  • Virginia Cooperative Extension 426-331 vce_426_331
  • Piedmont Master Gardeners piedmont_mg
  • UGA Vegetable Garden Calendar uga_calendar
  • Clemson Home & Garden Information Center clemson_hgic
  • UC IPM Statewide IPM Program uc_ipm
  • NOAA 1991-2020 Climate Normals noaa_normals

Growing notes, weekly.

Zone-aware seasonal nudges, what's worth planting now, and the occasional recipe from the harvest. No spam, ever.

Vol. 003 · Beefsteak Tomato · plant.lifestyle