Pick your zone and the dates re-calibrate.
The Guide Crops Vol. 003

Carrot

in Zone 11, this week

Carrots are a cool-weather root vegetable. The part you eat is one long root that grows straight down, so they need loose, rock-free soil and plenty of depth to grow well. Always plant carrot seeds right where they will grow, because moving a young carrot bends or splits that root. The seeds are slow, often taking 2 to 3 weeks to come up, and the tiny sprouts cannot break through a hard, dried-out crust, so keep the soil surface damp until they appear. Roots are usually ready in about 60 to 75 days and taste best when they finish growing in cool weather. In heat above about 75°F they turn tough and can taste bitter, though the plant itself keeps growing. A light frost actually makes carrots sweeter, which is why fall and winter carrots are often the best tasting. When you plant depends on your climate: spring and fall where summers are cool, and fall through early spring where summers are hot. Carrot (Daucus carota) is a cool-season root crop grown for its swollen taproot, which forms best in loose, stone-free, deeply worked soil that lets the root drive straight down. It is direct-sown only: the taproot extends almost immediately, so transplanting forks or stunts it. Seed is slow and erratic to germinate, often 2 to 3 weeks, and the fine seedlings cannot push through a crusted surface, so the seedbed must stay evenly moist from sowing until emergence. Roots size up over roughly 60 to 75 days and hold flavor and texture best when they finish in cool weather; sustained air temperatures above about 75°F push roots toward coarse texture, fibrousness, and strong or bitter flavor rather than killing the plant. Carrots tolerate light frost and sweeten after it as the root converts stored starch to sugar, which is why fall crops in cold climates and winter crops in mild ones are often the sweetest. The crop succeeds across a wide range of zones, but the planting season inverts by climate: a spring-through-early-summer and fall window where summers are cool, and a fall-through-early-spring window where summers are hot.
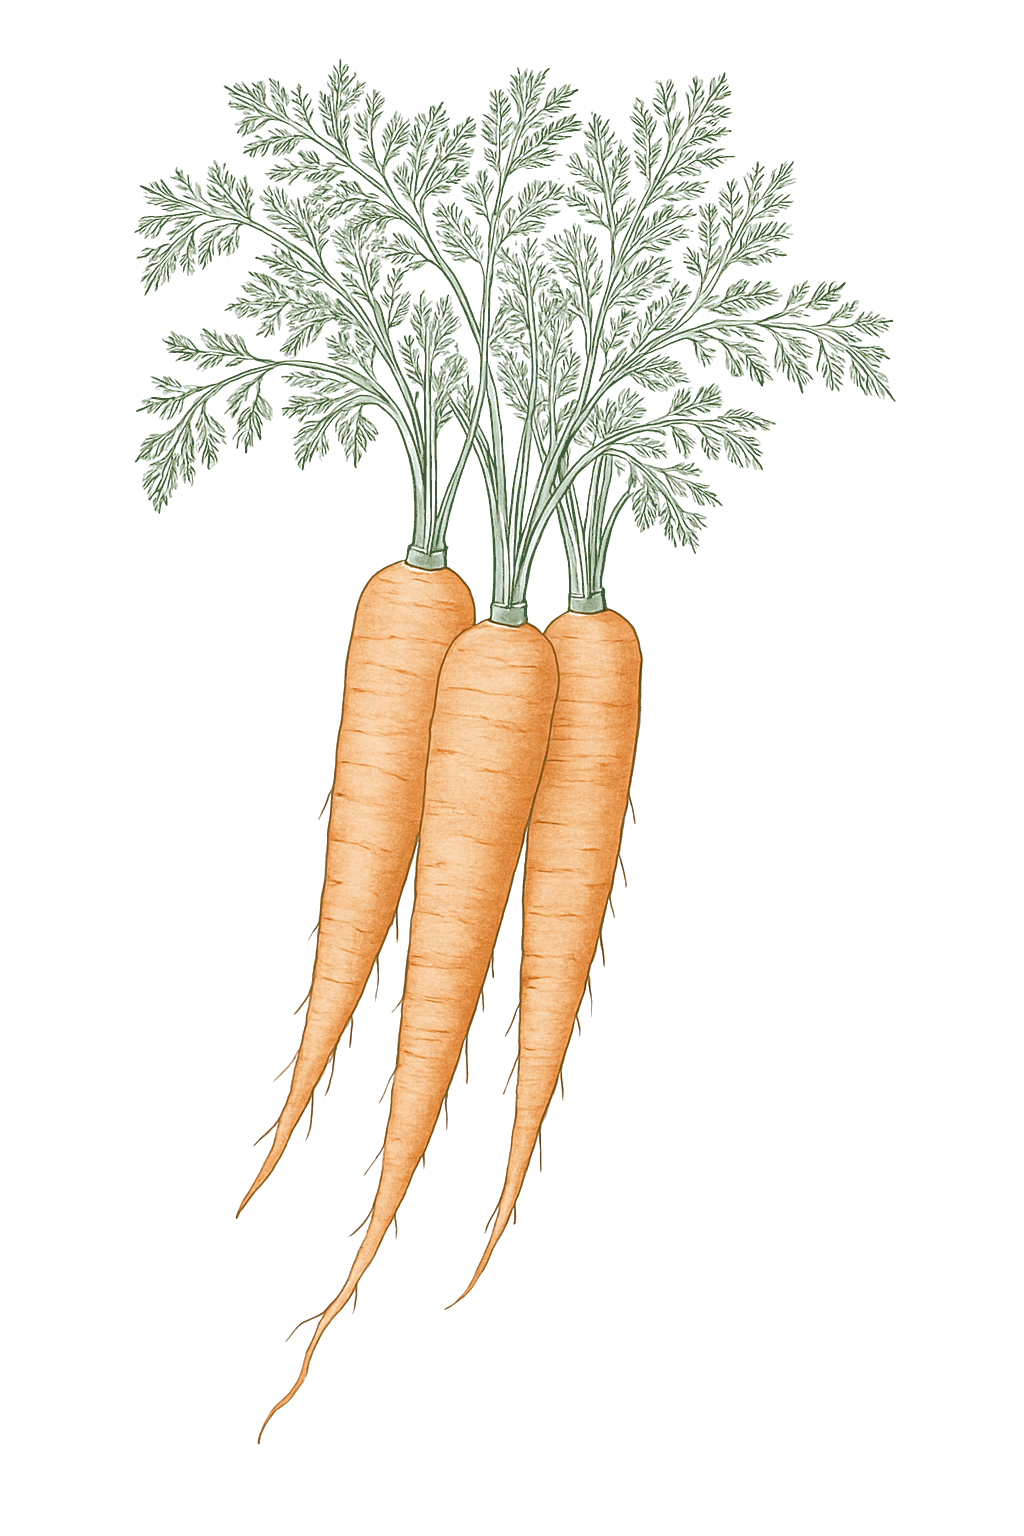
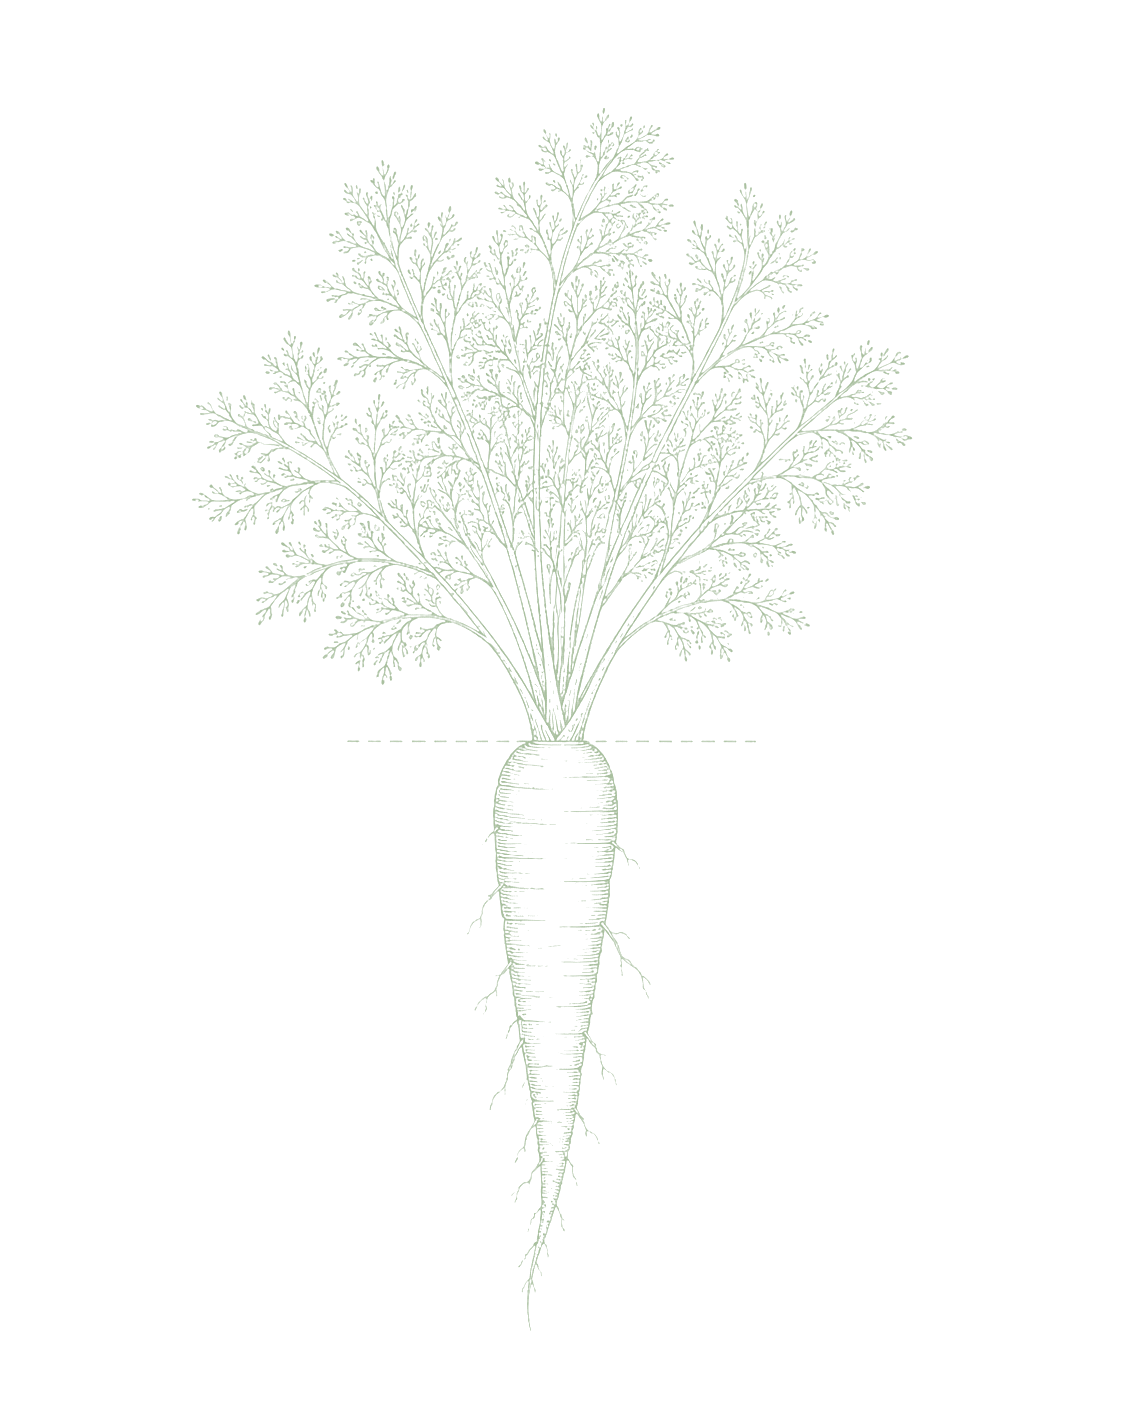
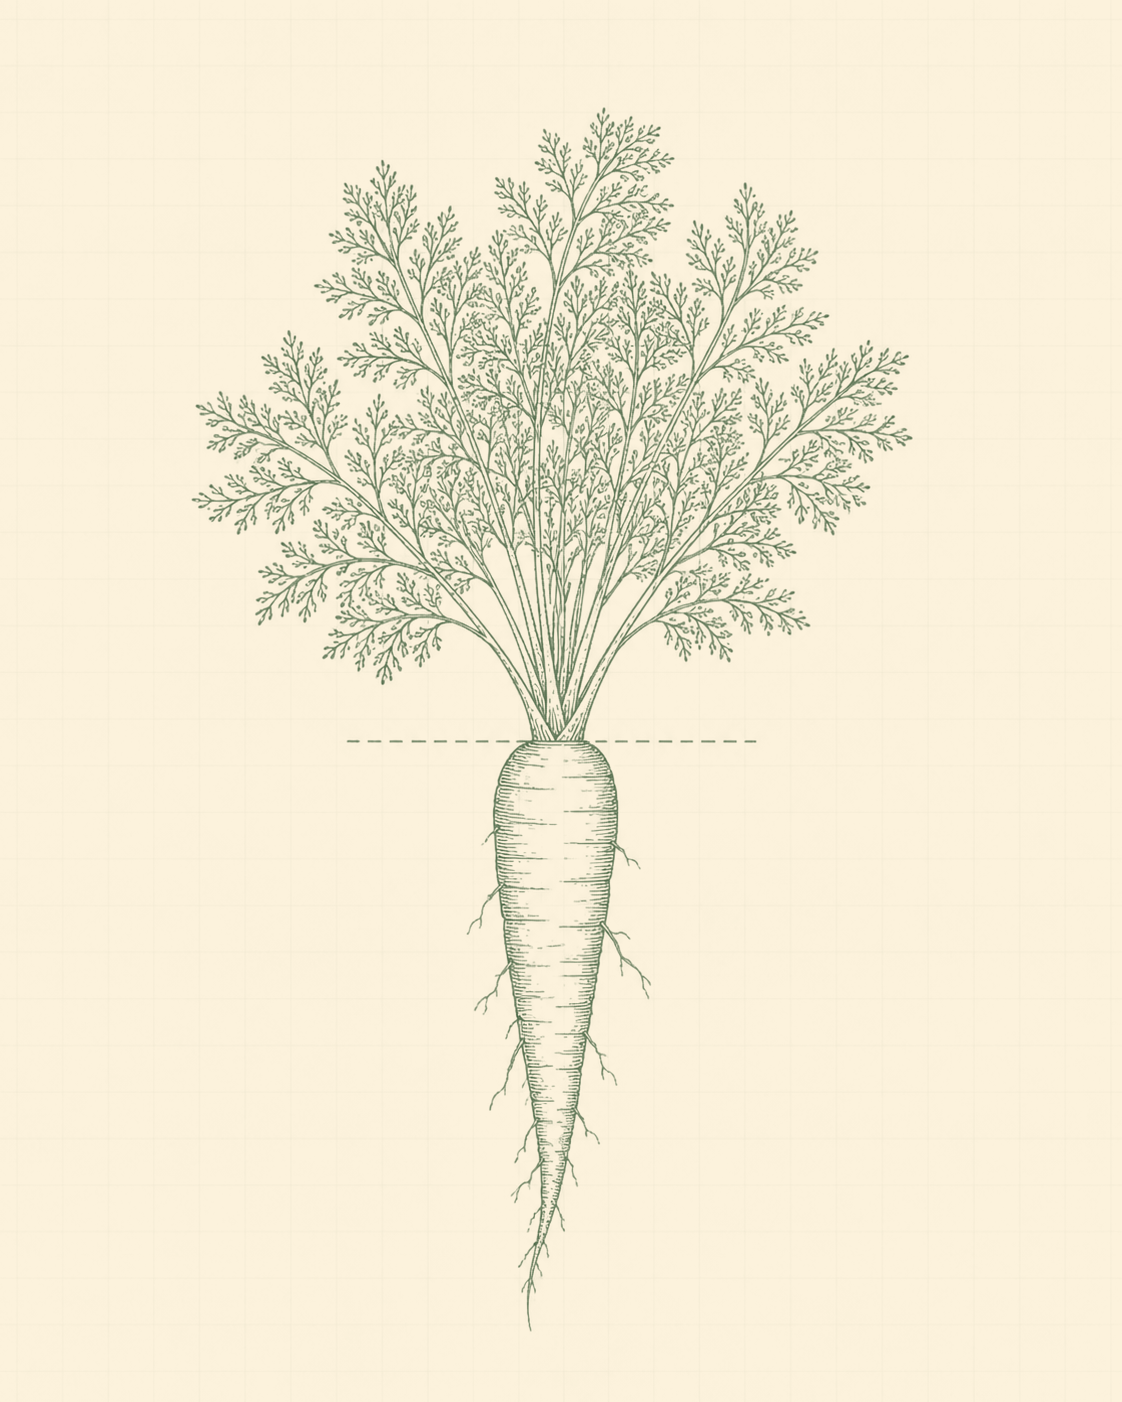
Carrot mature plant
Fig. 01 · Carrot, mature Zone 11
Mature in
60-75d
from transplant
Sunlight
Full sun to partial shade
6-10 hrs daily
Water
Regular
1 inch / week
Spacing
2-4"
between plants
Soil pH
6-6.8
slightly acidic
Today · in your zone

What's happening right now

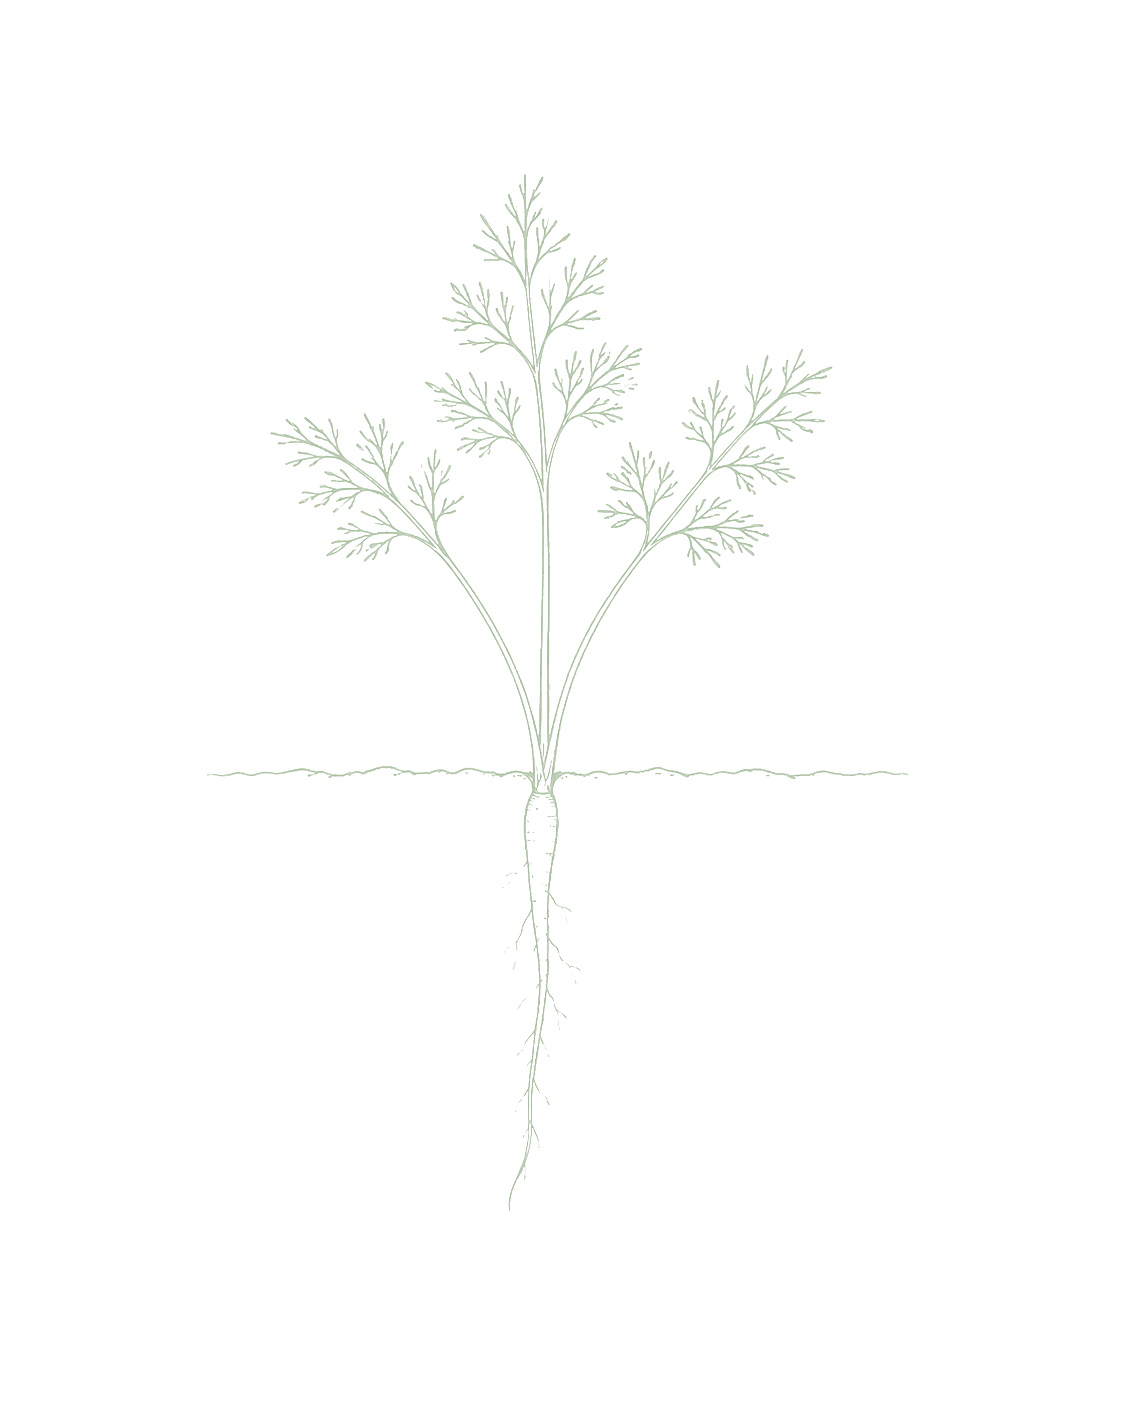
July 24 · Zone 11 · Stage 01 · Germination

Off-season for carrot in zone 11.

Your climate region in Zone 11
The season at a glance

Planting calendar

In Zone 11, carrot can be planted October through February, skipping the summer heat. Harvest runs December through April.

Jan
Feb
Mar
Apr
May
Jun
Jul
Aug
Sep
Oct
Nov
Dec
plant
plant
plant
too late
too late
too hot
too hot
too hot
too hot
too hot
plant
plant
plant
harvest
harvest
harvest
harvest
harvest
harvest
indoors
plant out
harvest
Above-ground cropBest planted on a waning moon
Seasoned
Stagger your sowings

Succession planting

Instead of planting all your carrots at once, sow a short row every 3 weeks or so. That way they are ready a few at a time over several weeks rather than all on the same day. In places with cool summers, start in spring and keep going into early summer, then sow one more batch in late summer for fall. In places with hot summers, grow them in fall, winter, and early spring and skip the summer heat. Carrots left in the ground too long in hot weather get tough and lose their sweet flavor, so stop sowing before the hottest part of the year.Carrots succession well: sow a short row every 3 weeks through the cool-season window rather than one large planting, so roots mature in sequence instead of all at once. In cold-summer climates that means spring through early summer, then a late-summer sowing for a fall and winter-storage crop; in hot-summer climates it means fall through early spring, skipping the heat. Stop spring sowings before sustained heat arrives, because carrots near maturity held in hot soil turn coarse, fibrous, and strong-flavored. The exact number of sowings per season is set by the length of your cool window, not a fixed cap.

Every 3 weeks · sow a short new rowUp to 12 sowings a seasonToo hot to sow midsummer
Jan
Feb
Mar
Apr
May
Jun
Jul
Aug
Sep
Oct
Nov
Dec
sow
harvest
keep sowing
too hot
continuous harvest
The season, mapped

Seed to garden

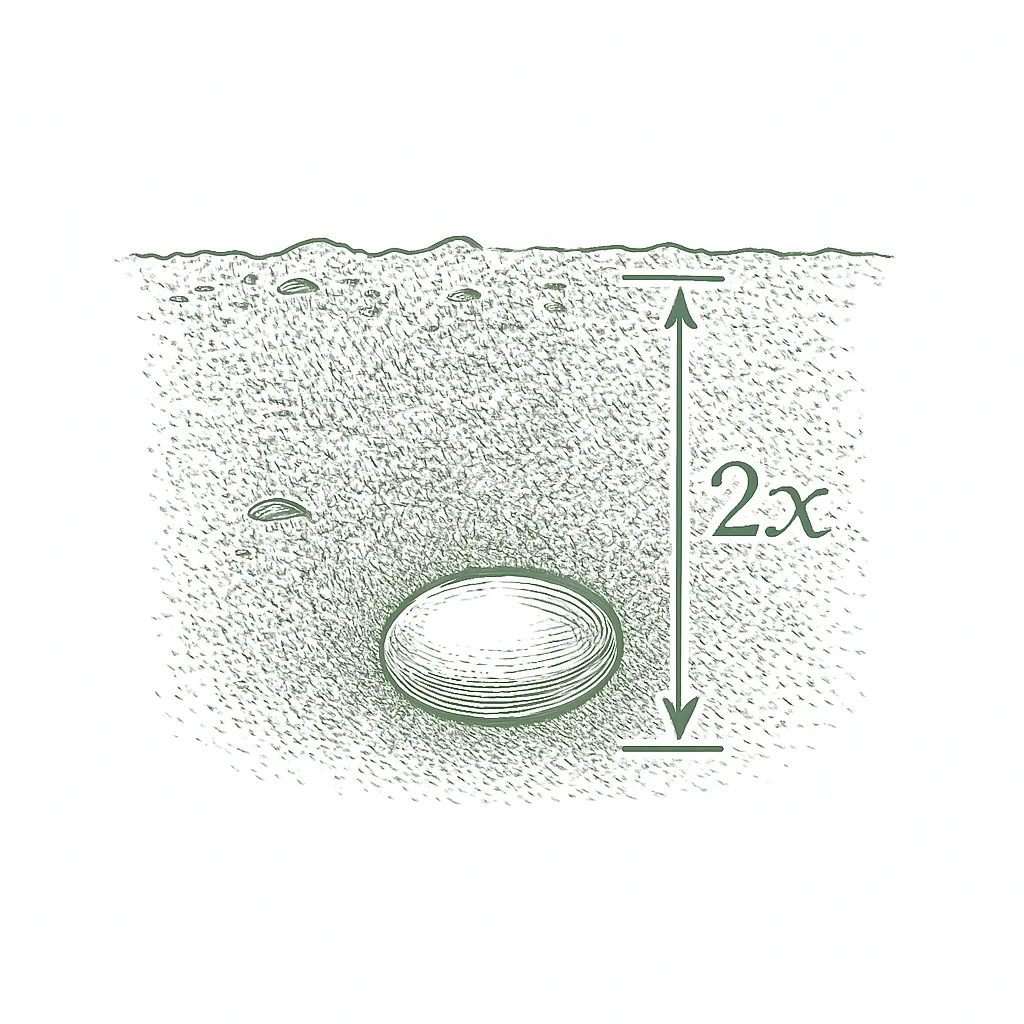
Plant carrot seeds right in the garden where they will grow. Do not start them in pots or trays. Carrots make one long root (the part you eat), and moving a started plant breaks or bends that root, so you end up with forked, stubby carrots. Sow the seed straight into loose soil about 3 to 4 weeks before your last spring frost, once the ground is no longer frozen or soggy. Cover the tiny seeds only lightly (about 1/8 to 1/4 inch) and keep the surface damp until they come up. Be patient: carrot seeds are slow and can take 2 to 3 weeks to sprout. A trick is to scatter a few fast-sprouting radish seeds in the same row to mark where the carrots are.Always direct-sow carrots into the garden; never start them in pots or cells. The taproot begins extending almost immediately and transplanting damages and misdirects its growth, producing forked or stunted roots. Direct-seed about 3 to 4 weeks before the last spring frost once the soil is workable and has reached at least 45°F, sowing seed shallowly (1/8 to 1/4 inch) and keeping the surface evenly moist, since a crusted seedbed blocks the small seedlings. Germination is slow, often 2 to 3 weeks; many growers sow a few fast radishes in the same row to mark it. There is no indoor-start or hardening-off step for carrots.
  1. 01
    Sow outside
    Oct - Feb
  2. 02
    First harvest
    From Dec 5
    60-75 days from sowing
Start method
Direct
Soil temp
55-75°F
From seed to fruit

The growing journey

Stage 01 · Germination
01
Germination
Days 0-21 · current stage
Bare soil for a while, then very thin seedlings with two skinny first leaves that look almost like grass. Carrots are slow, often taking 14 to 21 days to come up, and they will not come up at all if the surface dries out or forms a hard crust. If you scattered radish seeds as markers, those appear first.Bare soil for what feels like a long time, then thread-thin seedlings with two narrow seed leaves (cotyledons) that look almost grass-like. Emergence is slow and uneven, often 14 to 21 days, and a dry or crusted surface will stop it. Radishes interseeded as a row marker will be up well before the carrots.
Keep the top of the soil damp until the seedlings appear, watering gently and often in warm or windy weather so it never dries into a crust. Do not let the bed dry out now, and avoid blasting it with the hose, which can wash the shallow seeds around.Keep the surface consistently moist until emergence, watering lightly and often in warm or windy weather, and never let a crust form. Do not let the bed dry out during this window, and avoid hard overhead watering that displaces the shallow seed.
FROM PLANT · Carrot seeds are slow, often 14 to 21 days, and the tiny sprouts cannot break through a dry crust. Keep the soil surface damp from planting until they come up, watering a little and often. Laying a board or piece of burlap over the row helps hold moisture; lift it as soon as you see green.Carrot seed is slow and erratic, often 14 to 21 days, and the fine seedlings cannot push through a dried crust. Keep the surface evenly moist from sowing until emergence, watering lightly and often; a board or light burlap laid over the row holds moisture and is removed at the first sign of green.
FROM PLANT · Plant the seeds shallow, only about 1/8 to 1/4 inch deep, because carrot seeds planted too deep run out of energy before they reach the top. Mixing in a few fast radish seeds marks the row and helps break up any crust.Sow shallowly, about 1/8 to 1/4 inch, since deep-sown carrot seed exhausts itself before reaching the surface. Mixing in a few fast radish seeds marks the slow row and breaks any forming crust.
02
Seedling
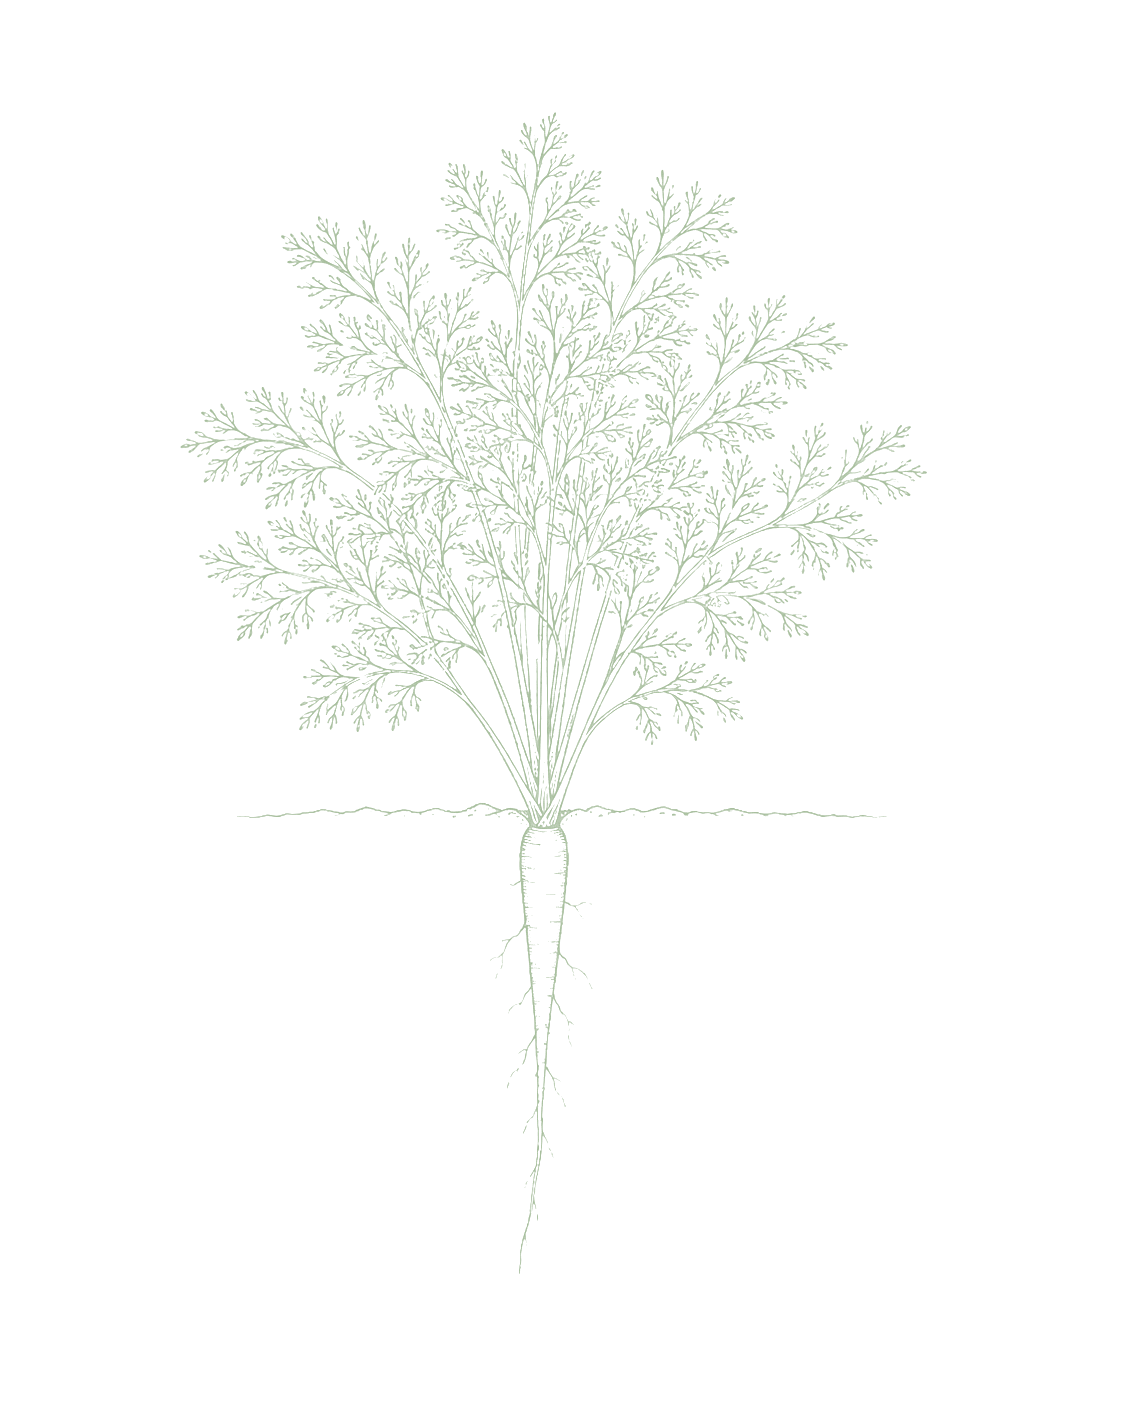
Days 21-40
Lots of thin little seedlings close together, now growing their first feathery true leaves. They will be too crowded to make good roots if you leave them all in.Crowded, fine seedlings putting out true ferny leaves beyond the first seed leaves. Because seed is sown thickly, the stand will be too dense for good root development if left alone.
Thin the seedlings so they are not crowded: first to about an inch apart once they stand 1 to 2 inches high, then to 2 to 4 inches apart a few weeks later. Snip the extras at the soil line instead of pulling. Keep weeds out and the soil evenly damp.Thin to about 1 inch once the stand reaches 1 to 2 inches in height, then to a final 2 to 4 inches a few weeks later; snip or pinch at the soil line rather than pulling. Keep the bed weed-free and evenly moist.
FROM PLANT · Do not skip thinning. Carrots sown thickly and left crowded grow small and twisted. Thin in two rounds: to about an inch apart once they stand 1 to 2 inches high, then to 2 to 4 inches apart. Snip the extras off at the soil line instead of pulling, so you do not disturb the ones you keep.Thinning is not optional: thickly sown carrots left crowded grow small, tangled, and forked. Thin in stages, to about 1 inch once the stand reaches 1 to 2 inches in height, then to a final 2 to 4 inches; snip at the soil line rather than pulling to spare the keepers' roots.
FROM PLANT · Pull weeds early and carefully. Little carrots do not compete well with weeds, and the feathery carrot tops are easy to confuse with weeds, so weed by hand near the row while the plants are small.Weed early and gently. Young carrots compete poorly with weeds, and their own fine tops are easy to mistake for weeds, so weed by hand close to the row while plants are small.
03
Established
Days 40-60
Strong, bushy feathery tops as the plants grow, while the carrot root bulks up underground. You may start to see the tops of the roots poking up at the soil line.Vigorous ferny tops and steady leaf growth as the plants put energy into building the taproot below. The shoulders of the roots may begin to show at the soil surface.
Keep the watering steady, about 1 inch a week, so the roots do not crack, and pull a little soil or mulch over any root tops that show so they do not turn green. They usually need no feeding, only a light low-nitrogen feeding if they look weak.Maintain even moisture, about 1 inch per week, to keep roots from splitting, and hill a little soil or mulch over exposed shoulders to prevent greening. Feeding is rarely needed; a single light low-nitrogen side-dressing only if growth is weak.
FROM PLANT · Keep the water steady, about 1 inch a week counting rain, given in fewer but deeper waterings. Letting the soil dry out and then soaking it makes the roots crack open, so being steady matters more than giving a lot at once.Hold even moisture, roughly 1 inch per week including rain, in deeper, less frequent soakings. A dry-then-flooded cycle makes roots take up water fast and split lengthwise, so steadiness matters more than volume.
FROM PLANT · If the tops of the roots push up out of the soil, cover them with a little soil or mulch. Root shoulders left in the sun turn green and taste bitter, which is easy to prevent.Cover any root shoulders that heave above the soil with a little soil or mulch. Exposed shoulders turn green and bitter from sunlight, a cosmetic and flavor loss that is easy to prevent.
04
Harvest
Days 60-75
Roots that have grown to a good size. Check the shoulder, the widest part where the leaves meet the root: about 1/2 to 3/4 inch across or more means ready, usually around 60 to 75 days. They get sweeter in cool weather and after a light frost.Roots reaching usable size, judged by shoulder diameter (roughly 1/2 to 3/4 inch or more) rather than the calendar; for most varieties this is around 60 to 75 days. Flavor sweetens in cool weather and after light frost.
Pull one carrot to check the size and taste before digging the rest. In heavier soil, loosen alongside the row with a fork so they come out whole. No rush: they keep in the ground for weeks in mild weather, and in cold areas you can mulch over them to dig through winter.Pull a test carrot to check size and flavor before harvesting in earnest. Loosen the soil beside the row with a fork in heavier ground so roots lift cleanly. There is no rush: roots hold in mild soil for weeks and can be mulched for winter holding in cold regions.
FROM PLANT · Harvest based on size, not a set date. Brush the soil off the top of a root and look for a shoulder about 1/2 to 3/4 inch across or more, and pull one to check. Most reach this around 60 to 75 days, but your soil and weather change the timing.Harvest by size, not the calendar: brush soil from a crown and look for a shoulder around 1/2 to 3/4 inch or more, pulling a test root to confirm. Most varieties reach this near 60 to 75 days, but soil and weather shift it.
FROM PLANT · There is no rush to dig mature carrots in cool weather; they get sweeter after a light frost as the root turns starch into sugar. But do not leave grown carrots sitting in hot summer soil, where they get tough and woody.There is no rush to lift mature carrots in cool weather; flavor improves after light frost as the root converts starch to sugar. Do not, however, leave mature roots in hot soil, where they grow coarse and woody.
FROM PLANT · In heavier soil, loosen the dirt next to the row with a fork before pulling, so the carrots come out whole instead of breaking. Pull straight up, holding close to the top of the root.In heavier ground, loosen the soil alongside the row with a fork before pulling so roots lift whole instead of snapping; tug straight up close to the crown.
FROM PLANT · Twist or cut off the leafy green tops before storing. Leaving them on draws water out of the root and makes it go limp in a few days. Store the roots unwashed, somewhere cold and damp.Twist or cut off the green tops before storing; leaving them on pulls moisture from the root and turns it limp within days. Store unwashed roots cold and humid.
FROM PLANT · In the fridge, keep the roots in a vented bag in the crisper drawer, where they stay crisp for several weeks to a month or more. For a big harvest, pack unwashed carrots in damp sand in a cold spot like an unheated garage, around 32 to 40°F, and they last for months.For the fridge, hold roots in a perforated bag in the crisper, where they keep crisp for several weeks to a month or more. For a larger harvest, pack unwashed roots in damp sand in a cold cellar or garage near 32 to 40°F, where they hold for months.
Beginner
Know your soil

Your soil

Identify yours

Not sure what soil you have? Grab a small handful of damp soil from your garden bed and squeeze it. If it crumbles apart easily, it's sandy. If it holds together but breaks when you poke it, it's loam (what most vegetables want). If it stays in a hard, slippery ball, it's clay.

What this crop wants

Carrots want deep, loose soil with no rocks or hard clumps, the looser the better. This matters more for carrots than for most vegetables: a carrot growing down into heavy clay or packed soil will come out short, forked, or twisted instead of long and straight. Loosen the soil at least 8 inches down before you plant, and mix in some compost. Go easy on fertilizer that is high in nitrogen (the first number on the bag), because too much makes big leafy tops but small roots. If your soil is heavy clay, a raised bed or a deep container filled with loose mix is the easiest fix.

If your soil doesn't match

You have sandy soil

Mix 2-3 inches of compost into the top 6 inches of your bed before planting. Compost holds moisture (which sandy soil drains too fast) and adds the nutrients sandy soil tends to lack. Repeat each season. Compost breaks down over time.

You have clay soil

Mix 2-3 inches of compost AND a few inches of coarse sand or perlite into the top 6 inches of your bed. The compost feeds the plants; the sand breaks up the clay so air and water can move through. Don't add sand without compost. It can compact like concrete.

Containers and raised beds

If amending your soil sounds like too much work, or if your soil is heavy clay, full of rocks, or contaminated, build over it. A raised bed at least 12 inches deep filled with a 50/50 mix of compost and sandy loam gives you ideal growing soil with no battles. A 5-gallon container with quality potting mix does the same for one plant at a time. Both bypass your native soil entirely.

Learn more about your soil
The specs

Care guide

The numbers that matter, at a glance.

Sunlight
Full sun to partial shade · 6-10 hrs/day
Water
Regular
Spacing
2-4 inches
Soil
sandy loam, loam
Days to maturity
60-75 days from transplant
Soil pH
6 to 6.8
Container OK?
Yes · 5+ gal pot
Germination temp
55-75°F
Soil chemistry

Soil pH for carrot

Preferred
6 to 6.8
Tolerated
5.5 to 7

Soil pH measures how acidic or alkaline your soil is, on a scale from 1 to 14 where 7 is neutral. Carrots like it right around 6.0 to 6.8, slightly acidic. They are not very fussy about it, so do not stress over pH if your roots are coming out fine, getting the soil loose and stone-free matters more. If you want to know your number for certain, a cheap soil test from your local extension office will tell you, and let you know whether to add anything before planting.Carrots grow best in neutral to slightly acidic soil, roughly pH 6.0 to 6.8, with extension sources placing the optimum band between about 5.8 and 6.8. Below 5.5, phosphorus, calcium, and molybdenum availability drops; above 7.5, micronutrients including boron, manganese, and iron become less available. pH is rarely the first thing that limits a home carrot crop (soil texture and even moisture matter more), but a $10 to $15 soil test from your local extension office removes the guesswork and tells you whether lime or sulfur is warranted before sowing.

Verified · 3 sources View
Steady hand on the hose

Watering

When & how much
Frequency
Keep the soil evenly damp, and pay closest attention in the first few weeks. From planting until the sprouts appear (which can take 2 to 3 weeks), the surface must stay moist and never dry into a hard crust, so you may need to water lightly every day in warm or windy weather. After that, give about 1 inch of water a week, counting rain, in fewer but deeper waterings so the roots grow down.Even, consistent moisture is the rule, and it matters most in the first few weeks. From sowing until the seedlings are up, often 2 to 3 weeks, the surface must never dry out or crust, so light daily watering may be needed in warm or windy weather. Once established, carrots want steady moisture rather than a wet-dry swing: aim for about 1 inch of water per week including rain, delivered in deeper, less frequent soakings that draw the roots downward.
Amount
About 1 inch of water a week, including rain, once the plants are growing. Give more in hot weather or sandy soil and less in cool weather or heavy soil. While the seeds are sprouting, just keep the top of the soil damp, not soggy.Roughly 1 inch per week including rainfall once established, adjusted up in heat or sandy soil and down in cool or clay soil. The seedbed needs only enough to stay evenly moist near the surface during germination, not soaking.
Method
Water gently at soil level, using a soft spray, soaker hose, or drip line. A hard blast from the hose can wash away the shallow seeds or pack the soil into a crust the sprouts cannot push through, so keep it gentle, especially right after planting.Water at the base with a gentle setting, soaker hose, or drip line to keep the surface evenly moist without washing out the shallow-planted seed or compacting the bed. Avoid hard overhead bursts on a fresh seedbed, which crust the surface and bury or displace seed.
Signs of trouble
Too much water
If the soil stays soaking wet, carrots can rot and get diseased. Watch for yellow leaves, soft or mushy roots, and a constantly wet, sour-smelling bed. If you see these, water less and make sure the soil drains well.Constantly saturated soil invites root rot and fungal disease and can crack roots; yellowing tops, soft or rotting roots, and a sour, waterlogged bed are signs to back off. Poorly drained ground is the usual cause, which is why loose, well-draining soil matters.
Too little water
Dry, cracked soil on top, droopy or dull-looking leaves, and slow growth mean the carrots need more water. The bigger problem is letting the soil go bone dry and then soaking it: the roots drink fast and crack open. Keep the watering steady to avoid splitting.Dry, cracked surface soil, wilting or dull tops, and slow growth signal too little water. The sharper risk is an irregular cycle of drought then heavy watering or rain, which makes the roots take up water fast and split lengthwise.
Feeding rhythm

Feeding

Frequency
low
Type
Balanced low-nitrogen
When to start
Work compost into the bed before sowing; optional single light side-dressing once tops are established.

If your soil has compost mixed in, carrots usually need no extra feeding. If they look weak and pale, you can give one light feeding of a low-nitrogen fertilizer after the leafy tops fill in. Never use fresh manure or high-nitrogen lawn fertilizer, because that is exactly what causes forked roots and too many leaves.In decent garden soil amended with compost, carrots often need no supplemental feeding at all. If growth is weak, a single light side-dressing of a low-nitrogen fertilizer once the tops are established is enough. Avoid fresh manure and high-nitrogen lawn-type feeds entirely, since they cause the forking and excessive top growth carrots are prone to.

N · P · K = 5-10-10

The three numbers on a fertilizer bag are nitrogen, phosphorus, and potassium (N-P-K). Carrots do not want much of the first one: too much nitrogen makes big leafy tops but forked, hairy roots. Pick a fertilizer that is low in the first number with more of the other two, like a 5-10-10, and mostly just mix compost into the soil before planting.Carrots are light feeders, and excess nitrogen is the classic mistake: it grows lush tops and forked, hairy roots at the expense of a clean taproot. Favor a low-nitrogen blend with adequate phosphorus and potassium to support root development, such as a 5-10-10. Most of the feeding is done by working modest, well-finished compost into the bed before sowing.

Try 5-10-10
Who grows well together

Companion planting

Carrots are easygoing about neighbors. The most reliable trick is sowing a few fast radishes in the carrot row to mark it and save space. Onions and chives are a popular choice to help fend off the carrot fly, though they do not always work. The main plants to keep away are carrot's close relatives, dill, parsnip, and fennel, since they share the same pests. Do not trust every companion-planting chart online; many of their claims have not held up when tested. Carrots fit easily into mixed beds. The best-supported pairing is the radish row-marker trick, which extension research presents as a genuine space-saver. Allium pairings (onion, chives) for carrot rust fly are popular and mechanistically plausible but not firmly proven, useful, not guaranteed. The clearest avoids are carrot's own family, dill, parsnip, and fennel, which share its pests and diseases. Treat most other companion-chart claims with skepticism: university reviews find many are not backed by evidence.

Other
Radishes
Radishes sprout in just a few days, while carrots can take 2 to 3 weeks. Sow a few radishes in the same row and they show you where the carrot row is; pull and eat them before they crowd the carrots. This is a proven space-saving trick from university gardening guides.Radishes earn their spot mostly through timing, not chemistry. They germinate in days while carrots can take two to three weeks, so a light scatter of radish seed down the carrot row marks the line, lets you cultivate and weed before the carrots are even up, and is pulled out well before the carrots need the room. The pest-deterrence claims are thinner, so treat the benefit as row-marking and space-sharing rather than protection. Traditional
Onions and other alliums
Onions, chives, leeks, and garlic have a strong smell that many gardeners use to help hide carrots from the carrot fly, a pest whose larvae tunnel into the roots. It is a popular pairing, though the evidence for it is mixed rather than ironclad.This is the carrot pairing with the most real evidence behind it. Onions, leeks, chives, and garlic give off sulfur volatiles that mask the carrot's scent and make it harder for the carrot rust fly to find the row and lay eggs; classic intercropping trials have measured meaningful reductions in fly damage where the two are grown together. Two practical catches: you need enough allium density relative to carrots for the masking to matter (roughly one allium per two carrots, in alternating rows), and the strongest results come from small mixed plantings rather than large blocks. Alliums are shallow-rooted and slow, so they share the bed without crowding the carrot's taproot. Research-backed
Lettuce and other leafy greens
Lettuce and other shallow-rooted greens grow near the surface and finish fast, while carrots reach deeper, so they share a bed without fighting for the same space. A handy way to fit more into a small garden.Lettuce and carrots work as a classic interplant on root structure and timing. Lettuce is shallow-rooted and quick, carrots are deep-rooted and slow, so they pull from different parts of the soil profile and the lettuce canopy shades the surface, holding moisture and suppressing weeds while the carrots establish. Harvest the lettuce as the carrots fill in. This is a space-and-soil benefit rather than a pest one, and it is one of the more reliable interplants for that reason. Traditional
Keep apart from
Dill Dill is a cousin of the carrot and shares the same pests. Once it flowers it can draw in the carrot fly and may slow nearby plants, so keep it in another part of the garden.Dill and carrot are both in the carrot family, so they share pests like the carrot rust fly, and if both are left to flower they can cross-pollinate, which matters if you are saving carrot seed. There is also an old claim that flowering dill stunts carrot roots; that part is folk wisdom rather than measured, but the shared-pest and cross-pollination reasons are real, so it is worth keeping them apart in a seed-saving bed. Traditional
Parsnips Parsnips are close carrot relatives and get the same pests and diseases. Growing them right next to carrots lets those problems build up, so give them separate spots.Parsnips are close carrot relatives, so the two share the same pests and diseases, including carrot rust fly and common root rots, and clustering them concentrates that pressure. They are also both long-season root crops drawing on the same phosphorus and the same below-ground space for months. Spread them out and rotate where each goes rather than running them side by side. Traditional
Fennel Fennel is another carrot relative that many gardeners find does not play well with neighbors. Plant it well away from your carrots.Fennel is a poor neighbor for most of the garden, carrots included. It is reputed to release compounds from its roots that hold back nearby plants, and while the lab work behind that is on weeds rather than carrots, it is a near-universal caution worth heeding. Fennel and carrot also share carrot-family pests. The simple handling is to give fennel its own bed or a large container, away from the carrot rows. Traditional
Provenance tagged inline · see methodology for the labeling system Key
Harvest signals

When to pick

Carrots are ready based on their size, not a set date. Gently scrape the soil away from the top of a root and look at the shoulder, the widest part where the leaves meet the root. When it looks about 1/2 to 3/4 inch across or bigger, pull one to check. For most kinds this is around 60 to 75 days after planting. There is no rush: carrots taste even better after a light frost, and they keep well right in the ground for weeks. In cold areas you can pile straw over the row and dig them as needed into winter until the ground freezes solid. Before pulling, loosen the soil next to the row with a fork so the roots come out whole instead of breaking off. Just do not leave fully grown carrots sitting in hot summer soil, where they get tough and may crack.Carrots are ready when the root has reached usable size, judged by the shoulder rather than the calendar: brush soil from the crown and look for a shoulder roughly 1/2 to 3/4 inch or more across, which for most varieties lands around 60 to 75 days from sowing. Size, not a fixed date, is the cue, and pulling a test carrot is the surest check. Flavor improves in cool weather and after light frost, so there is no rush to lift them; in mild soil they hold well in the ground for weeks, and in cold regions a heavy straw mulch lets them overwinter for pull-as-needed harvest until the ground freezes hard. Loosen the soil beside the row with a fork before pulling, especially in heavier ground, so the roots lift cleanly instead of snapping. Do not leave mature roots in hot soil, where they grow coarse and woody and may split.

Verified · 4 sources View
Yield

What to expect

Each carrot plant gives you one carrot, the single root it grows. So it helps to think about how much row you plant rather than per plant. Spaced 2 to 4 inches apart, a foot of row gives you roughly 3 to 6 carrots, often about 1 pound.One root per plant. Carrots are not a cut-and-come-again crop, so yield is best thought of by row length rather than per plant: at a 2 to 4 inch final spacing, expect roughly 3 to 6 carrots per foot of row, often around 1 pound of roots per foot in good soil.

Carrots do not keep producing after you pick them, since each plant makes just one root. A planting is ready about 60 to 75 days after sowing and you harvest it over a few weeks. For a steady supply, plant a new short row every few weeks instead of one big batch.There is no repeat harvest; a sowing matures over a short window roughly 60 to 75 days after planting and is lifted over a few weeks. Continuous supply comes from succession sowing every few weeks, not from a single long-bearing planting. Carrots are grown fresh from seed each year, so your very first planting can do just as well as any later one. The main things that decide your results are loose, rock-free soil and keeping the bed evenly damp while the seeds sprout.Carrots are an annual grown fresh from seed every season, so there is no first-year-versus-later distinction as there is with perennials; the first sowing performs as well as any, provided the soil is loose and stone-free and moisture stays even during germination.

What changes yield
Soil looseness and depth: stones, clods, and compaction cause forking and stunting that cut usable yield.Final spacing after thinning: crowded roots stay small, while a correct 2 to 4 inch spacing sizes them up.Even moisture: drought-then-flood cycles split roots, and uneven germination thins the stand.Temperature at finish: roots maturing in sustained heat above about 75°F turn coarse and lose quality.Nitrogen balance: excess nitrogen grows tops at the expense of roots and can cause forking.
Verified · 3 sources View
Pick your variety

Recommended varieties

Pick your carrot variety to match your soil. If your soil is deep and loose, you can grow the long, slender kinds. If it is shallow, heavy, or rocky, grow the short, fat, or round kinds (like Chantenay or Paris Market), which handle tough soil much better and fork less. For your first try, Nantes types are the easiest: sweet, smooth, and fairly fast. There are fun colors too (purple, yellow, white), but matching the shape to your soil matters more than color.Carrot variety choice is driven mostly by soil. In deep, loose, sandy soil the long types (Imperator, longer Nantes) reach full length; in shallow, heavy, or rocky soil the short, broad, or round types (Chantenay, Danvers, Paris Market) perform far better and resist forking. For a first crop, Nantes types are the most forgiving: sweet, smooth, and quick. Maturity and color (orange, plus purple, yellow, and white novelties) vary by cultivar, but matching root shape to your soil matters most.

Nantes types (Scarlet Nantes, Nelson): sweet, cylindrical, and the most forgiving choice for a first crop
Danvers: sturdy and tapered, tolerates heavier soil better than most
Chantenay: short and broad, a good pick for shallow or heavy ground
Imperator: long and slender, needs deep, loose, stone-free soil to size up
Round and finger types (Paris Market, Romeo): best for containers and clay
Off the vine

Storing your harvest

Room temp
Not good for more than a day or two. Left out on the counter, carrots dry out and go bendy and soft. Keep out only what you will eat in the next day or two and refrigerate the rest.Poor for more than a day or two. At room temperature carrots lose moisture fast and go limp and rubbery, and cut or topped roots soften quickest. Counter storage is only for what you will use within a couple of days; everything else belongs in the refrigerator or a cold root cellar.
Fridge
This is the best way for everyday storage. First twist or cut off the leafy green tops, because leaving them on draws water out of the root and makes the carrots go limp in just a few days. Put the roots in a loosely closed or vented plastic bag in the crisper drawer of your fridge. They will stay crisp for several weeks, often a month or more. Keep them away from apples and pears, which give off a gas called ethylene that can make carrots taste bitter.The best everyday option. Twist or cut off the green tops first, since leaving them on pulls moisture from the root and makes it go limp within days. Store the roots in a perforated or loosely closed plastic bag in the crisper drawer, where high humidity and cold keep them crisp for several weeks and often a month or more. Keep them away from apples, pears, and other ethylene-producing fruit, which can turn carrots bitter.
Freezer
You can freeze carrots for the long term, but blanch them first. Blanching means a quick dip in boiling water followed by ice water before freezing. If you freeze carrots raw they turn mushy, because the cold bursts the cells, and blanching is what stops that. Slice or dice them, boil 2 to 3 minutes, cool fast in ice water, drain, and freeze. They keep well for about 10 to 12 months.Workable for long-term use, but only after blanching. Frozen raw, carrots turn mushy and lose flavor, because freezing ruptures cell walls and the enzymes that degrade texture and color stay active unless heat-stopped. Slice or dice, blanch in boiling water about 2 to 3 minutes, cool quickly in ice water, drain, and freeze; quality holds for roughly 10 to 12 months.
Verified · 3 sources View
When something goes wrong

Common problems

Forked or twisted carrotsForked or twisted roots
01 of 06
What happened The root split into several prongs or grew crooked because it hit something hard as it grew down: a rock, a clod, packed soil, or a lump of fresh manure or fertilizer. Moving a started carrot does the same thing. (If the roots also have firm little bumps or knots, that points to root-knot nematode instead.)The taproot split into multiple prongs or grew crooked because it met an obstruction as it drove down: a stone, clod, hardpan, or pocket of fresh manure or concentrated fertilizer. Transplanting carrots causes the same damage. (If the roots also carry firm beadlike galls, suspect root-knot nematode instead.) Next season Before planting, dig the bed deep, break up clods, and pull out rocks. Skip fresh manure and heavy fertilizer, use finished compost, and always plant the seeds right where they will grow. If your soil is rocky or heavy, grow short, round carrot types or use a deep, loose container or raised bed.Work the bed deep and fine, removing stones and clods, before sowing; avoid fresh manure and heavy nitrogen, use only well-finished compost, and always direct-sow. On heavy or rocky ground, grow short or round types or use a deep, loose container or raised bed.
Split or cracked carrotsSplit or cracked roots
02 of 06
What happened The carrots cracked open, usually because the soil went dry and then got soaked: the root drinks fast and splits. Carrots left in the ground too long after they are ready also crack more easily.Roots cracked lengthwise, usually because a dry spell was followed by heavy watering or rain: the root takes up water rapidly and the tissue splits. Over-mature roots left in the ground are also prone to cracking. Next season Water steadily, about 1 inch a week, instead of letting the soil go dry and then soaking it, and harvest carrots when they are ready rather than leaving them in the ground through wet spells.Keep moisture even, roughly 1 inch per week, rather than letting the bed swing from dry to flooded, and harvest at maturity instead of holding roots in the ground through wet weather.
Green tops on the carrotsGreen or sunburned shoulders
03 of 06
What happened The top of the root pushed up out of the soil, and the part in the sun turned green and sometimes bitter, like a potato does. It is just a sun problem, not a disease.The crown of the root pushed above the soil and the exposed shoulder turned green, and sometimes bitter, from sunlight, the same way a potato greens. It is a cosmetic and flavor issue, not a disease. Next season Pull a little soil or mulch over the root tops when they start to show, and keep the row thinned so the carrots grow evenly at the same depth.Hill a little soil or mulch over the shoulders as they appear during the established stage, and keep the row well thinned and evenly grown so roots sit at a consistent depth.
Hairy, whiskery carrotsExcessively hairy roots
04 of 06
What happened The carrot grew a thick fuzz of tiny side roots. Usually this comes from too much nitrogen or fresh manure, or from rough, lumpy, or soggy soil. (If the leaves are also yellow or reddish, twisted, and bunched up and the root tastes bitter, that is more likely aster yellows, which is a disease.)The root grew a dense fuzz of fine secondary roots. The common cultural causes are excess nitrogen or fresh manure and rough, cloddy, or waterlogged soil. (If the tops are also yellowed, reddish, twisted, and bunchy and the roots taste bitter, the cause is more likely aster yellows, a disease.) Next season Use less nitrogen and no fresh manure, loosen the bed into a fine, well-drained texture, and water evenly. If it turns out to be aster yellows, focus on controlling weeds and leafhoppers instead.Go easy on nitrogen and avoid fresh manure, work the bed to a fine, loose, well-drained texture, and keep moisture even. Where aster yellows is the cause, manage weeds and leafhoppers instead.
Bitter or tough carrotsBitter or woody, coarse roots
05 of 06
What happened The carrots tasted bitter and were tough, fibrous, or woody. This usually comes from growing in heat (air above about 75°F hurts the roots), leaving them in the ground too long after they are ready, or green tops from sun.Roots developed strong, bitter flavor and a coarse, fibrous, woody texture. The usual causes are maturing in sustained heat (air above about 75°F degrades root quality), over-maturity from being left in the ground too long, or green shoulders from sun exposure. Next season Plan the crop so the carrots finish growing in cool weather, not summer heat: sow earlier in spring and add a fall planting. Harvest them on time, and keep the root tops covered so they do not green and turn bitter.Time the crop so roots mature in cool weather rather than summer heat, shifting spring sowings earlier and adding a fall crop; harvest promptly at maturity; and keep shoulders covered to prevent greening.
Seeds did not come up wellPoor or patchy germination
06 of 06
What happened Few seedlings came up, or they came up patchy. Carrot seed is slow (often 14 to 21 days), and the tiny sprouts cannot push through a dried, crusted surface. Most failures come from the bed drying out while sprouting, seeds planted too deep, old seed, or soil that was too cold. (If seedlings came up and then flopped over with a dark, pinched stem, that is damping-off, a disease.)Few or uneven seedlings emerged. Carrot seed is naturally slow (often 14 to 21 days) and the fine seedlings cannot break a dried or crusted surface; a bed that dried out during germination, was sown too deep, used old seed, or stayed too cold accounts for most failures. (Seedlings that emerged and then collapsed with a dark, pinched stem base point to damping-off, a disease.) Next season Keep the soil surface damp from planting until the seedlings appear, plant shallow (1/8 to 1/4 inch) with fresh seed, wait until the soil is warm enough, and gently break any crust. Scattering a few fast radish seeds in the row marks it and helps keep the surface from crusting.Keep the surface evenly moist from sowing to emergence, sow shallowly (1/8 to 1/4 inch) with fresh seed, wait for the soil to warm enough, and break any crust gently; interseeding fast radishes marks the row and keeps the surface open.
Verified · 5 sources View
The usual suspects

Pests & diseases

Pests
Carrot rust fly
P · 01
Symptoms Aboveground you often see nothing until it is bad, when the leaves may look rusty, wilted, or stunted. The damage is underground: small stiff white maggots tunnel just under the surface of the lower part of the root, leaving winding tunnels filled with rusty-brown mush. Affected carrots are scarred, taste off, and tend to rot in storage.There are usually no aboveground symptoms until damage is advanced, when foliage may look rusty, wilted, or stunted. The real signs are in the root: the larvae, small stiff white maggots, mine surface tunnels through the lower portion of the taproot, and the tunnels fill with a rusty-brown mush. Damaged roots are scarred, off-flavored, and prone to secondary rot in storage. Cause The maggots (young larvae) of the carrot rust fly, a small fly. The female is drawn to the smell of carrot leaves and lays her eggs near the base of the plant, and the maggots that hatch burrow into the roots. It also goes after parsnip, celery, and parsley. It is mainly a problem in cool, damp, coastal areas and much less common where summers are hot.Larvae of the carrot rust fly (Psila rosae), a small fly whose females are drawn to the scent of carrot foliage and lay eggs near the crown; the hatching maggots burrow into the roots. It also attacks parsnip, celery, parsley, and other carrot-family plants. The fly is a weak flier with localized populations and is most damaging in cool, humid, maritime regions, far less so in hot-summer areas. Organic treatment You cannot fix roots that are already tunneled, just cut away the damaged parts before eating. To limit more damage, harvest on time instead of leaving carrots in the ground, throw away (do not compost) badly infested roots, and clear out any wild or leftover carrots nearby that keep the flies going.There is no home rescue for roots already mined; trim damaged portions before use. Limit further damage by harvesting promptly rather than leaving roots in the ground, removing and not composting infested roots, and clearing nearby wild or volunteer carrots that sustain the population. Prevention The best home defense is a row cover, a light fabric or fine mesh laid over the bed right after sowing and tucked in at the edges, because the low-flying female cannot get to the plants to lay eggs. Also move carrots well away from last year's spot, time planting to dodge the main egg-laying periods (in cold areas sow in early summer; in mild areas, in late winter or in late summer), harvest a block at a time, and do not leave carrots in the ground over winter where this fly is active.The most reliable home defense is a floating row cover or fine mesh set over the bed at sowing and sealed at the edges, since the low-flying females cannot reach the crowns to lay. Rotate carrots well away from last year's bed, time sowings to miss the main egg-laying flights (in cold areas an early-summer sowing; in mild areas, in late winter or in late summer), harvest in blocks, and do not overwinter roots in the ground where the fly is active.
Root-knot nematode
P · 02
Symptoms The giveaway is little firm bumps or knots on the small side roots, called galls, which is different from the soft, fine hairy roots of aster yellows. The main root forks and twists into a deformed, often many-pronged carrot, because the tiny worms enter the root tip and disrupt it. Aboveground, plants in bad spots are stunted and yellowish and pull up easily. Northern root-knot nematode makes small knots; some other kinds make bigger, more obvious ones.The diagnostic sign is galling: firm, beadlike knots on the feeder and lateral roots, distinct from the fine, soft secondary roots of aster yellows. The taproot forks, twists, and grows malformed, often with several prongs, because the nematodes enter the root tip and disrupt it. Aboveground, plants in affected patches are stunted and yellowish and pull from the soil easily. Galls from northern root-knot nematode (Meloidogyne hapla) are small; other Meloidogyne species make larger, more conspicuous galls. Cause Microscopic worms in the soil called root-knot nematodes (in the genus Meloidogyne). They are most active and most damaging in warm, sandy soil and go quiet in cool soil, which is why carrots grown in cool weather or winter often come through fine. Carrots are one of the crops they hit hardest, and they live in the soil and feed on many different plants.Microscopic soil roundworms in the genus Meloidogyne (the root-knot nematodes), including the northern species M. hapla and warm-climate species such as M. incognita and M. javanica. They are most active and damaging in warm, sandy soils and largely inactive in cool soil, which is why cool-season and winter carrots often escape. Carrots are among the more susceptible garden crops, and the nematodes persist in soil and feed on many hosts. Organic treatment There is no home cure once the soil is infested, so pull up and throw away affected carrots instead of composting them. Plan around it next time: grow carrots in the cool season when the worms are inactive, rotate to other crops, and add organic matter to the soil, which helps the natural enemies that keep nematodes down.There is no home cure once a crop is infested; pull and dispose of affected carrots rather than composting them. Manage for future seasons: where infestation is known, grow carrots in the cool part of the year when nematodes are inactive, rotate to non-host or less-susceptible crops, and build soil organic matter, which supports the natural enemies that suppress nematodes. Prevention If your soil is warm and sandy and prone to nematodes, plant carrots so they grow in cool soil (below about 55 to 64°F), since the worms do not attack roots when the soil is cool. Keep carrots out of beds that have had root-knot problems, do not plant them right after other crops the worms love, add organic matter, and in bad cases use a raised bed filled with clean soil.In warm, sandy soils prone to nematodes, time carrot sowings so the roots develop in cool soil, below roughly 55 to 64°F depending on the species, since the nematodes do not invade roots in cool soil. Rotate away from beds with a history of root-knot, avoid following known host crops, build soil organic matter, and where pressure is severe consider raised beds with clean soil.
Diseases
Leaf blight (Alternaria and Cercospora)
D · 01
Symptoms You will see spots on the leaves. Alternaria blight makes dark brown to black ragged spots with a yellow edge, starting on the older, lower leaves. Cercospora blight makes tan or gray round spots and can show up on younger leaves too. As the spots spread and join together, the leaves look burned and can die back. The two are hard to tell apart, and you treat them the same way. The carrots underground are not infected directly, but if the leaves get badly damaged the roots stay small.Dark brown to black, irregularly shaped spots with yellow halos appear first on the older, lower leaflet margins and tips; this is Alternaria dauci. Tan to gray circular spots with darker margins, showing on younger leaves and earlier in the season, point to the closely related Cercospora carotae. As the spots multiply they run together and the foliage takes on a scorched, blighted look, and large lesions can girdle and kill the petioles. The two fungi are difficult to tell apart and are managed identically. The roots are not infected directly but size up poorly when the canopy is badly damaged. A third, bacterial blight (Xanthomonas campestris pv. carotae), looks similar, with water-soaked, varnished lesions that track down the veins. Cause Fungi that travel on the seed and survive on old carrot debris and on wild carrots nearby. They spread in splashing water and need wet leaves to take hold, so long spells of wet foliage from rain, dew, or overhead watering bring them on, especially in warm, humid weather.Two fungi, Alternaria dauci and Cercospora carotae, that are seedborne and also survive on infected crop debris and on wild carrot. They spread in splashing water and need leaf wetness to infect, so prolonged wet foliage from rain, dew, or overhead watering drives the disease, especially in warm, humid weather. Organic treatment You cannot cure leaves that are already infected, only slow it down. Pick off and throw away (do not compost) the worst leaves, thin crowded plants so air can move through, and water at the soil in the morning so the leaves dry fast. In a very wet year a copper fungicide labeled for vegetables can help if you start early, but keeping the leaves dry and the plants uncrowded does most of the work.There is no cure for tissue already infected; management slows the spread. Remove and destroy badly infected leaves, thin to proper spacing to improve airflow, and water at the base in the morning so foliage dries quickly. In a wet season, a copper-based fungicide labeled for vegetables can suppress spread if started early, but cultural control is the mainstay for a home crop. Prevention Use fresh, clean seed, and do not grow carrots (or relatives like parsley and dill) in the same spot two years in a row. Clear away old carrot tops and any wild carrots nearby, since the fungi live on them. Water at the base instead of overhead, give plants room so the leaves dry, and pick a blight-tolerant variety if it keeps coming back.Start with clean or treated seed, rotate carrots and other carrot-family crops out of the bed for at least two years, and clear crop debris and volunteer or wild carrots that harbor the fungi. Avoid overhead watering, space and thin for airflow, and choose tolerant varieties where blight recurs.
Aster yellows
D · 02
Symptoms An infected carrot grows strangely: the new leaves turn yellow, then reddish-purple, twist, and bunch into a weak clump, and the root underneath comes out pale and tapered with a thick fuzz of fine hairy roots. The carrot tastes bitter and is not good to eat. You will usually see just a scattered plant here and there, not a spreading patch, and there is no way to cure a plant once it has it.Infected carrots push up yellowed, then reddish-purple, twisted new foliage that clusters into a weak, bunchy top, while the taproot turns pale and tapered and grows a dense mat of fine hairy secondary roots. The root tastes bitter and is inedible. Affected plants usually appear scattered singly through a planting rather than spreading plant to plant, and there is no cure once a plant is infected. Cause It is caused by a phytoplasma (a bacterium-like organism) that lives inside the plant. A small insect called the aster leafhopper carries the phytoplasma from infected weeds or plants and passes it on when it feeds on your carrots. Weeds like wild carrot, dandelion, and thistle can hold it and pass it along.A phytoplasma, a bacterium-like organism that lives in the plant's food-conducting tissue, spread by the aster leafhopper. The insect picks the pathogen up from infected weeds or crops, often arriving on migrating leafhoppers, and injects it while feeding. Many weeds, including wild carrot, dandelion, and thistle, serve as reservoirs. Organic treatment There is no way to cure a plant that already has it. As soon as you spot one, pull it up and throw it away, not in the compost, so leafhoppers cannot pick it up from that plant and carry it to your other carrots.No treatment cures an infected plant. Pull and destroy symptomatic plants promptly so they cannot serve as a source for leafhoppers to spread it further, and do not compost them. Prevention Keep weeds down in and around the garden, especially wild carrot and dandelion, since they shelter both the germ and the insect that spreads it. A row cover, a light fabric laid over the plants, keeps the leafhopper off, and pulling any sick plant right away keeps it from spreading. How common this is depends on your area and the year.Control broadleaf weeds in and around the garden that host the phytoplasma and the leafhopper, especially wild carrot and dandelion. Row covers exclude the leafhopper from a planting, and prompt removal of any infected plant limits a local reservoir. Risk is highest where migrating aster leafhoppers are abundant, which varies by region and year.
Cavity spot
D · 03
Symptoms Small sunken oval pits, usually only a few millimeters long, on the surface of the carrot root, sometimes turning dark or cracking. The leaves look fine, so you usually notice it only when you pull and wash the carrots. It does not kill the plant; it just blemishes the roots. It mostly turns up in larger in-ground rows on wet, heavy, poorly drained soil, so a well-drained raised bed is low risk.Sunken, elliptical lesions a few millimeters long on the taproot surface, sometimes darkening or cracking. There are no aboveground symptoms, so it is found at harvest. It is a quality and storage problem rather than a plant-killer, and it tends to show up in larger in-ground plantings on wet, heavy, poorly drained soil rather than in a well-drained raised bed. Cause Tiny soil organisms called Pythium, which are fungus-like water molds (mainly Pythium violae and Pythium sulcatum), that infect the growing root. They thrive where soil stays too wet, drains poorly, or is too acidic, and carrots left in the ground a long time are more likely to get it. They survive in soil for years and attack many plants, so simply rotating crops does not get rid of them.Soilborne Pythium species, chiefly Pythium violae and Pythium sulcatum, that infect the developing root. The disease is favored by prolonged wet soil, acidic conditions, and poor drainage, and older roots left in the ground longer are more susceptible. The pathogens persist in soil as resting spores and have a wide host range, so rotation alone does not eliminate them. Organic treatment There is no spray that fixes roots once they are infected. The fix is in how you grow them: improve drainage, do not overwater, and harvest on time instead of leaving mature carrots sitting in wet soil.There is no rescue treatment once roots are infected. Management is preventive and cultural: improve drainage, avoid overwatering, and harvest promptly rather than holding mature roots in wet ground. Prevention Plant in loose, well-drained soil, and use a raised bed if your ground stays soggy. Do not overwater, keep the soil pH in the right range (around 6.0 to 6.8, not too acidic), and harvest carrots when they are ready instead of leaving them in wet ground, since the longer they sit the worse it gets.Grow carrots in loose, well-drained soil, raise beds where drainage is poor, avoid overwatering, and keep soil pH in the recommended slightly acidic to neutral range rather than letting it run low. Harvest at maturity, since the longer roots stay in infested wet soil the worse it gets, and choose tolerant varieties where there is a history of the disease.
Damping-off
D · 04
Symptoms Seeds that never come up, or tiny seedlings that flop over and die soon after sprouting, usually with a dark, pinched, water-soaked spot on the stem right at the soil line. You often see it as bare gaps in the row. Because carrot seed is slow and the bed is kept damp for 2 to 3 weeks, conditions favor it; the same organism can also leave young roots stubby and forked if it kills the root tip early.Seeds fail to emerge, or young seedlings topple and die soon after emergence, typically with a dark, water-soaked, shriveled spot at the stem base right at the soil line. Losses often appear as bare patches in the row. Because carrot germination is slow, often 2 to 3 weeks, the seedbed is held moist for a long time, which is exactly the condition the pathogens exploit; the same Pythium can also leave young roots stubby and branched if it kills the root tip early. Cause Soil organisms (mostly Pythium, a fungus-like water mold, plus a few others) that attack sprouting seeds and baby seedlings. They thrive in cool, wet, poorly drained soil and when you overwater, and they move in soil water. Old or weak seed and a hard, soggy seedbed make it worse.Soilborne pathogens, chiefly Pythium species along with Rhizoctonia and others, that attack germinating seed and young seedlings. They are favored by cool, wet, poorly drained soil and by overwatering, and they spread in soil water. Old or weak seed and a crusted, slow-draining seedbed increase losses. Organic treatment Seedlings that have collapsed will not recover. If it shows up, stop watering for a bit and let the soil surface dry out some to slow it down, and clear away the fallen seedlings. Mostly, though, this one is about prevention, because there is no good home cure once it starts.Affected seedlings cannot be saved. If damping-off appears, stop watering and let the surface dry somewhat to slow the pathogens, and clear out collapsed seedlings. The real lever is prevention, since there is no effective home cure once it takes hold. Prevention Wait to sow until the soil is warm enough and not cold and soggy, and keep the seedbed evenly damp without letting it stay soaking wet. Use fresh seed, do not plant too deep, improve drainage or use a raised bed if your soil is heavy, and resist the urge to overwater during the long wait for the seeds to come up.Sow into warm-enough, well-drained soil rather than cold, wet ground, and keep the seedbed evenly moist without keeping it saturated, maintaining moisture at seed depth rather than soaking the surface. Use fresh seed, avoid sowing too deep, improve drainage or use raised beds on heavy soil, and do not overwater during the long germination window.
Verified · 5 sources View
Seasoned
Where to plant next year

Crop rotation

Move your carrots to a different spot each year and do not put them (or their relatives like parsley and dill) back in the same bed for about three years. This stops pests and diseases from piling up in the soil. It is best to plant carrots after a crop that did not get heavy fertilizer, since leftover nitrogen makes the roots fork.Rotate carrots on a three-year cycle, keeping them and all other carrot-family crops out of a bed for two seasons after they are grown there. This breaks the buildup of soilborne pathogens and root pests the family shares. Following a light-feeding or nitrogen-depleting crop is ideal; following a heavily manured crop is not, because residual nitrogen causes forking.

Family
Apiaceae
Years between
3 years
in the same bed
Avoid following
Do not grow carrots in a spot where you grew carrots, parsnips, celery, parsley, dill, or fennel last year. These are all in the same plant family and share the same soil pests and diseases, which build up over time. Also avoid beds that got a lot of manure or fertilizer for the last crop, because the leftover nitrogen makes carrots fork and grow hairy. Wait about three years before carrots or their relatives go back into the same bed.Do not plant carrots where another carrot-family crop (Apiaceae) grew the previous season, including carrot, parsnip, celery, parsley, dill, or fennel, since they share soilborne diseases and root pests that build up where the family is grown repeatedly. Avoid beds heavily manured or fertilized for the previous crop, because the leftover nitrogen drives forking and hairy roots. The standard guideline is a three-year gap before carrots or their relatives return to a bed.
Plant after
Leafy greens such as lettuce and spinachAlliums such as onions and garlicFruiting crops that have used up available nitrogen, such as tomatoes
Verified · 3 sources View
In the app · pre-launch

When plant taps you on the shoulder

The plant app sends a timely reminder at every critical moment of your carrot season. The wording adjusts to whichever you pick: beginner or seasoned. Here are three you'll see in Zone 11.

p
plant
3 weeks before last frost
Time to plant carrots
Plant carrot seeds right in the garden about 3 to 4 weeks before your last frost, once the soil is no longer frozen or soggy. Plant them shallow and keep the surface damp.
p
plant
10 days after planting date
Carrots take a while to come up
Carrot seeds often take 14 to 21 days to come up. Keep the soil surface damp and free of a hard crust until they appear, and do not give up too soon.
p
plant
4 weeks after planting date
Time to thin your carrots
Once the seedlings stand 1 to 2 inches high, thin them to about an inch apart, then to 2 to 4 inches. Snip the extras at the soil line. Crowded carrots stay small and twisted.
Get personalized alerts.

plant sends the right notification at exactly the right moment, for your zone, your weather, your crops. Founding members lock the rate forever.

Back the Kickstarter →
Ask the gardener

Common questions

Got a question we missed?

We're building this guide with real growers. Got a question we missed? Ask here. We read every one and add the best answers right to this page.

Grown this before?

Share a tip

Learned something the hard way? Pass it on. Real growers' tips make this guide better for the next person, and we credit you by name when yours goes live.

Seasoned
Spot something wrong?

Report a problem

If you've grown this crop and you see a date, a temperature, a companion claim, or a recommendation that doesn't match your experience, tell us. Real growers' corrections make this guide better for the next person.

How we built this guide

Methodology & sources

Every date, temperature, spacing, and recommendation on this page is sourced from university cooperative extension publications, peer-reviewed agricultural research, NOAA climate data, and direct extension calendars. Where claims are softer (traditional gardening wisdom not formally documented), we say so.

Research-backed Documented in cooperative extension publications or peer-reviewed research
Well-grounded A known agronomic principle, but not formally tested for this specific pair
Traditional Time-tested gardening wisdom, limited formal research support
Last reviewed
June 10, 2026
Data version
crops_data_final · v1.0 · schema 2.9
Sources cited on this page
16 publications
Verified entries
Companion-planting claims tagged inline · zone dates verified against 5+ extensions
See all sources cited on this page
  • University of Minnesota Extension umn_ext
  • University of Maryland Extension umd_ext
  • Cornell Cooperative Extension cornell_ext
  • Iowa State University Extension iastate_ext
  • Michigan State University Extension msu_ext
  • NC State Extension ncsu_ext
  • Penn State Extension psu_ext
  • U. of Illinois Urbana-Champaign Extension uiuc_ext
  • UC Davis Postharvest Center ucd_postharvest
  • Texas A&M AgriLife Extension tamu_agrilife
  • Virginia Cooperative Extension 426-331 vce_426_331
  • Piedmont Master Gardeners piedmont_mg
  • UGA Vegetable Garden Calendar uga_calendar
  • Clemson Home & Garden Information Center clemson_hgic
  • UC IPM Statewide IPM Program uc_ipm
  • NOAA 1991-2020 Climate Normals noaa_normals

Growing notes, weekly.

Zone-aware seasonal nudges, what's worth planting now, and the occasional recipe from the harvest. No spam, ever.

Vol. 003 · Carrot · plant.lifestyle